Rear fender trim - My approach with PICS
 01-27-2015, 12:50 PM
#1
CF Veteran
Thread Starter
I know this subject has been discussed to death, so I am not looking to do much more than share my thoughts and approach. I'm sure others have done it this way in some form or another, so this is not ground breaking stuff. Either the case, who doesn't like some pictures and a little more info to build on this modification.
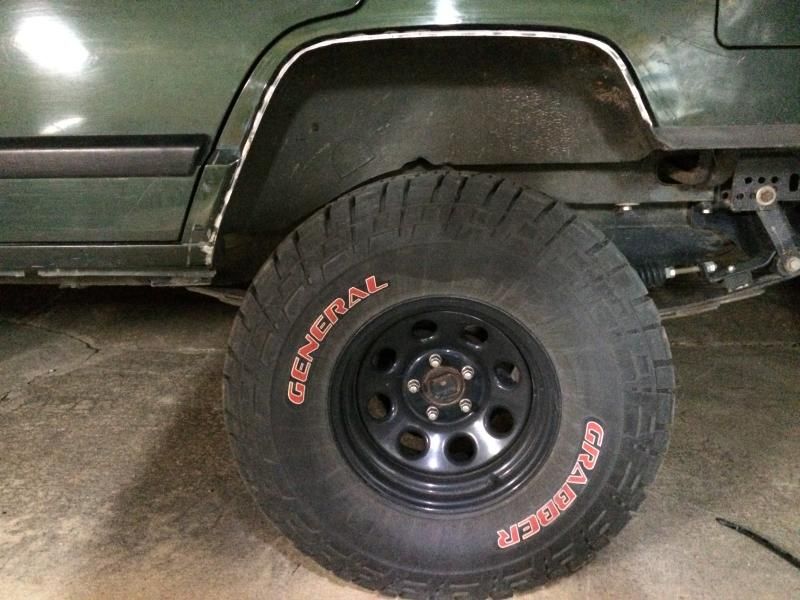
Basically, this is as high as you should cut if you're looking for that OEM PLUS look. What I did was drill an array of 3/16" holes, every 1-1.5" along the perimeter edge of where I intended to cut. I chose this area b/c it's where the inner fender starts to roll away from the outer body. This leaves you a lap edge for the two panels of approximately 1/8" to 3/16". I then prepped for welding and plug welded each hole. After all were filled and then cleaned up with a flap wheel, I cut along a line I drew in just tangent to each 3/16" hole with a 4" cutoff wheel. This is where I ended up.....
For reference, my truck is at 4.5-5" on 33x10.5's
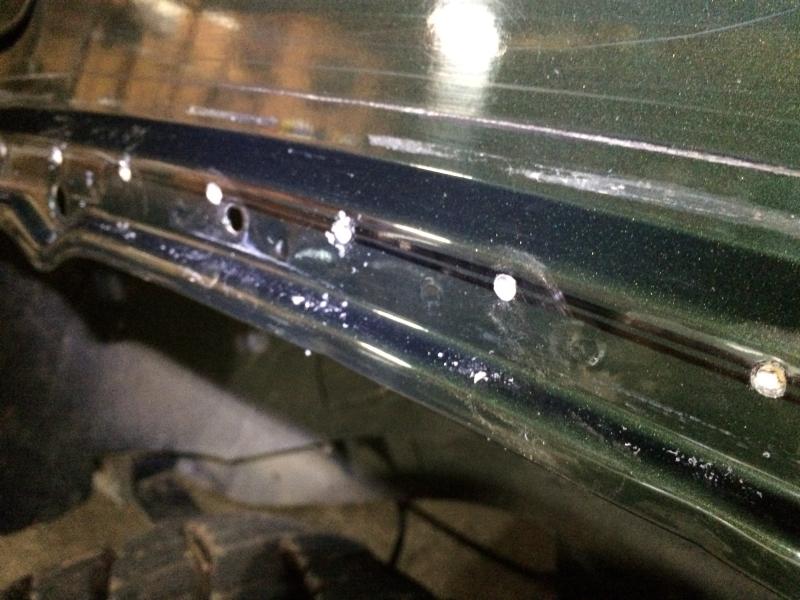

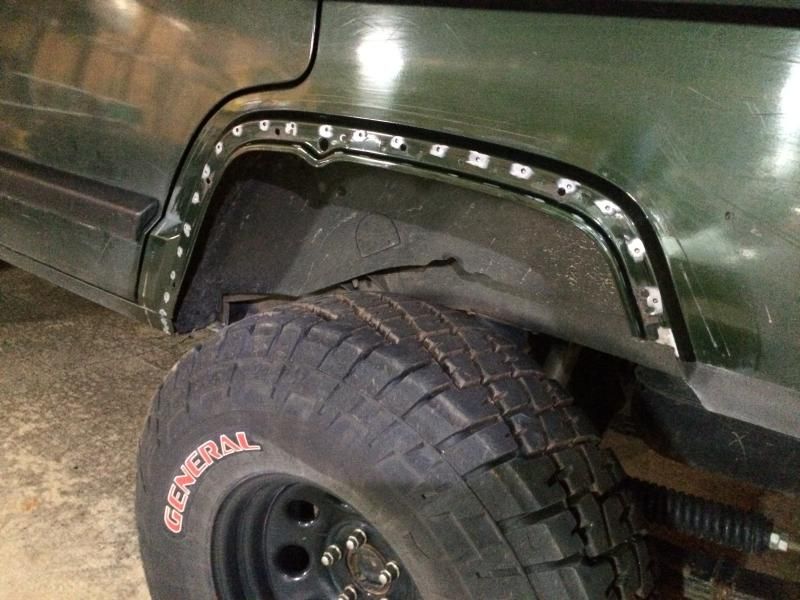


For the interim, I've just sprayed some anti-rust solution on the area until I get a warm window to shoot some paint. I'll update later with those, along with a full body shot (gigitty )
)
Basically, this is as high as you should cut if you're looking for that OEM PLUS look. What I did was drill an array of 3/16" holes, every 1-1.5" along the perimeter edge of where I intended to cut. I chose this area b/c it's where the inner fender starts to roll away from the outer body. This leaves you a lap edge for the two panels of approximately 1/8" to 3/16". I then prepped for welding and plug welded each hole. After all were filled and then cleaned up with a flap wheel, I cut along a line I drew in just tangent to each 3/16" hole with a 4" cutoff wheel. This is where I ended up.....
For reference, my truck is at 4.5-5" on 33x10.5's
For the interim, I've just sprayed some anti-rust solution on the area until I get a warm window to shoot some paint. I'll update later with those, along with a full body shot (gigitty
)
Last edited by s14unimog; 01-27-2015 at 12:52 PM.
 01-27-2015, 01:11 PM
#2
CF Veteran
Join Date: Apr 2012
Location: Ross Vegas, Ga
Posts: 1,843
Likes: 0
Received 2 Likes
on
2 Posts
Year: 2000
Model: Cherokee
Engine: 4.0 w/ tupy head
I know this subject has been discussed to death, so I am not looking to do much more than share my thoughts and approach. I'm sure others have done it this way in some form or another, so this is not ground breaking stuff. Either the case, who doesn't like some pictures and a little more info to build on this modification.
Basically, this is as high as you should cut if you're looking for that OEM PLUS look. What I did was drill an array of 3/16" holes, every 1-1.5" along the perimeter edge of where I intended to cut. I chose this area b/c it's where the inner fender starts to roll away from the outer body. This leaves you a lap edge for the two panels of approximately 1/8" to 3/16". I then prepped for welding and plug welded each hole. After all were filled and then cleaned up with a flap wheel, I cut along a line I drew in just tangent to each 3/16" hole with a 4" cutoff wheel. This is where I ended up.....
For reference, my truck is at 4.5-5" on 33x10.5's

For the interim, I've just sprayed some anti-rust solution on the area until I get a warm window to shoot some paint. I'll update later with those, along with a full body shot (gigitty)
Basically, this is as high as you should cut if you're looking for that OEM PLUS look. What I did was drill an array of 3/16" holes, every 1-1.5" along the perimeter edge of where I intended to cut. I chose this area b/c it's where the inner fender starts to roll away from the outer body. This leaves you a lap edge for the two panels of approximately 1/8" to 3/16". I then prepped for welding and plug welded each hole. After all were filled and then cleaned up with a flap wheel, I cut along a line I drew in just tangent to each 3/16" hole with a 4" cutoff wheel. This is where I ended up.....
For reference, my truck is at 4.5-5" on 33x10.5's
For the interim, I've just sprayed some anti-rust solution on the area until I get a warm window to shoot some paint. I'll update later with those, along with a full body shot (gigitty
)
01-27-2015, 01:32 PM
#3
CF Veteran
Thread Starter
https://www.cherokeeforum.com/f67/ro...kit-xj-191727/
01-27-2015, 01:39 PM
#4
CF Veteran
Join Date: Apr 2012
Location: Ross Vegas, Ga
Posts: 1,843
Likes: 0
Received 2 Likes
on
2 Posts
Year: 2000
Model: Cherokee
Engine: 4.0 w/ tupy head
It's a RoadMaster Active kit. It's an adjustable helper spring. Helps my truck sit level with a trailer or a lot of gear in the back. I did a thread on it a while back.
https://www.cherokeeforum.com/f67/ro...kit-xj-191727/
https://www.cherokeeforum.com/f67/ro...kit-xj-191727/
01-27-2015, 04:31 PM
#5
Junior Member
Join Date: Oct 2011
Location: Papillion, NE
Posts: 88
Likes: 0
Received 1 Like
on
1 Post
Year: 2000
Model: Cherokee
Engine: 4.0
Same thing dang near killed my springs. I'm nervous just driving on it now they're so freakin' flat. Need to get new leaves and ditch the extended shackle, I think. But it's seriously crazy how flat they've suddenly gone.
01-29-2015, 09:36 AM
#6
CF Veteran
Thread Starter
Not to mention, it acts quite well in jump and has improved the overall handling on the road.
Trending Topics
01-30-2015, 12:39 PM
#8
CF Veteran
Thread Starter
01-30-2015, 06:05 PM
#9
Member
Join Date: Oct 2014
Location: San Diego, CA
Posts: 187
Likes: 0
Received 0 Likes
on
0 Posts
Year: 1999
Model: Cherokee
Engine: 4.0
Looks good, man. What exactly did you do for the welding? I'm trying to reweld mine now and having some troubles. Mig / tig? Wire size? Amperage? Argon?
02-01-2015, 10:07 PM
#10
CF Veteran
Thread Starter
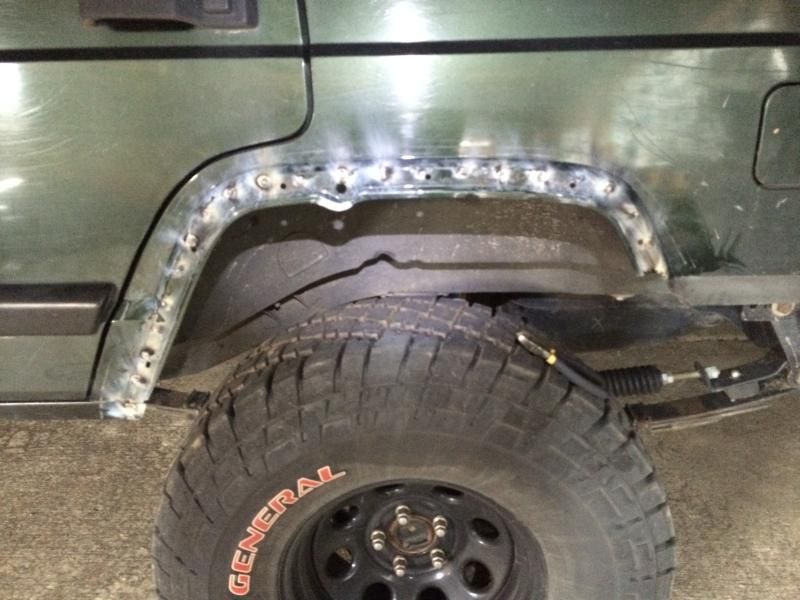
Mig unit, 0.03 wire, around 50amps, 75/25 gas. The problem is that there is some seam sealer leaching in to your weld from the inside.
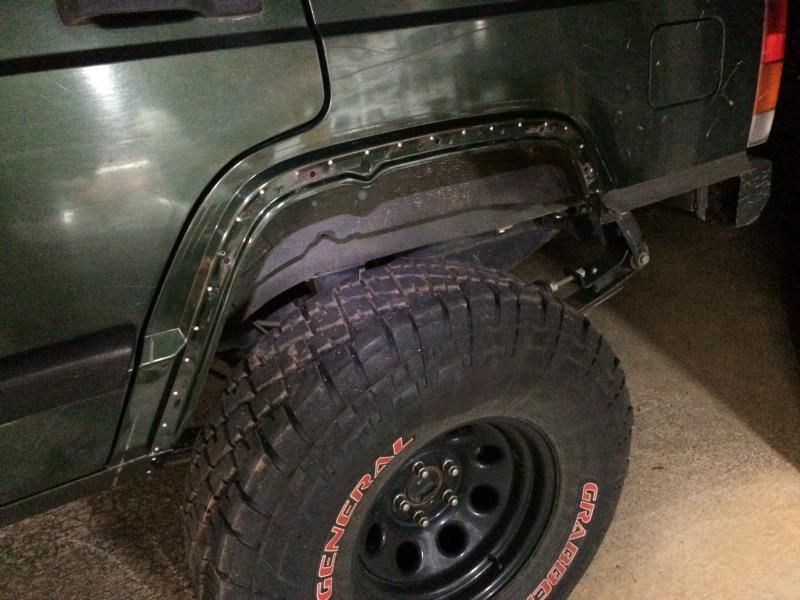
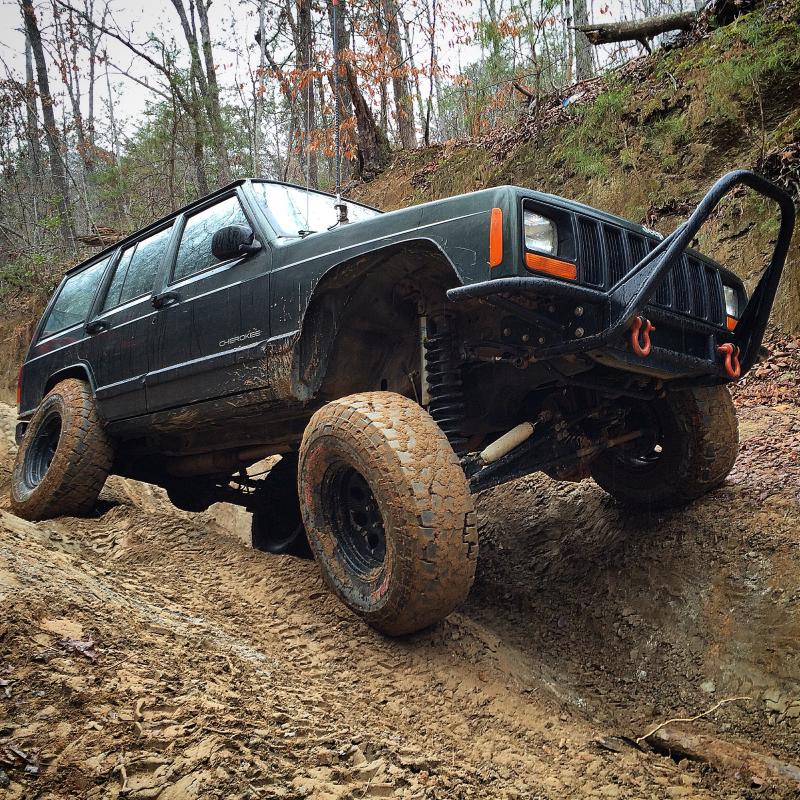
...and the picture from a far. Man I love it when you can go bump to bump without rubbing no matter what you try.
Last edited by s14unimog; 02-01-2015 at 10:09 PM.
02-01-2015, 11:55 PM
#11
Member
Join Date: Oct 2014
Location: San Diego, CA
Posts: 187
Likes: 0
Received 0 Likes
on
0 Posts
Year: 1999
Model: Cherokee
Engine: 4.0
Thanks for the info. I got it figured out this weekend. Took some finesse but I was running .035 wire self shielded mig and kept blowing through the base metal (obviously wire is too thick but it's all I had). I reeeeally need to invest in a bottle of gas and thinner wire.
Anyway, nice rig! Very clean.
Anyway, nice rig! Very clean.
02-02-2015, 06:19 AM
#12
CF Veteran
Thread Starter
Thanks for the info. I got it figured out this weekend. Took some finesse but I was running .035 wire self shielded mig and kept blowing through the base metal (obviously wire is too thick but it's all I had). I reeeeally need to invest in a bottle of gas and thinner wire. Anyway, nice rig! Very clean.
Thanks again

Thread
Thread Starter
Forum
Replies
Last Post
Currently Active Users Viewing This Thread: 1 (0 members and 1 guests)