HID Retrofit - seems to be the current trend
 11-25-2013, 10:16 AM
#1
Member
Thread Starter

Join Date: Dec 2012
Location: Indianapolis
Posts: 156
Likes: 0
Received 0 Likes
on
0 Posts
Year: 1999
Model: Cherokee
Engine: 4.0
I, unfortunately, require instant gratification as part of my nature. I'm just impatient. I was intending on ordering the completed set from Froelich (sp?) but after seeing that he was looking at 3-4+ weeks turnaround I decided to order my own parts last weekend and give this little project a try.
My parts list is pretty simple:
Tools/stuff needed
I started this ordeal Friday evening and finished up yesterday after dinner. I'll give a quick overview how I did them...
So, all said and done it was a complete pain in the *** to wing it lol After doing the first set I could probably do this in a day, but trial and error really slows down the process. The light output is incredible but I will be switching to a 4300 bulb soon i believe. The light color isnt warm enough for my liking.
the cuttoff is ridiculous and the light output is 50000 times better than stock.
My only problem right now is that the high beam works just fine, it flips up the cutoff shield and illuminates the entire neighborhood... BUT, when i turn off the highs, the projectors stay on high. I have to shut them off in order to get them to go back to low beam setting... not sure what to do about this.. but I'll figure it out sooner or later. ***FIXED!!! --- I had to pull the fog light relay out of the fuse box. The fog lights were causing a voltage backup. So it looks like I will have to wire the fog lights independently if I want to keep them functioning... right now I dont need them lol
All said and done I'm very pleased with the outcome and the fact that I didnt have to wait a month (no offense meant at all! I'm just, as I said before, incredibly impatient).
Oh yeah, pictures...
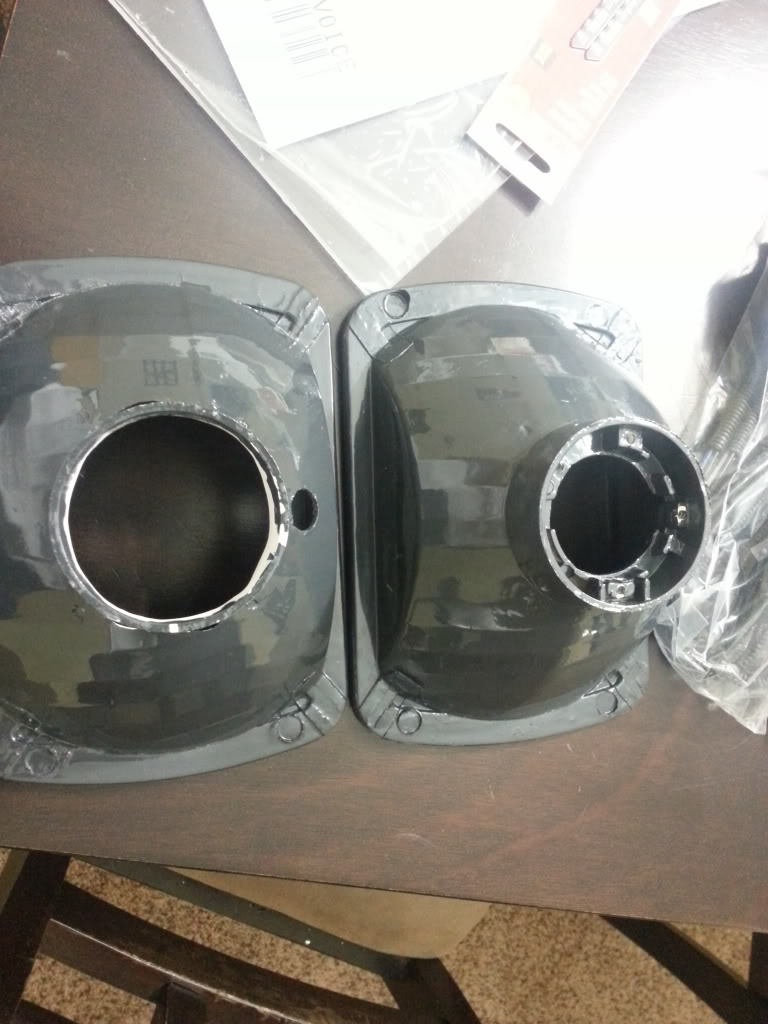
Backside of housings. Original on the right, modified and final on left
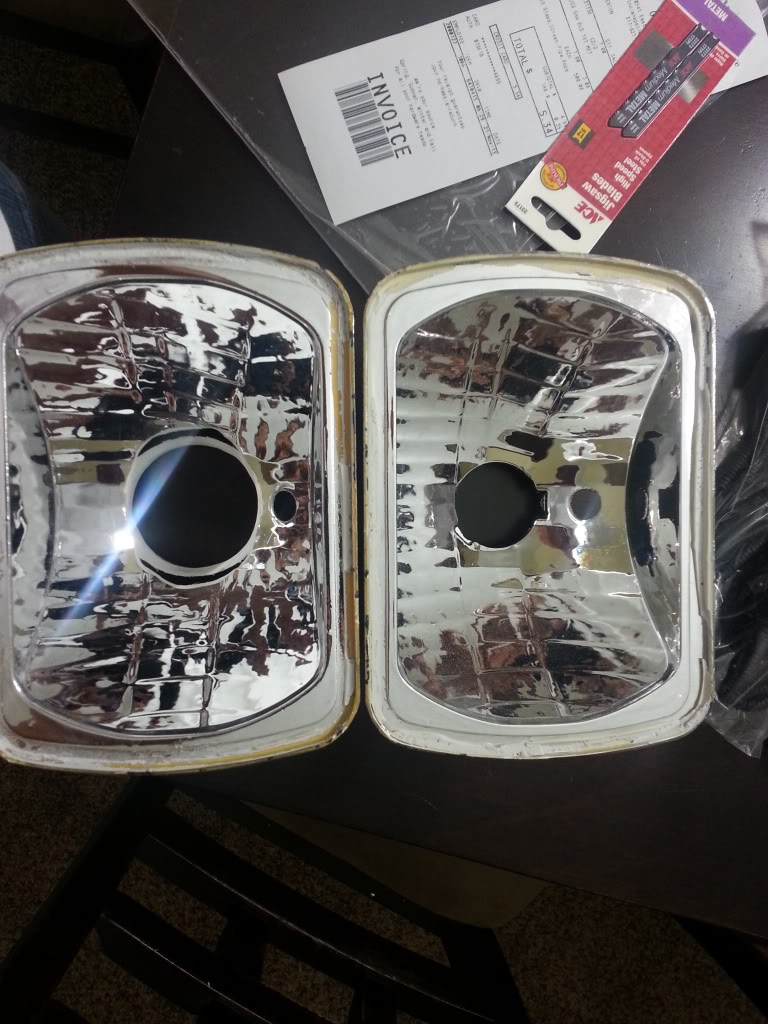
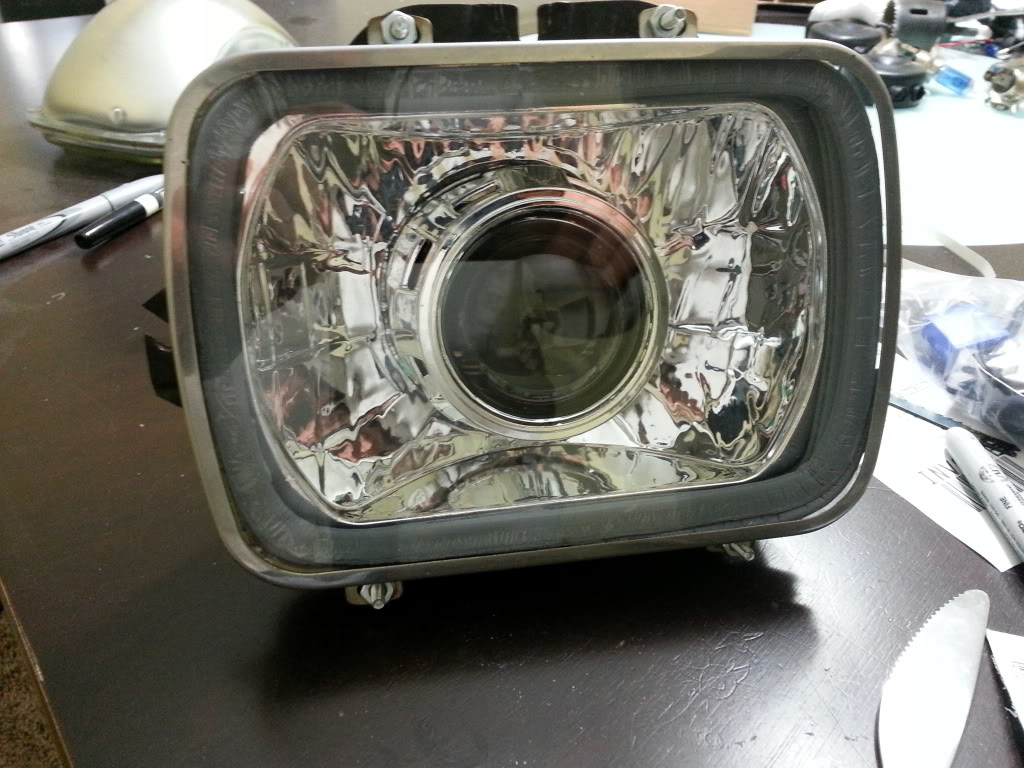
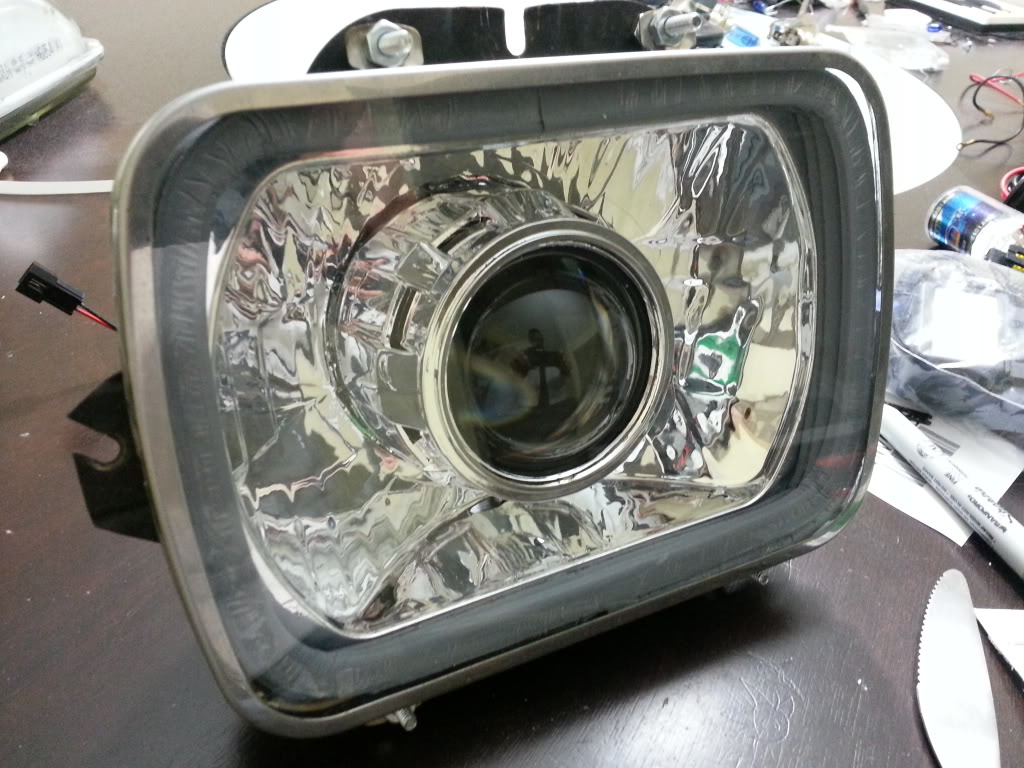
Front of housings. Modified on left
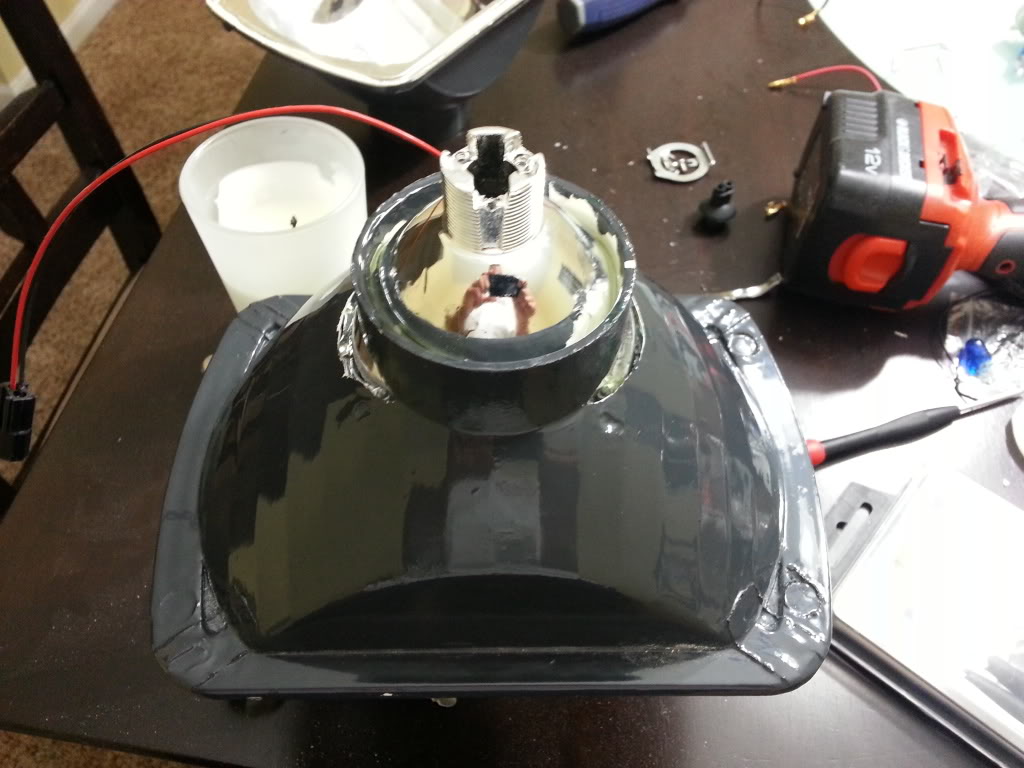
Projector being JD welded (clear JB weld was all they had.. doesnt matter)
Perimeter of weather seal in channel
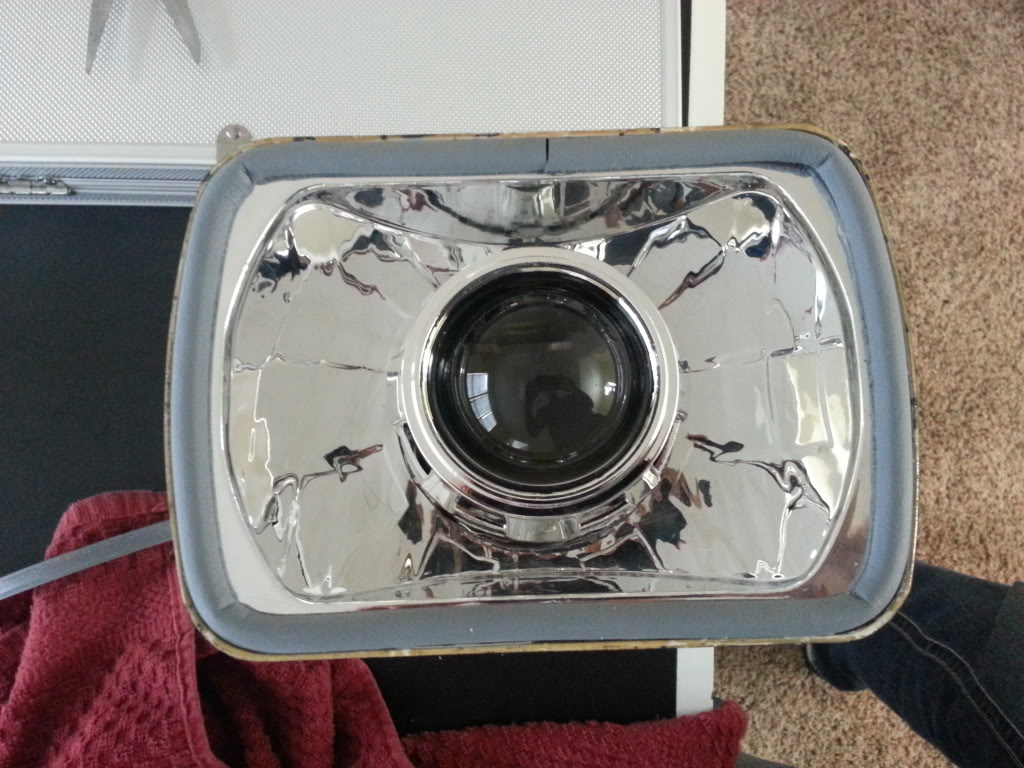
Entire assembly bolted together with bucket (yes lens is there as well)
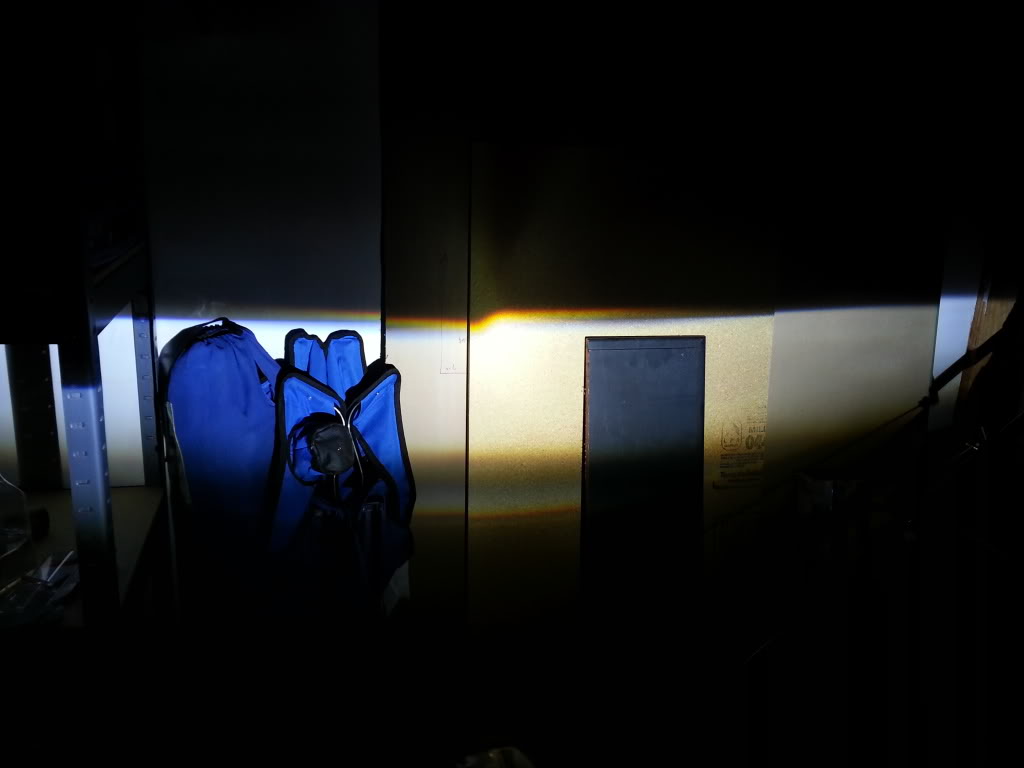
First fireup of the headlight. (this was only one) I just wanted to see the cutoff
Eek.. left is my 370z factory bixenon setup (which is actually amazing lighting on the road) and right is the Jeep's new setup (unaligned)
And one more...

Lows
Highs
Against the garage..

My parts list is pretty simple:
- Cheap diamond cut clear headlights from Amazon
- 2.5" Bi-Xenon projectors
- 6000k HID bulbs with slim 35watt AC Digital ballasts (DONT RUN ANYTHING HIGHER THAN 35 WATTS IN THESE SMALL PROJECTORS!!! They are too small to handle the heat)
- 1 small sheet of lexan glass
- Gray D profile weather seal
- JB Weld
- Black Silicone sealant
- 8 new 8/32 x 1.25" screws for the lens/buckets
Tools/stuff needed
- Dremel with sanding drums at the least
- 1 1/4" drill or hole saw bit
- jig saw or a method to cut the Plexiglas/acrylic
- various sockets and wrenches
- screw drivers
- needle nose pliers
- zip ties
- wire cutters
- basic tools for the most part
I started this ordeal Friday evening and finished up yesterday after dinner. I'll give a quick overview how I did them...
- Bake headlights at 250 for 10-15 minutes, just keep an eye on them. I had no intention on keeping the glass lenses so I baked mine just a little in hopes to pull them off but they cracked easily so I took them outside, covered them with a shop rag, and busted the glass. I then used pliers to grab the pieces of glass and pull them away from the housings. After removing the lens (pieces) I carefully scraped all of the remaining adhesive from the housings.
- Next I test fit the projector into the unmodified housing to get an idea where I needed to remove material. Once looking it over, I used a marker to make a few reference points and began sanding/grinding out the housing with the Dremel tool. I would stop every so often, re-testfit the projector to check progress, and repeated until the projector sat correctly against the housing.
- After the first one, the second housing was simple to replicate the first.
- Before moving further, trace the housings onto the plexiglass/acrylic for cutting. Cutting these was a complete pain in the ***. I used a finer tooth metal blade and it wanted to melt the glass back together right behind the blade. It worked but it sucked and took a lot of sanding with the dremel to get them cleaned up. (DO NOT REMOVE THE protective plastic/paper from the glass until later!!!)
- Once the projectors fit properly into the housing I used a glass from the kitchen that the projector sat down in perfectly allowing me to sit the housing onto the rear of the projector. Once i had it all leveled out (taking note of the cutoff shield that was visible inside through the bulb opening) an using a small level to ensure the projector was sitting close to level with the housing, I then used JB Weld from the top (rear) of the housing/projector to weld it in place. Repeated on the other projector/housing.
- An hour later I came back to check them out. Made sure they were in the right place, close to level, etc. Then I applied another layer of JB Weld.
- The next day I sealed up the rear or the housing with a bead and layer of black silicone.
- Once all cured. I flipped the housings over, cleaned the channels with mineral spirits or rubbing alcohol to clean the surface, and placed the weather seal around the rim of the housing into the old channel where the original lens once sat. I used superglue around some places to ensure the seal would stay put.
- Now I removed the protective plastic from the plexiglass and placed another rim of weather seal around the perimeter in the same fashion and shape of the one on the headlight housings
- From there I went out to the Jeep and removed the buckets. I cleaned them up and then placed the new headlight housing into the bucket for test assembly. (this step really wasnt completely needed as it's kind of a pain in the *** to get that spring back onto the housings) I just did it because I wanted to see the completed product and make sure it was going to work.
- During this test assembly I placed the housings into the buckets, placed my new lenses onto the housings and ensured the weather seals matched up to one another, placed the metal headlight retaining perimeter onto the new assembly, and then used the new screws to slightly tighten the entire assembly together, slowly working my way around making sure to not overtighten them.
- The headlights are now done. So onto the wiring and install.
- I removed my air box and my battery to have more access to mount the ballasts and wiring.
- I then took a headlight outside and put a dab of toothpaste on the back of the headlight bulb's wire and pushed the assembly into place until it hit the metal blocking the engine bay. This left me a mark showing where to drill.
- I drilled a small pilot hole on the spot and then followed with my 1 1/4" hole saw bit and made the holes. Note the driver side was very close to a wire harness on the inside of the engine bay so be careful.
- I filed the holes down to ensure there were no sharp edges that might wear or cut the wires. (or my fingers when I'm fishing the wires through)
- From there its up to you how you want to run the wire harness. I mounted my passenger ballast to the bottom of the bay under the front corner of the battery tray and my driver side ballast with 3m super strong double side tape just under the harness connections on the side wall.
- From there i disassembled the headlights, reinstalled the headlight buckets onto the jeep, then I carefully placed the new housings into the buckets, then the lens, and then the retaining ring and screwed them into the buckets until they were secure (not overly tight).
- I proceeded to then plug in all of the wiring, make sure my grounds were sanded and good to the chassis and test fired them. Once they worked, I went ahead and aimed them (which they still need properly aimed) and reinstalled the plastic covers.
So, all said and done it was a complete pain in the *** to wing it lol After doing the first set I could probably do this in a day, but trial and error really slows down the process. The light output is incredible but I will be switching to a 4300 bulb soon i believe. The light color isnt warm enough for my liking.
the cuttoff is ridiculous and the light output is 50000 times better than stock.
My only problem right now is that the high beam works just fine, it flips up the cutoff shield and illuminates the entire neighborhood... BUT, when i turn off the highs, the projectors stay on high. I have to shut them off in order to get them to go back to low beam setting... not sure what to do about this.. but I'll figure it out sooner or later. ***FIXED!!! --- I had to pull the fog light relay out of the fuse box. The fog lights were causing a voltage backup. So it looks like I will have to wire the fog lights independently if I want to keep them functioning... right now I dont need them lol
All said and done I'm very pleased with the outcome and the fact that I didnt have to wait a month (no offense meant at all! I'm just, as I said before, incredibly impatient).
Oh yeah, pictures...
Backside of housings. Original on the right, modified and final on left
Front of housings. Modified on left
Projector being JD welded (clear JB weld was all they had.. doesnt matter)
Perimeter of weather seal in channel
Entire assembly bolted together with bucket (yes lens is there as well)
First fireup of the headlight. (this was only one) I just wanted to see the cutoff
Eek.. left is my 370z factory bixenon setup (which is actually amazing lighting on the road) and right is the Jeep's new setup (unaligned)
And one more...
Lows
Highs
Against the garage..
Last edited by BrandonSS; 12-23-2013 at 10:30 PM.
 11-25-2013, 12:19 PM
#2
Member

Join Date: Oct 2010
Location: O'Fallon Missouri
Posts: 186
Likes: 0
Received 0 Likes
on
0 Posts
Year: 1996
Model: Cherokee
Engine: 4.0 High Output
Debating on joining the trend & doing my own. I think I have more time than I do money. I don't see where people are getting the kits with the projector housing(not the headlight housing). I know that some headlight housings are projector style. And you are cutting that out. I searched kits like KenSun and only see the lights and ballasts. Still doing my research. Also not sure on what bulb style to get. H4/9003 or a cheaper 9006 kit since I'm retrofitting it anyways.
11-25-2013, 12:33 PM
#3
Member
Thread Starter
Join Date: Dec 2012
Location: Indianapolis
Posts: 156
Likes: 0
Received 0 Likes
on
0 Posts
Year: 1999
Model: Cherokee
Engine: 4.0
Debating on joining the trend & doing my own. I think I have more time than I do money. I don't see where people are getting the kits with the projector housing(not the headlight housing). I know that some headlight housings are projector style. And you are cutting that out. I searched kits like KenSun and only see the lights and ballasts. Still doing my research. Also not sure on what bulb style to get. H4/9003 or a cheaper 9006 kit since I'm retrofitting it anyways.
You start with a regular headlight housing. not the ****ty halogen "projector" style found on ebay. You have to retrofit your choice of projector. You can search ebay for 2.5" bixenon projector or spend more money and get serious stuff from www.theretrofitsource.com ... being that my Jeep is a backup/winter vehicle, I went withe the cheaper parts.
Since I didnt take a picture of the projector by itself, this is one sourced from the net that appears to be the exact same without the shroud in place. The wires you see are not the bulb wires, they are wires that go to the motors(magnetic servos?) that control the cutoff shield that adjusts for high and low beams.
 11-25-2013, 12:35 PM
#4
Senior Member

Join Date: Jun 2011
Location: Florida
Posts: 759
Likes: 0
Received 2 Likes
on
2 Posts
Year: 1999
Model: Cherokee
Engine: 4.0
I did a similar thing, but used 04'-06' Maxima HID projectors. That is a BIG projector and wasn't fun to fit in my Pilot housing. It was worth it though!
11-25-2013, 01:57 PM
#5
CF Veteran
Join Date: Dec 2010
Location: shawnee,ks
Posts: 9,897
Likes: 0
Received 2 Likes
on
2 Posts
Year: 1993
Model: Cherokee
Engine: 4.0
Since you are looking for different bulbs I think you should check these out.
http://olympusoffroad.3dcartstores.c...air_p_161.html
http://olympusoffroad.3dcartstores.c...air_p_161.html
11-25-2013, 02:06 PM
#6
Member
Thread Starter
Join Date: Dec 2012
Location: Indianapolis
Posts: 156
Likes: 0
Received 0 Likes
on
0 Posts
Year: 1999
Model: Cherokee
Engine: 4.0
Lol no thanks, I'll just pick up a set of hid bulbs (sans ballasts) from the local shop for $30. I did these as a budget build.. no need to make improvements as they are already pretty bad *** for a backup vehicle (better than my 370z's oem hids)
Last edited by BrandonSS; 11-25-2013 at 02:09 PM.
11-25-2013, 02:10 PM
#7
Member
Join Date: Oct 2010
Location: O'Fallon Missouri
Posts: 186
Likes: 0
Received 0 Likes
on
0 Posts
Year: 1996
Model: Cherokee
Engine: 4.0 High Output
Thanks for help. It looks like I would be in it for at least $130. $50 for the HID light kit. another $50 for the 2.5 projectors and at least $30 for a cheap headlight housing. I really want to build by own, but not pay anymore than $150. I already have the wiring harness.
Trending Topics
11-25-2013, 02:13 PM
#8
Member
Thread Starter
Join Date: Dec 2012
Location: Indianapolis
Posts: 156
Likes: 0
Received 0 Likes
on
0 Posts
Year: 1999
Model: Cherokee
Engine: 4.0
you dont have the right wiring harness. The upgrade for the stock lights is irrelevant to wiring these. It's not compatible with the ballasts. All in all with jb weld, screws, lexan, etc etc you will end up around the $200 mark. If i wasnt impatient, I would have just bought Froehlich's and called it a day. But I am so I went ahead and made mine a little differently than he did while I was at it.
11-25-2013, 02:56 PM
#9
Member
Join Date: Oct 2010
Location: O'Fallon Missouri
Posts: 186
Likes: 0
Received 0 Likes
on
0 Posts
Year: 1996
Model: Cherokee
Engine: 4.0 High Output
The projectors I was looking at said they came with H4 adapters(now I'm guessing that's just for the bulbs). They were $60 on Amazon. I see your point though. I think you just sold Froehlich another set.
11-25-2013, 03:18 PM
#10
Senior Member
Join Date: Oct 2011
Location: Westfield MA
Posts: 674
Likes: 0
Received 0 Likes
on
0 Posts
Year: 1992
Model: Cherokee
Engine: 4.0L
those came out great! i plan on doing a few sets too. retrofitting is alot of fun once u start u will want to do them for everything lol
11-25-2013, 03:23 PM
#11
Member
Thread Starter
Join Date: Dec 2012
Location: Indianapolis
Posts: 156
Likes: 0
Received 0 Likes
on
0 Posts
Year: 1999
Model: Cherokee
Engine: 4.0
Thanks! And absolutely. I already ordered parts for my wife's '06 RSX. Her headlights are almost as bad as the XJ's were. It's not fair of me to drive the cars with the amazing headlights while she struggles to see.
11-25-2013, 04:10 PM
#13
Member
Thread Starter
Join Date: Dec 2012
Location: Indianapolis
Posts: 156
Likes: 0
Received 0 Likes
on
0 Posts
Year: 1999
Model: Cherokee
Engine: 4.0
If you can find it that would be great. I'm guessing it has something to do with a negative switch operation and moving a ground around to something... but to what I'm not sure yet.
11-26-2013, 12:17 PM
#14
Member
Thread Starter
Join Date: Dec 2012
Location: Indianapolis
Posts: 156
Likes: 0
Received 0 Likes
on
0 Posts
Year: 1999
Model: Cherokee
Engine: 4.0
I tried disconnecting the delay module under the dash. It helped nothing.
Though I did find out that the headlights highs and lows switch back and forth properly when the Jeep is off and just the headlights are on. When the Jeep is on, however, they turn on as they should, switch to high beams as they should, but will not go back to low beam until I turn the lights off... I'm stumped.
I am using the exact same harness as Froehlich and he hasnt said anything about this being an issue with his kit. The only difference between our Jeeps is his is a 98 and mine is a 99. It appears his used to have fog lights but he has removed them. I have no idea...
11-26-2013, 09:17 PM
#15
Member
Thread Starter
Join Date: Dec 2012
Location: Indianapolis
Posts: 156
Likes: 0
Received 0 Likes
on
0 Posts
Year: 1999
Model: Cherokee
Engine: 4.0
FIXED*!!! I had to pull the fog light relay in order for them to perform properly. So if I want to run my fogs in the future I will have to wire them independently, apparently.
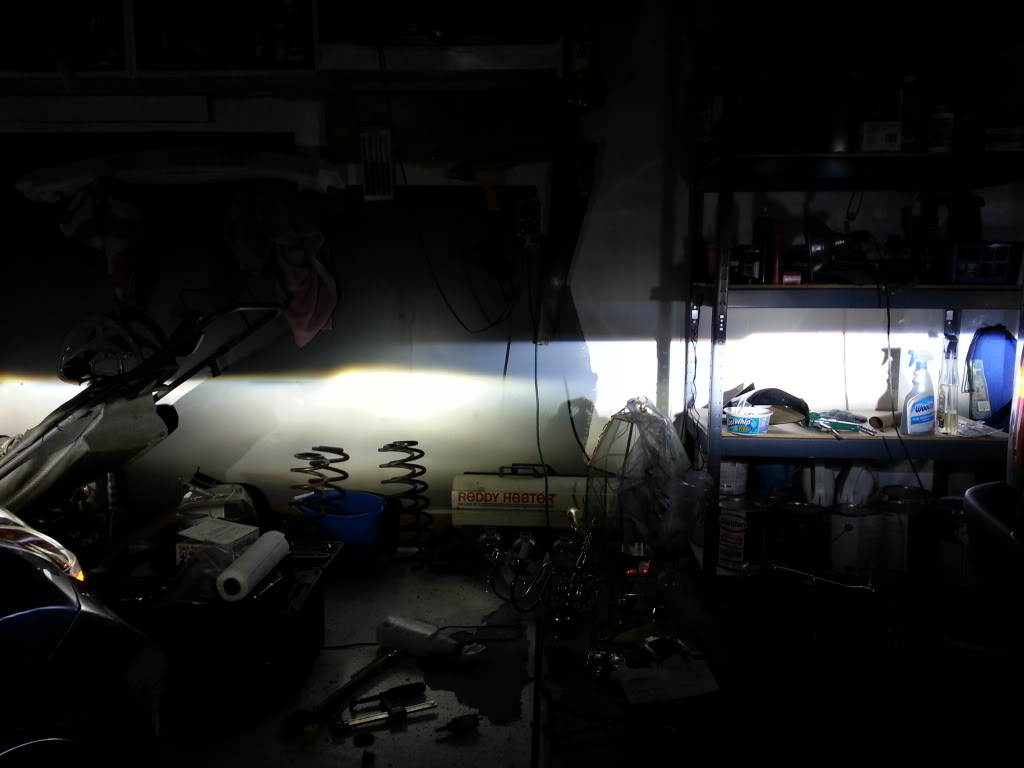
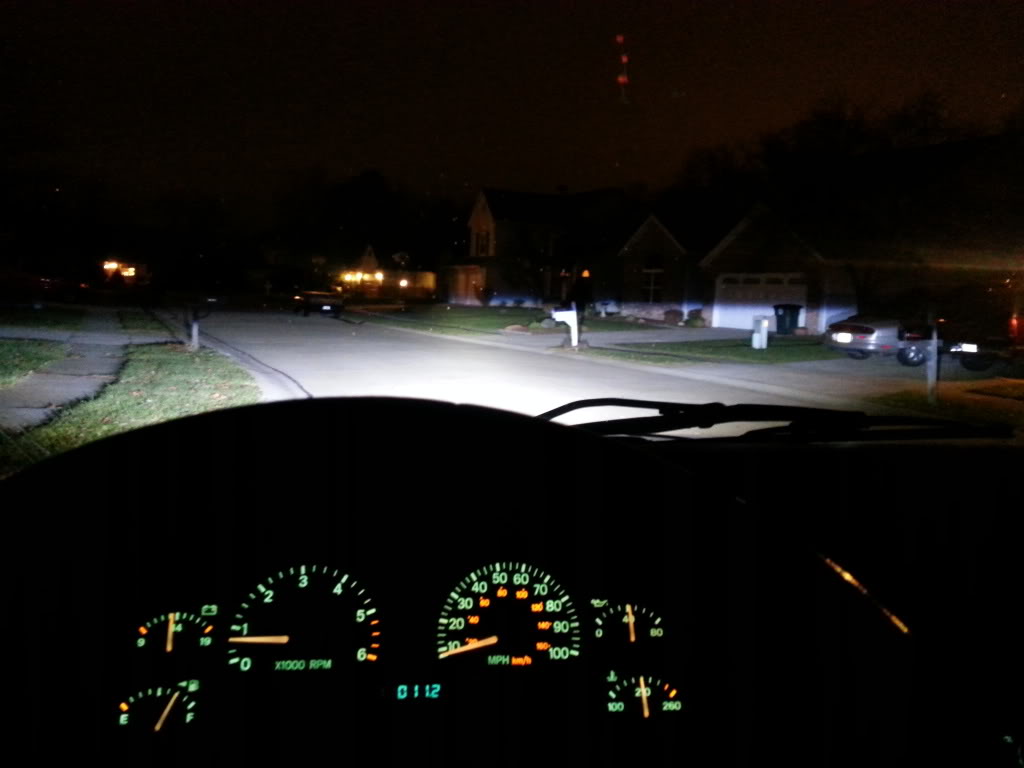
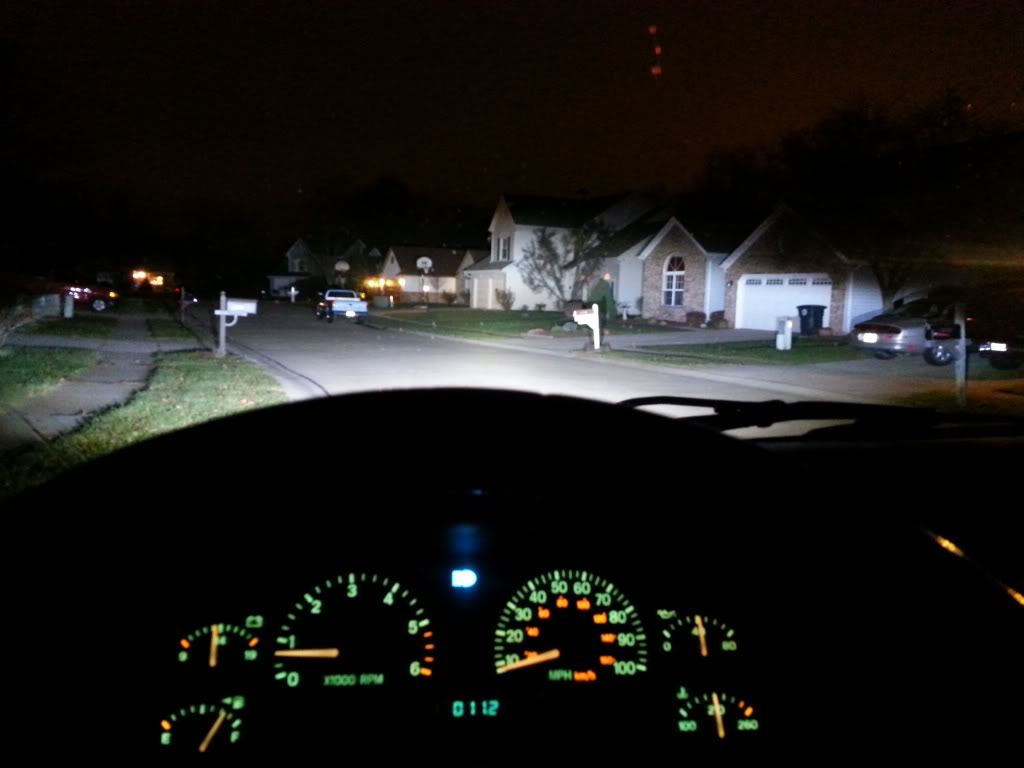
Here are some function pics. I havent been flashed yet but they do need aligned correctly against a wall 25' away. I just eyeballed them in the garage and took them for a test drive... no flashes and the beam seems to land just below cars windshield... highs on the other hand, they might blind an airliner...
Lows

Highs

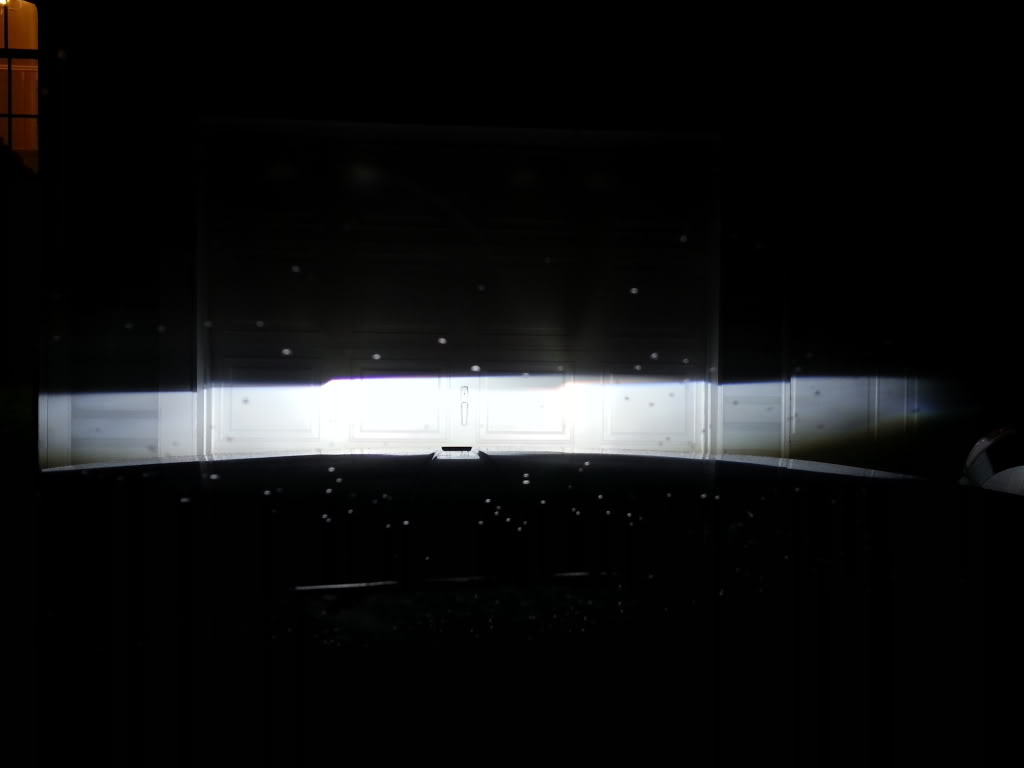
Against the garage..
Here are some function pics. I havent been flashed yet but they do need aligned correctly against a wall 25' away. I just eyeballed them in the garage and took them for a test drive... no flashes and the beam seems to land just below cars windshield... highs on the other hand, they might blind an airliner...
Lows
Highs
Against the garage..
Last edited by BrandonSS; 11-27-2013 at 09:59 AM.