XJ Rear Bumper & Fuel Tank Skid Build
 03-22-2018, 09:05 AM
#1
Junior Member
Thread Starter
Join Date: Jan 2012
Location: Elmira, MI
Posts: 39
Likes: 0
Received 0 Likes
on
0 Posts
Year: 1995
Engine: 4.0l straight 6
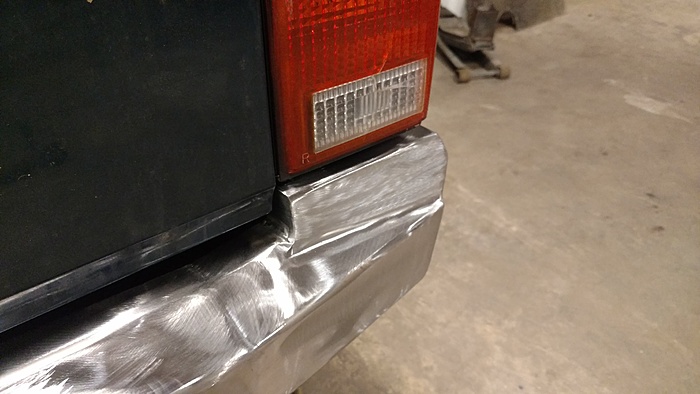
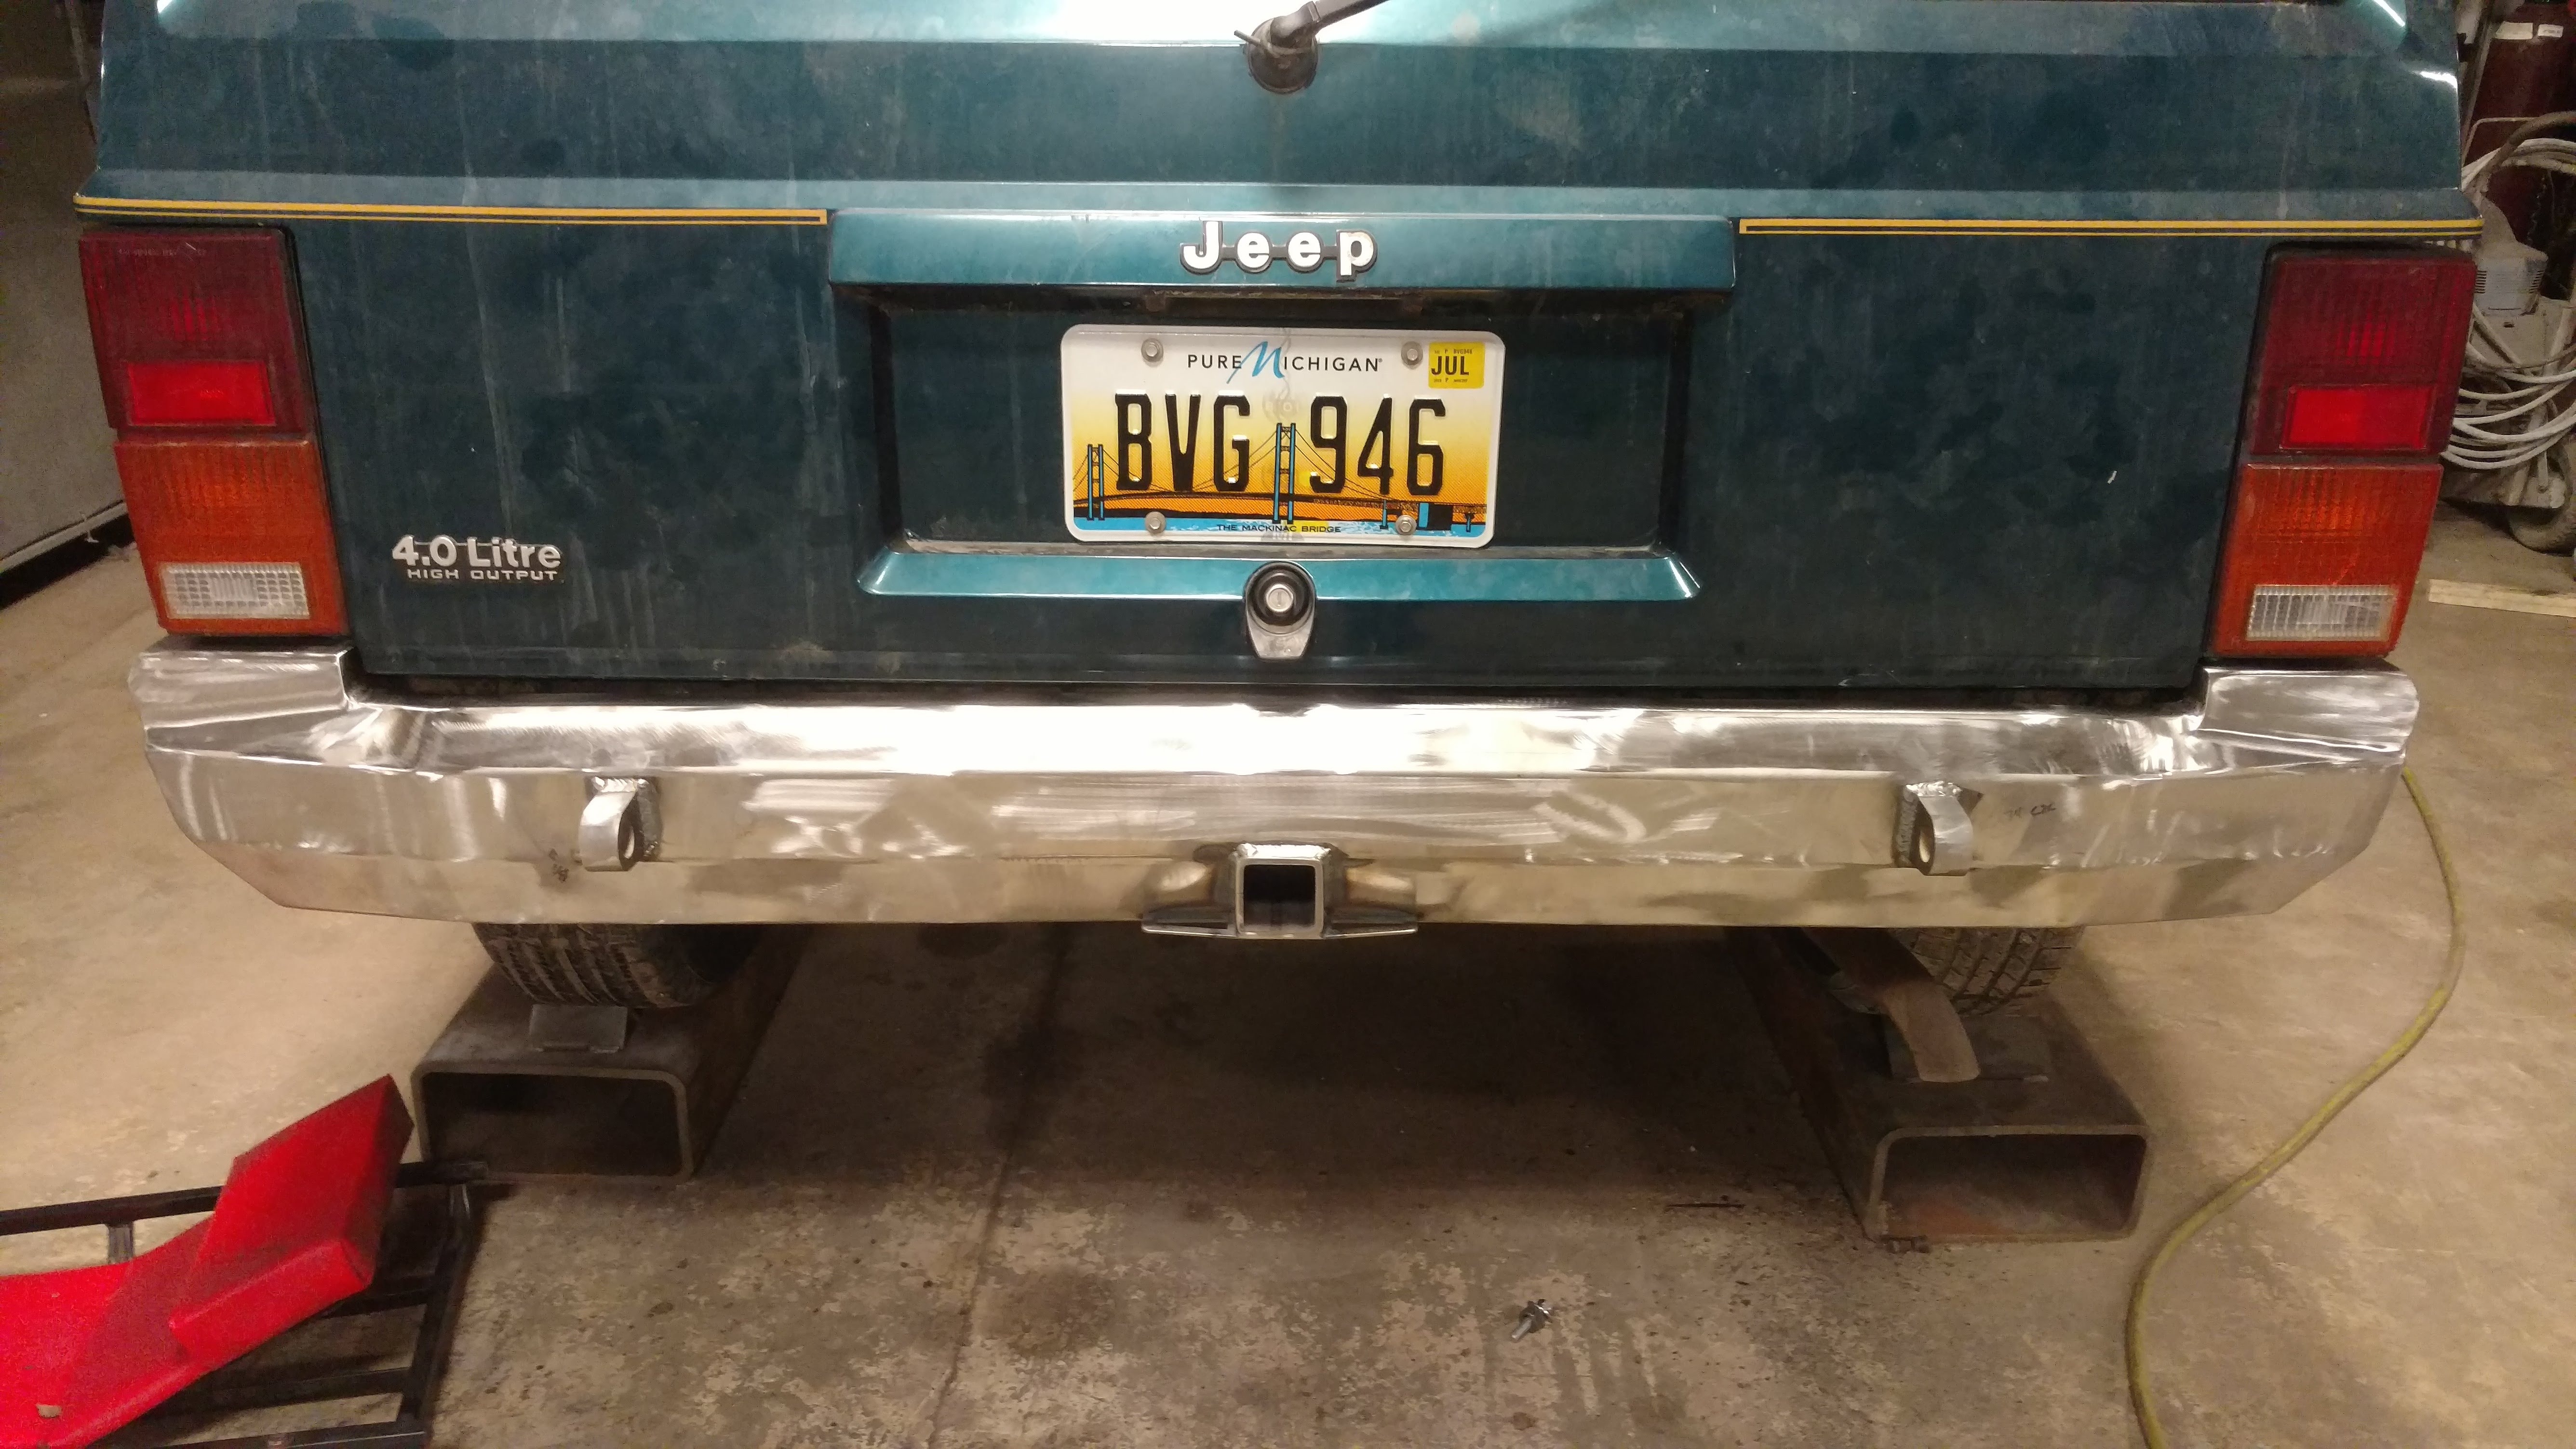
After hitting my fuel tank on a rock and having to replace it I decided it would be a good time to build a skid for it. I was building the nutstrips to mount the skid to when I figured what the heck, might as well build a bumper while i'm at it. Sorry there is'nt as many pics as I had hoped.
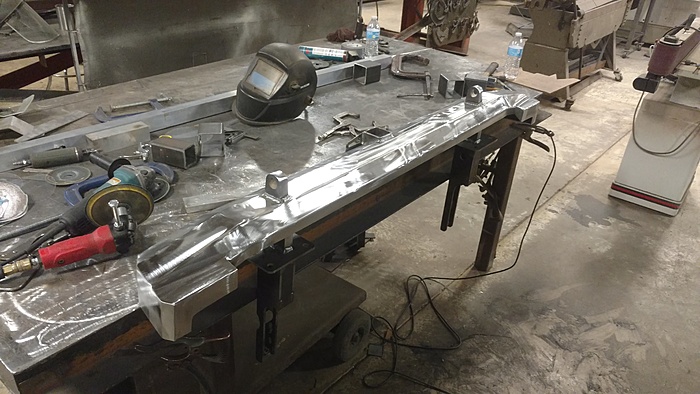
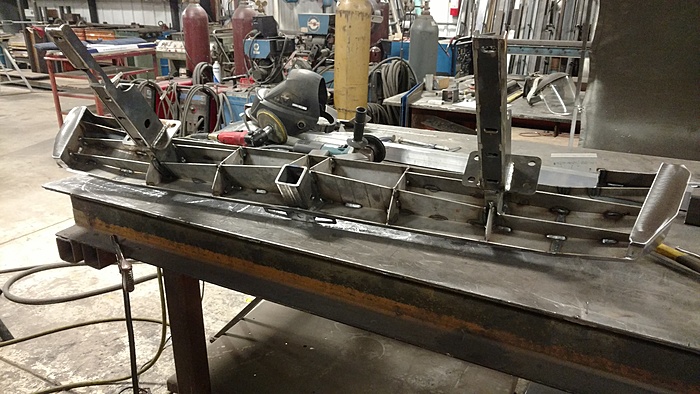
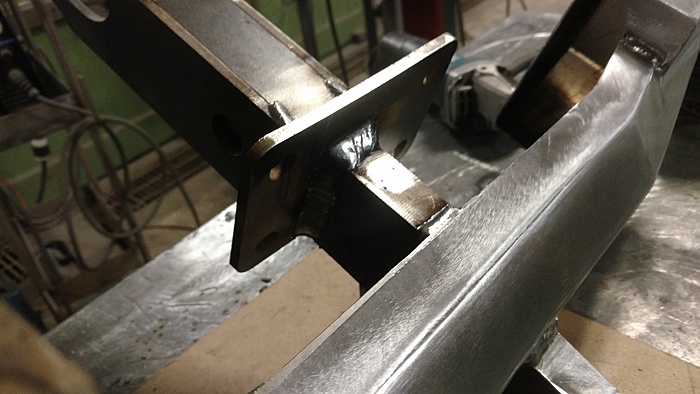
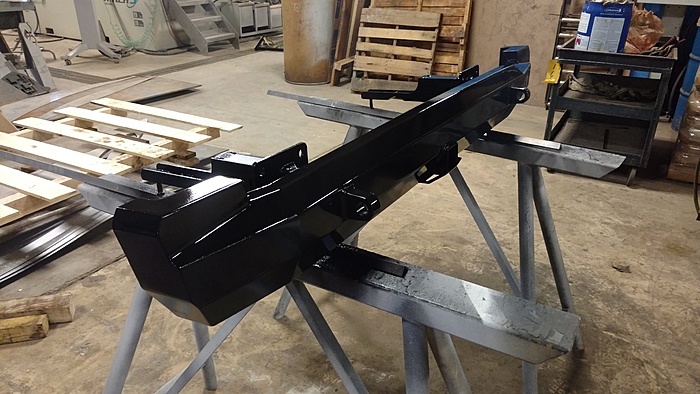
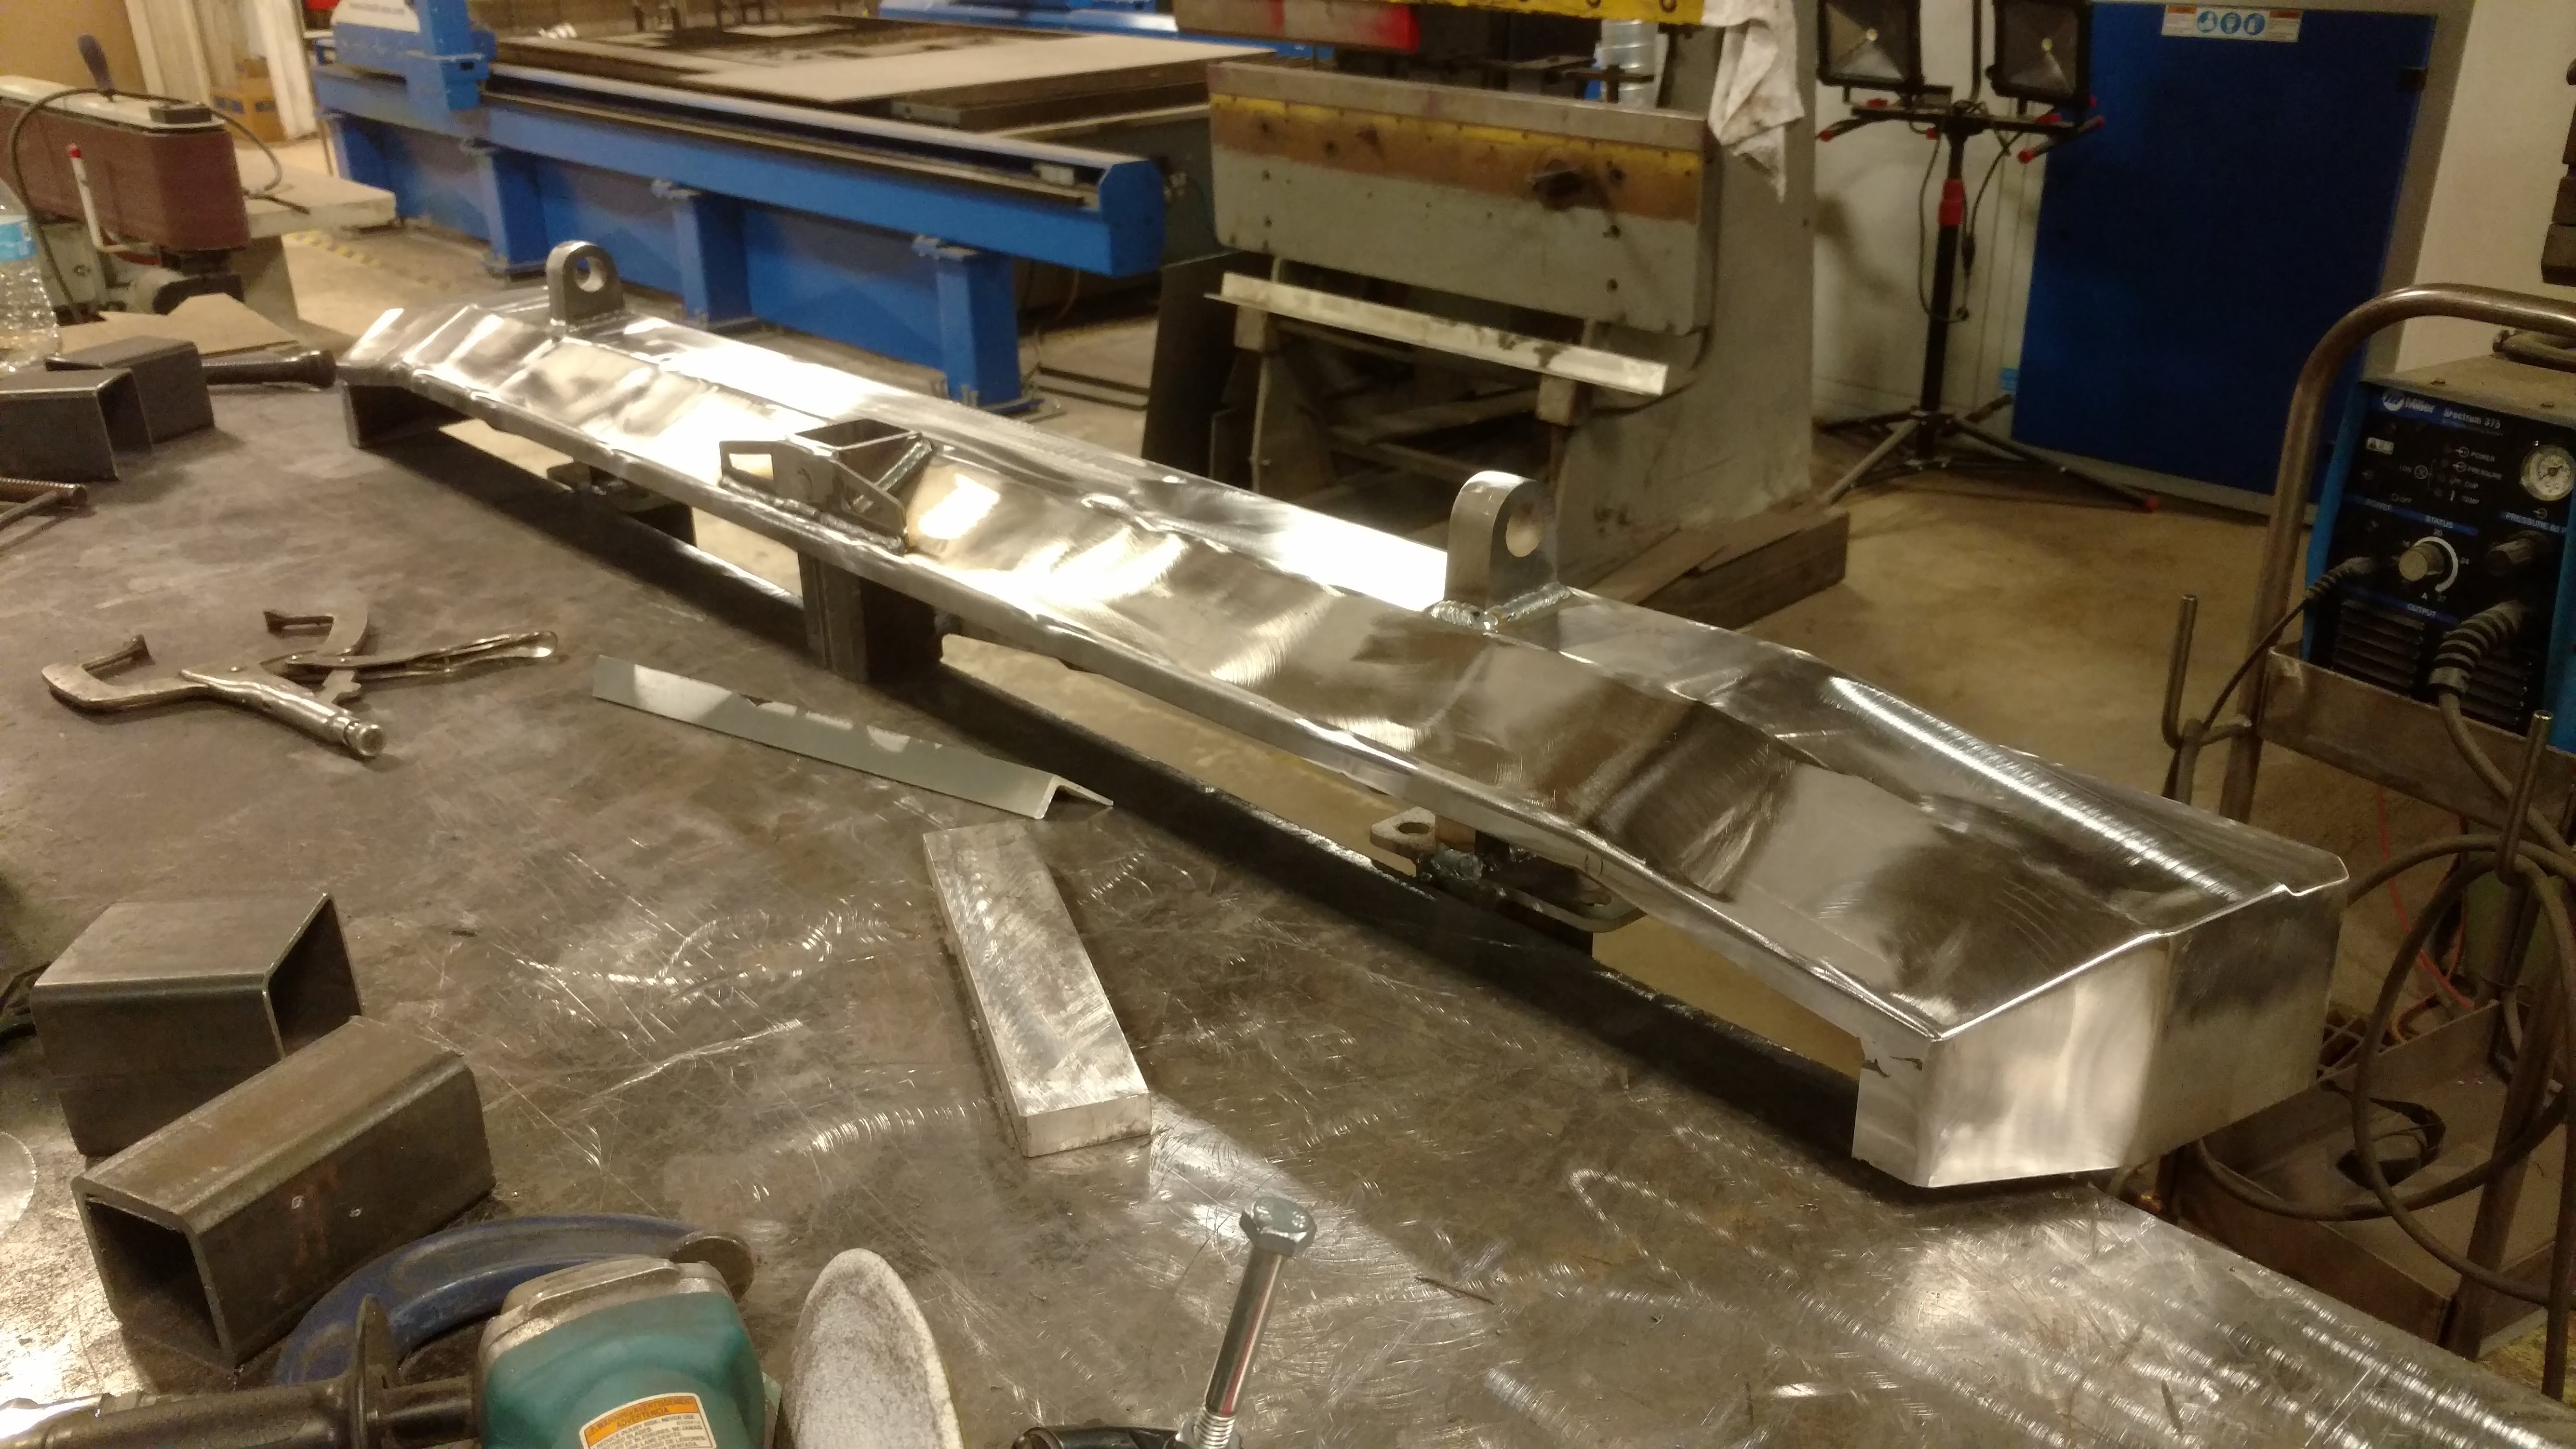
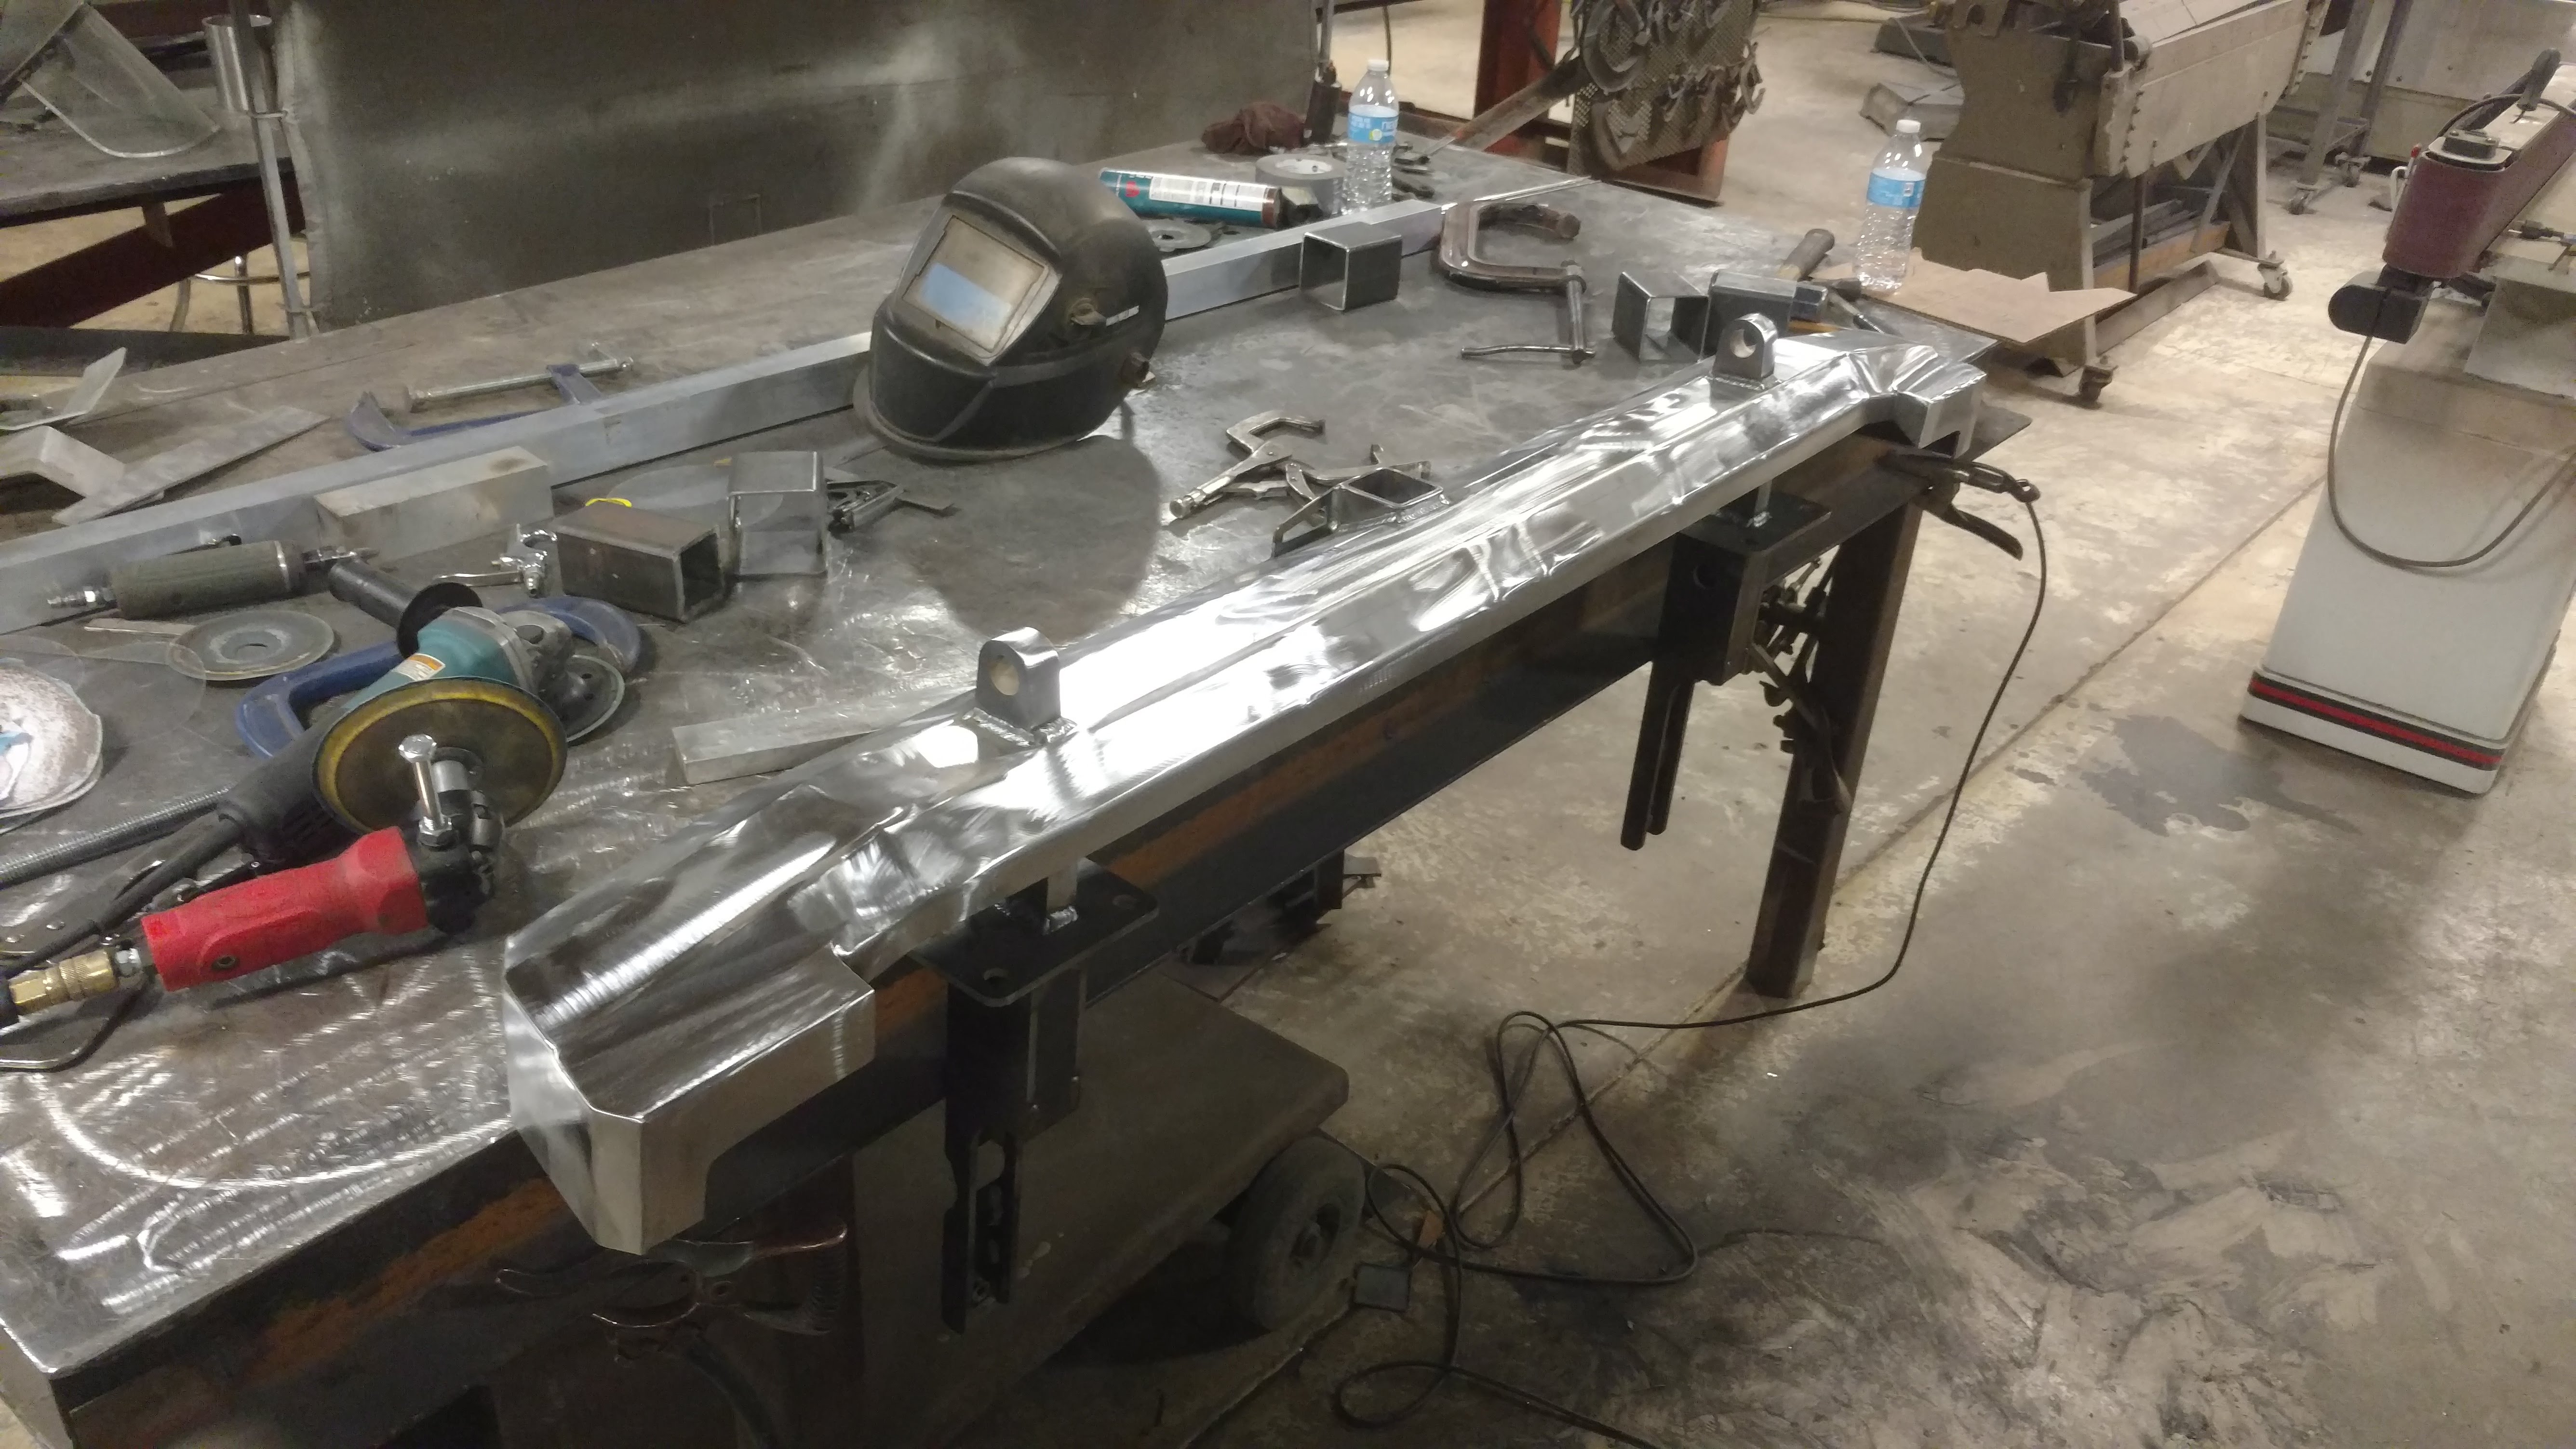
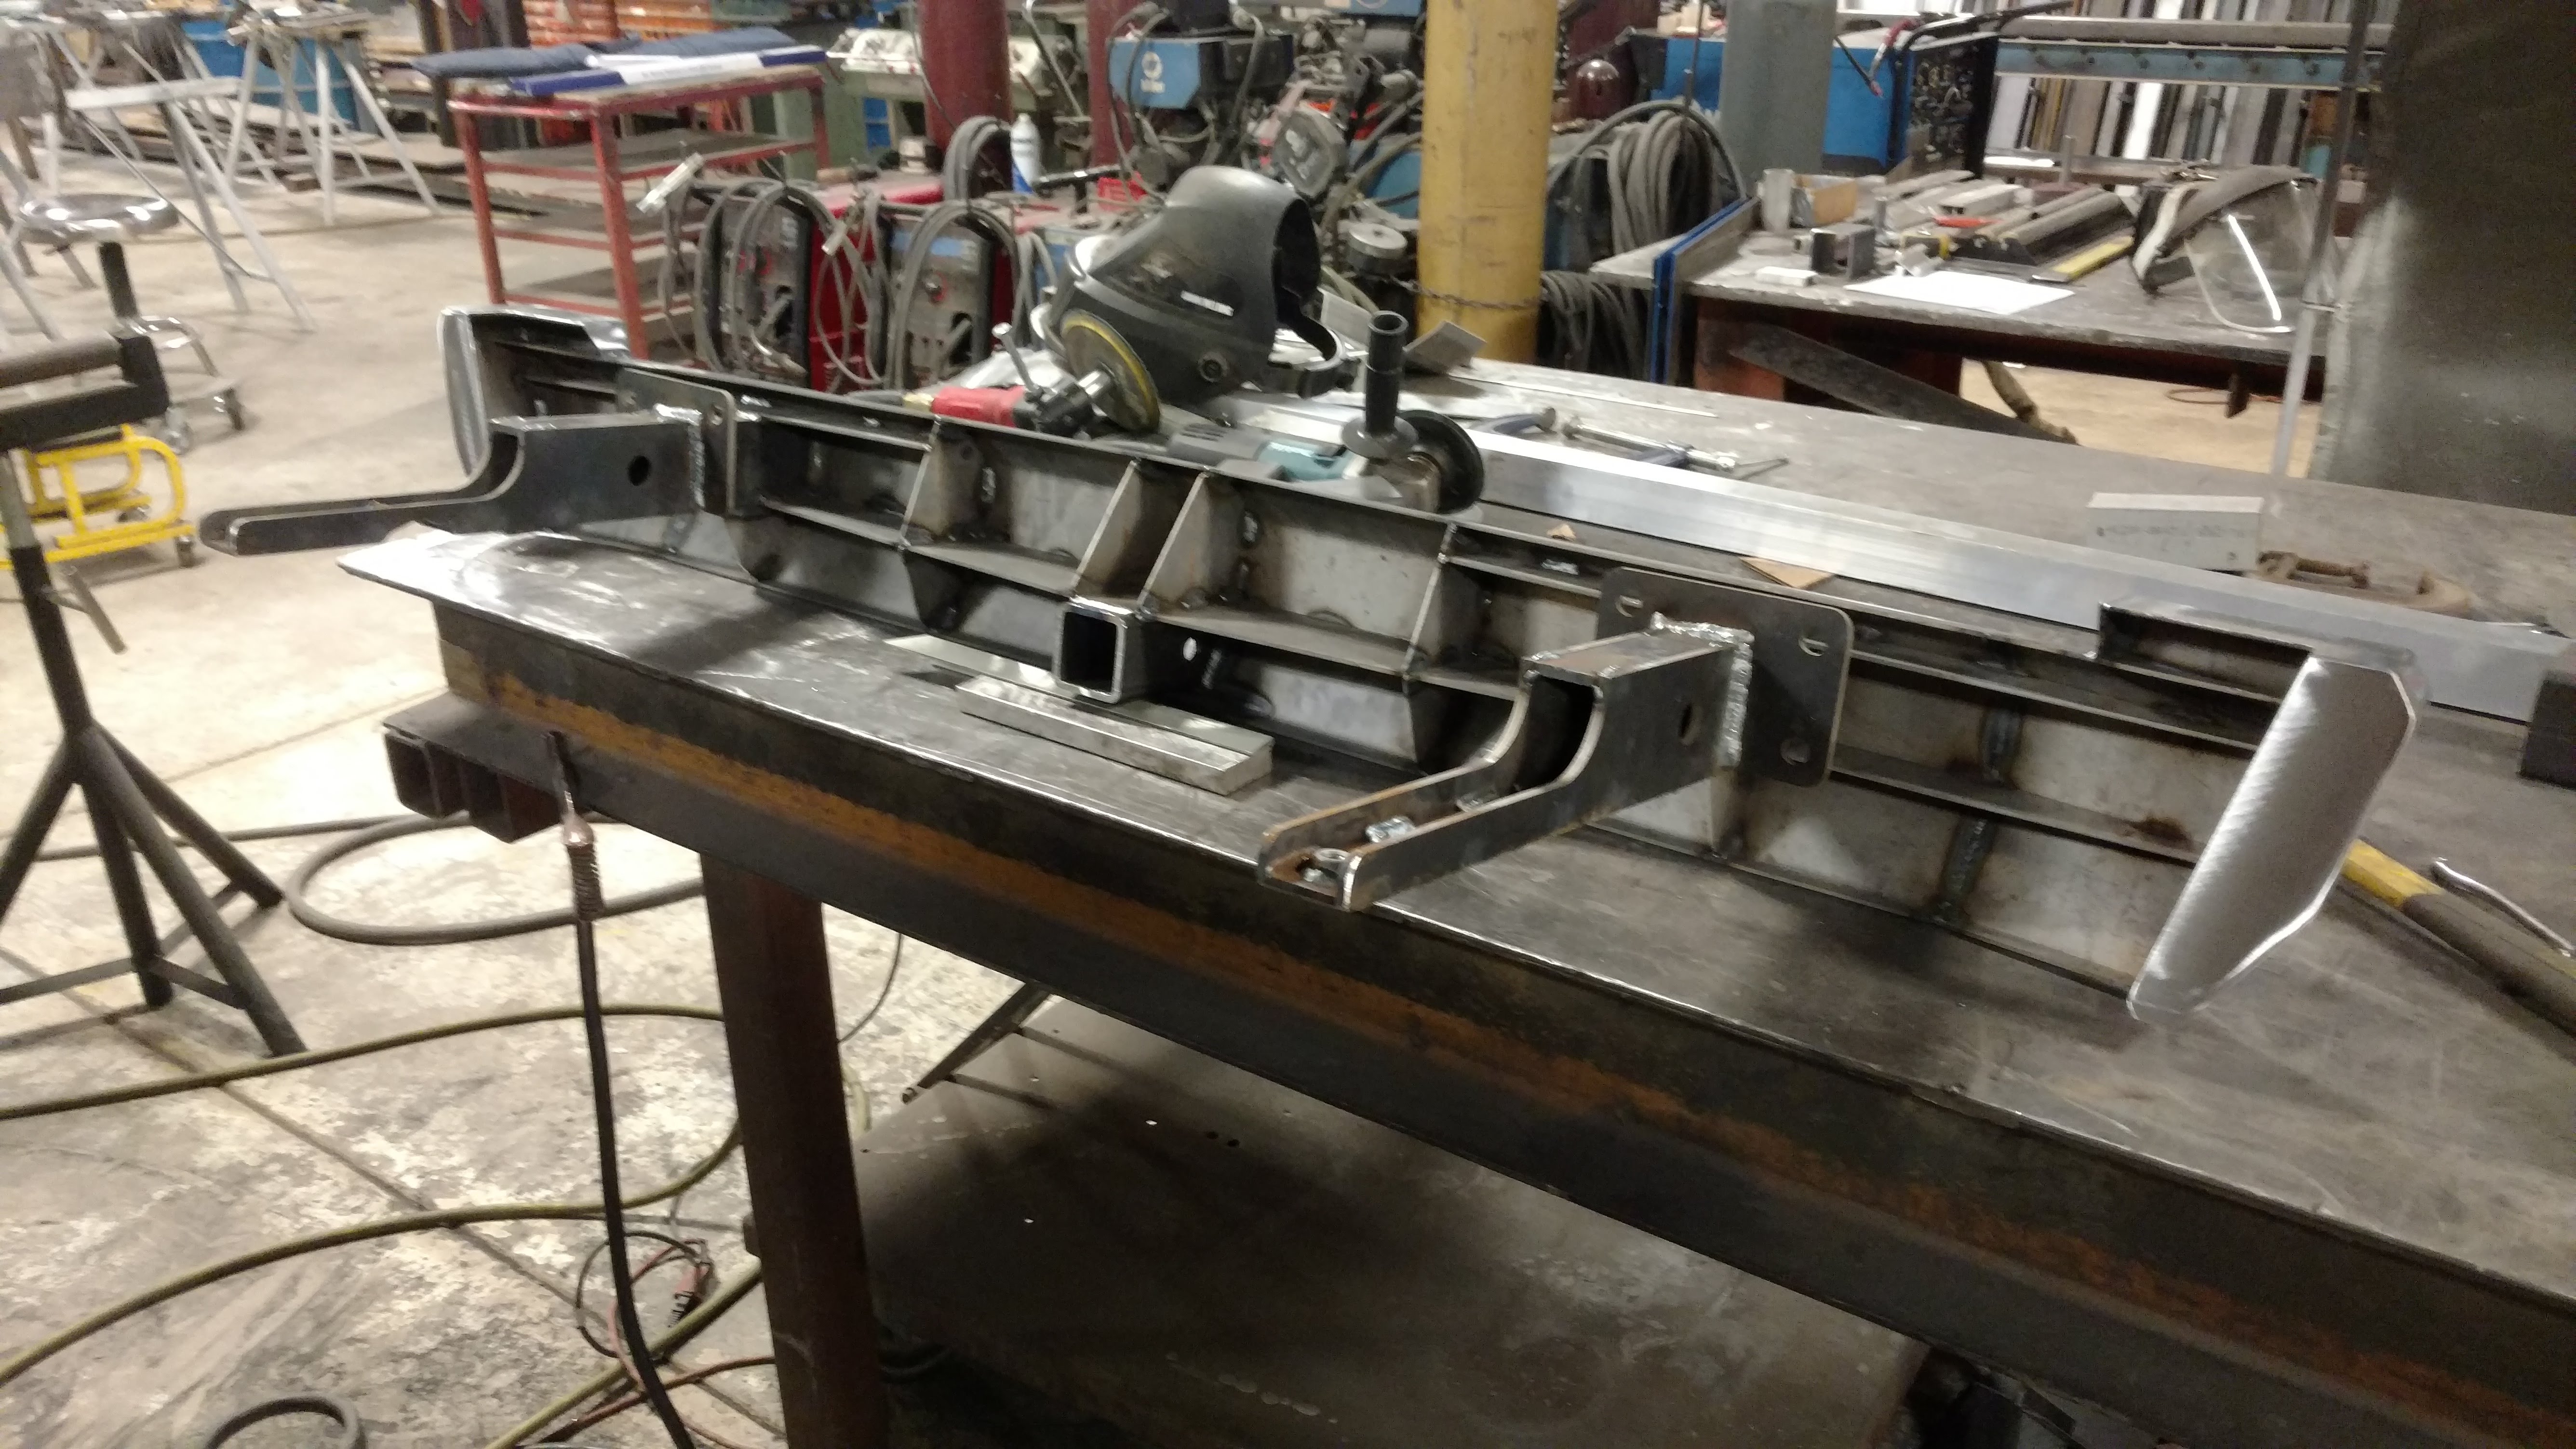
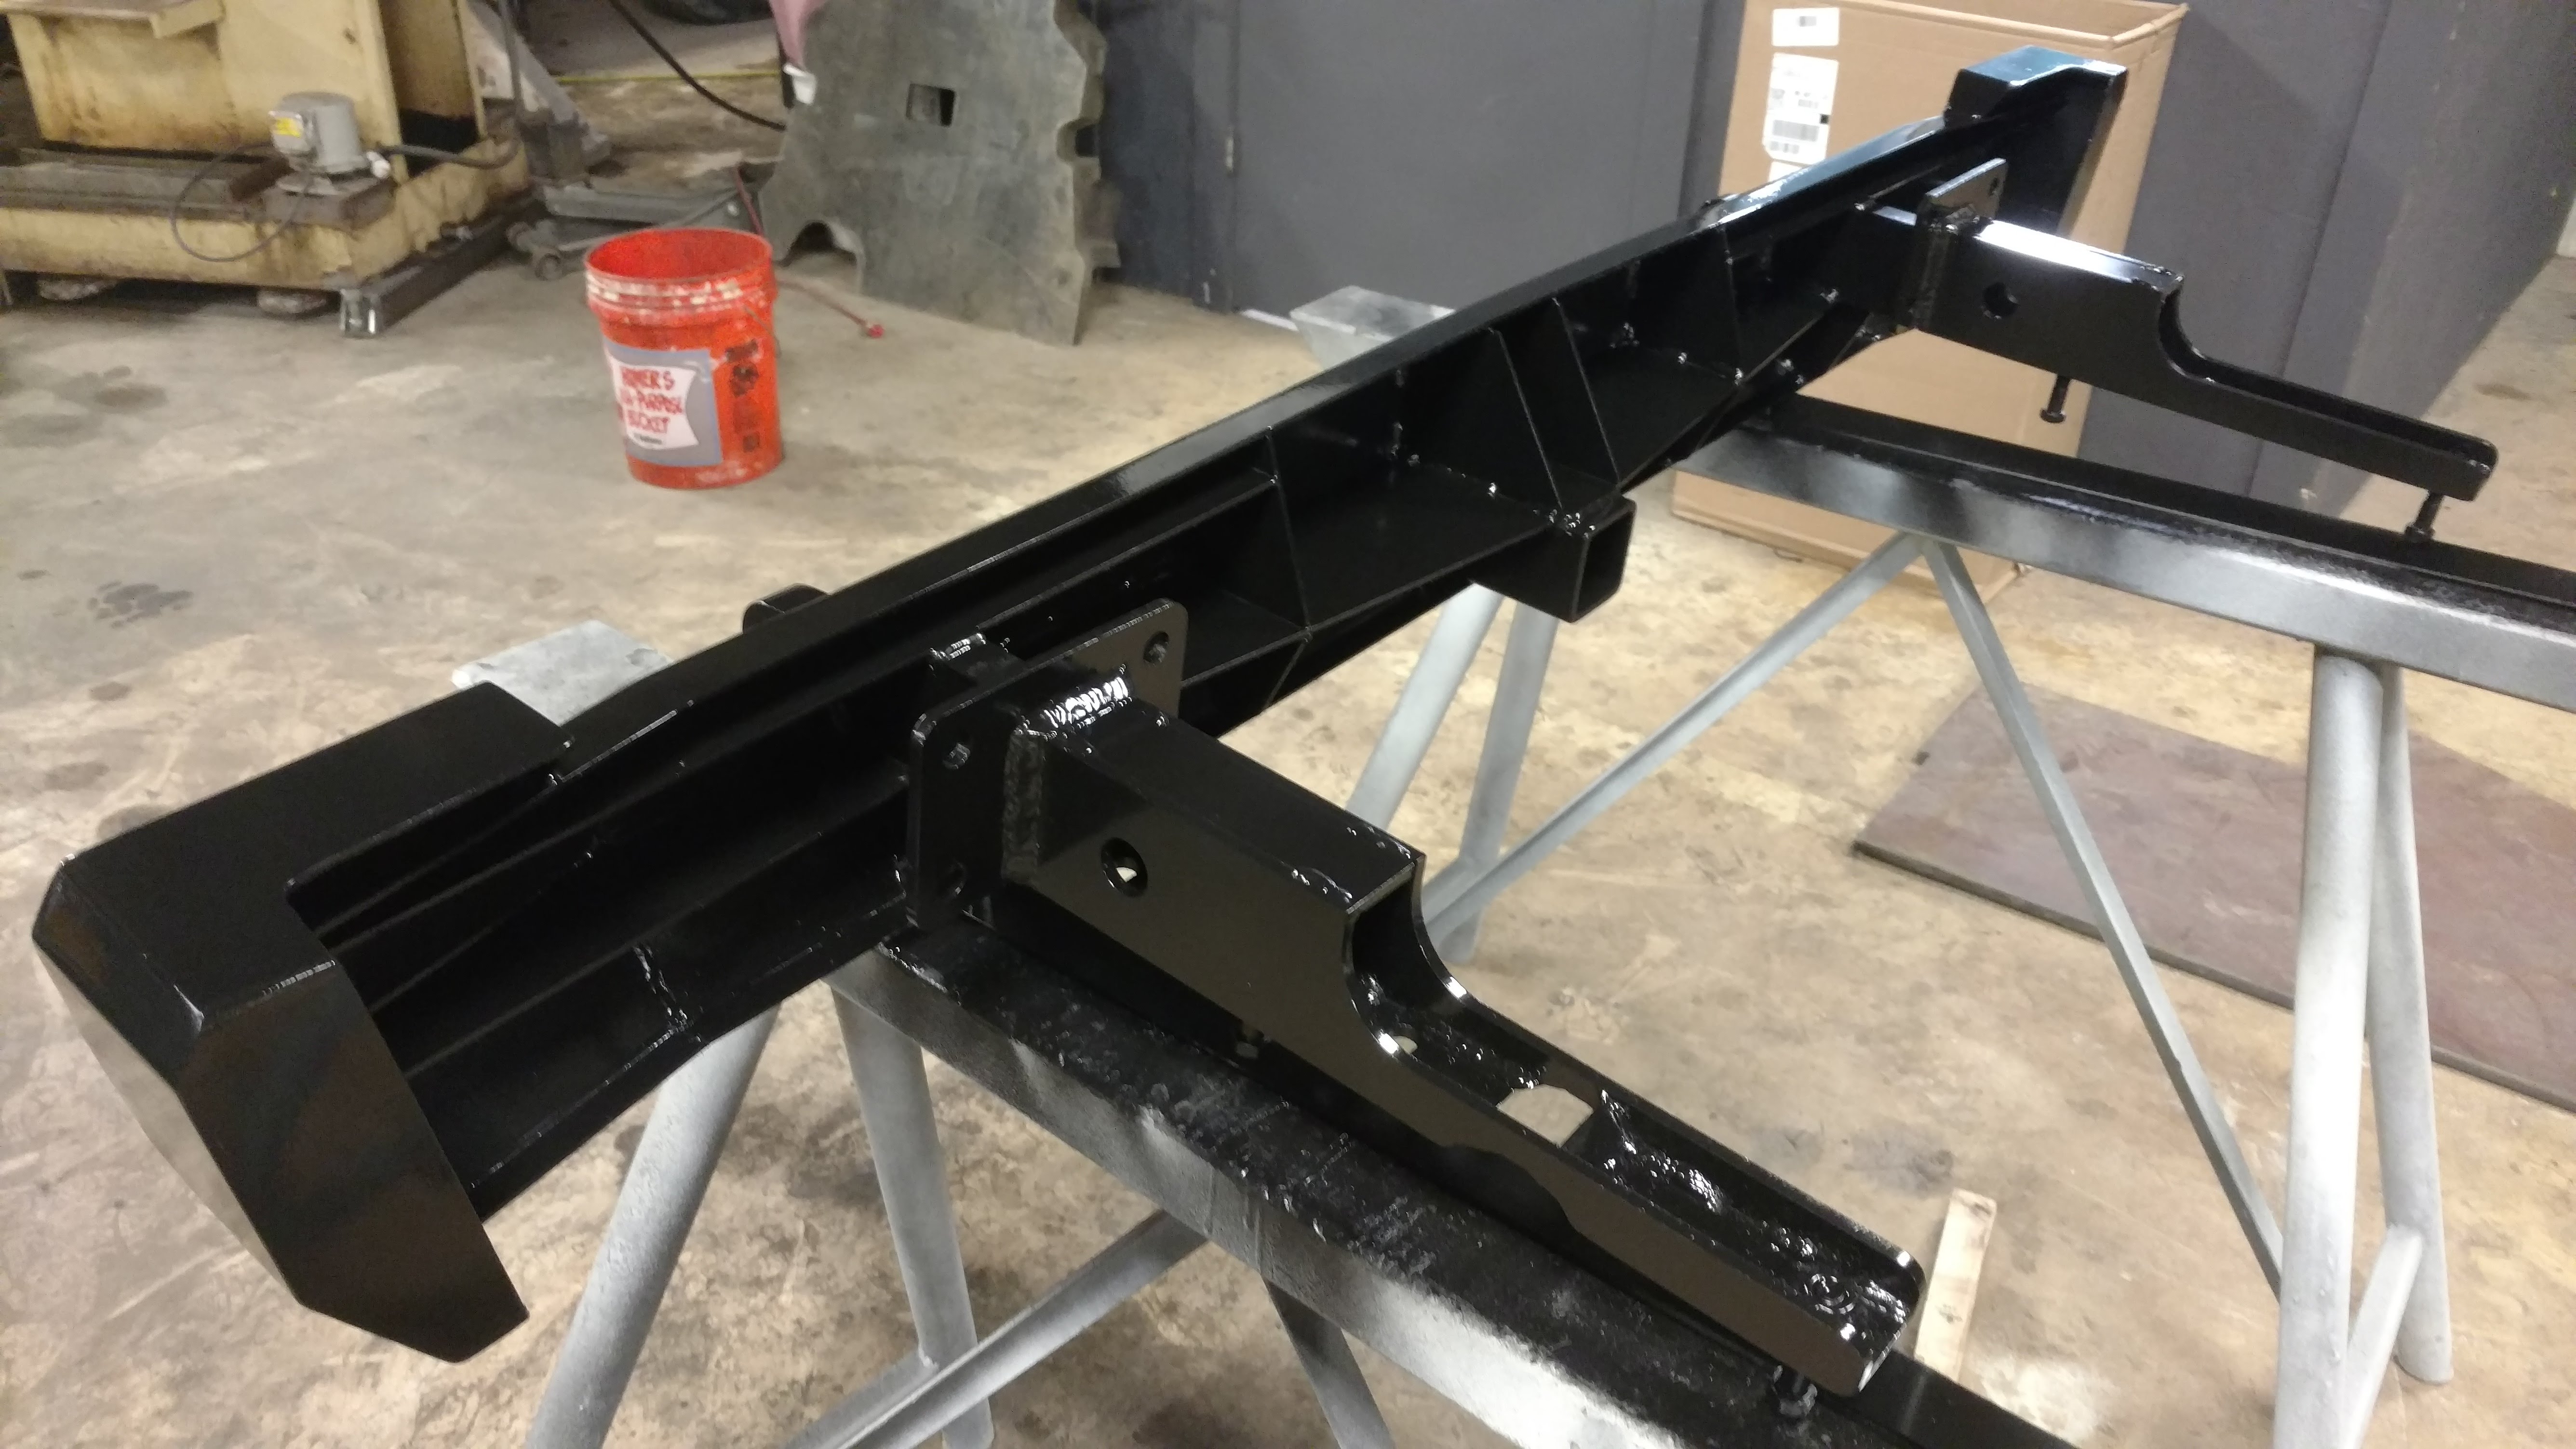
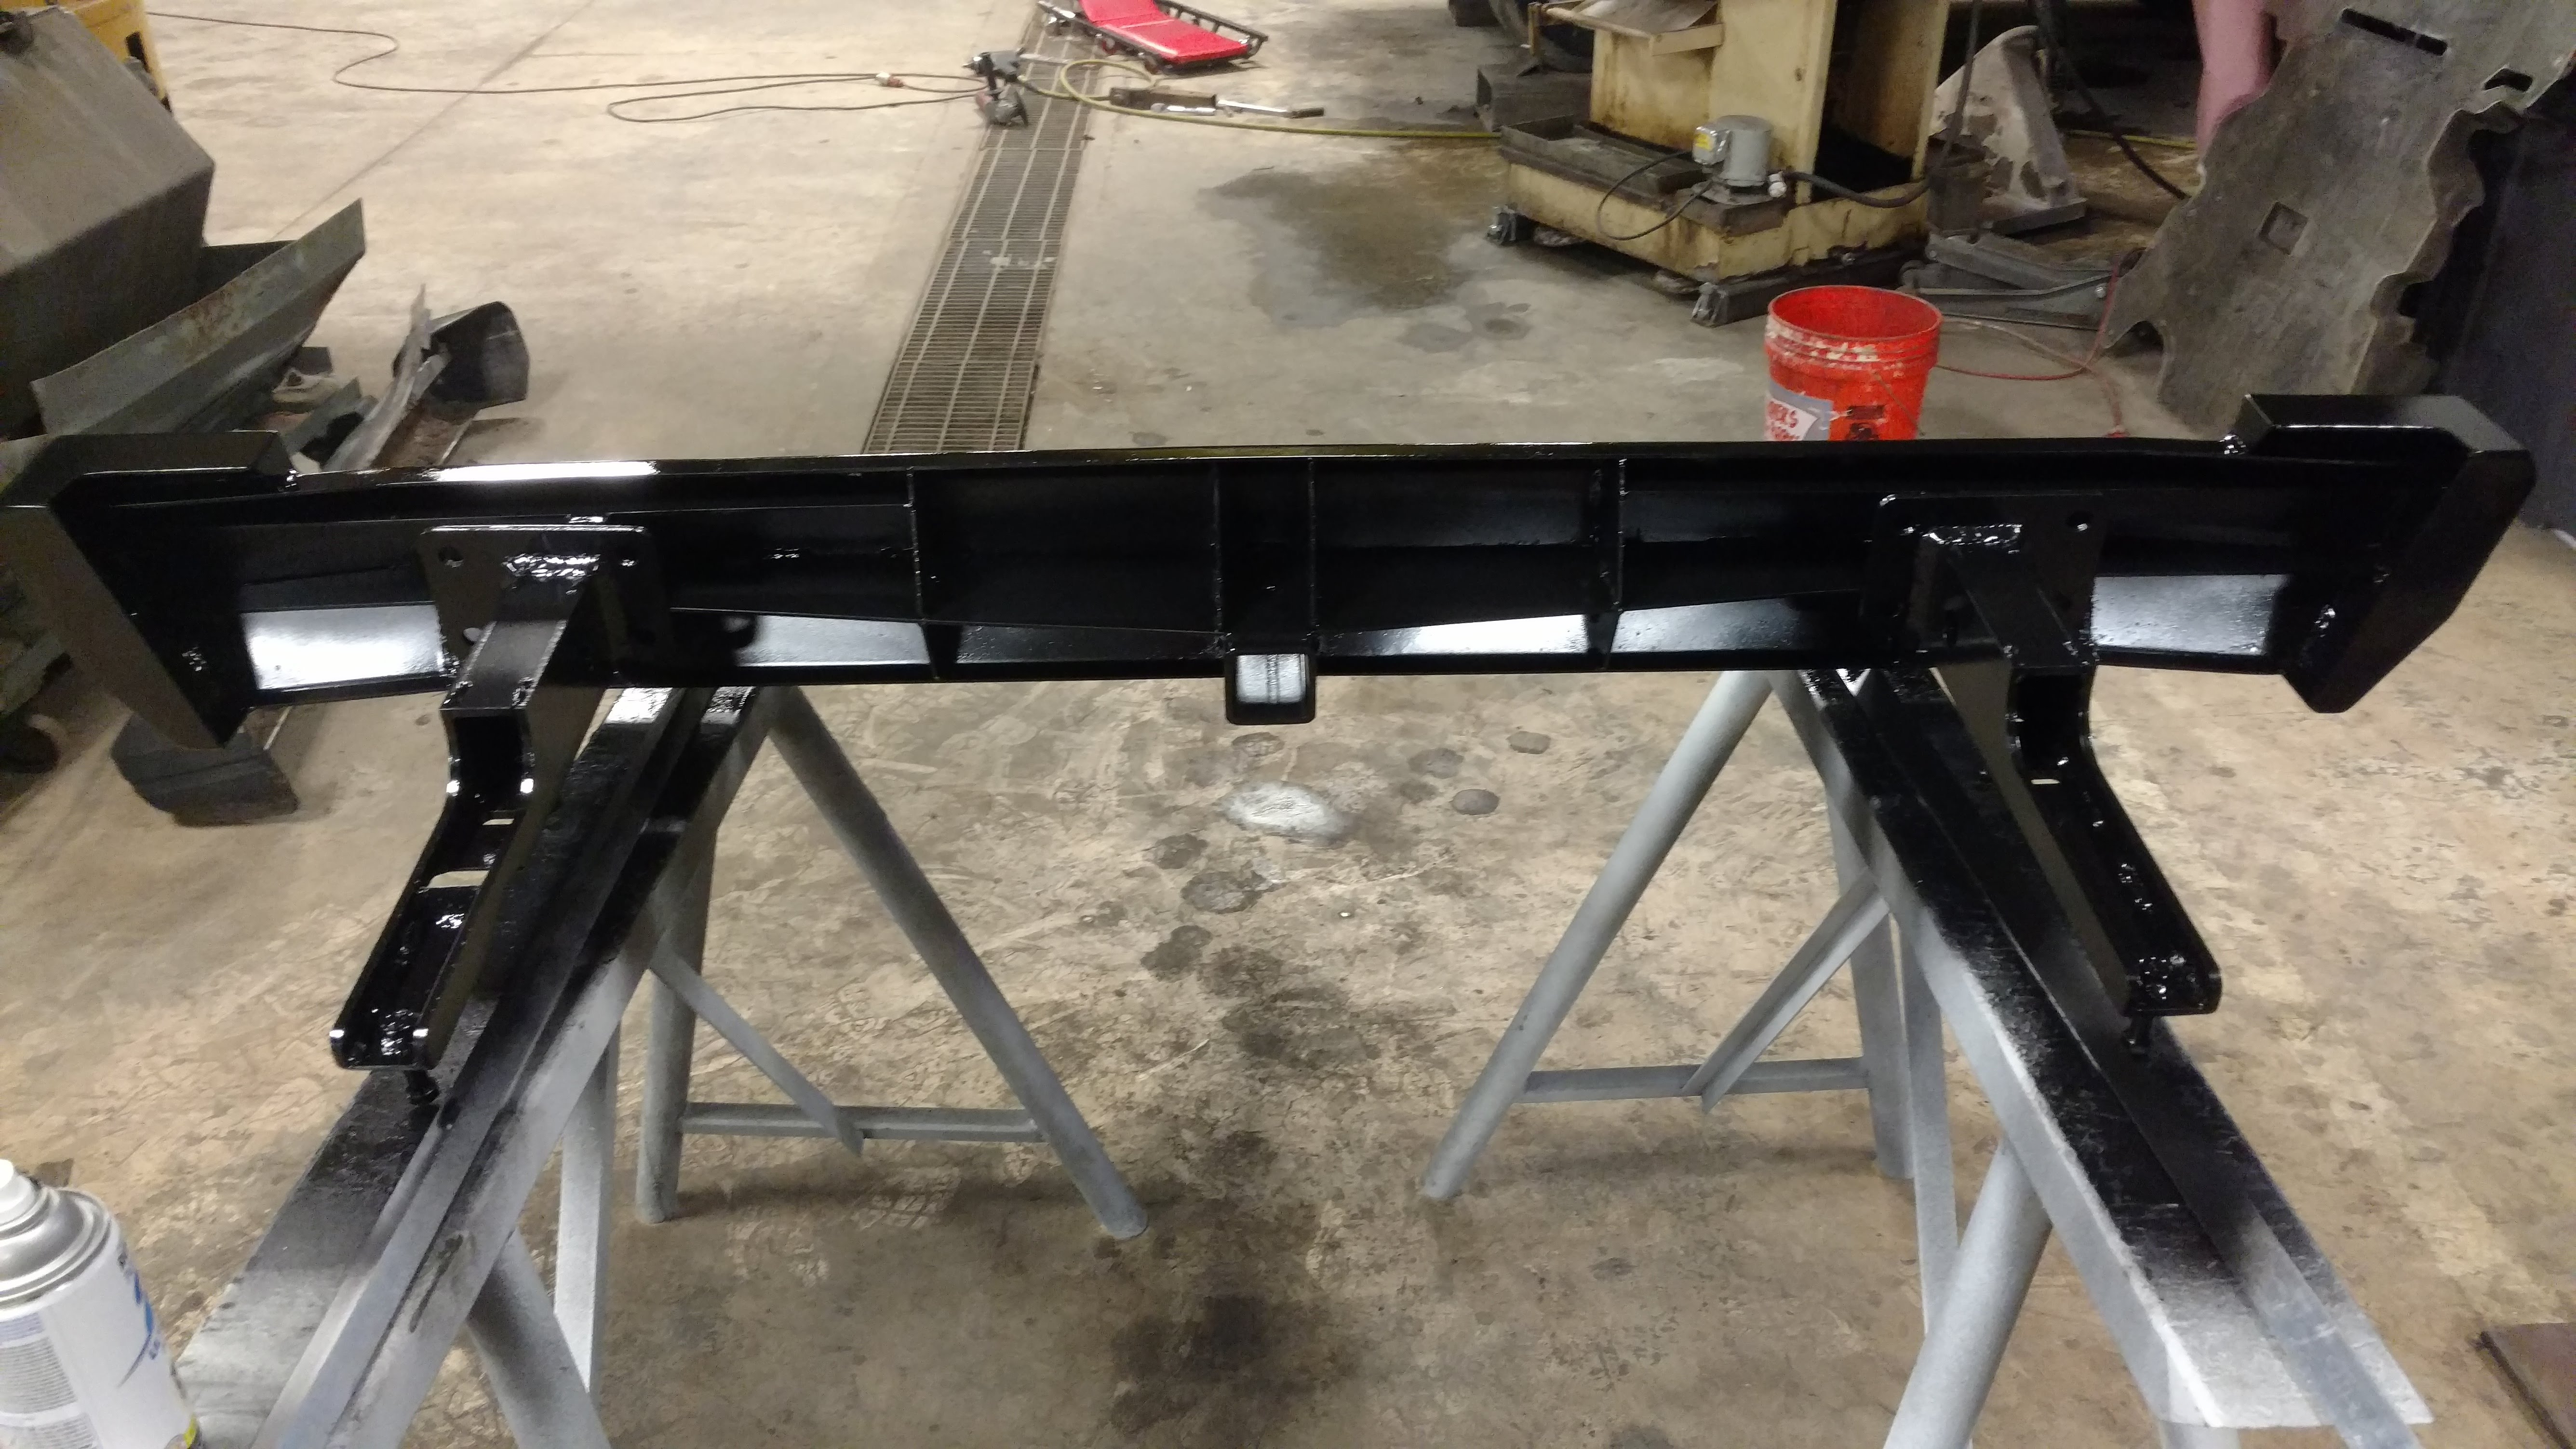
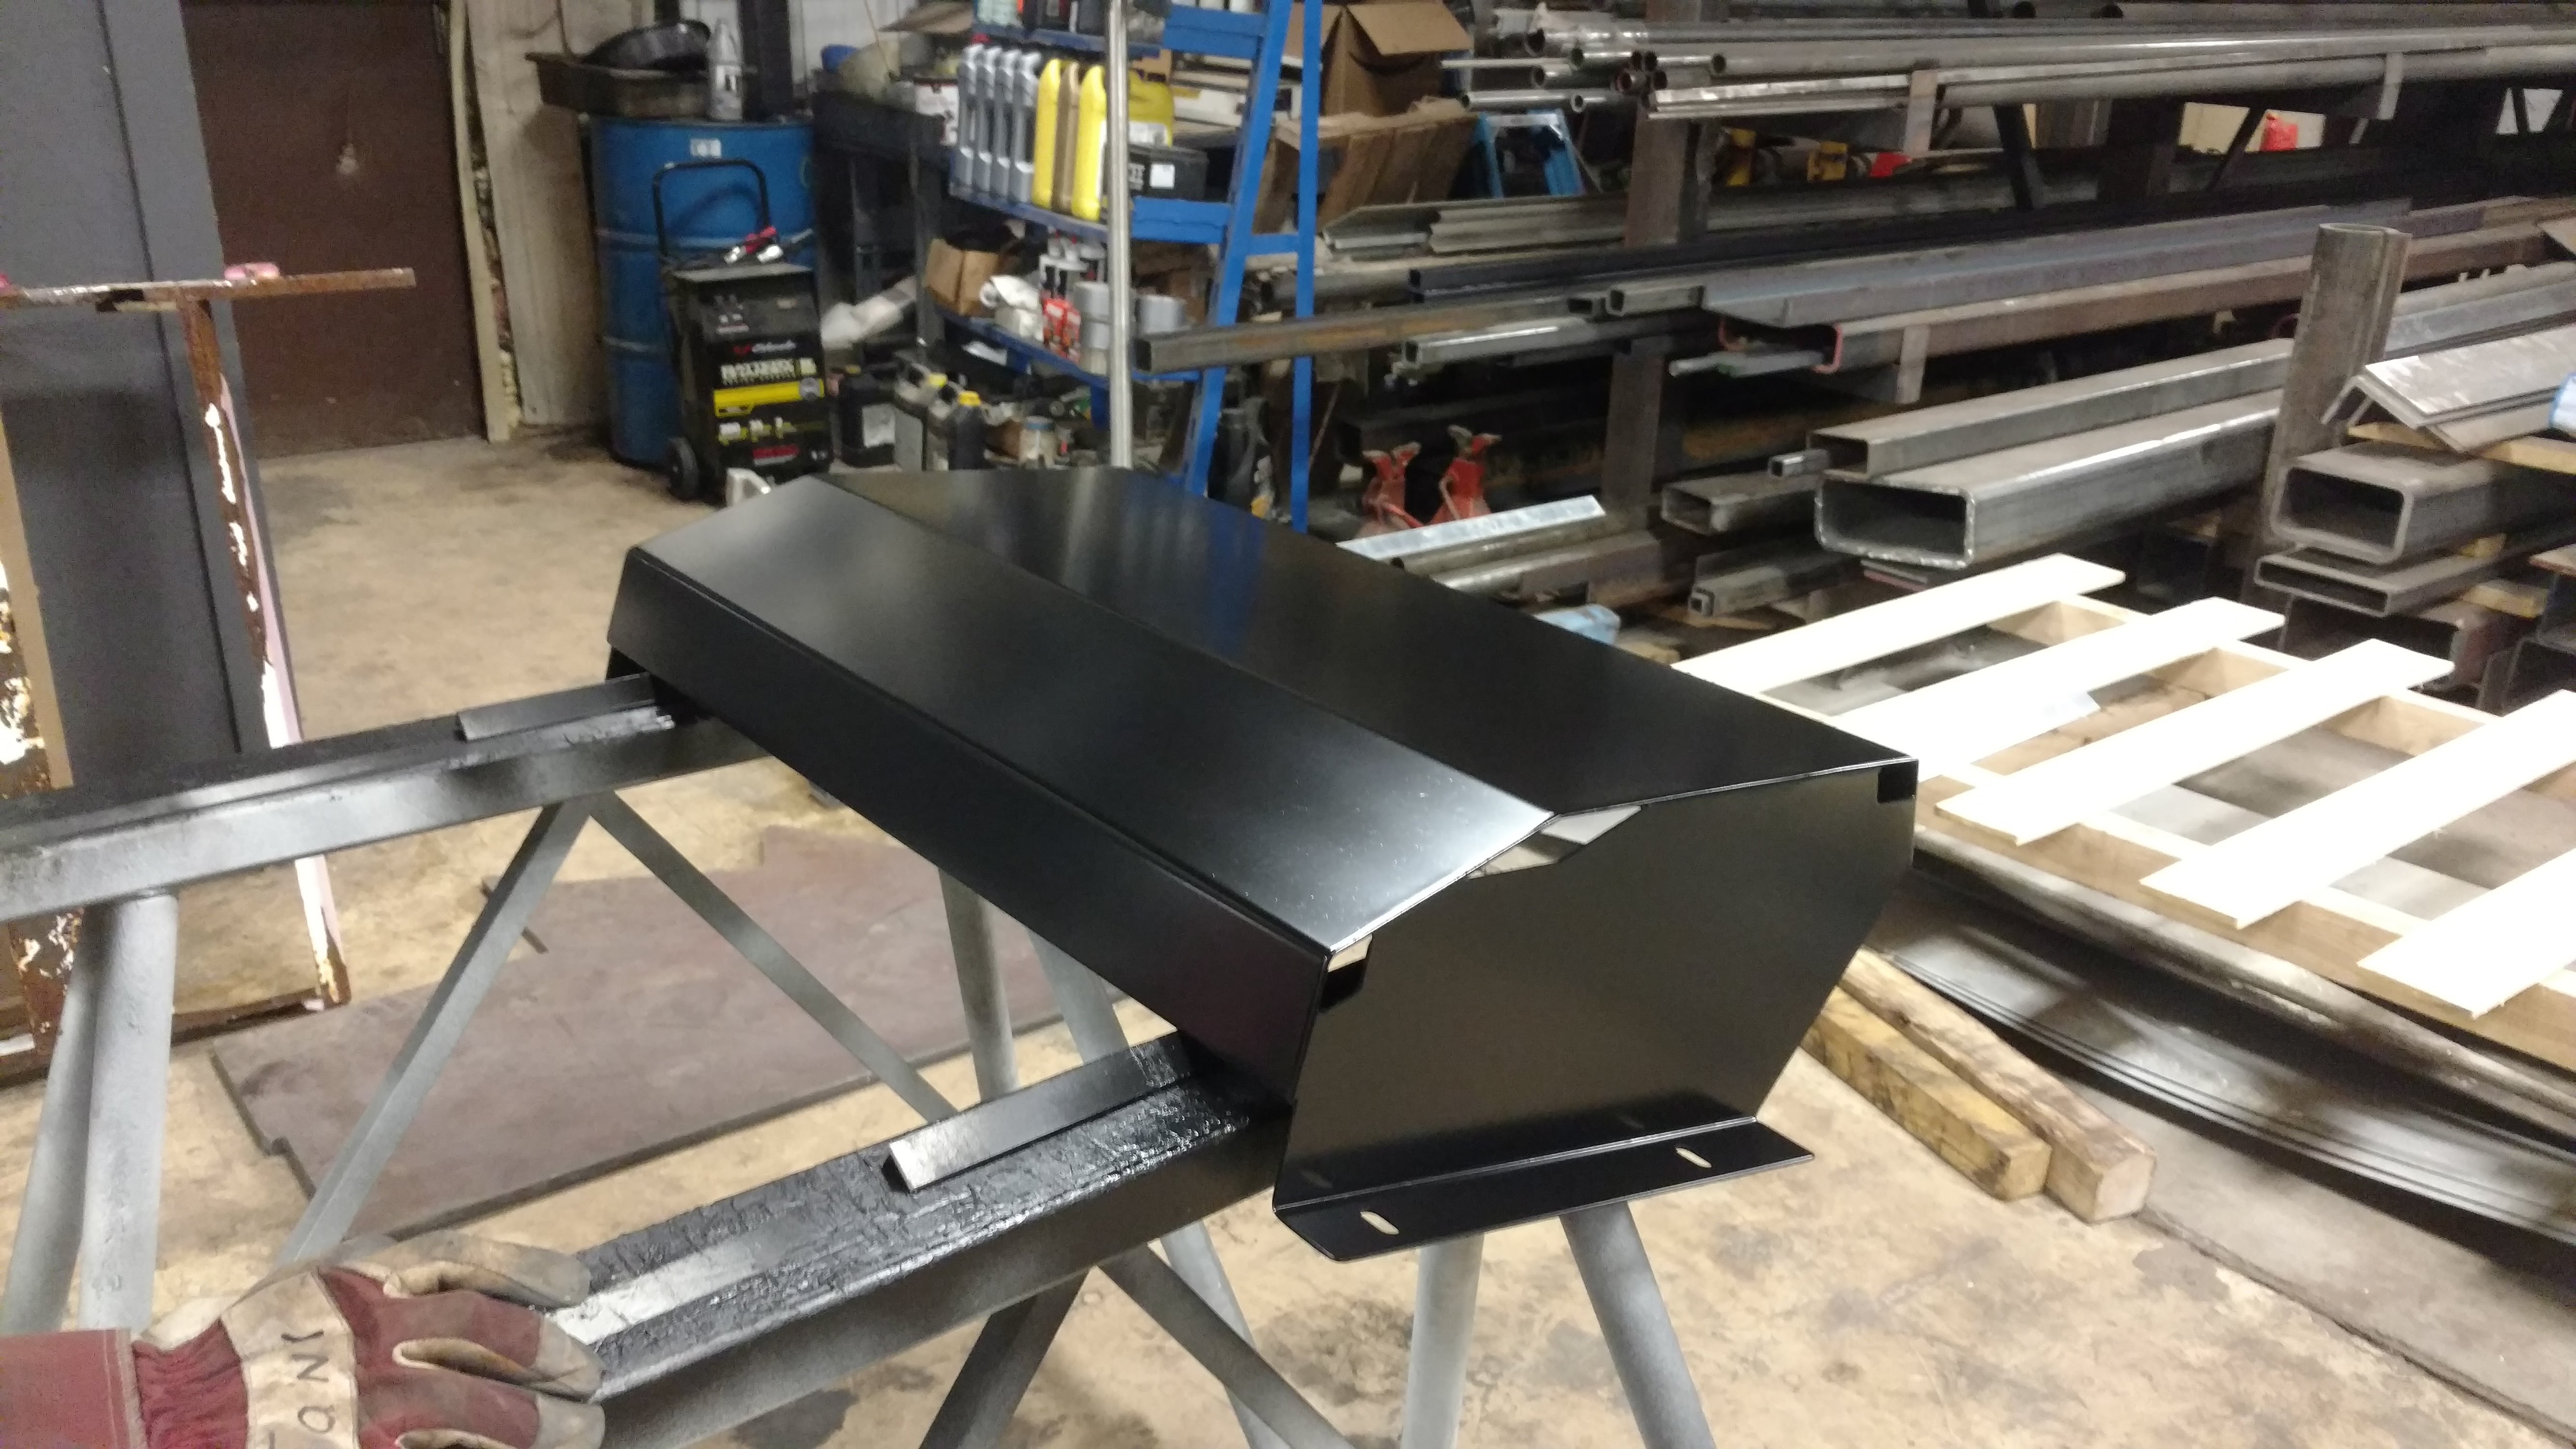
Started out by fabbing up some Frame tie ins. Made sure those fit nicely and began to cut for the bumper. Started out with a pc of 11ga brake formed in 4 spots to get my main profile for the bumper. Waterjet cut 1" steel shackle mts to weld to the frame inserts. Then cut rectangular holes in the bumper to allow the 1" plate to protrude through.
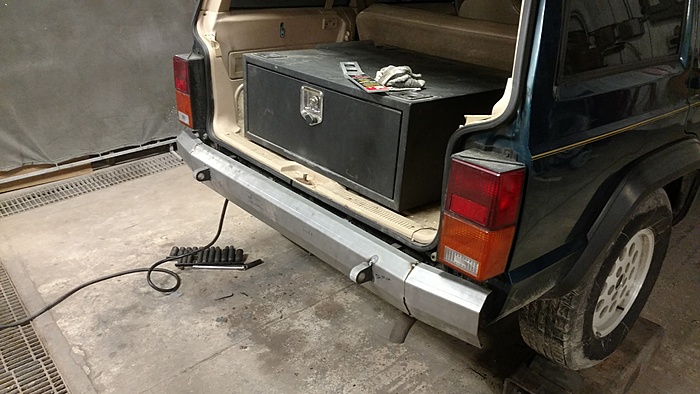
Got everything tacked together, did some trimming, and moved on to the sides.
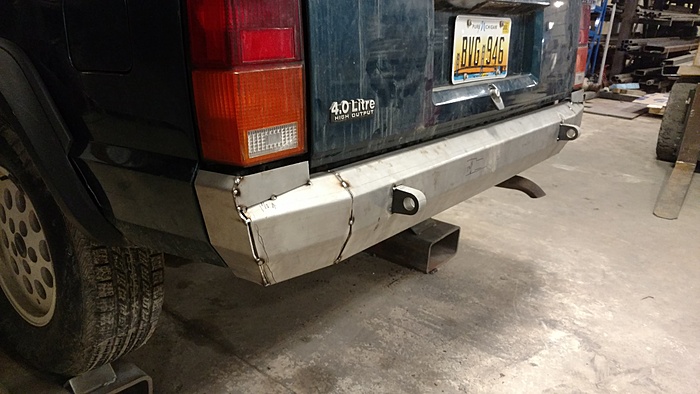
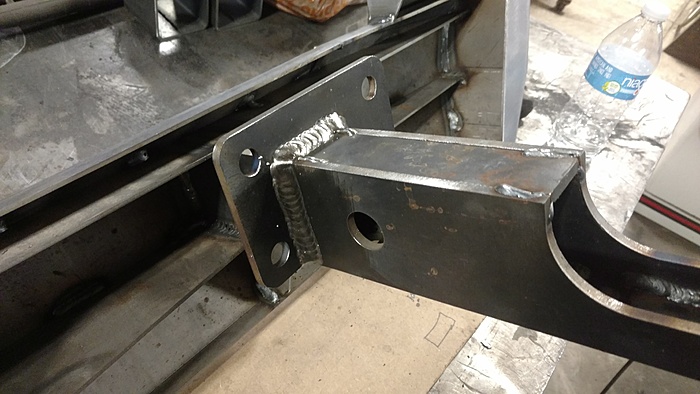
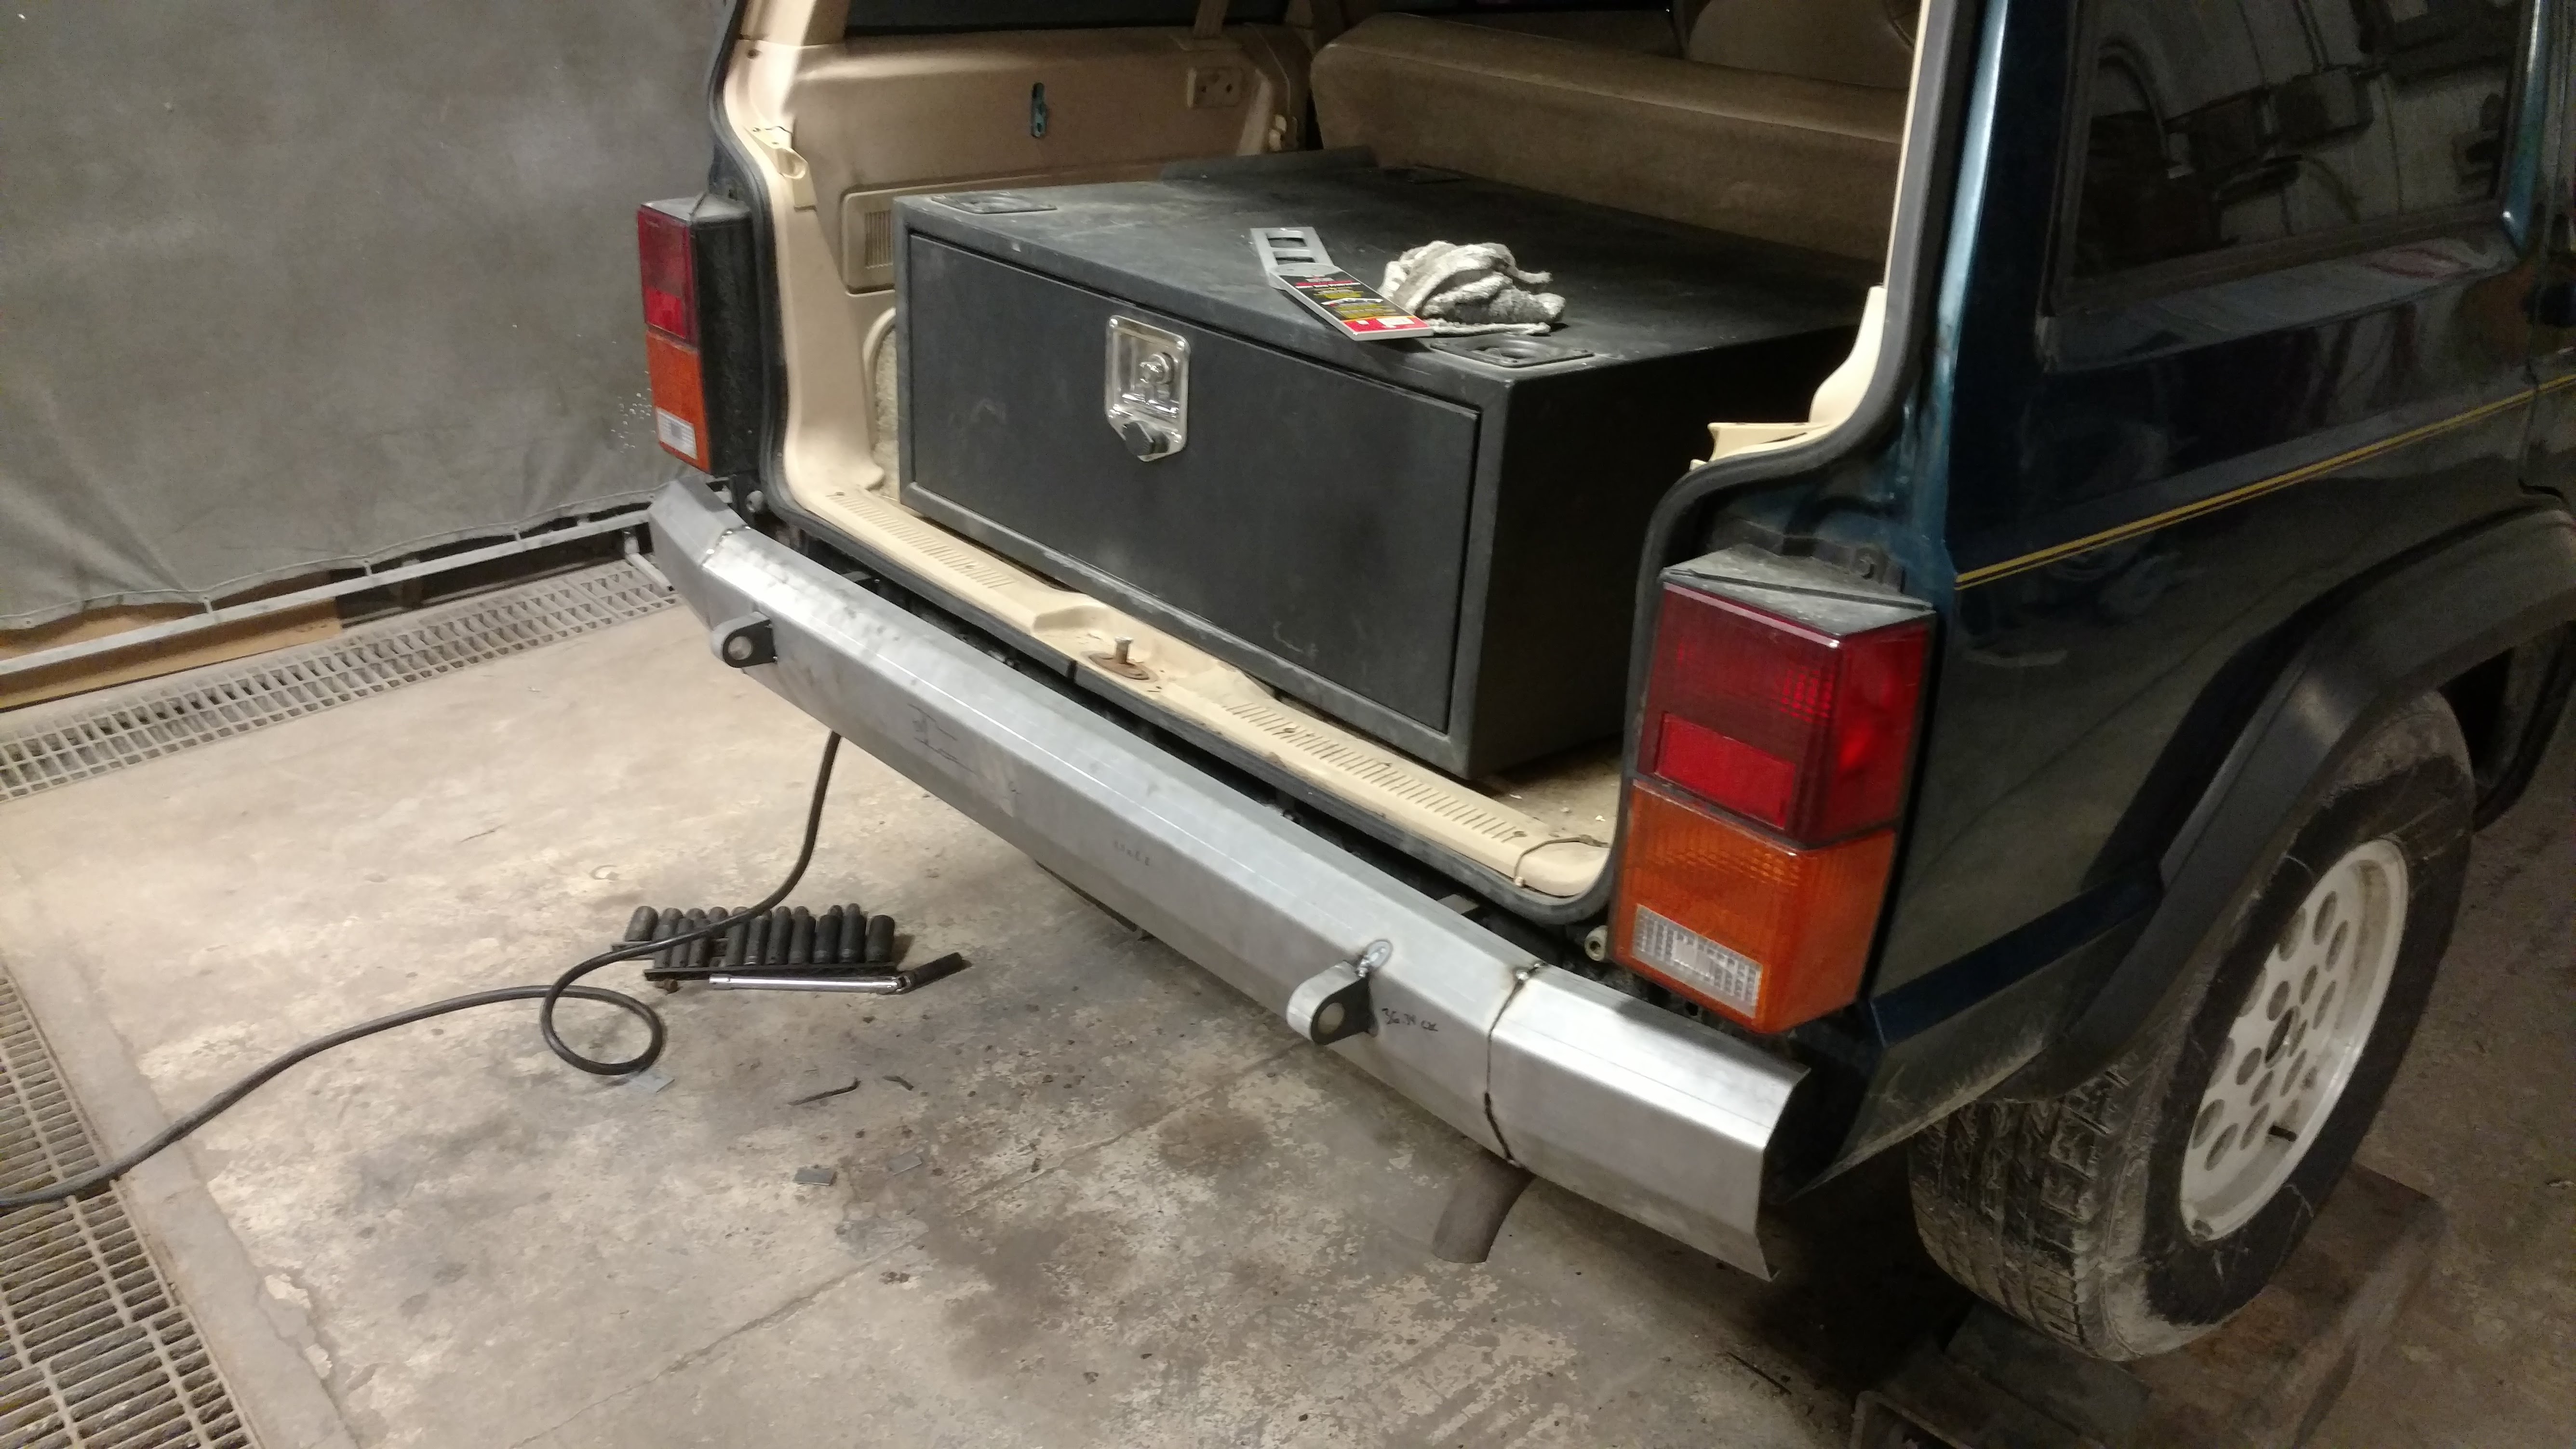
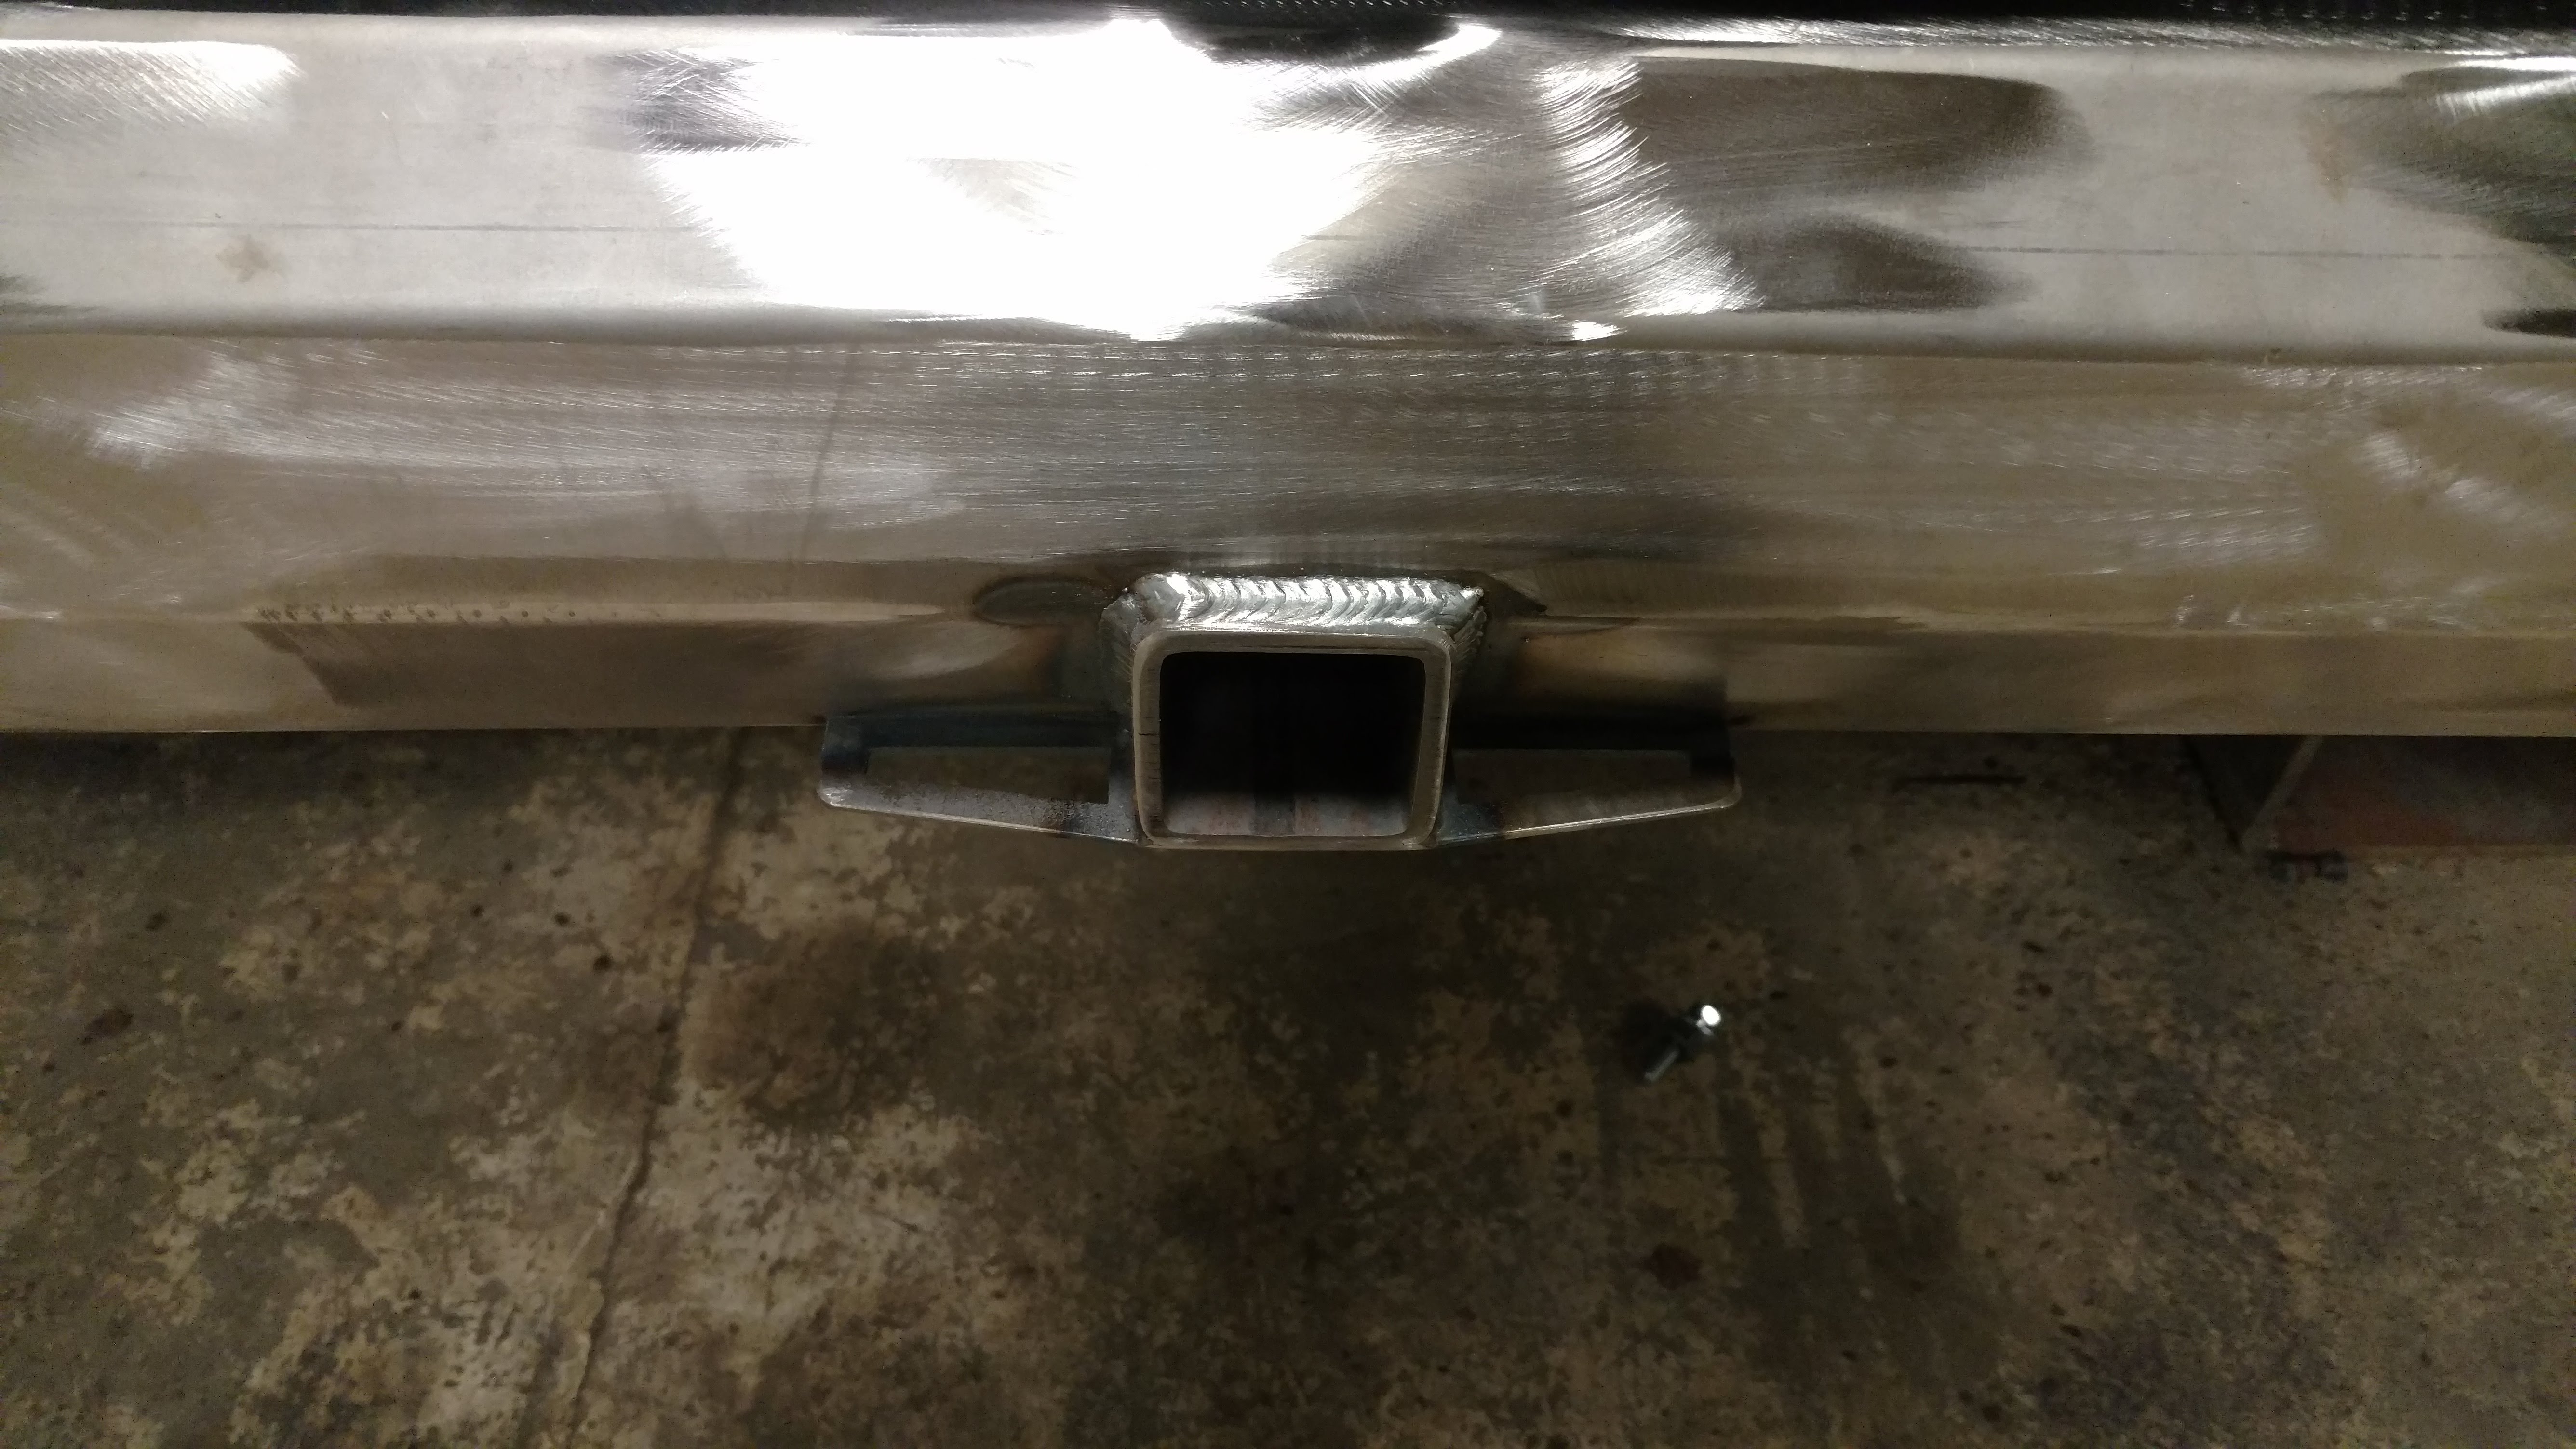
Then put the receiver tube in
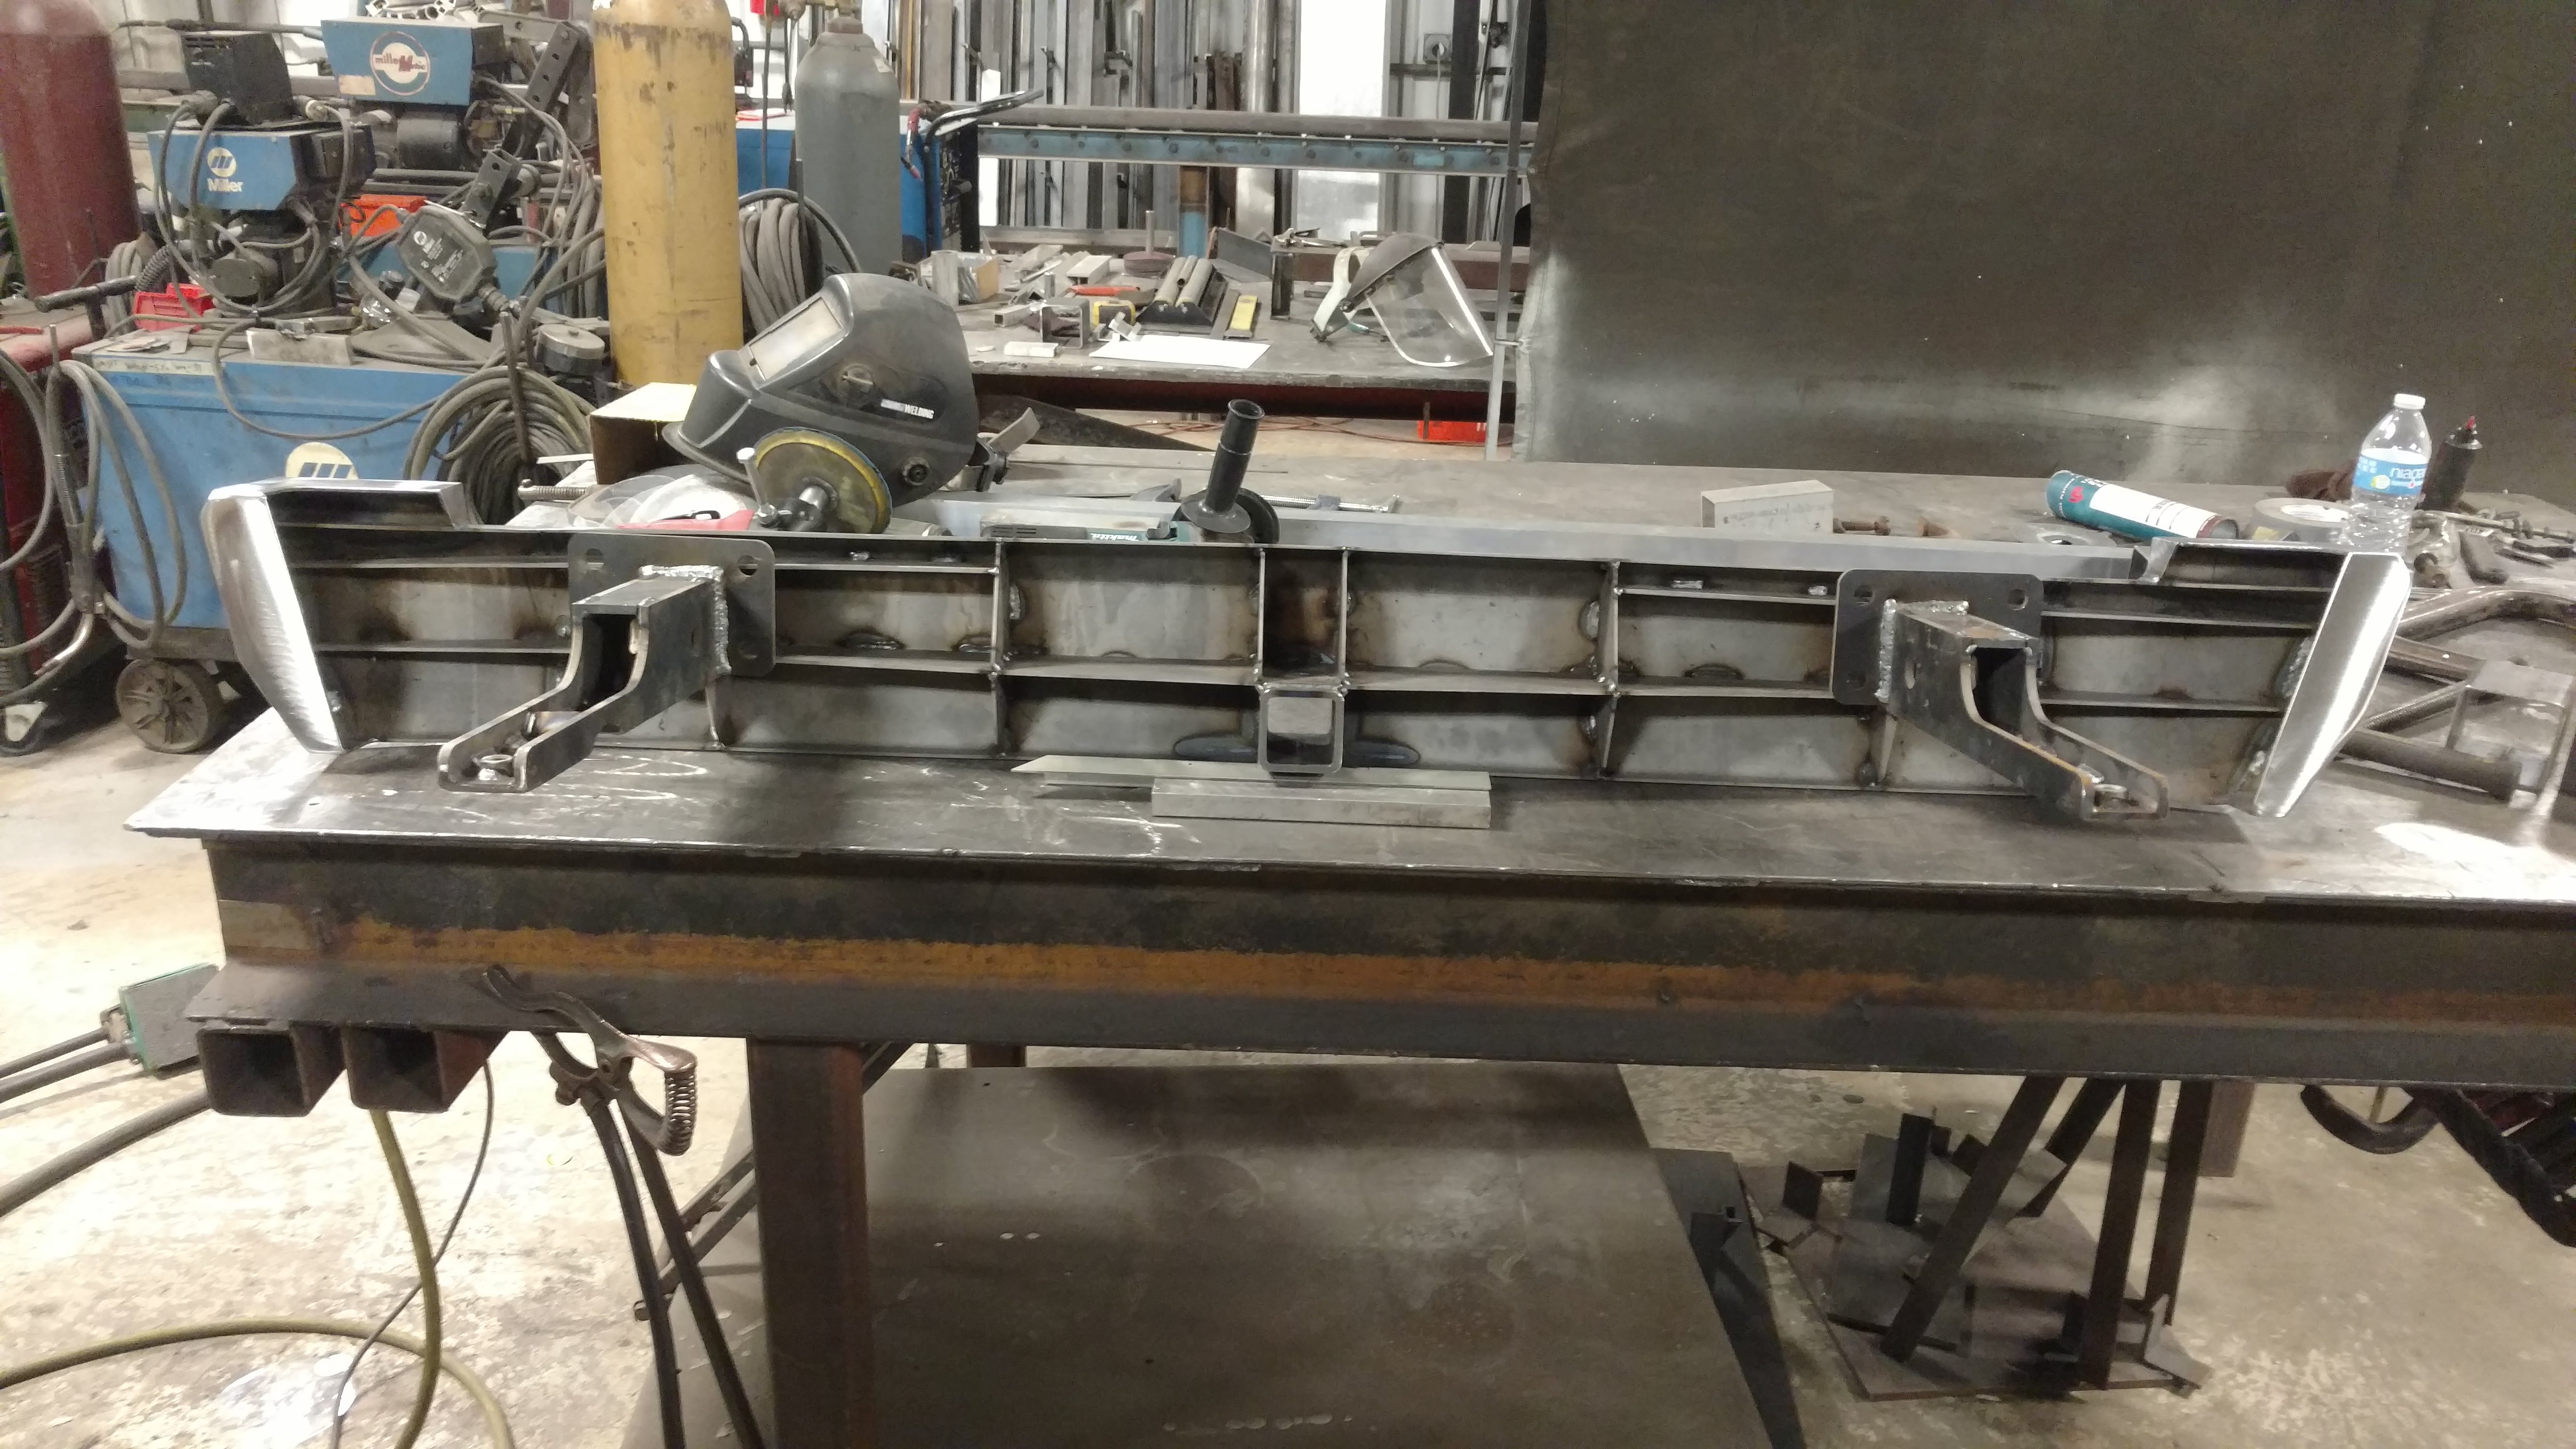
Did a little welding and a little grinding


Confirmed nothing got warped during cleanup


And then began working on the bracing

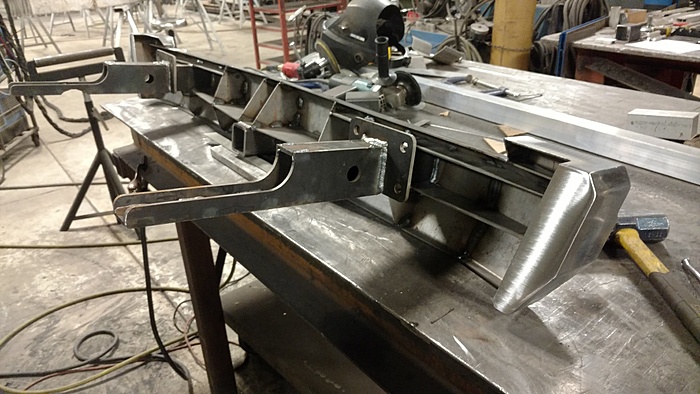

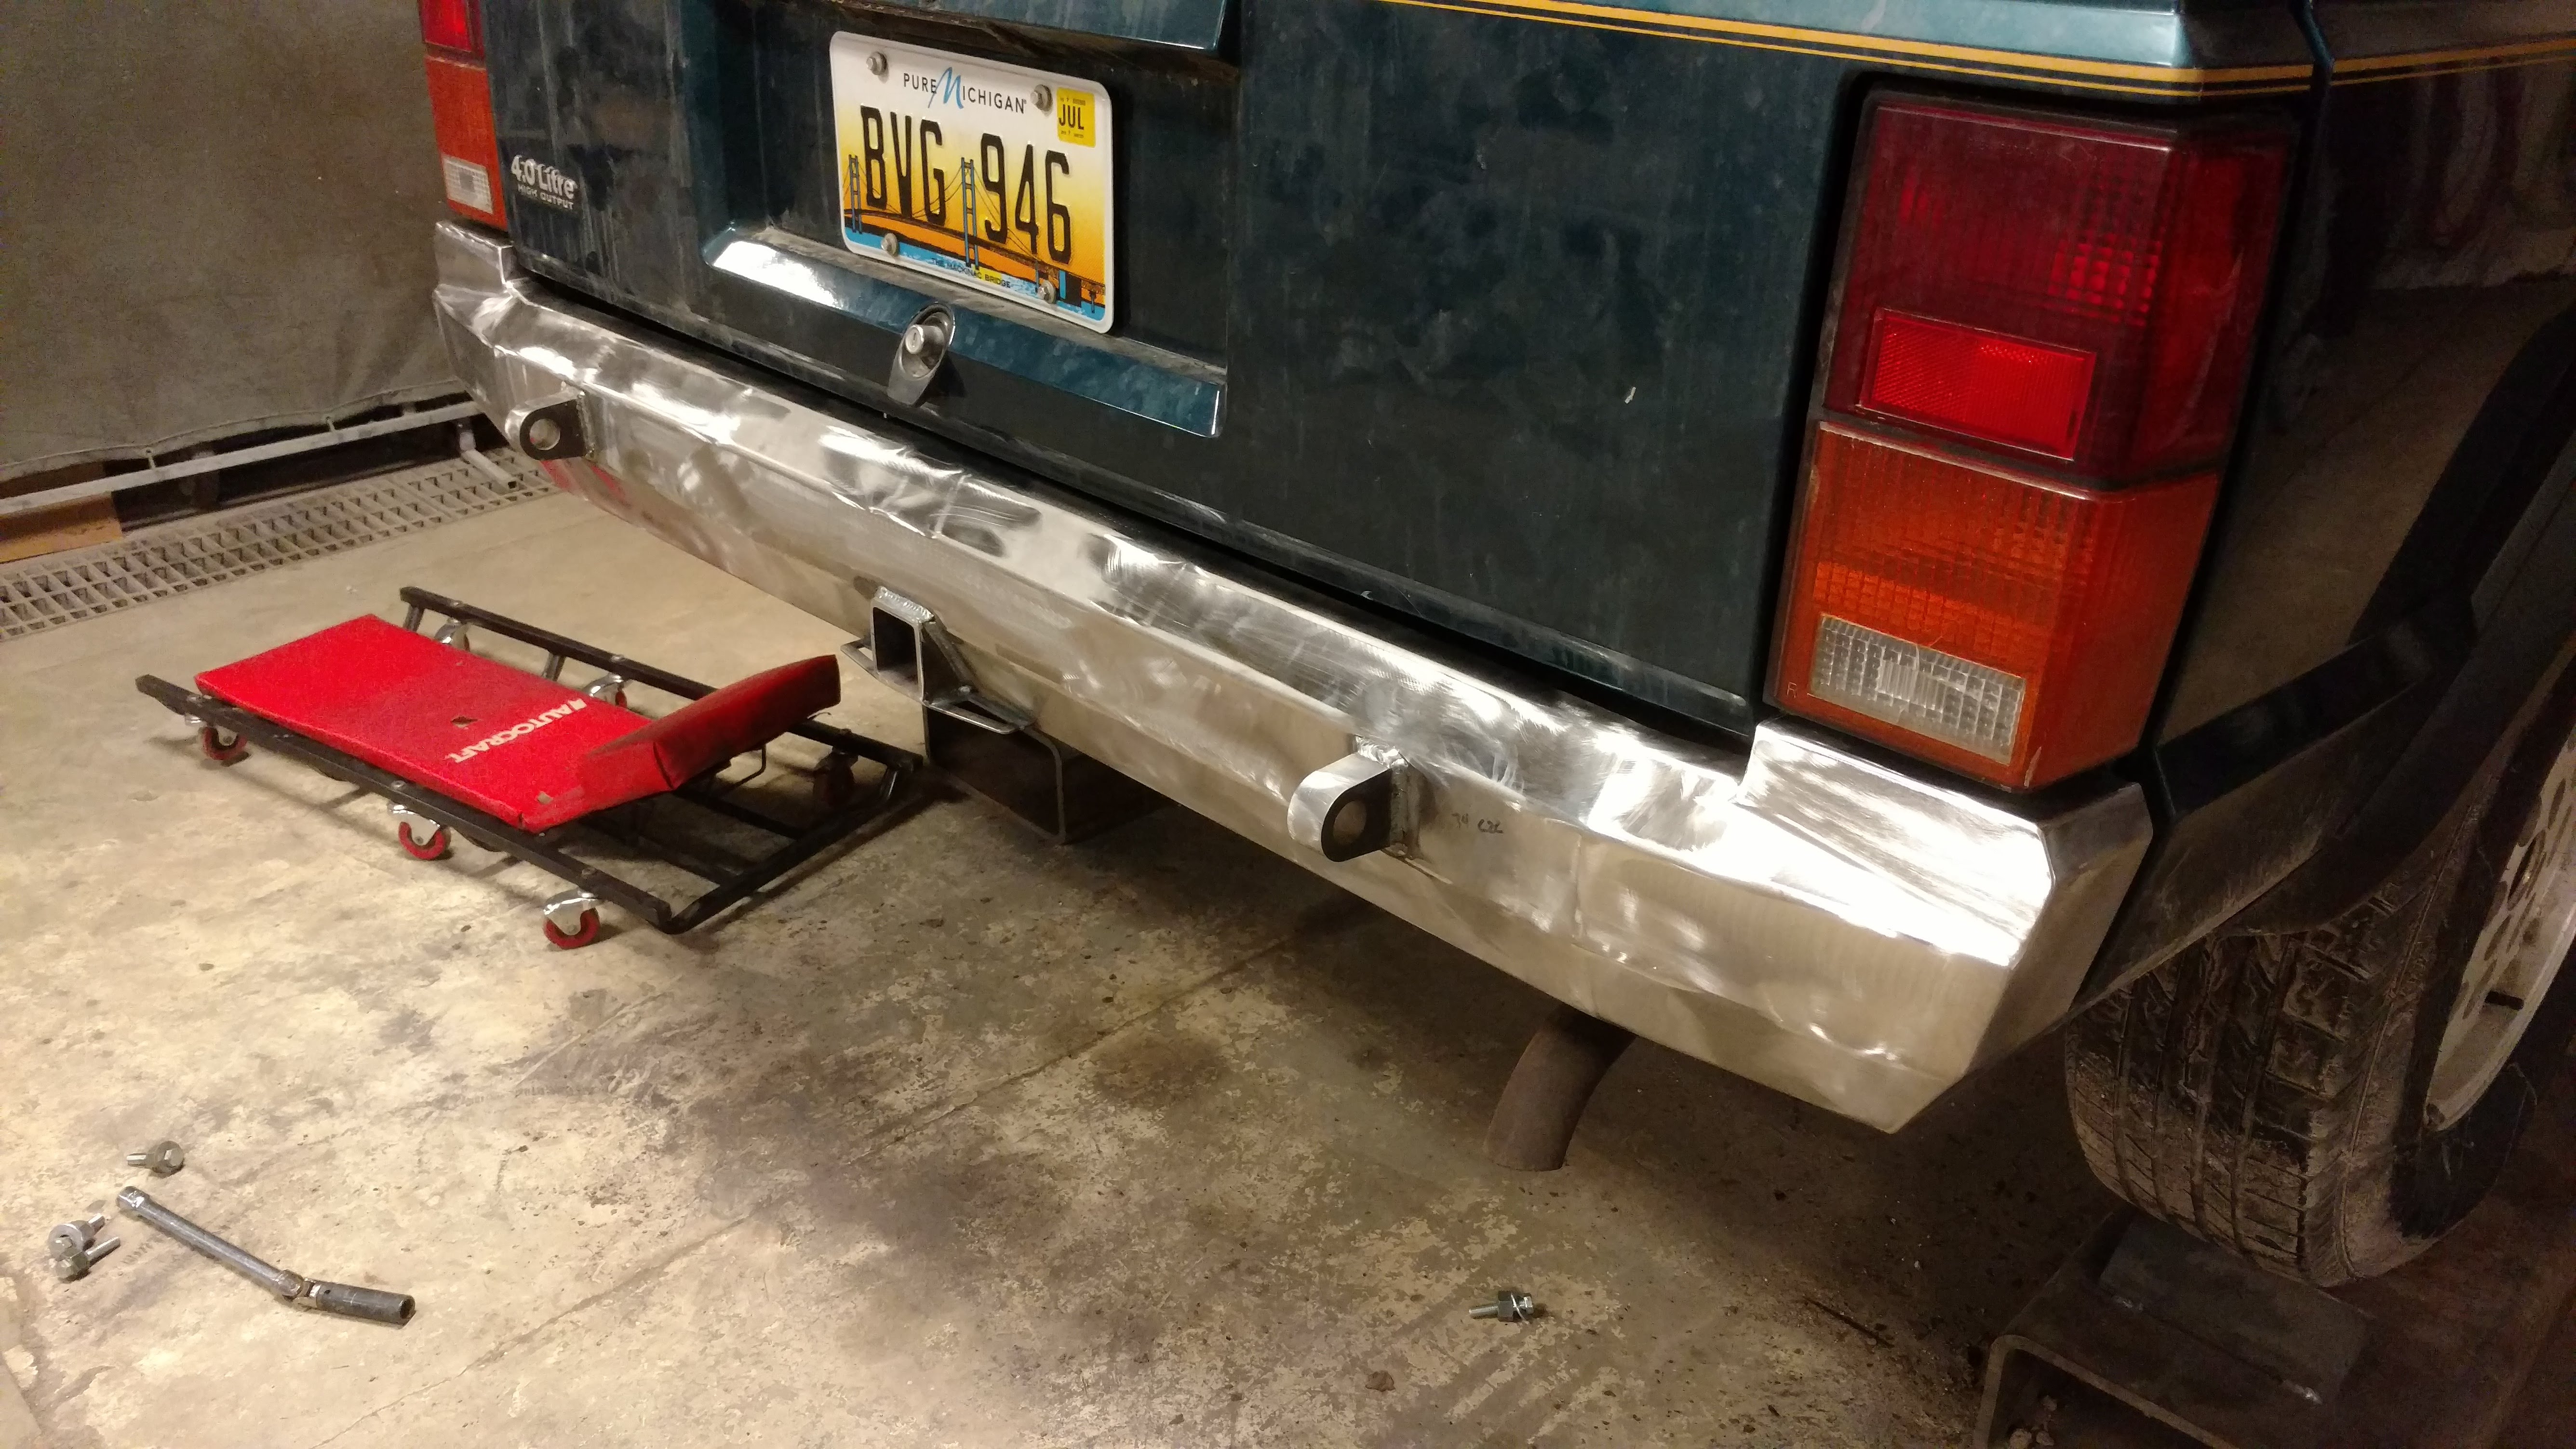
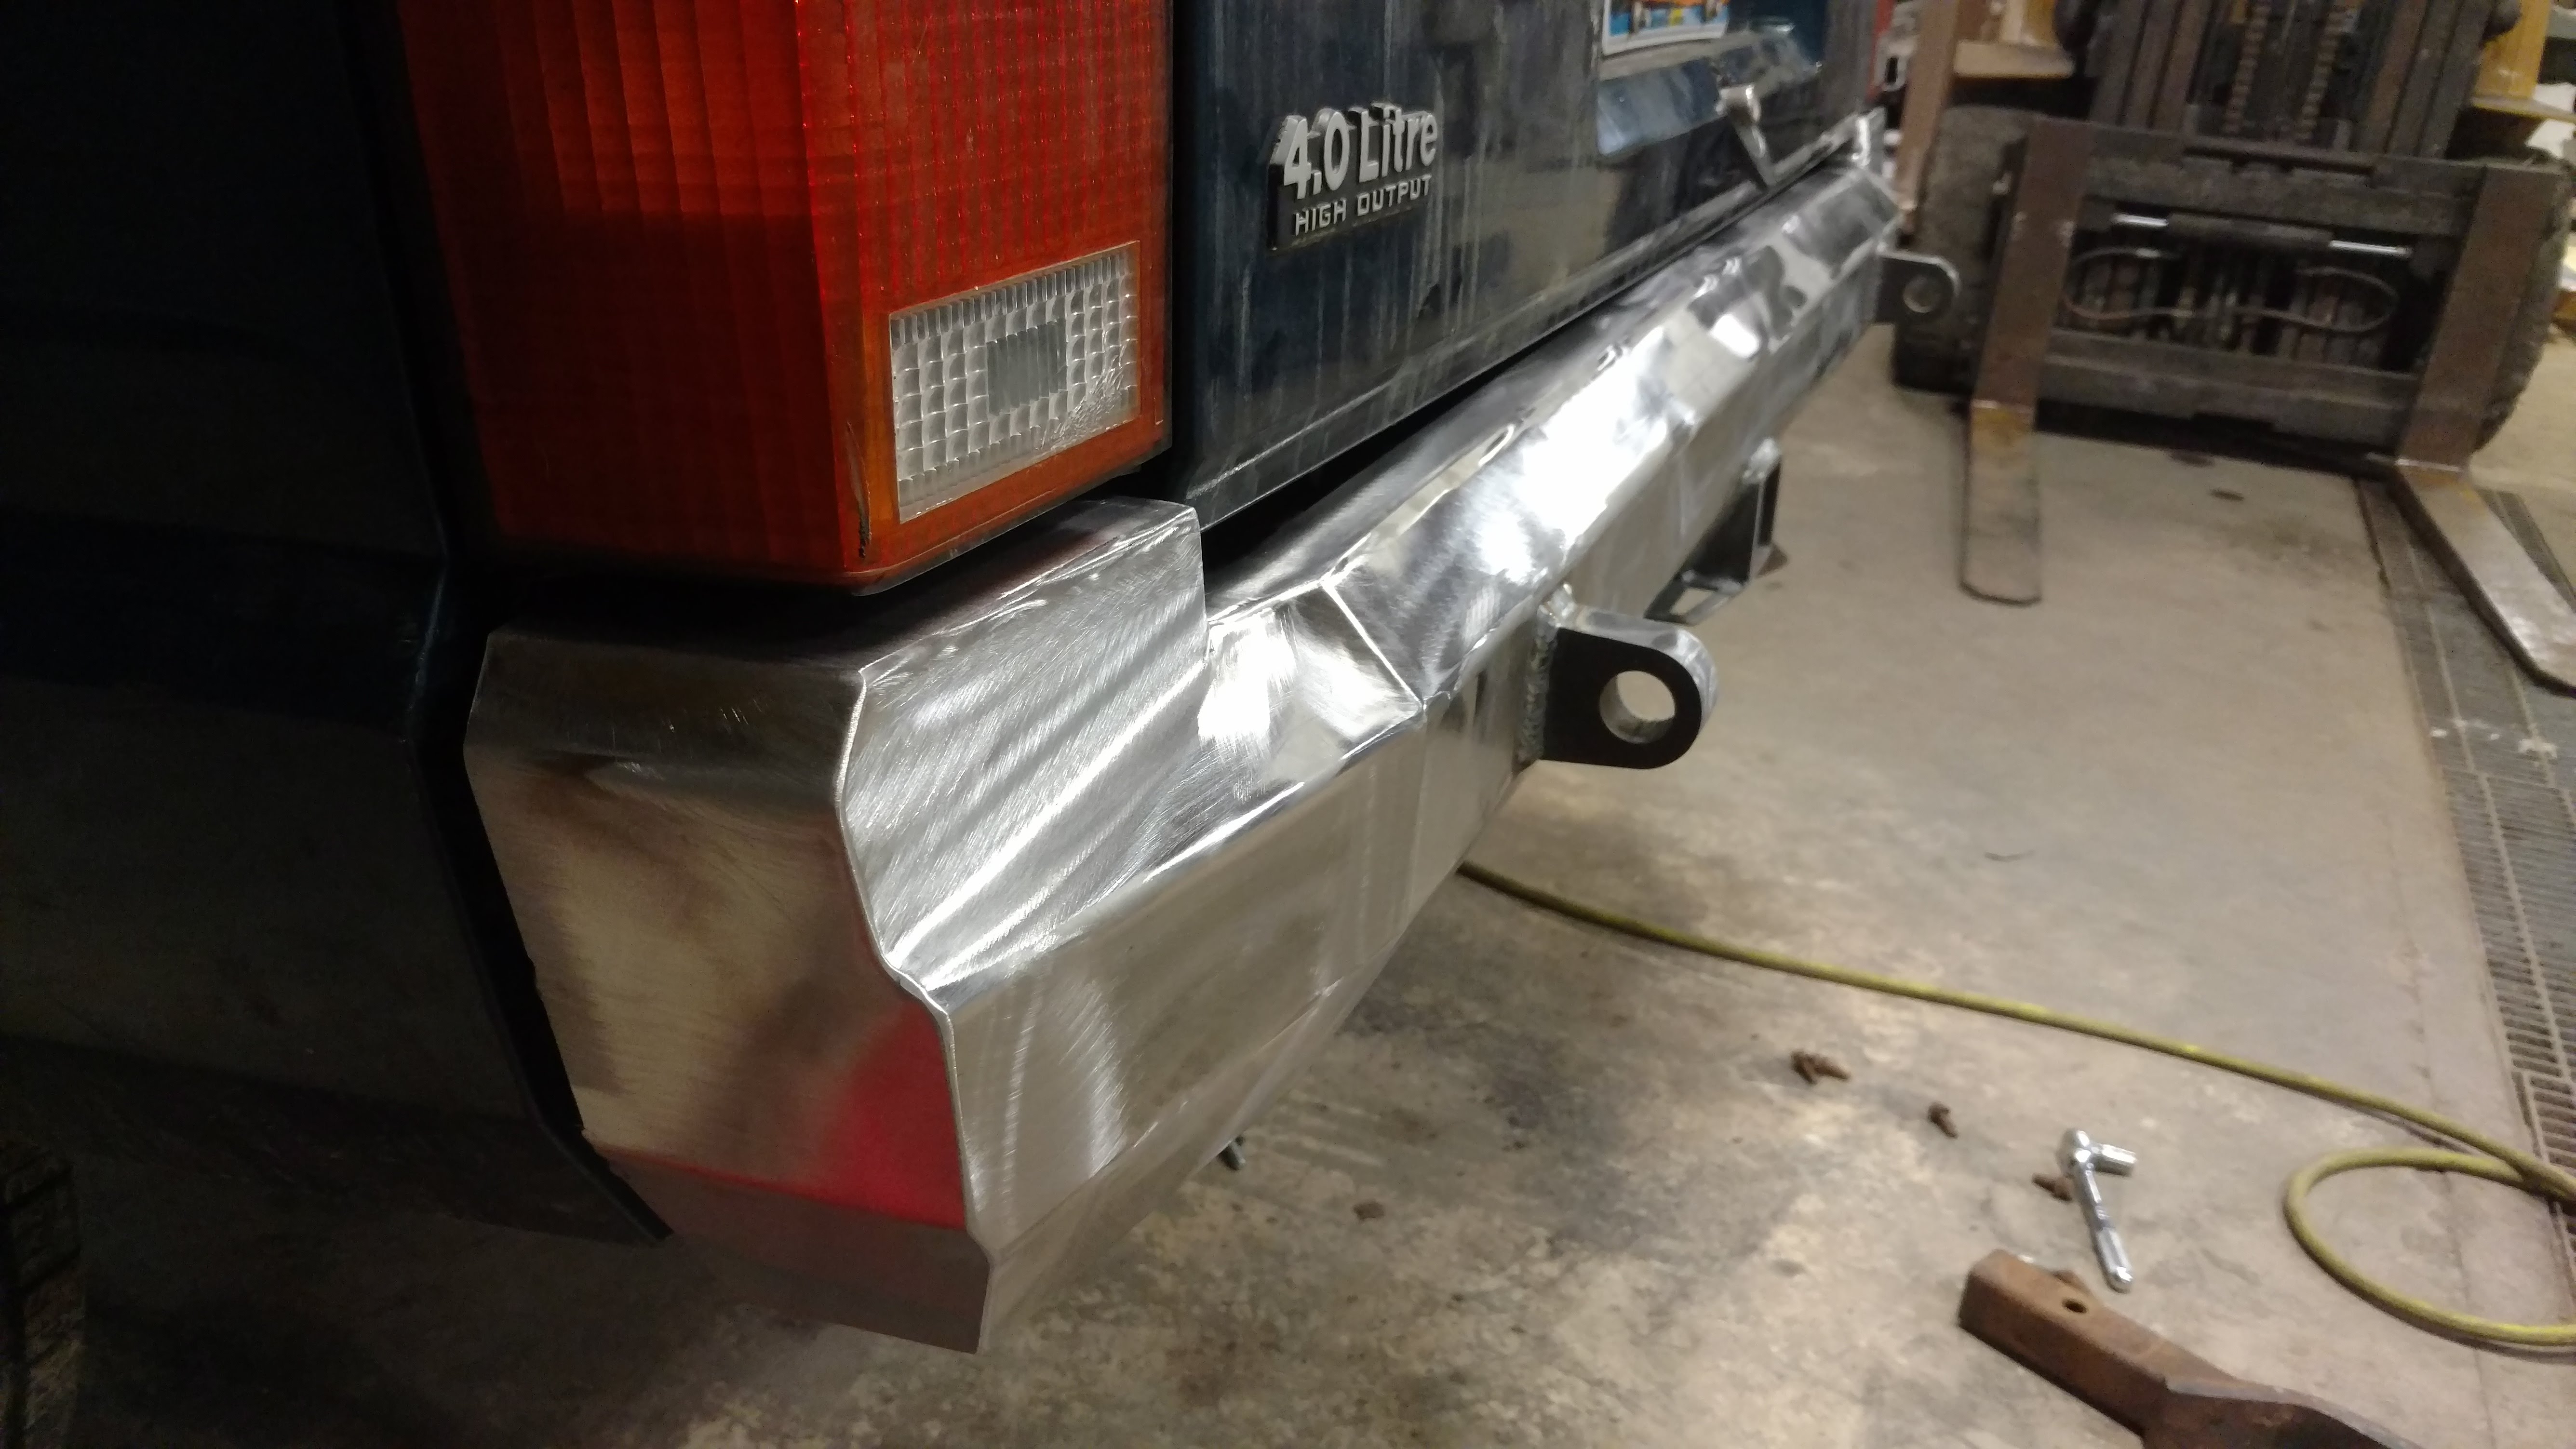
Some finishing touches and hit with 240 then 320
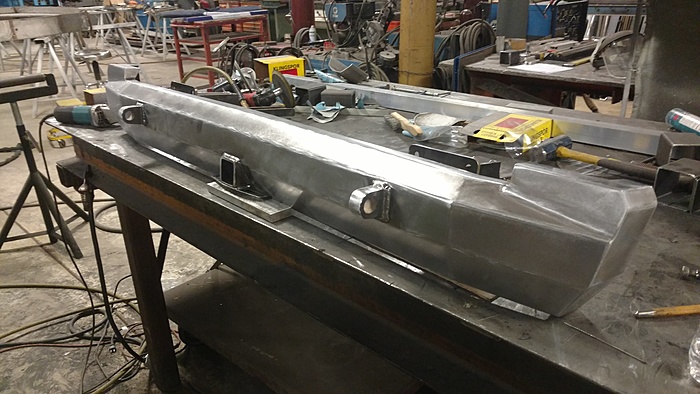

READY FOR SOME PAINT!


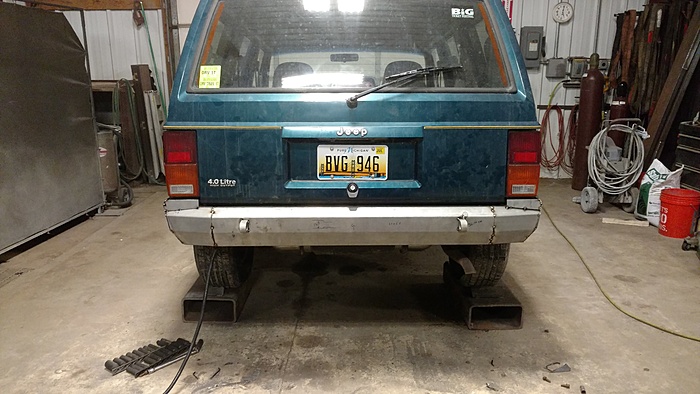
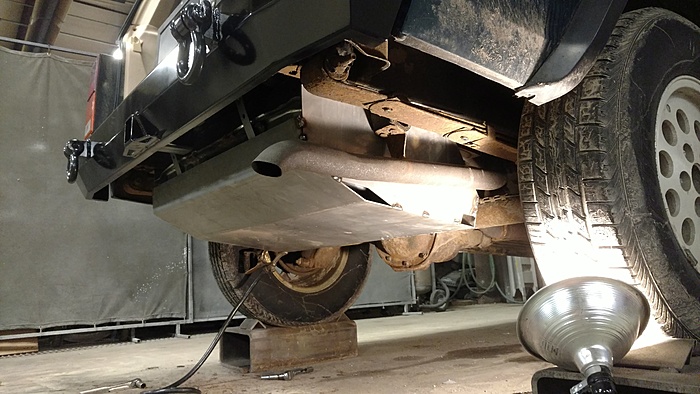
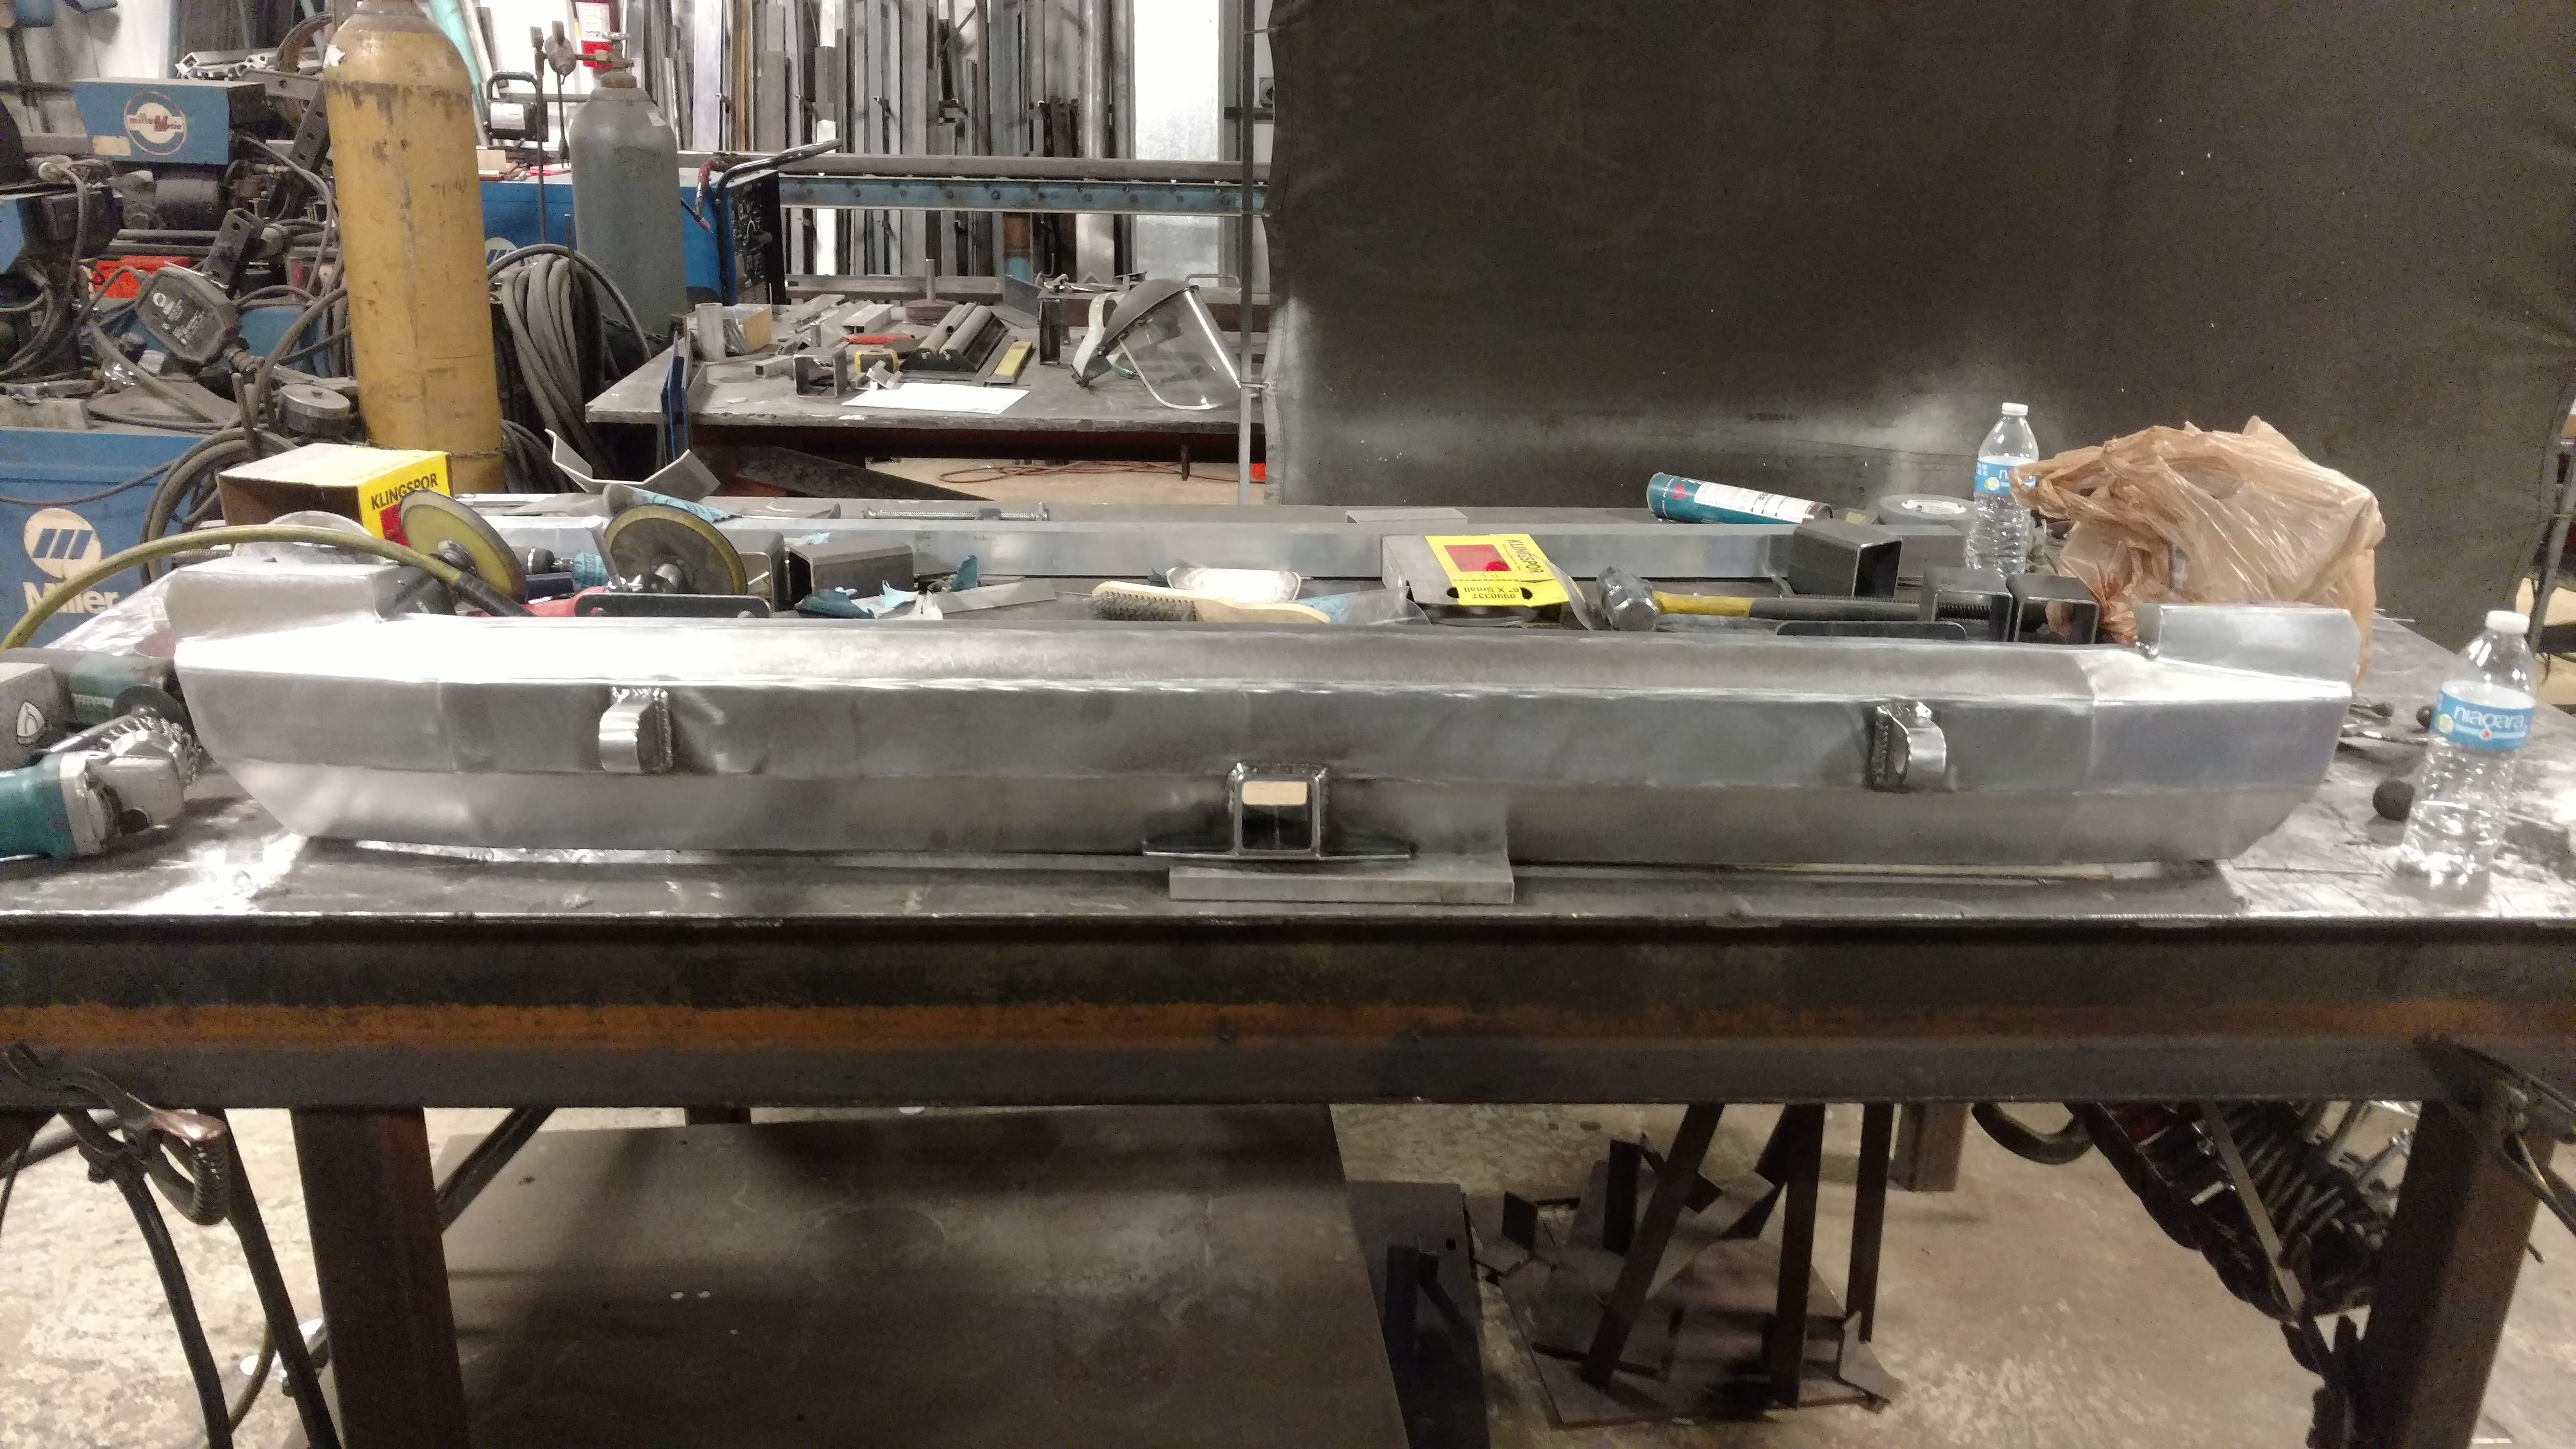
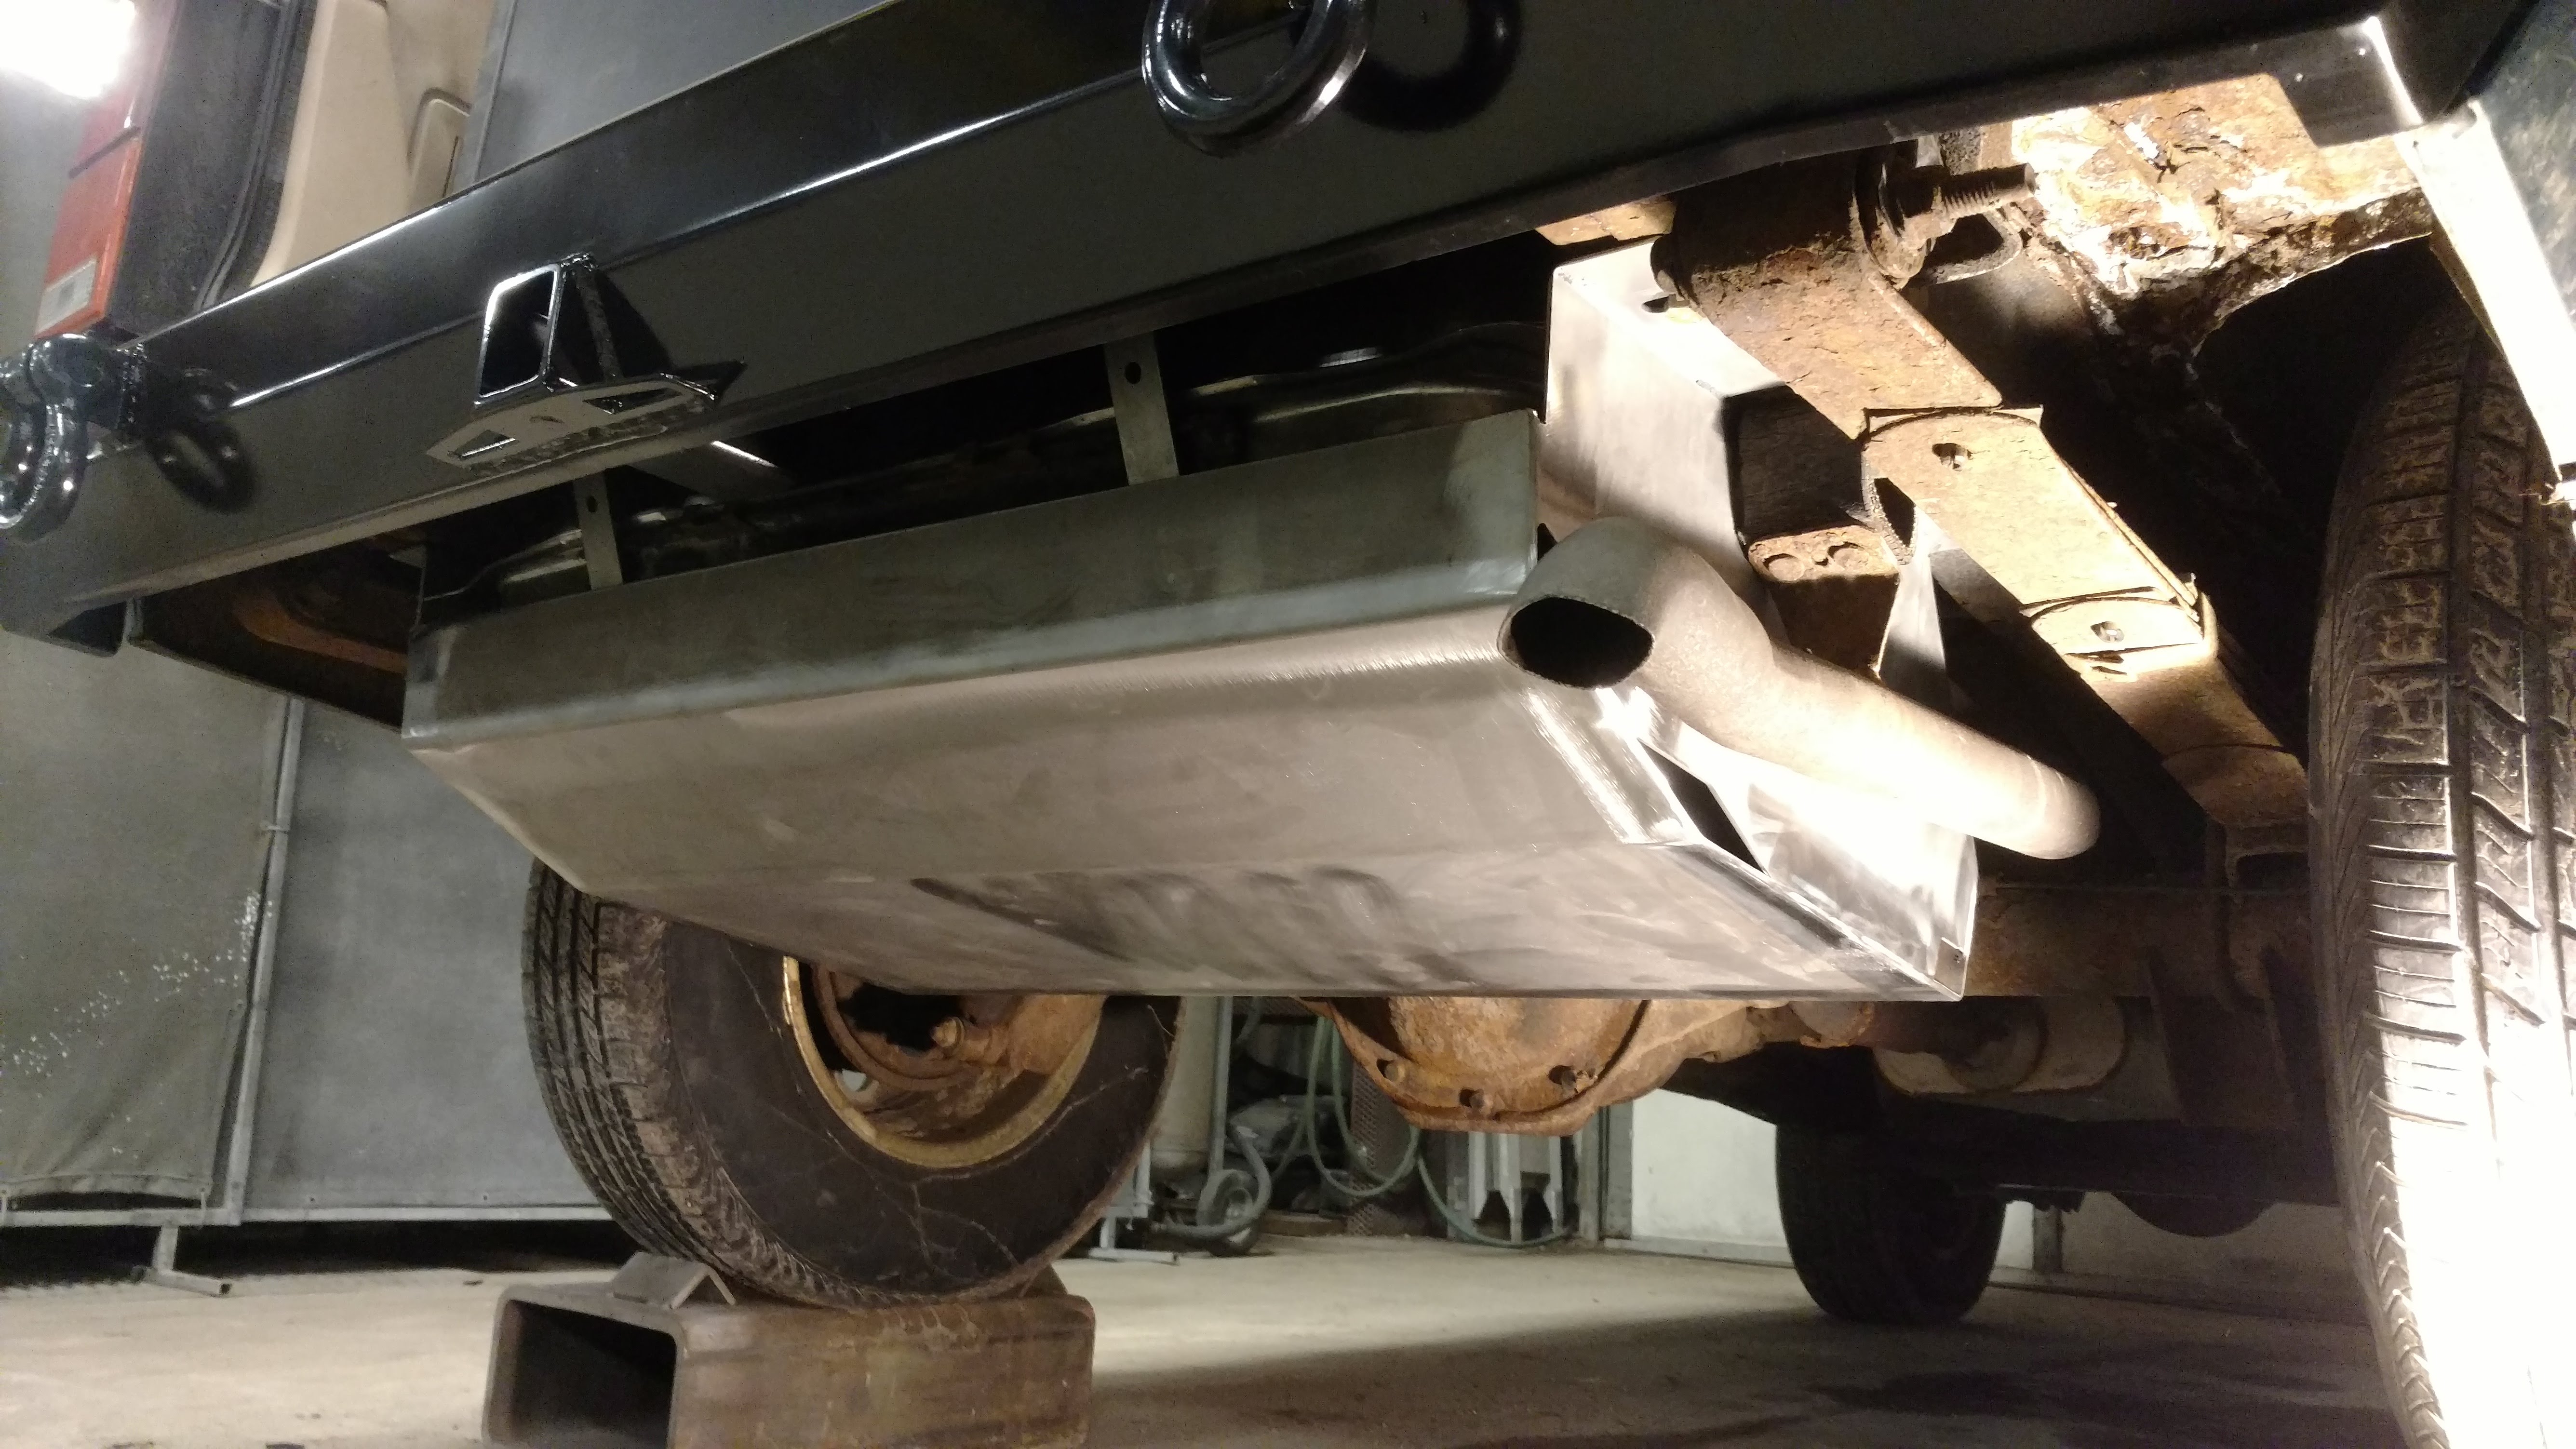
On to the skid! Used 11ga steel again brake formed and welded on the sides with integrated mounts.
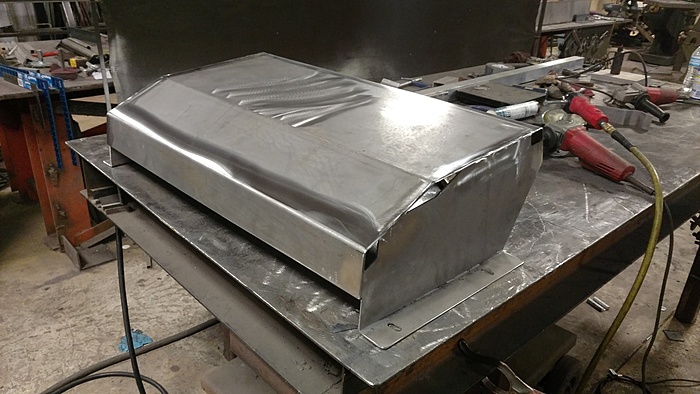
Test fit before paint


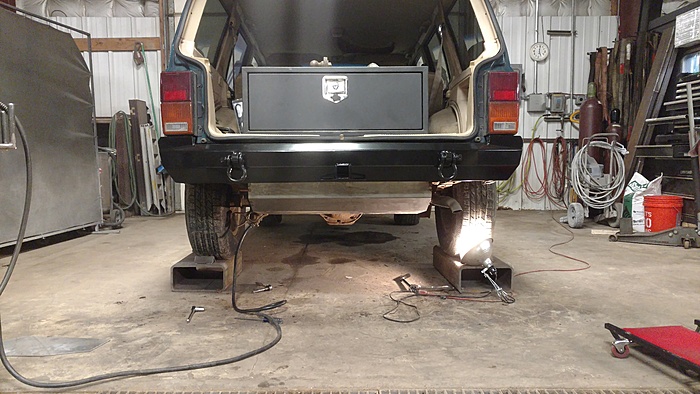
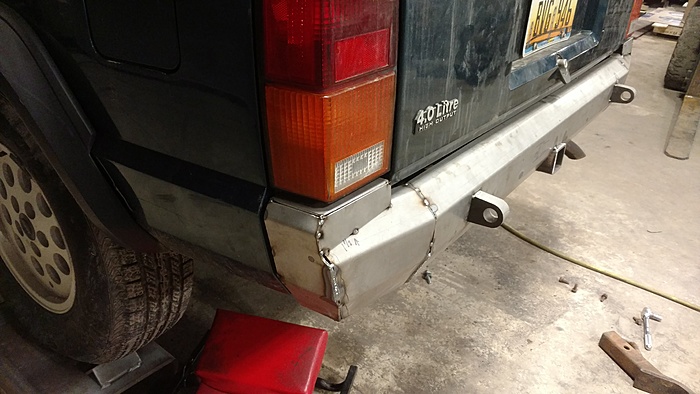
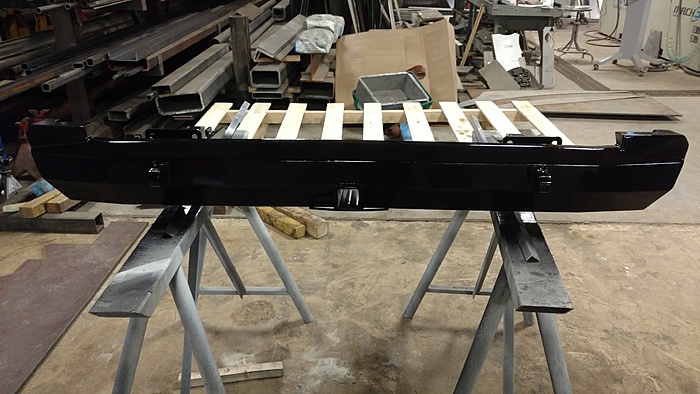
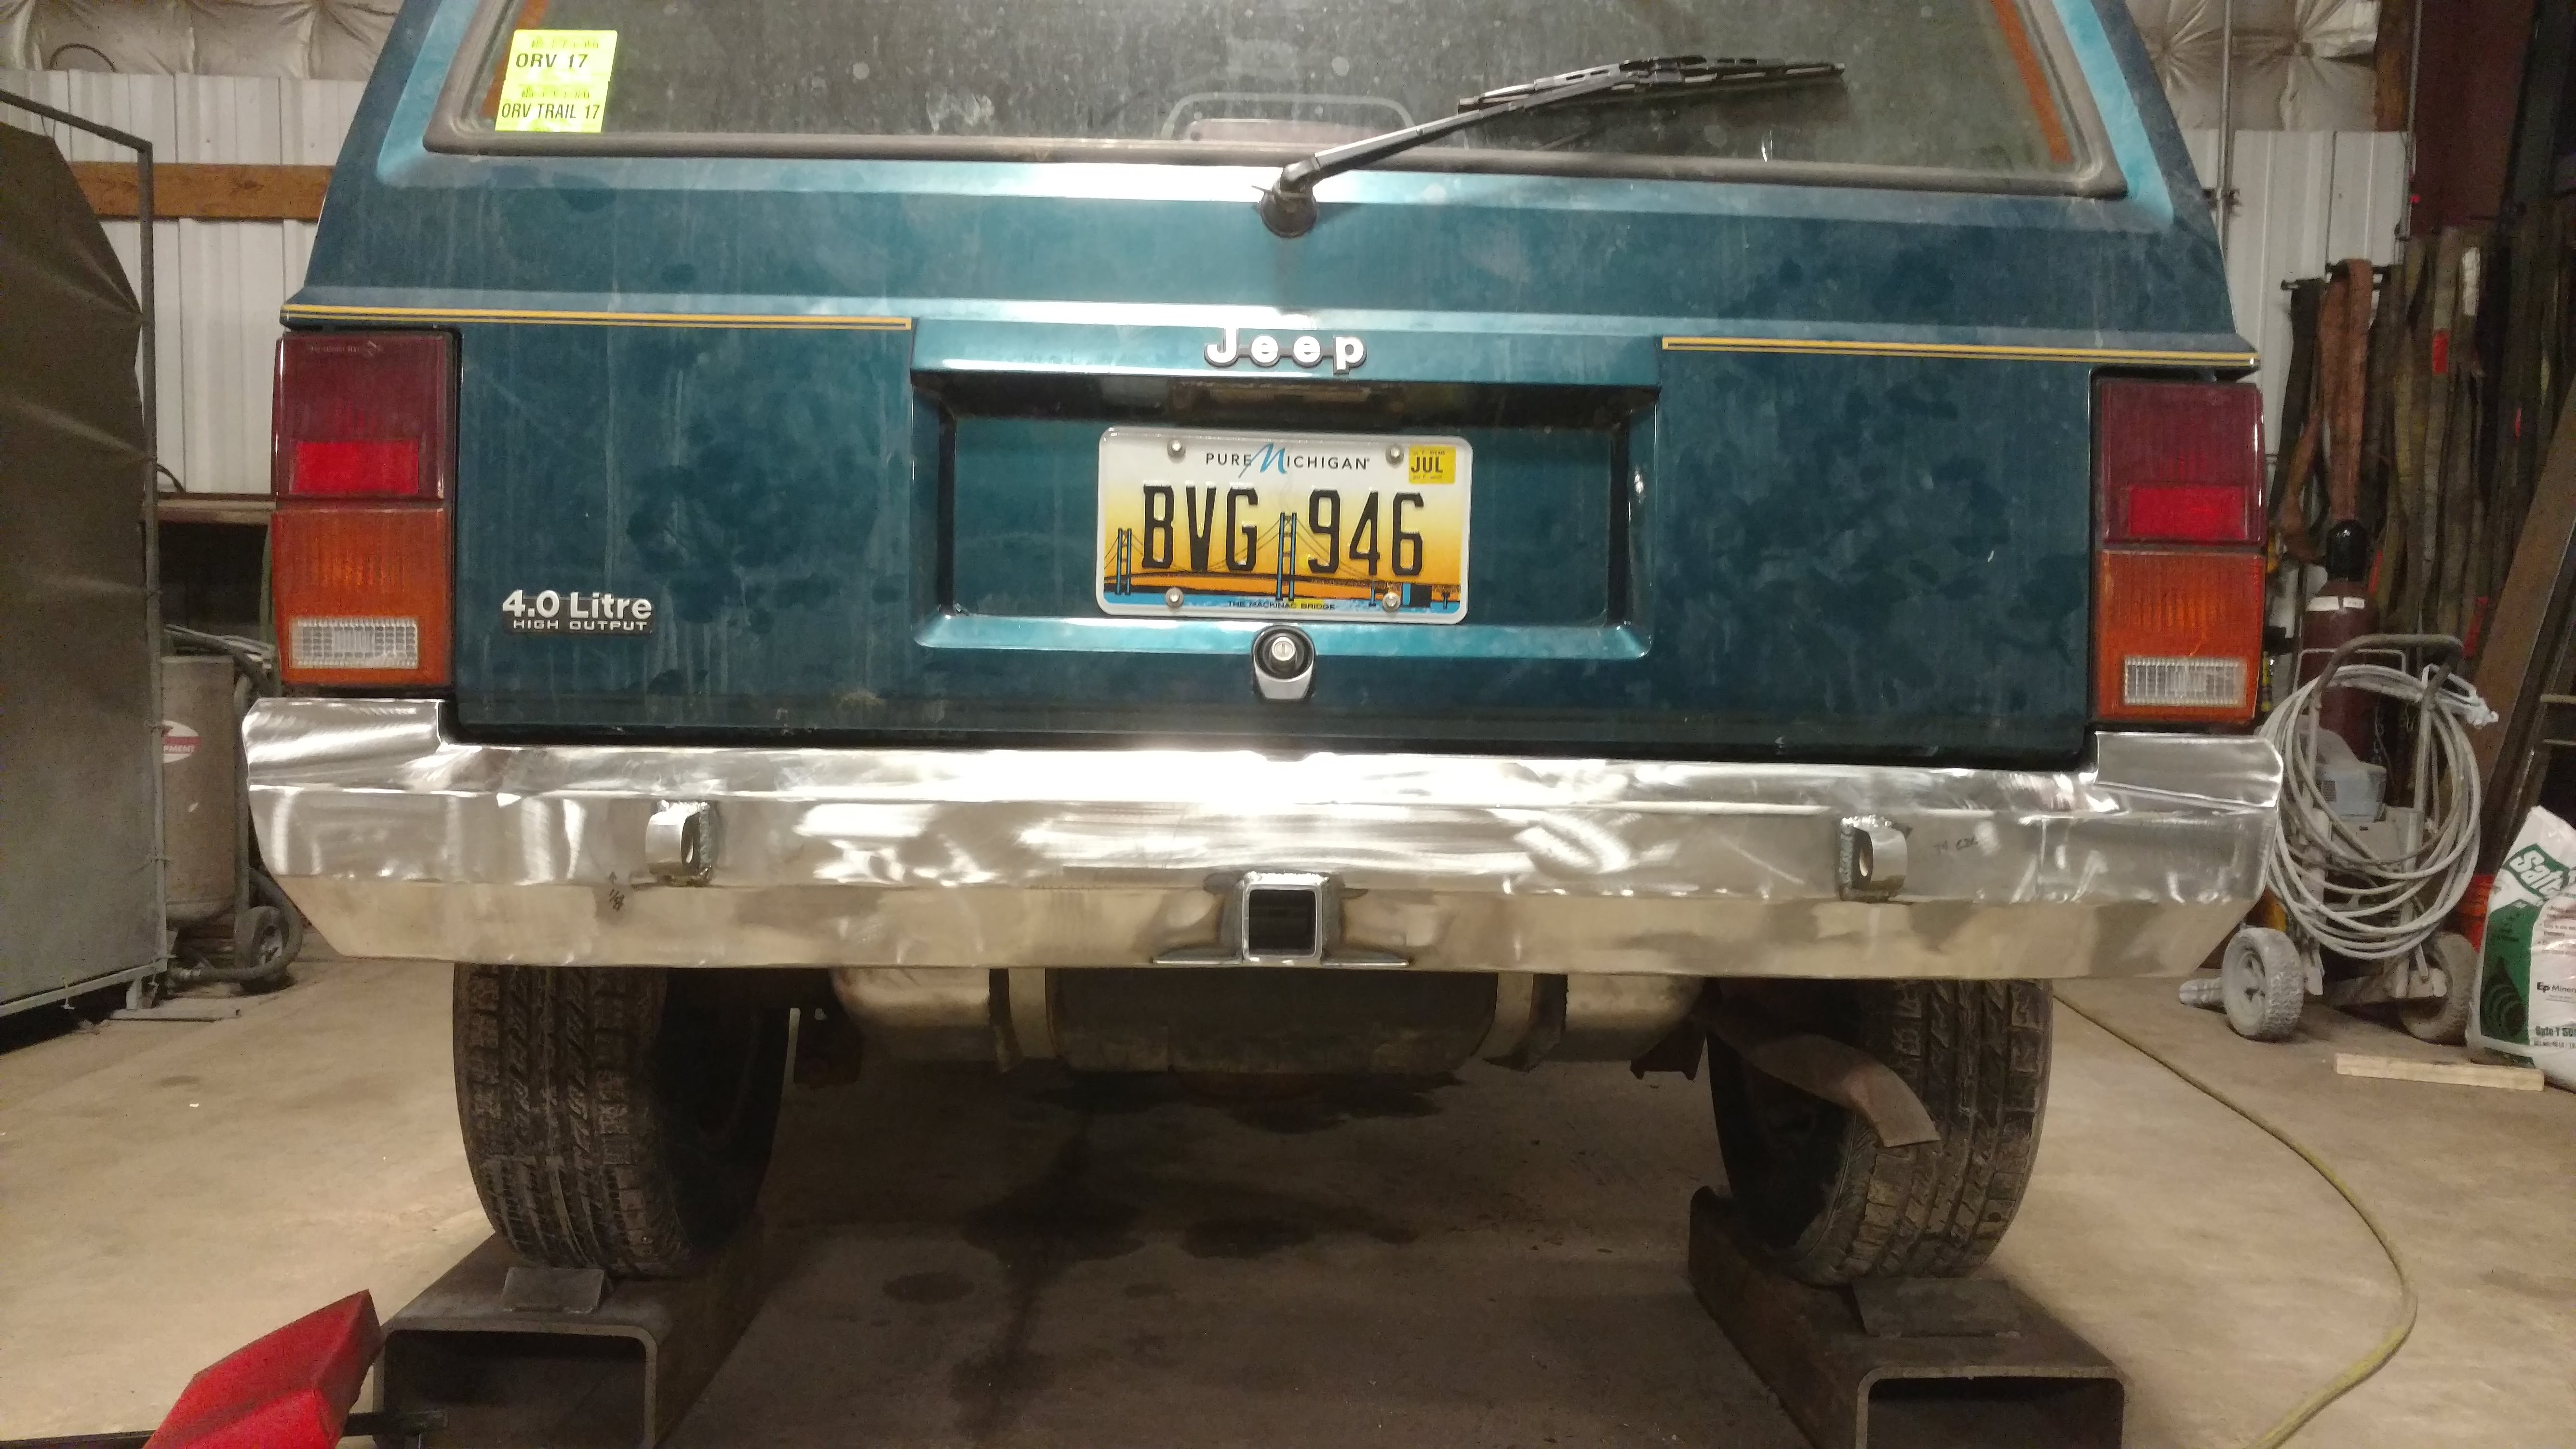
You can have any color you want as long as it's black

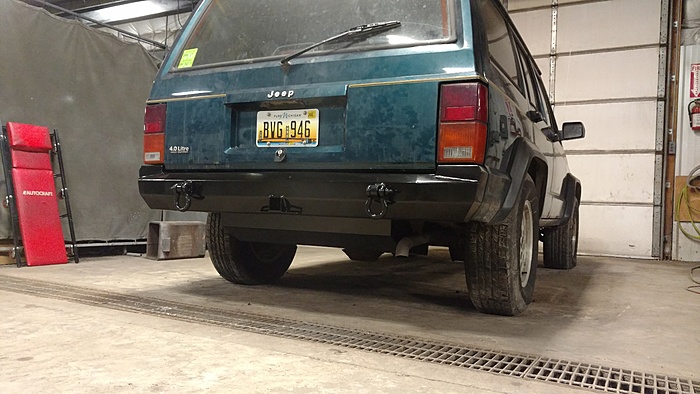
Finished product, I really like the way everything turned out! Fits great, nice and tight, sleek look. Works for me!
Started out by fabbing up some Frame tie ins. Made sure those fit nicely and began to cut for the bumper. Started out with a pc of 11ga brake formed in 4 spots to get my main profile for the bumper. Waterjet cut 1" steel shackle mts to weld to the frame inserts. Then cut rectangular holes in the bumper to allow the 1" plate to protrude through.
Got everything tacked together, did some trimming, and moved on to the sides.


Then put the receiver tube in

Did a little welding and a little grinding

Confirmed nothing got warped during cleanup
And then began working on the bracing


Some finishing touches and hit with 240 then 320


READY FOR SOME PAINT!

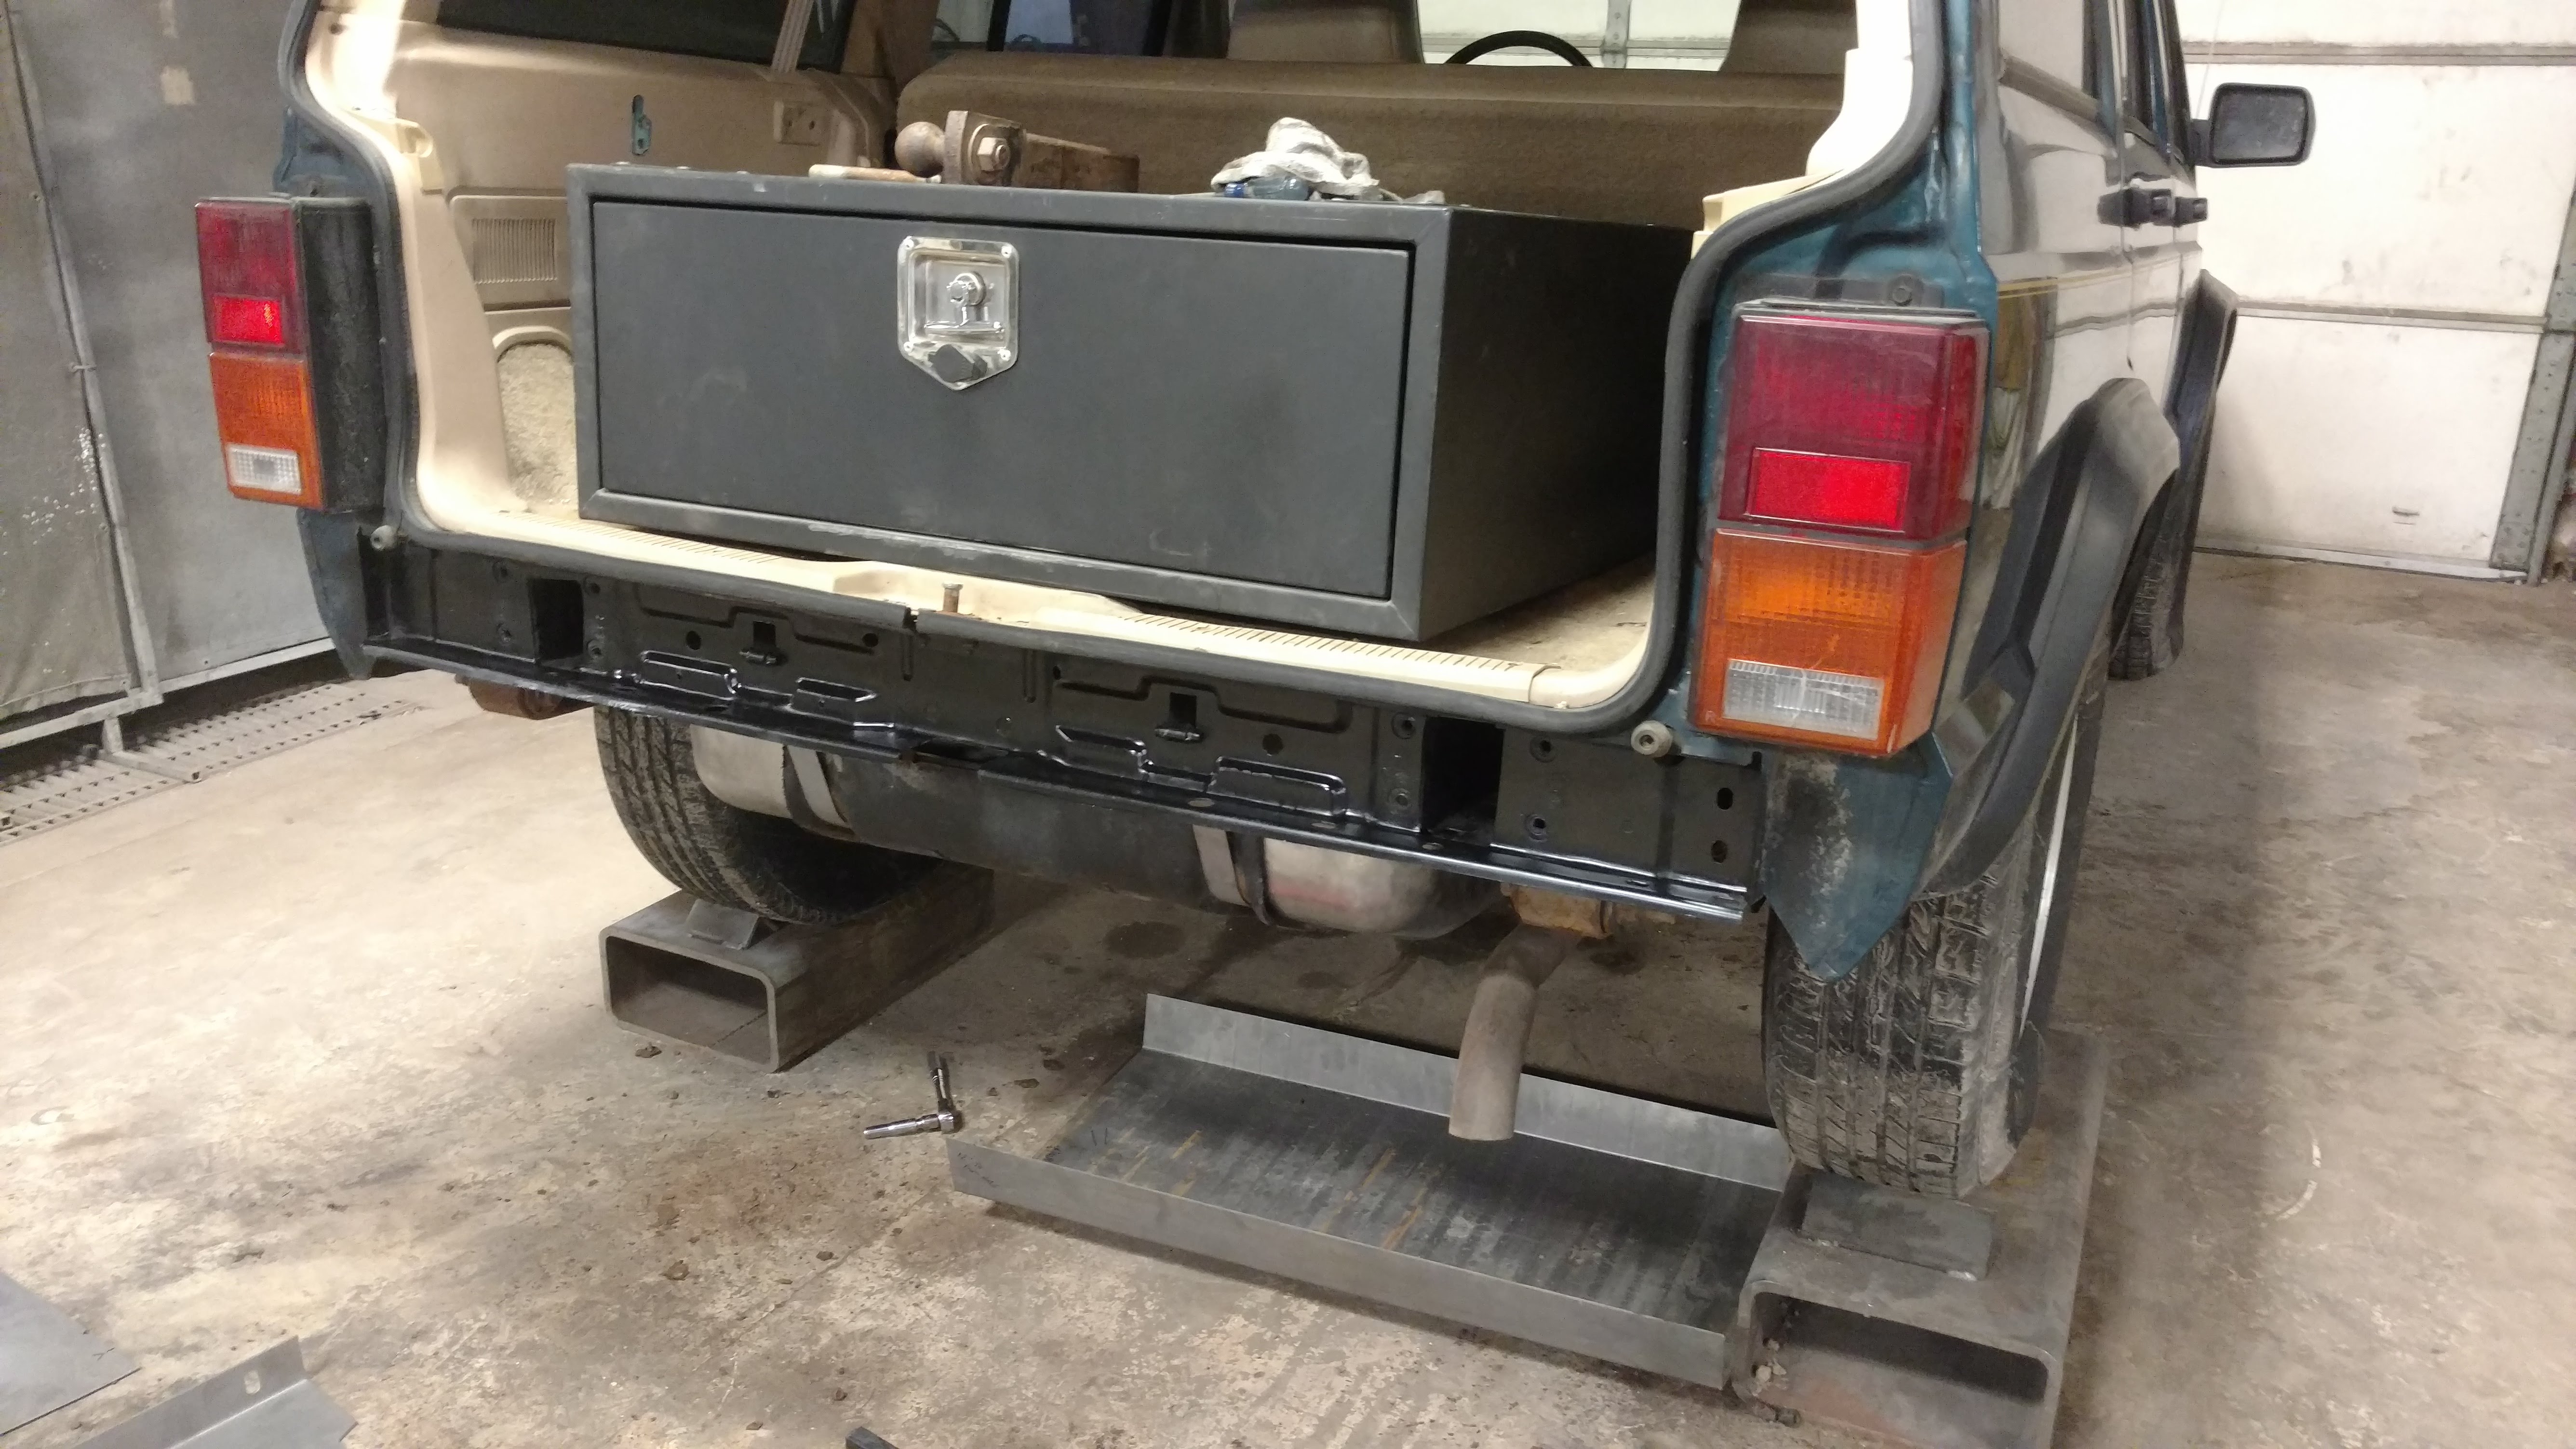

On to the skid! Used 11ga steel again brake formed and welded on the sides with integrated mounts.

Test fit before paint
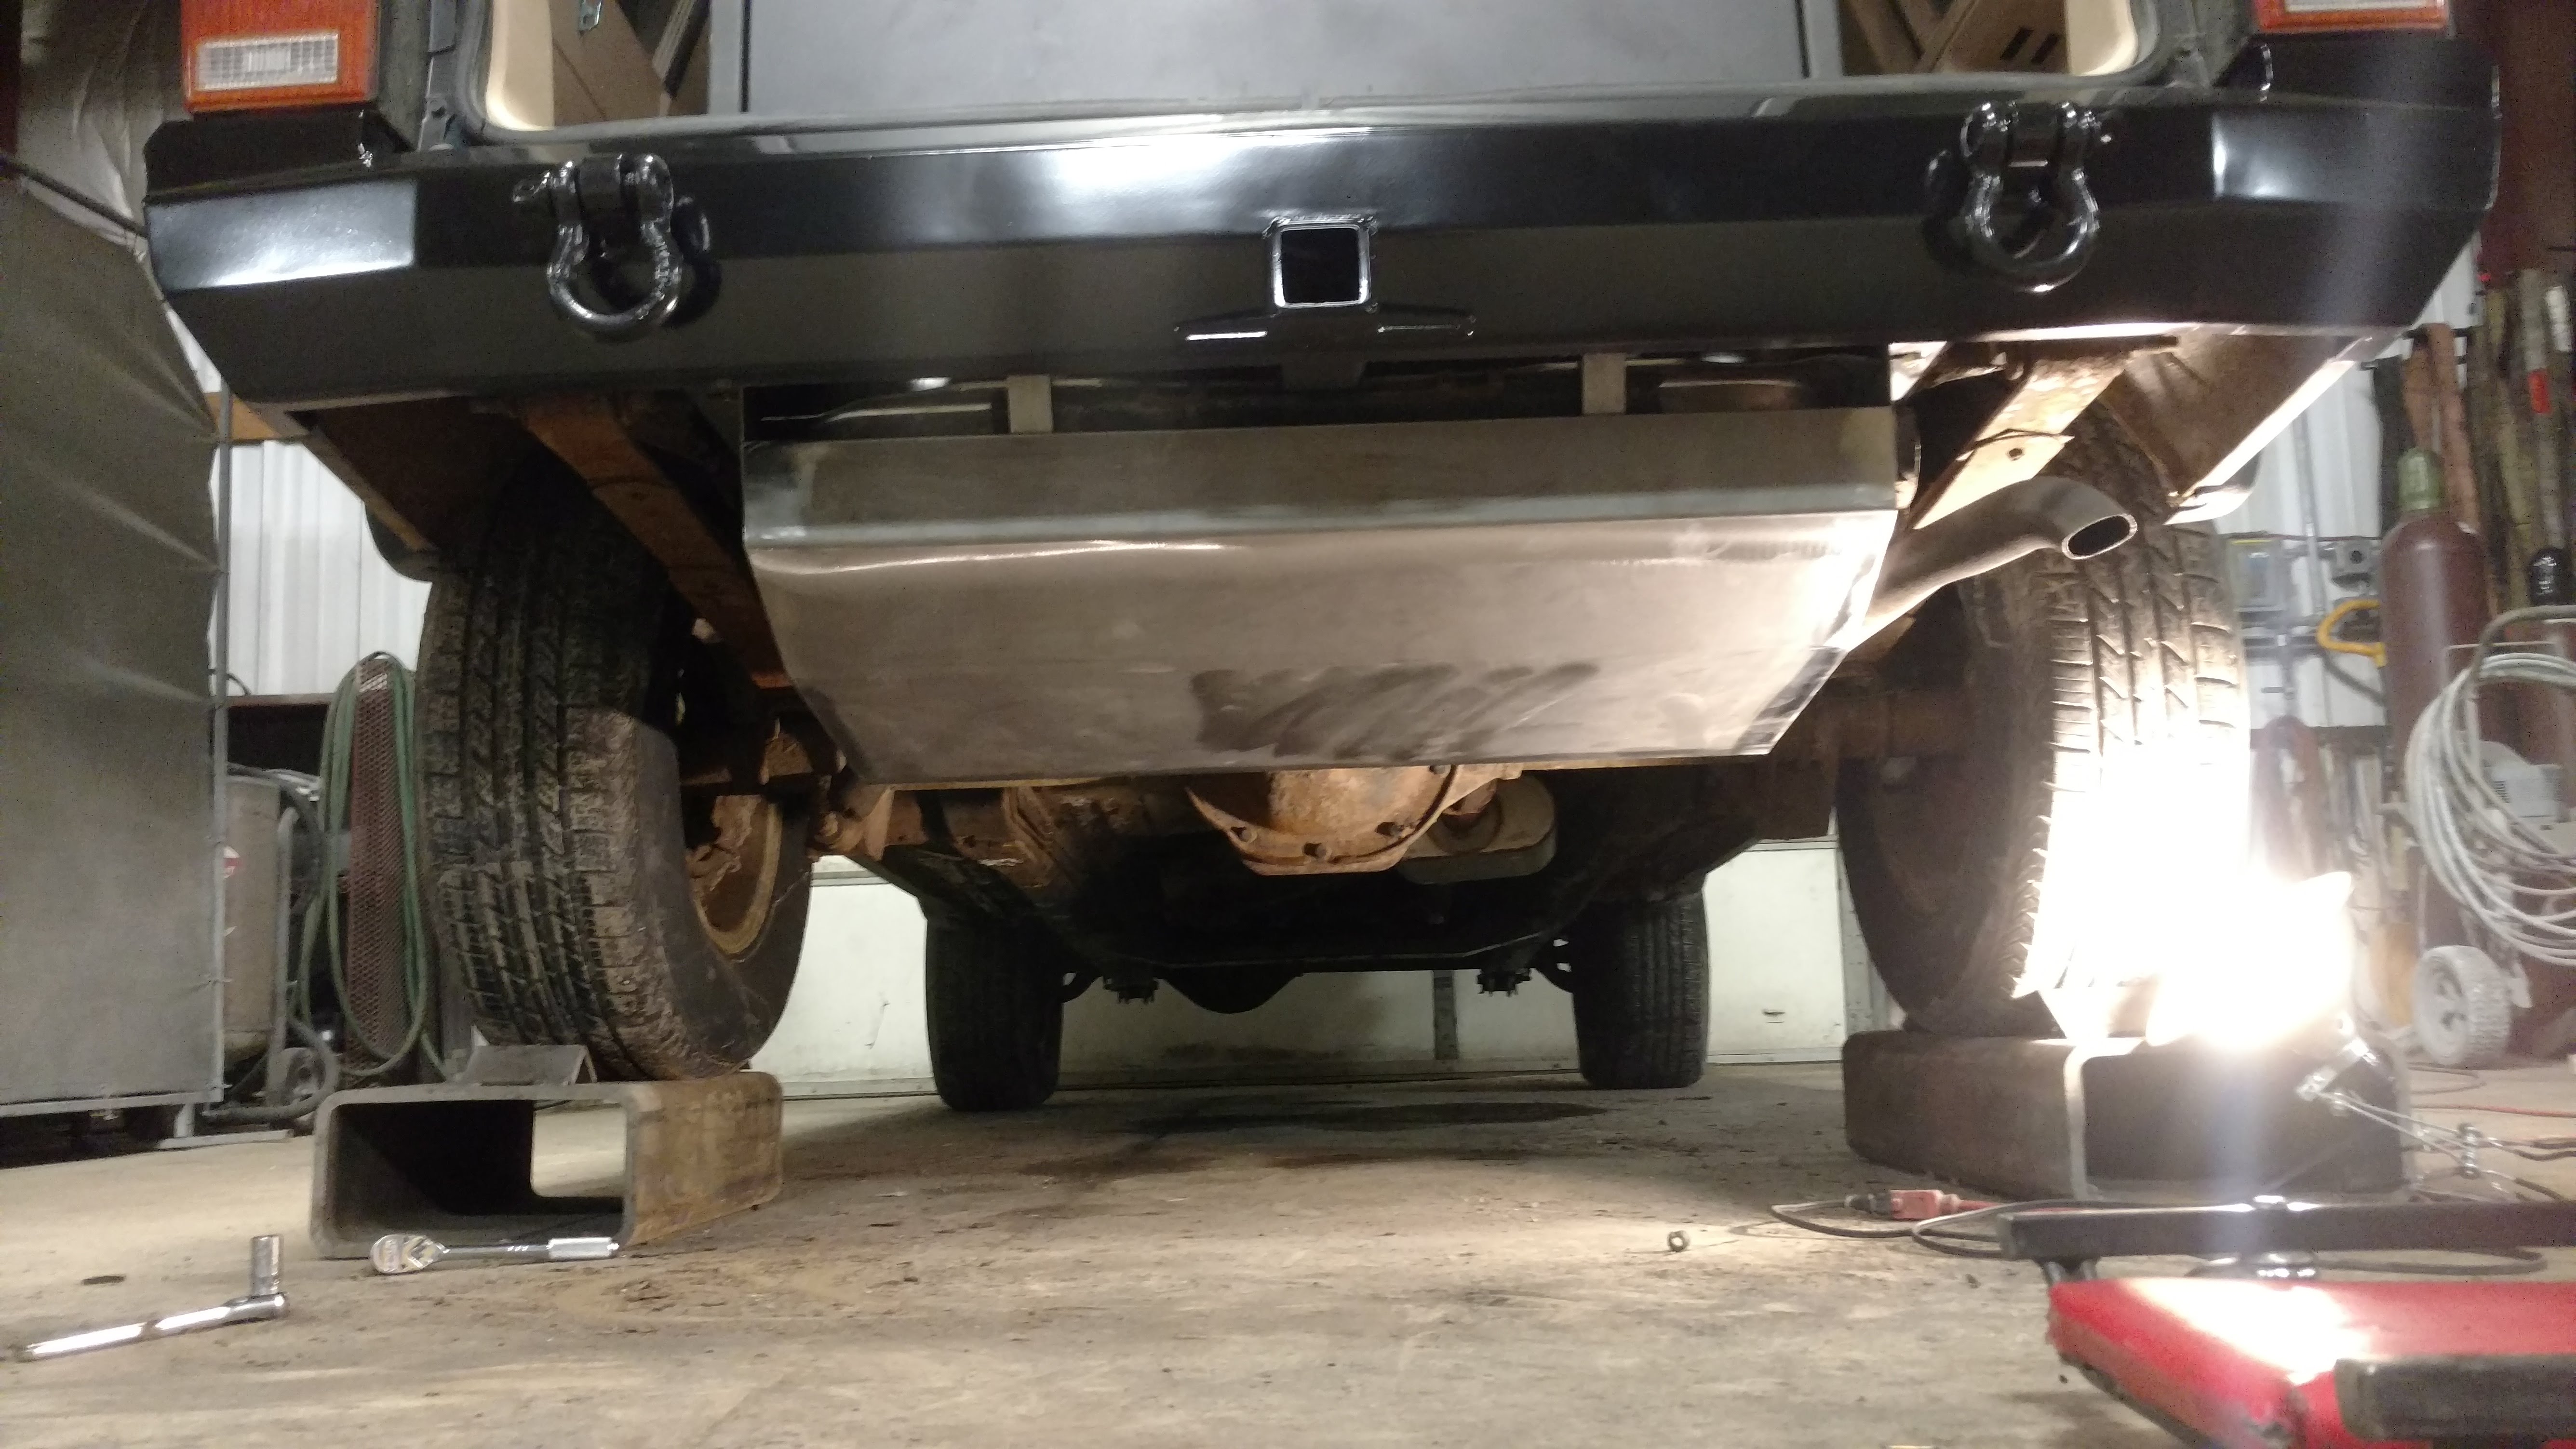


You can have any color you want as long as it's black
Finished product, I really like the way everything turned out! Fits great, nice and tight, sleek look. Works for me!

 03-22-2018, 03:17 PM
#4
Senior Member

looks good.
What welder you running?
Also, those bumper brackets,, do they slide into the OEM uni-frame? did you cut openings in the rear panel to open up the uni-frame?
Slack
What welder you running?
Also, those bumper brackets,, do they slide into the OEM uni-frame? did you cut openings in the rear panel to open up the uni-frame?
Slack
Trending Topics
 03-23-2018, 05:06 AM
#9
Junior Member
Thread Starter
Join Date: Jan 2012
Location: Elmira, MI
Posts: 39
Likes: 0
Received 0 Likes
on
0 Posts
Year: 1995
Engine: 4.0l straight 6
Yes the bracketry slides into the frame. The fuel tank skid and the brackets sandwich the frame, also utilized the stock bumper mounting point on the rear plate.
Last edited by shepboyrd; 03-23-2018 at 05:13 AM.
03-23-2018, 05:10 AM
#10
Junior Member
Thread Starter
Join Date: Jan 2012
Location: Elmira, MI
Posts: 39
Likes: 0
Received 0 Likes
on
0 Posts
Year: 1995
Engine: 4.0l straight 6
I used 2d cad to replicate the body line profile and cut bend templates. A lot of it was cardboard templates though, not the best at solidworks yet haha. I use a software that is integrated into my waterjet console (FlowPath). Very similar to mastercam
03-23-2018, 08:18 PM
#11
Seasoned Member

That is truly some impressive skills there. I am a retired welder and even in my day, that would have still impressed me. Now there will be those wanting you to build them one and expect it to be $300. lol Superb workmanship my friend.
Happy Jeepin'
Texas Taz
Happy Jeepin'
Texas Taz
03-24-2018, 02:34 PM
#12
Newbie
Join Date: Mar 2018
Location: Cornelius, Oregon
Posts: 13
Likes: 0
Received 0 Likes
on
0 Posts
Year: 1991
Model: Cherokee(XJ)
Engine: 4.0L
That is excellent work! Have you considered marketing that? Could you build and market those yourself now that you know what is involved in the whole process or would it be too time and cost prohibitive to be able to market them at a reasonable price, not to mention shipping? Definitely more than $300 worth of work. The question is could you sell make and sell them for under $1000?
03-26-2018, 11:09 AM
#13
Junior Member
Thread Starter
Join Date: Jan 2012
Location: Elmira, MI
Posts: 39
Likes: 0
Received 0 Likes
on
0 Posts
Year: 1995
Engine: 4.0l straight 6
Thanks Guys! I didn't really consider marketing it because the price range for these bumpers is just too hard to beat, and without having it powder coated it would be hard to sell when the competition's product can sell for less and have it coated.
03-27-2018, 08:03 PM
#15
Senior Member
My Son and I used Flowpath at Tech Shop before they closed.
Flowpath was funny about importing drawings,, they encouraged us to do our drawings natively in Flowpath,, problem was Flowpath was not available for home use,, And I do my best design in my slippers and robe.
Slack
Flowpath was funny about importing drawings,, they encouraged us to do our drawings natively in Flowpath,, problem was Flowpath was not available for home use,, And I do my best design in my slippers and robe.
Slack