Noob weld cart build.
 10-31-2013, 12:16 PM
#61
::CF Administrator::

 11-01-2013, 12:57 PM
#62
CF Veteran
Join Date: Aug 2011
Location: San Jose
Posts: 1,994
Likes: 0
Received 7 Likes
on
7 Posts
Year: 89
Model: Cherokee
Engine: 4.0 I6
I like burn through, it lets me know I'm getting good penetration and tells me I need to go faster. I take my time when I weld
 11-03-2013, 12:08 PM
#63
Junior Member

Join Date: Aug 2012
Location: dhs
Posts: 88
Likes: 0
Received 0 Likes
on
0 Posts
Model: Cherokee
Engine: 4.0L
great looking cart so far. I would show you my cart but yours is way nicer, nice welds too. I just welded the casters to the frame I doubt they will ever get worn out rolling around in my garage. Also would recommend you connect the rear wheels with a solid shaft that runs the whole width across connecting the wheels instead of those stubby axles you used. Those tanks are heavy. Keep up the great work.
11-05-2013, 12:13 PM
#64
CF Veteran
Thread Starter
Join Date: Dec 2012
Location: York, PA
Posts: 4,169
Likes: 0
Received 6 Likes
on
6 Posts
Year: 1998
Model: Cherokee
Engine: 4.0
great looking cart so far. I would show you my cart but yours is way nicer, nice welds too. I just welded the casters to the frame I doubt they will ever get worn out rolling around in my garage. Also would recommend you connect the rear wheels with a solid shaft that runs the whole width across connecting the wheels instead of those stubby axles you used. Those tanks are heavy. Keep up the great work.

Post up yours, let's see it!
11-05-2013, 12:44 PM
#65
CF Veteran
Join Date: Aug 2011
Location: San Jose
Posts: 1,994
Likes: 0
Received 7 Likes
on
7 Posts
Year: 89
Model: Cherokee
Engine: 4.0 I6
There's a lot of weird little tricks like that which will drastically increase the strength of your welds. The rule of thumb I found is "flatter welds are better" though that's not always true.
11-08-2013, 01:23 AM
#66
CF Veteran
Thread Starter
Join Date: Dec 2012
Location: York, PA
Posts: 4,169
Likes: 0
Received 6 Likes
on
6 Posts
Year: 1998
Model: Cherokee
Engine: 4.0
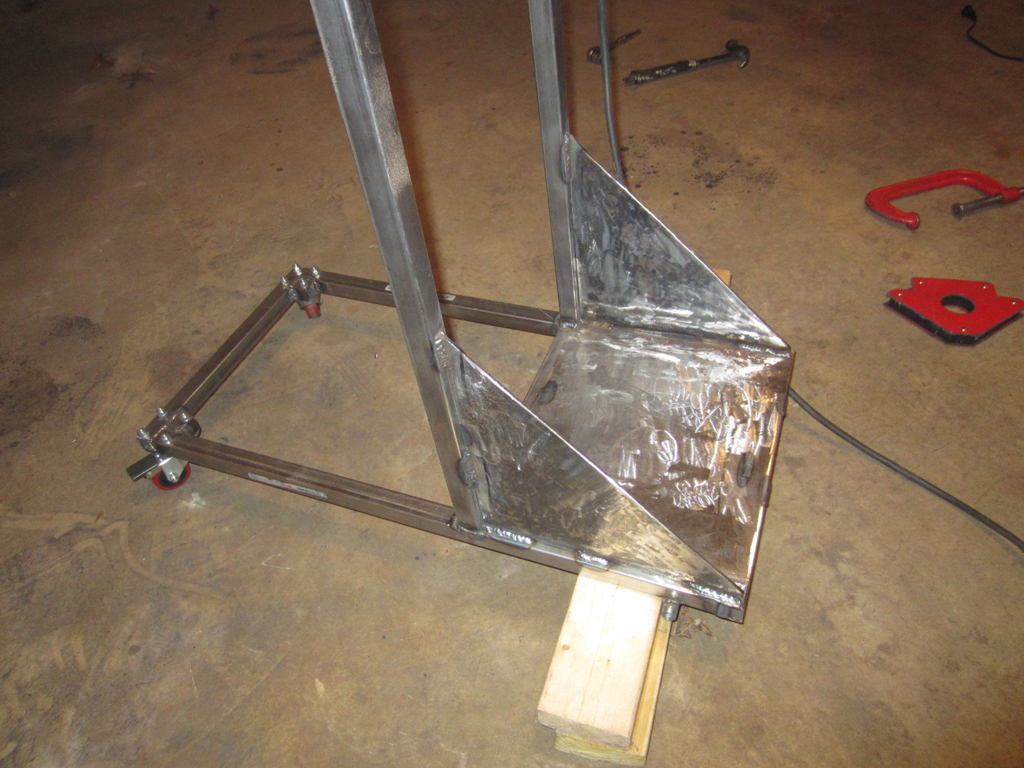
Update...took a week off to wrap up some other things and what not. Anywho, made some great progress tonight. I was on a roll and worked on it until about 1am.
Got the vertical supports cut and welded up.
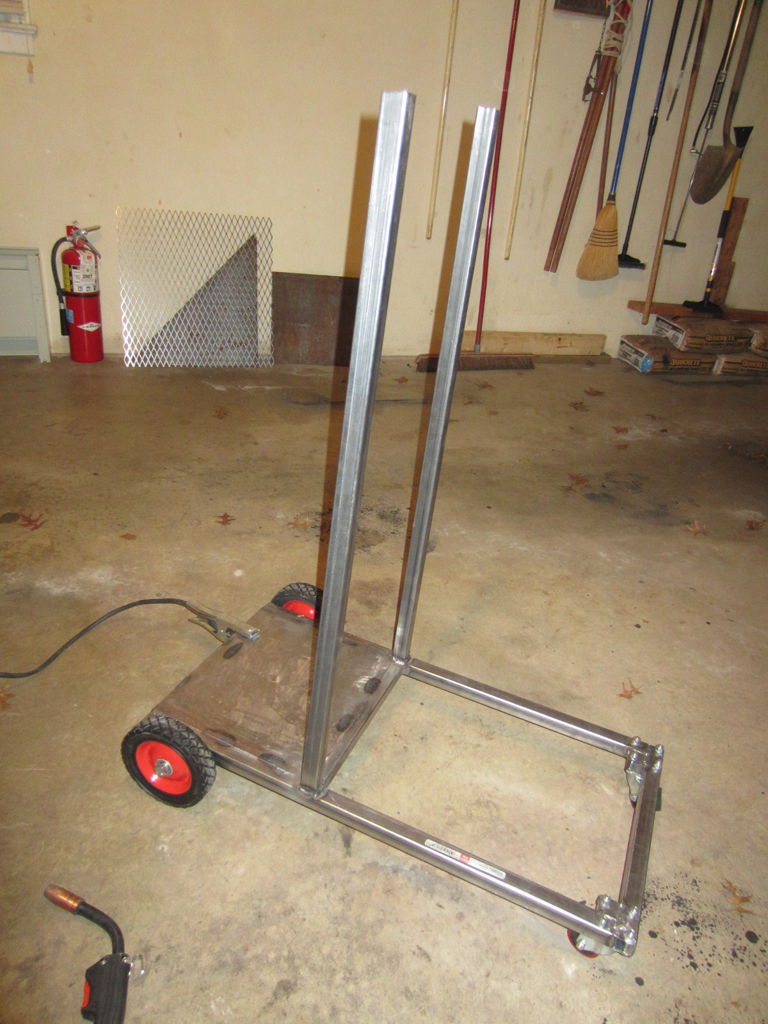
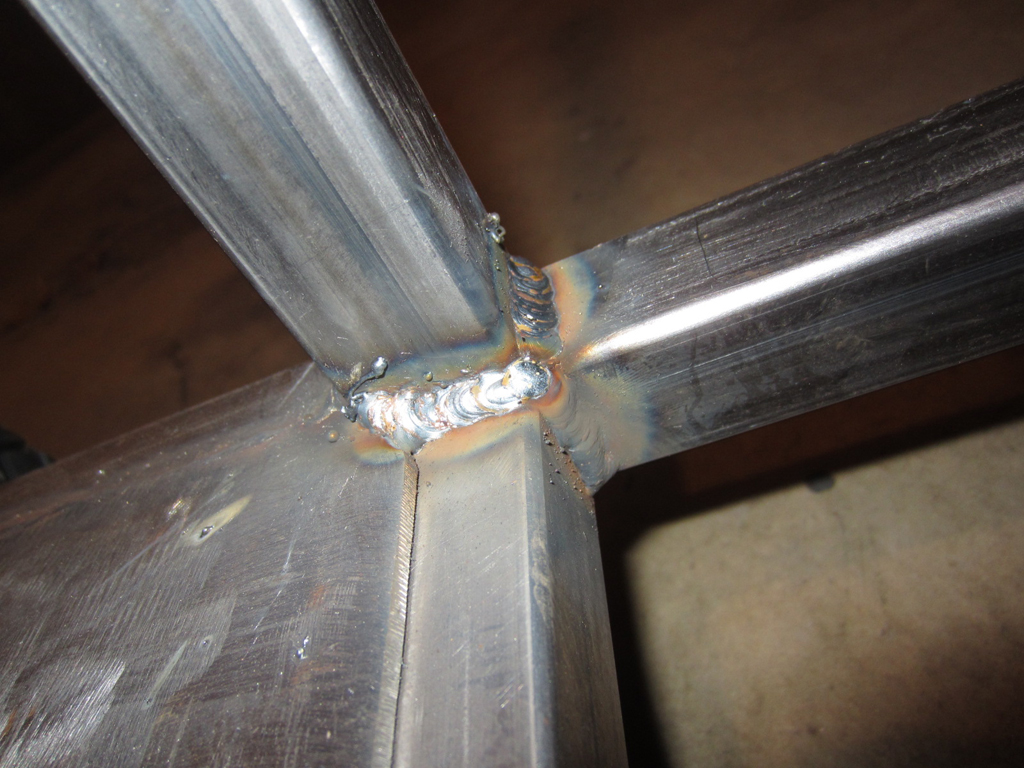
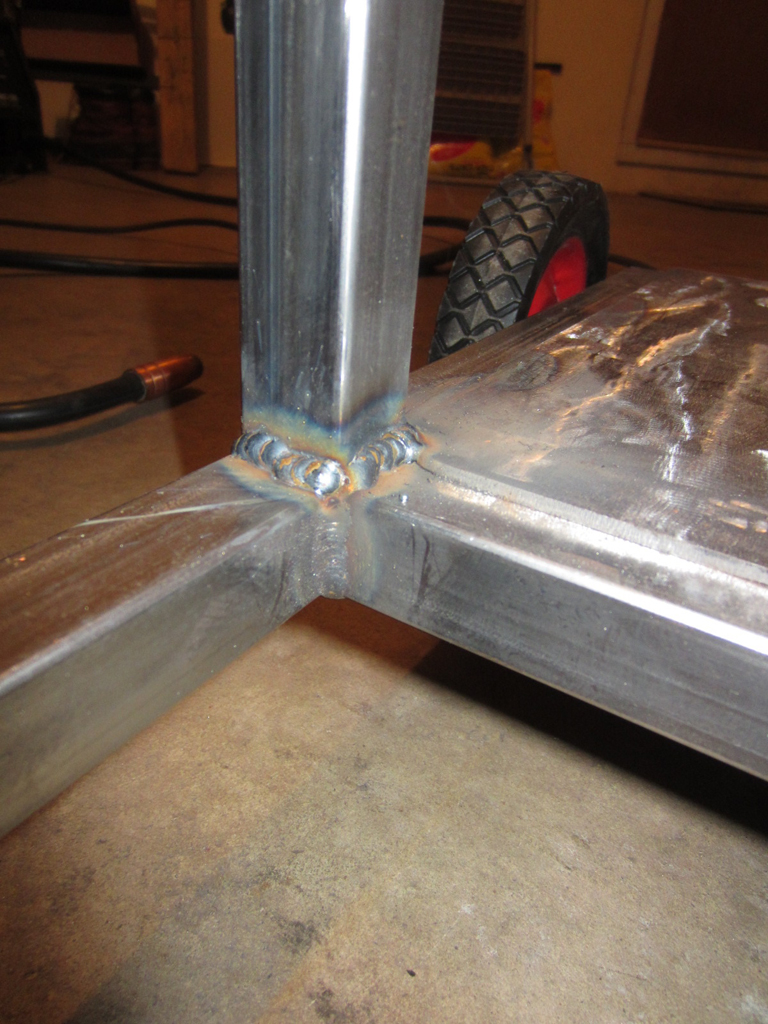
My welds have been kind of hit or miss tonight, I think partly because 1.) I'm still a noob 2.) Quite the variety of welding tonight, angles and up and down and such 3.) I think my gas nozzle is shot. I did make some good welds, though. Let me know what you think
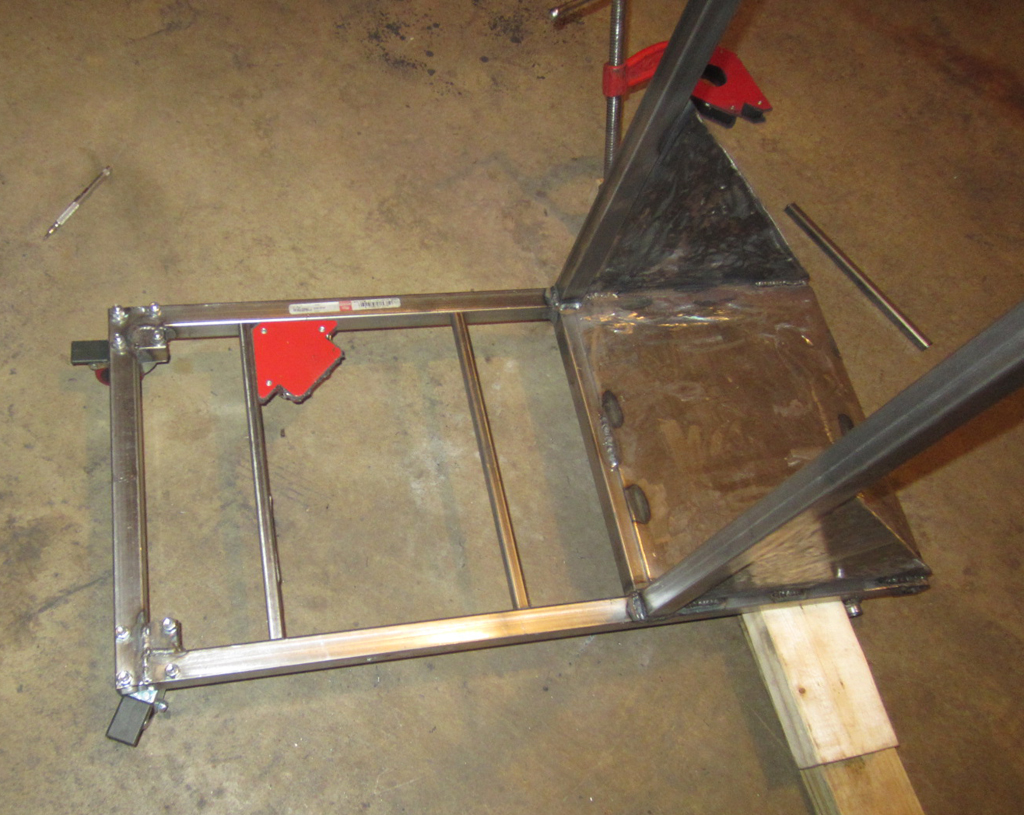
I got these two big triangles of steel from a guy at work. I'm not sure how thick they are exactly, but they are pretty damn beefy. I needed to cut them down to fit the cart as frame supports. This was a biotch to cut with an angle grinder!
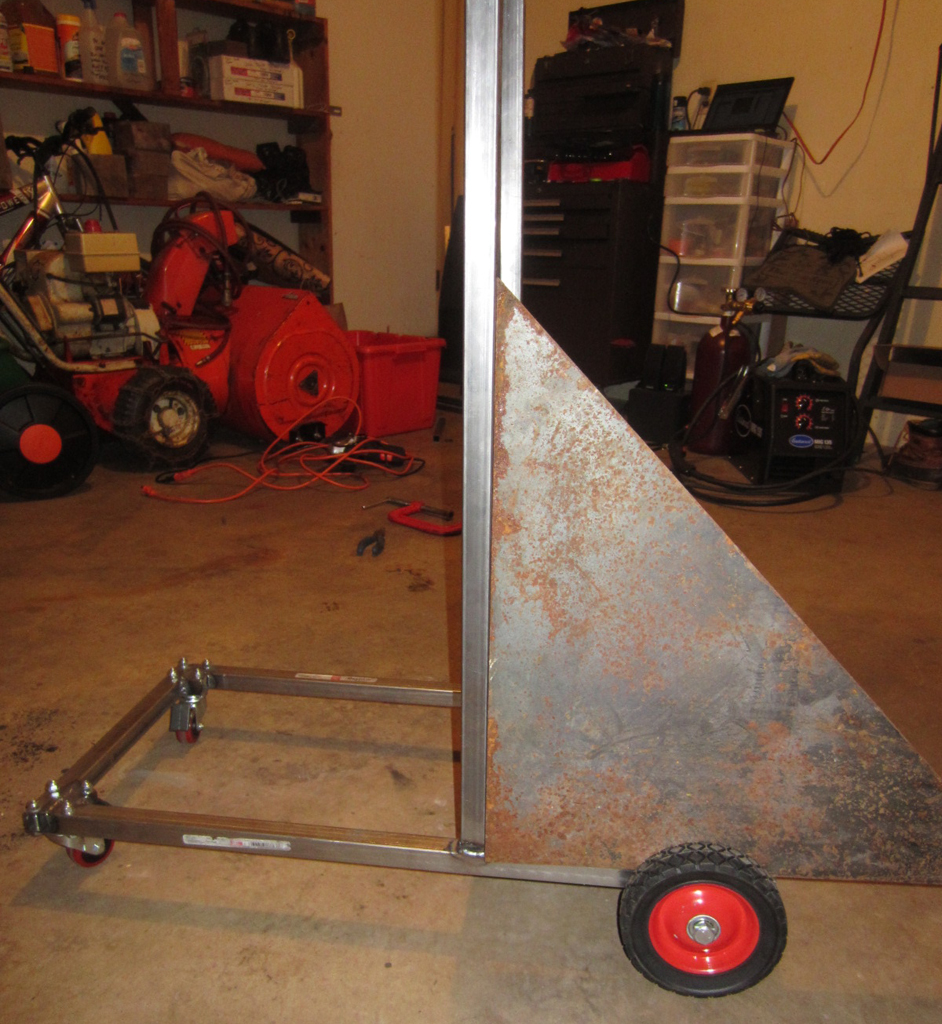
Both sides finally done and rust ground off, and finessed to fit the frame properly. That took a while! And got rolling with welding them on. I forgot to grab closeups of some of these welds...whoops!
Those two supports sure added a ton of beef to the cart. Here I'm adding 1/2" square tube supports in the middle section before putting mesh over it.
Got those welded in, ground down for the mesh, and went to town on this!
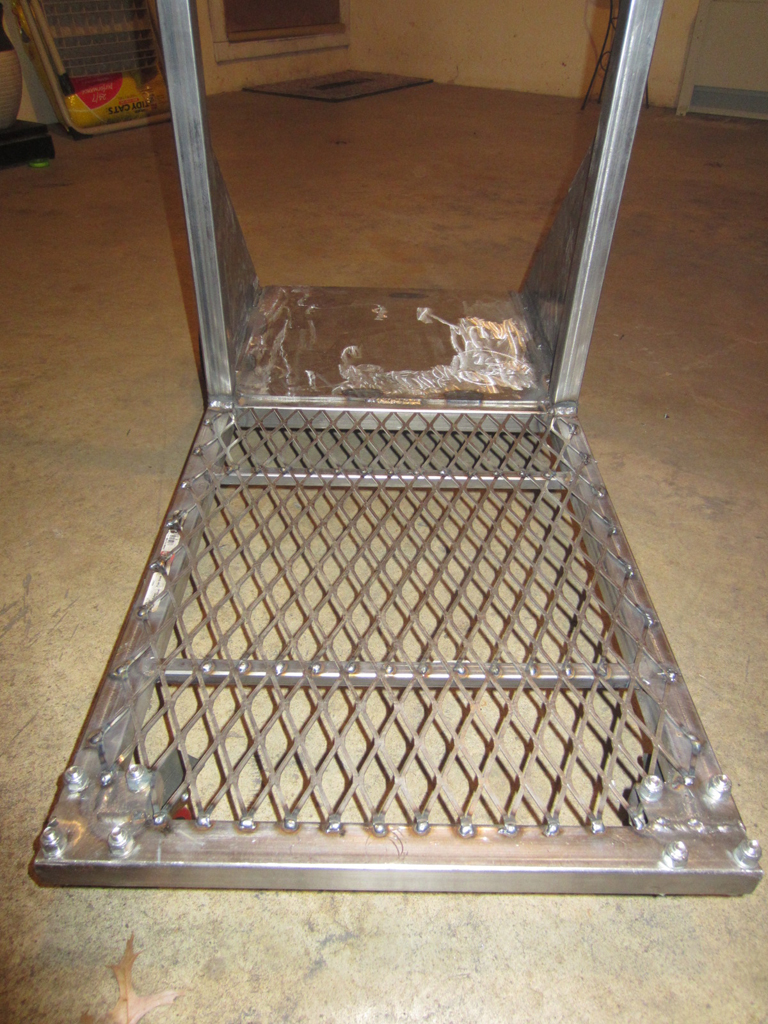
And here's what I ended the night with.
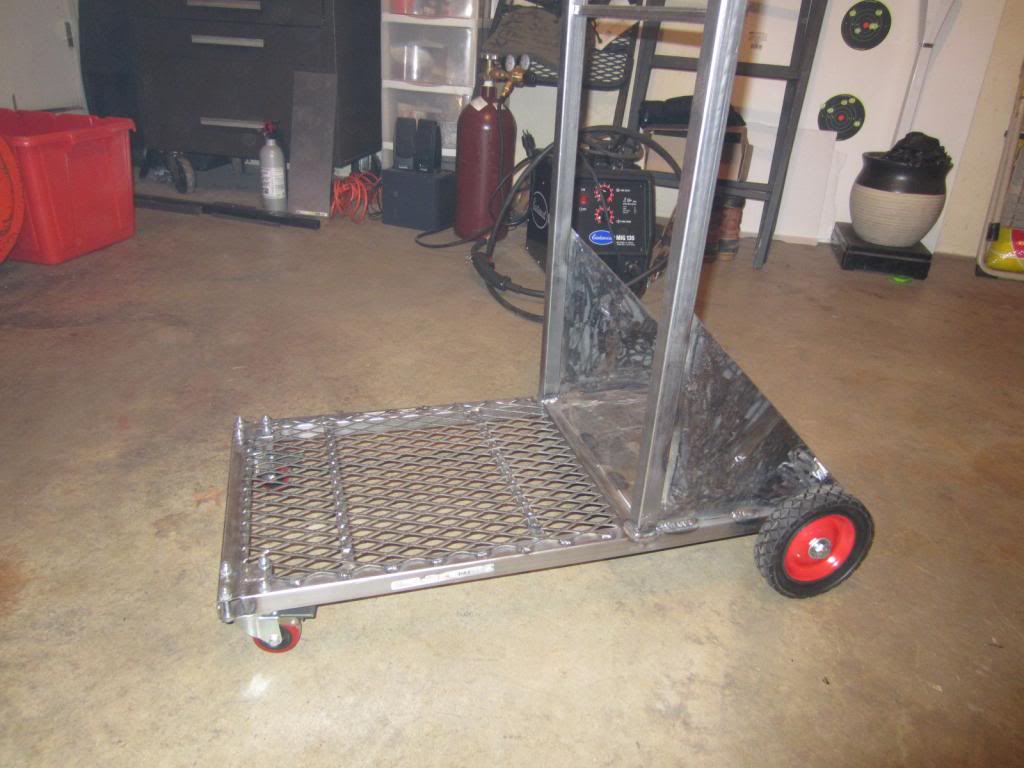

I won't be able to do much with it this weekend as I have the pleasure of cutting out rusted floors and fabbing up new ones from a car hood for my girlfriend's car. I'm pretty impressed with how it's coming along so far! I can't wait to get more done on it.
Got the vertical supports cut and welded up.
My welds have been kind of hit or miss tonight, I think partly because 1.) I'm still a noob 2.) Quite the variety of welding tonight, angles and up and down and such 3.) I think my gas nozzle is shot.
I did make some good welds, though. Let me know what you thinkI got these two big triangles of steel from a guy at work. I'm not sure how thick they are exactly, but they are pretty damn beefy. I needed to cut them down to fit the cart as frame supports. This was a biotch to cut with an angle grinder!
Both sides finally done and rust ground off, and finessed to fit the frame properly. That took a while! And got rolling with welding them on. I forgot to grab closeups of some of these welds...whoops!
Those two supports sure added a ton of beef to the cart. Here I'm adding 1/2" square tube supports in the middle section before putting mesh over it.
Got those welded in, ground down for the mesh, and went to town on this!
And here's what I ended the night with.
I won't be able to do much with it this weekend as I have the pleasure of cutting out rusted floors and fabbing up new ones from a car hood for my girlfriend's car.
I'm pretty impressed with how it's coming along so far! I can't wait to get more done on it.
11-08-2013, 02:05 AM
#69
CF Veteran
Thread Starter
Join Date: Dec 2012
Location: York, PA
Posts: 4,169
Likes: 0
Received 6 Likes
on
6 Posts
Year: 1998
Model: Cherokee
Engine: 4.0
Thanks ya'll! And I'll tell you that if you buy a welder and decide to build a cart for it, you're definitely going to get a bit of practice! 
11-08-2013, 06:57 AM
#71
CF Veteran
Thread Starter
Join Date: Dec 2012
Location: York, PA
Posts: 4,169
Likes: 0
Received 6 Likes
on
6 Posts
Year: 1998
Model: Cherokee
Engine: 4.0
I'll have to post a pic of the cutting wheel I was using all night. I didn't bring extras to my parents house and had only the one so I had to make it last...lol wore it down to the nub
11-08-2013, 09:25 AM
#74
::CF Administrator::
So much want...lol...OP, looking good man. Time to start building stuff for the Jeep, ...on a side note, ordering my digital angle finder and hydro conversion kit for my bender today, FINALLY, LOL....real life got in the way, I hate responsibilities...
...on a side note, ordering my digital angle finder and hydro conversion kit for my bender today, FINALLY, LOL....real life got in the way, I hate responsibilities...
11-08-2013, 09:47 AM
#75
CF Veteran
Thread Starter
Join Date: Dec 2012
Location: York, PA
Posts: 4,169
Likes: 0
Received 6 Likes
on
6 Posts
Year: 1998
Model: Cherokee
Engine: 4.0
Getting some experience welding sheet metal this weekend for my girlfriend's new floorpan, and hopefully after that I'll be comfortable enough to patch my quarter panel and finish my Bushwacker flat install. THEN I'll be ready for 2x6