Noob weld cart build.


 10-28-2013, 08:18 AM
#50
CF Veteran
Thread Starter
Join Date: Dec 2012
Location: York, PA
Posts: 4,169
Likes: 0
Received 6 Likes
on
6 Posts
Year: 1998
Model: Cherokee
Engine: 4.0
lol, well I need to determine how I'm going to mount the vertical supports on the front. I'm thinking I'd like to weld them in between the 4 bolts for each wheel, but don't want any interference with the bolts.
I'm also thinking that I'd like to have the welder sit at slight angle, like this cart here from GarageJournal forums...and this one has also been my primary inspiration.

Right now I'm planning on how to grate or finish the base. I've been looking at different materials, specifically from here: http://www.mcnichols.com/viewer.htm They have some neat options for grating or wire mesh type metal that I Could use. I'm looking at the rounded hole kind, and maybe the flattened expanded type. Lots of options so I'm unsure--awaiting prices on a custom cut.
I'm also thinking that I'd like to have the welder sit at slight angle, like this cart here from GarageJournal forums...and this one has also been my primary inspiration.
Right now I'm planning on how to grate or finish the base. I've been looking at different materials, specifically from here: http://www.mcnichols.com/viewer.htm They have some neat options for grating or wire mesh type metal that I Could use. I'm looking at the rounded hole kind, and maybe the flattened expanded type. Lots of options so I'm unsure--awaiting prices on a custom cut.
10-30-2013, 11:17 PM
#51
CF Veteran
Thread Starter
Join Date: Dec 2012
Location: York, PA
Posts: 4,169
Likes: 0
Received 6 Likes
on
6 Posts
Year: 1998
Model: Cherokee
Engine: 4.0
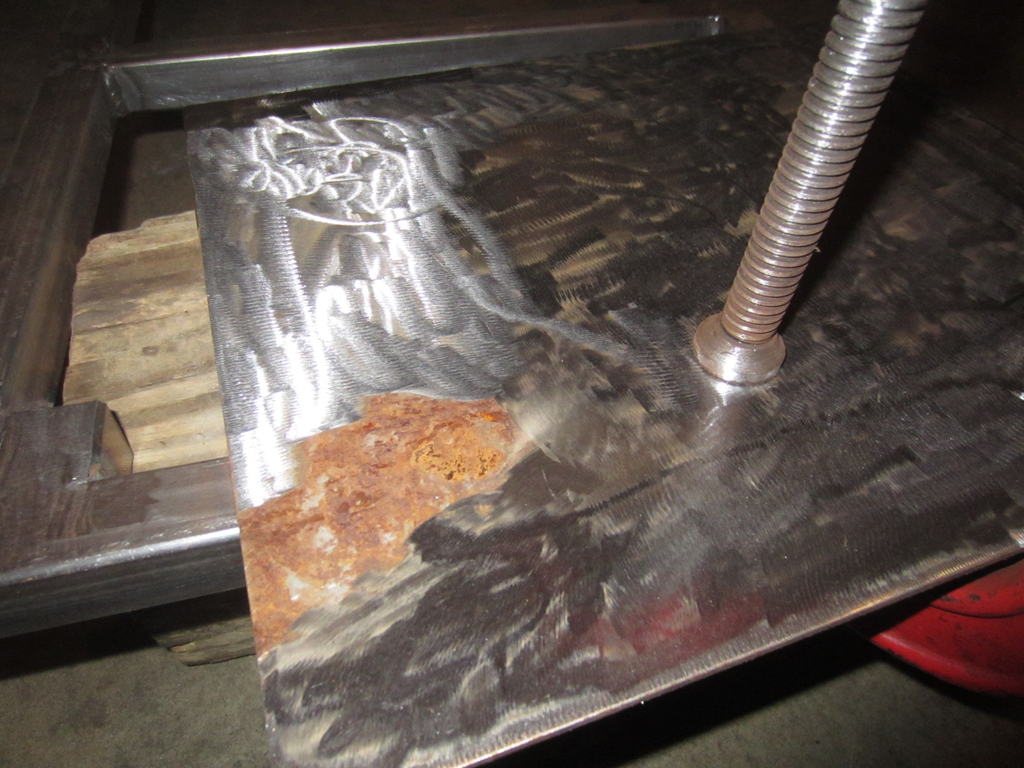
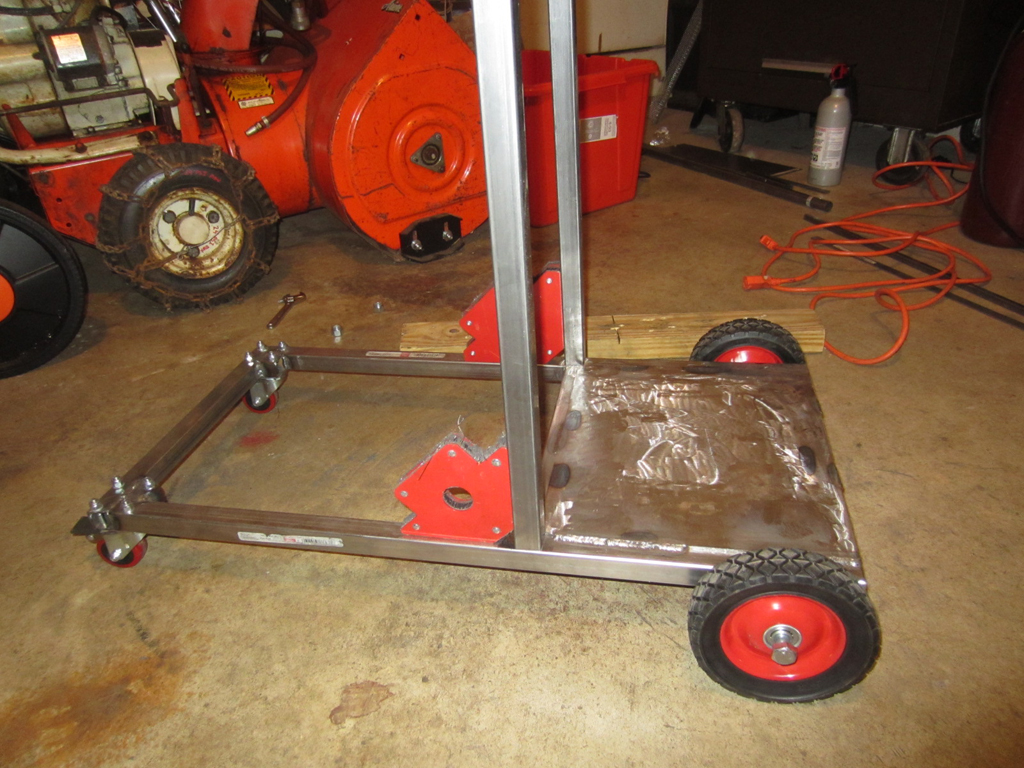
Some updates! So a few days ago, I got some pieces of scrap steel from the maintenance guy at work. Turns out one of the pieces was perfect for the rear tank section of the cart. All I did was angle the two corners near the center crossmember so that they don't interfere with vertical 1x1.
First things first, grind that rust away. I spent a bit of time on that and went through 1 cutting wheel in the process (lost my grinding wheel )
)
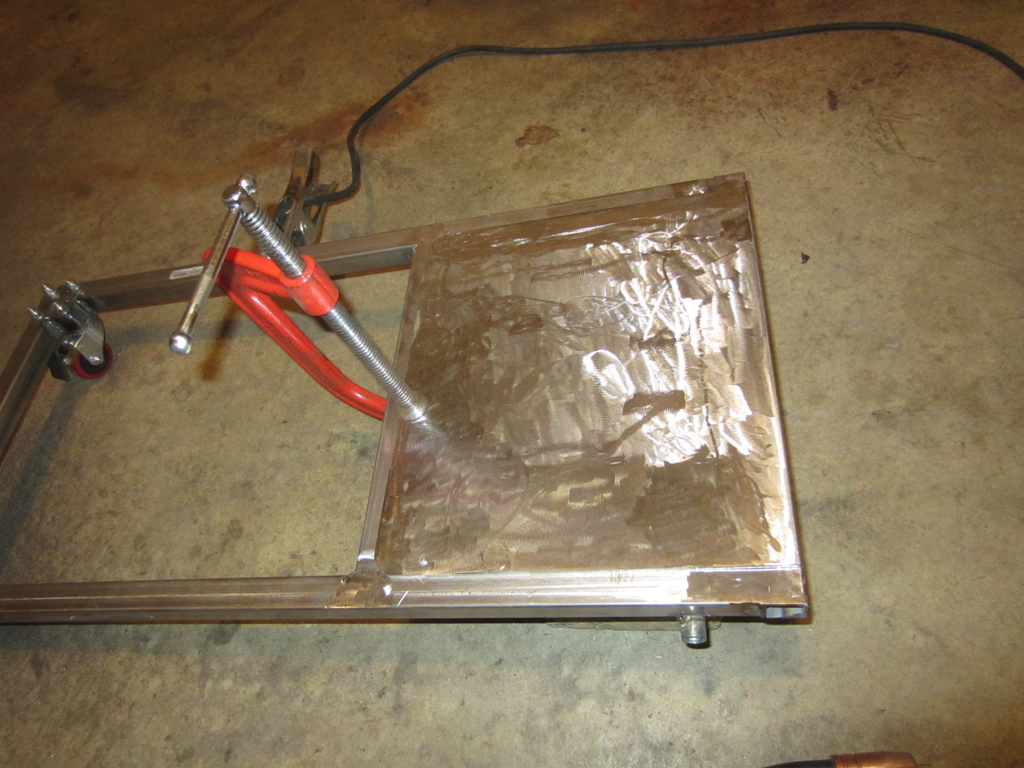
Clamped and grounded, ready for welding. (I also added some vice grips on the left side, not pictured)
The sheet that I got seemed somewhat thicker than the 1x1, but it actually ended up being the same size. I bumped the voltage a notch on the welder, and then I laid down this beauty.
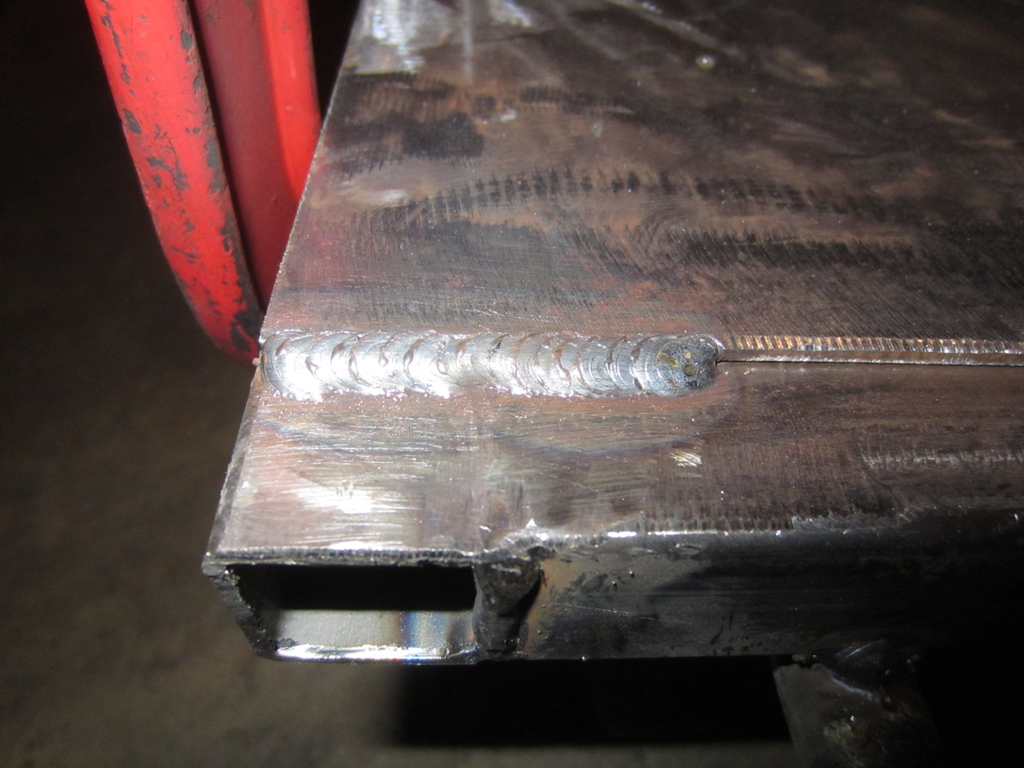
Sorry--didn't take any more pictures of the welds I laid down on the topside. They weren't quite as good as that one, but definitely still good. I flipped it over and ran a few beads underneath. I still seem to have the most trouble with the 90 degree welds, but getting better with practice.
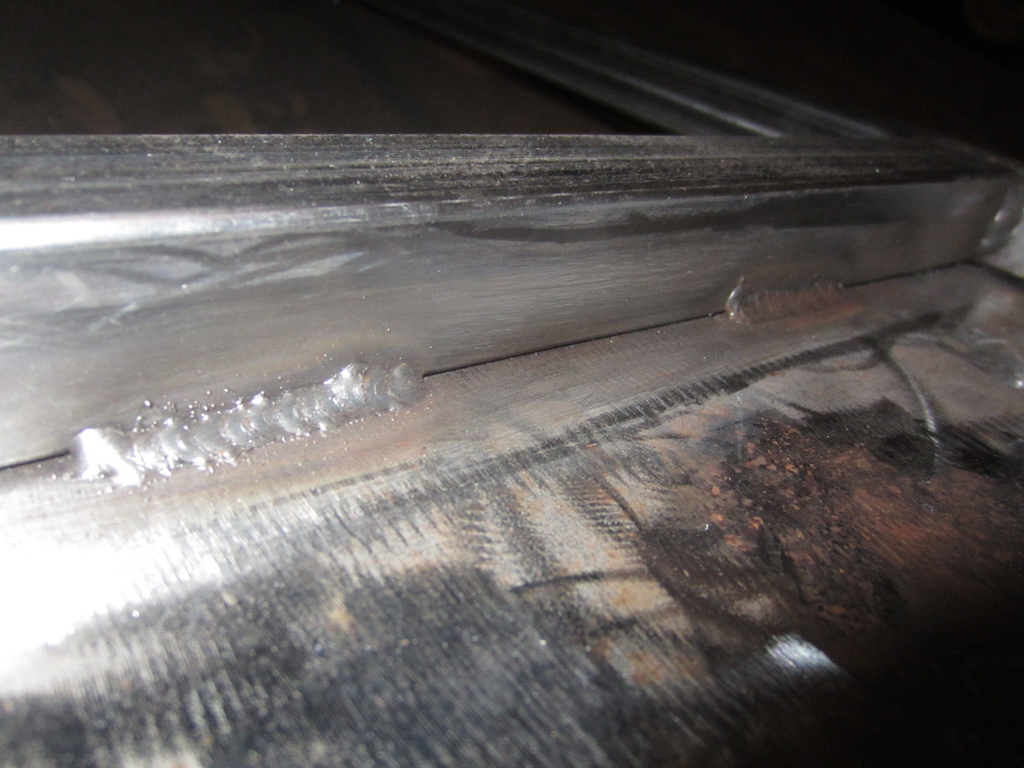

All done, ready to start moving upwards! You can see the one topside long bead I ran there. Came out pretty good for the most part but I shouldn't have let it go so long.
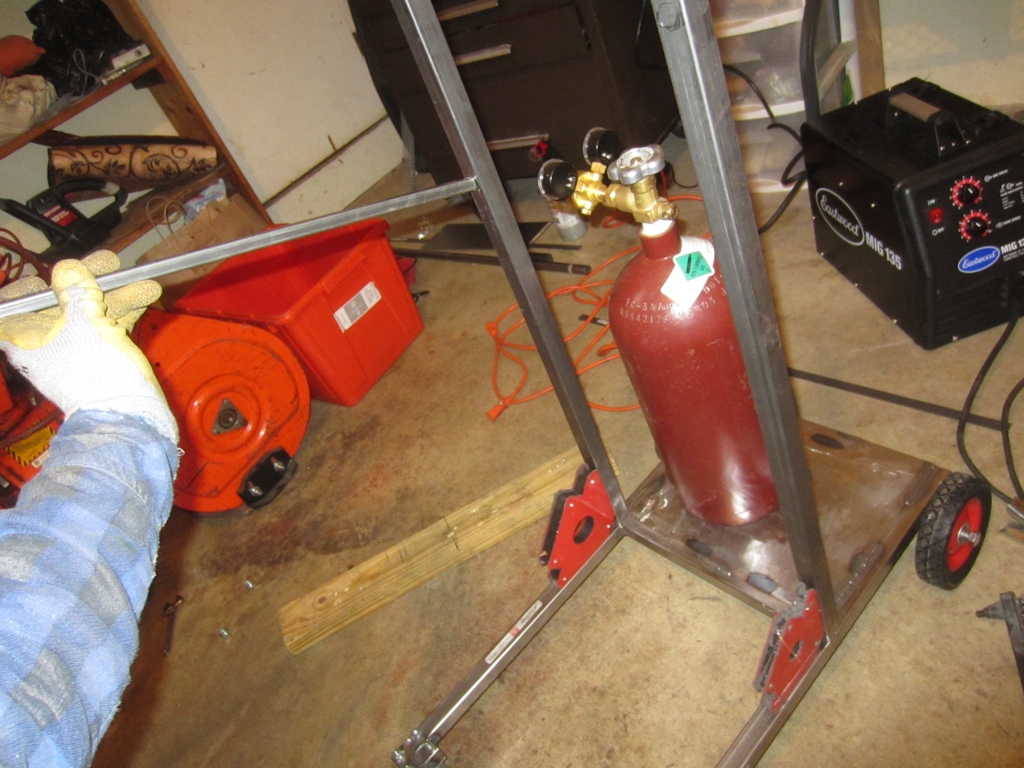
Some mockups with the welder in place.
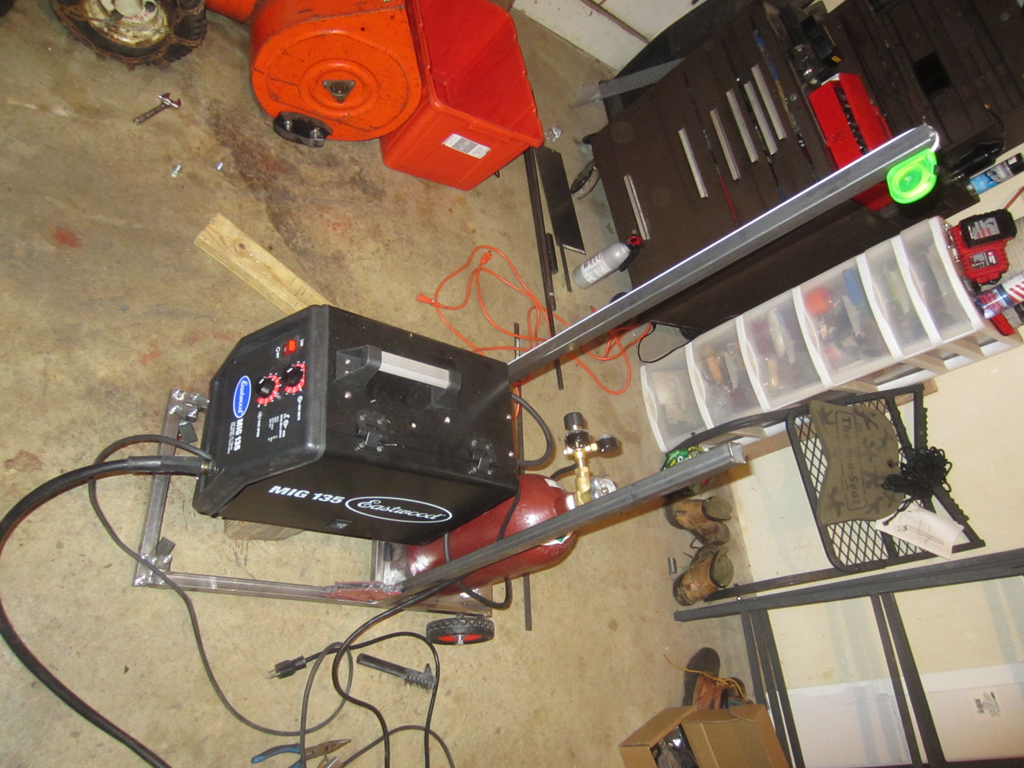
If you look closely there you can see the tape measure hanging over top the one 1x1 tube. I decided that 35" tall was plenty.
Here I'm just figuring on the angle and how high up I'm going to have the welder base. More to come on that.
A decently productive 2 hours. Man, give me 8 hours and see what I can get done with this thing!
First things first, grind that rust away. I spent a bit of time on that and went through 1 cutting wheel in the process (lost my grinding wheel
)Clamped and grounded, ready for welding. (I also added some vice grips on the left side, not pictured)
The sheet that I got seemed somewhat thicker than the 1x1, but it actually ended up being the same size. I bumped the voltage a notch on the welder, and then I laid down this beauty.
Sorry--didn't take any more pictures of the welds I laid down on the topside. They weren't quite as good as that one, but definitely still good. I flipped it over and ran a few beads underneath. I still seem to have the most trouble with the 90 degree welds, but getting better with practice.
All done, ready to start moving upwards! You can see the one topside long bead I ran there. Came out pretty good for the most part but I shouldn't have let it go so long.
Some mockups with the welder in place.
If you look closely there you can see the tape measure hanging over top the one 1x1 tube. I decided that 35" tall was plenty.
Here I'm just figuring on the angle and how high up I'm going to have the welder base. More to come on that.
A decently productive 2 hours. Man, give me 8 hours and see what I can get done with this thing!
10-31-2013, 10:31 AM
#54
CF Veteran
Thread Starter
Join Date: Dec 2012
Location: York, PA
Posts: 4,169
Likes: 0
Received 6 Likes
on
6 Posts
Year: 1998
Model: Cherokee
Engine: 4.0
Good point! I need to do some more measuring. I originally was going to make the top base more fit to the welder instead of matching the size to the base, but might make more sense to keep them the same. I still need to keep in mind some tool holders on the side as well
10-31-2013, 11:02 AM
#55
CF Veteran
Join Date: Jan 2013
Location: west chester, pa
Posts: 19,216
Likes: 0
Received 39 Likes
on
35 Posts
Year: 1999
Engine: 4.0
Don't forget doorways. U might would need the cart to go through doorways lol. Don't mount outlets on top. Grinding dust or splatter can get inside the outlets.
10-31-2013, 11:24 AM
#56
CF Veteran
Thread Starter
Join Date: Dec 2012
Location: York, PA
Posts: 4,169
Likes: 0
Received 6 Likes
on
6 Posts
Year: 1998
Model: Cherokee
Engine: 4.0
Definitely not mounting them on top. I saw another cart that a guy did that. Boy did he get flamed on the forums lol. It'll definitely fit through doorways. Overall it's pretty compact so far
10-31-2013, 12:04 PM
#58
CF Veteran
Thread Starter
Join Date: Dec 2012
Location: York, PA
Posts: 4,169
Likes: 0
Received 6 Likes
on
6 Posts
Year: 1998
Model: Cherokee
Engine: 4.0
Thanks man! I'm hoping to have it mostly done by next weekend. I'm going to need some more steel by the looks of things.
The three tricks that helped me the most with welding is the "e" trick, getting a good puddle started, and also focusing the heat of the weld on the piece that you're attaching. Or some jazz like that
The three tricks that helped me the most with welding is the "e" trick, getting a good puddle started, and also focusing the heat of the weld on the piece that you're attaching. Or some jazz like that
10-31-2013, 12:04 PM
#59
::CF Administrator::

So, this weld looks as if your work angle is favoring the bottom plate, (maybe its just the picture), try getting it at more of a 45* angle into the joint, other than that, your welds are looking good! Keep 'em coming, you're making good progress....
10-31-2013, 12:13 PM
#60
CF Veteran
Thread Starter
Join Date: Dec 2012
Location: York, PA
Posts: 4,169
Likes: 0
Received 6 Likes
on
6 Posts
Year: 1998
Model: Cherokee
Engine: 4.0
Attachment 218372
So, this weld looks as if your work angle is favoring the bottom plate, (maybe its just the picture), try getting it at more of a 45* angle into the joint, other than that, your welds are looking good! Keep 'em coming, you're making good progress....
So, this weld looks as if your work angle is favoring the bottom plate, (maybe its just the picture), try getting it at more of a 45* angle into the joint, other than that, your welds are looking good! Keep 'em coming, you're making good progress....
