Homemade front bumper
 02-16-2013, 12:16 PM
#1
CF Veteran
Thread Starter
Join Date: Jan 2013
Location: west chester, pa
Posts: 19,216
Likes: 0
Received 39 Likes
on
35 Posts
Year: 1999
Engine: 4.0
For a while I has been doing research on the front bumper for my 99. I didn't see any good ones that had nice lines and functionality, until I saw those crusaders made by jcr off road... I got to say, they looked good, so I decided to copy the design off it. I asked my boss to "donate some material" for the cause, and he did. I got a bunch of 1/4 steel plates and some tubing.
I went home and start making a template with cardboard cut outs to the right size that I wanted and taped them together so it would look like a real bumper and put the, on the xj so I can determine where to make changes on the measurements and locations, etc.
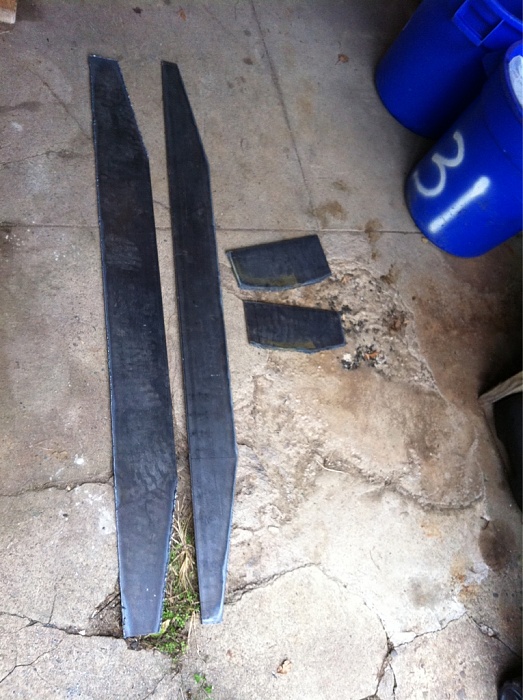
Now I knew what I needed, I proceed to cut everything that I need out of the steel plate with a burning torch. After all that is cut out, I got edges that were jagged and sharp, but I had to lay out some exacting lines first, so I know how much to grind off. I used blue layout fluid and measured various points of intersections, and scratched clean and crisp lines. Now with that being done, I can see exactly where to grind off, and that I did. After couple of hours of grinding, I got pieces all straight and clean. I had to bend couple of places on the front plate, so I brought it over to my work and used the hydraulic press with a homemade bending brake. After bending them a few degrees, I brought them back home.
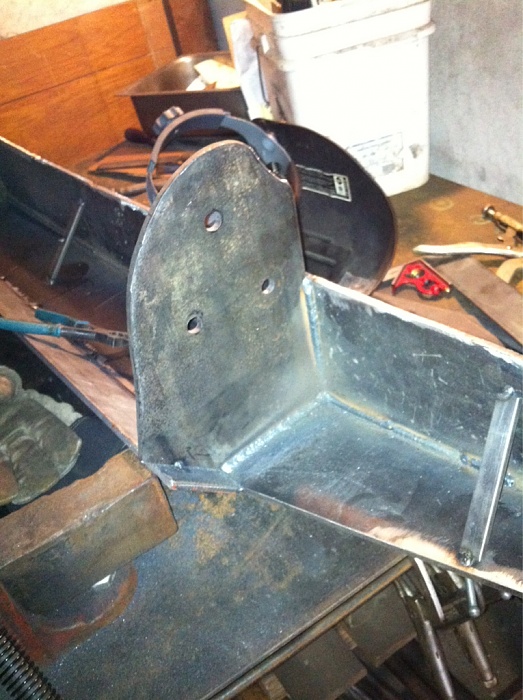
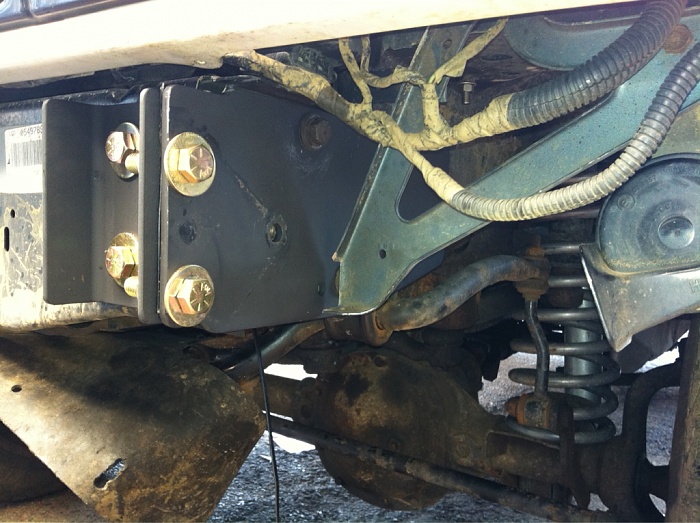
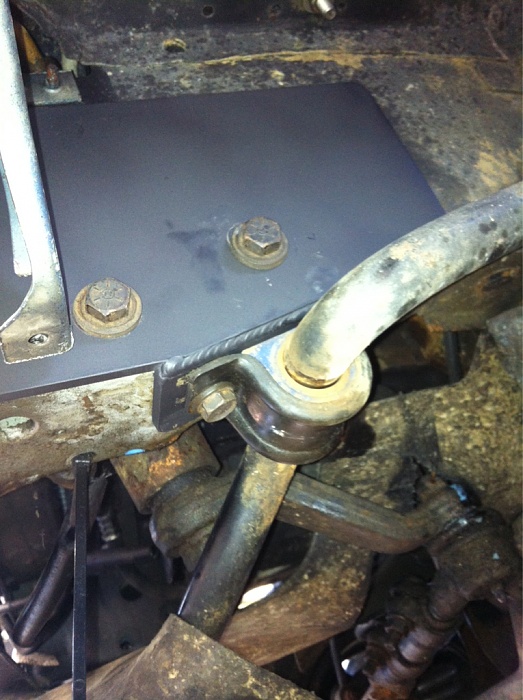
With the pieces bent and ready to go, I tacked the top plate to the front plate, and welded in some temporary tabs to hold it in exact ninety degrees, then I cut out more plates for the bottom, sides, mounts, etc. I then tacked everything on the big piece. At the same time I also decided to cut the steel plates for the unibody tie-ins. I also copied the design from jcr offroad. They really have good ideas. Only thing that I bought was all the hardware (bolts/washers/nuts) and a steering spacer from jcr offroad.
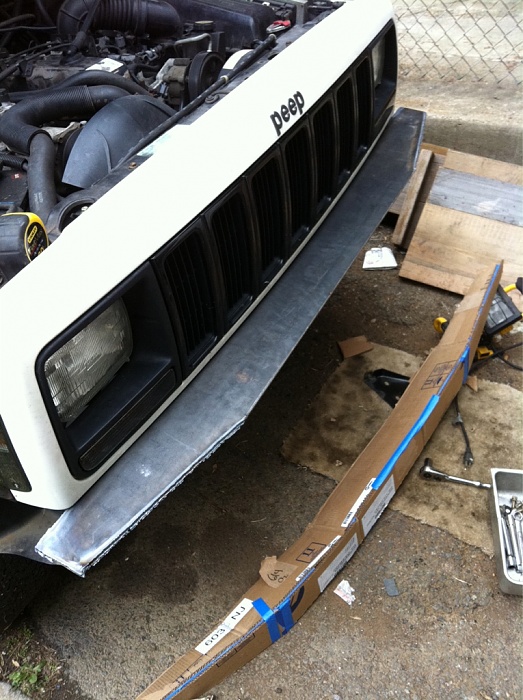
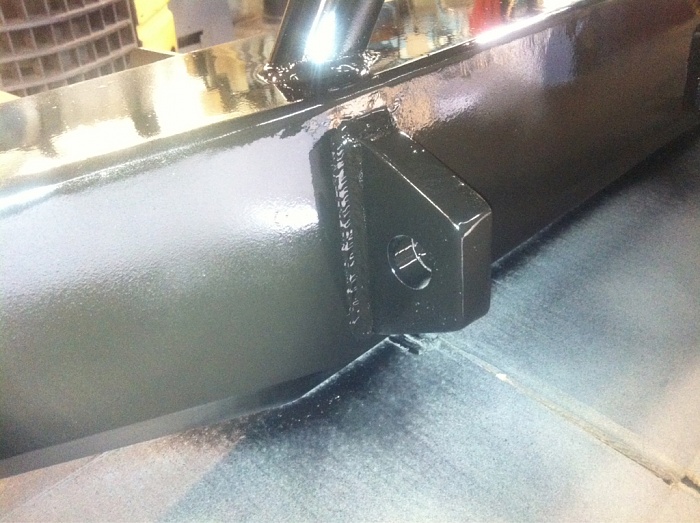
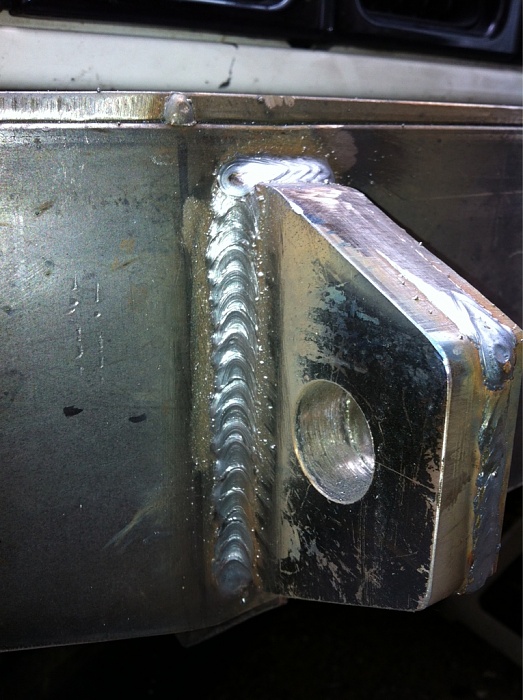
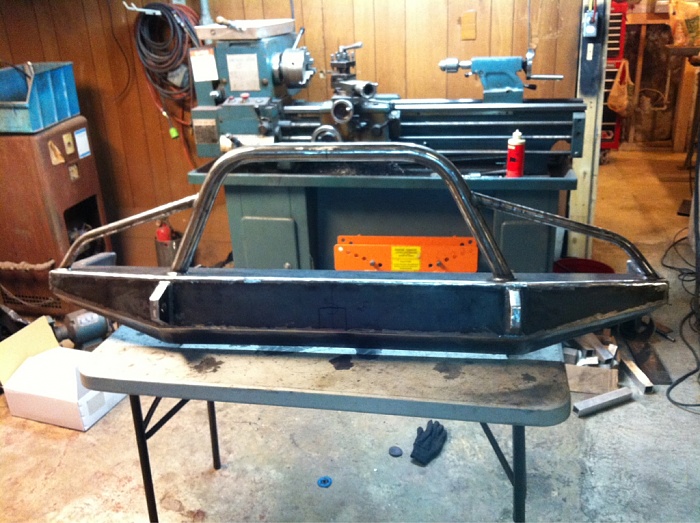
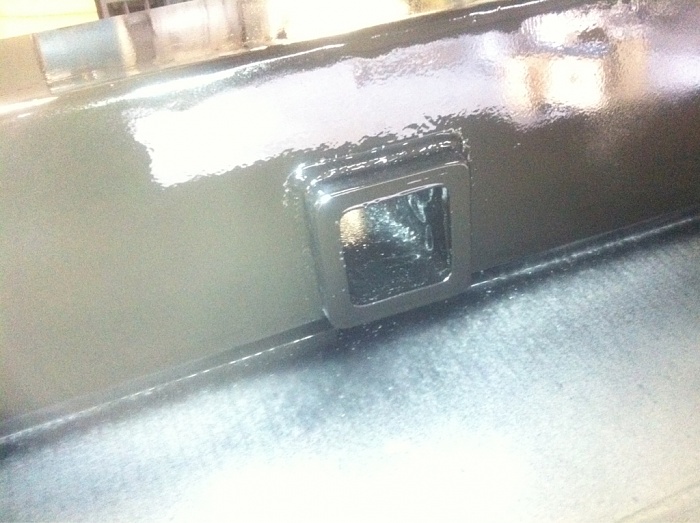
After all pieces were tacked on the bumper, It was time to put it on the xj to make sure everything was correct before I go ahead and finish up the welding. Everything seemed good, so I start making the mounting plates and cut out holes on the bumper so I can fit the recovery tab through. I had some 5/8 steel plate that my boss gave me and I made some brackets out of it with one inch hole drilled in it. After the mounting plate was tacked on the bumper, I lined the brackets up with the holes and tacked it on.
Now everything looks good and just the way I wanted it, I went ahead and welded everything up together, then it was time to do finishing work on it. I grinded and sanded the outside welds all smooth so it ll look like one piece. With that out of the way, I started on the hoops, I bought some thick walled pipes (because I only have a pipe bender, not a tubing bender) and I made the front hoops with the bender. With the pipes welded on the bumper and out of the way, I found a reciever hitch tube, so I located and marked the place where I will cut out the hole on the bumper for it.
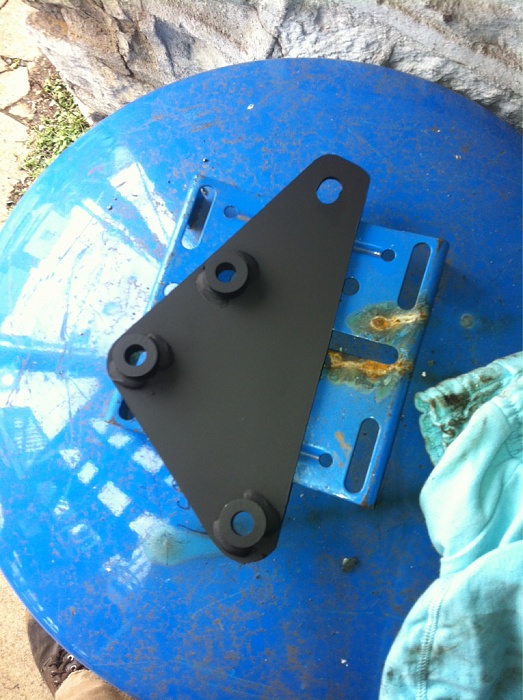
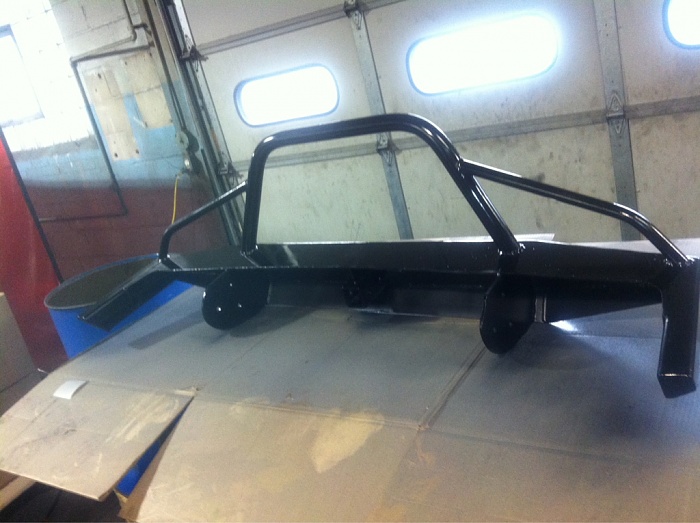
With the hole cut out, I sliced the tube in and welded it in place. Everything that needed welding was finally done and I brought it back to my work so I can rattle can it. My garage did t have a heater, so I wouldn't want to paint it In cold February weather. Luckily my boss let me stay after hours to paint it.
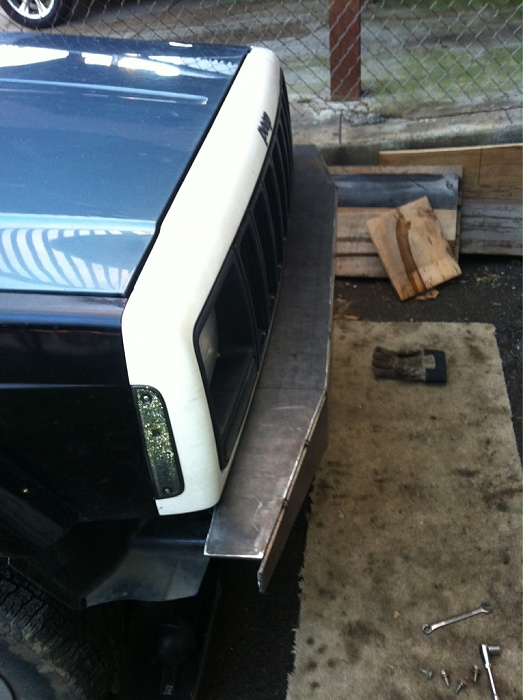
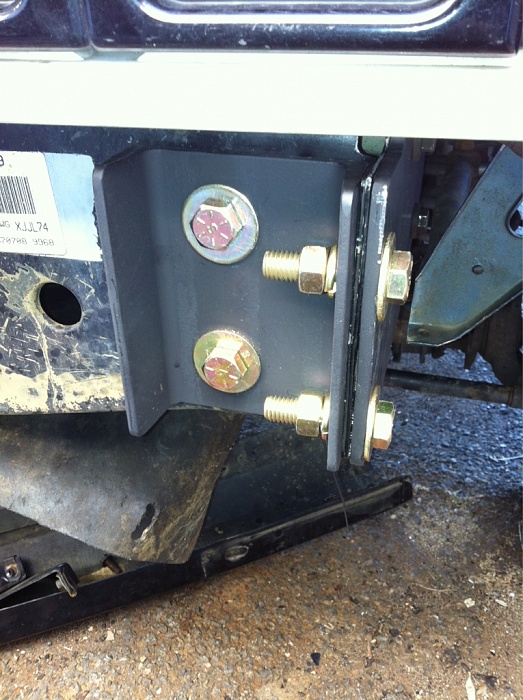
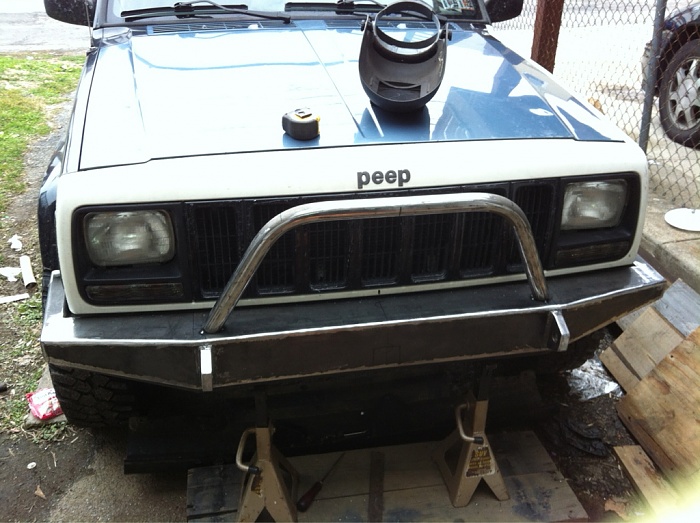
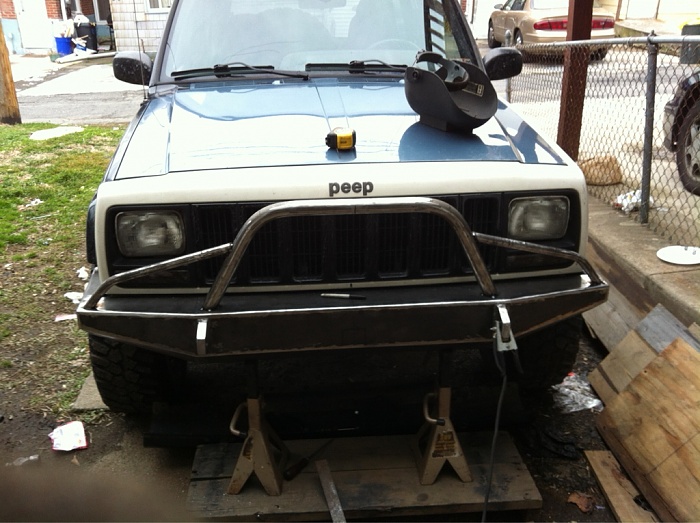
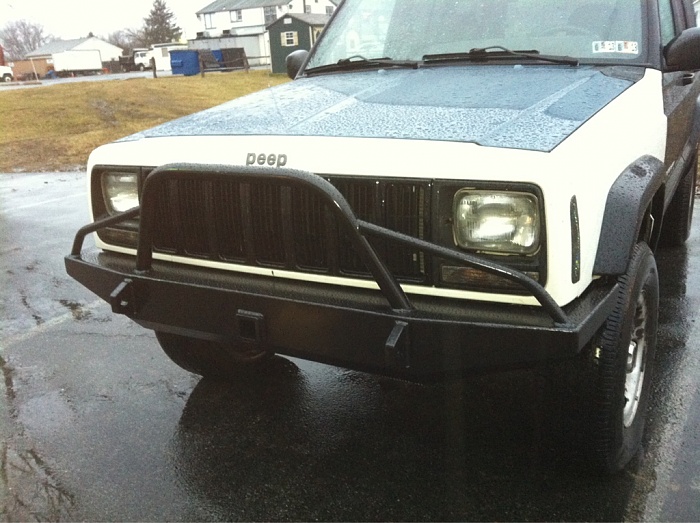
The next day, after the paint dried and hardened, I was able to put it on the XJ, and boy, it looked good, to me.
I would say I spent about less than 100 bucks on the shackles, hardware, steering spacer, and paint. Everything else was free.
I would like to say thanks to JCR OFFROAD for inspiration.


I went home and start making a template with cardboard cut outs to the right size that I wanted and taped them together so it would look like a real bumper and put the, on the xj so I can determine where to make changes on the measurements and locations, etc.
Now I knew what I needed, I proceed to cut everything that I need out of the steel plate with a burning torch. After all that is cut out, I got edges that were jagged and sharp, but I had to lay out some exacting lines first, so I know how much to grind off. I used blue layout fluid and measured various points of intersections, and scratched clean and crisp lines. Now with that being done, I can see exactly where to grind off, and that I did. After couple of hours of grinding, I got pieces all straight and clean. I had to bend couple of places on the front plate, so I brought it over to my work and used the hydraulic press with a homemade bending brake. After bending them a few degrees, I brought them back home.
With the pieces bent and ready to go, I tacked the top plate to the front plate, and welded in some temporary tabs to hold it in exact ninety degrees, then I cut out more plates for the bottom, sides, mounts, etc. I then tacked everything on the big piece. At the same time I also decided to cut the steel plates for the unibody tie-ins. I also copied the design from jcr offroad. They really have good ideas. Only thing that I bought was all the hardware (bolts/washers/nuts) and a steering spacer from jcr offroad.
After all pieces were tacked on the bumper, It was time to put it on the xj to make sure everything was correct before I go ahead and finish up the welding. Everything seemed good, so I start making the mounting plates and cut out holes on the bumper so I can fit the recovery tab through. I had some 5/8 steel plate that my boss gave me and I made some brackets out of it with one inch hole drilled in it. After the mounting plate was tacked on the bumper, I lined the brackets up with the holes and tacked it on.
Now everything looks good and just the way I wanted it, I went ahead and welded everything up together, then it was time to do finishing work on it. I grinded and sanded the outside welds all smooth so it ll look like one piece. With that out of the way, I started on the hoops, I bought some thick walled pipes (because I only have a pipe bender, not a tubing bender) and I made the front hoops with the bender. With the pipes welded on the bumper and out of the way, I found a reciever hitch tube, so I located and marked the place where I will cut out the hole on the bumper for it.
With the hole cut out, I sliced the tube in and welded it in place. Everything that needed welding was finally done and I brought it back to my work so I can rattle can it. My garage did t have a heater, so I wouldn't want to paint it In cold February weather. Luckily my boss let me stay after hours to paint it.
The next day, after the paint dried and hardened, I was able to put it on the XJ, and boy, it looked good, to me.
I would say I spent about less than 100 bucks on the shackles, hardware, steering spacer, and paint. Everything else was free.
I would like to say thanks to JCR OFFROAD for inspiration.


Trending Topics
02-16-2013, 08:10 PM
#8
Seasoned Member
Join Date: Nov 2012
Location: NC
Posts: 401
Likes: 0
Received 5 Likes
on
4 Posts
Year: 2001
Model: Cherokee
Engine: 4.slow
Looks really good. I was considering getting the pre-cut DIY kit for front and rear. I think I'd rather build it all myself to save some coin. What was the size of plate used? (Not talking about 1/4" but total size)
02-16-2013, 08:21 PM
#9
Senior Member
Join Date: Dec 2011
Location: Riverside county
Posts: 851
Likes: 0
Received 0 Likes
on
0 Posts
Year: 89' soon to be
Model: Cherokee
Engine: 4.0 HO 167k miles
 02-18-2013, 11:23 AM
#13
CF Veteran
Thread Starter
Join Date: Jan 2013
Location: west chester, pa
Posts: 19,216
Likes: 0
Received 39 Likes
on
35 Posts
Year: 1999
Engine: 4.0
No but I wish I took measurements of it before installing it on the jeep. However, I do have old aluminum spacer that used to be there, I can measure the location and the offset of bolt holes if u want me to.
 02-18-2013, 11:26 AM
#15
CF Veteran
Thread Starter
Join Date: Jan 2013
Location: west chester, pa
Posts: 19,216
Likes: 0
Received 39 Likes
on
35 Posts
Year: 1999
Engine: 4.0
I used a 12 inch wide plate about 70 inch long and cut it in half and later in the build, I eventually trimmed it down a bit. But I think 6 inch wide by 70 inch long would be a great start for u. You can trim down to size as u go along After all it's better to cut bigger than too small because u would have a second chance to get it right.

