expedition rig build out
 05-12-2015, 01:18 AM
#286
Senior Member
Thread Starter
Join Date: Mar 2013
Location: lake stevens, wa
Posts: 639
Likes: 0
Received 2 Likes
on
2 Posts
Year: 1996
Model: Cherokee
Engine: 4.0L
wasnt feeling the lights 100%, so took them back apart again. came up with a different mount for my projectors and tossed some bulbs in to test them out
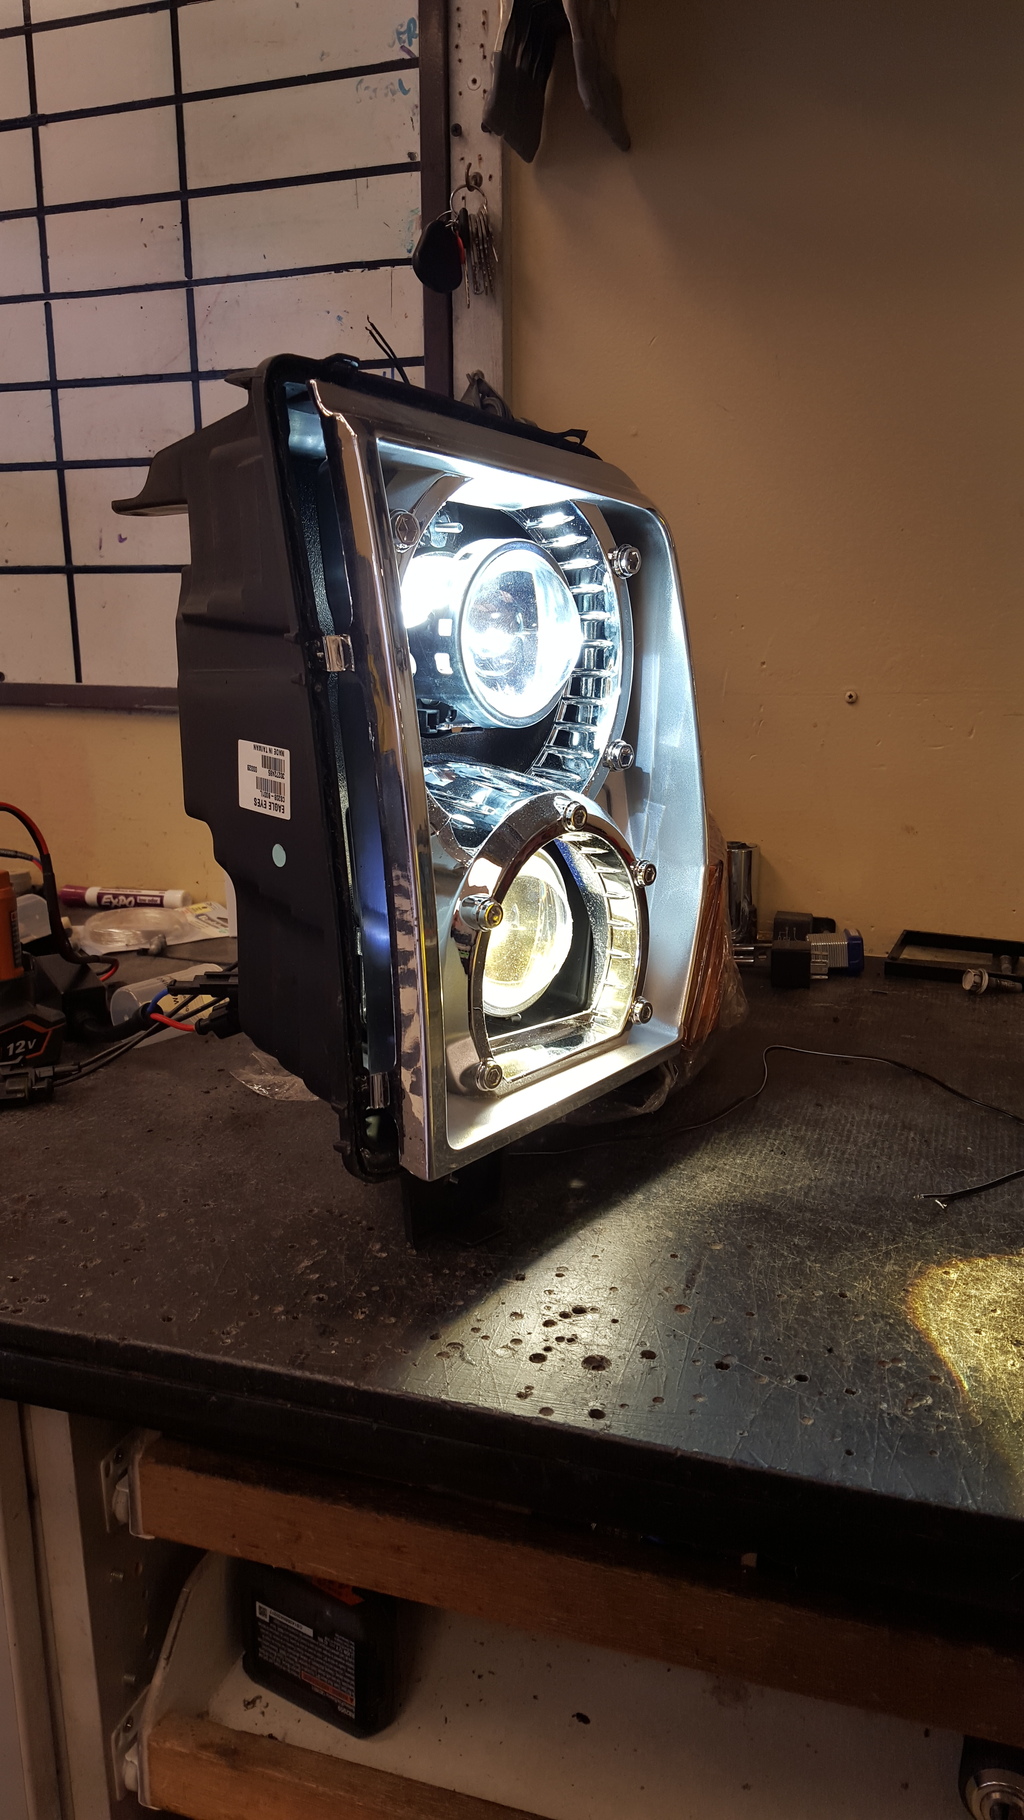
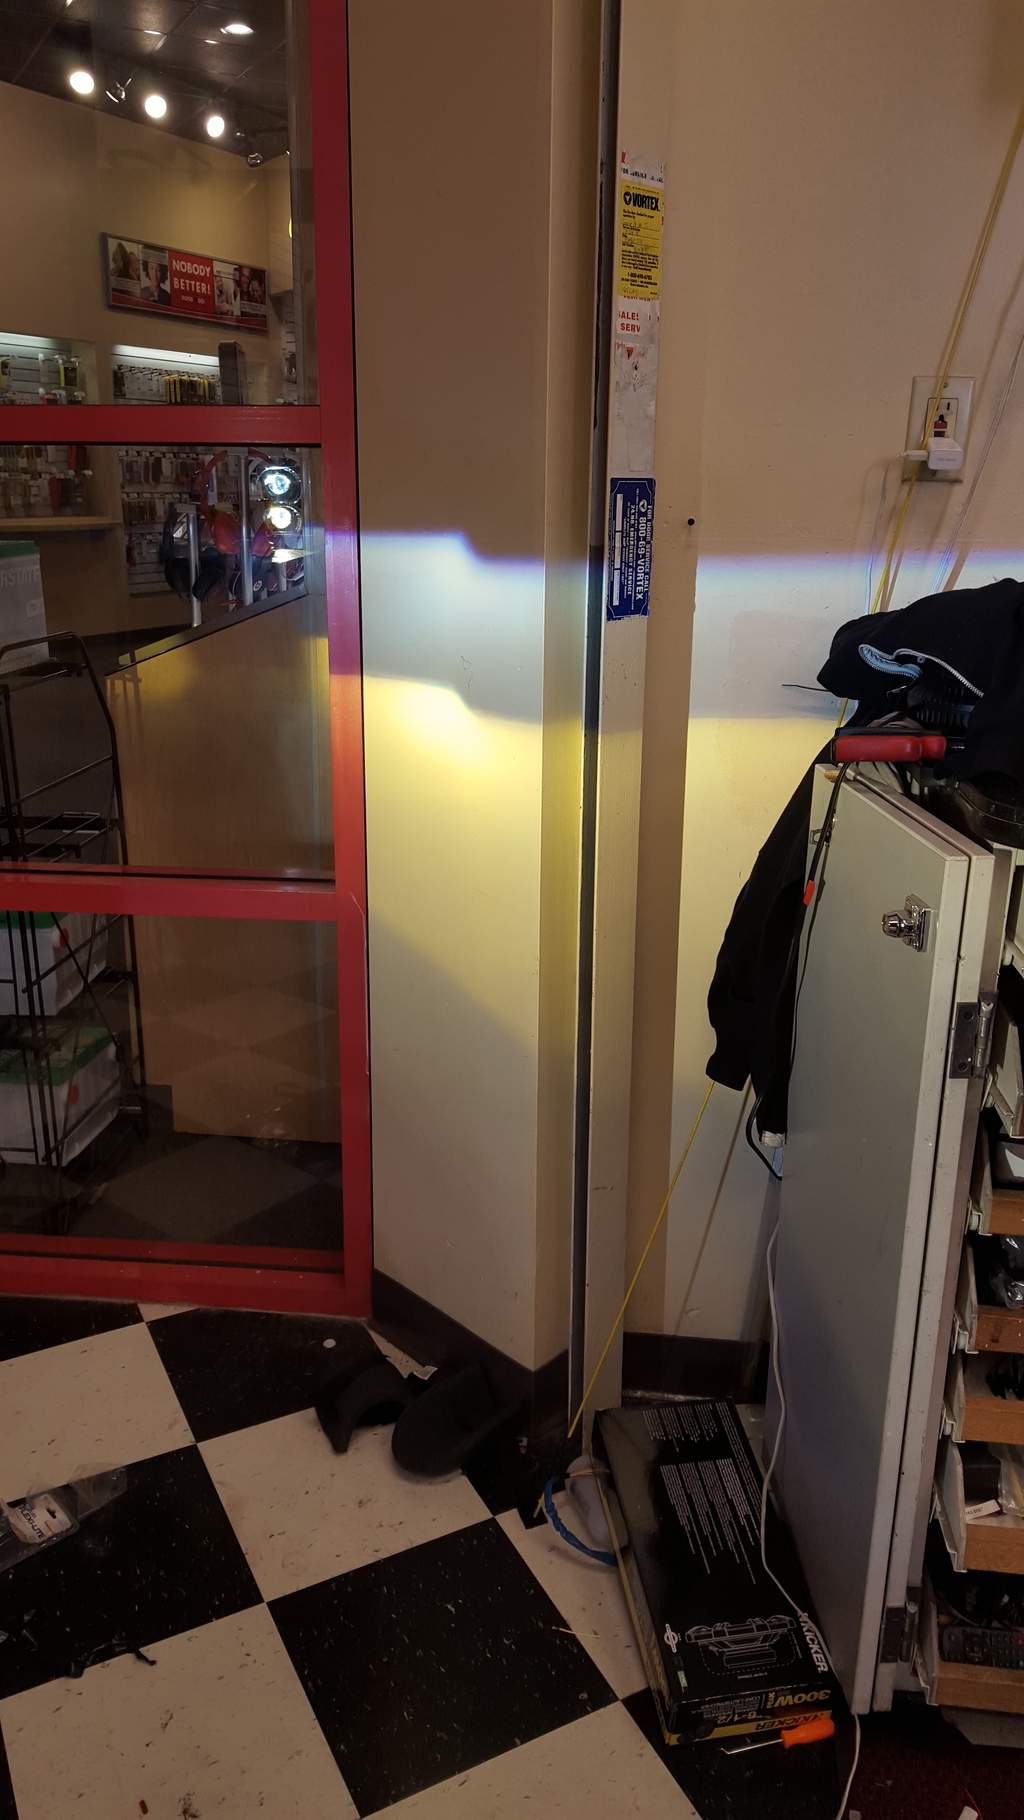
very happy with the output and very happy I didn't settle for something less than perfect. hope to have them finished and on the jeep soon
very happy with the output and very happy I didn't settle for something less than perfect. hope to have them finished and on the jeep soon
 05-12-2015, 04:56 AM
#287
No, I don't lick fish.
Wow man, I'm completely floored. Thanks for taking the time to share all of your ideas with us. You've got quite a bit of creativity in that head of yours.
Subscribed.
Subscribed.
06-12-2015, 01:24 AM
#288
Seasoned Member
Join Date: Mar 2015
Location: Oregon
Posts: 453
Likes: 0
Received 3 Likes
on
3 Posts
Year: 1995
Model: Cherokee
Engine: 4.0 I6
You sir, are absolutely an incredible human being! Amazing build I just read the entire thread and I am blown away! I can only hope that I become as creative as you! I'm 17 and you are truly an inspiration to me for my future. Keep up the good work!
06-15-2015, 11:43 PM
#289
Senior Member
Thread Starter
Join Date: Mar 2013
Location: lake stevens, wa
Posts: 639
Likes: 0
Received 2 Likes
on
2 Posts
Year: 1996
Model: Cherokee
Engine: 4.0L
thanks for the kind words guys
so started yet another damn project.. lol
found a home built tire carrier bumper for sale locally for cheap, so I picked it up. there were a few things I wanted to add to it, but after looking at it at home I realized that I would be basically rebuilding the whole thing to get it how I wanted. so now I've decided to sell it off and start designing my own. I don't have the gear to do it myself, but that doesn't mean I can't develop a solid plan to hand to someone who does. and the best way to iron out the kinks? build a mock-up of course!
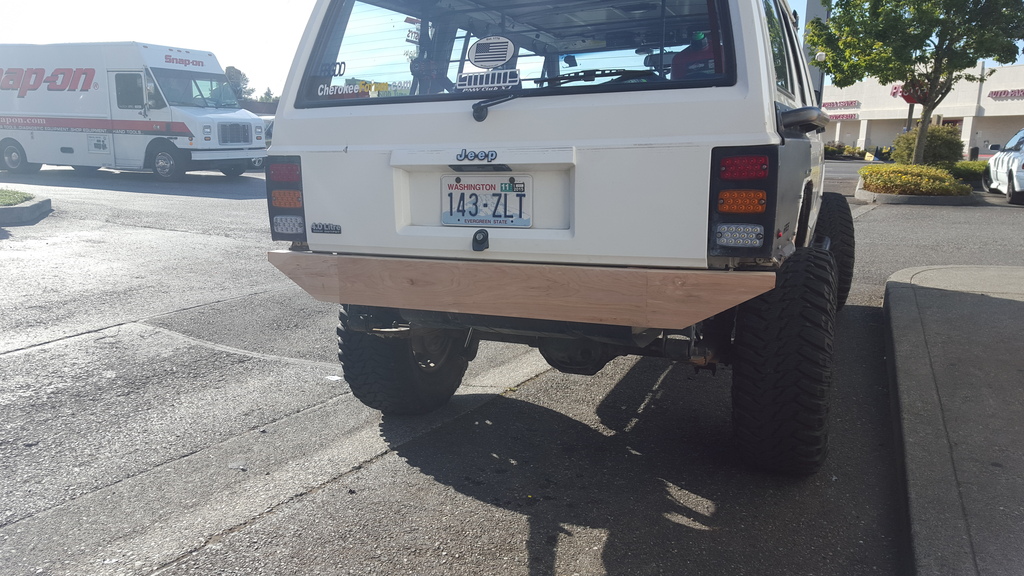
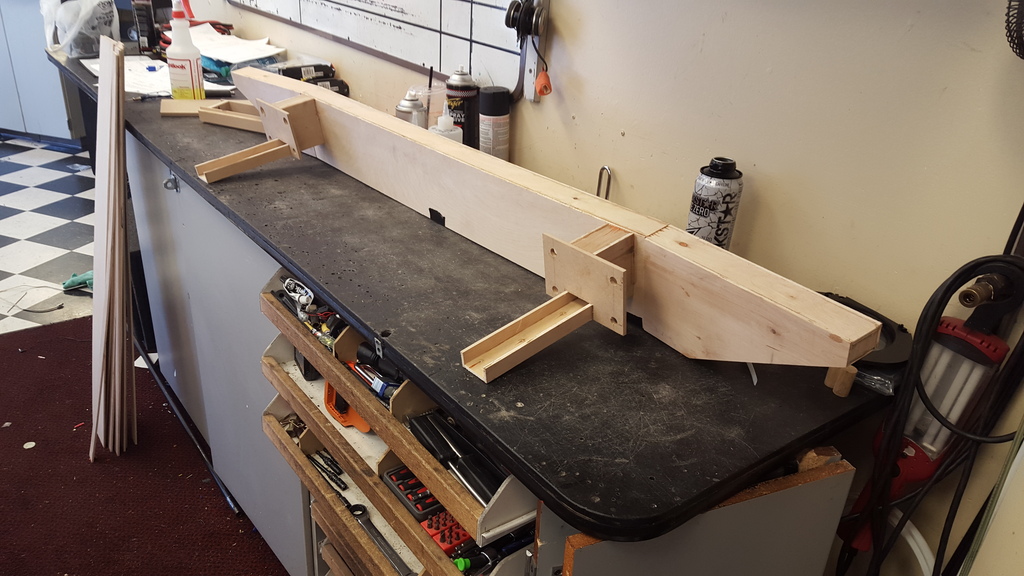
this will go to a local friend who will knock it together using a 2x6 main bar, 2x4 frame inserts, and 1/4" plate for the original mounts. I figure the 8 factory bolts along with 6 in the frame rail should make this thing plenty strong for my needs.
next step will be to design the tire/gear carrier and have that fabbed up as well.
so started yet another damn project.. lol
found a home built tire carrier bumper for sale locally for cheap, so I picked it up. there were a few things I wanted to add to it, but after looking at it at home I realized that I would be basically rebuilding the whole thing to get it how I wanted. so now I've decided to sell it off and start designing my own. I don't have the gear to do it myself, but that doesn't mean I can't develop a solid plan to hand to someone who does. and the best way to iron out the kinks? build a mock-up of course!
this will go to a local friend who will knock it together using a 2x6 main bar, 2x4 frame inserts, and 1/4" plate for the original mounts. I figure the 8 factory bolts along with 6 in the frame rail should make this thing plenty strong for my needs.
next step will be to design the tire/gear carrier and have that fabbed up as well.
06-16-2015, 04:53 PM
#290
Seasoned Member
Join Date: Jan 2014
Location: Oak Lawn, Illinois
Posts: 484
Likes: 0
Received 1 Like
on
1 Post
Year: 1997
Model: Cherokee
Engine: 4.0
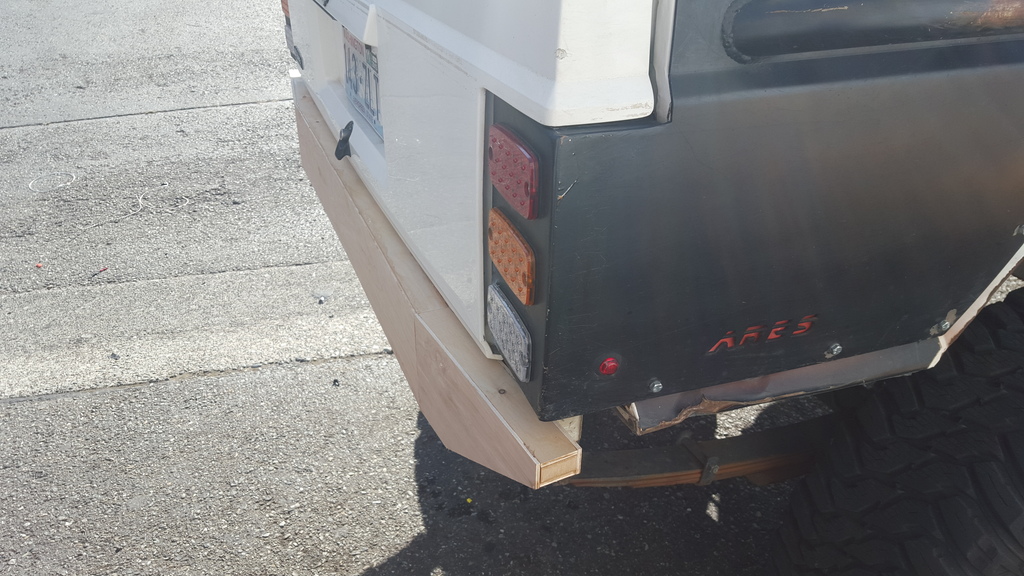
Good job on the prototype bumper looks good. Just wondering why you didn't add any thing under the cut and fold to protect the quarter
06-18-2015, 12:39 AM
#291
Senior Member
Thread Starter
Join Date: Mar 2013
Location: lake stevens, wa
Posts: 639
Likes: 0
Received 2 Likes
on
2 Posts
Year: 1996
Model: Cherokee
Engine: 4.0L
i was thinking about doing that as well. i planned on chatting with my fab guy to see what we could do with it. also want to add something under the taillight box to take up some of the gap there.

 07-13-2015, 02:26 AM
#297
Senior Member
Thread Starter
Join Date: Mar 2013
Location: lake stevens, wa
Posts: 639
Likes: 0
Received 2 Likes
on
2 Posts
Year: 1996
Model: Cherokee
Engine: 4.0L
working out great.. road noise is a lot more manageable now, and I can actually carry a conversation without having to yell. will be adding more later when I feel like pulling the rear apart again. after that I'll be doing the ceiling.
by all means, go for it! be sure to post some pics as you go
by all means, go for it! be sure to post some pics as you go
07-13-2015, 02:57 AM
#298
Senior Member
Thread Starter
Join Date: Mar 2013
Location: lake stevens, wa
Posts: 639
Likes: 0
Received 2 Likes
on
2 Posts
Year: 1996
Model: Cherokee
Engine: 4.0L
so I guess it's time for another pic dump .. haven't done a whole lot to it because I picked up another toy to goof around with. buddy at work sold me his old 190e for $200 because it was tired and ran like crap. fixed her up a bit and then shoehorned 4 12's in the trunk. she is awesomely obnoxious now.. lol
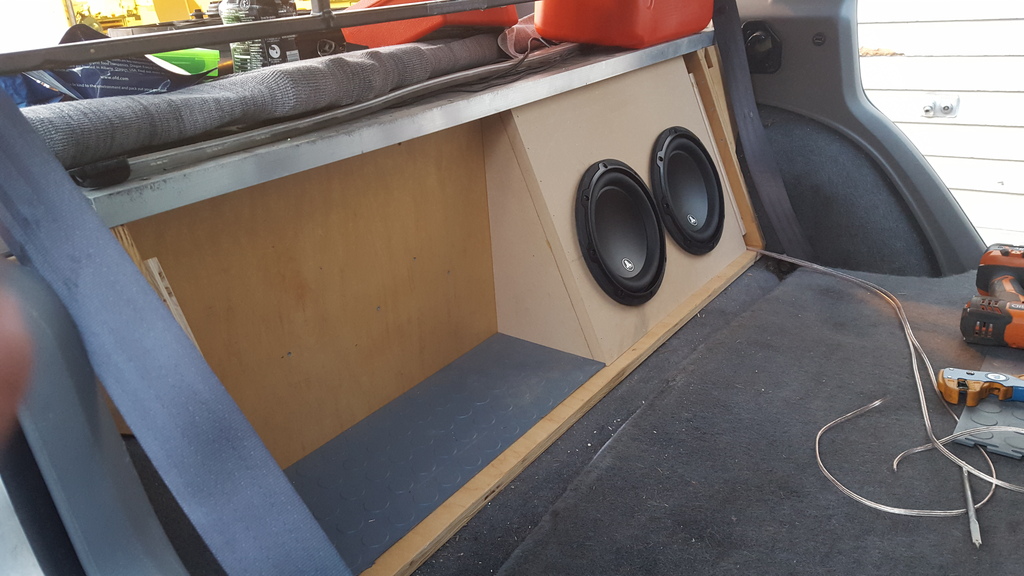
anyways, back to the jeep.. upgrading the tunes in that thing a bit, starting with new subs. the 10 in the back rattled the stuff in my drawers at higher volumes, and that bugged the crap out of me. so now I'm running 2 jl audio 8s behind the seat. airspace requirements are low, so I still have a decent amount of room for gear. they sound a hell of a lot better than that 10 did too.
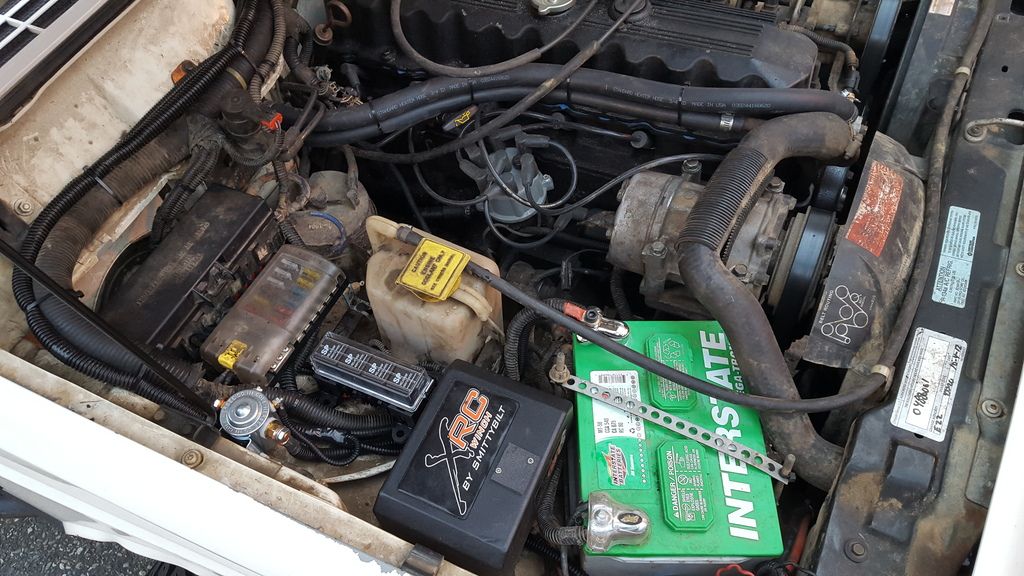
then got to cleaning stuff up under the hood a bit more. started by replacing the heater core lines and getting rid of that goofy cutoff valve. I don't have a/c anymore (or a standard heater setup either for that matter) so it was useless clutter. next i added a solenoid to separate my starting battery from the rest of the rig when the key is off. now if I happen to fall asleep with the radio on (once or twice now) I don't have to worry about waking up to a dead jeep. I also added a hella relay box for a few things like the hid's and such. some people add a second factory box, but I just don't have the room under there for that. this makes for a simple, clean solution.

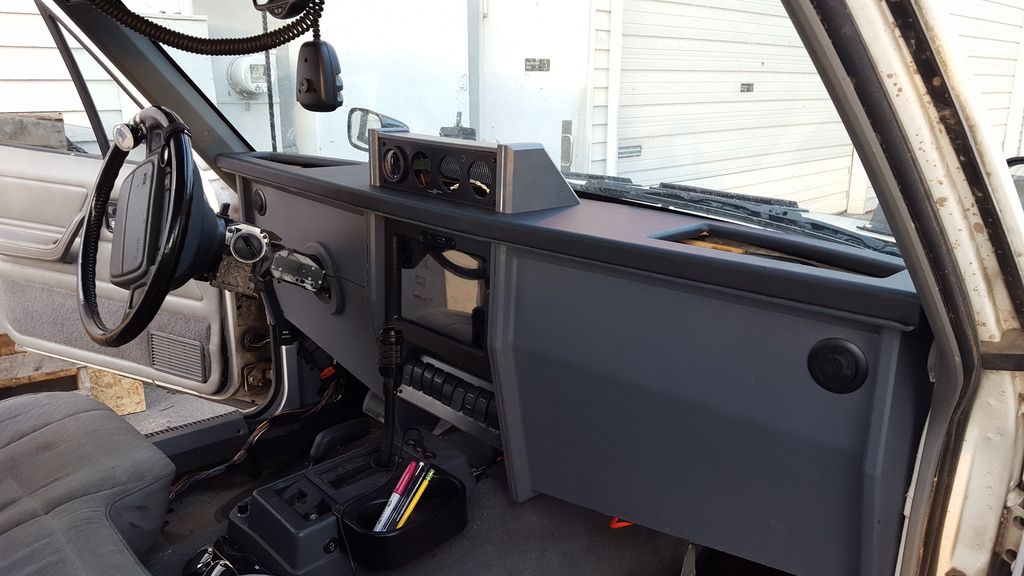
and then I decided I should probably try and get this dash wrapped up for good. started off by building the little guage pod that I'll be running. idea was to mimic the setup of the rest of the dash, and I think it turned out pretty good. still waiting on the other guages to arrive, just have fuel level for now (kind of important.. haha)
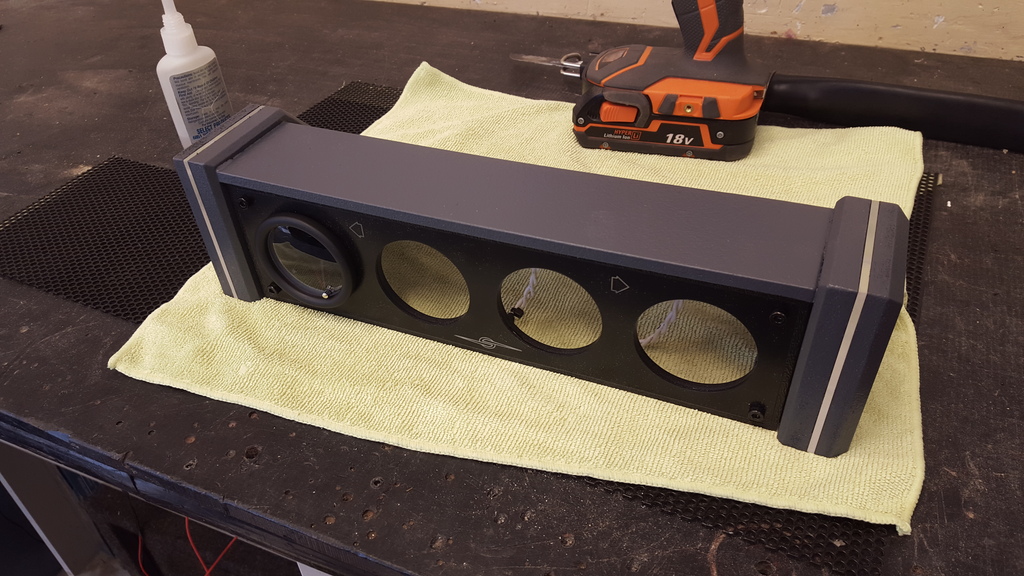
I have a computer fan behind the tablet to help with airflow around the electronics in there, so I added a mesh panel on the back to give the warm air somewhere to go
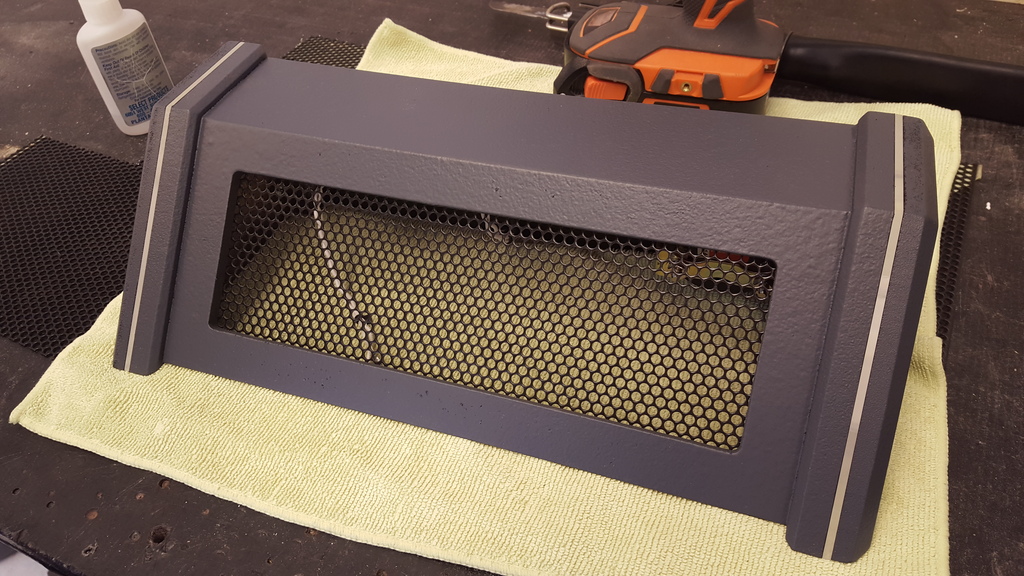
and then I made the upper dash cap and wrapped it in black vinyl for a bit of contrast. the guage pod sits right on top and lines up perfectly with the center dash section below it, which really ties it in. I still need to press out the speaker grills, but for the finish line is in sight. that's a good feeling for sure.

anyways, back to the jeep.. upgrading the tunes in that thing a bit, starting with new subs. the 10 in the back rattled the stuff in my drawers at higher volumes, and that bugged the crap out of me. so now I'm running 2 jl audio 8s behind the seat. airspace requirements are low, so I still have a decent amount of room for gear. they sound a hell of a lot better than that 10 did too.
then got to cleaning stuff up under the hood a bit more. started by replacing the heater core lines and getting rid of that goofy cutoff valve. I don't have a/c anymore (or a standard heater setup either for that matter) so it was useless clutter. next i added a solenoid to separate my starting battery from the rest of the rig when the key is off. now if I happen to fall asleep with the radio on (once or twice now) I don't have to worry about waking up to a dead jeep. I also added a hella relay box for a few things like the hid's and such. some people add a second factory box, but I just don't have the room under there for that. this makes for a simple, clean solution.
and then I decided I should probably try and get this dash wrapped up for good. started off by building the little guage pod that I'll be running. idea was to mimic the setup of the rest of the dash, and I think it turned out pretty good. still waiting on the other guages to arrive, just have fuel level for now (kind of important.. haha)
I have a computer fan behind the tablet to help with airflow around the electronics in there, so I added a mesh panel on the back to give the warm air somewhere to go
and then I made the upper dash cap and wrapped it in black vinyl for a bit of contrast. the guage pod sits right on top and lines up perfectly with the center dash section below it, which really ties it in. I still need to press out the speaker grills, but for the finish line is in sight. that's a good feeling for sure.
07-14-2015, 12:44 AM
#299
No, I don't lick fish.
so I guess it's time for another pic dump .. haven't done a whole lot to it because I picked up another toy to goof around with. buddy at work sold me his old 190e for $200 because it was tired and ran like crap. fixed her up a bit and then shoehorned 4 12's in the trunk. she is awesomely obnoxious now.. lol
anyways, back to the jeep.. upgrading the tunes in that thing a bit, starting with new subs. the 10 in the back rattled the stuff in my drawers at higher volumes, and that bugged the crap out of me. so now I'm running 2 jl audio 8s behind the seat. airspace requirements are low, so I still have a decent amount of room for gear. they sound a hell of a lot better than that 10 did too.

then got to cleaning stuff up under the hood a bit more. started by replacing the heater core lines and getting rid of that goofy cutoff valve. I don't have a/c anymore (or a standard heater setup either for that matter) so it was useless clutter. next i added a solenoid to separate my starting battery from the rest of the rig when the key is off. now if I happen to fall asleep with the radio on (once or twice now) I don't have to worry about waking up to a dead jeep. I also added a hella relay box for a few things like the hid's and such. some people add a second factory box, but I just don't have the room under there for that. this makes for a simple, clean solution.
and then I decided I should probably try and get this dash wrapped up for good. started off by building the little guage pod that I'll be running. idea was to mimic the setup of the rest of the dash, and I think it turned out pretty good. still waiting on the other guages to arrive, just have fuel level for now (kind of important.. haha)

I have a computer fan behind the tablet to help with airflow around the electronics in there, so I added a mesh panel on the back to give the warm air somewhere to go

and then I made the upper dash cap and wrapped it in black vinyl for a bit of contrast. the guage pod sits right on top and lines up perfectly with the center dash section below it, which really ties it in. I still need to press out the speaker grills, but for the finish line is in sight. that's a good feeling for sure.
anyways, back to the jeep.. upgrading the tunes in that thing a bit, starting with new subs. the 10 in the back rattled the stuff in my drawers at higher volumes, and that bugged the crap out of me. so now I'm running 2 jl audio 8s behind the seat. airspace requirements are low, so I still have a decent amount of room for gear. they sound a hell of a lot better than that 10 did too.
then got to cleaning stuff up under the hood a bit more. started by replacing the heater core lines and getting rid of that goofy cutoff valve. I don't have a/c anymore (or a standard heater setup either for that matter) so it was useless clutter. next i added a solenoid to separate my starting battery from the rest of the rig when the key is off. now if I happen to fall asleep with the radio on (once or twice now) I don't have to worry about waking up to a dead jeep. I also added a hella relay box for a few things like the hid's and such. some people add a second factory box, but I just don't have the room under there for that. this makes for a simple, clean solution.
and then I decided I should probably try and get this dash wrapped up for good. started off by building the little guage pod that I'll be running. idea was to mimic the setup of the rest of the dash, and I think it turned out pretty good. still waiting on the other guages to arrive, just have fuel level for now (kind of important.. haha)
I have a computer fan behind the tablet to help with airflow around the electronics in there, so I added a mesh panel on the back to give the warm air somewhere to go
and then I made the upper dash cap and wrapped it in black vinyl for a bit of contrast. the guage pod sits right on top and lines up perfectly with the center dash section below it, which really ties it in. I still need to press out the speaker grills, but for the finish line is in sight. that's a good feeling for sure.
07-16-2015, 01:26 PM
#300
Member
Join Date: Aug 2012
Location: Waxhaw, NC
Posts: 232
Likes: 0
Received 0 Likes
on
0 Posts
Year: 1996
Model: Cherokee
Engine: 4.0
thanks for the kind words guys
so started yet another damn project.. lol
found a home built tire carrier bumper for sale locally for cheap, so I picked it up. there were a few things I wanted to add to it, but after looking at it at home I realized that I would be basically rebuilding the whole thing to get it how I wanted. so now I've decided to sell it off and start designing my own. I don't have the gear to do it myself, but that doesn't mean I can't develop a solid plan to hand to someone who does. and the best way to iron out the kinks? build a mock-up of course!
this will go to a local friend who will knock it together using a 2x6 main bar, 2x4 frame inserts, and 1/4" plate for the original mounts. I figure the 8 factory bolts along with 6 in the frame rail should make this thing plenty strong for my needs.
next step will be to design the tire/gear carrier and have that fabbed up as well.