expedition rig build out
 03-01-2015, 11:49 AM
#271
Newbie
Join Date: Sep 2013
Location: Long Island, NY
Posts: 8
Likes: 0
Received 0 Likes
on
0 Posts
Year: 1999
Model: Cherokee
Engine: 4.0
trail readiness pic dump time 
new lights
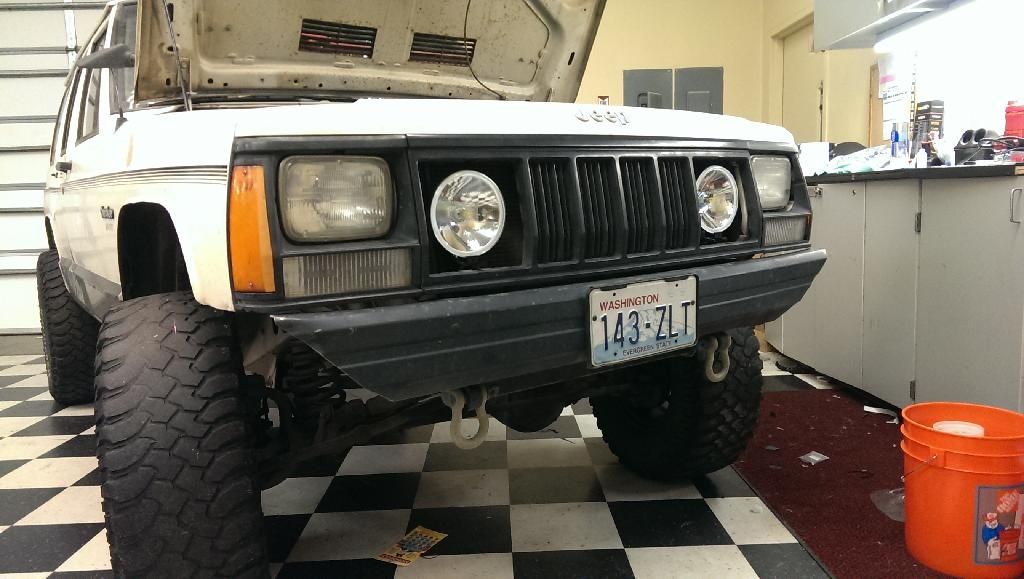
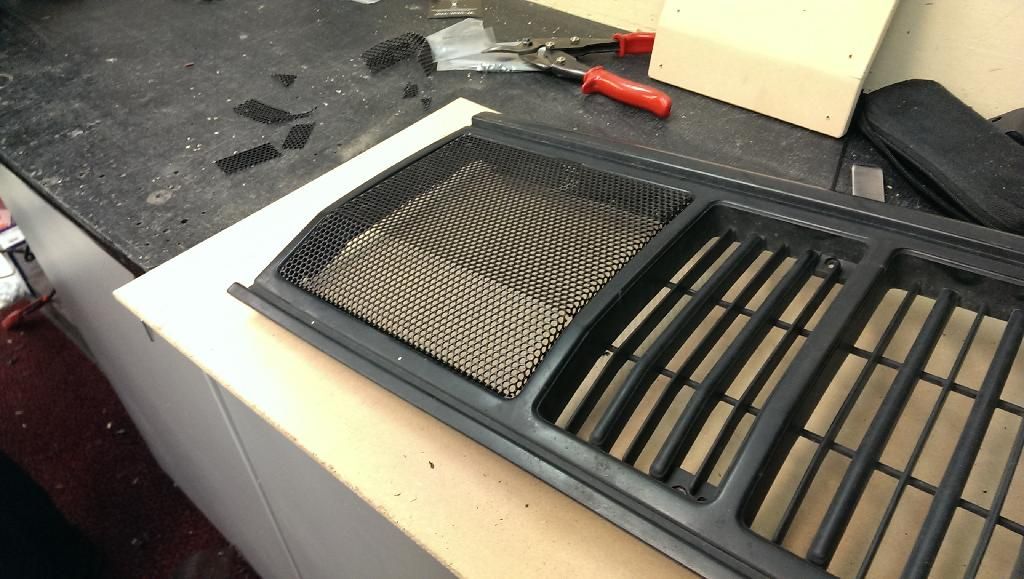
light protection..
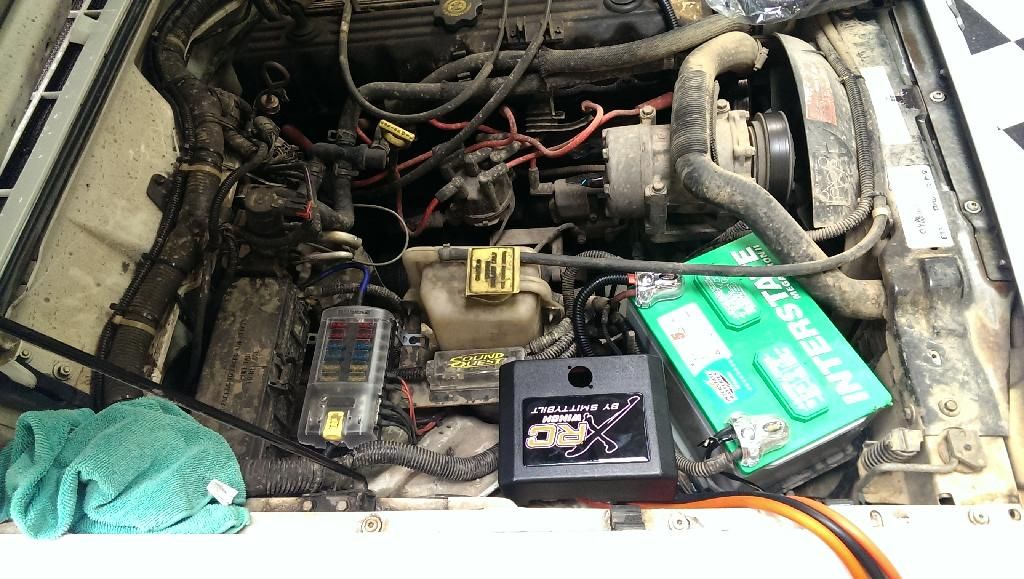
new fuse panel for accessories, and a home for the winch solenoid..
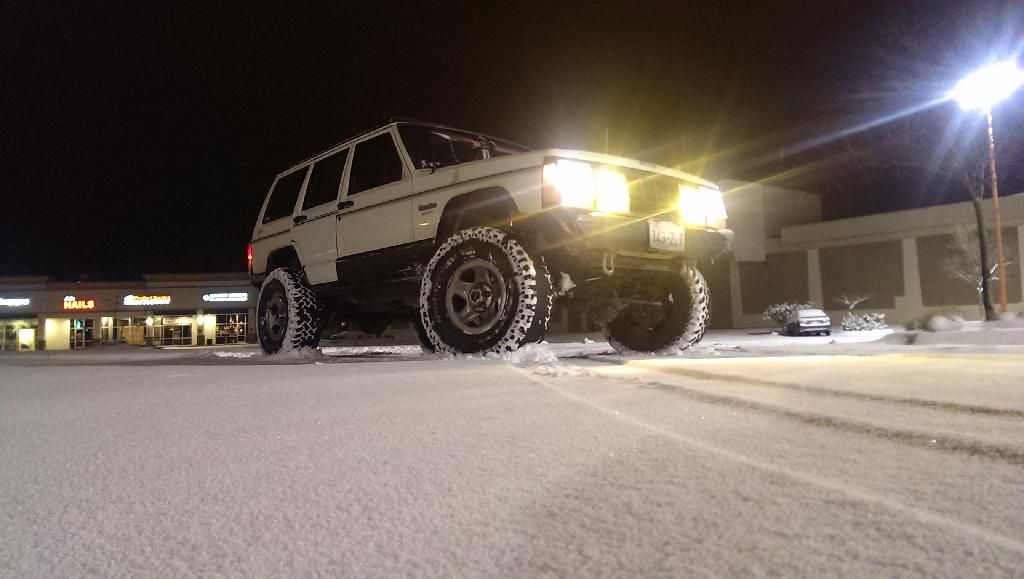
nice and bright..
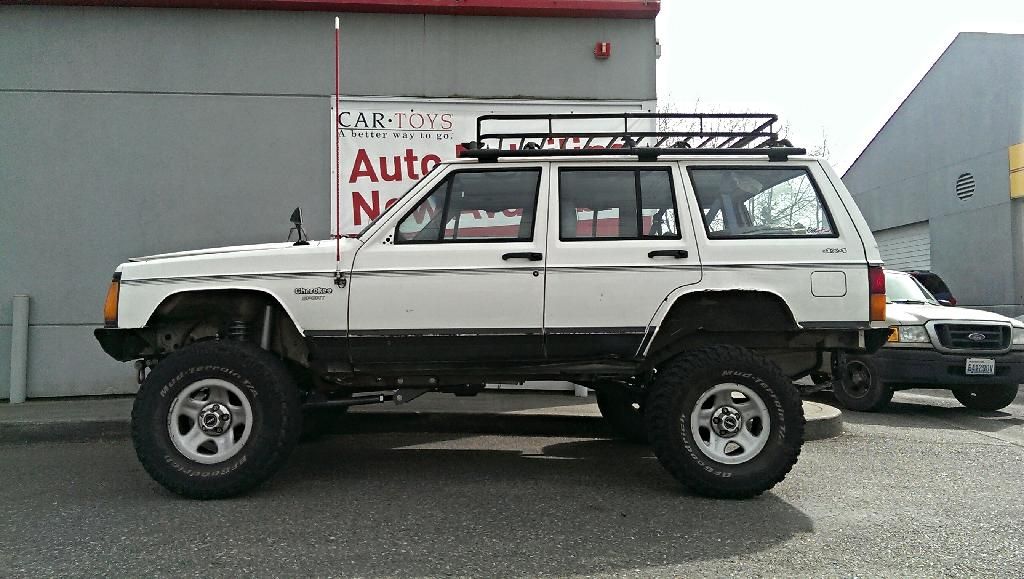
rc 4.5" long arm kit installed, as well as new roof rack setup from olympic 4x4..
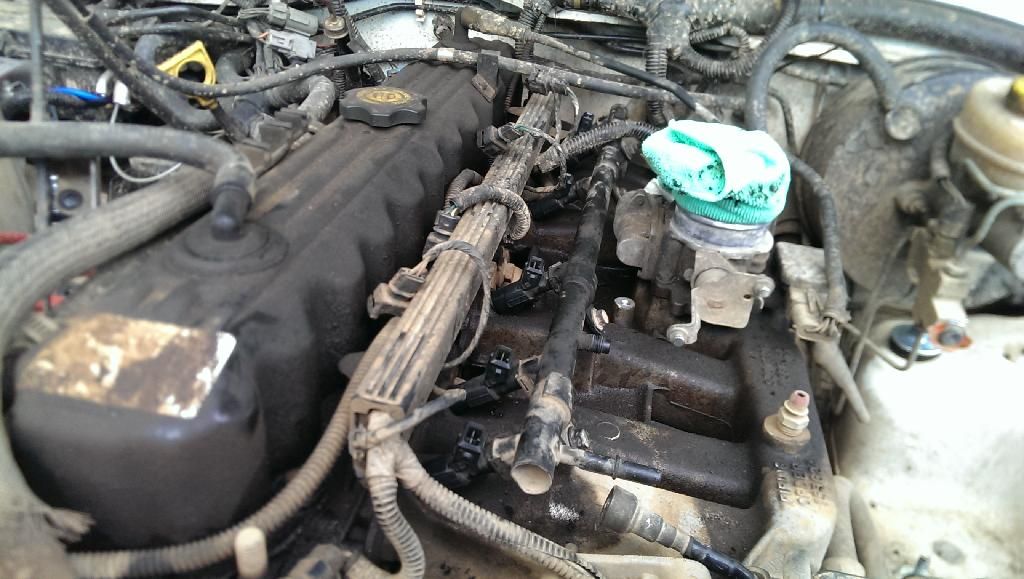
bosch 703 injector swap..
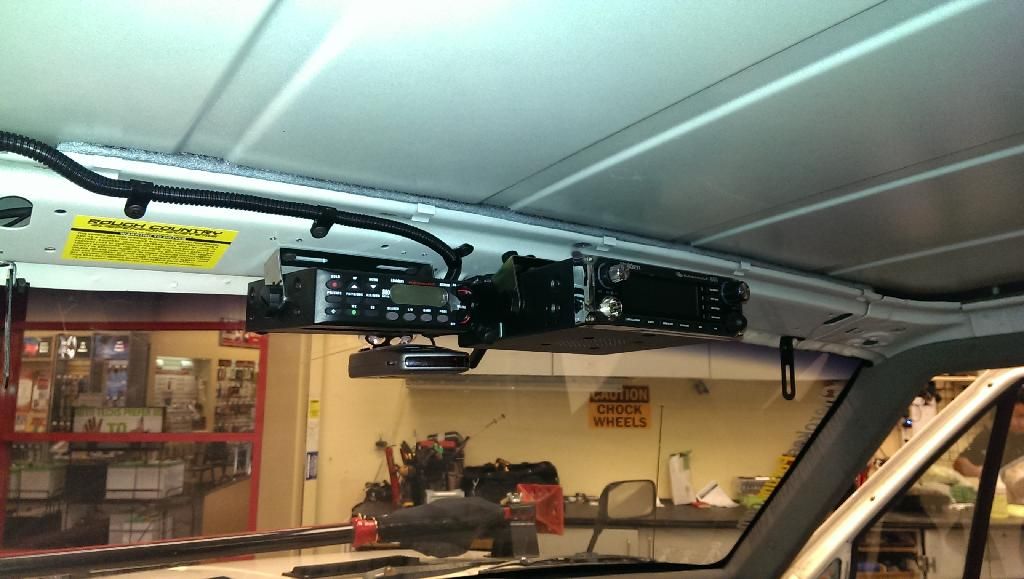
new scanner and cb..
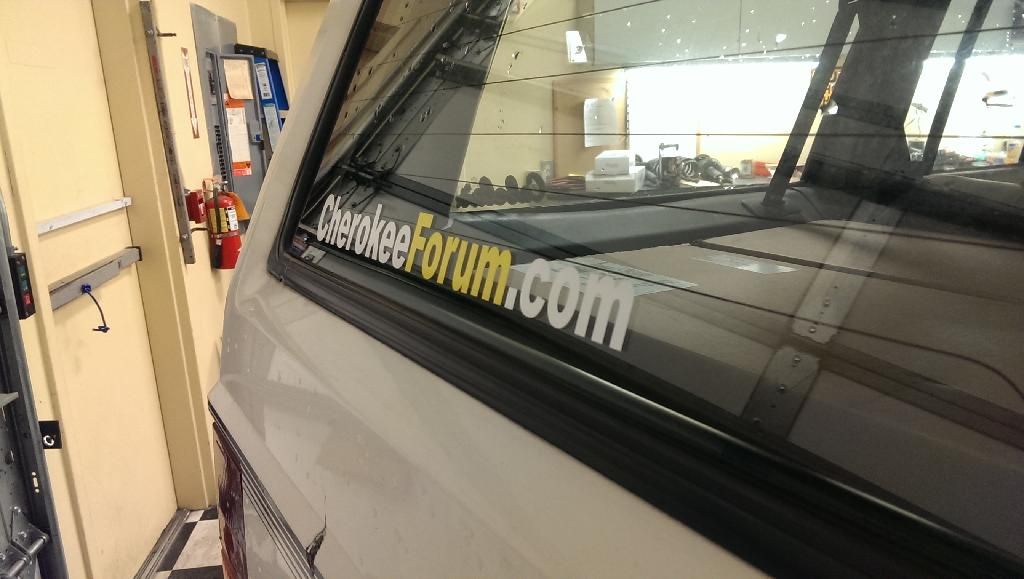
best addition yet
new lights
light protection..
new fuse panel for accessories, and a home for the winch solenoid..
nice and bright..
rc 4.5" long arm kit installed, as well as new roof rack setup from olympic 4x4..
bosch 703 injector swap..
new scanner and cb..
best addition yet
 03-06-2015, 02:28 AM
#272
Senior Member
Thread Starter
Join Date: Mar 2013
Location: lake stevens, wa
Posts: 639
Likes: 0
Received 2 Likes
on
2 Posts
Year: 1996
Model: Cherokee
Engine: 4.0L
noise isn't any worse than it was before I guess.. I don't pay attention really. I do plan on sound deadening it eventually tho, just because
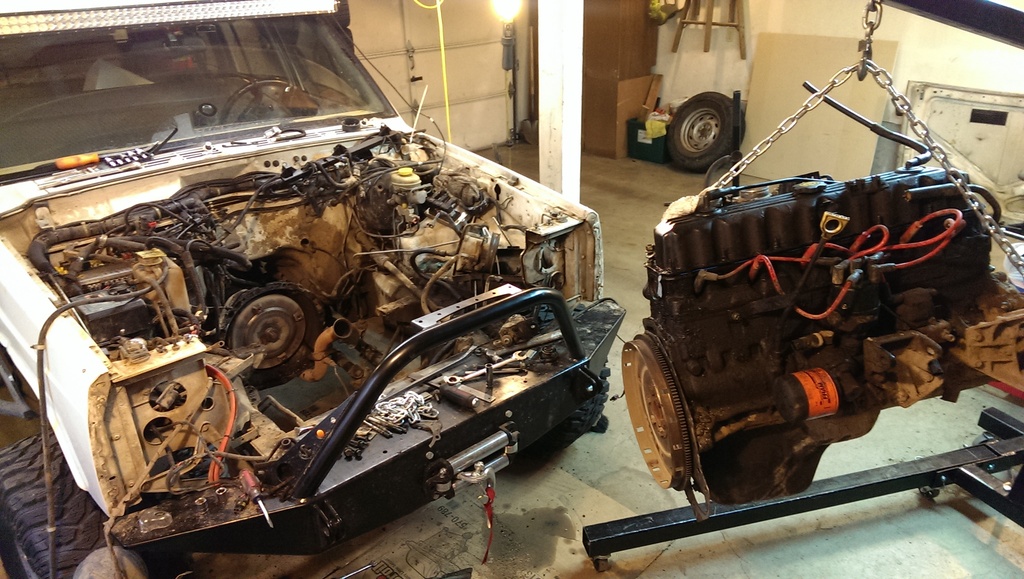
so, blew the motor last weekend (already have a replacement lined up tho) but that won't stop the projects. so carrying on..
I bought these
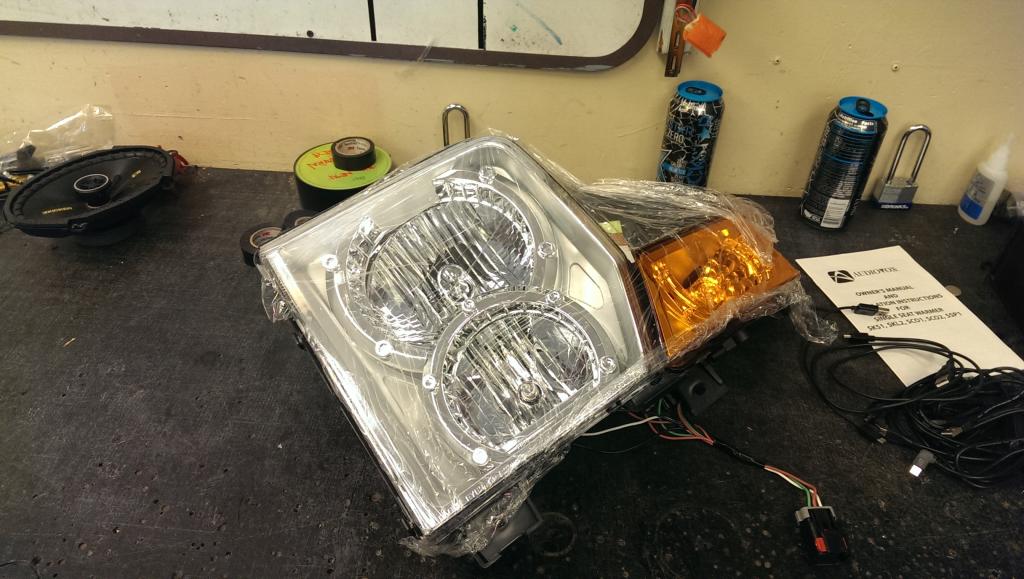
and scored a deal on some of these
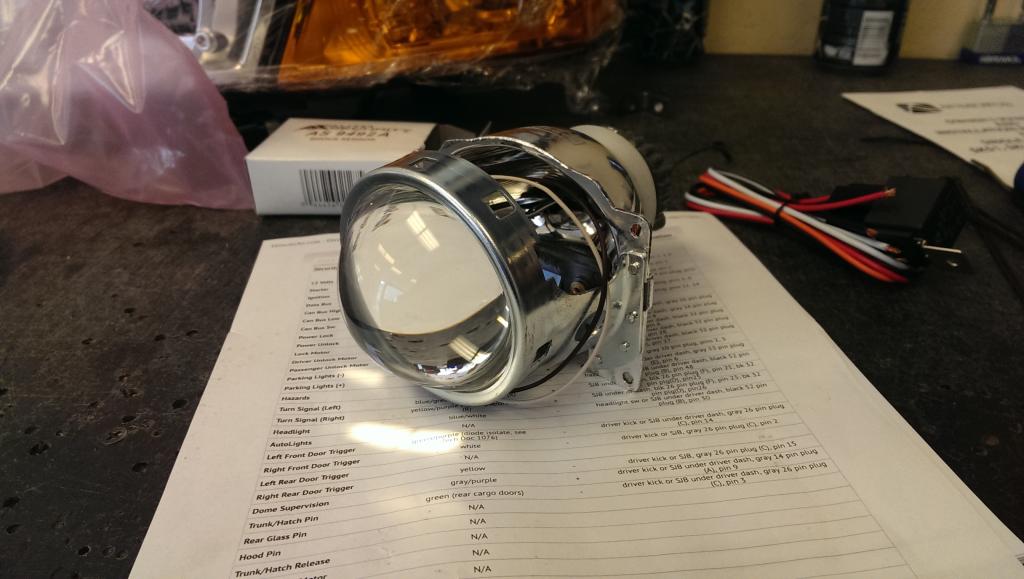
so I did this
liked it, so I did this too
to be continued later..
so, blew the motor last weekend (already have a replacement lined up tho) but that won't stop the projects. so carrying on..
I bought these
and scored a deal on some of these
so I did this
liked it, so I did this too
to be continued later..
03-23-2015, 02:56 AM
#273
Senior Member
Thread Starter
Join Date: Mar 2013
Location: lake stevens, wa
Posts: 639
Likes: 0
Received 2 Likes
on
2 Posts
Year: 1996
Model: Cherokee
Engine: 4.0L
man, have I been slacking on the updates.. so let's start with some simple things
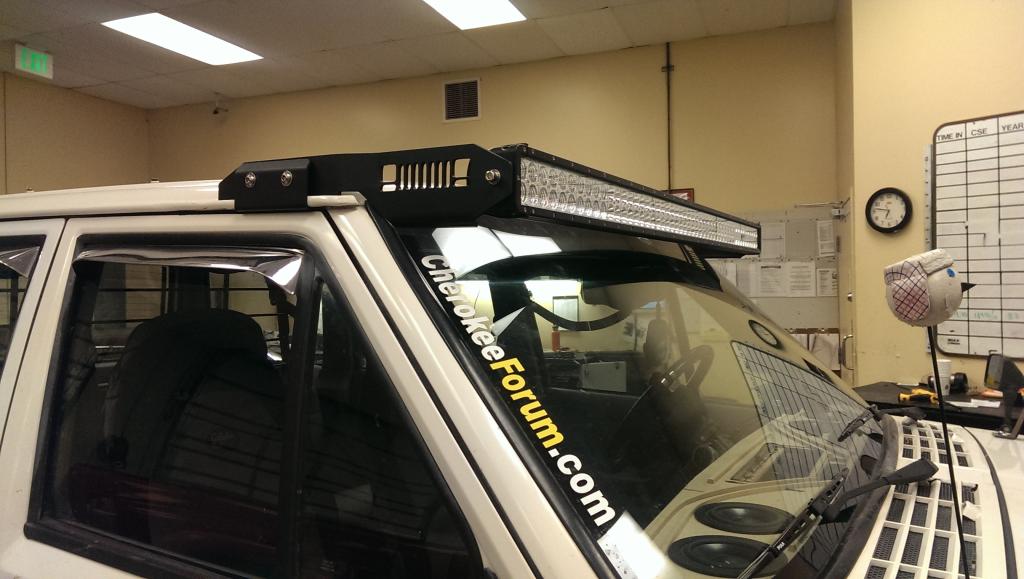
first, I upgraded my lighting situation with an eyourlife amazon special lightbar. on the suggestion of several people who purchased one, I took the thing apart and sealed it up with silicone the minute I received it. then I bolted it up to the awesome hooligan offroad mounts I had ordered (which cost me as much as the damn light bar did.. haha) and tossed it on the roof. I love that these mounts set it in front of the windshield instead of up in the air.
next I installed my rusty's offroad winch bumper. I know a lot of people are iffy on it, but I like it a lot. especially the way it keeps the winch out of the way for security and approach angle purposes. let me tell you how much it sucked to have to hang a bumper and winch at the same time tho.. holy crap was that heavy!
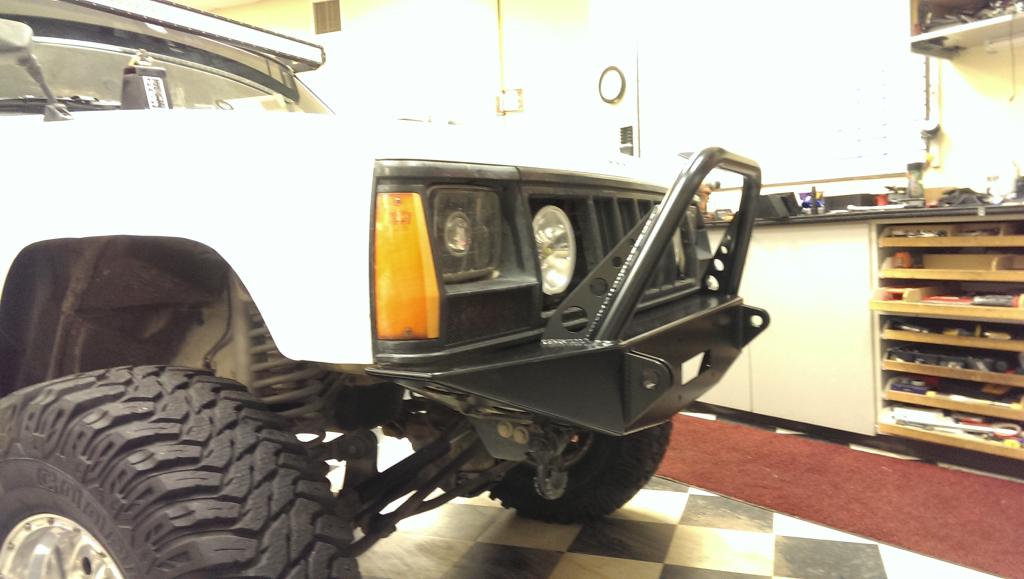
I also added a little bit of protection to my little d30 by means of a rusty's guard. in don't do anything too crazy in this rig, but you know what they say about an ounce of prevention

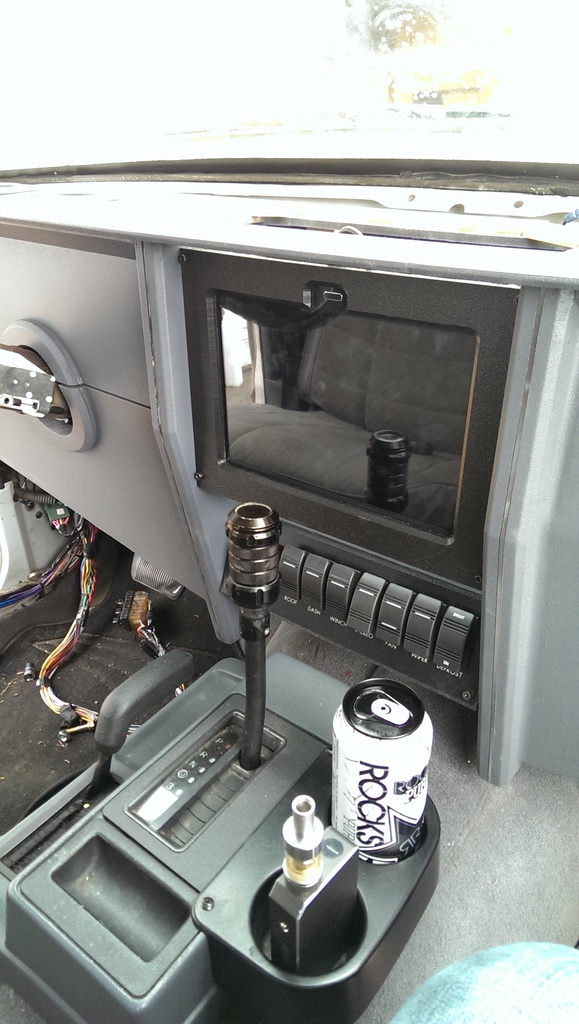
so with a couple bolt ons out of the way, it was time to get back to building things. I decided I wasn't 100% sold on the dash how it was. the tablet was a bit smallish, and sat annoyingly out of arm's reach unless I leaned forward. the smallish part really bugged me.. what was the point of going for different if I ended up with a screen the same size as the double din I had removed to start this whole project? so out the center section went, and this went in instead
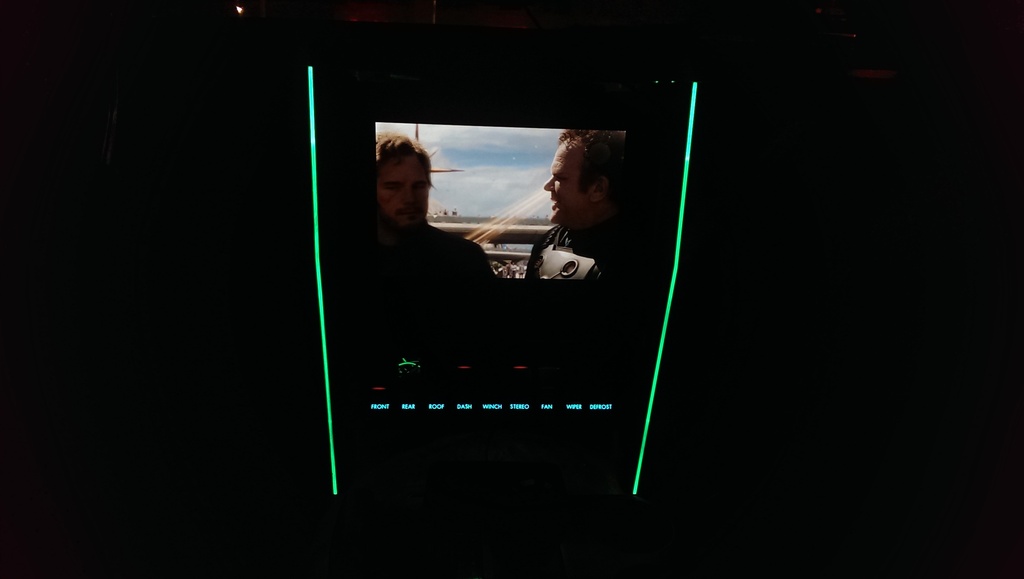
you like that night time teaser? yeah.. me too. here's what she looks like when the lights come on. 10 inches of galaxy pad glory. soooo hot! lol
was glad I got that finished when I did, because it came in handy a week later. I was 2 hours away from home when disaster struck. 5 minutes away from a wheeling spot (after driving for 2 hours without incident) my motor decided it didn't want to be a part of this rig anymore. it started with a blown head gasket and ended with a weird case of coolant-induced hydrolock in cylinder #2.. at least that's our best guess anyway. so after patching it together the best we could (thanks to a really great guy who helped me in his driveway til 3:30am.. you are the man Jason) I limped her home. she wasn't happy about it, but she didn't give up til we made it safely to her parking spot in front of my condo. atta girl..
a week later I scored a used motor and towed it to my buddy's house to get her running again. that was fun.
first, I upgraded my lighting situation with an eyourlife amazon special lightbar. on the suggestion of several people who purchased one, I took the thing apart and sealed it up with silicone the minute I received it. then I bolted it up to the awesome hooligan offroad mounts I had ordered (which cost me as much as the damn light bar did.. haha) and tossed it on the roof. I love that these mounts set it in front of the windshield instead of up in the air.
next I installed my rusty's offroad winch bumper. I know a lot of people are iffy on it, but I like it a lot. especially the way it keeps the winch out of the way for security and approach angle purposes. let me tell you how much it sucked to have to hang a bumper and winch at the same time tho.. holy crap was that heavy!
I also added a little bit of protection to my little d30 by means of a rusty's guard. in don't do anything too crazy in this rig, but you know what they say about an ounce of prevention
so with a couple bolt ons out of the way, it was time to get back to building things. I decided I wasn't 100% sold on the dash how it was. the tablet was a bit smallish, and sat annoyingly out of arm's reach unless I leaned forward. the smallish part really bugged me.. what was the point of going for different if I ended up with a screen the same size as the double din I had removed to start this whole project? so out the center section went, and this went in instead
you like that night time teaser? yeah.. me too. here's what she looks like when the lights come on. 10 inches of galaxy pad glory. soooo hot! lol
was glad I got that finished when I did, because it came in handy a week later. I was 2 hours away from home when disaster struck. 5 minutes away from a wheeling spot (after driving for 2 hours without incident) my motor decided it didn't want to be a part of this rig anymore. it started with a blown head gasket and ended with a weird case of coolant-induced hydrolock in cylinder #2.. at least that's our best guess anyway. so after patching it together the best we could (thanks to a really great guy who helped me in his driveway til 3:30am.. you are the man Jason) I limped her home. she wasn't happy about it, but she didn't give up til we made it safely to her parking spot in front of my condo. atta girl..
a week later I scored a used motor and towed it to my buddy's house to get her running again. that was fun.
Last edited by uber; 03-23-2015 at 03:01 AM.
03-23-2015, 03:32 AM
#274
Senior Member
Thread Starter
Join Date: Mar 2013
Location: lake stevens, wa
Posts: 639
Likes: 0
Received 2 Likes
on
2 Posts
Year: 1996
Model: Cherokee
Engine: 4.0L
so we've taken this thing on a few camping trips, and living in Washington means the weather isn't always awesome. this usually leads to my daughters beating a hasty retreat to the jeep for a dry night's sleep. this usually resulted in a bitter battle as to who got to spawl out in the back seat while the other suffered the night in reclined bucket hell. so it hit me.. why not have 2 bench seats? I've owned a lot of old cars over the years, and I've always been a huge fan of having a bench up front. this isn't a race car by any means, so why not? I figured with as many mj guys wanted to swap to buckets, there must be hundreds of old unwanted benches looking for a new home.
I thought wrong.. talk about a needle in a haystack. I must have spent 6 months looking for a decent bench for sale. but luckily, fate kicked in and I was in business. my buddy Jason (the one I mentioned in my last post who helped me with my breakdown) had just recently picked up an mj with a gray bench seat, and was wanting to swap it out to a set of xj buckets. as a matter of fact, we were supposed to swap seats after that wheeling trip. but of course that didn't quite go to plan. oh well, I ended up picking it up from him on the same trip I took to pick up my new motor. so with my new bench in hand, it was time to figure out how to get it mounted.
let me be the first to tell you, that was nowhere near as easy as I had thought it was going to be. I ended up having to use the outside mounts of my xj seats, albeit slightly 'modified'. first I had to grind off the rivet heads and beat the sliders off the 'feet' as the sliders put my head into the ceiling. then I had to break the foot into it's two separate pieces and come up with a way to reattach them a bit more stretched than before. doing this made them a bit flimsy (ok, a lot flimsy) so I had to find something to fix that as well. in the end, I used a piece of angle iron as a splint of sorts and bolted the whole thing together. this is what I ended up with
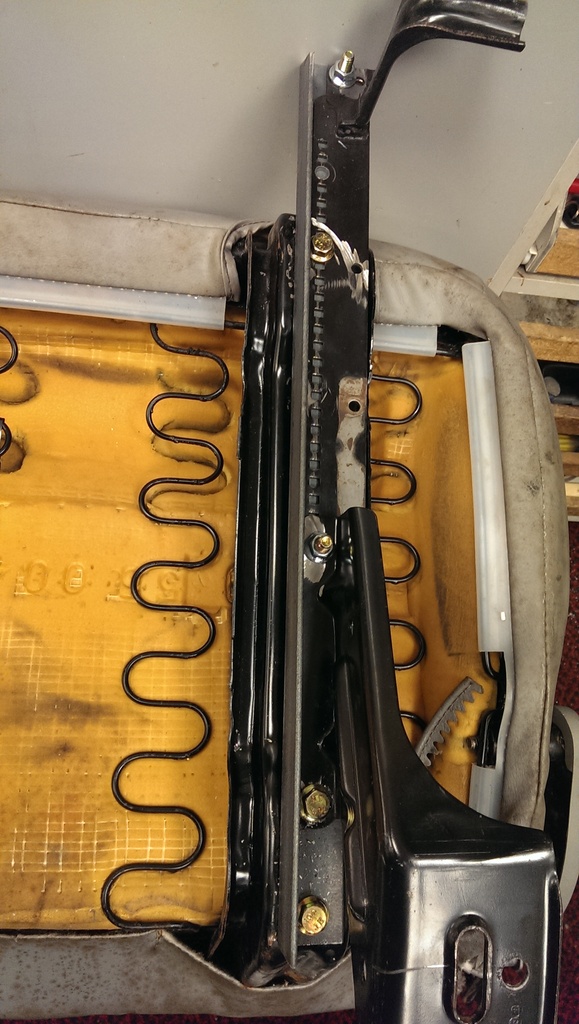
since there were no longer any sliders, wherever I put the bench was were it was going to stay. after a lot of measuring and test fitting, I finally decided on a good spot and bolted it all together for the last time. after that, I drilled new holes in the floor for the rear mounts (due to the design of the bench, the rails landed dead center between the old bolt holes) once those were in, I drilled a couple holes in the front mount beam and installed some heavy duty threaded inserts. a bunch of grade 8 hardware later, I was done.
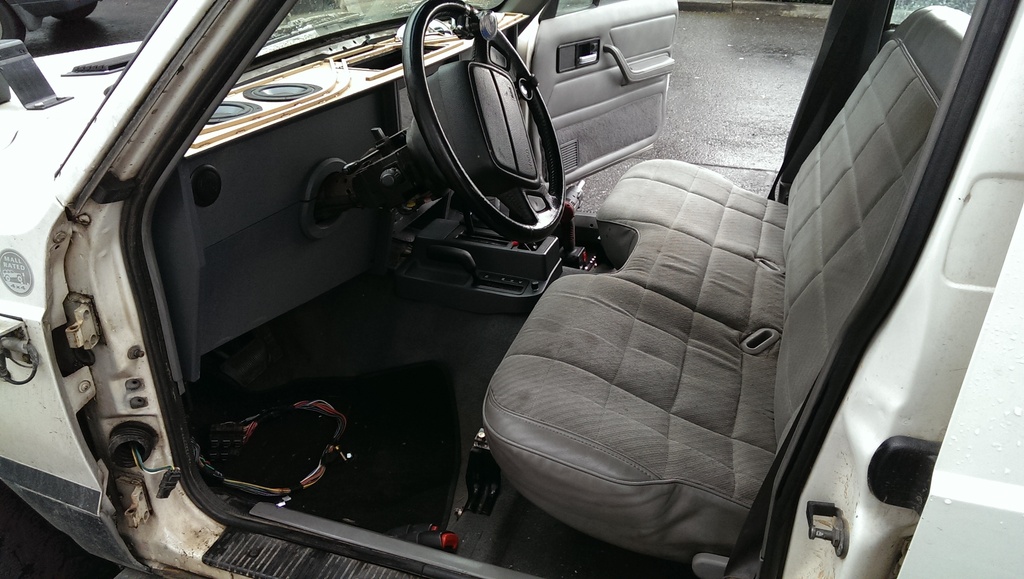
I still need to have my detailer give it a thorough cleaning, but man is that thing comfy. I installed heated elements in the bottom cushion today, and ordered another set so I can do the upper section a well. overall, I am extremely happy with this swap and I'm sure my girls will be as well on our next rainy camping trip.
I thought wrong.. talk about a needle in a haystack. I must have spent 6 months looking for a decent bench for sale. but luckily, fate kicked in and I was in business. my buddy Jason (the one I mentioned in my last post who helped me with my breakdown) had just recently picked up an mj with a gray bench seat, and was wanting to swap it out to a set of xj buckets. as a matter of fact, we were supposed to swap seats after that wheeling trip. but of course that didn't quite go to plan. oh well, I ended up picking it up from him on the same trip I took to pick up my new motor. so with my new bench in hand, it was time to figure out how to get it mounted.
let me be the first to tell you, that was nowhere near as easy as I had thought it was going to be. I ended up having to use the outside mounts of my xj seats, albeit slightly 'modified'. first I had to grind off the rivet heads and beat the sliders off the 'feet' as the sliders put my head into the ceiling. then I had to break the foot into it's two separate pieces and come up with a way to reattach them a bit more stretched than before. doing this made them a bit flimsy (ok, a lot flimsy) so I had to find something to fix that as well. in the end, I used a piece of angle iron as a splint of sorts and bolted the whole thing together. this is what I ended up with
since there were no longer any sliders, wherever I put the bench was were it was going to stay. after a lot of measuring and test fitting, I finally decided on a good spot and bolted it all together for the last time. after that, I drilled new holes in the floor for the rear mounts (due to the design of the bench, the rails landed dead center between the old bolt holes) once those were in, I drilled a couple holes in the front mount beam and installed some heavy duty threaded inserts. a bunch of grade 8 hardware later, I was done.
I still need to have my detailer give it a thorough cleaning, but man is that thing comfy. I installed heated elements in the bottom cushion today, and ordered another set so I can do the upper section a well. overall, I am extremely happy with this swap and I'm sure my girls will be as well on our next rainy camping trip.
Last edited by uber; 03-23-2015 at 03:37 AM.
03-23-2015, 03:53 AM
#275
Senior Member
Thread Starter
Join Date: Mar 2013
Location: lake stevens, wa
Posts: 639
Likes: 0
Received 2 Likes
on
2 Posts
Year: 1996
Model: Cherokee
Engine: 4.0L
oh yeah, I also ended up adding a proper second battery using bleepingjeep's method with a regular battery tray. now I've got plenty of juice for my current/future mods. excuse the mess, this is the only pic I have of them both at the moment

note to admin : I'm wondering if this thread still belongs here, or if it should be moved to build threads? I try to share a lot of fab stuff, but I know there's a lot of regular bolt on stuff as well. I'm good either way.. uber
note to admin : I'm wondering if this thread still belongs here, or if it should be moved to build threads? I try to share a lot of fab stuff, but I know there's a lot of regular bolt on stuff as well. I'm good either way.. uber
 04-20-2015, 03:43 PM
#278
CF Veteran
Quick question. The metal grill material you used as your aux light protection, what is the name of it? Like metal speaker grill or something like that?
04-22-2015, 01:58 AM
#279
Senior Member
Thread Starter
Join Date: Mar 2013
Location: lake stevens, wa
Posts: 639
Likes: 0
Received 2 Likes
on
2 Posts
Year: 1996
Model: Cherokee
Engine: 4.0L
04-22-2015, 11:02 PM
#280
Senior Member
Thread Starter
Join Date: Mar 2013
Location: lake stevens, wa
Posts: 639
Likes: 0
Received 2 Likes
on
2 Posts
Year: 1996
Model: Cherokee
Engine: 4.0L
took a bit of a timeout from the jeep mods for a bit while I tricked out a 2 seater gokart I picked up for my kids. but now that that's done, its time to get back to business.
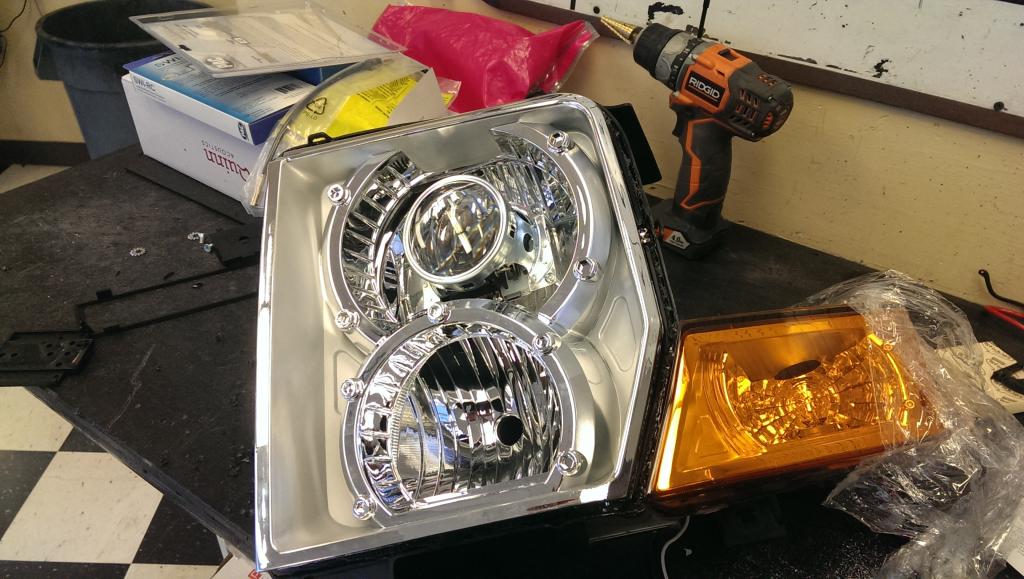
so going back to the headlights.. the first one is now complete!
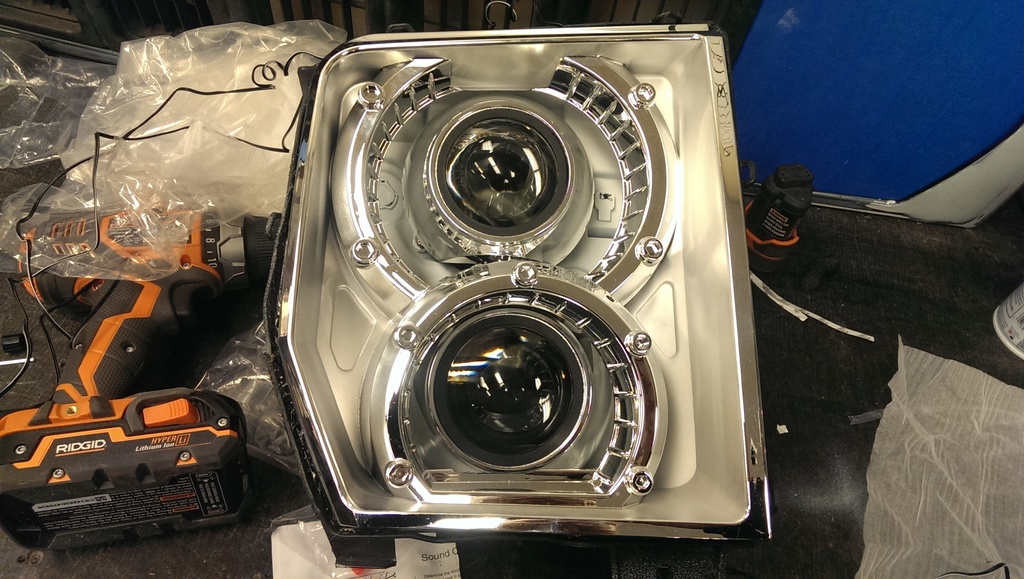
instead of adding a bulb for the turn signal, I decided to do something a bit different.
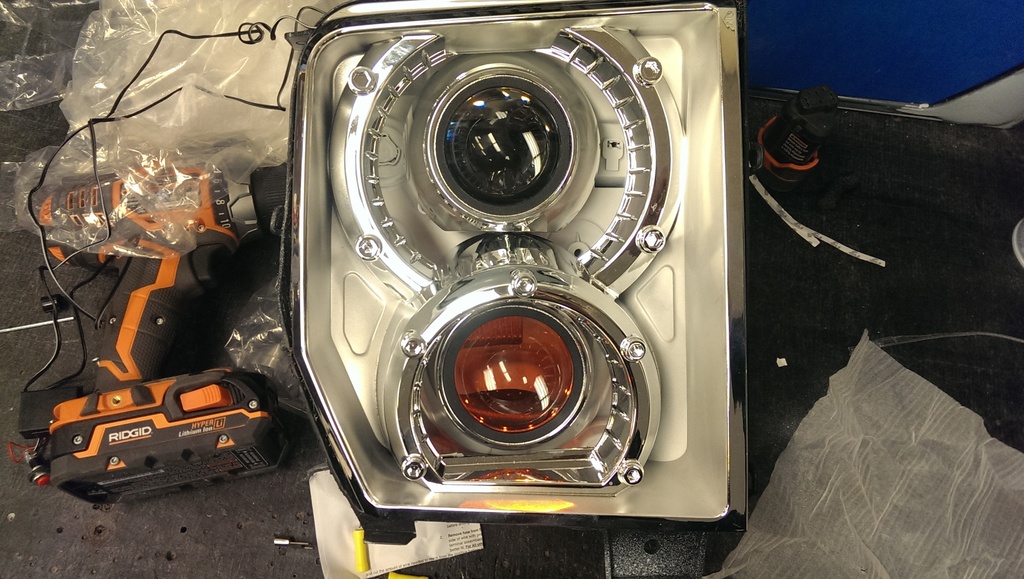
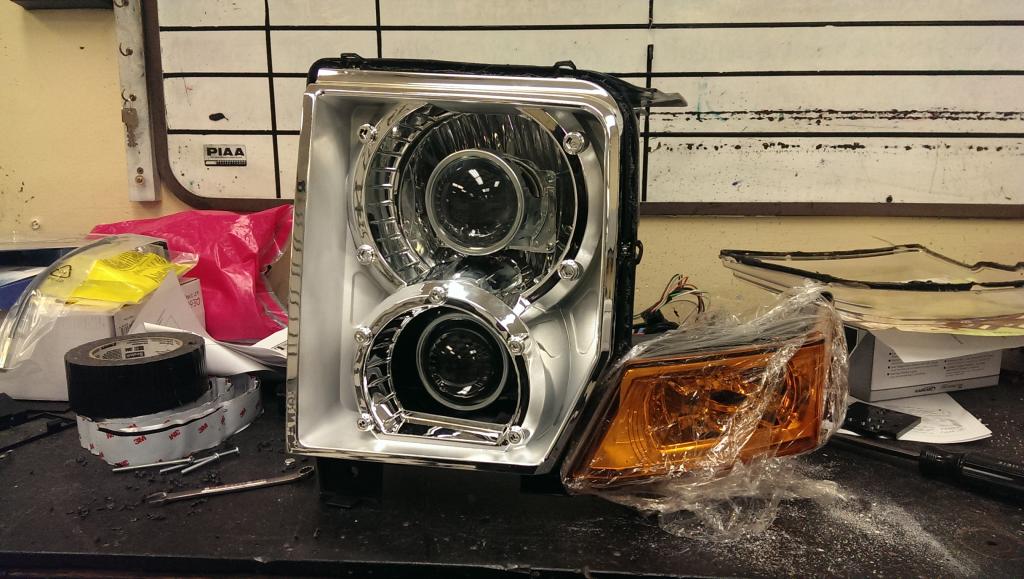
in the headlight retrofit community, this is referred to as demon eyes. its basically just an orange led strip that sits around the inside of the lens housing. makes for a cool effect when on, but doesn't interfere with regular light output when the light is on. I do have plans for different turn signals for later down the road, but these should keep me legal. which is all I really care about at the moment.
and while I had it apart, I decided to add a little bling factor to match my other lighting.
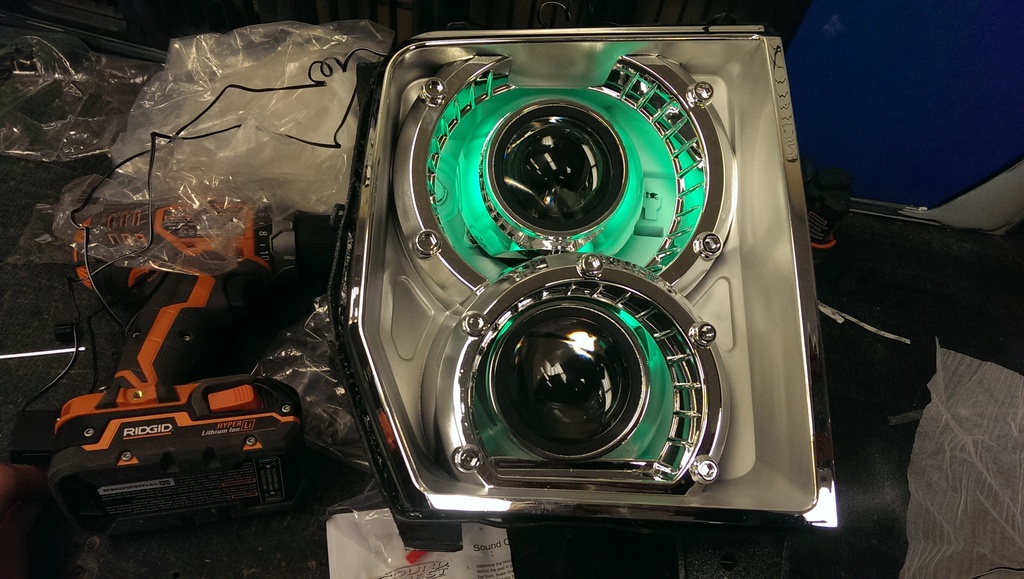
now I just gotta do the other one to match
so going back to the headlights.. the first one is now complete!
instead of adding a bulb for the turn signal, I decided to do something a bit different.
in the headlight retrofit community, this is referred to as demon eyes. its basically just an orange led strip that sits around the inside of the lens housing. makes for a cool effect when on, but doesn't interfere with regular light output when the light is on. I do have plans for different turn signals for later down the road, but these should keep me legal. which is all I really care about at the moment.
and while I had it apart, I decided to add a little bling factor to match my other lighting.
now I just gotta do the other one to match
04-22-2015, 11:29 PM
#281
Senior Member
Thread Starter
Join Date: Mar 2013
Location: lake stevens, wa
Posts: 639
Likes: 0
Received 2 Likes
on
2 Posts
Year: 1996
Model: Cherokee
Engine: 4.0L
figured i should probably get the grill started while i had the headlight lenses off to play with.
here's the original headlight bucket..
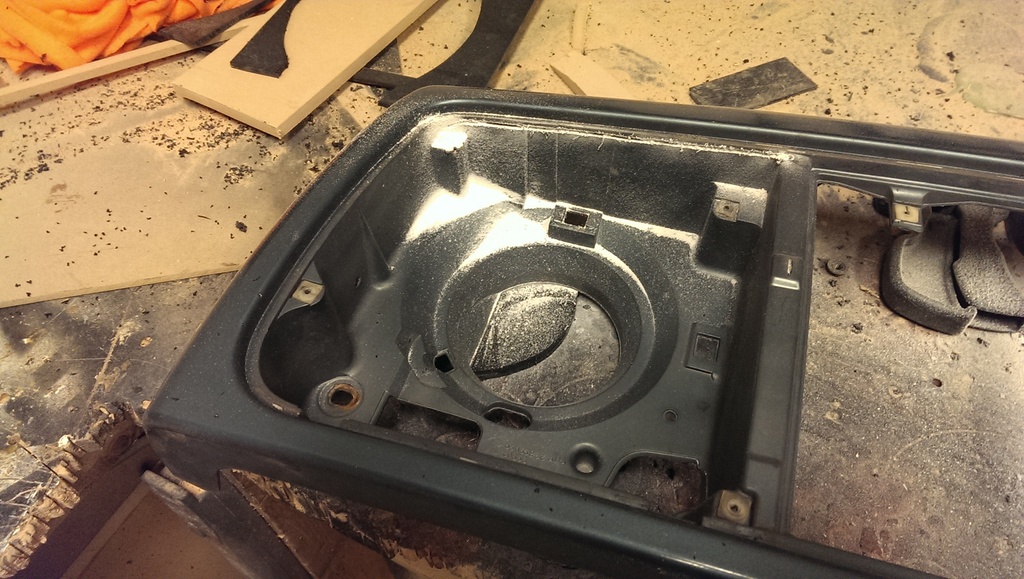
so lets make all of that go away..

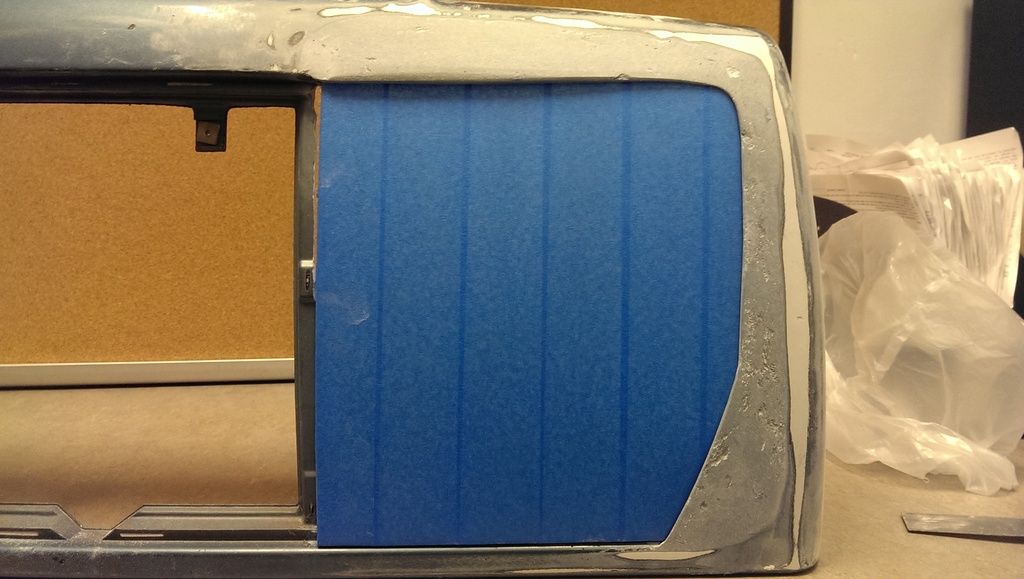
then start cutting material until the lens fits where you want it..

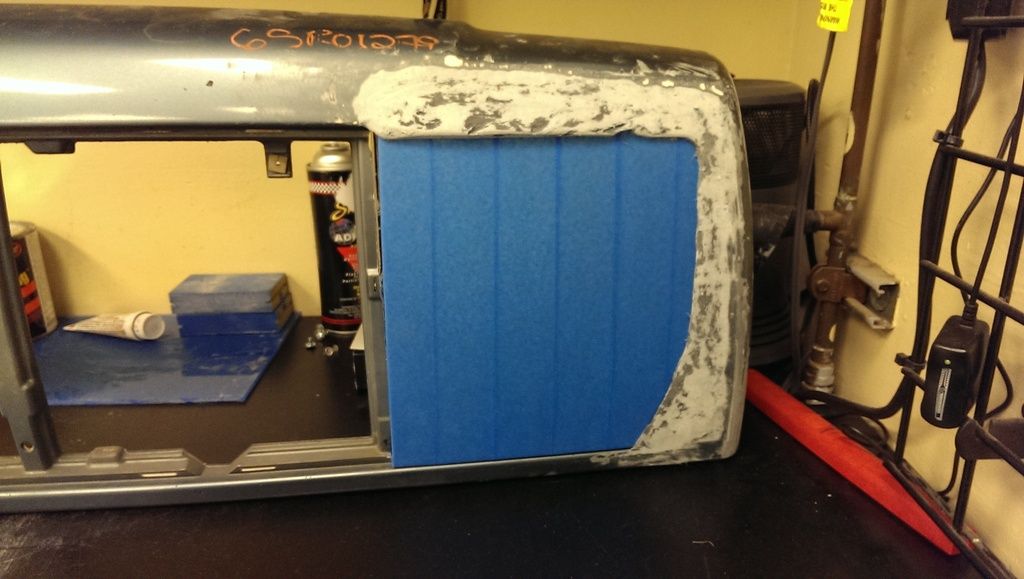
then start packing in the kitty hair (like bondo with embedded fiberglass strands) to get the rough shape..

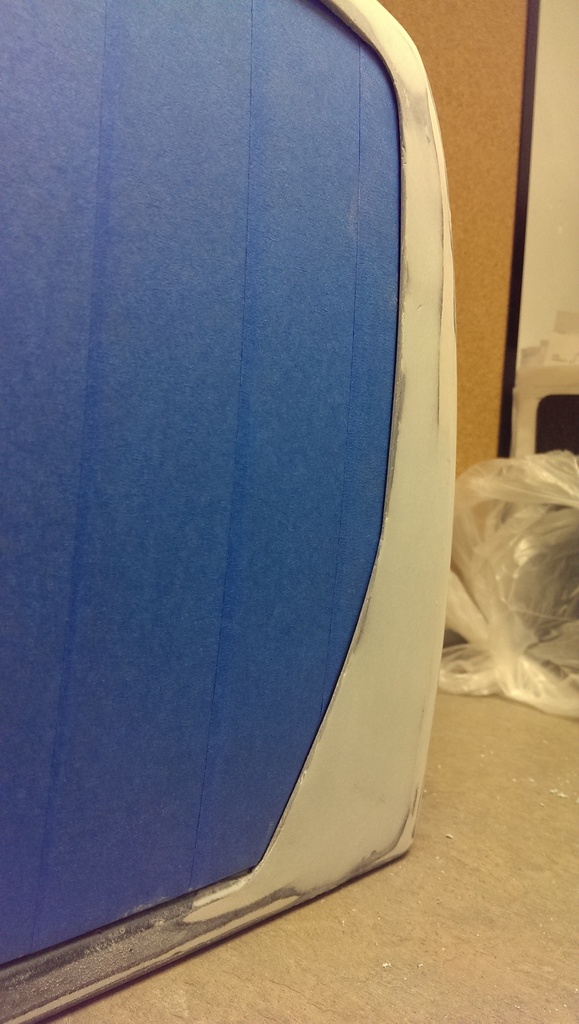
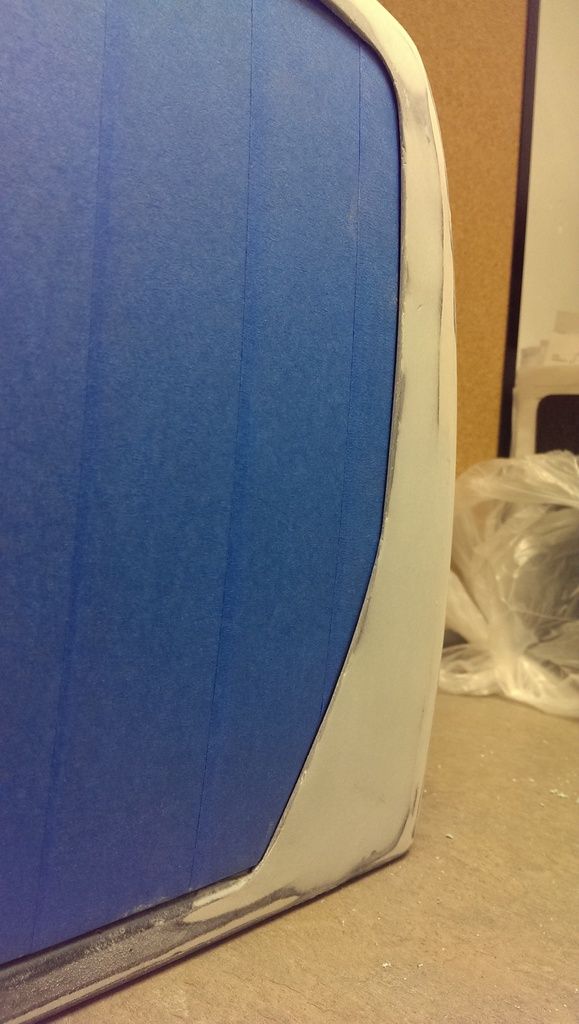
continue sanding until you're happy with the fit..
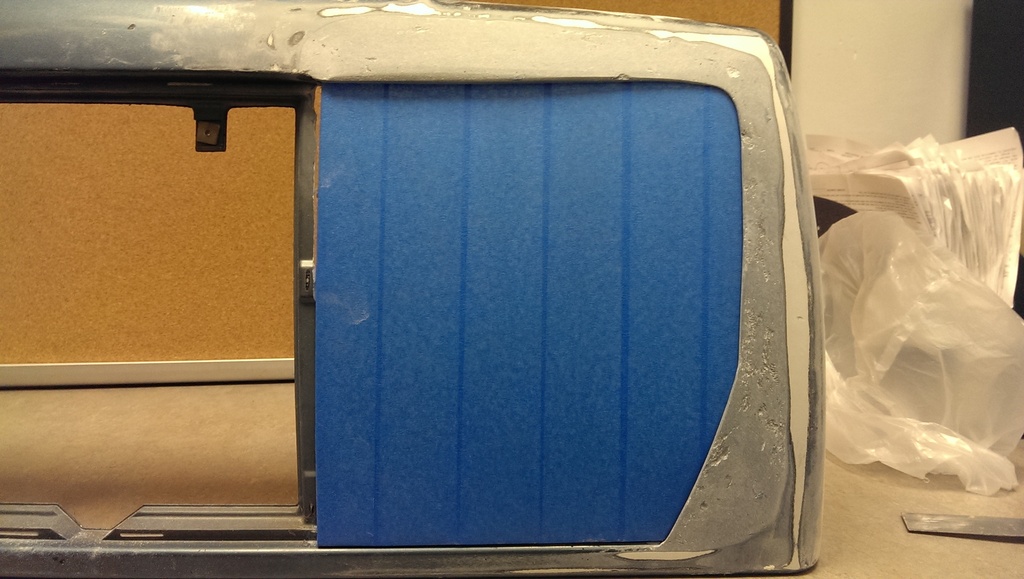
then bondo to fill in the minor voids and clean up the edges..
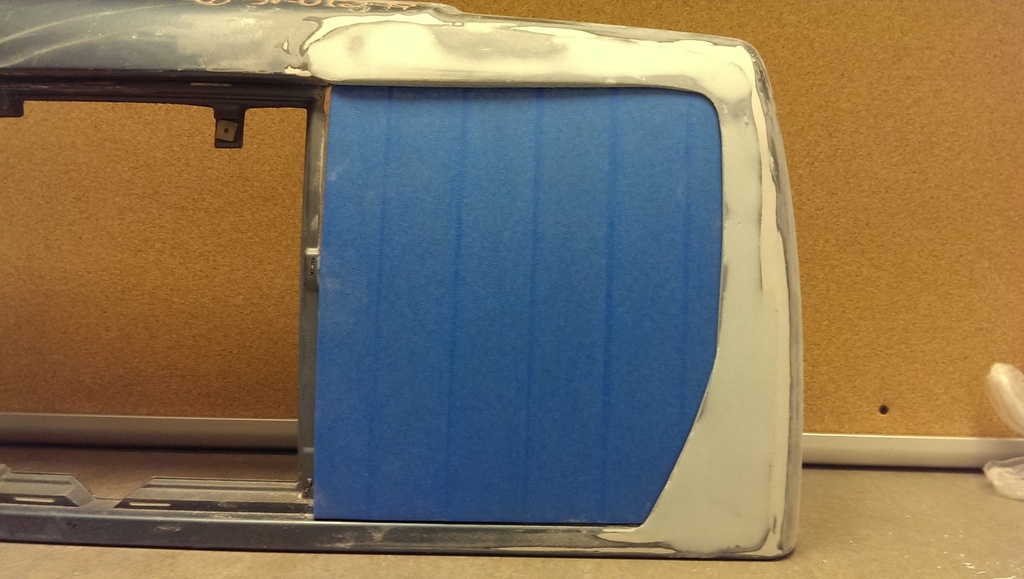
ooooohhhh.. soooo pretty!
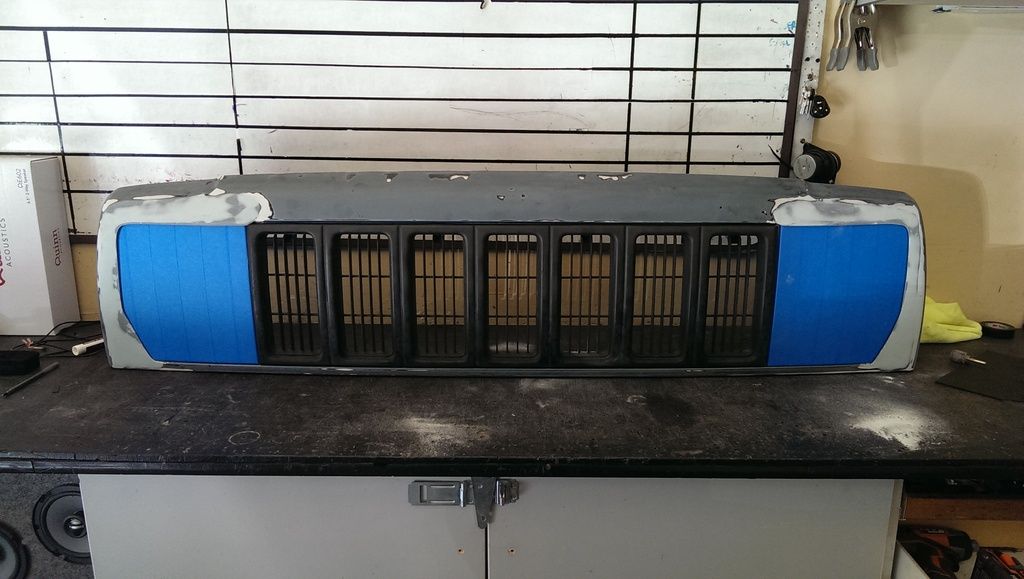
then repeat the process on the other side..

and here's what it looks like with the completed headlight set into place..
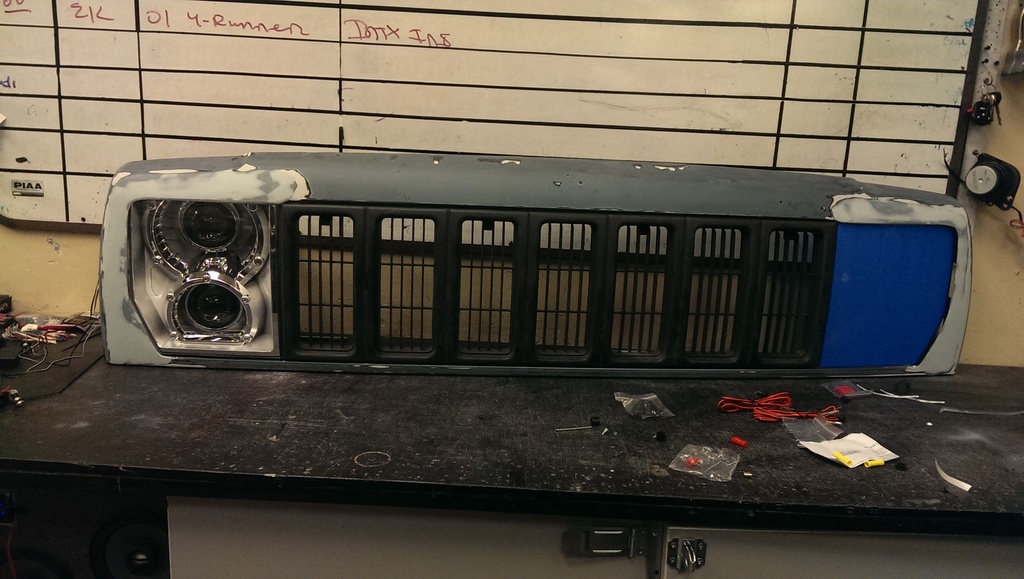
still quite a bit of work to do, but i'm loving how it's coming out for such an ambitious mod. i'm just hoping the end result is worth all the time i'm investing in it (not to mention the $300+ that i've got into it so far)
good times tho
here's the original headlight bucket..
so lets make all of that go away..
then start cutting material until the lens fits where you want it..
then start packing in the kitty hair (like bondo with embedded fiberglass strands) to get the rough shape..
continue sanding until you're happy with the fit..
then bondo to fill in the minor voids and clean up the edges..
ooooohhhh.. soooo pretty!
then repeat the process on the other side..
and here's what it looks like with the completed headlight set into place..
still quite a bit of work to do, but i'm loving how it's coming out for such an ambitious mod. i'm just hoping the end result is worth all the time i'm investing in it (not to mention the $300+ that i've got into it so far)
good times tho
04-23-2015, 08:00 AM
#283
CF Veteran
Join Date: Apr 2012
Location: Ross Vegas, Ga
Posts: 1,843
Likes: 0
Received 2 Likes
on
2 Posts
Year: 2000
Model: Cherokee
Engine: 4.0 w/ tupy head
figured i should probably get the grill started while i had the headlight lenses off to play with.
here's the original headlight bucket..

so lets make all of that go away..

then start cutting material until the lens fits where you want it..

then start packing in the kitty hair (like bondo with embedded fiberglass strands) to get the rough shape..
continue sanding until you're happy with the fit..
then bondo to fill in the minor voids and clean up the edges..

ooooohhhh.. soooo pretty!
then repeat the process on the other side..
and here's what it looks like with the completed headlight set into place..

still quite a bit of work to do, but i'm loving how it's coming out for such an ambitious mod. i'm just hoping the end result is worth all the time i'm investing in it (not to mention the $300+ that i've got into it so far)
good times tho
here's the original headlight bucket..
so lets make all of that go away..
then start cutting material until the lens fits where you want it..
then start packing in the kitty hair (like bondo with embedded fiberglass strands) to get the rough shape..
continue sanding until you're happy with the fit..
then bondo to fill in the minor voids and clean up the edges..
ooooohhhh.. soooo pretty!
then repeat the process on the other side..
and here's what it looks like with the completed headlight set into place..
still quite a bit of work to do, but i'm loving how it's coming out for such an ambitious mod. i'm just hoping the end result is worth all the time i'm investing in it (not to mention the $300+ that i've got into it so far)
good times tho
