
 09-10-2015, 03:24 PM
Last edit by: IB Advertising
See related guides and technical advice from our community experts:
Browse all: Engine Guides
- Jeep Cherokee XJ 1984 to 1996 How to Change Valve Cover Gasket
Step by step instructions for do-it-yourself repairs
Browse all: Engine Guides

Valve Cover Gasket Replacement
03-15-2012, 11:23 PM
#1
CF Veteran
Thread Starter
Join Date: Nov 2011
Location: Northern MN
Posts: 2,433
Likes: 0
Received 6 Likes
on
5 Posts
Year: 1990
Model: Cherokee (XJ)
Engine: Renix 4.0
DO NOT use cork gaskets. Cork don't work, as my boss told me. Spring for the more expensive rubber gasket.
Alrighty guys, here's my how-to on VC gaskets! This is my second time doing this AND I'm 18 so I'm kind of an expert now
TOOLS NEEDED: 7/16" deep well socket, 1/4" or 3/8" drive ratchet with 6" extension and U joint, Rubber Mallet, scraper, and RTV sealant.
To start, undo the CCV hoses coming from the VC and any cables/wires running over it. Also, pull the clips off of the studs that hold the wiring harness.
Now, undo all of the bolts and grab the BFM (cousin to the BFH) and smack the cover a few times. MAKE SURE YOU GET ALL OF THE BOLTS OUT. There is one at the back of the block and one under the hoses coming off of the thermostat housing.

Next, pull the cover off. For me, it was easiest to tip the cover towards the passenger side while lifting up and forward.
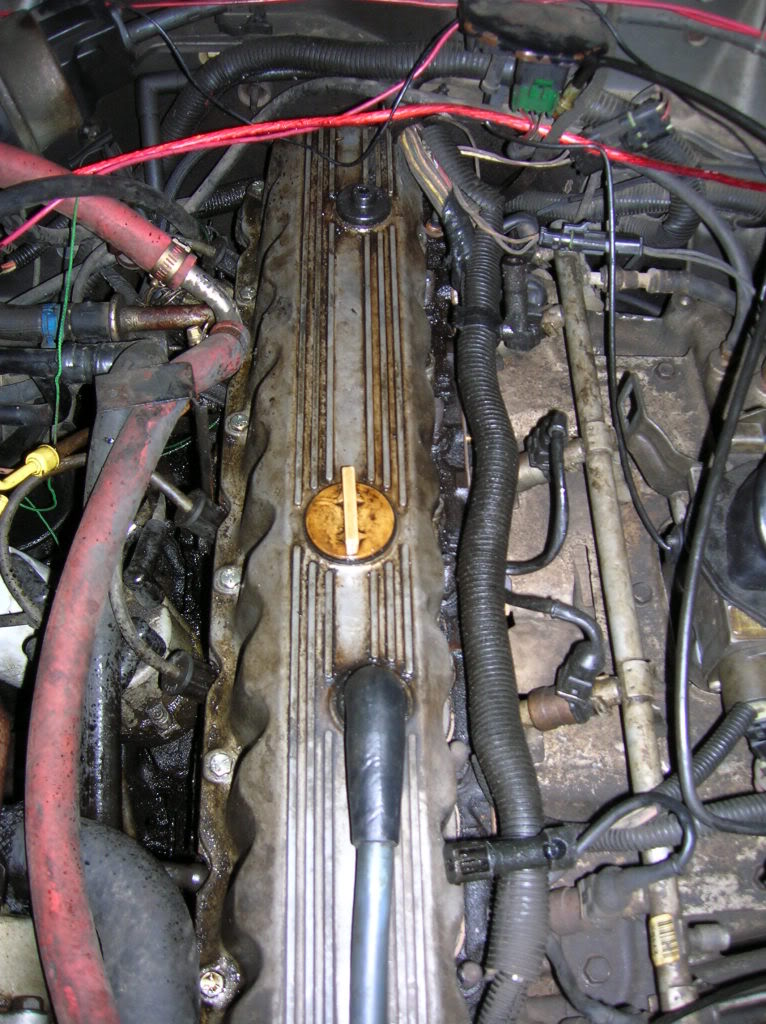
This is what you should be looking at now
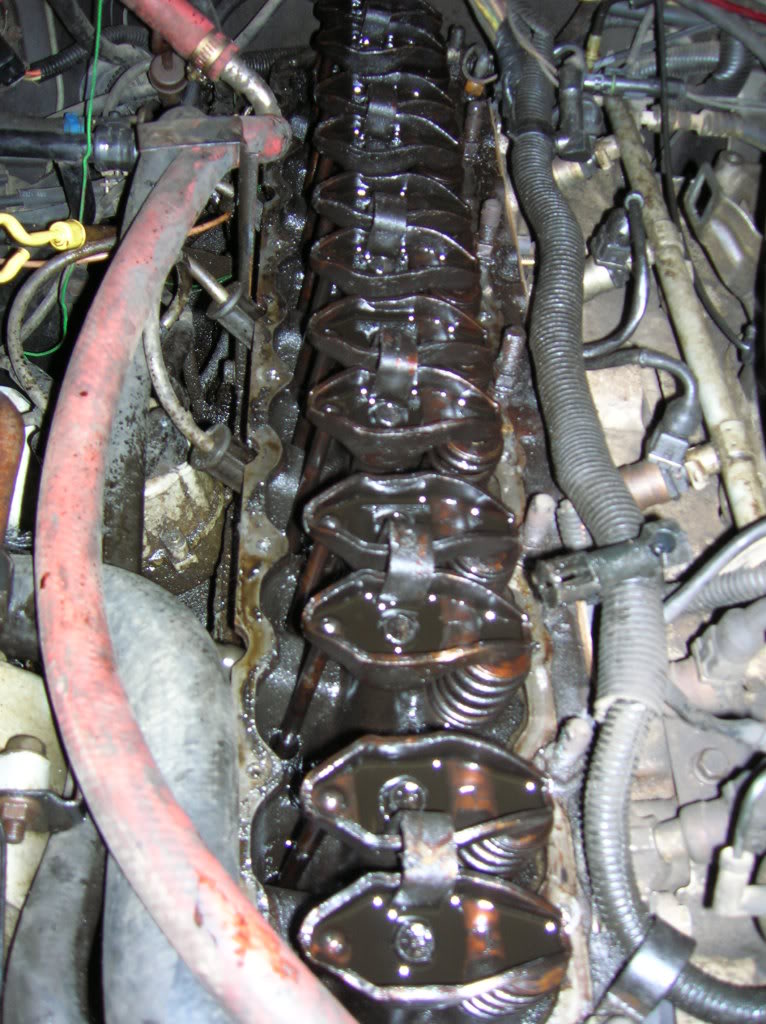
Pretty good looking for a few miles shy of 250K miles if I do say so myself
Now to scrape the old gasket off of both mating surfaces. Be careful not to scuff it up too bad, everyone says. To that I ask, what's the RTV for then? Just be aware of what the scraper is scraping. I founds some kind of plastic brush wheel for an air tool and it worked great, though I am not recommending it. ScotchBrite was my first choice but I couldn't find any
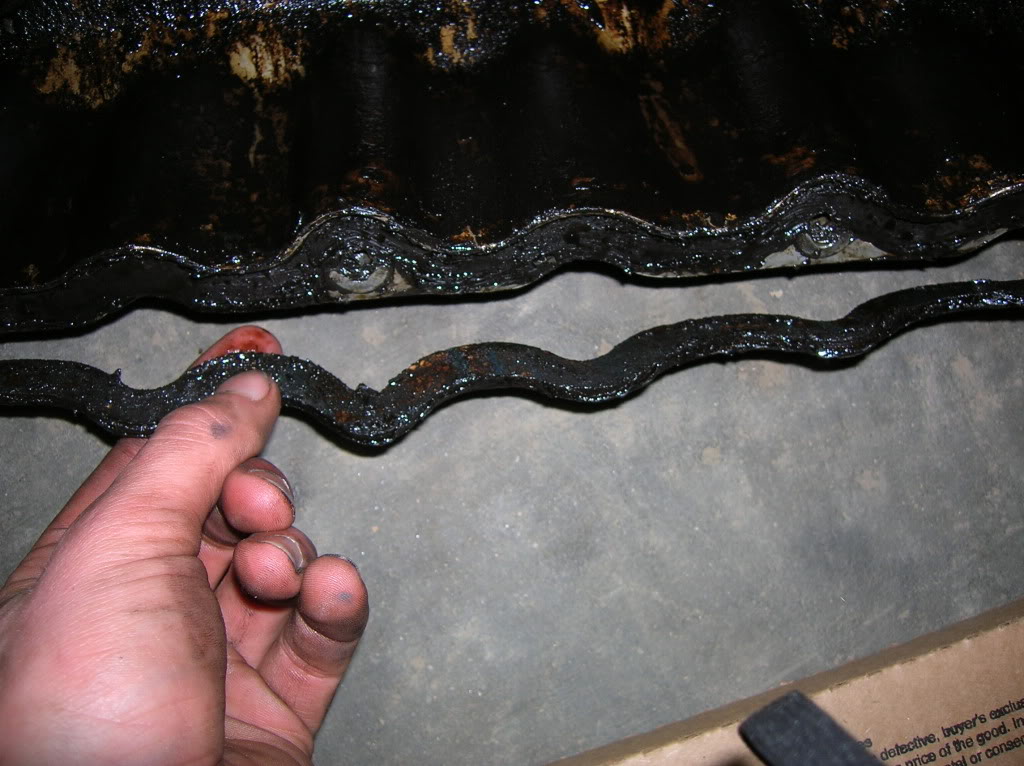
It doesn't have to be shiny but reasonably clean.
Now grab your new gasket.
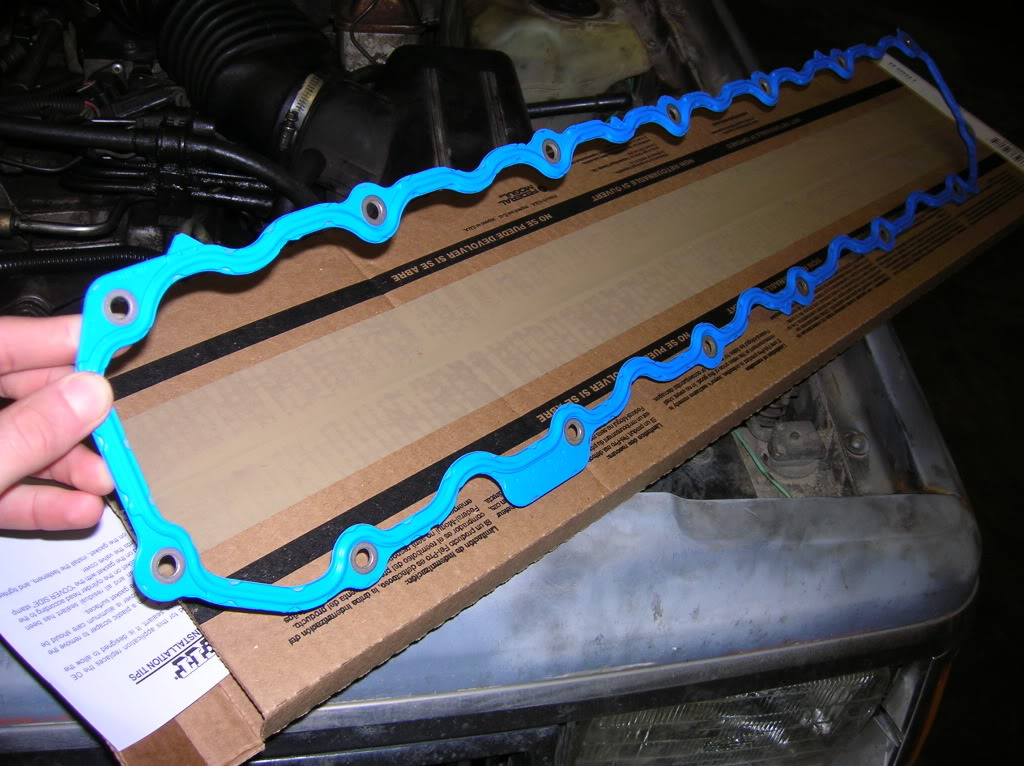
Apply a thin layer of RTV on the gasket, engine side first, and then place it on the cylinder head with all of the holes lined up. Now spread RTV on the top side of the gasket or the VC. Getting it back on is a . Try to put it back together EXACTLY the same way you took it off, while trying to keep stuff from smearing the RTV.
Start putting bolts in now. I'd recommend starting the back bolt first. ONLY get it started. I could not get mine on and got pissed and am now a bolt short. On the passenger side of the engine, count 4 bolts back from the front. This is where you will place the first bolt. After this one, go to the other side and get the opposing bolts in, alternating each and every time. If you have a torque wrench, torque them all to 28in/lbs. Very important, INCH pounds.
Replace all of the stuff you removed as prep work and crack open a beer, pop, what ever and consider yourself done!
Alrighty guys, here's my how-to on VC gaskets! This is my second time doing this AND I'm 18 so I'm kind of an expert now
TOOLS NEEDED: 7/16" deep well socket, 1/4" or 3/8" drive ratchet with 6" extension and U joint, Rubber Mallet, scraper, and RTV sealant.
To start, undo the CCV hoses coming from the VC and any cables/wires running over it. Also, pull the clips off of the studs that hold the wiring harness.
Now, undo all of the bolts and grab the BFM (cousin to the BFH) and smack the cover a few times. MAKE SURE YOU GET ALL OF THE BOLTS OUT. There is one at the back of the block and one under the hoses coming off of the thermostat housing.
Next, pull the cover off. For me, it was easiest to tip the cover towards the passenger side while lifting up and forward.
This is what you should be looking at now
Pretty good looking for a few miles shy of 250K miles if I do say so myself
Now to scrape the old gasket off of both mating surfaces. Be careful not to scuff it up too bad, everyone says. To that I ask, what's the RTV for then? Just be aware of what the scraper is scraping. I founds some kind of plastic brush wheel for an air tool and it worked great, though I am not recommending it. ScotchBrite was my first choice but I couldn't find any
It doesn't have to be shiny but reasonably clean.
Now grab your new gasket.
Apply a thin layer of RTV on the gasket, engine side first, and then place it on the cylinder head with all of the holes lined up. Now spread RTV on the top side of the gasket or the VC. Getting it back on is a
. Try to put it back together EXACTLY the same way you took it off, while trying to keep stuff from smearing the RTV.Start putting bolts in now. I'd recommend starting the back bolt first. ONLY get it started. I could not get mine on and got pissed and am now a bolt short. On the passenger side of the engine, count 4 bolts back from the front. This is where you will place the first bolt. After this one, go to the other side and get the opposing bolts in, alternating each and every time. If you have a torque wrench, torque them all to 28in/lbs. Very important, INCH pounds.
Replace all of the stuff you removed as prep work and crack open a beer, pop, what ever and consider yourself done!

The following users liked this post:
awaywego (02-21-2022)

Thread
Thread Starter
Forum
Replies
Last Post
SixShooterXJCherokee
Stock XJ Cherokee Tech. All XJ Non-modified/stock questions go here
9
09-23-2015 06:27 PM
Doove
Stock XJ Cherokee Tech. All XJ Non-modified/stock questions go here
12
08-26-2015 08:21 PM
rdr8887
Stock XJ Cherokee Tech. All XJ Non-modified/stock questions go here
7
08-24-2015 07:48 AM
Currently Active Users Viewing This Thread: 1 (0 members and 1 guests)