Complete Hub Assembly Swap
 03-26-2012, 10:09 PM
#1
CF Veteran
Thread Starter
Join Date: Jan 2010
Location: Virginia Beach by way of Michigan
Posts: 5,482
Likes: 0
Received 24 Likes
on
24 Posts
Alright, so you need to swap out your hub assemblies but aren't sure how. Well, here's how it's done....
1. Make sure you have the proper tools. Air tools are easy, but with basic hand tools you can get this done on about 30-45 minutes. What you need:
- Jack and jack stands
- Socket for your lug nuts (18mm, 19mm, 3/4", or a 13/16" socket sizes are all possibilities)
- 1/2" drive breaker bar (or a 1/2" drive ratchet and a piece of pipe).
- 3/8" drive ratchet
- 36mm socket
- 12mm socket
- 12 point 13mm socket
- Needle nose pliers
- Pry bar
- Hammer
- Axle grease
- 200ft/lb torque wrench
Now that you got all your stuff ready, head on out and start working on your Jeep.
We're just gonna go over one side, as they're both the same. That, and this is just the tear-down. The reason is because to put it all back together, just go in reverse.
2. Loosen the lug nuts on the front wheels.
3. Jack up the front of the vehicle and place jack stands under the front front axle.
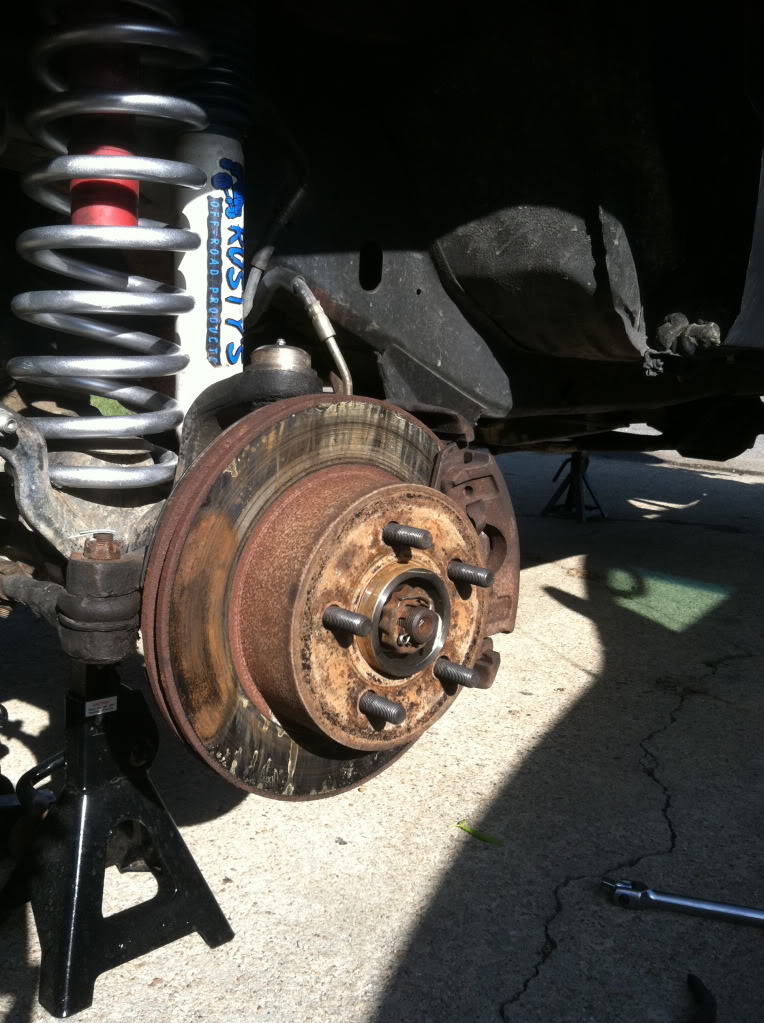
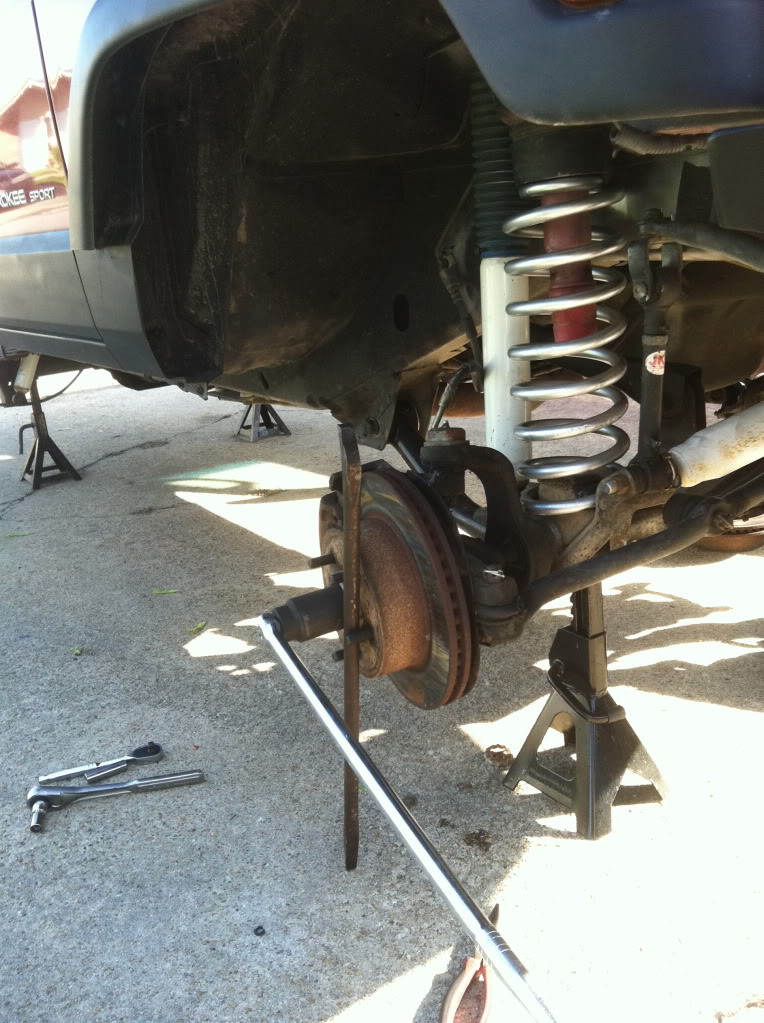
4. Finish taking off the lug nuts and remove the front wheels. This is what you'll have to look at.
5. Start by taking out the axle nut cotter pin and crown cover with the needle nose pliers.
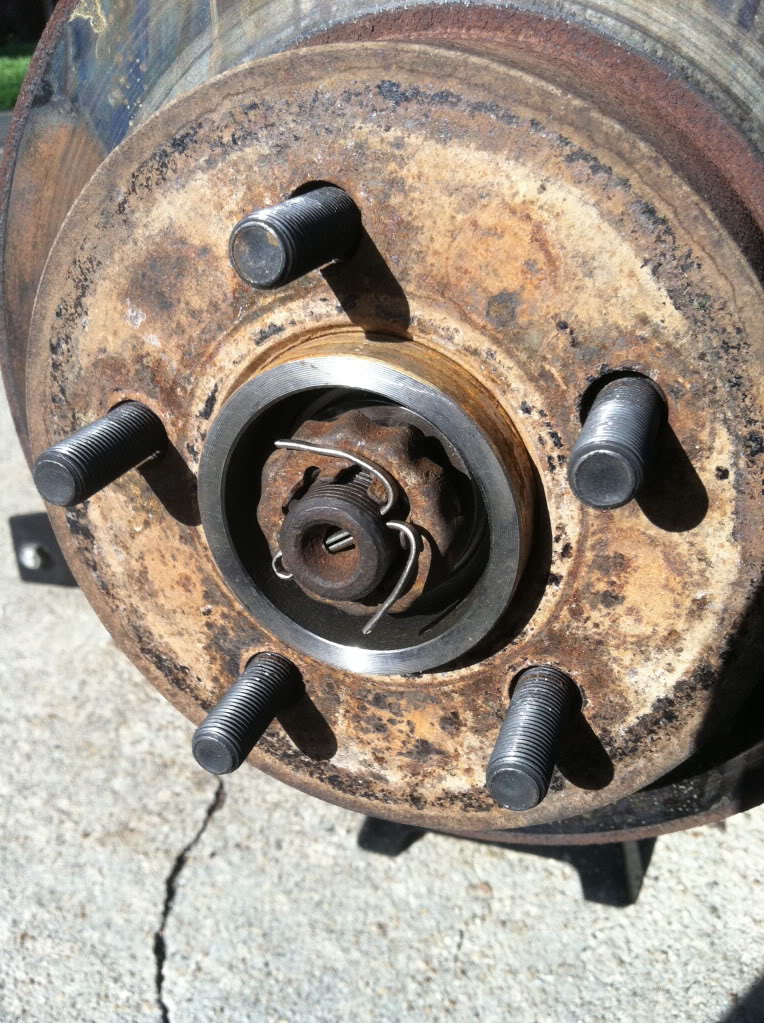
If the cotter pin isn't too rusted you can reuse it, otherwise you'll need to get new ones -one per side.
6. Now that the axle nut is exposed, move to brake caliper. Remove the top and bottom caliper bolts with the 12mm. These are the ones that have the rubber compression boot on them.
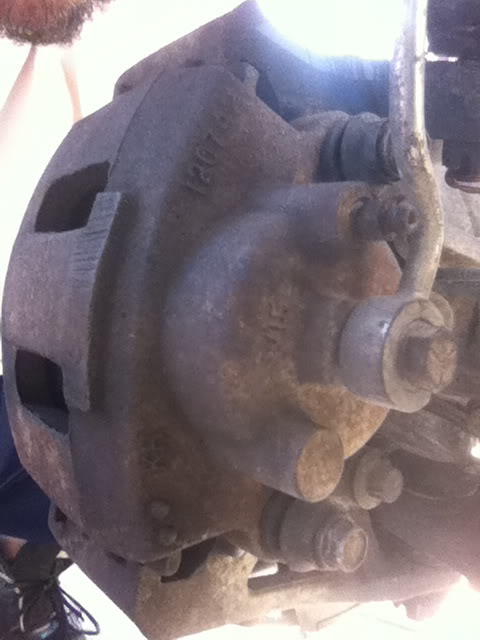
7. Remove the caliper and set it on the lower control arm. if you're not comfortable putting it there, grab a zip tie to hang it from the coil spring.
8. Now, it's back to that axle nut.
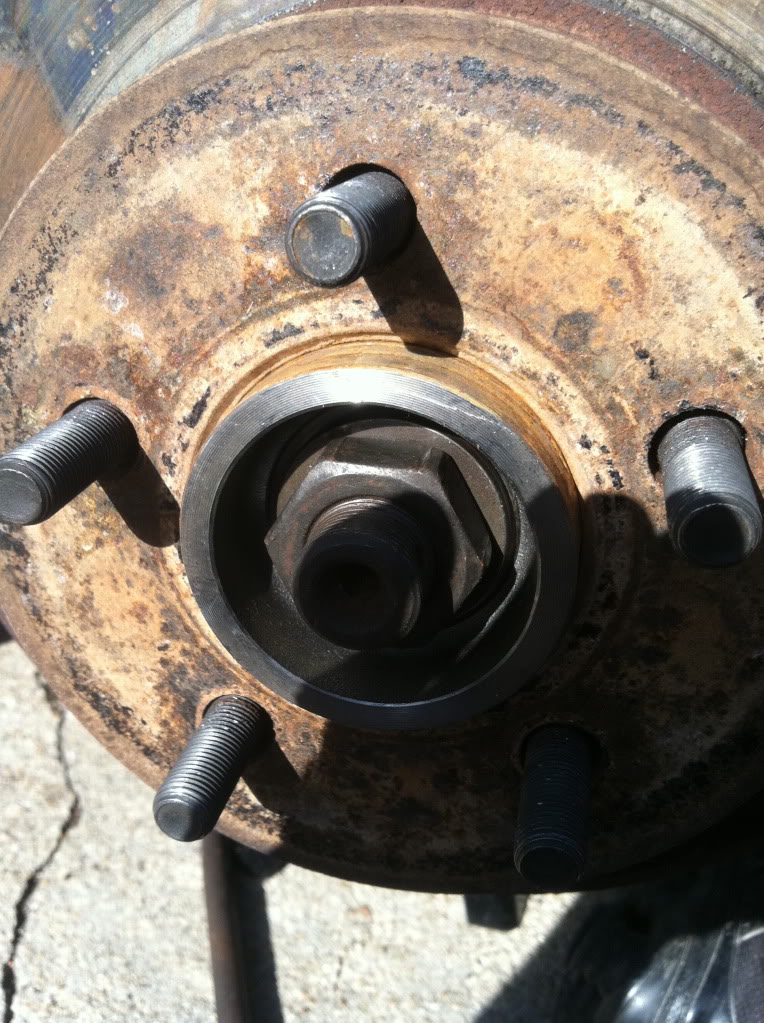
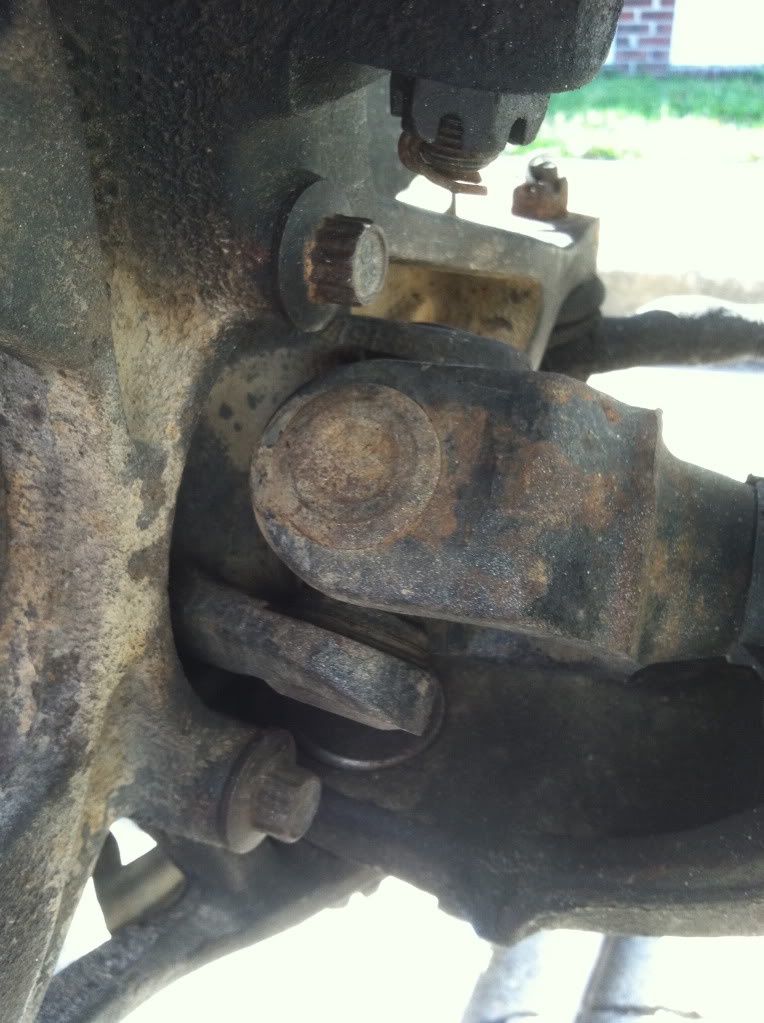
Yup, this is the big one. 36mm. This thing is on there tight, so a little PB blaster may help you out, even with your breaker bar/pipe. This is also where the pry bar comes in. Place the pry bar between a couple of the studs so that it acts as a stopper when you turn the wheel while loosening the axle nut. Here's a quick look at what the set up should look like...
9. Now that you finally got that thing off, pull the washer out as well and we can move forward. Pull the brake rotor off and get that 12-point 13mm out and remove the 3 bolts that hold the hub assembly on. All three are right around the axle u-joint.
10.Alright, now you get to remove that hub assembly. If it's stuck a little, take that hammer and give a few taps along the edge to pop it free of the knuckle. Be careful though, if the axle comes with it you'll need to re-seat the axle. If this does happen, slowly push the axle back into the axle tube. Be careful to keep it centered. If you don't, you could tear the inner seal and then you're in for another repair if you wanna keep gear oil in your front diff for any extended period of time.
Once the hub is out, here's what you should be looking at...
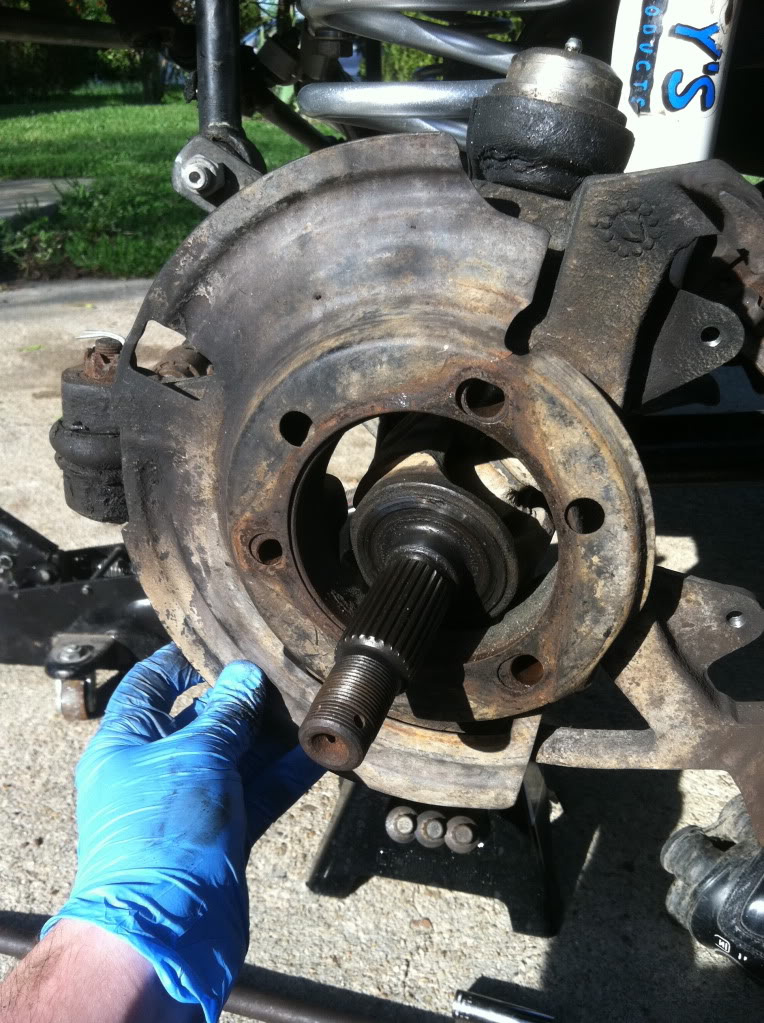
That metal ring is the dust shield for your brakes. Hang onto that, You'll want to keep it. Congratulations on removing your hub assemblies.
11. Now you just got to put the new ones in. Like I said earlier, just do the steps in reverse. But, before you start to put it all back together there's a couple things you need to do/know.
1) Roll a little axle grease into the new hub. They come pre-greased, but trust me, this helps.
2) Be careful when putting the hubs bolts back in. They can cross thread real easily, so thread them in slowly.
3) When you put the axle nut back on, you need to torque it to 175ft/lbs. The hub and caliper bolts can be torqued down with the 3/8" ratchet.
4) Torque the wheel lugs to 100ft/lbs. After driving 50 miles, re-torque them.
1. Make sure you have the proper tools. Air tools are easy, but with basic hand tools you can get this done on about 30-45 minutes. What you need:
- Jack and jack stands
- Socket for your lug nuts (18mm, 19mm, 3/4", or a 13/16" socket sizes are all possibilities)
- 1/2" drive breaker bar (or a 1/2" drive ratchet and a piece of pipe).
- 3/8" drive ratchet
- 36mm socket
- 12mm socket
- 12 point 13mm socket
- Needle nose pliers
- Pry bar
- Hammer
- Axle grease
- 200ft/lb torque wrench
Now that you got all your stuff ready, head on out and start working on your Jeep.
We're just gonna go over one side, as they're both the same. That, and this is just the tear-down. The reason is because to put it all back together, just go in reverse.
2. Loosen the lug nuts on the front wheels.
3. Jack up the front of the vehicle and place jack stands under the front front axle.
4. Finish taking off the lug nuts and remove the front wheels. This is what you'll have to look at.
5. Start by taking out the axle nut cotter pin and crown cover with the needle nose pliers.
If the cotter pin isn't too rusted you can reuse it, otherwise you'll need to get new ones -one per side.
6. Now that the axle nut is exposed, move to brake caliper. Remove the top and bottom caliper bolts with the 12mm. These are the ones that have the rubber compression boot on them.
7. Remove the caliper and set it on the lower control arm. if you're not comfortable putting it there, grab a zip tie to hang it from the coil spring.
8. Now, it's back to that axle nut.
Yup, this is the big one. 36mm. This thing is on there tight, so a little PB blaster may help you out, even with your breaker bar/pipe. This is also where the pry bar comes in. Place the pry bar between a couple of the studs so that it acts as a stopper when you turn the wheel while loosening the axle nut. Here's a quick look at what the set up should look like...
9. Now that you finally got that thing off, pull the washer out as well and we can move forward. Pull the brake rotor off and get that 12-point 13mm out and remove the 3 bolts that hold the hub assembly on. All three are right around the axle u-joint.
10.Alright, now you get to remove that hub assembly. If it's stuck a little, take that hammer and give a few taps along the edge to pop it free of the knuckle. Be careful though, if the axle comes with it you'll need to re-seat the axle. If this does happen, slowly push the axle back into the axle tube. Be careful to keep it centered. If you don't, you could tear the inner seal and then you're in for another repair if you wanna keep gear oil in your front diff for any extended period of time.
Once the hub is out, here's what you should be looking at...
That metal ring is the dust shield for your brakes. Hang onto that, You'll want to keep it. Congratulations on removing your hub assemblies.
11. Now you just got to put the new ones in. Like I said earlier, just do the steps in reverse. But, before you start to put it all back together there's a couple things you need to do/know.
1) Roll a little axle grease into the new hub. They come pre-greased, but trust me, this helps.
2) Be careful when putting the hubs bolts back in. They can cross thread real easily, so thread them in slowly.
3) When you put the axle nut back on, you need to torque it to 175ft/lbs. The hub and caliper bolts can be torqued down with the 3/8" ratchet.
4) Torque the wheel lugs to 100ft/lbs. After driving 50 miles, re-torque them.
Last edited by no rdplz; 03-26-2012 at 10:25 PM.


Thread
Thread Starter
Forum
Replies
Last Post
lgrant
Stock XJ Cherokee Tech. All XJ Non-modified/stock questions go here
2
07-05-2022 12:19 AM
NM-XJ
Stock XJ Cherokee Tech. All XJ Non-modified/stock questions go here
18
10-23-2018 04:21 PM
Buzball
Stock Grand Cherokee Tech. All ZJ/WJ/WK Non-modified/stock questions go here!
14
09-12-2015 05:39 PM
Ibanezz
Stock XJ Cherokee Tech. All XJ Non-modified/stock questions go here
24
09-10-2015 07:15 PM
Currently Active Users Viewing This Thread: 1 (0 members and 1 guests)