How to remove your seat fabric for machine washing
 07-03-2010, 11:13 PM
#1
Seasoned Member
Thread Starter
Join Date: Sep 2009
Location: Everett, WA
Posts: 373
Likes: 0
Received 0 Likes
on
0 Posts
Year: 1990
Model: Cherokee
Engine: 4.0l
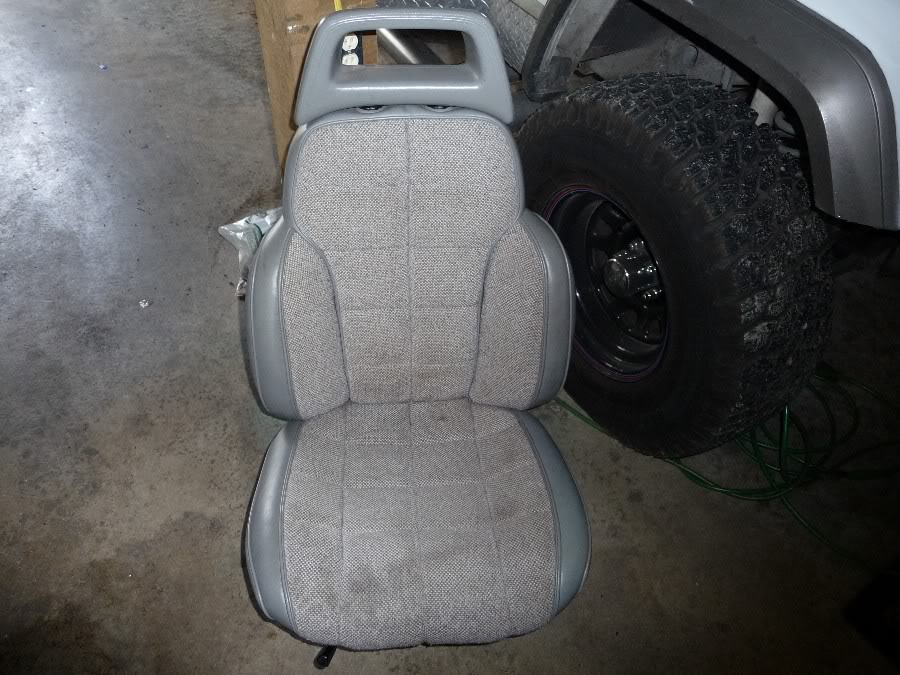
I was getting really tired of looking at how dirty my seats were, so I decided to go into the unknown and remove the seat skins, both bottom and top. I've heard you can pressure wash your seats, but I didn't like the idea of pushing 20-some-years of "previous owner" deeper into my seat  Lets get started!:
This writeup also goes over how to repair the "gangsta lean" these seats are known for too.
-Time needed - 2-4hrs per seat tear down/reassembly and washing
-Difficulty - Easy, this project is newbie friendly
-Highly recommended to anyone with stock seats
I'm conducting this write-up using a 1990 XJ 4-door
What your gonna need:
1. 13mm or 1/2" socket with ratchet
2. 13mm or 1/2" wrench
3. Couple extentions and a u-joint may prove useful
4. #2 Flathead screwdriver
5. #2 philips screwdriver(drill/driver is ok, but be careful not to over-drive on reassembly)
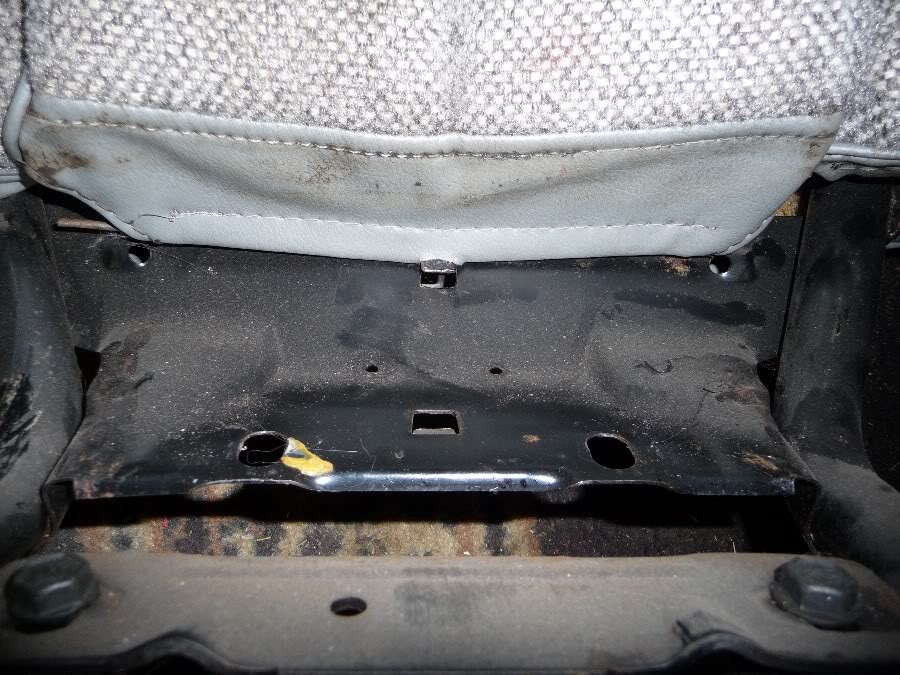
I have all my carpet out, but that doesn't matter as the seats sit on top of the carpet. You might also have some plastic trim covering your seat bases, it comes off with your #2 phillips. Start by pulling the seats out with your socket and ratchet. Theres four bolts two in the front
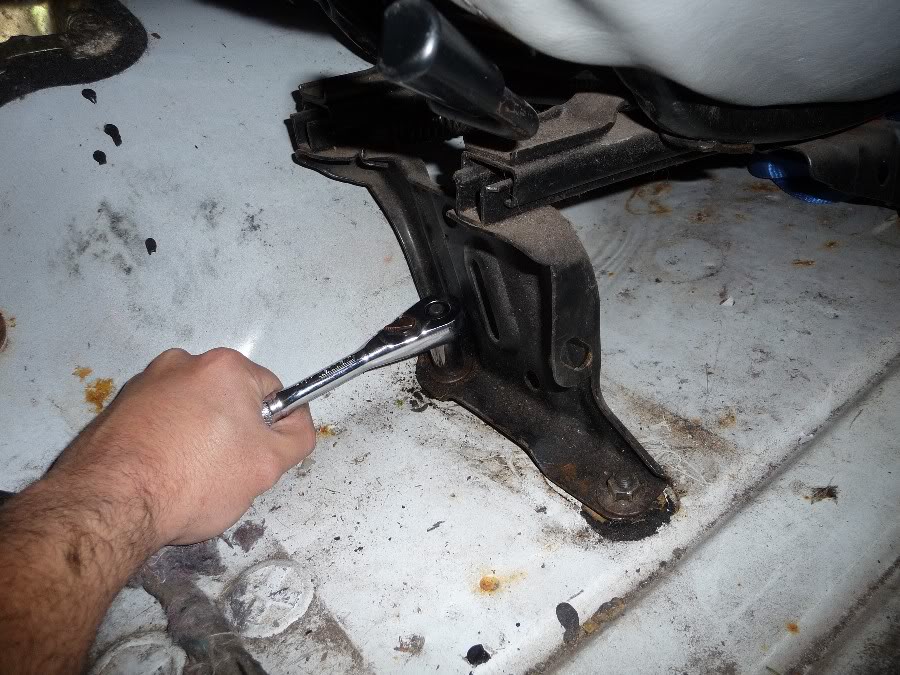
And two in the back
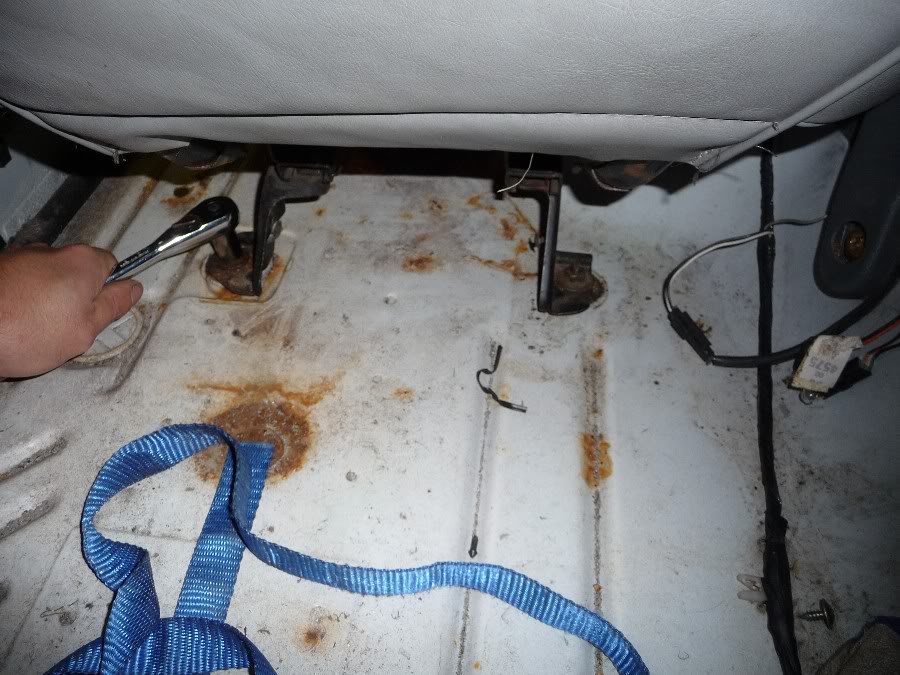
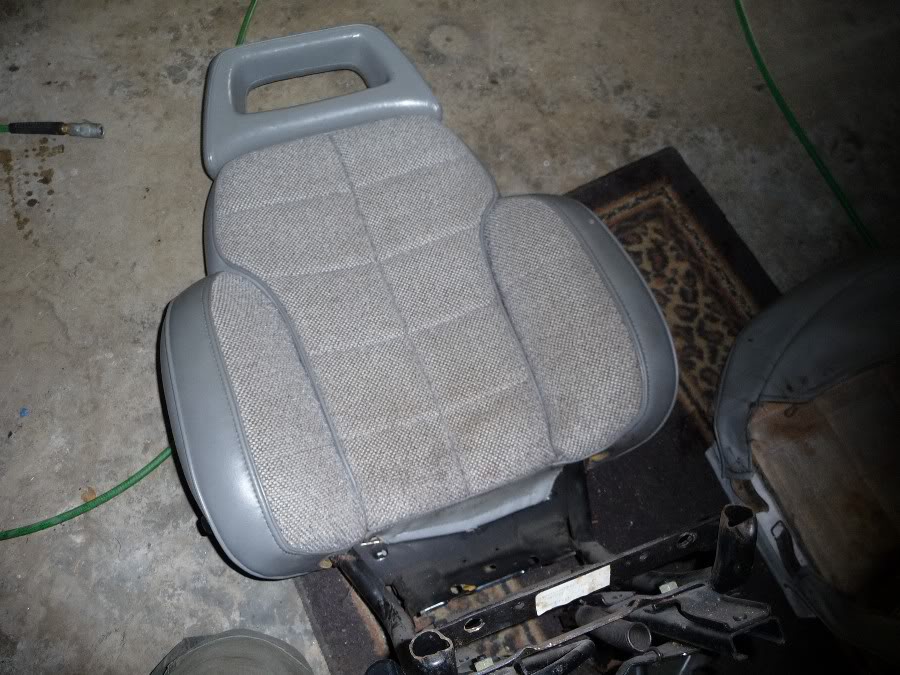
Gently pull the seats out....super easy!
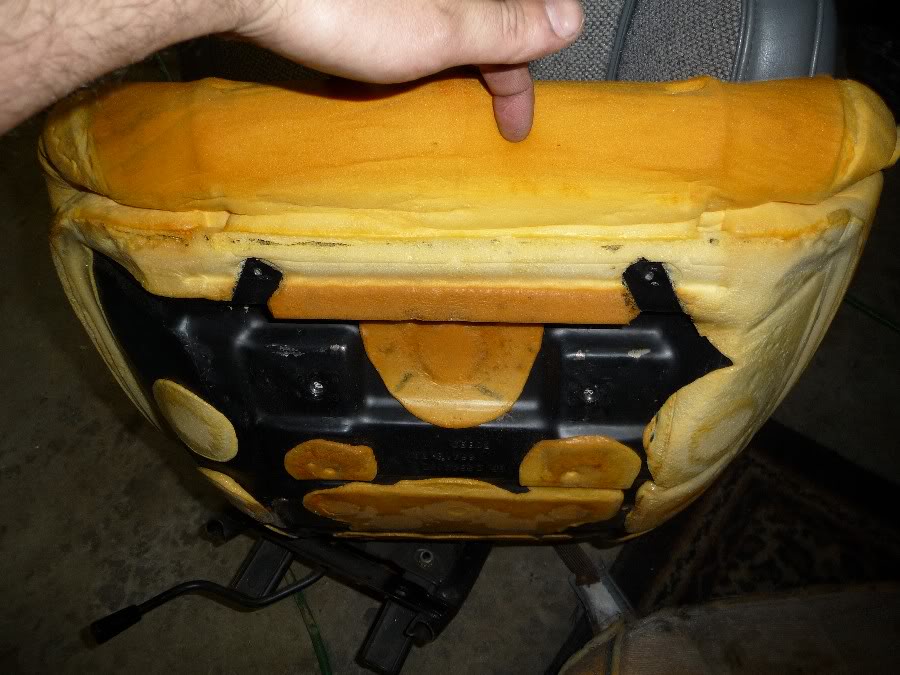
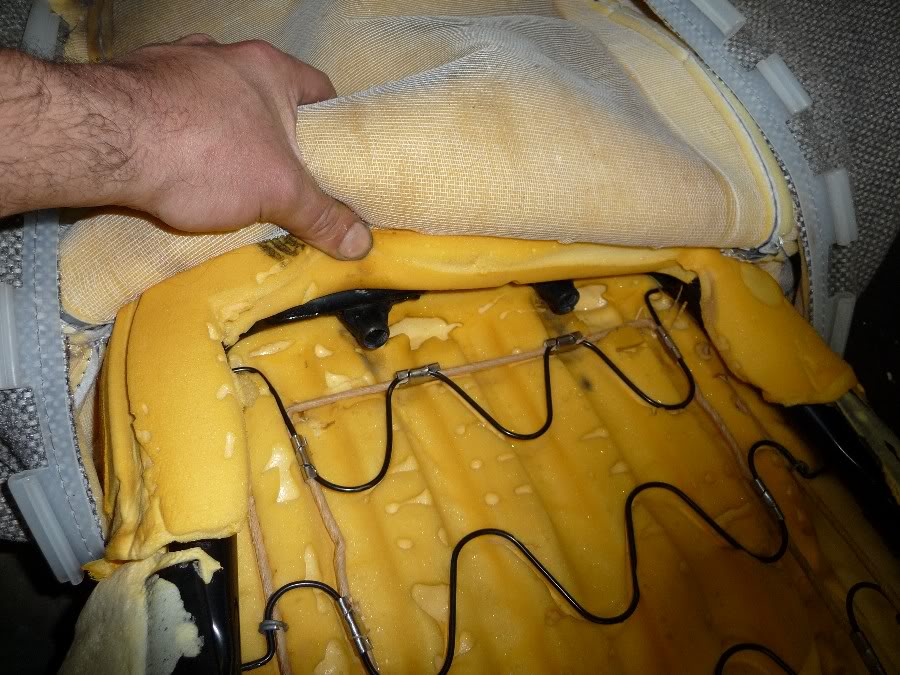
We're gonna start the teardown by removing the bottom cushion. Lay down a clean rug or cardboard, so your seat doesn't get damaged and flip it over. You'll see its not to complicated...Unhook the two black rubber bands that attach to the base as well as the white(was white)elastic band that goes side to side. bend the metal C clip a little if you have to.
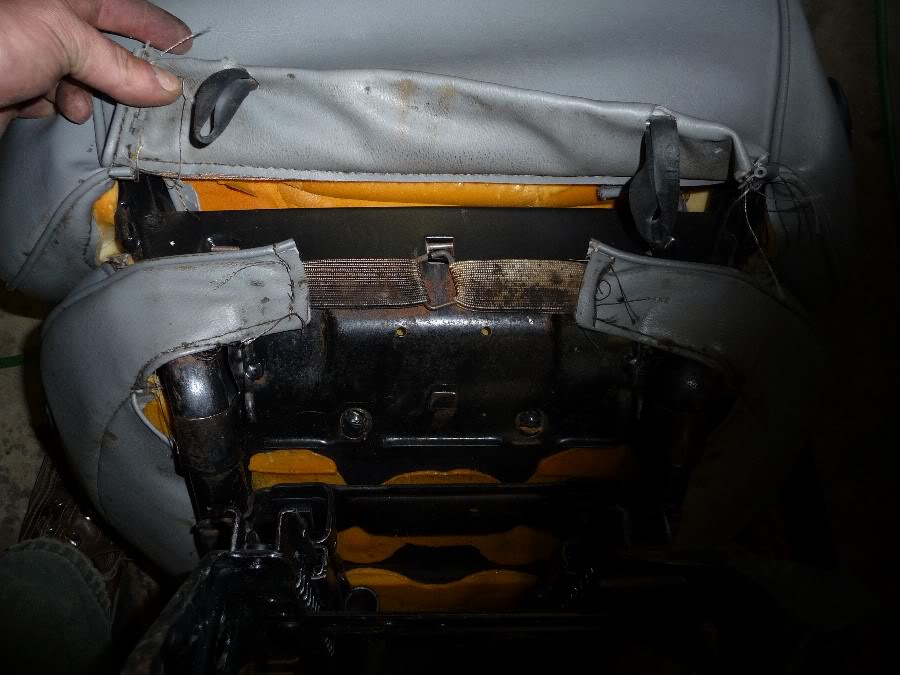
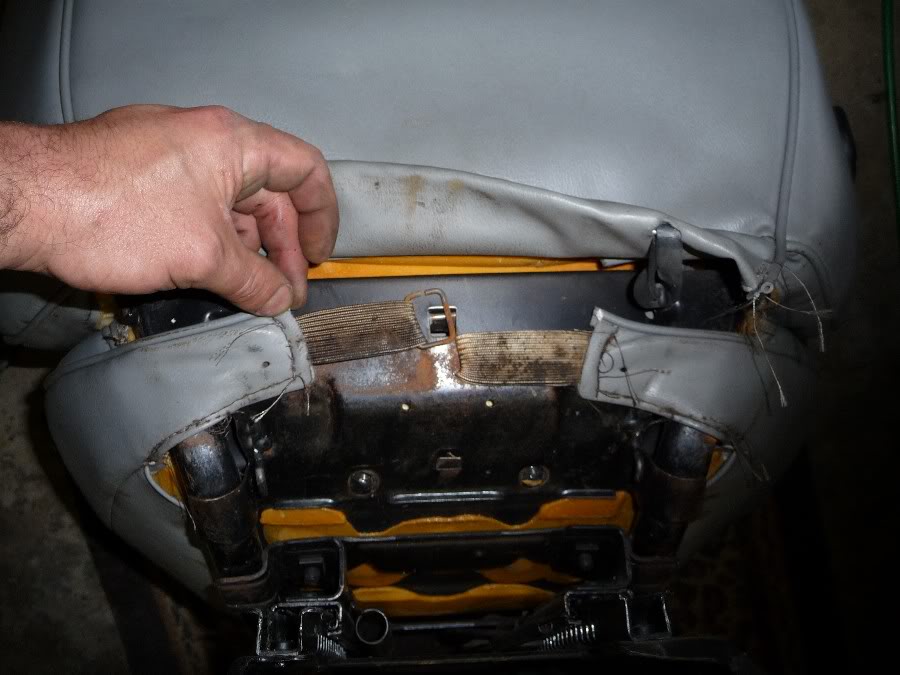
Heres what you should be lookin at (Note: 2 door colapsible buckets are a little different, but not by much, if you can understand this write-up you should be able to figure it out)

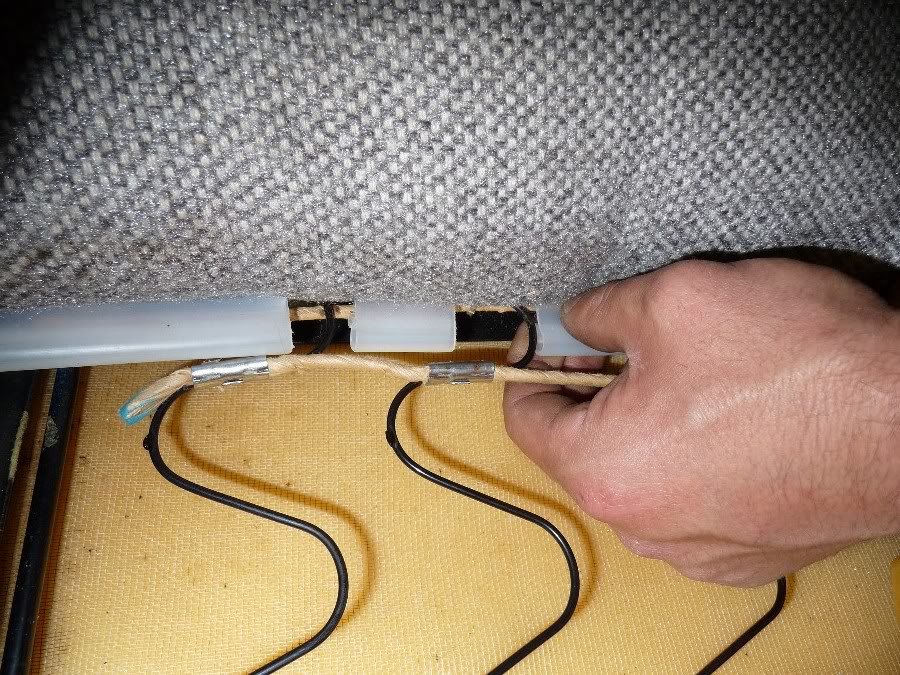
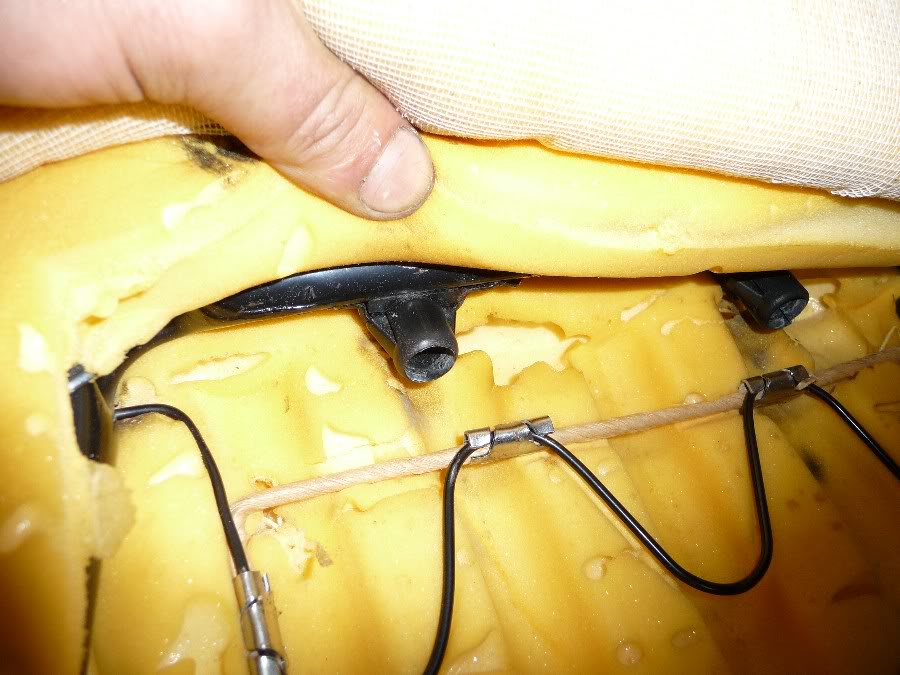
I went ahead and pulled the retaining wire for the top coushin now, while I had it upside down, you'll need your flathead screwdriver. Just pop the center loose
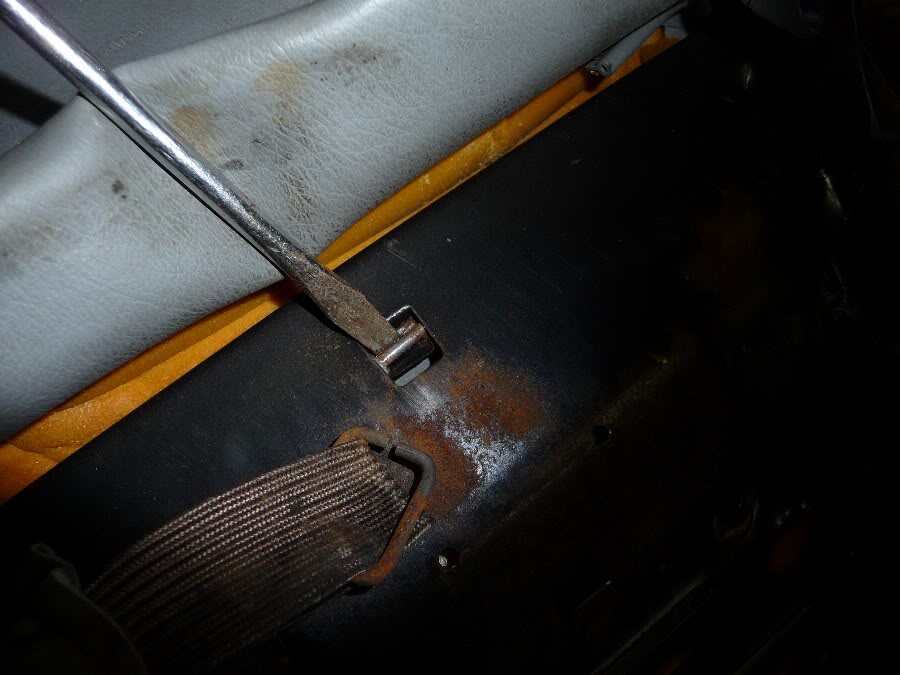
Then push it side ways to get a grip on it so you can pull it out the rest of the way
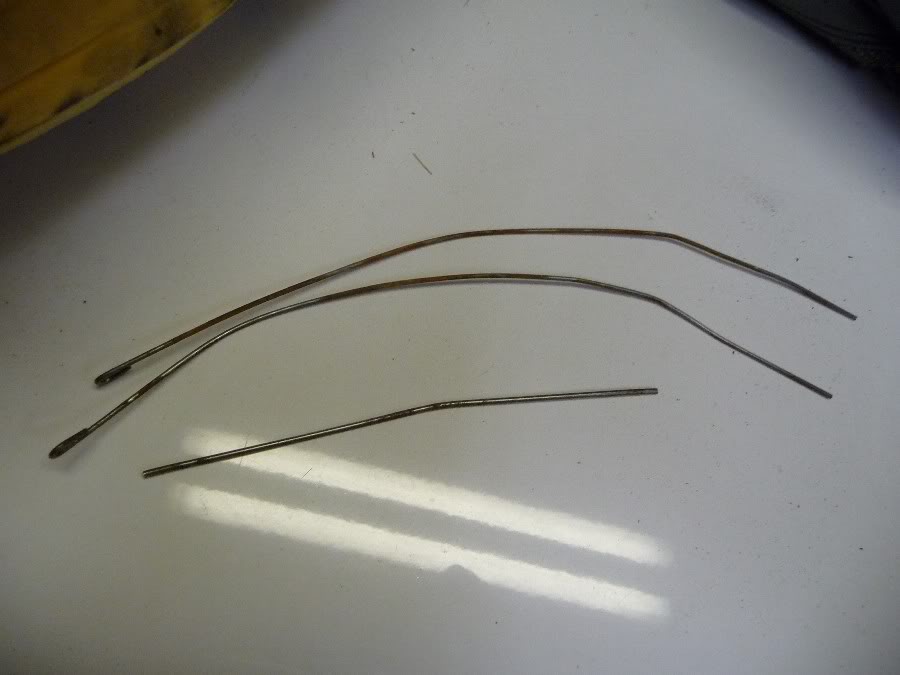
---STOP--- Put all the wires in one spot and mark which one go where. They are different legnths and I think theres 6 per seat. If you do get them mixed up, don't panic, just take your time and figure out what goes were. I threw them in a pile the first time...oops
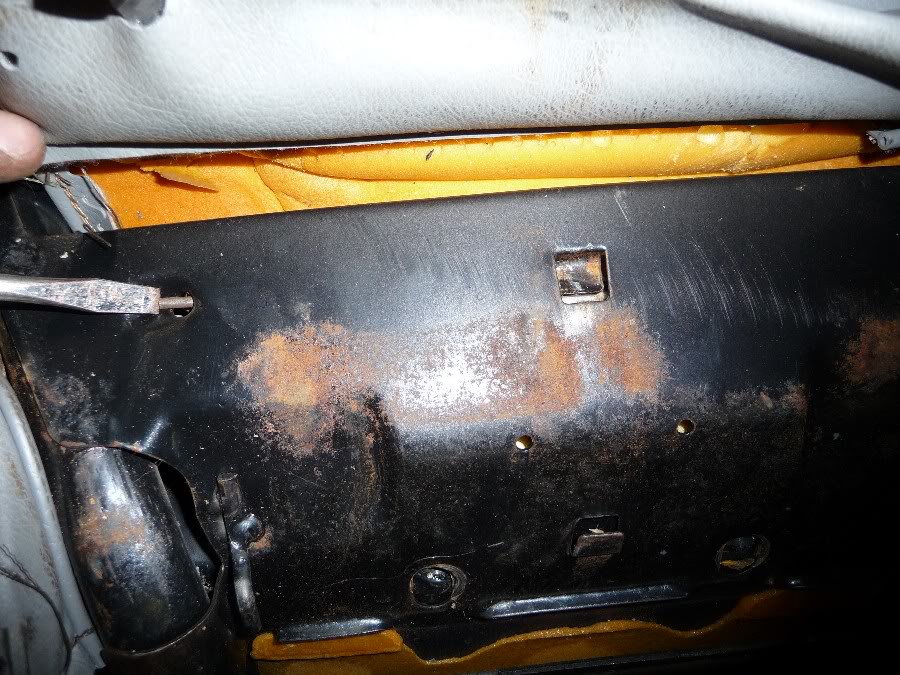
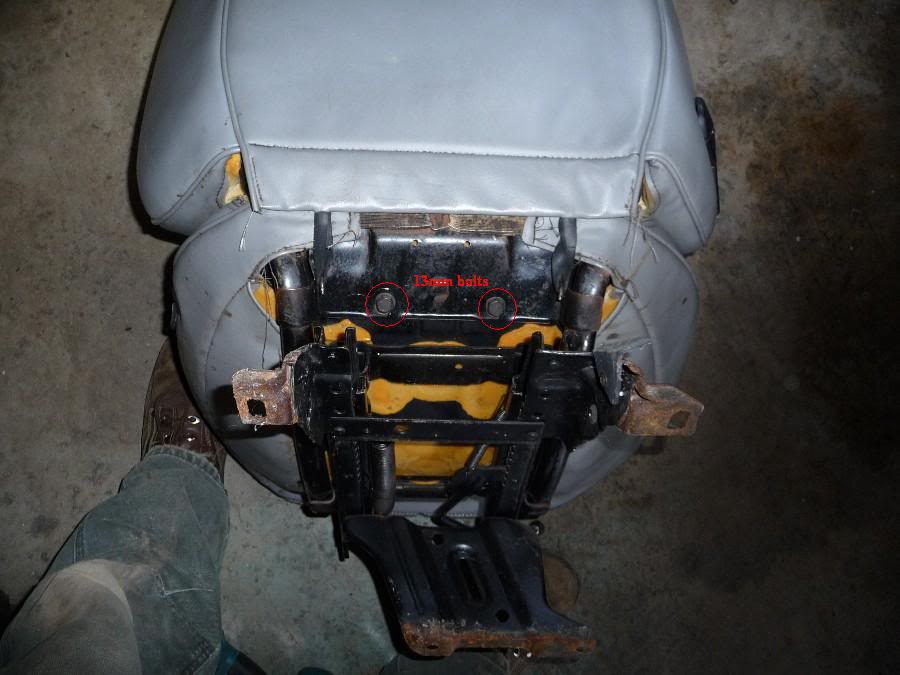
Now tackle the four 13mm bolts that hold the bottom cushion on the frame. Two in the front

And two in the back
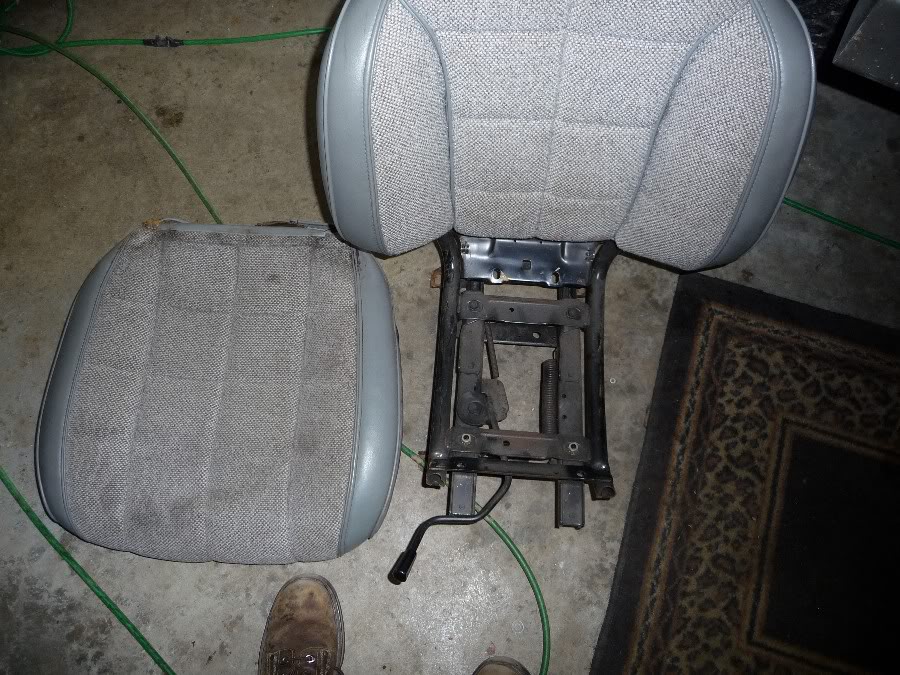
Now the bottom seat cushion should pop right off
Theres eight phillips screws that hold the skin on, four on the bottom, two on the front
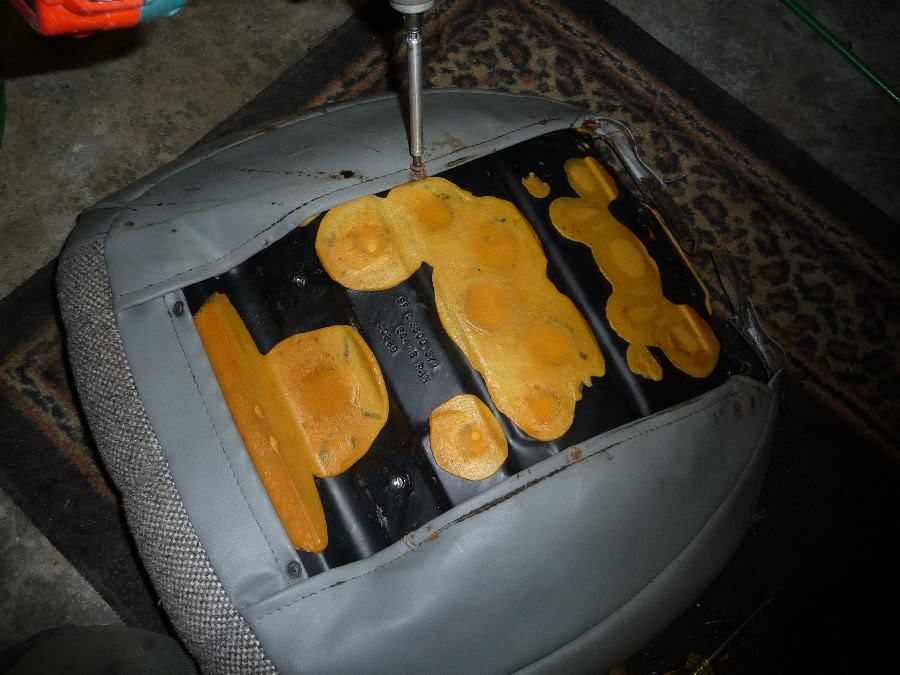
And two on the back

Lets get started!:This writeup also goes over how to repair the "gangsta lean" these seats are known for too.
-Time needed - 2-4hrs per seat tear down/reassembly and washing
-Difficulty - Easy, this project is newbie friendly
-Highly recommended to anyone with stock seats
I'm conducting this write-up using a 1990 XJ 4-door
What your gonna need:
1. 13mm or 1/2" socket with ratchet
2. 13mm or 1/2" wrench
3. Couple extentions and a u-joint may prove useful
4. #2 Flathead screwdriver
5. #2 philips screwdriver(drill/driver is ok, but be careful not to over-drive on reassembly)
I have all my carpet out, but that doesn't matter as the seats sit on top of the carpet. You might also have some plastic trim covering your seat bases, it comes off with your #2 phillips. Start by pulling the seats out with your socket and ratchet. Theres four bolts two in the front
And two in the back
Gently pull the seats out....super easy!
We're gonna start the teardown by removing the bottom cushion. Lay down a clean rug or cardboard, so your seat doesn't get damaged and flip it over. You'll see its not to complicated...Unhook the two black rubber bands that attach to the base as well as the white(was white)elastic band that goes side to side. bend the metal C clip a little if you have to.
Heres what you should be lookin at (Note: 2 door colapsible buckets are a little different, but not by much, if you can understand this write-up you should be able to figure it out)
I went ahead and pulled the retaining wire for the top coushin now, while I had it upside down, you'll need your flathead screwdriver. Just pop the center loose
Then push it side ways to get a grip on it so you can pull it out the rest of the way
---STOP--- Put all the wires in one spot and mark which one go where. They are different legnths and I think theres 6 per seat. If you do get them mixed up, don't panic, just take your time and figure out what goes were. I threw them in a pile the first time...oops
Now tackle the four 13mm bolts that hold the bottom cushion on the frame. Two in the front
And two in the back
Now the bottom seat cushion should pop right off
Theres eight phillips screws that hold the skin on, four on the bottom, two on the front
And two on the back
 07-03-2010, 11:19 PM
#2
Seasoned Member
Thread Starter
Join Date: Sep 2009
Location: Everett, WA
Posts: 373
Likes: 0
Received 0 Likes
on
0 Posts
Year: 1990
Model: Cherokee
Engine: 4.0l
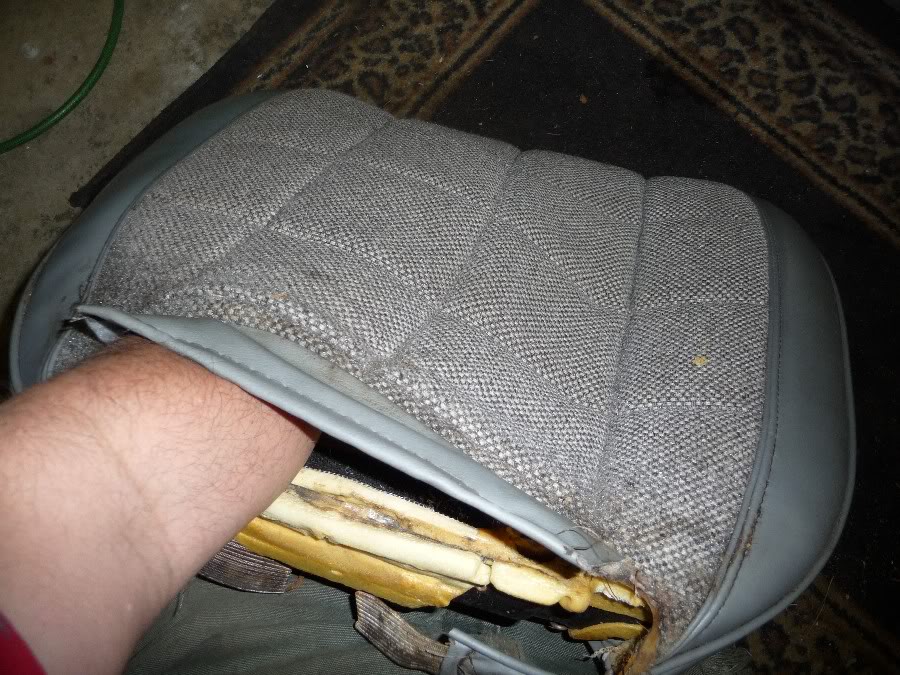
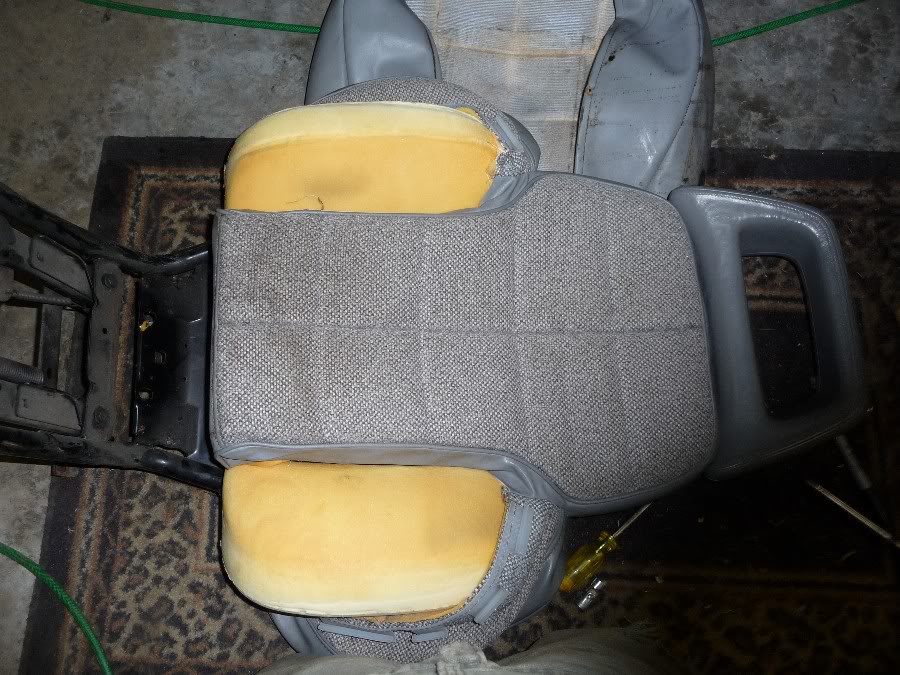
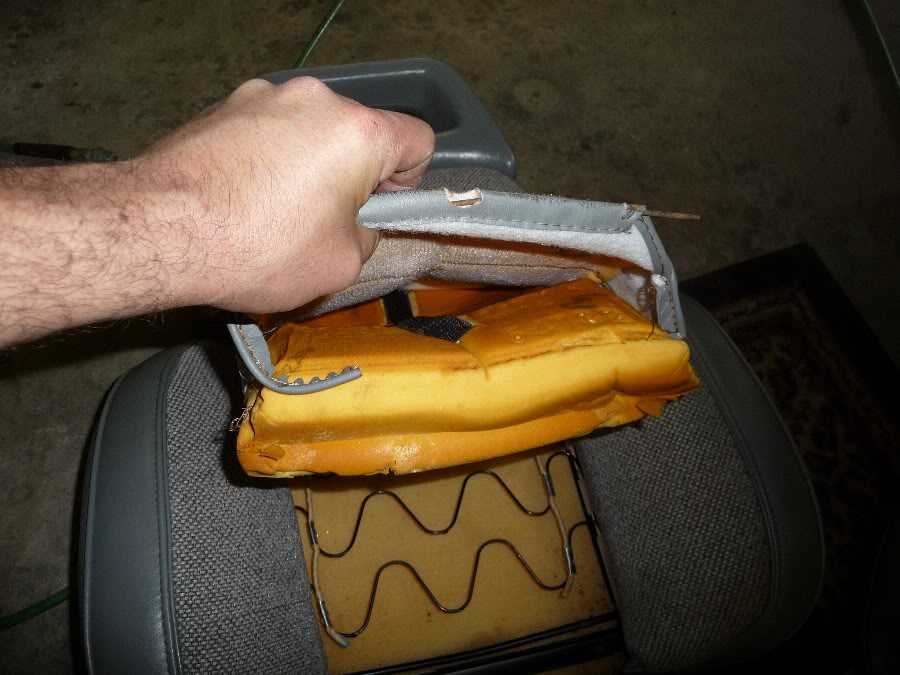
I started by releasing the velcro first, heres what you'll first encounter. This is looking at the back of the seat bottom cushion. Before you start separating it, read ahead to the next paragraph. The black line is the velcro, not dirt.
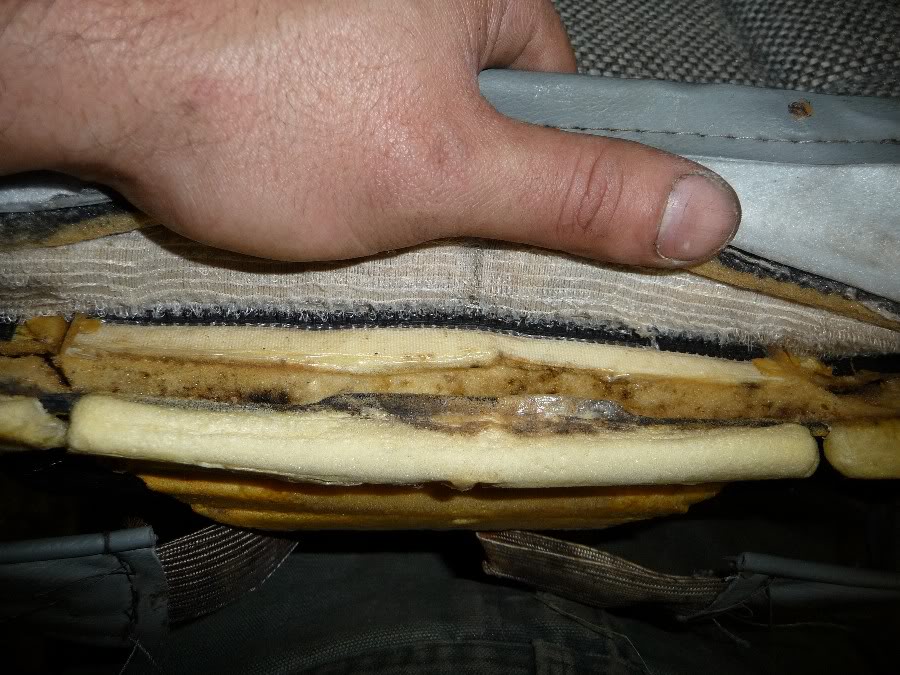
This part is tricky if your not paying attention. The foam isn't to strong and if you try to seperate the velcro by pulling on the fabric and the foam you'll just tear the velcro off your foam. The trick is get your fingers in the velcro seam and push down on the velcro while holding the fabric in place. Keeping your force on the velcro will insure good results(try not to press on the foam at all)
Once the velcro is loose(it will reattach a little bit) adn the screws out, pull the skin forward starting at the back
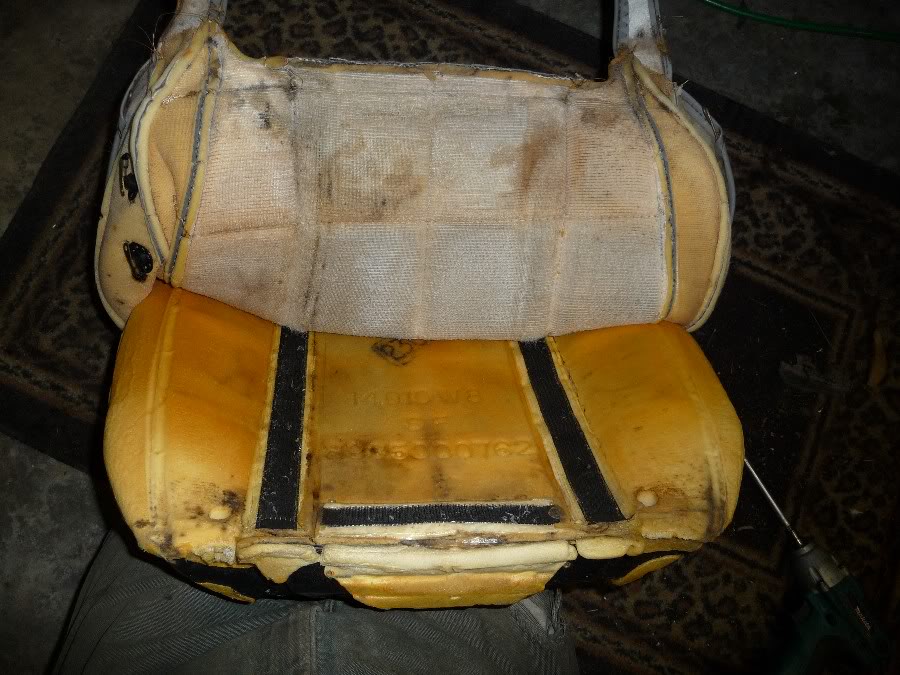
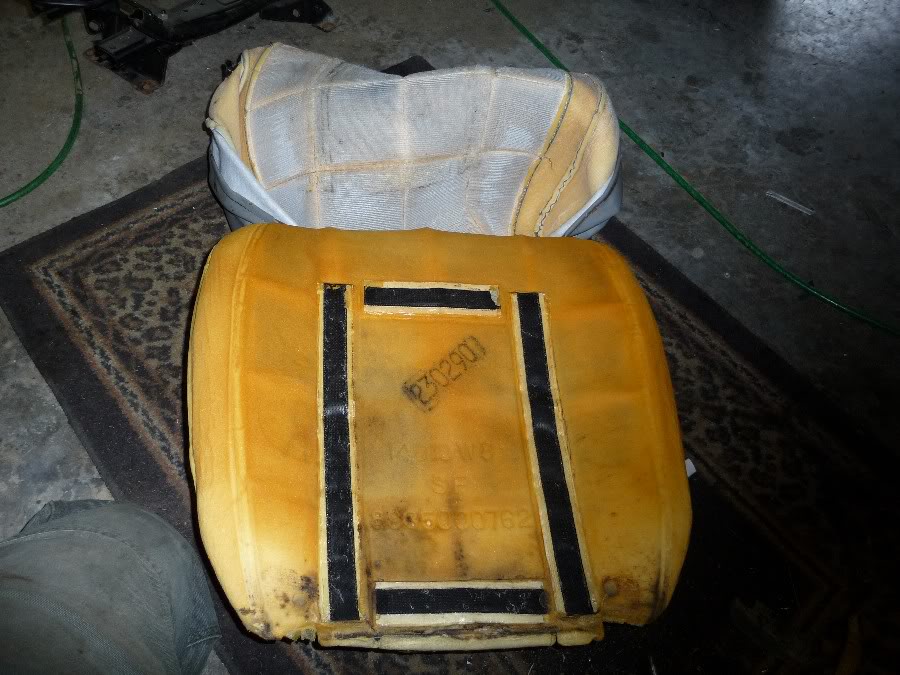
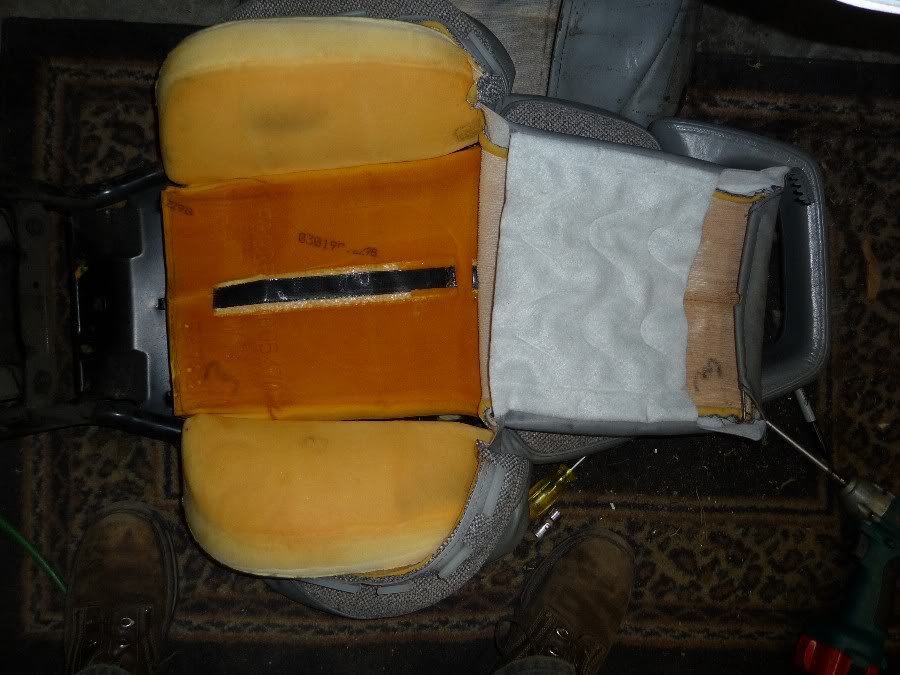
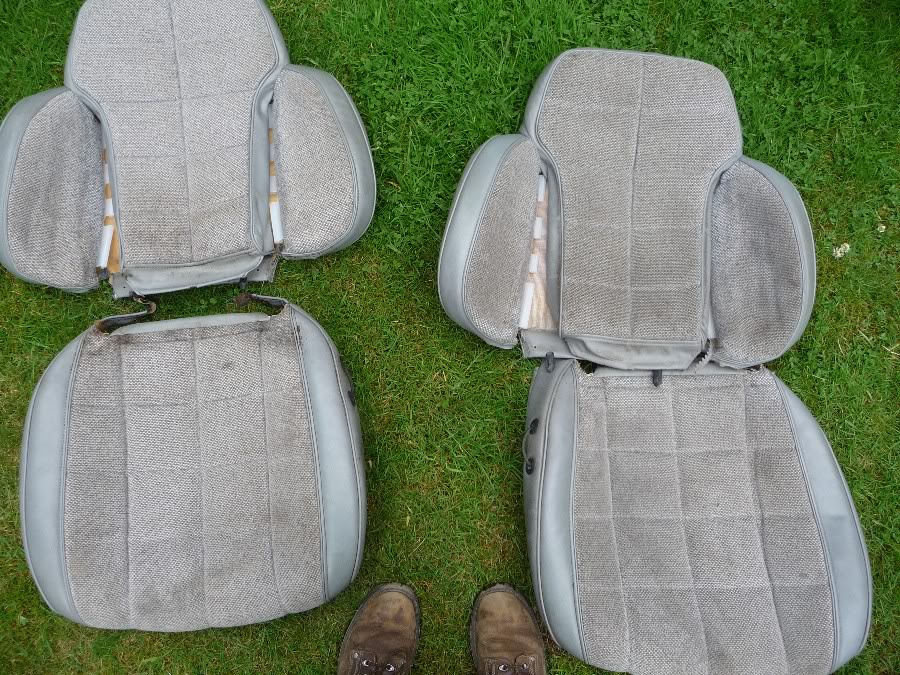
Take a second to inspect your cushion. This first one has the "gangsta lean" problem..note the crack on the right side(in the vehicle this would be on the left)
Heres my replacement. Its a passenger seat XJ cushion(the driver passenger cushions are the same) from the JY..$14
Now lets get started on the back rest skins
Sometime those little wires get stuck/out of place and I couldn't get this one till the bottom cushion was off. Take it off now if its still there
Now the center of the back rest will lift right out(we will come back to this later..moving on)
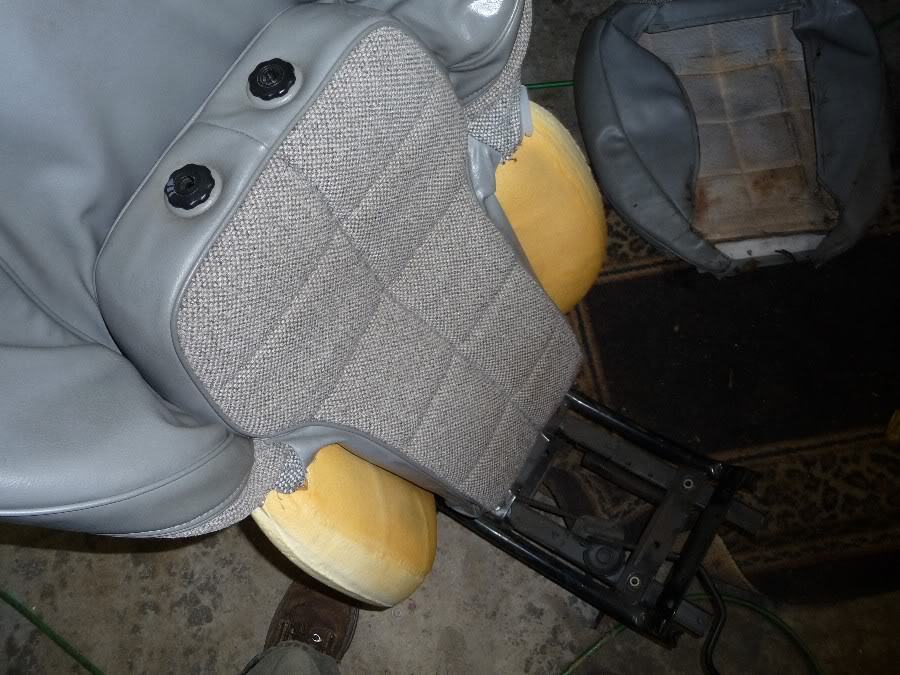
Next I started on the "love handles" of the seat. once you lift the back cushion up you'll see white plastic clips

These simply unhook them. Note: on reassembly make sure you put them on the right rope, or things willn't fit right.
Now the "love handles" can be pulled back. This is another area where you need to pay attention. There is no velcro here, but if you just pull on the fabric you will tear the foam. Work a hand into the seat to where the fabric meets the vinyl, then once again, press on the foam while pulling the back of your hand up....the skin should slid down the back of you hand
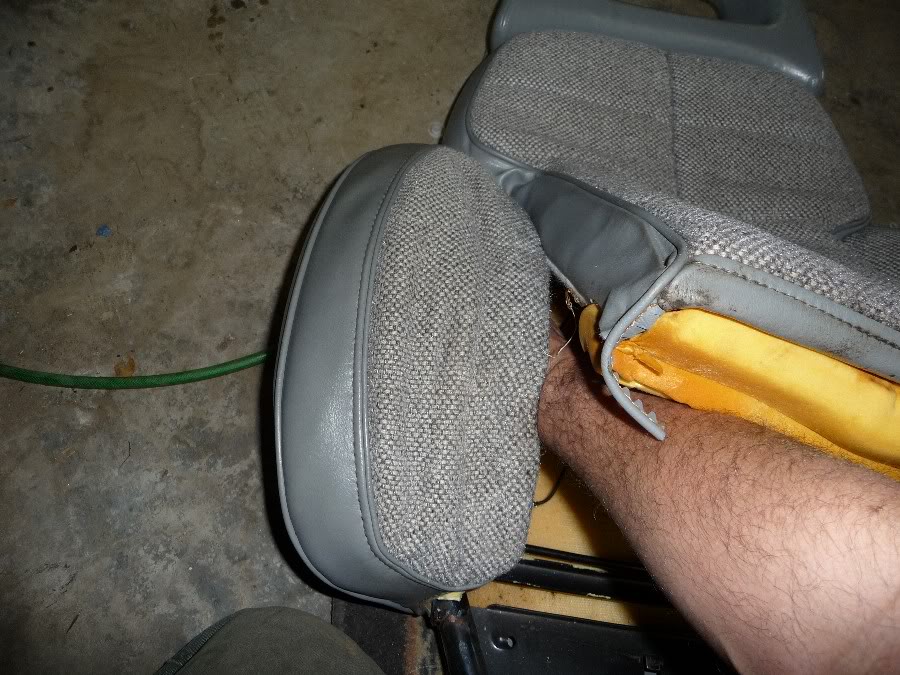
Do that to both sides till you got this
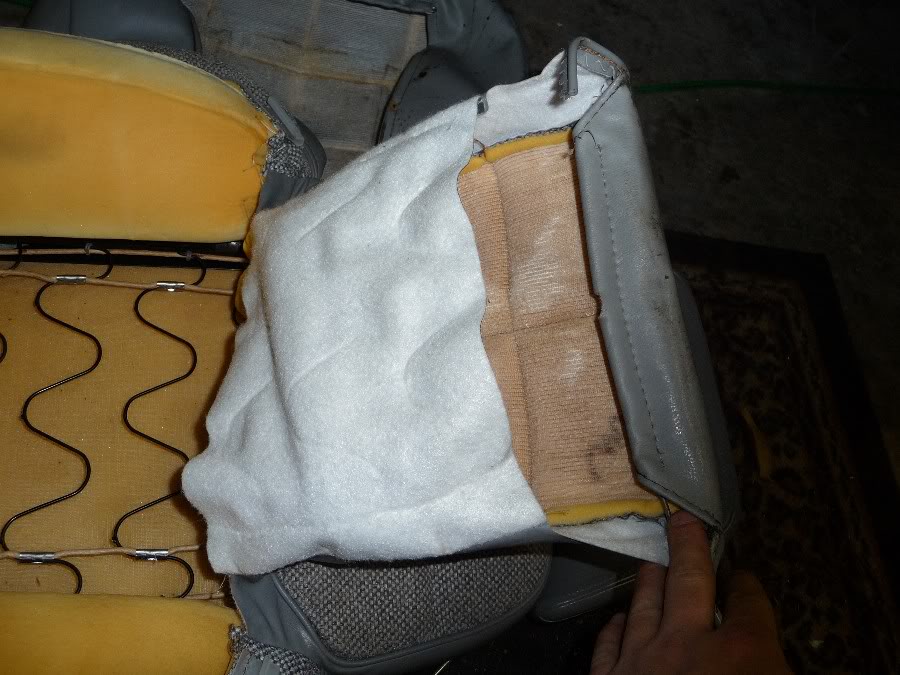
Now lift the back cushion up again. There is velcro here, but it is much easier, take what you learned earlier and apply that here
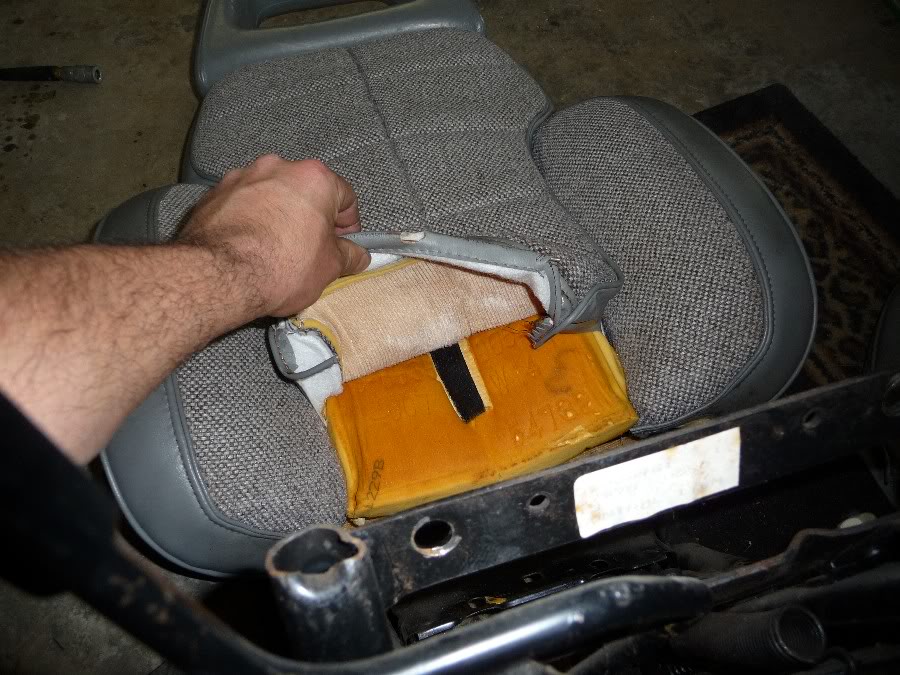
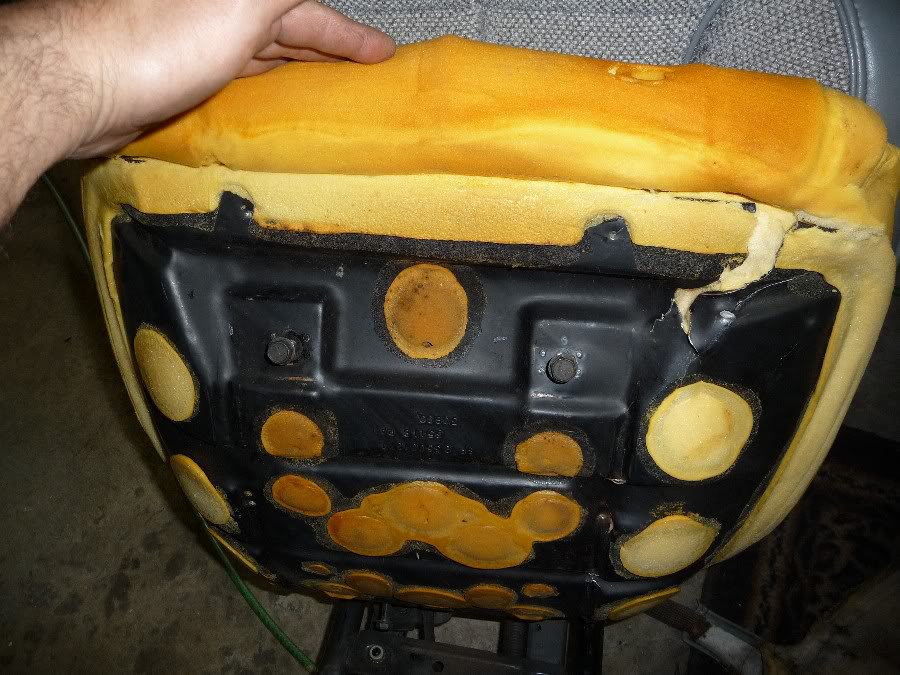
Once the velcro is released all the way to the top, pull the foam out of the big white retaining strap. I found it easiest to kinda fold the foam in half and then push it out. Here its folded in half inside the retainer
Now its out
This part is tricky if your not paying attention. The foam isn't to strong and if you try to seperate the velcro by pulling on the fabric and the foam you'll just tear the velcro off your foam. The trick is get your fingers in the velcro seam and push down on the velcro while holding the fabric in place. Keeping your force on the velcro will insure good results(try not to press on the foam at all)
Once the velcro is loose(it will reattach a little bit) adn the screws out, pull the skin forward starting at the back
Take a second to inspect your cushion. This first one has the "gangsta lean" problem..note the crack on the right side(in the vehicle this would be on the left)
Heres my replacement. Its a passenger seat XJ cushion(the driver passenger cushions are the same) from the JY..$14
Now lets get started on the back rest skins
Sometime those little wires get stuck/out of place and I couldn't get this one till the bottom cushion was off. Take it off now if its still there
Now the center of the back rest will lift right out(we will come back to this later..moving on)
Next I started on the "love handles" of the seat. once you lift the back cushion up you'll see white plastic clips
These simply unhook them. Note: on reassembly make sure you put them on the right rope, or things willn't fit right.
Now the "love handles" can be pulled back. This is another area where you need to pay attention. There is no velcro here, but if you just pull on the fabric you will tear the foam. Work a hand into the seat to where the fabric meets the vinyl, then once again, press on the foam while pulling the back of your hand up....the skin should slid down the back of you hand
Do that to both sides till you got this
Now lift the back cushion up again. There is velcro here, but it is much easier, take what you learned earlier and apply that here
Once the velcro is released all the way to the top, pull the foam out of the big white retaining strap. I found it easiest to kinda fold the foam in half and then push it out. Here its folded in half inside the retainer
Now its out
07-03-2010, 11:21 PM
#3
Seasoned Member
Thread Starter
Join Date: Sep 2009
Location: Everett, WA
Posts: 373
Likes: 0
Received 0 Likes
on
0 Posts
Year: 1990
Model: Cherokee
Engine: 4.0l
Oh yeah don't forget the seat recline lever!!
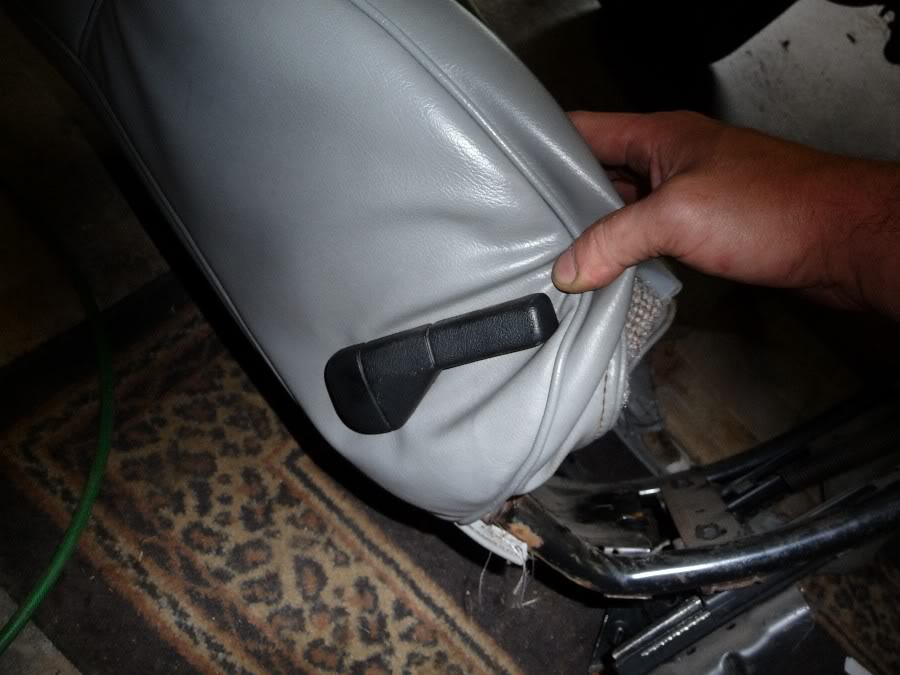
Now pull the skin off starting at the bottom, where the two cushions meet and pulling up towards the top of the seat Do not pull it all the way off at this time!
Turn it around and you'll see the headrest anchors near the top. They have two little barbs that you need to push in, and then they lift out the top. Be carefull as they do break easy
Now pull the skin all the way off...Take a minute to admire the years of sweat, fast food, grease and previous owner grime...mmmm.
How to wash:
-I started by getting a can of auto upholstery cleaner, the stuff with the scrubb brush on the top and oxy booster stuff in it. I recommend using some sort of upholstery cleaner to really get in there deep.
-Spray the entire can on your two from seat skins and scrub like your being payed for it(payed well).
-go drink a beer and come back in a couple hours. Gather up your seat skins and explain to your wife you don't know how to wash them. Explain your incompetent with a washing machine and you don't know what to do. If she feels sorry she'll wash them for you..you can go back to drinking your beer
-If you need to do this on your own, your gonna need a super capacity washer to fit all of them at once. A buddy with a bunch of kids will have one or a laundry mat would, but if theres an attendent, they might say no to seat skins.
-Heres how I fit them, the two backs went in first at the 9 o'clock and 3 o'clock positions, they should squeeze(barely) inside the drum. Now put the two bottom skins at 12 o'clock and 6 o'clock positions
-Wash until clean. If the tops of the back skins didn't get agitated in, you can flip them upside down and wash again
It took me two heavy wash cycles for the water to stay clear on the final cycle. I had no idea how much dirt was in there...good grief! the water was a grey slurry of...ahh..it was just gross
Note: Putting your covers in the dryer will shrink them dramaticly!!! the final spin cycle gets almost %95 of the water out, but I decided to put mine in the dryerfor about 15 min to help "tighten" them up
Once they are dry ore near dry, reassemble your seats in the opposite order being careful of tearing the foam and replacing all the wire pieces in their proper places
You should now have NEW looking stock seats and no "gansta lean"!!!
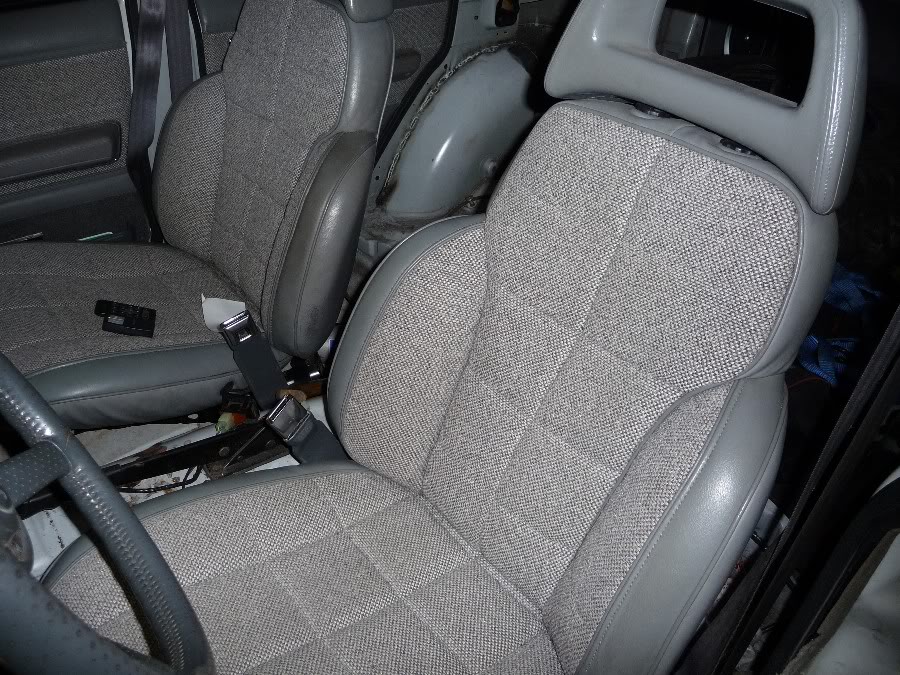
Also your Jeep will smell great!!, Good luck!!
Now pull the skin off starting at the bottom, where the two cushions meet and pulling up towards the top of the seat Do not pull it all the way off at this time!
Turn it around and you'll see the headrest anchors near the top. They have two little barbs that you need to push in, and then they lift out the top. Be carefull as they do break easy
Now pull the skin all the way off...Take a minute to admire the years of sweat, fast food, grease and previous owner grime...mmmm.
How to wash:
-I started by getting a can of auto upholstery cleaner, the stuff with the scrubb brush on the top and oxy booster stuff in it. I recommend using some sort of upholstery cleaner to really get in there deep.
-Spray the entire can on your two from seat skins and scrub like your being payed for it(payed well).
-go drink a beer and come back in a couple hours. Gather up your seat skins and explain to your wife you don't know how to wash them. Explain your incompetent with a washing machine and you don't know what to do. If she feels sorry she'll wash them for you..you can go back to drinking your beer
-If you need to do this on your own, your gonna need a super capacity washer to fit all of them at once. A buddy with a bunch of kids will have one or a laundry mat would, but if theres an attendent, they might say no to seat skins.
-Heres how I fit them, the two backs went in first at the 9 o'clock and 3 o'clock positions, they should squeeze(barely) inside the drum. Now put the two bottom skins at 12 o'clock and 6 o'clock positions
-Wash until clean. If the tops of the back skins didn't get agitated in, you can flip them upside down and wash again
It took me two heavy wash cycles for the water to stay clear on the final cycle. I had no idea how much dirt was in there...good grief! the water was a grey slurry of...ahh..it was just gross
Note: Putting your covers in the dryer will shrink them dramaticly!!! the final spin cycle gets almost %95 of the water out, but I decided to put mine in the dryerfor about 15 min to help "tighten" them up
Once they are dry ore near dry, reassemble your seats in the opposite order being careful of tearing the foam and replacing all the wire pieces in their proper places
You should now have NEW looking stock seats and no "gansta lean"!!!
Also your Jeep will smell great!!, Good luck!!

Thread
Thread Starter
Forum
Replies
Last Post
gwthamm
Stock XJ Cherokee Tech. All XJ Non-modified/stock questions go here
3
09-04-2015 11:29 AM
Currently Active Users Viewing This Thread: 1 (0 members and 1 guests)