Rear yoke u-bolt conversion
 11-04-2009, 09:13 AM
#1
CF Veteran
Thread Starter
This an easy and inexpensive upgrade to increase the strength of your driveline. If you have ever broken a rear u-joint on the trail and had the retaining strap bolts break off in the yoke, then you already know what a pain it is to repair in the field. This will make the driveline stronger and will make trail repair much easier in the event of a u-joint failure.
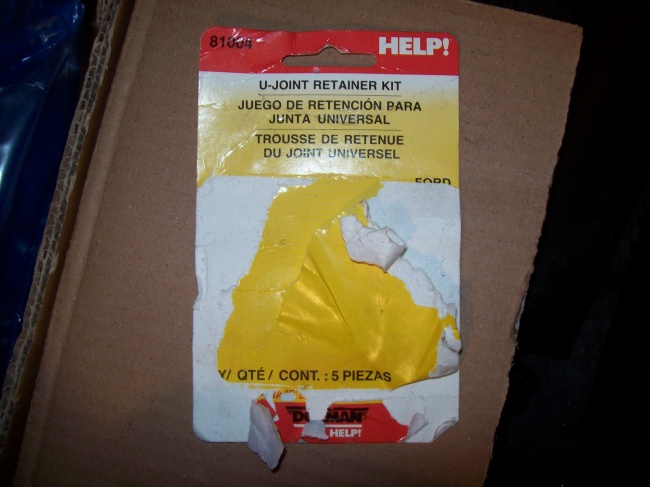
Parts needed: 2 u-joint retainer kits, part # 81004. These can be found at almost every auto parts store for around $5 each. You will also need a good quality 5/16 drill bit to drill out the yoke. And yes the package says Ford on it.
Tools needed: Electric or cordless drill with a good bit, 8mm wrench to remove the existing u-strap bolts, and a 1/2" wrench to install the new retainers.
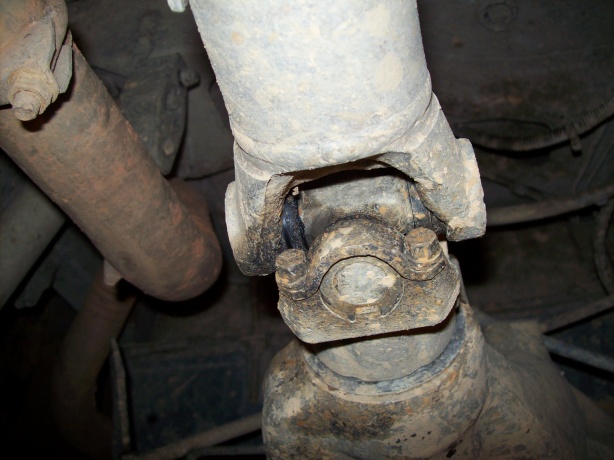
To start with the basics of why this improves to driveline strength. The factory method of holding the u-joint into the yoke is 2 straps secured by 4 small weak bolts. With the increased driveline angles caused by lifting a vehicle, it becomes easier to put the u-joint in a bind when accelerating while flexing the suspension. When the u-joint binds it has to find some way to relaese the pressure. That usually means the bolts on the retaining strap will break and the driveshaft seperates from the yoke.
Factory setup
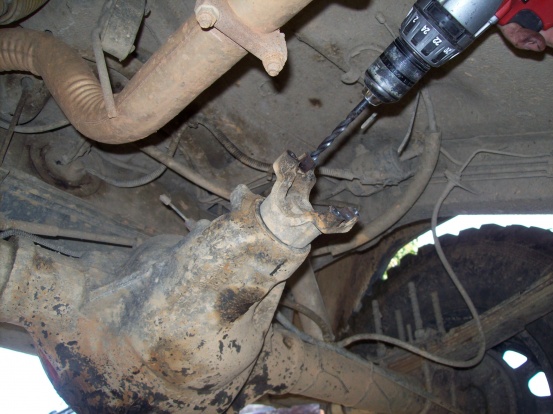
After removing the 4 existing u-strap bolts and moving the driveshaft out of the way. Drill out the four bolt holes in the yoke with the 5/16 bit.
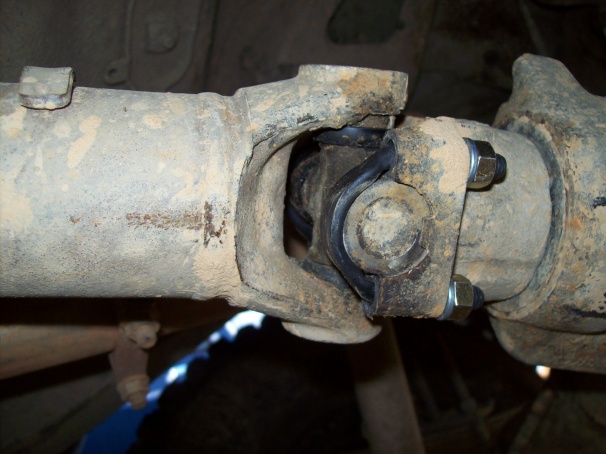
Position the driveshaft back in the yoke, this would also be a good time to replace that rear yoke if needed. Install the u-bolts, lock washers, and retaining nuts. Tighten it all up with the 1/2" wrench and you are ready to go.
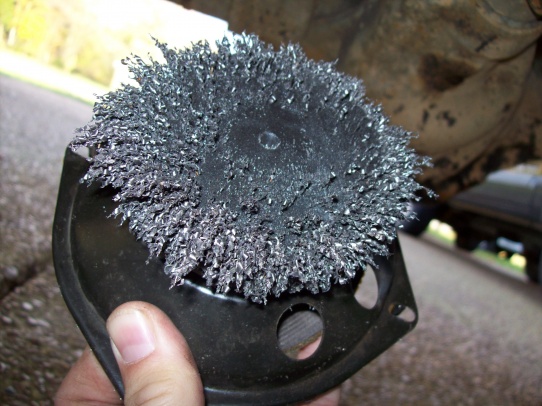
As an additional tip, keep a old blown speaker laying around the garage. It makes the clean up of all those metal shavings a quick and easy process.
You can also purchase a couple of extra u-bolts kits to keep in your trail kit. If you do break a u-joint and damage the u-bolt, they are easy to remove and replace.
Parts needed: 2 u-joint retainer kits, part # 81004. These can be found at almost every auto parts store for around $5 each. You will also need a good quality 5/16 drill bit to drill out the yoke. And yes the package says Ford on it.
Tools needed: Electric or cordless drill with a good bit, 8mm wrench to remove the existing u-strap bolts, and a 1/2" wrench to install the new retainers.
To start with the basics of why this improves to driveline strength. The factory method of holding the u-joint into the yoke is 2 straps secured by 4 small weak bolts. With the increased driveline angles caused by lifting a vehicle, it becomes easier to put the u-joint in a bind when accelerating while flexing the suspension. When the u-joint binds it has to find some way to relaese the pressure. That usually means the bolts on the retaining strap will break and the driveshaft seperates from the yoke.
Factory setup
After removing the 4 existing u-strap bolts and moving the driveshaft out of the way. Drill out the four bolt holes in the yoke with the 5/16 bit.
Position the driveshaft back in the yoke, this would also be a good time to replace that rear yoke if needed. Install the u-bolts, lock washers, and retaining nuts. Tighten it all up with the 1/2" wrench and you are ready to go.
As an additional tip, keep a old blown speaker laying around the garage. It makes the clean up of all those metal shavings a quick and easy process.
You can also purchase a couple of extra u-bolts kits to keep in your trail kit. If you do break a u-joint and damage the u-bolt, they are easy to remove and replace.
Last edited by winston427; 11-04-2009 at 09:18 AM.

The following users liked this post:
t-manxj (03-23-2022)

Thread
Thread Starter
Forum
Replies
Last Post
Currently Active Users Viewing This Thread: 1 (0 members and 1 guests)