
 09-18-2015, 12:43 PM
Last edit by: IB Advertising
See related guides and technical advice from our community experts:
Browse all: Jeep Cherokee XJ Interior Guides
- Jeep Cherokee 1997-2001: How to Replace Instrument Panel Bulbs
Step by step instructions for do-it-yourself repairs.
Browse all: Jeep Cherokee XJ Interior Guides

Instrument panel removal and bulb replacement
07-09-2012, 03:05 PM
#1
Junior Member
Thread Starter
Join Date: Mar 2012
Location: Leavenworth, KS
Posts: 39
Likes: 0
Received 0 Likes
on
0 Posts
Year: 1999
Model: Cherokee
Engine: 4.0L
How to remove instrument panel and replace light bulbs in a 97+ XJ
I didn’t like having dummy lights in my instrument panel, so I picked up a gauged panel at the local boneyard. After installation, I discovered a few dead bulbs (CEL, left turn signal) so I pulled it out and replaced the dead lights with ones from my old panel. The entire swap can be done in less than an hour by anyone with minimal mechanical ability. This was done on a ’97 XJ SE, the donor was a ’98 XJ Sport. Yours may be different, ask around if you're unsure. Abovetimberline did a great write-up on dash removal for pre-97s, but there's a few differences in the newer ones.
Tools Needed:
Flathead screwdriver
Phillips screwdriver
Needle-nose pliers
Fuse tester
12mm socket or other tool to disconnect the battery
Parts needed:
Replacement instrument panel
The old:
1. First disconnect the negative battery terminal. You’re gonna be near the airbag, no need to take chances.
2. Remove the plastic cover over the radio, center vents, HVAC controls etc. This is easy, just get a grip on it and pull, it just clips on.
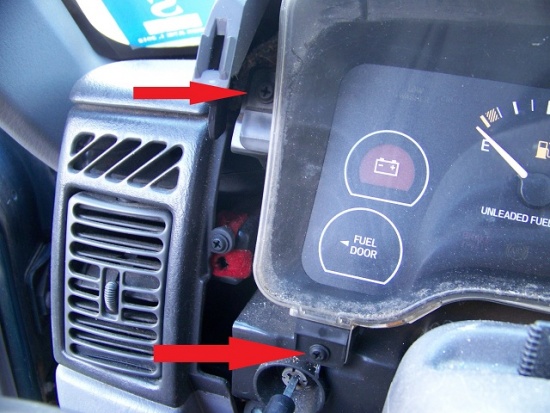
3. Remove four Phillips screws as shown:

Don’t worry if your radio is still there, it doesn’t get in the way unless you’ve done some weird aftermarket changes.
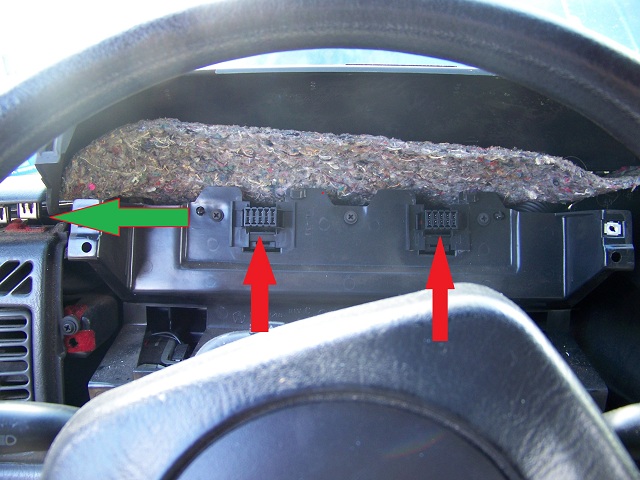
4. Remove three screws from the bottom of the plastic trim underneath the steering wheel, the top is held in by clips. Then remove the two screws holding the metal piece up (green arrows), and remove it.
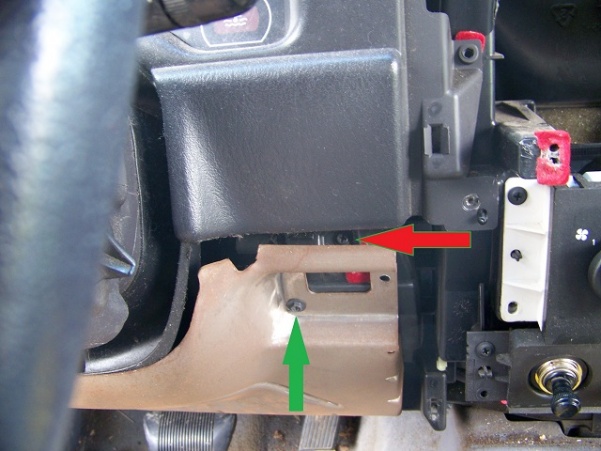
BTW, that aftermarket oil gauge is finally gone!! I hated that thing.
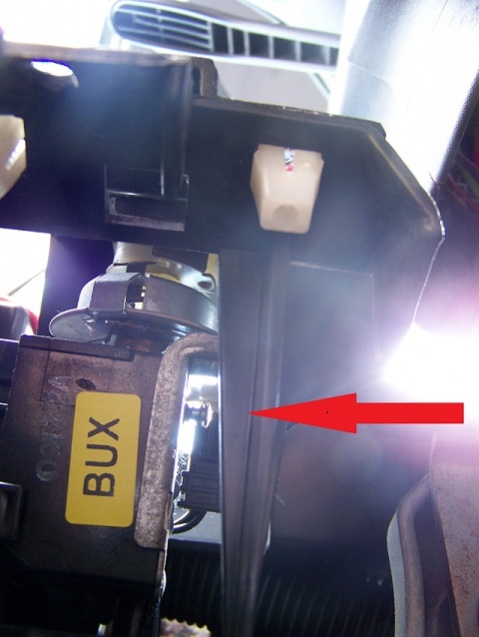
5. Now remove the headlight switch ****. Looking underneath you will see this screw with a spring on it. Depress the screw with a flathead screwdriver while pulling the **** out.
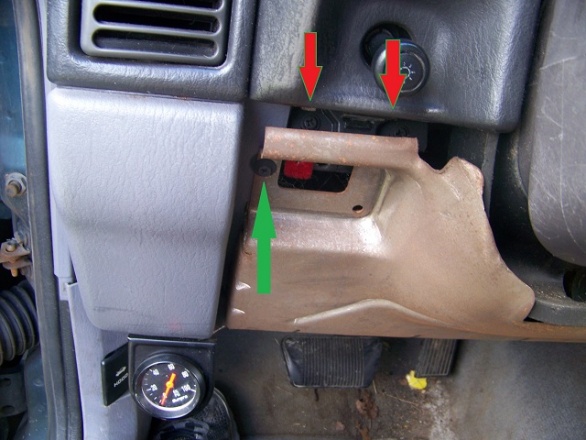
6. Remove the screws marked with red arrows in step 4. Loosen the rubber gasket that surrounds the steering column, starting at the bottom. Pull the console straight out, there are a couple of clips still holding it.
Last edited by morelia1976; 07-09-2012 at 03:19 PM. Reason: add link to abovetimberline's write-up
 07-09-2012, 03:11 PM
#2
Junior Member
Thread Starter
Join Date: Mar 2012
Location: Leavenworth, KS
Posts: 39
Likes: 0
Received 0 Likes
on
0 Posts
Year: 1999
Model: Cherokee
Engine: 4.0L
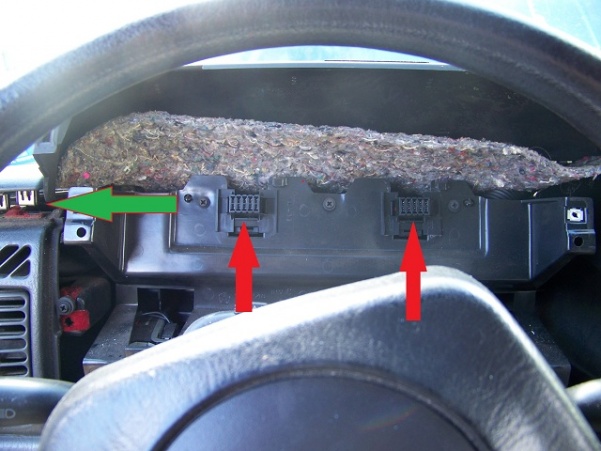
7. Remove the four screws holding your instrument panel in place.


8. Pull the instrument panel straight out. Mine was a bit hard to remove, but it came out eventually. Its held by two harnesses (Red arrows. Green arrow shows one of the clip points.)
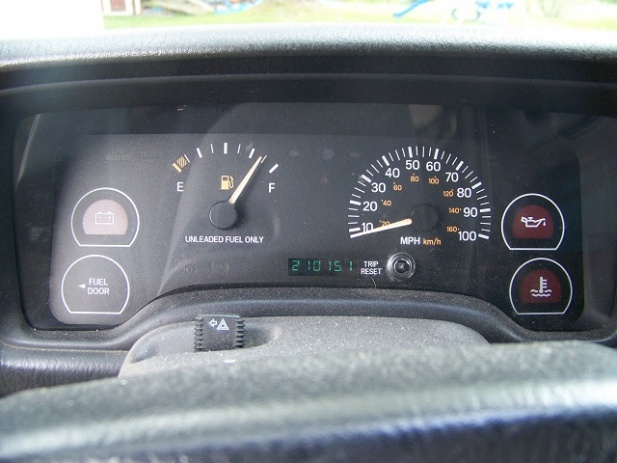
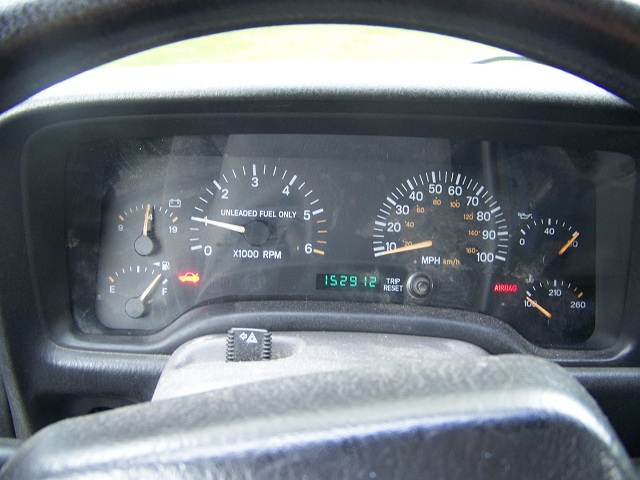
9. Installation is the reverse of removal. Be patient when putting the rubber gasket back around the steering column and you shouldn’t have any troubles. Here’s my new panel, notice the mileage change. The mileage is stored in the instrument panel, check local laws about changing vehicle mileage, I know in Michigan, the title has a spot to check if the mileage shown on the odometer is not the true mileage on the vehicle.
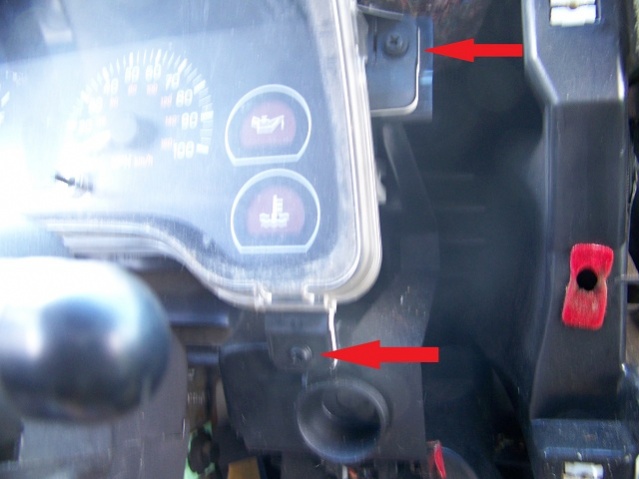
8. Pull the instrument panel straight out. Mine was a bit hard to remove, but it came out eventually. Its held by two harnesses (Red arrows. Green arrow shows one of the clip points.)
9. Installation is the reverse of removal. Be patient when putting the rubber gasket back around the steering column and you shouldn’t have any troubles. Here’s my new panel, notice the mileage change. The mileage is stored in the instrument panel, check local laws about changing vehicle mileage, I know in Michigan, the title has a spot to check if the mileage shown on the odometer is not the true mileage on the vehicle.
 07-09-2012, 03:13 PM
#3
Junior Member
Thread Starter
Join Date: Mar 2012
Location: Leavenworth, KS
Posts: 39
Likes: 0
Received 0 Likes
on
0 Posts
Year: 1999
Model: Cherokee
Engine: 4.0L
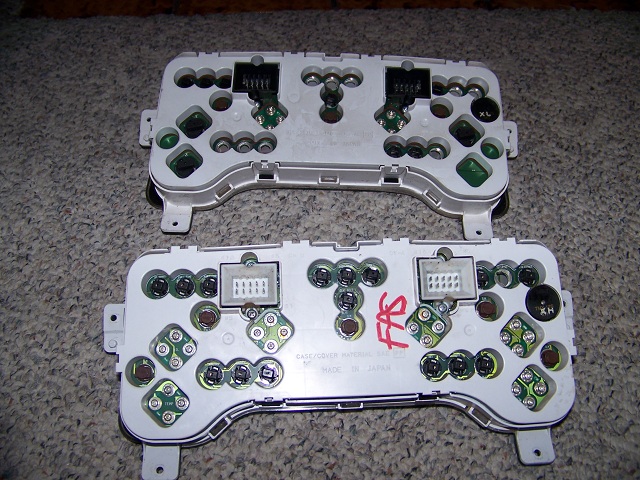
Instrument panel lights:
Once the instrument panel is removed, you’ll turn it over and see this (the old one is on top, the “new” one is on bottom.):
Find the dead light, and use needlenose pliers to give it a Ľ turn counterclockwise, removing it. Test the light to make sure it’s dead. I used a fuse tester:
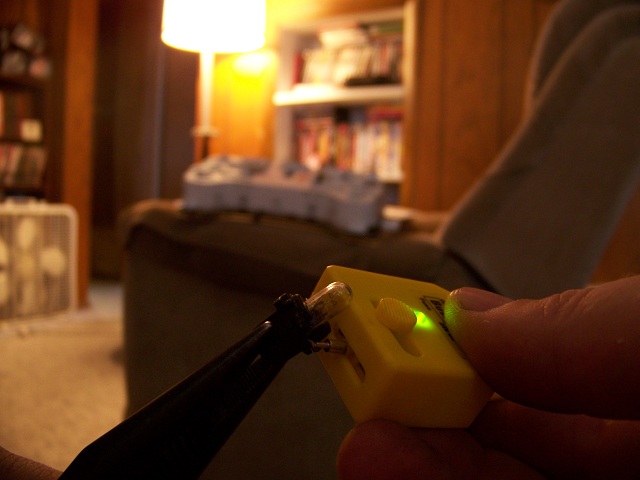
If it lights, it’s good. I learned that the CEL in both panels were bad. I just went through lights on the old panel until I found enough good ones to replace the dead ones on the new panel. I’d be interested if anyone knows of any LED replacements or if it’s possible.
Use needlenose pliers to gently install the new bulb, and you’re good to go.
Once the instrument panel is removed, you’ll turn it over and see this (the old one is on top, the “new” one is on bottom.):

Find the dead light, and use needlenose pliers to give it a Ľ turn counterclockwise, removing it. Test the light to make sure it’s dead. I used a fuse tester:

If it lights, it’s good. I learned that the CEL in both panels were bad. I just went through lights on the old panel until I found enough good ones to replace the dead ones on the new panel. I’d be interested if anyone knows of any LED replacements or if it’s possible.
Use needlenose pliers to gently install the new bulb, and you’re good to go.

Thread
Thread Starter
Forum
Replies
Last Post
Blackcherokee290
Stock XJ Cherokee Tech. All XJ Non-modified/stock questions go here
27
07-26-2022 07:52 PM
Zerocyde
Stock XJ Cherokee Tech. All XJ Non-modified/stock questions go here
5
08-24-2015 10:56 AM
Currently Active Users Viewing This Thread: 1 (0 members and 1 guests)