How to: ignition tune up
 11-20-2008, 10:15 PM
#1
CF Veteran
Thread Starter
Join Date: Nov 2008
Location: Metro Denver, CO
Posts: 1,735
Likes: 0
Received 0 Likes
on
0 Posts
Year: 1987
Model: Cherokee
Engine: 4.0L
It's a basic guide, but it's something that I didn't know how to do immediately. Here's a guide for the not so mechanically inclined (with pictures).
I had a problem where my jeep would jolt (just one big shake) when I was driving down the road around 40~50 mph. As it turns out, my ignition wires were arcing ( you can check and see if yours do this by parking in a DARK area and watching the top of the spark plugs for a spark.). So, I'm going to write up a guide on how to fix this problem.
Difficulty: 2 wrenches out of 5. Not the hardest repair in the world, but definitely a little more involved than an oil change.
Grime factor: 3 rags out of 5. My hands were pretty black after I was done and it took a good bit of cleaner to get the stuff off, hands are all clean now.
Completion time: Approximately 20 minutes
Tools and parts needed:
5/8" spark plug socket (as pictured)
ratchet wrench with extender (as pictured)
A good set of pliers (not needle nose)
new ignition wires (box set)
new spark plugs (in my jeep's case, six. You'll need one for each cylinder)
camera (optional, but if you forget the way the wires were arranged, it'll help quite a bit.)
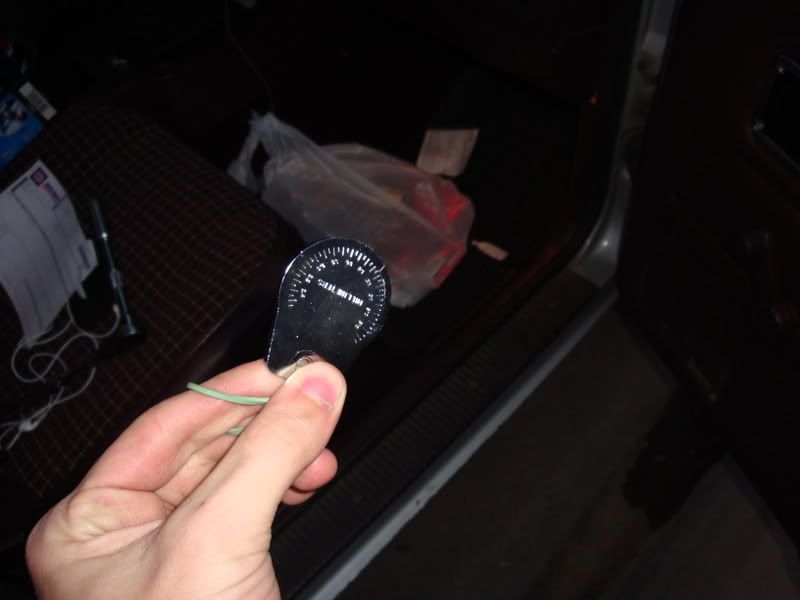
Spark plug gap measuring tool. (they cost like a dollar)
Skills needed:
Ability to operate a ratchet wrench
Know how to check gaps on spark plugs

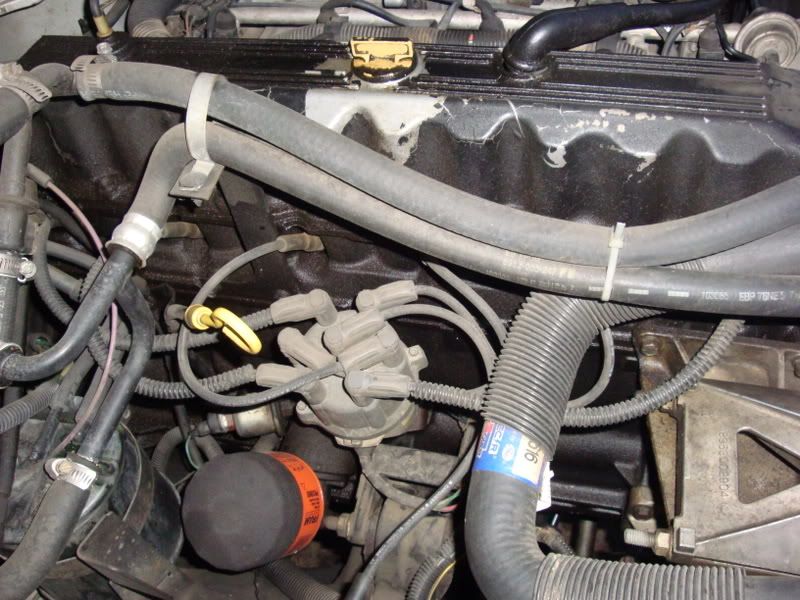
Here is a picture of my ignition wires & plugs (spark plugs) before the tune up:
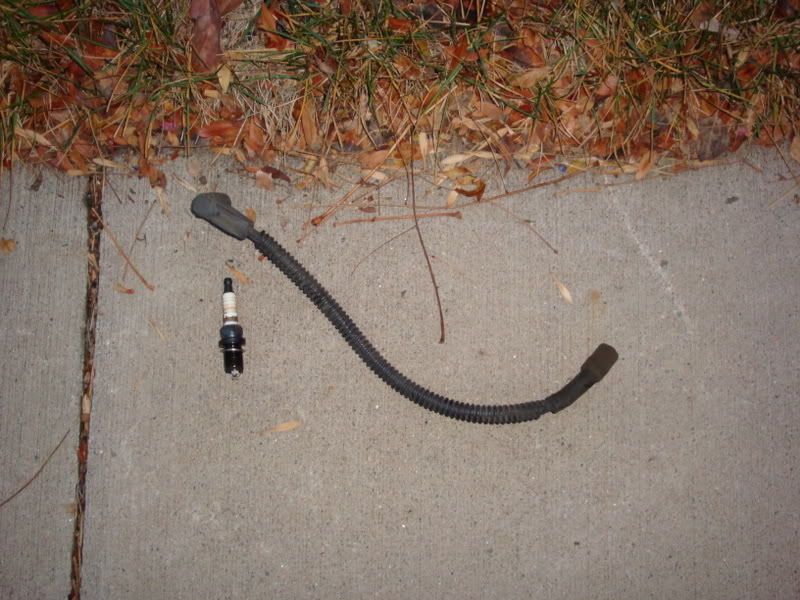
Here is a picture of a spark plug (left) and ignition wire (right):
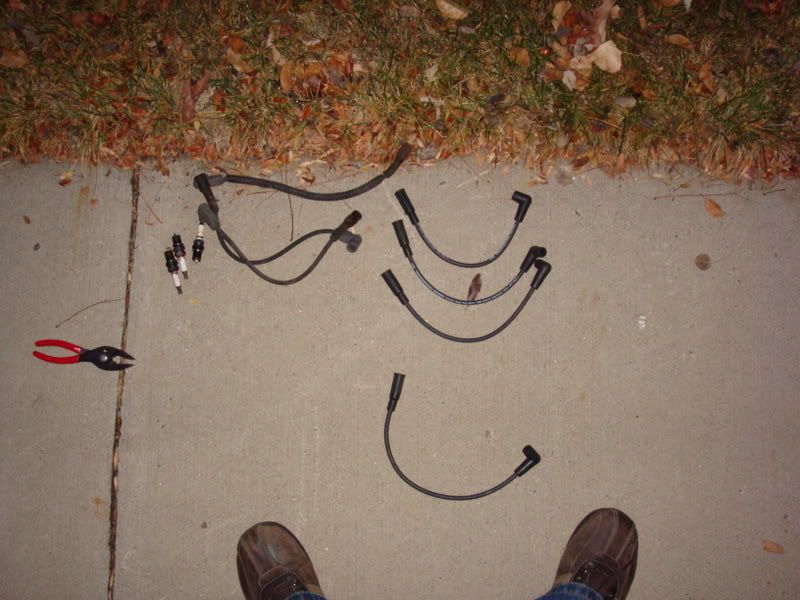
I start at the left end (I'll call this cylinder 1) and moved my way to the back (cylinder 6). Note: ONLY REMOVE ONE PLUG/WIRE ASSEMBLY AT A TIME! If you remove more than one, you could lose track of which wires hook up to which plug very quickly. This is bad. When you are replacing the ignition wires and spark plugs, try to keep parts organized. This will allow you to easily keep track of which wires and plugs you have already replaced. In this photo, the old wires are on the left along with the old spark plugs. The new wires are on the right. The pliers I used to help pull the plugs out are on the far left. (I kept the new spark plugs up off the ground in their boxes to help keep them clean.
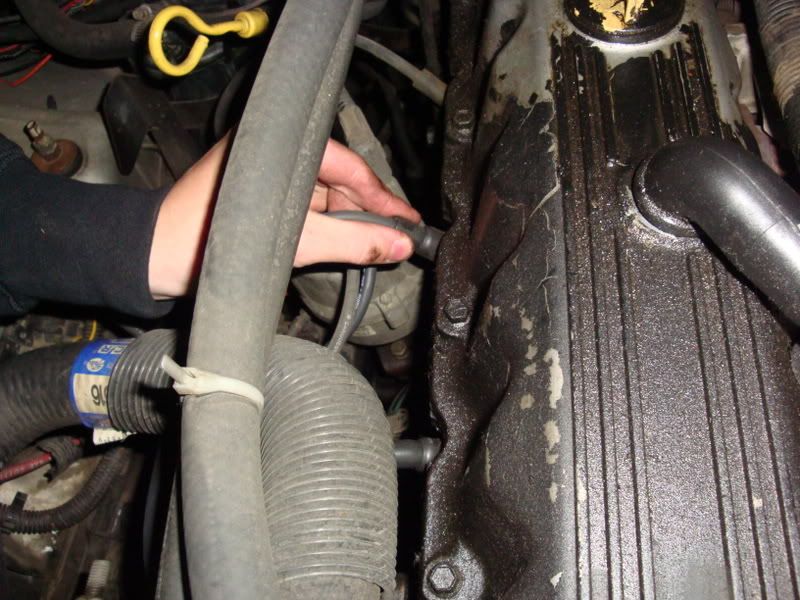
To begin, remove the old ignition wire from both the cap (the black part all the wires are connected to) and the spark plug (the end on the engine block). Make sure when you remove the wires, that you pull them by the base of the plug, if you pull by the wire, you can separate the wire from the plug, making it very difficult to remove. When you remove the wire, make a note of the other wires it crosses over (this is how it's supposed to be) for when you put the new wire back in. Attempt to get it as close to the same as possible, this is where the camera comes in handy to take a picture of how it's set up to reference later.
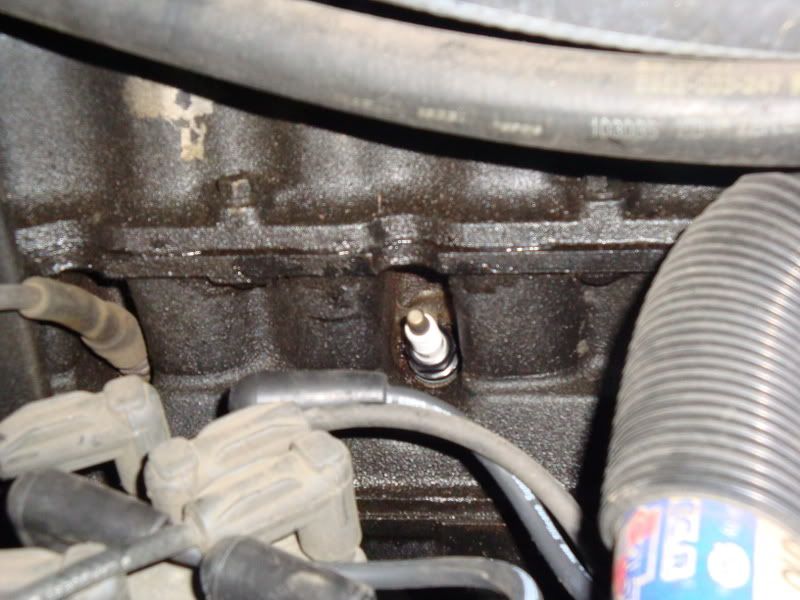
Step 2: Remove the spark plug from the engine block. Note: if you had been running your car for any duration before the repair, you should let it cool off first, as these parts get very hot. Try not to drop any dirt or blow into the open hole from the spark plug as this leads directly into your cylinder. Once you remove the spark plug, set it down next to the old ignition wire. Here is a picture of my spark plug, ignition wire removed.
Get your new spark plug and check the gap to make sure it is correct. Spark plug gaps vary by plug and car models, so make sure you find out the correct gap. Place the new spark plug in the slot where the old spark plug was, as per your organizational method. Begin threading by hand. If the spark plug is too hard to reach, you can use the socket and extender (but not the ratchet itself!) to give yourself a little more reach. On my particular cherokee, plug #6 was difficult to reach. Make sure the plug is snug, but don't tighten it as far as you can.

Replace the ignition wire, making sure you use the wire that is closest in length to the old one (yes, they come in varying sizes). Remember how much force these took to get off? Keep that in mind when you put the new ones on, they should click into place. To check and see that the ignition wires are fully secured, gently pull the plug out. If it takes little to no force to disconnect it from either the cap or the spark plug, it was not installed correctly.
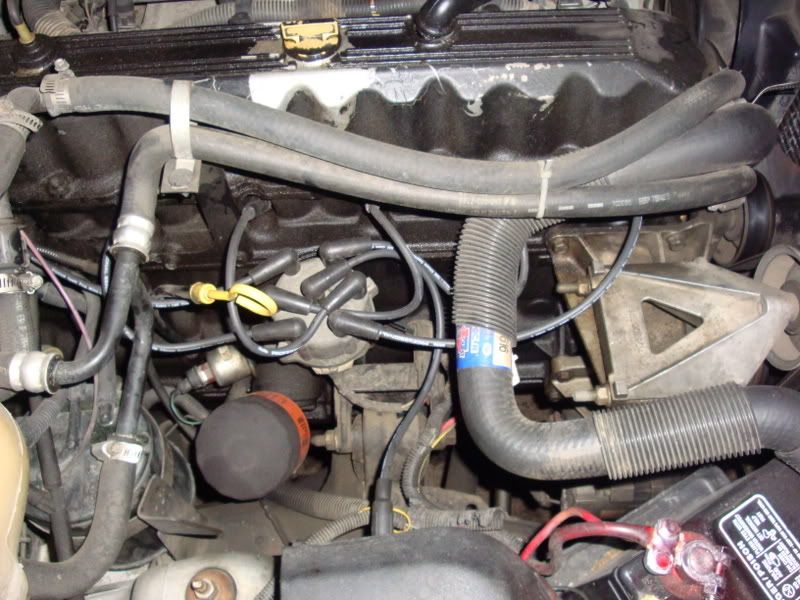
Repeat this process for all cylinders, the final wire will lead away from the cap. Repeat the same process as you did for the other cylinders, but note that you DO NOT need a spark plug for this connection, all you need is the wire. Once you have finished installing the new wires and spark plugs, check that you have installed all the new parts and haven't missed anything. The finished result should look like this (note that the new wires are darker in color and cleaner than the old ones):
Congratulations! You have completed an ignition tune up! Start up your engine and make sure that it runs smoothly. If you hear any unusual noises or hear that the engine isn't running correctly, shut down the engine immediately and double check your work.
I had a problem where my jeep would jolt (just one big shake) when I was driving down the road around 40~50 mph. As it turns out, my ignition wires were arcing ( you can check and see if yours do this by parking in a DARK area and watching the top of the spark plugs for a spark.). So, I'm going to write up a guide on how to fix this problem.
Difficulty: 2 wrenches out of 5. Not the hardest repair in the world, but definitely a little more involved than an oil change.
Grime factor: 3 rags out of 5. My hands were pretty black after I was done and it took a good bit of cleaner to get the stuff off, hands are all clean now.
Completion time: Approximately 20 minutes
Tools and parts needed:
5/8" spark plug socket (as pictured)
ratchet wrench with extender (as pictured)
A good set of pliers (not needle nose)
new ignition wires (box set)
new spark plugs (in my jeep's case, six. You'll need one for each cylinder)
camera (optional, but if you forget the way the wires were arranged, it'll help quite a bit.)
Spark plug gap measuring tool. (they cost like a dollar)
Skills needed:
Ability to operate a ratchet wrench
Know how to check gaps on spark plugs
Here is a picture of my ignition wires & plugs (spark plugs) before the tune up:
Here is a picture of a spark plug (left) and ignition wire (right):
I start at the left end (I'll call this cylinder 1) and moved my way to the back (cylinder 6). Note: ONLY REMOVE ONE PLUG/WIRE ASSEMBLY AT A TIME! If you remove more than one, you could lose track of which wires hook up to which plug very quickly. This is bad. When you are replacing the ignition wires and spark plugs, try to keep parts organized. This will allow you to easily keep track of which wires and plugs you have already replaced. In this photo, the old wires are on the left along with the old spark plugs. The new wires are on the right. The pliers I used to help pull the plugs out are on the far left. (I kept the new spark plugs up off the ground in their boxes to help keep them clean.
To begin, remove the old ignition wire from both the cap (the black part all the wires are connected to) and the spark plug (the end on the engine block). Make sure when you remove the wires, that you pull them by the base of the plug, if you pull by the wire, you can separate the wire from the plug, making it very difficult to remove. When you remove the wire, make a note of the other wires it crosses over (this is how it's supposed to be) for when you put the new wire back in. Attempt to get it as close to the same as possible, this is where the camera comes in handy to take a picture of how it's set up to reference later.
Step 2: Remove the spark plug from the engine block. Note: if you had been running your car for any duration before the repair, you should let it cool off first, as these parts get very hot. Try not to drop any dirt or blow into the open hole from the spark plug as this leads directly into your cylinder. Once you remove the spark plug, set it down next to the old ignition wire. Here is a picture of my spark plug, ignition wire removed.
Get your new spark plug and check the gap to make sure it is correct. Spark plug gaps vary by plug and car models, so make sure you find out the correct gap. Place the new spark plug in the slot where the old spark plug was, as per your organizational method. Begin threading by hand. If the spark plug is too hard to reach, you can use the socket and extender (but not the ratchet itself!) to give yourself a little more reach. On my particular cherokee, plug #6 was difficult to reach. Make sure the plug is snug, but don't tighten it as far as you can.
Replace the ignition wire, making sure you use the wire that is closest in length to the old one (yes, they come in varying sizes). Remember how much force these took to get off? Keep that in mind when you put the new ones on, they should click into place. To check and see that the ignition wires are fully secured, gently pull the plug out. If it takes little to no force to disconnect it from either the cap or the spark plug, it was not installed correctly.
Repeat this process for all cylinders, the final wire will lead away from the cap. Repeat the same process as you did for the other cylinders, but note that you DO NOT need a spark plug for this connection, all you need is the wire. Once you have finished installing the new wires and spark plugs, check that you have installed all the new parts and haven't missed anything. The finished result should look like this (note that the new wires are darker in color and cleaner than the old ones):
Congratulations! You have completed an ignition tune up! Start up your engine and make sure that it runs smoothly. If you hear any unusual noises or hear that the engine isn't running correctly, shut down the engine immediately and double check your work.
Last edited by hubbazoot; 11-20-2008 at 10:17 PM.


Thread
Thread Starter
Forum
Replies
Last Post
ra.stewart
Stock XJ Cherokee Tech. All XJ Non-modified/stock questions go here
9
02-15-2021 01:47 PM
Jeremy Millner
Stock XJ Cherokee Tech. All XJ Non-modified/stock questions go here
10
10-02-2015 02:21 PM
Currently Active Users Viewing This Thread: 1 (0 members and 1 guests)