Tyler's 99 XJ DD Build
 02-22-2012, 10:37 PM
#16
Seasoned Member
Thread Starter
Join Date: Jun 2011
Location: Cali
Posts: 334
Likes: 0
Received 1 Like
on
1 Post
Year: 1999
Model: Cherokee
Engine: 4.0 L
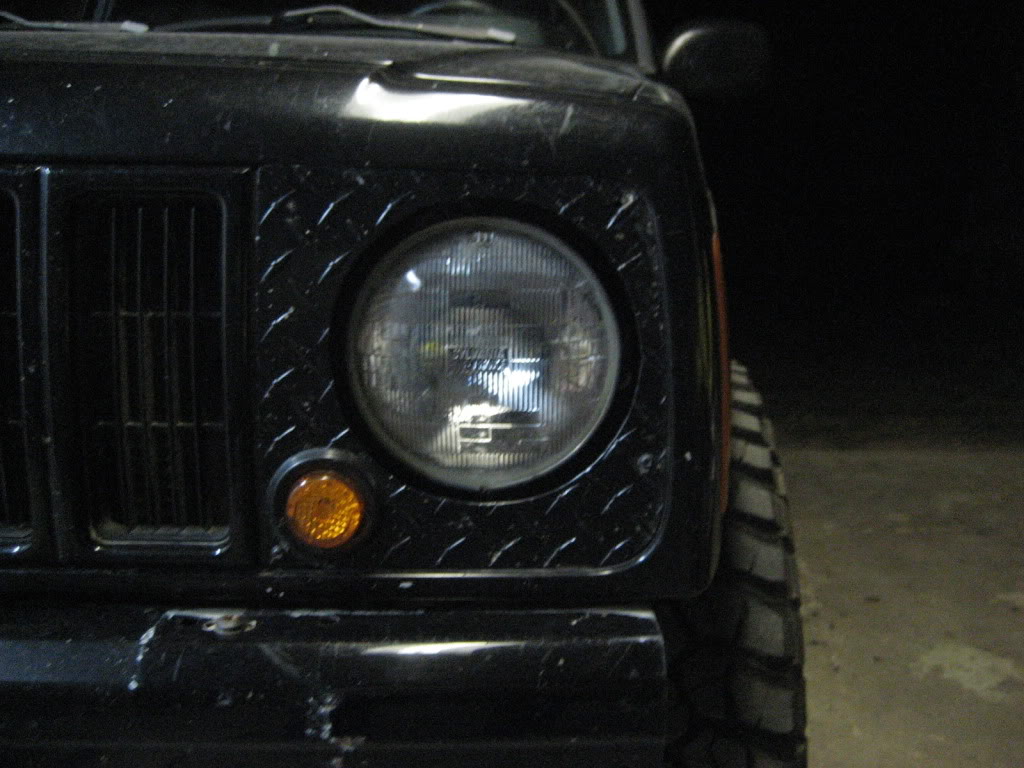
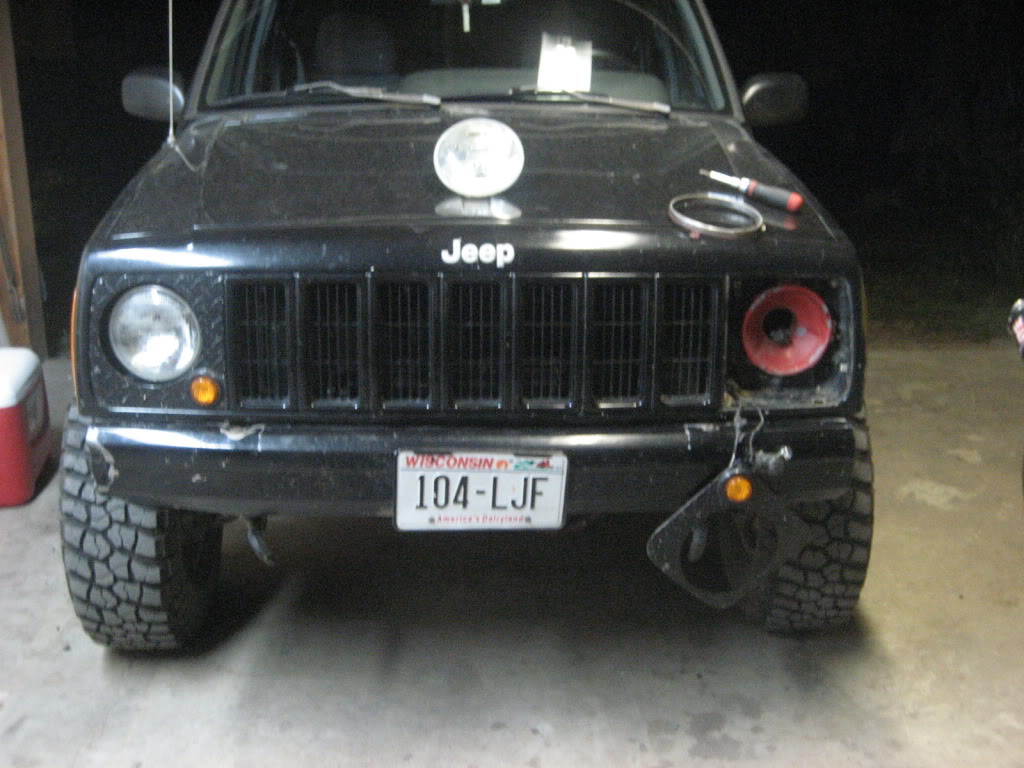
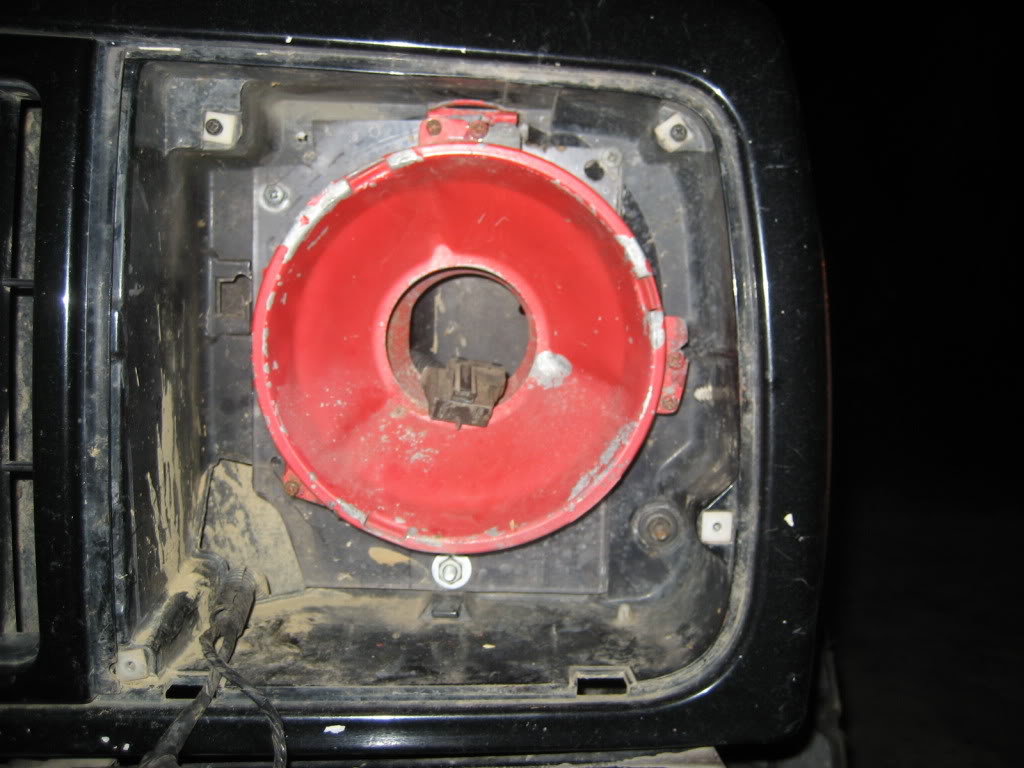
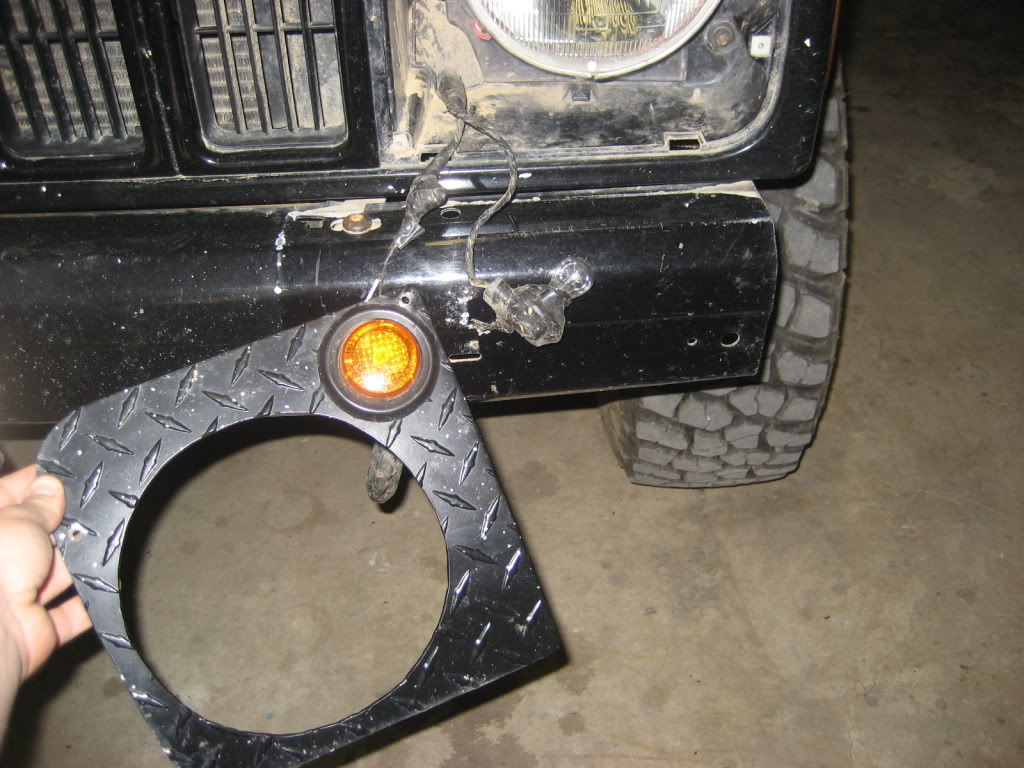
Sean1125 I miss the round light on my old XJ. I used some old cj head light buckets to replace the rectangular XJ buckets and some cheap round LED blinkers. I fabricated the head light cover out of some thin aluminum diamond plate. I plan to round a gain and will take some better pics and do a legitimate write up.
 02-23-2012, 11:17 PM
#17
Seasoned Member
Thread Starter
Join Date: Jun 2011
Location: Cali
Posts: 334
Likes: 0
Received 1 Like
on
1 Post
Year: 1999
Model: Cherokee
Engine: 4.0 L
I finish putting the rear lift on tonight. Only minor rear drive line vibes, I would like to do a SYE but for now I think I will do some first aid with a T-case drop. I will get some better pics during the day.

Last edited by thebe001; 02-23-2012 at 11:20 PM.
 02-26-2012, 09:53 PM
#20
Seasoned Member
Thread Starter
Join Date: Jun 2011
Location: Cali
Posts: 334
Likes: 0
Received 1 Like
on
1 Post
Year: 1999
Model: Cherokee
Engine: 4.0 L
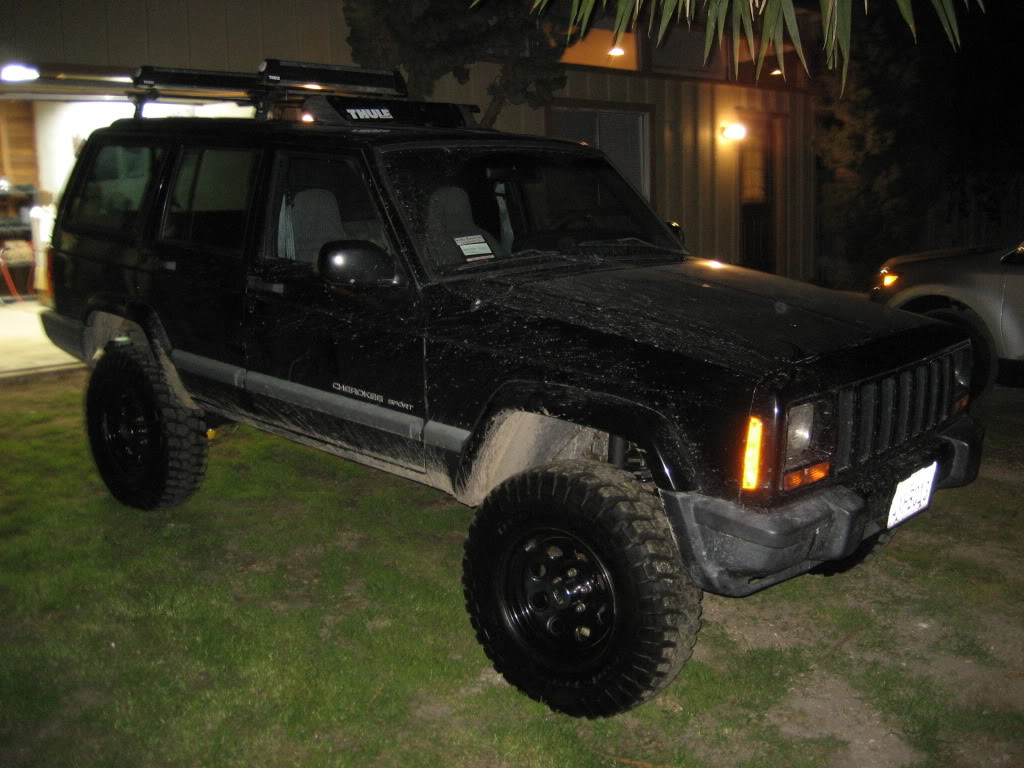
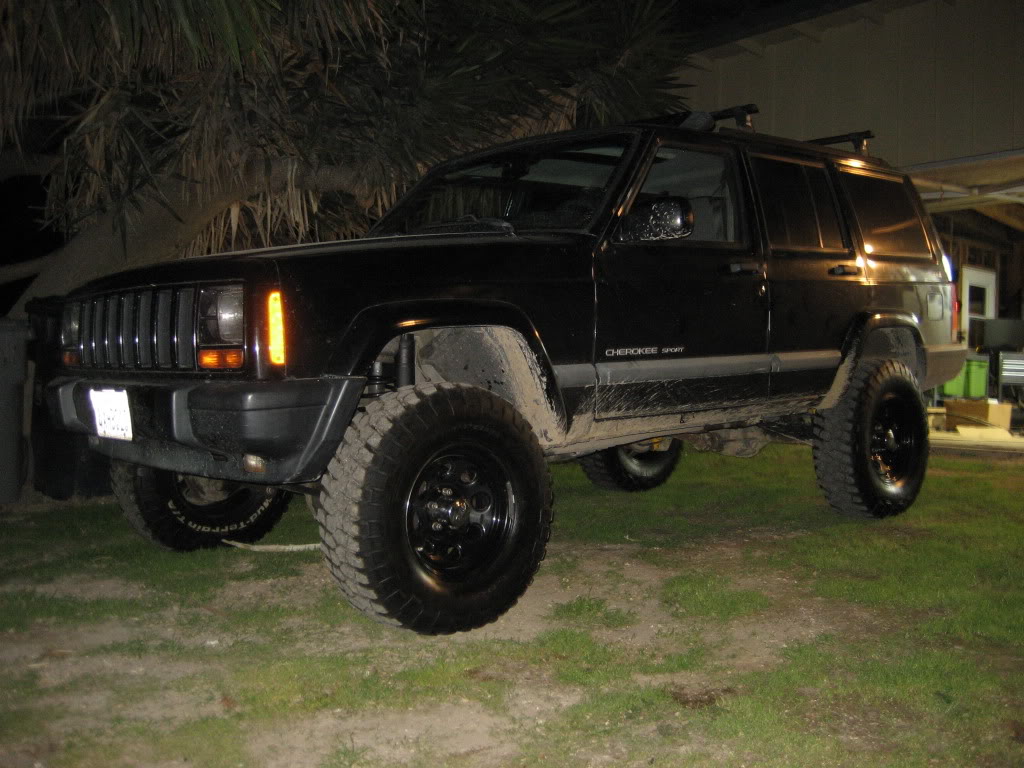
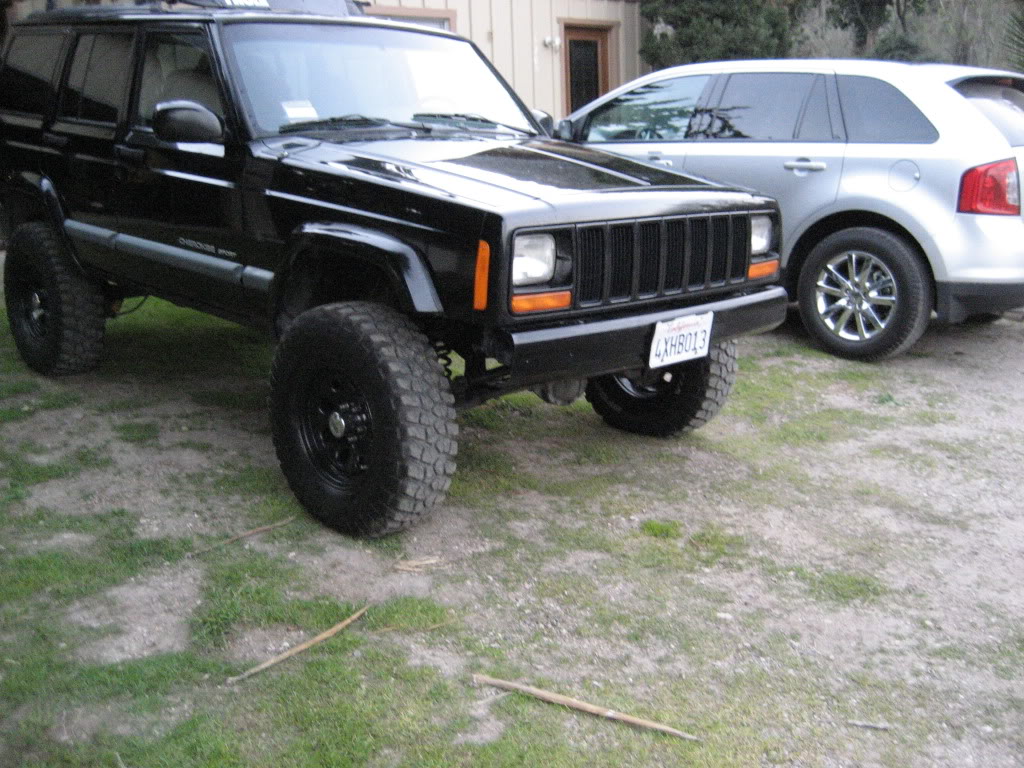
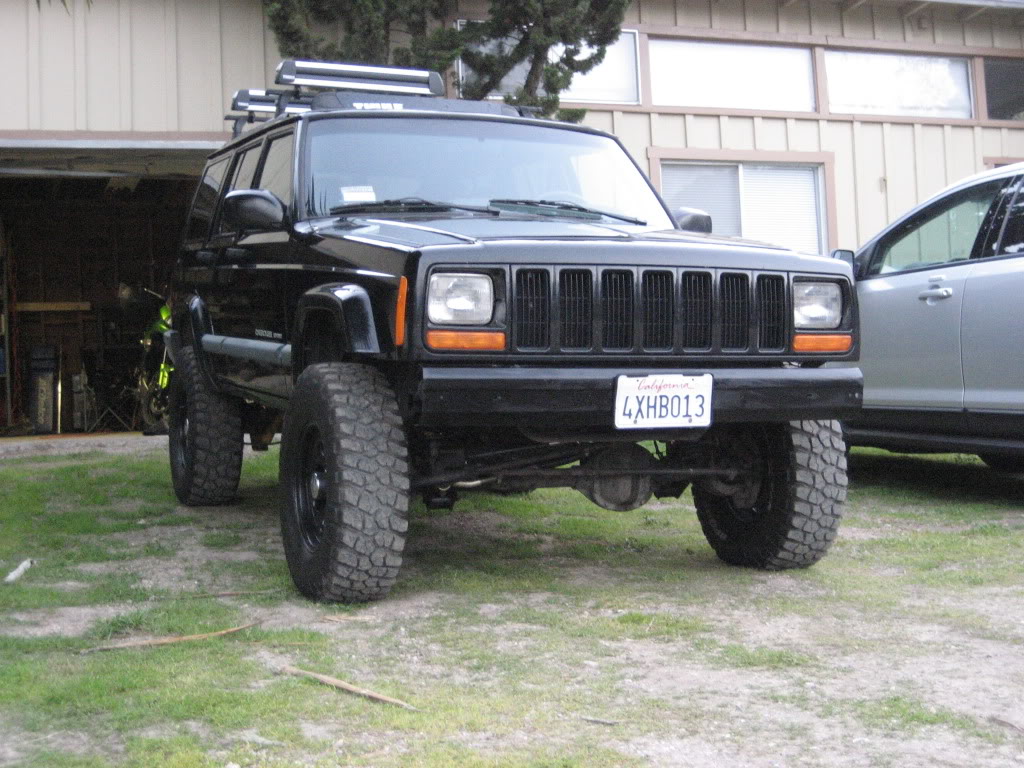
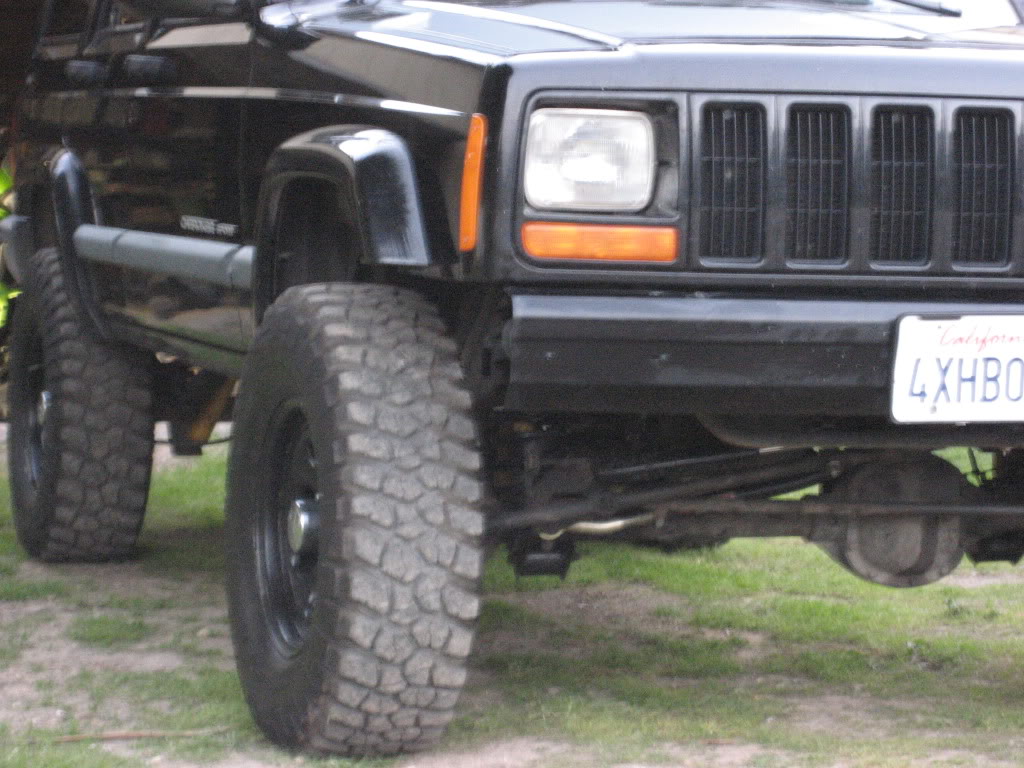
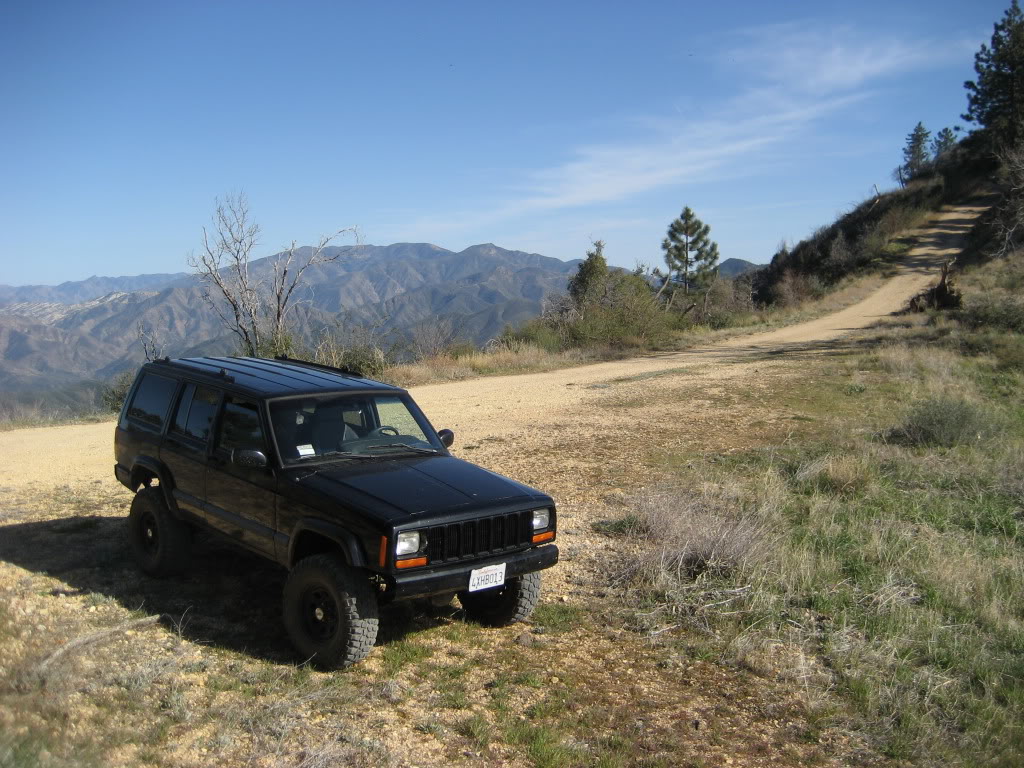
So far I give the 3.5" DPG Old Man Emu lift a 9 out of 10. right now its more like a 4"-4.5" lift hopefully it will settle a little when the springs get worn in. On the road it handles and rides very well, I would say its a slightly firmer than stock but yet has a much smoother ride. I have only taken it on some washed out gravel roads so far, at 45mph the OME suspension has no problem socking uneven terrain. As a side note I unintentionally cough some air going over a cross road going about 40mph and the suspension took it like a champ. I have had a few issues, one being minor drive line vibes which were expected. I also have some random noises coming from the rear suspension on occasion, nothing too concerning but I will check it out this week. Overall very pleased with the lift and I'm glad I spent the extra money on OME, well worth it.
02-26-2012, 10:09 PM
#21
Member

Join Date: Jul 2011
Location: AK
Posts: 152
Likes: 0
Received 0 Likes
on
0 Posts
Year: 1997
Model: Cherokee
Engine: 4.0L
Have you looked into doing a "hack-n-tap" using a yoke and the front drive shaft from a 4WD 4.0L Cherokee? I used a yoke from Driveline of Fresno and a '99 XJ Cherokee sport front drive shaft. Works greats, no vibes what so ever. I can get you a part number if your interested.
02-26-2012, 10:43 PM
#22
Seasoned Member
Thread Starter
Join Date: Jun 2011
Location: Cali
Posts: 334
Likes: 0
Received 1 Like
on
1 Post
Year: 1999
Model: Cherokee
Engine: 4.0 L
Yeah I think I will probably have to do a SYE, my only concern is that the drive shaft on the manual trans is longer than the auto so I dont know if the front stock drive shaft from an XJ would work. How much was the yoke From Drive Line of Fresno?
02-27-2012, 12:11 PM
#23
Member
Join Date: Jul 2011
Location: AK
Posts: 152
Likes: 0
Received 0 Likes
on
0 Posts
Year: 1997
Model: Cherokee
Engine: 4.0L
The yoke was about $80 shipped. Most of the driveline shops in my area couldn't even get a part number for one. As for the drive shaft, I think the front shaft from an auto will still work due to them being longer then the stock auto rear when extended, at least the front was longer then my stock rear.
03-04-2012, 02:21 AM
#24
Seasoned Member
Thread Starter
Join Date: Jun 2011
Location: Cali
Posts: 334
Likes: 0
Received 1 Like
on
1 Post
Year: 1999
Model: Cherokee
Engine: 4.0 L
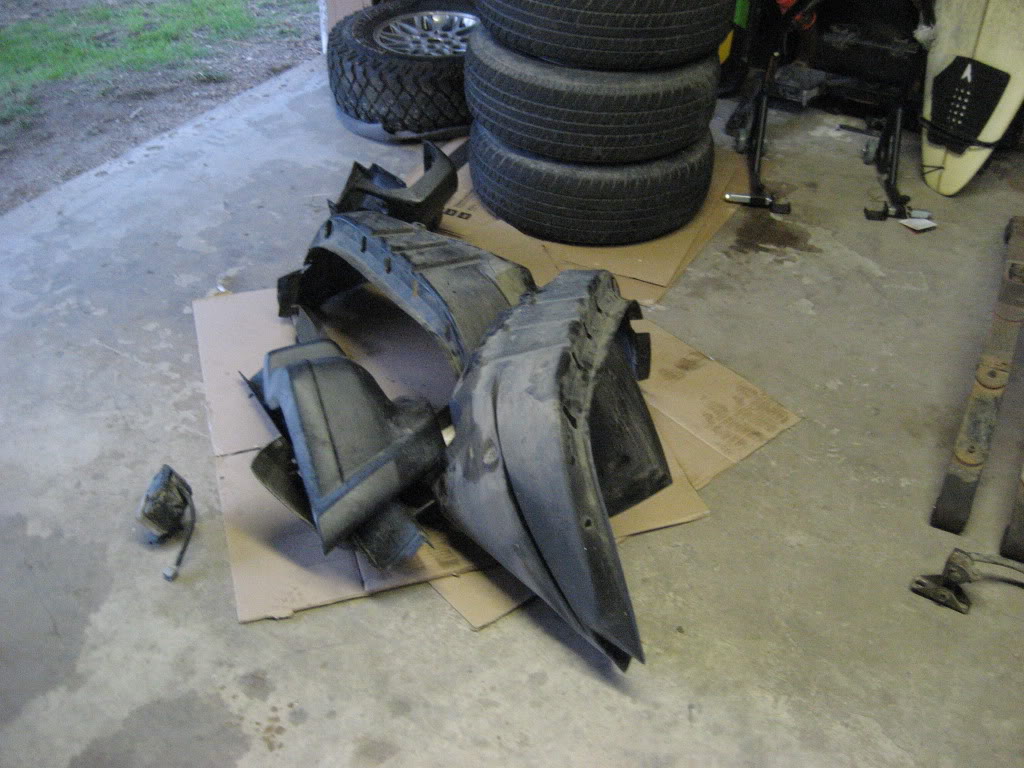
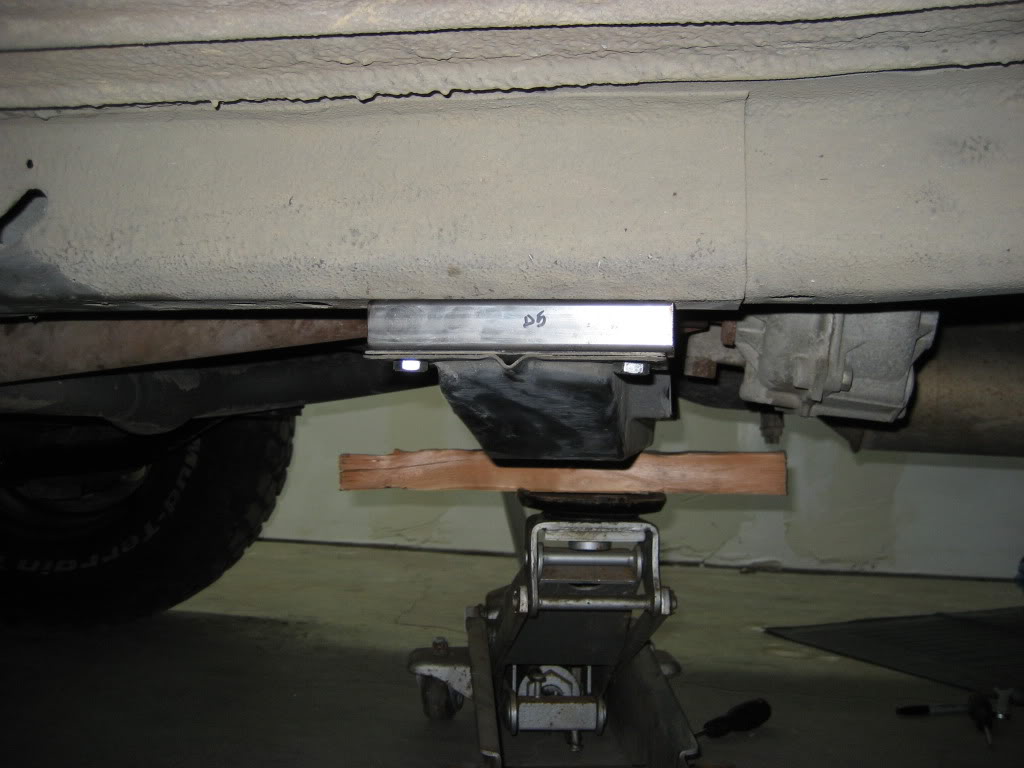
After my lift i had slight drive line vibes, right now I don't want to spend the time or the $ to do SYE but will do one in the future. I built a 1" T-Case drop as a temporary band-aid for around $10. After I installed the 1" drop I notices a significant improvement in drive line vibes, they were still there but barely noticeable. I plan on jumping under the jeep tomorrow to measuring my pinion angels to see how well they line up. As a side note t-case drops doesn't always do the trick, I had a 97 xj with a 3" lift and a t-case drop and it still had really bad drive line vibes.
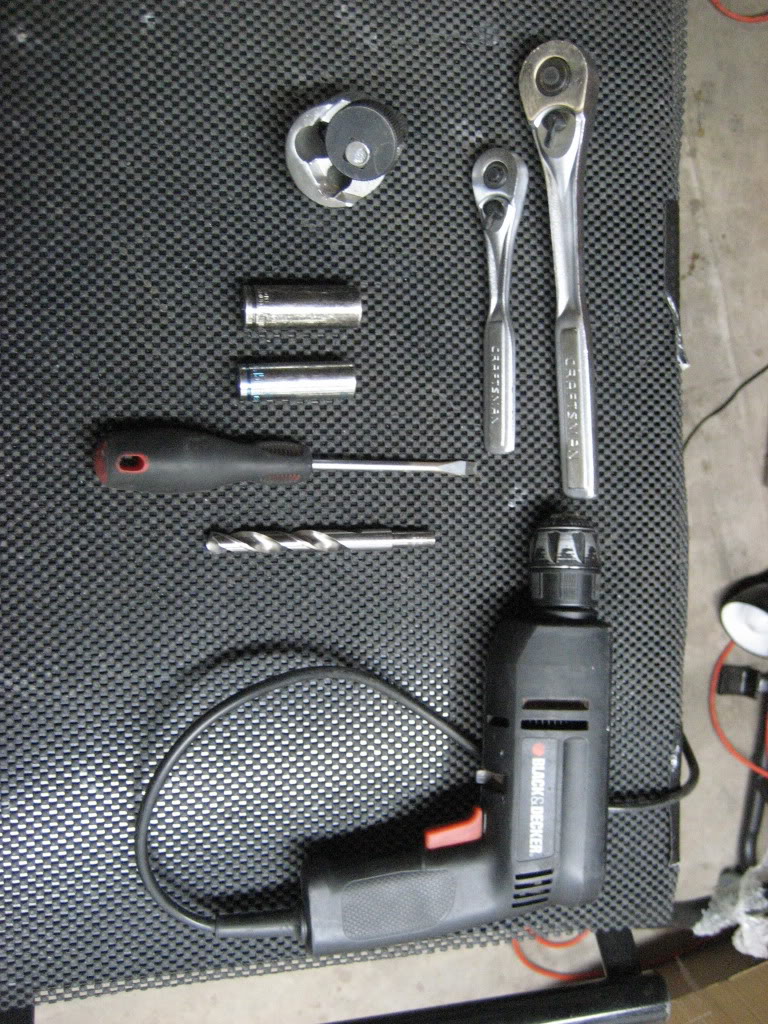
Materials-
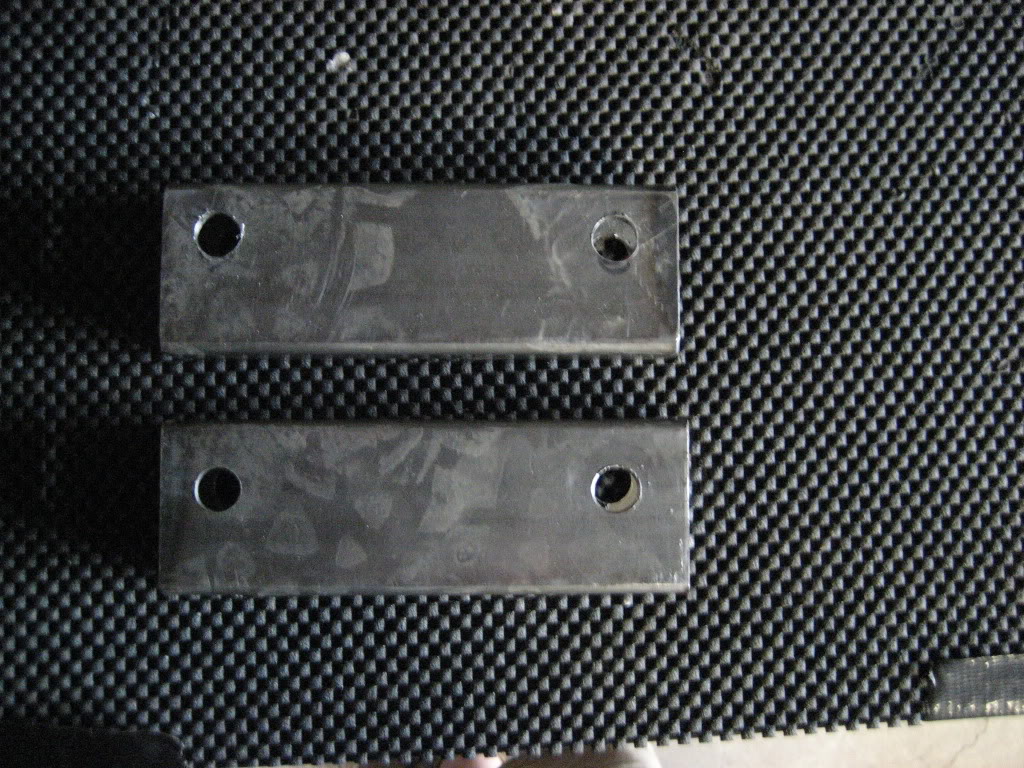
2 - 1"x2"-6" steel tubing (I used 1/8" thick tubing)
4 - M10-1.5 x 50MM bolts + washers (get automotive grade bolts)
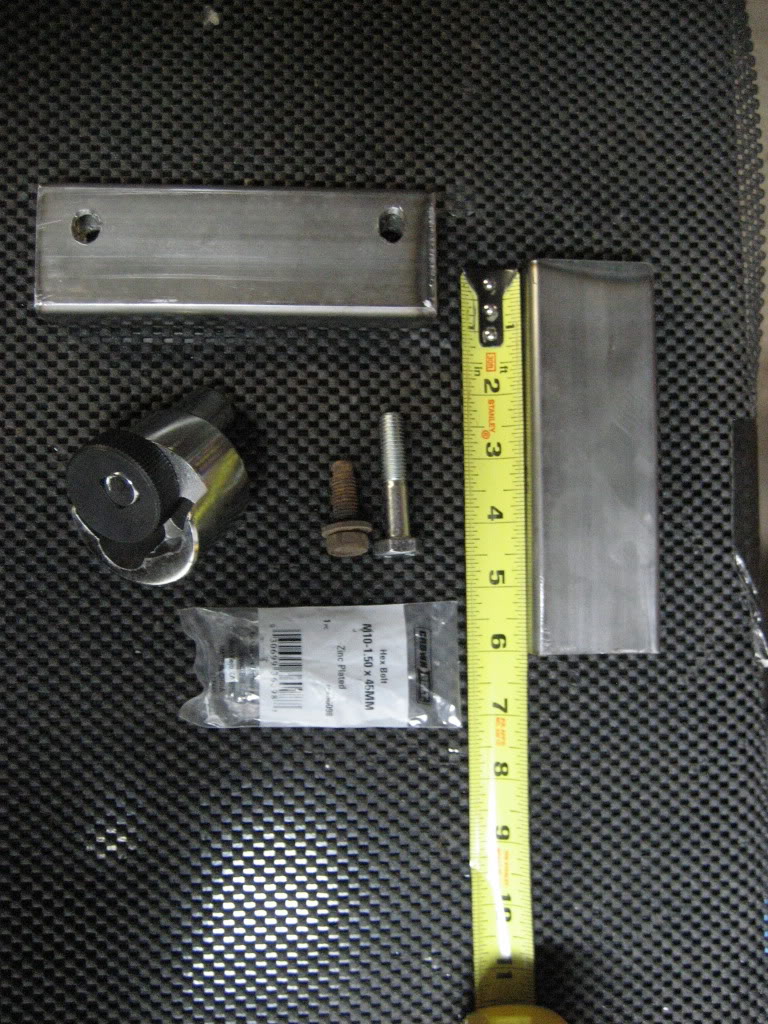
Tools-
15mm socket: to remove the factory bots and nuts on the cross member
17mm socket: to install the new M10 bolts
Socket driver:
Stud remover: used to remove stud on cross member (you can also use 2 nuts)
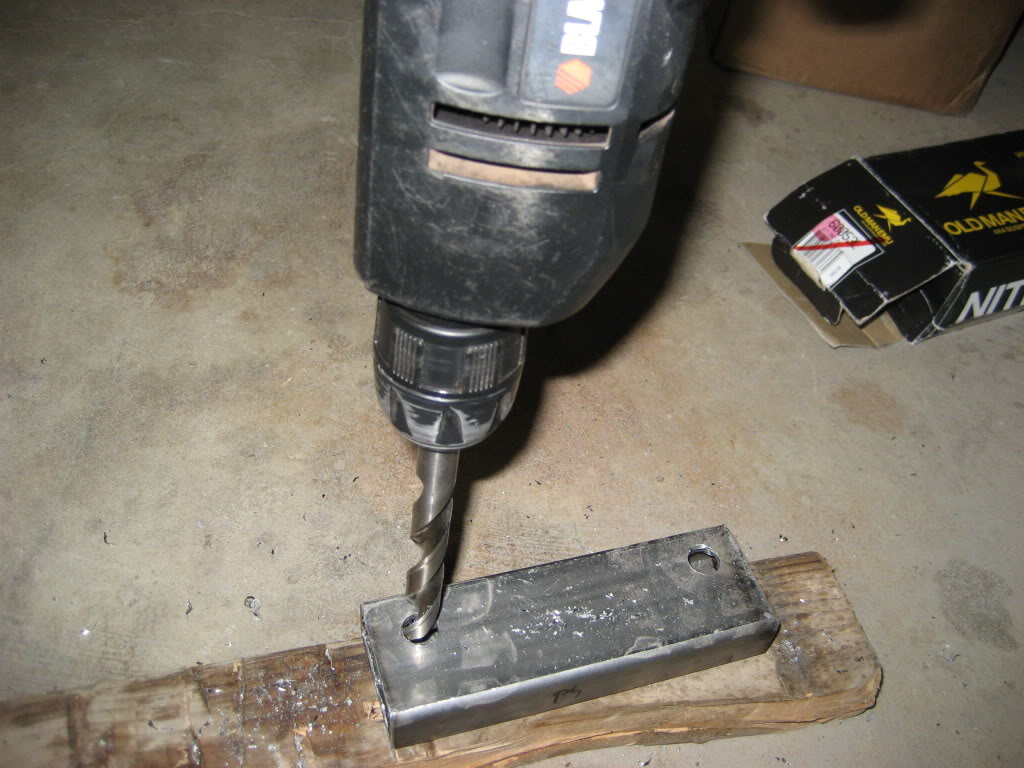
Drill + 1/2"bit: to drill holes in steel tube
Hack saw or metal chop saw: to cut steel tube
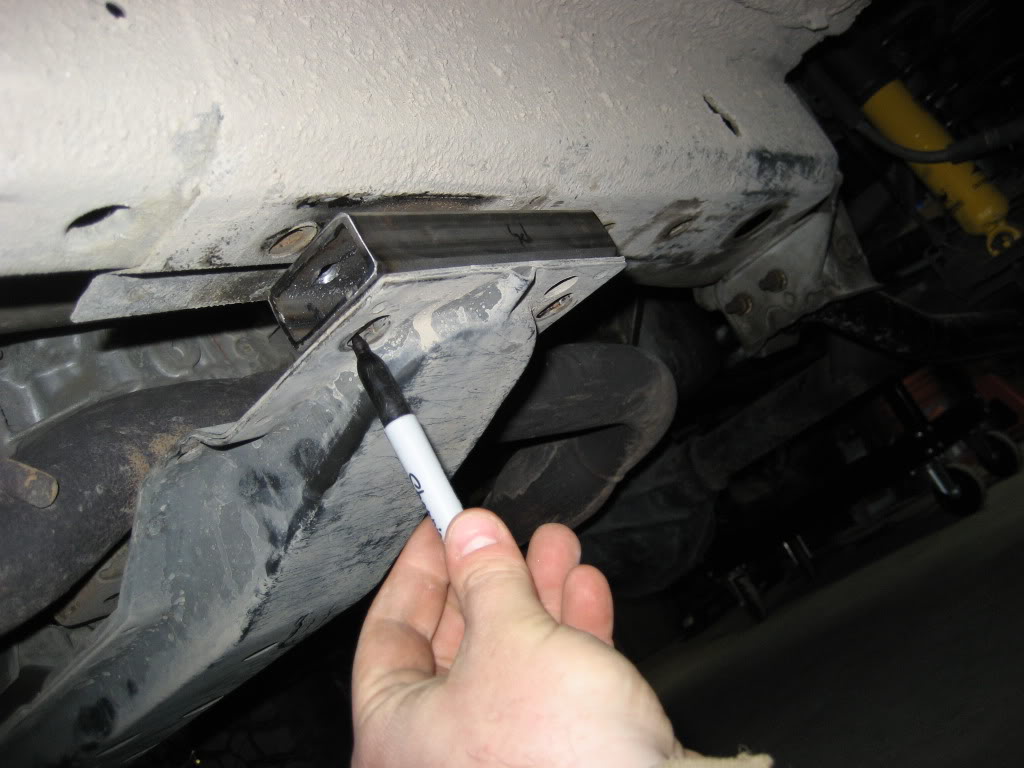
Remove retaining bots and nuts on cross member (15mm socket). You will find there is one bolt and one threaded stud on each side, its a good idea to use a jack to help support the weight of the transmission and t-case.
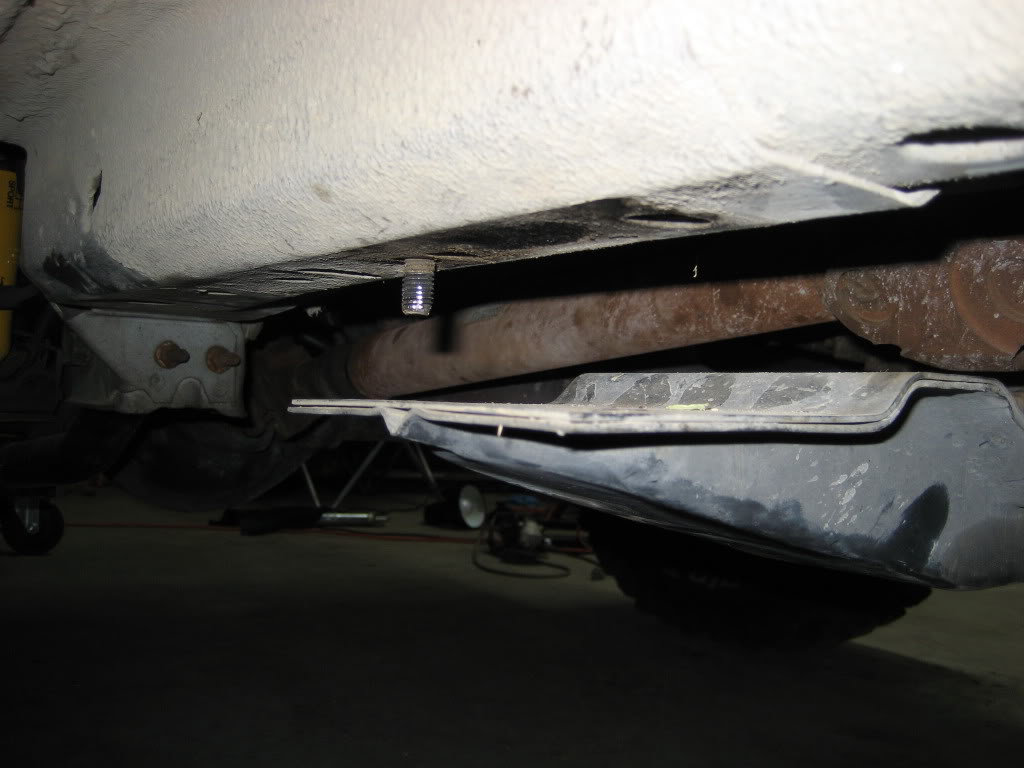
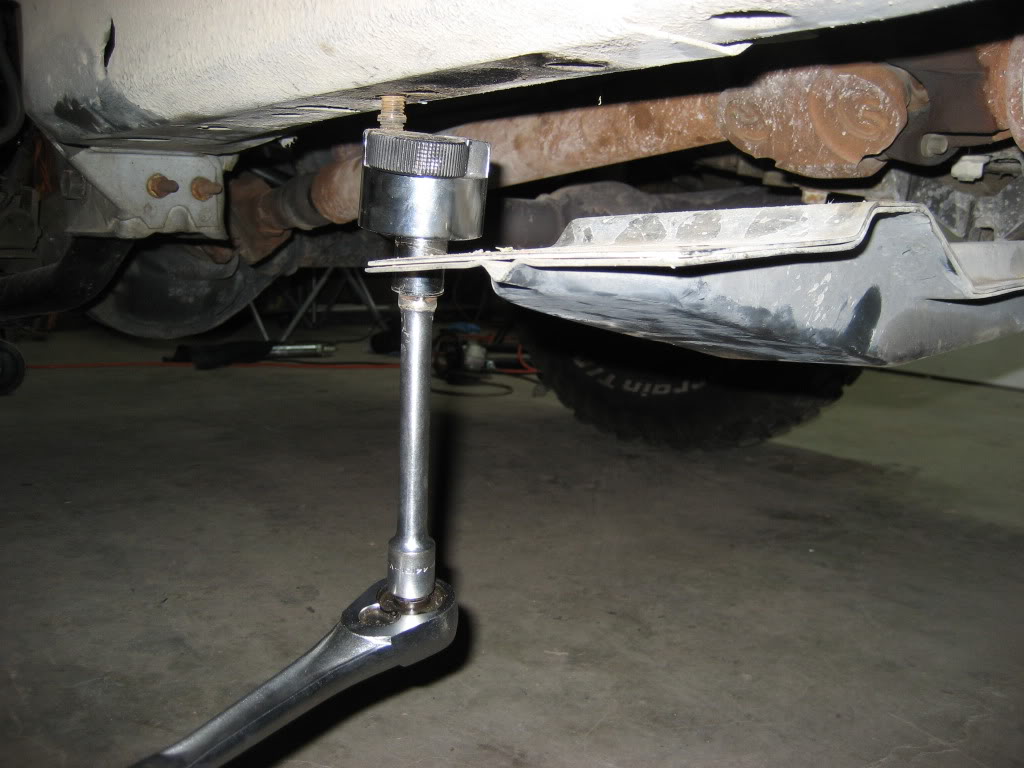
Remove the 2 threaded studs using a stud remover (I picks one up for $5.99 at harbor freight, or you can go to NAPA and pay $45) it worked great for me. Another popular method is to thread 2 nuts on the stud and loosen the top nut which should back out the stud.
Buy, steal or scavenge your spacer tubing and cut 2 - 6" long sections. I was able to score some 1"x2" tubing for $free.99 at my auto hobby shop.
Place your tube spacers on the t-case cross member and mark your holes.
Drill your holes in the the steel tubing make sure you use a drill bit a few sizes larger than your bolts (I used a 1/2" drill bit), this will allow for easy installation and will allow you to fine tune the placement of the spacers.
Once all holes are drilled I sugest doing a soft mate to insure all your holes line up. After loosely installing one spacer use a jack stand and a screw driver to help align the first bolt on the remaining spacer.
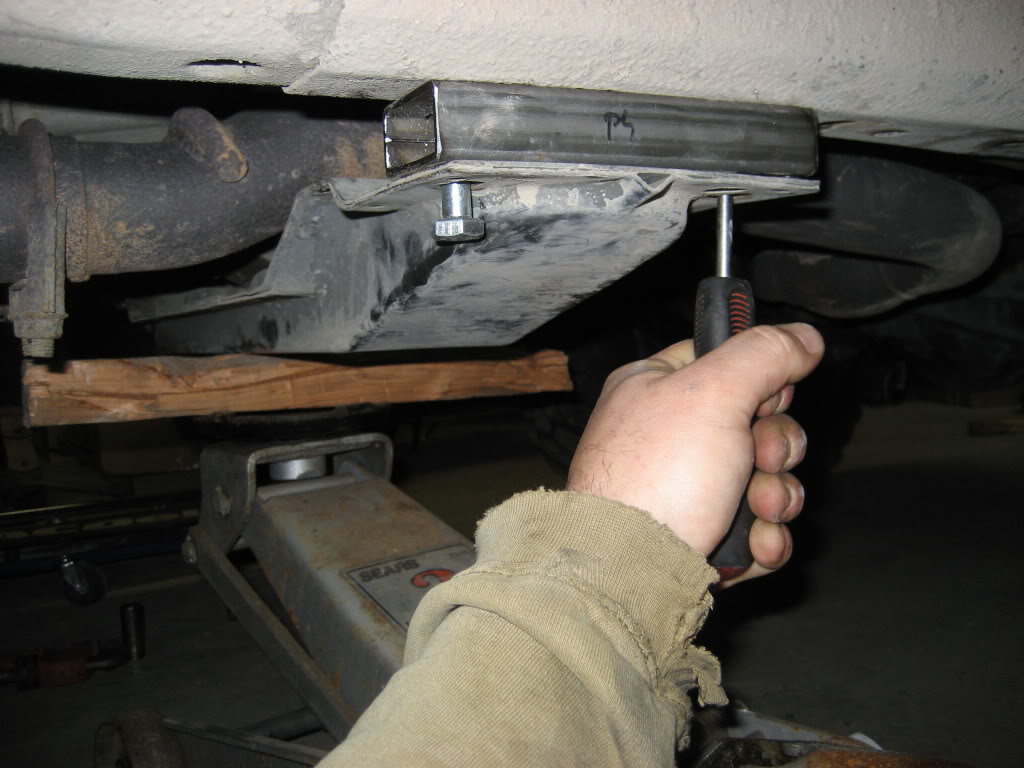
After verifying the tube spacers fit properly remove them and give them a few coats of paint (make sure you do a little prep work to remove oils and crud that might be on the tubing).
Once the paint dries reinstall using your new bots (M10-1.5 x 50MM).
Materials-
2 - 1"x2"-6" steel tubing (I used 1/8" thick tubing)
4 - M10-1.5 x 50MM bolts + washers (get automotive grade bolts)
Tools-
15mm socket: to remove the factory bots and nuts on the cross member
17mm socket: to install the new M10 bolts
Socket driver:
Stud remover: used to remove stud on cross member (you can also use 2 nuts)
Drill + 1/2"bit: to drill holes in steel tube
Hack saw or metal chop saw: to cut steel tube
Remove retaining bots and nuts on cross member (15mm socket). You will find there is one bolt and one threaded stud on each side, its a good idea to use a jack to help support the weight of the transmission and t-case.
Remove the 2 threaded studs using a stud remover (I picks one up for $5.99 at harbor freight, or you can go to NAPA and pay $45) it worked great for me. Another popular method is to thread 2 nuts on the stud and loosen the top nut which should back out the stud.
Buy, steal or scavenge your spacer tubing and cut 2 - 6" long sections. I was able to score some 1"x2" tubing for $free.99 at my auto hobby shop.
Place your tube spacers on the t-case cross member and mark your holes.
Drill your holes in the the steel tubing make sure you use a drill bit a few sizes larger than your bolts (I used a 1/2" drill bit), this will allow for easy installation and will allow you to fine tune the placement of the spacers.
Once all holes are drilled I sugest doing a soft mate to insure all your holes line up. After loosely installing one spacer use a jack stand and a screw driver to help align the first bolt on the remaining spacer.
After verifying the tube spacers fit properly remove them and give them a few coats of paint (make sure you do a little prep work to remove oils and crud that might be on the tubing).
Once the paint dries reinstall using your new bots (M10-1.5 x 50MM).
03-05-2012, 02:09 AM
#27
Seasoned Member
Join Date: Apr 2009
Posts: 317
Likes: 0
Received 1 Like
on
1 Post
Year: 1998, 1999
Model: Cherokee
Engine: 4.0 I6
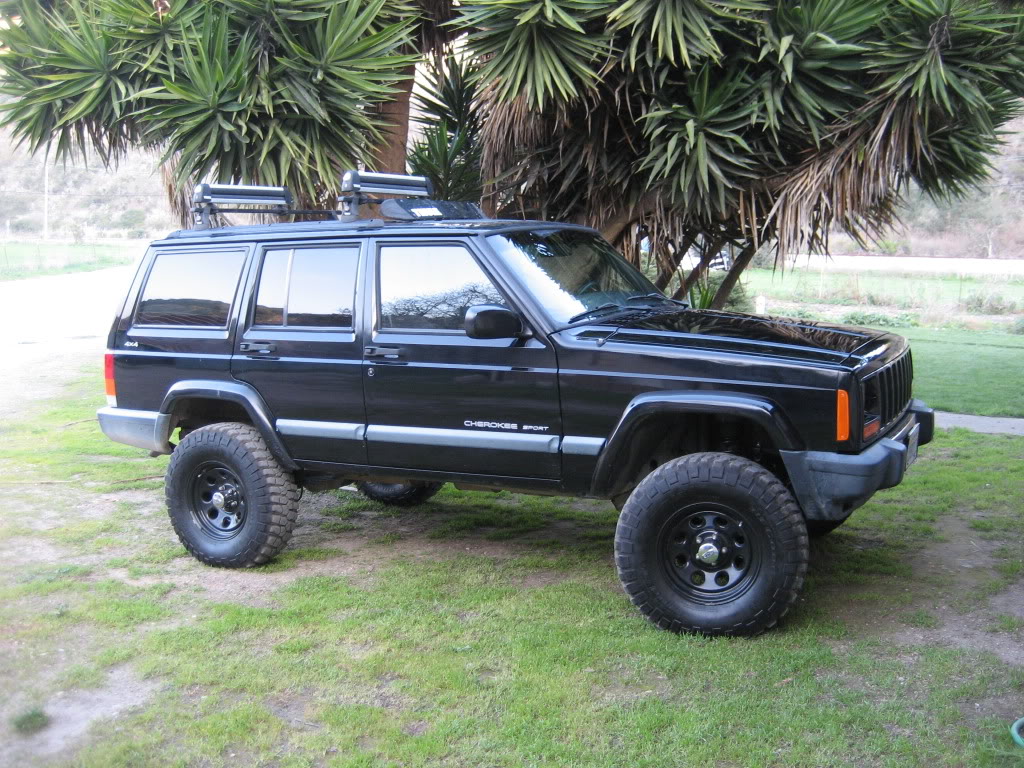
so many things about this build are similar to what mine is going to be when i start, i have a black 5 speed as well and just ordered some km2's and soft 8's. and is that a Suzuki SV i spy in the background of one of your pics?! because i have one of those as well haha, like i said, many similarities. it's great to see what mine could look like this summer when i start, good work, and look forward to see more!
03-05-2012, 10:59 PM
#28
Seasoned Member
Thread Starter
Join Date: Jun 2011
Location: Cali
Posts: 334
Likes: 0
Received 1 Like
on
1 Post
Year: 1999
Model: Cherokee
Engine: 4.0 L
timontanye good eye and good taste, I just sold my SV and traded up for a new Kawi Versys. All I can tell you is that the OME springs and shocks ride ridiculously well, if you are thinking about getting OME components don't hesitate to pull the trigger. As my daily driver the road manners are great. I have not had a chance to really test out the suspension yet (except for accidentally catching air on a fire road) but the small amount of trail riding has been eye opening. The suspension set up is more firm than I expected but much smoother than expected, I can hall down washed out fire roads at 30-40 mph and the ride is controlled and smooth. In my opinion OME is worth every penny. If your interested in OME lifts over 2" I would check out DPG Off-Road for my application they were the best value and offered great support.
 03-06-2012, 05:30 AM
#30
Seasoned Member
Join Date: Apr 2009
Posts: 317
Likes: 0
Received 1 Like
on
1 Post
Year: 1998, 1999
Model: Cherokee
Engine: 4.0 I6
thanks! my old '87 had a 2" OME lift on it with 31" tires and rode amazing, rubbed but i didn't have it long enough to care about trimming- it was a rust bucket and not worth modifying at all. this new one i have 33's ordered and am seriously considering a clayton 4.5" long arm kit. we'll see. i got my SV1k as my first bike in june 2011 and put 4k miles on it in june and july before mobilization, with gas prices they way they are i'll probably double that this summer when i get back. i love it. anyway, enough of me.
great picture! all i have at home is woods.
great picture! all i have at home is woods.