Two XJs...but only building one

 10-29-2015, 12:33 PM
#17
Seasoned Member
Thread Starter
10-31-2015, 02:09 AM
#18
Seasoned Member
Thread Starter
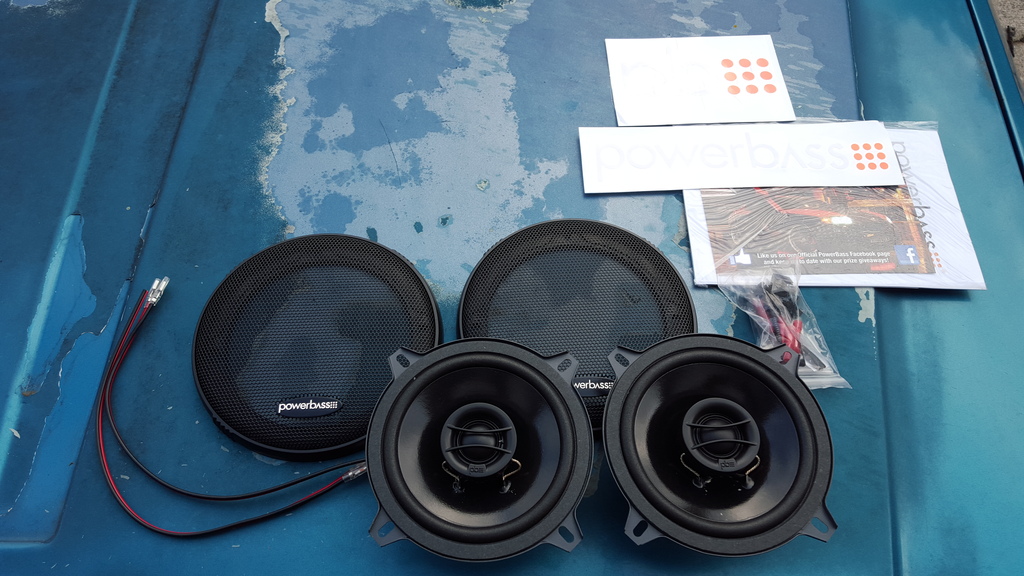
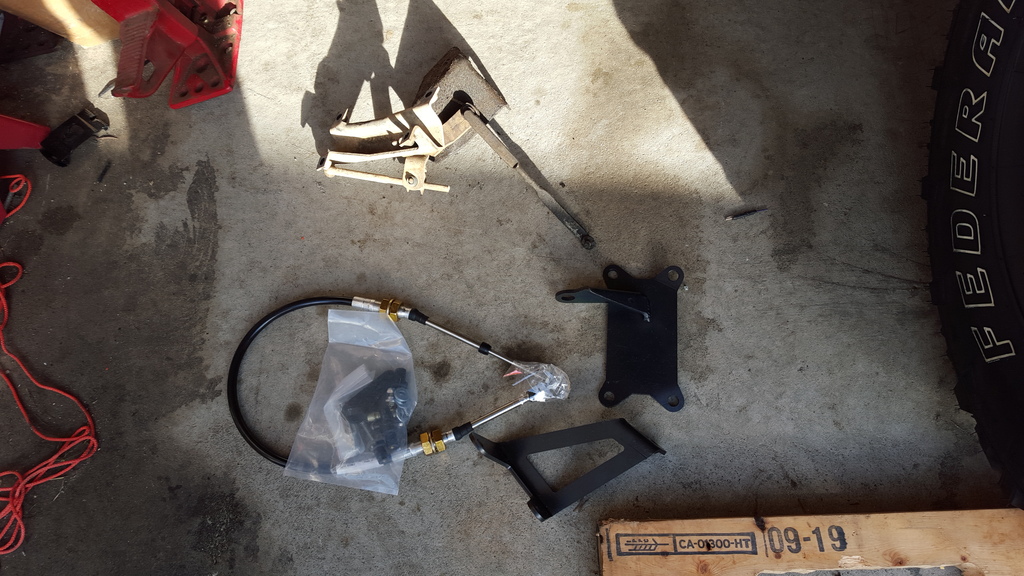
Well the SYE, new speakers, and RC relocation brackets have shown up.
I put the new speakers in, had a blown rear speaker that was driving me nuts. Currently the stereo is a whole lot of lame sauce...but it puts out sound just loud enough you can hear it on the freeway over the exhaust/tires/vibrations...lol, so it'll stay for now.

For now the shackle brackets and the SYE will sit on the shelf, I plan to do the brackets next week sometime and the SYE will wait until the beginning of Nov as that's when the DS should be here and also when my pops can get freed up enough to make the trip over.
I put the new speakers in, had a blown rear speaker that was driving me nuts. Currently the stereo is a whole lot of lame sauce...but it puts out sound just loud enough you can hear it on the freeway over the exhaust/tires/vibrations...lol, so it'll stay for now.


For now the shackle brackets and the SYE will sit on the shelf, I plan to do the brackets next week sometime and the SYE will wait until the beginning of Nov as that's when the DS should be here and also when my pops can get freed up enough to make the trip over.
Last edited by Joshua White; 10-31-2015 at 02:36 AM.
11-06-2015, 02:30 PM
#19
Seasoned Member
Thread Starter
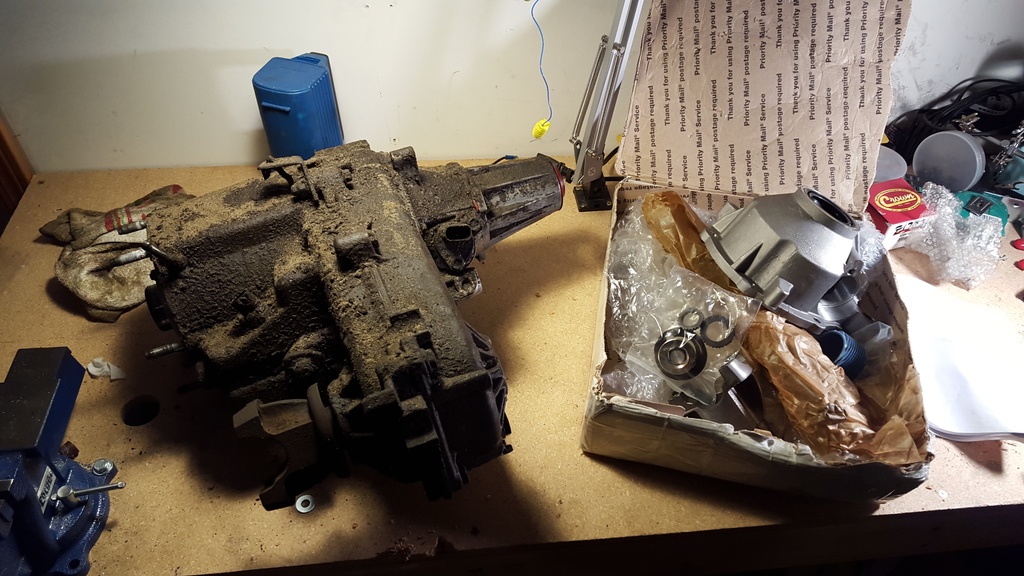
Well all the parts have shown up, so I'll start disassembling the Jeep this next week for the finish install of the SYE/DS on the weekend.
Along the way I'll get the other stuff (shims, shackle relocation kit) installed.
Along the way I'll get the other stuff (shims, shackle relocation kit) installed.
11-28-2015, 02:14 AM
#20
Seasoned Member
Thread Starter
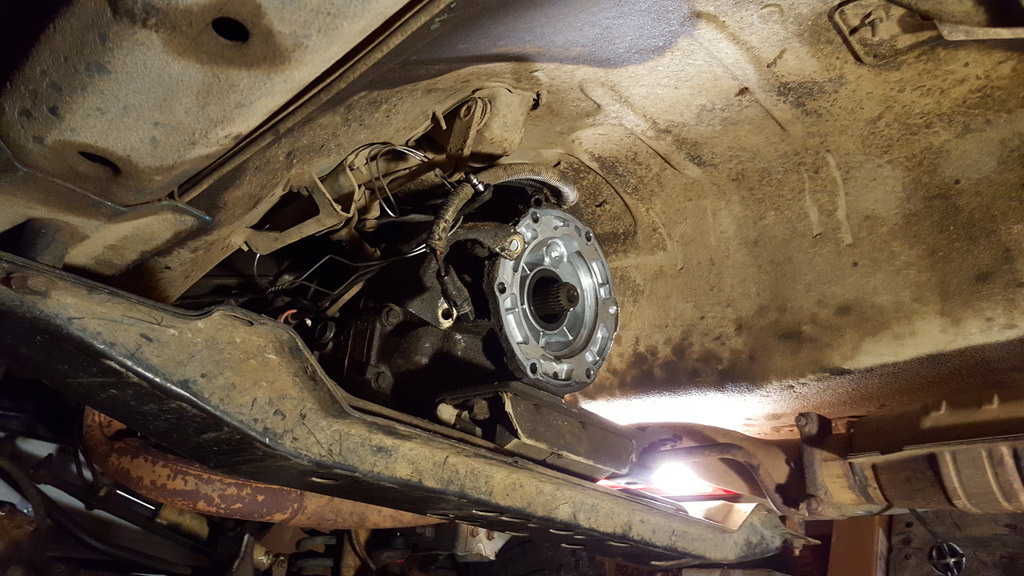
Pulled the T-Case last night after Thanksgiving "lunch" with the family and completed the SYE install today after hunting for our Christmas tree.


 11-28-2015, 02:25 AM
#21
Seasoned Member
Thread Starter
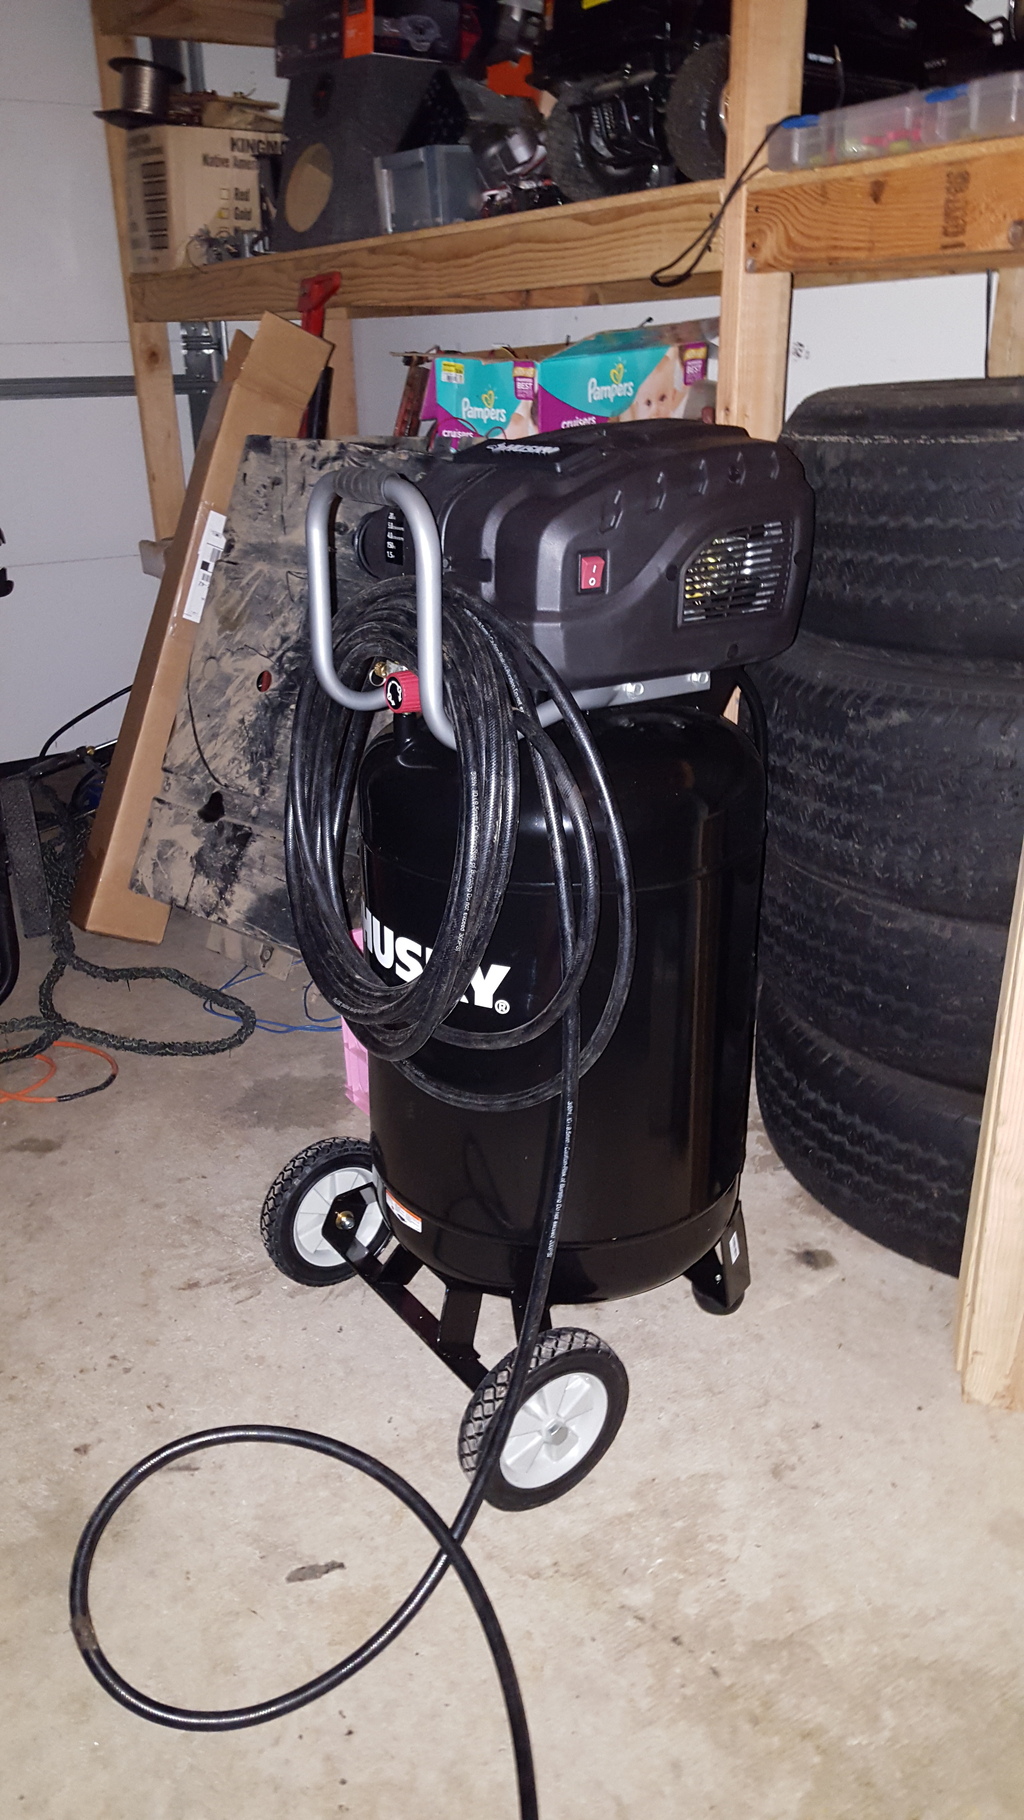
While working on getting the T-Case apart my compressor took a dive right when we needed it to bust the yoke bolts loose...thankfully my dad was here helping with the the SYE install and took it upon himself to bring Christmas a little early.
A HUGE thank you to him!!
A HUGE thank you to him!!

 11-30-2015, 10:58 PM
#22
Seasoned Member
Thread Starter
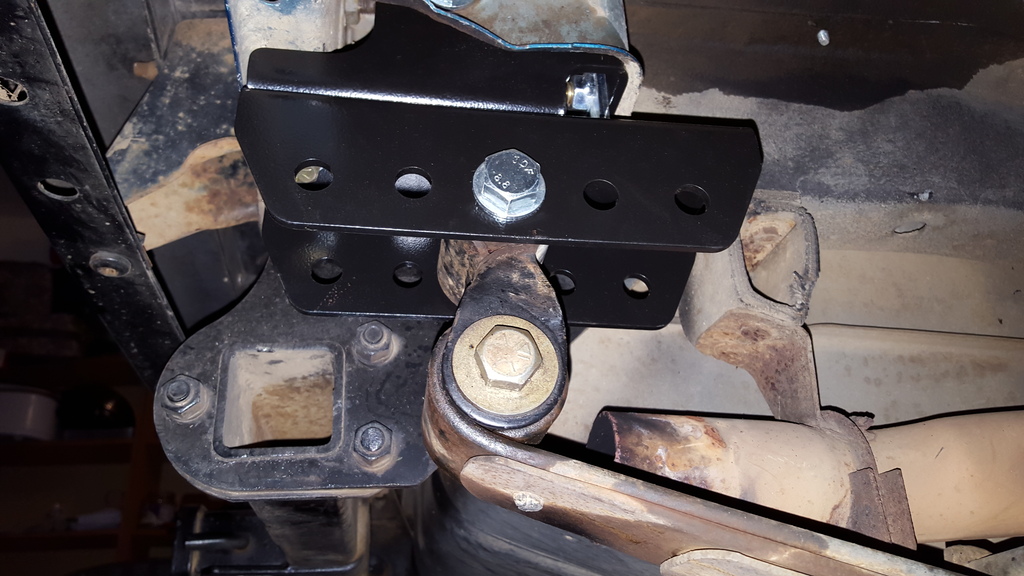
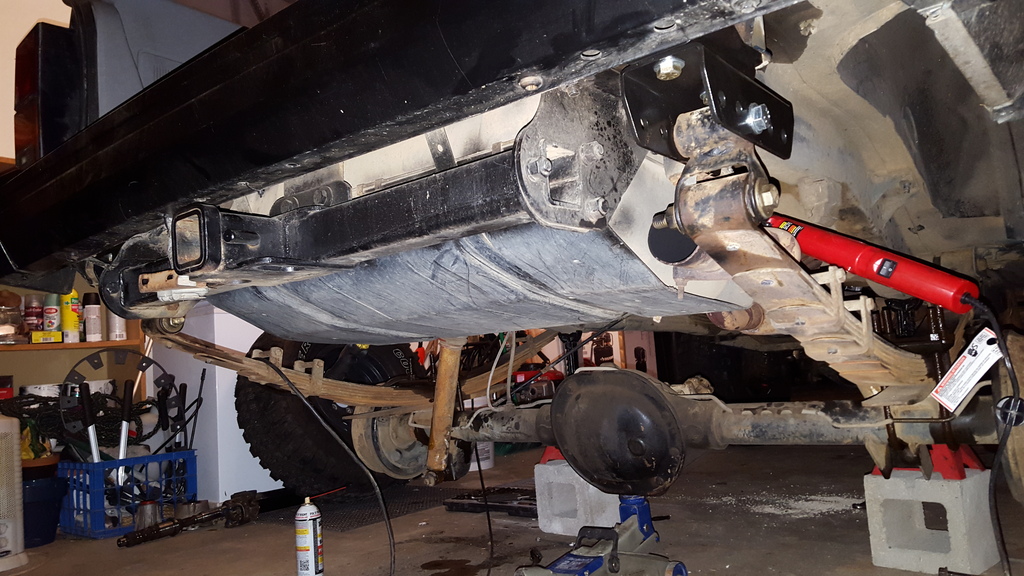
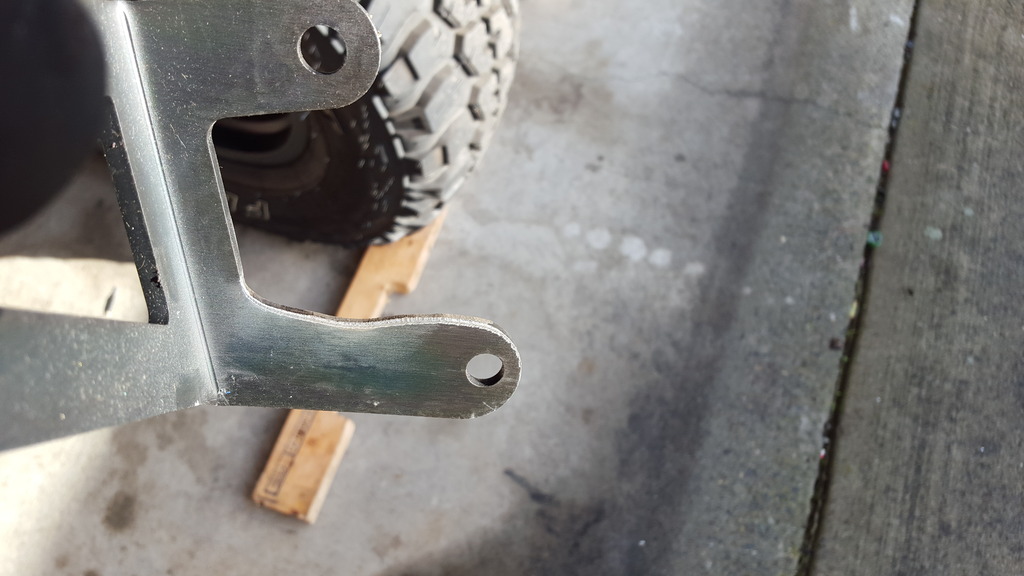
Shackle relocation brackets are in, passenger side was a real pain so it took me about 3 hours to get both sides done...lol
I've still got axle shims to install, a T-Case to put back in, new shift linkage to install for the T-Case (should be here in the next few days), then the new drive shaft, and finally the removable mud-flaps. Dad and I will be making a trip to the to the Naches area on the 12th so I've got to get this thing back together by this weekend, that way I can get some drive time in before our first trip with this beast!


I've still got axle shims to install, a T-Case to put back in, new shift linkage to install for the T-Case (should be here in the next few days), then the new drive shaft, and finally the removable mud-flaps. Dad and I will be making a trip to the to the Naches area on the 12th so I've got to get this thing back together by this weekend, that way I can get some drive time in before our first trip with this beast!
12-06-2015, 09:59 PM
#23
Seasoned Member
Thread Starter
So with the XJ back under it's own weight the rear shackles look better. Still not ideal but better than stock and will get much better when I can get/make some different shackles later, but this raised my rear to match my front and gave me free range of motion where I didn't have it before.

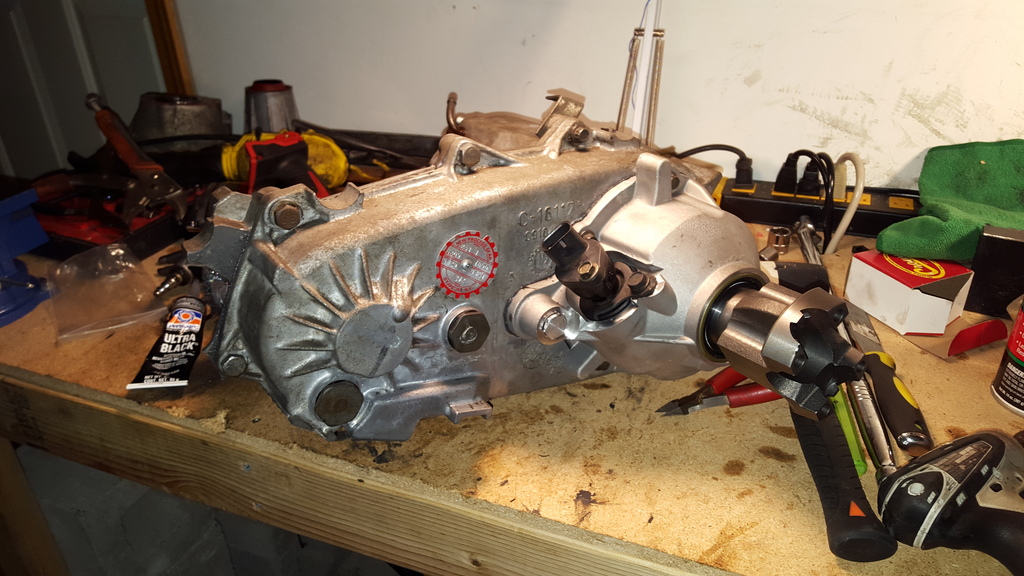
Installed the Novak shift linkage for my transfer case today. Wasn't to bad, and adjustments were made easily enough to get full engagement out of the transfer case.
Had to clearance the transfer case side bracket for the cable though, not a huge deal.
All in all things went well.
Today I put the transfer case back in, installed the new linkage and adjusted it, installed the new rear DS, re-installed the front DS, and began installing the CB. I've routed the antenna and bracket ground but had to take some extra time to get the location for the CB prepped (pics to come)

Installed the Novak shift linkage for my transfer case today. Wasn't to bad, and adjustments were made easily enough to get full engagement out of the transfer case.

Had to clearance the transfer case side bracket for the cable though, not a huge deal.

All in all things went well.
Today I put the transfer case back in, installed the new linkage and adjusted it, installed the new rear DS, re-installed the front DS, and began installing the CB. I've routed the antenna and bracket ground but had to take some extra time to get the location for the CB prepped (pics to come)
Last edited by Joshua White; 12-10-2015 at 12:17 AM.
12-10-2015, 12:54 AM
#24
Seasoned Member
Thread Starter
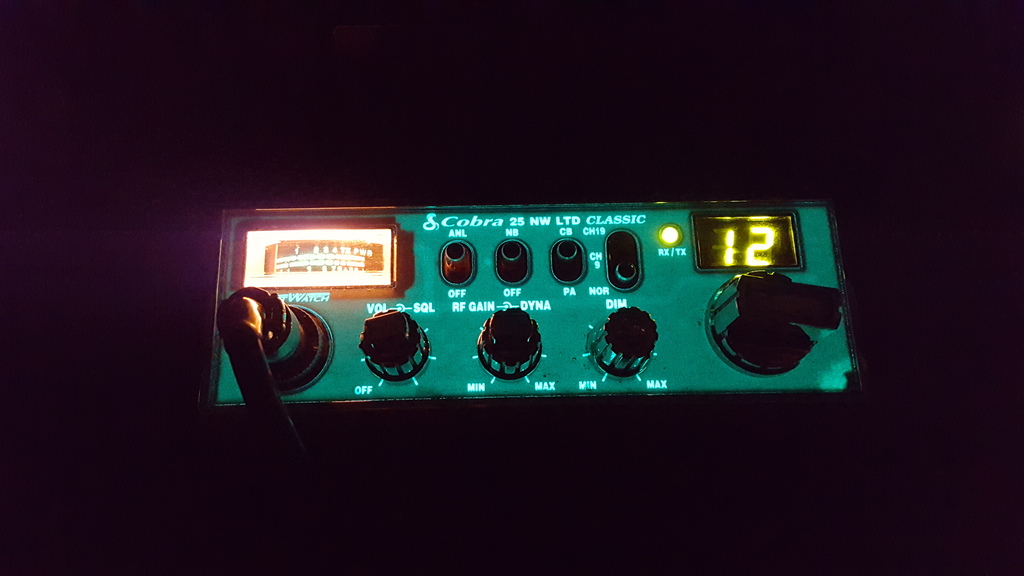
Well CB is in, seems to work well based off the built in meter but I'll have to wait until someone with a CB is around to really test it. The location didn't work quite as well as I intended but it's a great option for the unit I have and my wants/needs for mounting a CB which are as follows...
*sorry for the night time pics*
1 - The CB can't be near my legs/knees (heard to many horror stories about knee caps and heavy impact with a CB in that area)
2 - I want it near where my hands will naturally be if possible for easy of use
3 - If I don't have to have **** dangling in my face as I'm bouncing around on the trail I'm happy (see the "mounting it above your mirror" option)
So in front of the shifter seemed like a great spot, and since my CB is a big ***** and my XJ has always been missing the ashtray/change-cup from the dash it seemed like a perfect way to fill that hole (yeah I said it) and check off all of my wants/needs for mounting my CB.
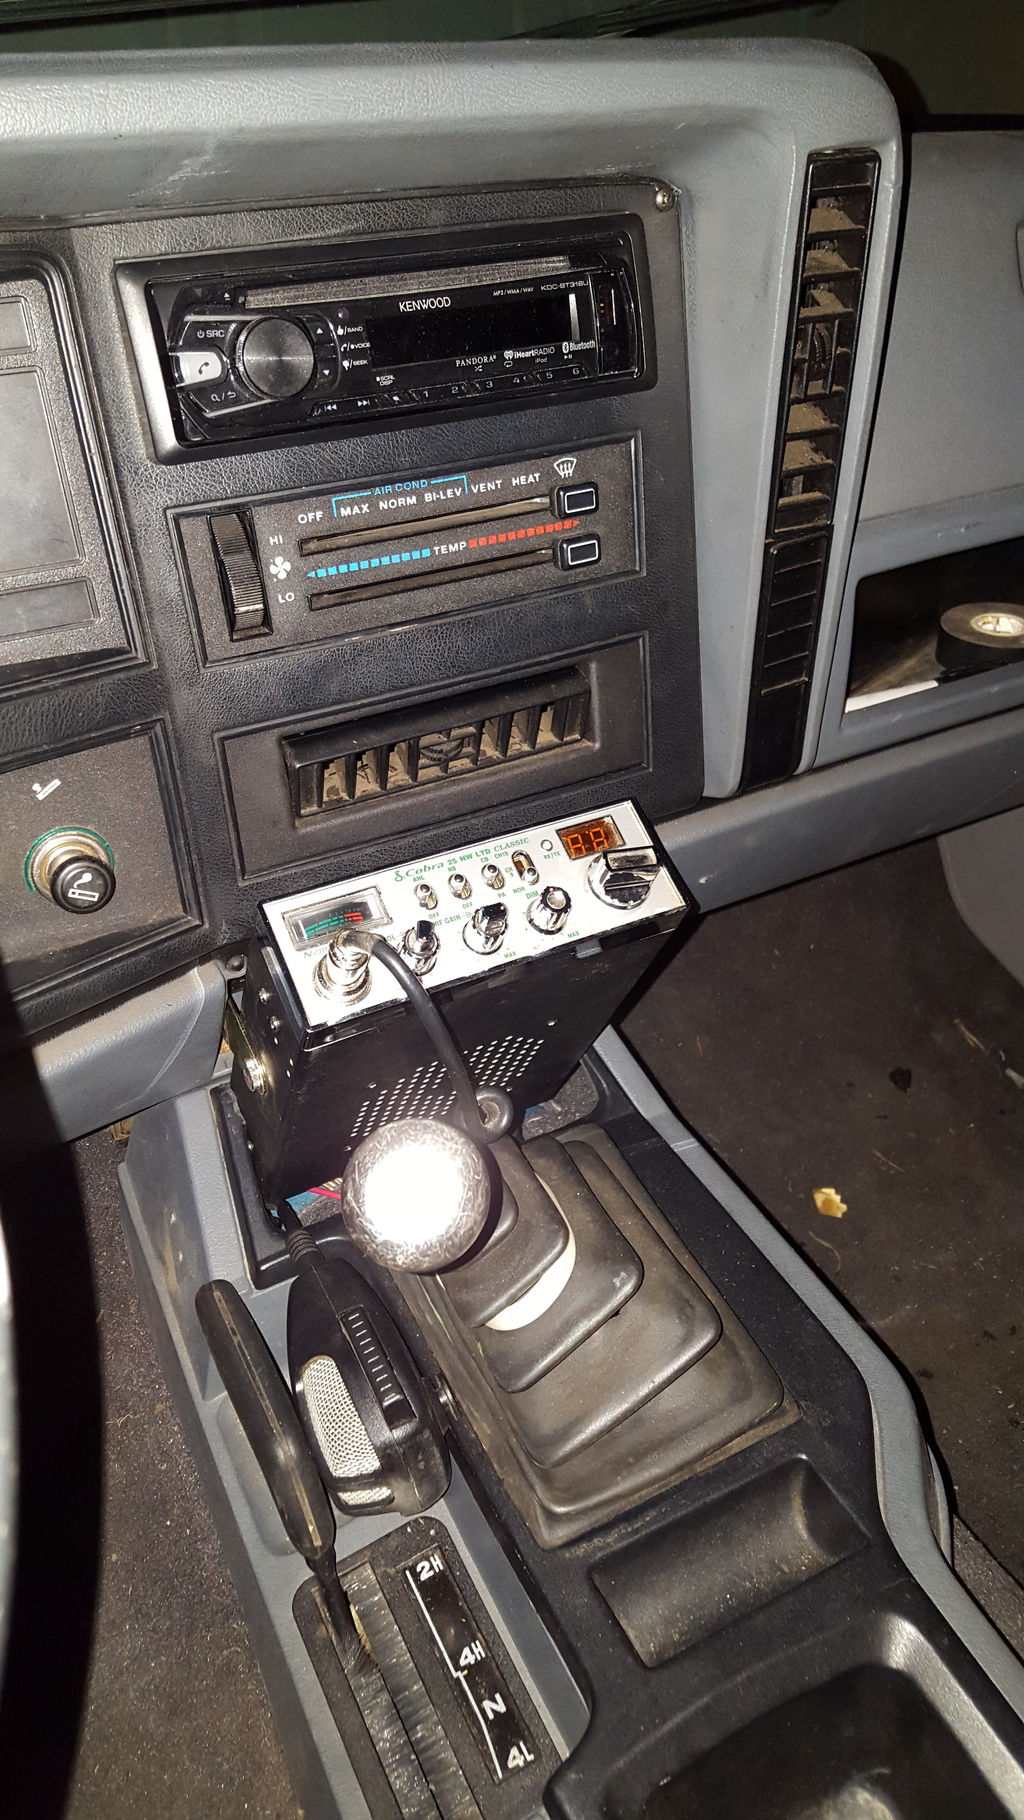
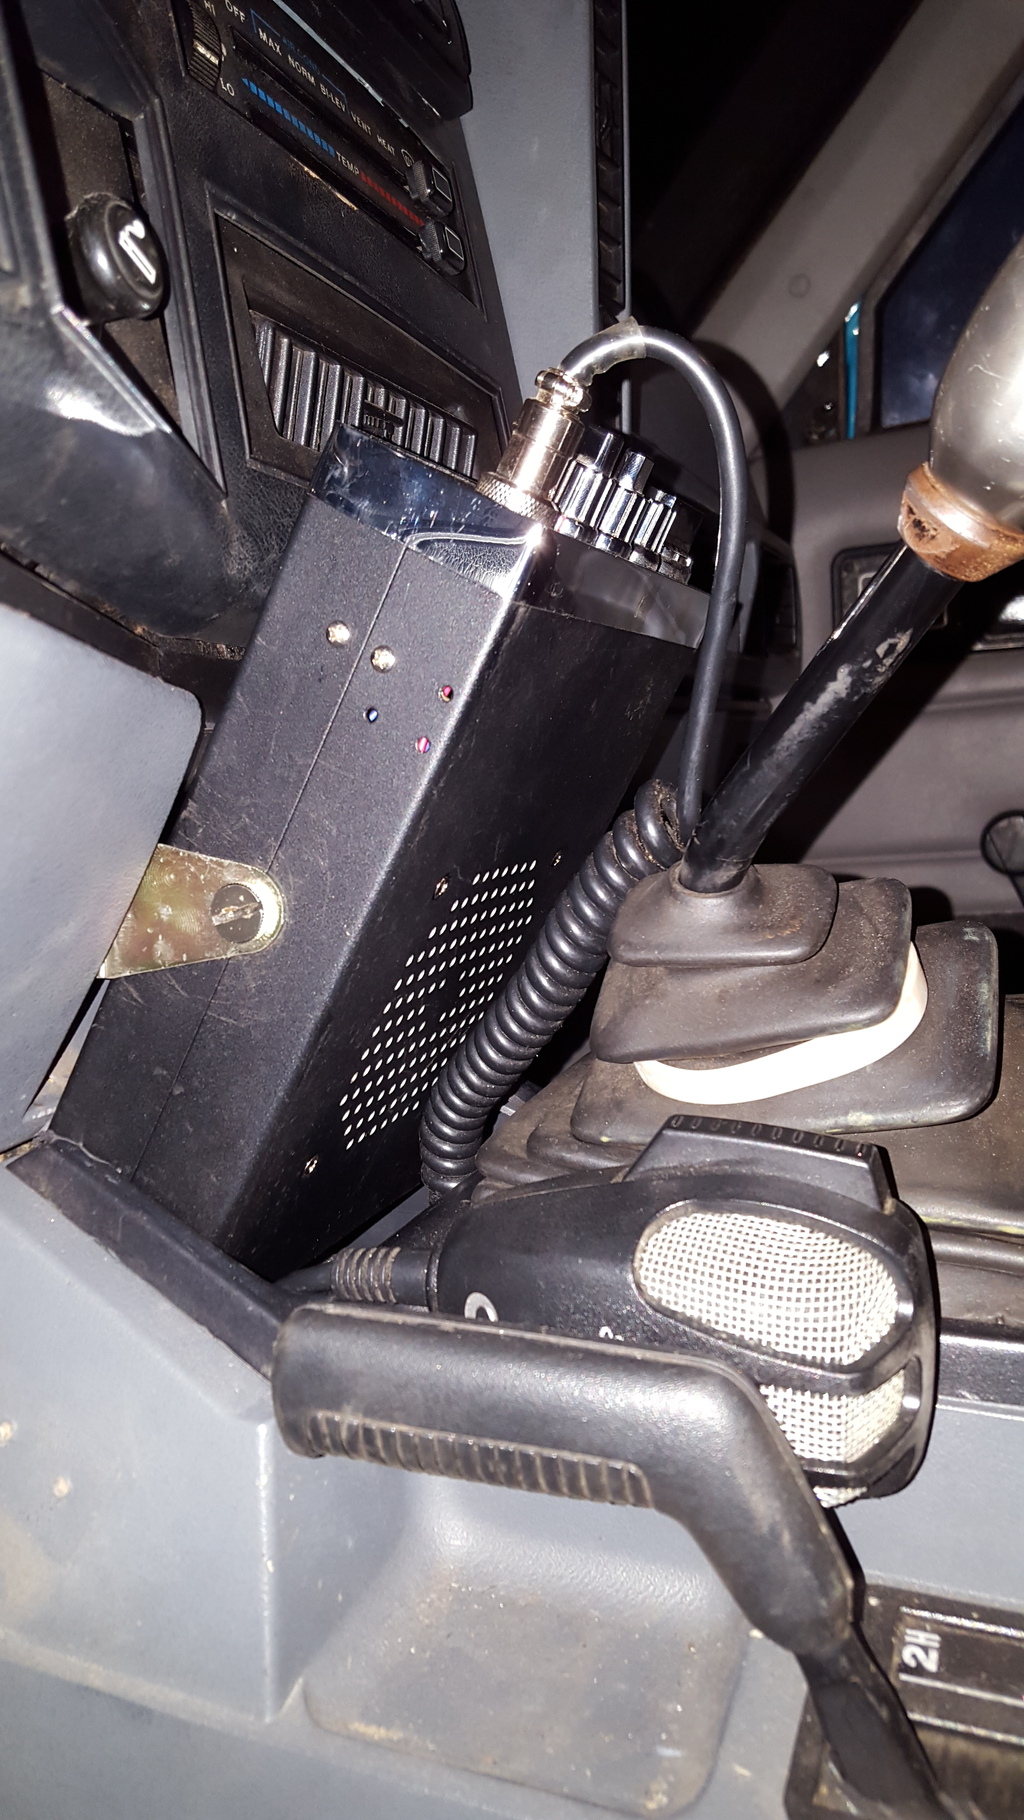

Oooooooooh Shiny!
As for my antenna I kind of put myself into a bind. See I bought a stud mount and a firestik tune-able three foot antenna, as I was intending on doing an over the fender type of deal. But as I started to mount it up there I just didn't like how it hung out away from the body and well...we have trees to deal with up here. So I started looking around for another place to mount it and I went to the rear end like most folks do.
However, I don't see the sense in mounting the antenna off to the left or right of the tail lights as that does the same exact thing of putting it in a prime location to get ripped off. So...I went about making a bracket for the rear that came down over part of the tail light...bla bla bla...that didn't work so well.
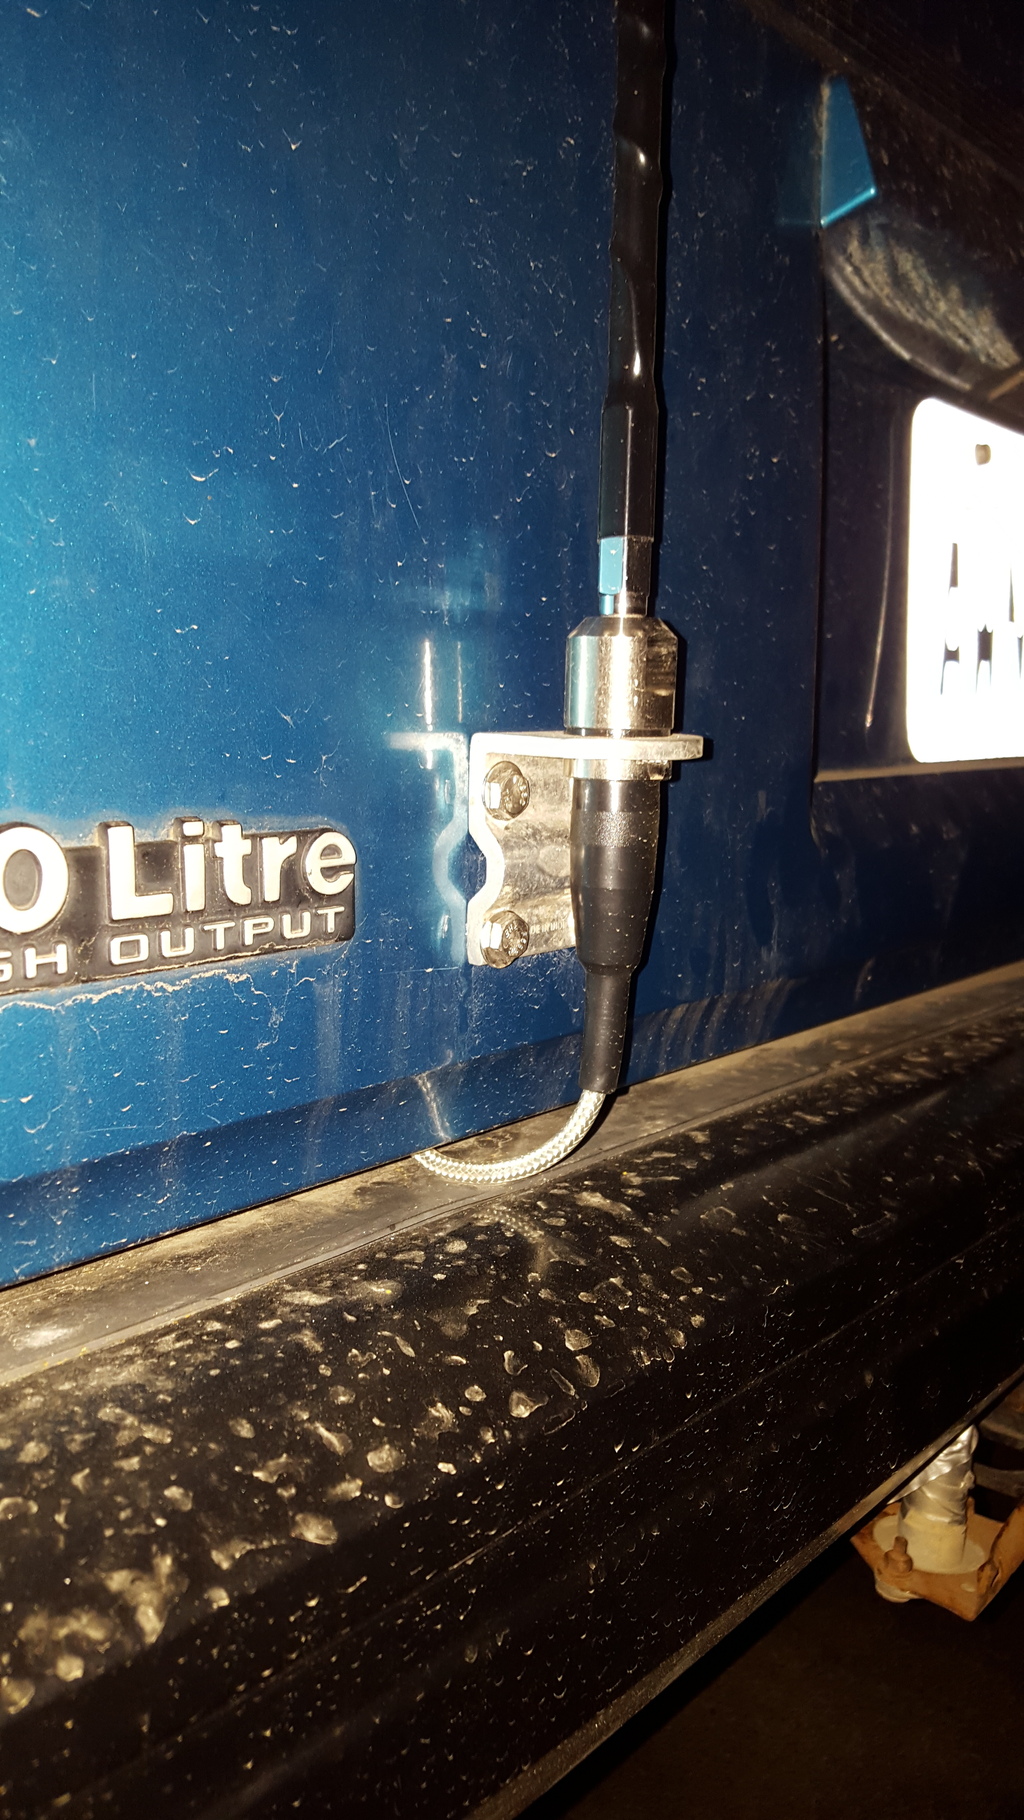
In the end I mounted it to the rear hatch, now I know what you're thinking... "hey, um dude...the rear hatch is fiber glass and you can't ground that there" and you'd be right. So I ran a ground from the battery to the rear of the mount where I put a ring terminal and a nylock nut/washer. The ground and antenna wire are ran up the factory channel through the section where the factory wiring comes out of the hatch and into the cab.
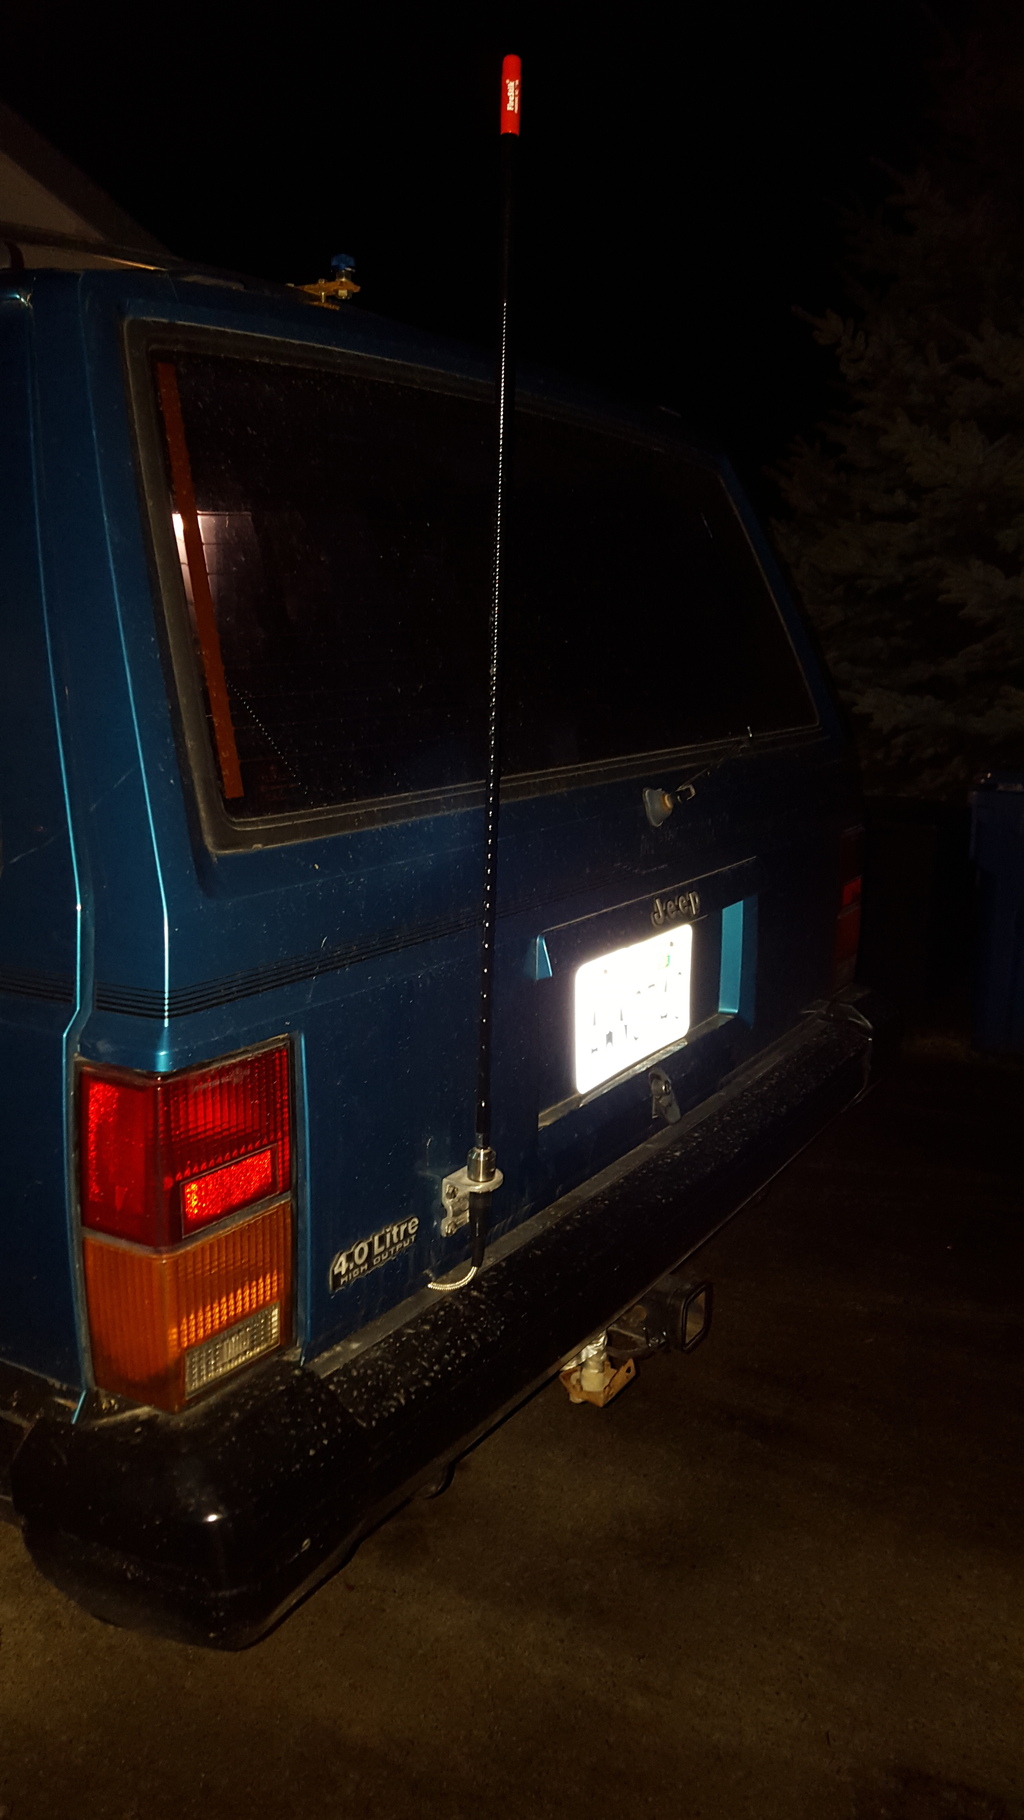
Now the other part that I'm still going to have to test is the fact that this antenna and mount are meant for a "ground plane" setup, meaning they need something to reflect off of...I didn't intend to run it like this so I didn't purchase a "no ground plane" mounting system. We'll have to see how bad the SWR meter is later.
*sorry for the night time pics*
1 - The CB can't be near my legs/knees (heard to many horror stories about knee caps and heavy impact with a CB in that area)
2 - I want it near where my hands will naturally be if possible for easy of use
3 - If I don't have to have **** dangling in my face as I'm bouncing around on the trail I'm happy (see the "mounting it above your mirror" option)
So in front of the shifter seemed like a great spot, and since my CB is a big ***** and my XJ has always been missing the ashtray/change-cup from the dash it seemed like a perfect way to fill that hole (yeah I said it) and check off all of my wants/needs for mounting my CB.


Oooooooooh Shiny!

As for my antenna I kind of put myself into a bind. See I bought a stud mount and a firestik tune-able three foot antenna, as I was intending on doing an over the fender type of deal. But as I started to mount it up there I just didn't like how it hung out away from the body and well...we have trees to deal with up here. So I started looking around for another place to mount it and I went to the rear end like most folks do.
However, I don't see the sense in mounting the antenna off to the left or right of the tail lights as that does the same exact thing of putting it in a prime location to get ripped off. So...I went about making a bracket for the rear that came down over part of the tail light...bla bla bla...that didn't work so well.
In the end I mounted it to the rear hatch, now I know what you're thinking... "hey, um dude...the rear hatch is fiber glass and you can't ground that there" and you'd be right. So I ran a ground from the battery to the rear of the mount where I put a ring terminal and a nylock nut/washer. The ground and antenna wire are ran up the factory channel through the section where the factory wiring comes out of the hatch and into the cab.


Now the other part that I'm still going to have to test is the fact that this antenna and mount are meant for a "ground plane" setup, meaning they need something to reflect off of...I didn't intend to run it like this so I didn't purchase a "no ground plane" mounting system. We'll have to see how bad the SWR meter is later.
12-10-2015, 07:33 AM
#25
CF Veteran
If you end up getting a bumper/tire swing out you will already have the wire run back there, I was lucky enough to come across a killer deal on C.L. for mine. I think I gave $250 for it. I had to fab a couple of things to make it work but it turned out great. and has a C.B. antenna mount. I can't wait to get a C.B. (It's on my X-mas list) but I have already bought my 2' fire stick and thumb-nailed most of the things I will need with the E-bayer I bought it from.
12-10-2015, 10:43 AM
#26
Seasoned Member
Thread Starter
If you end up getting a bumper/tire swing out you will already have the wire run back there, I was lucky enough to come across a killer deal on C.L. for mine. I think I gave $250 for it. I had to fab a couple of things to make it work but it turned out great. and has a C.B. antenna mount. I can't wait to get a C.B. (It's on my X-mas list) but I have already bought my 2' fire stick and thumb-nailed most of the things I will need with the E-bayer I bought it from.
I would highly recommend selling your current firestik and purchasing an NGP (no ground plane) kit to mount on your bumper. Not using the proper kit can and will burn up your CB.
NGP from firestik - http://www.wearecb.com/firestik-ngp-cb-antenna-kit.html
12-11-2015, 06:42 PM
#27
Seasoned Member
Thread Starter
While I wired up my CB for power and ground I noticed an issue...
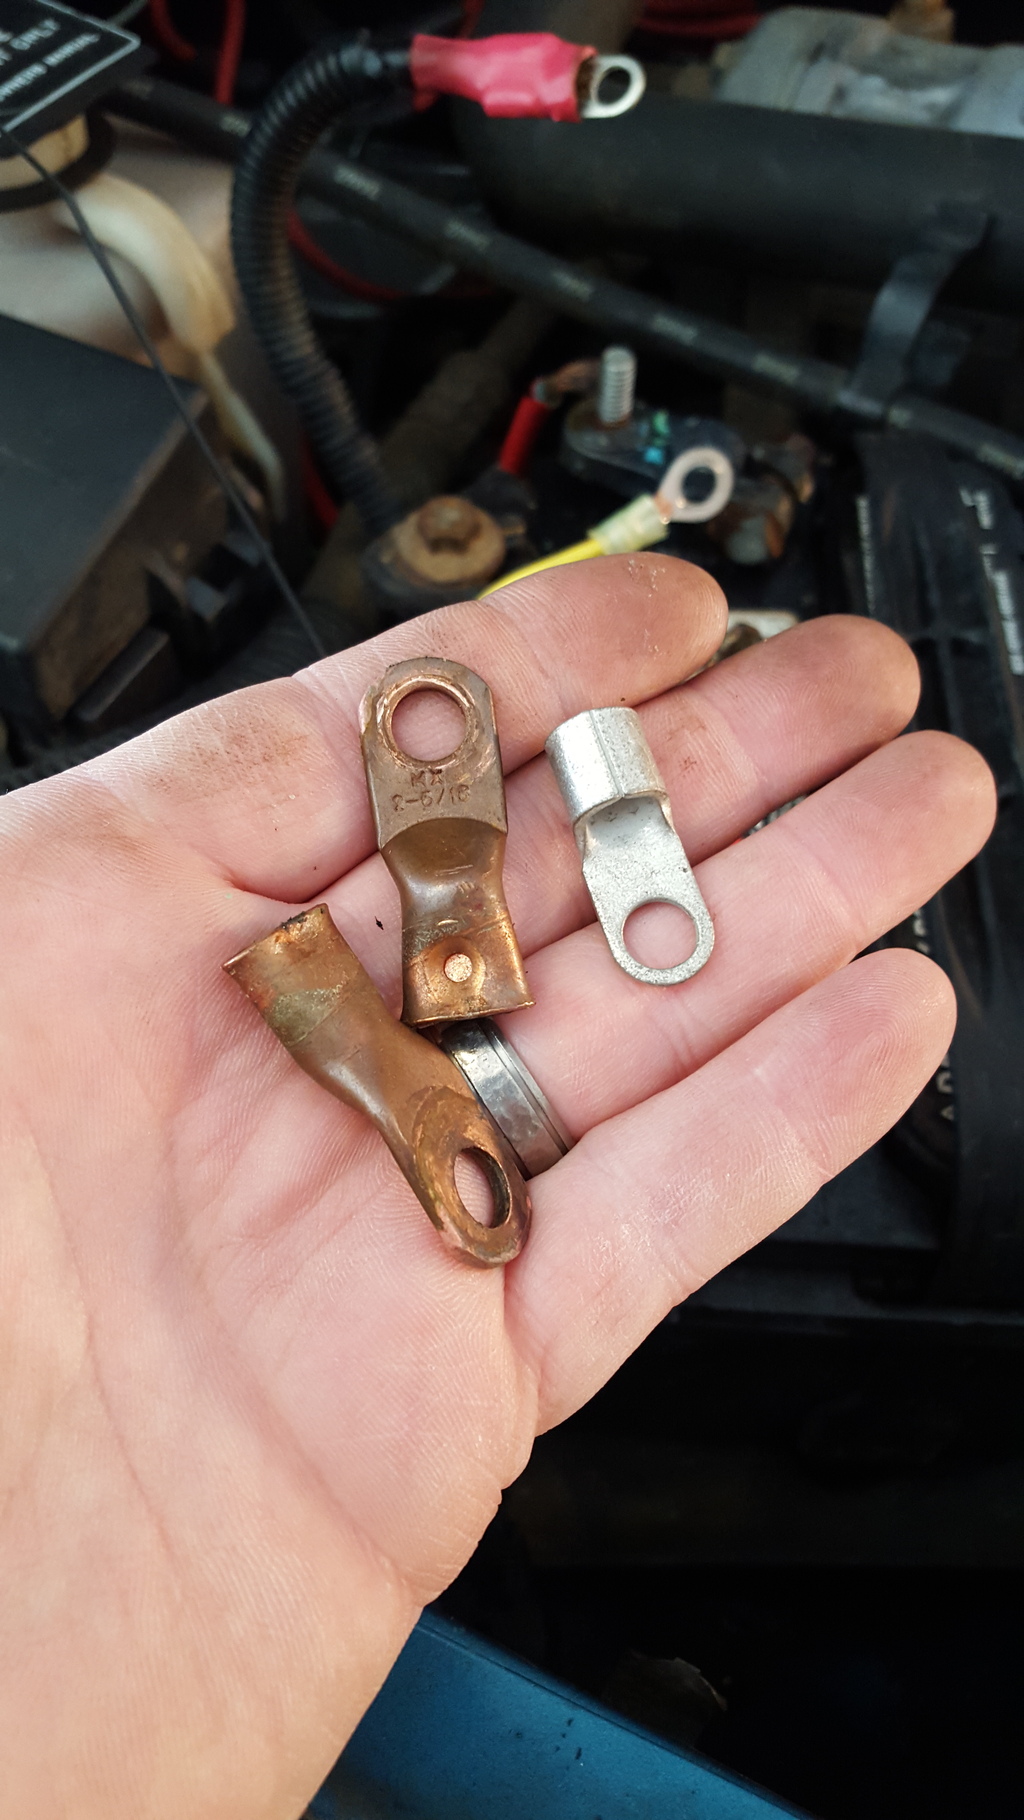
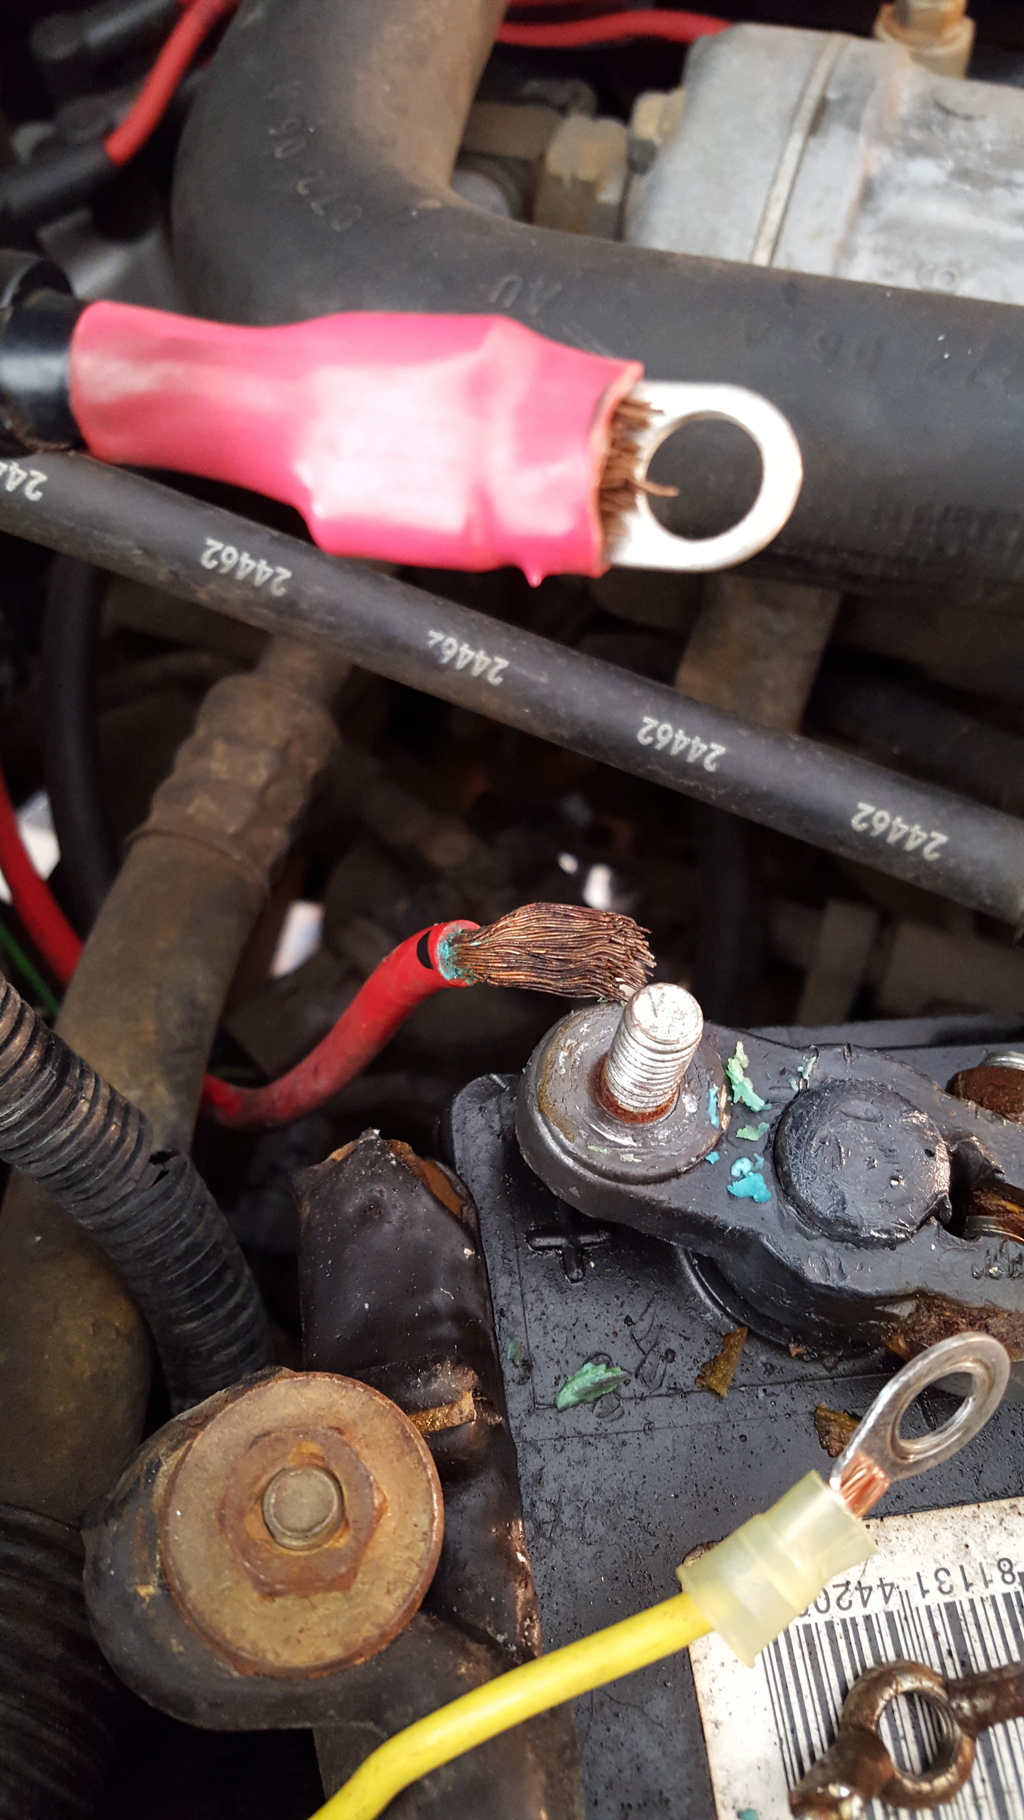
Someone put some junk "crimp" connectors that were damn near falling off on the main power leads and then covered their **** crimp job up with some electrical tape. I replaced them with a good crimp connection and used the proper insulation as well.


Someone put some junk "crimp" connectors that were damn near falling off on the main power leads and then covered their **** crimp job up with some electrical tape. I replaced them with a good crimp connection and used the proper insulation as well.
12-11-2015, 09:30 PM
#28
Seasoned Member
Join Date: Jul 2015
Location: York County, PA
Posts: 264
Likes: 0
Received 1 Like
on
1 Post
Year: 1998
Model: Cherokee
Engine: 4.0
Literally nothing pisses me off more than sub par electrical work. How my Jeep has not caught on fire yet from the PO's hack job wiring is a miracle in itself. I feel you brother. Love the color!
The following users liked this post:
Clayt (09-02-2021)
12-11-2015, 09:33 PM
#29
Seasoned Member
Thread Starter
The XJ I purchased before this one (red one in the first post of this thread) had toggle switches running everything and a push button start that should have caught fire, melted, and took the whole Jeep with it...somehow it didn't. I changed all that out, re-wired the headlights at the front header panel, and put an aftermarket ignition in so it at least had a key...lol
12-11-2015, 10:25 PM
#30
CF Veteran
This is actually my overall plan as well, f/r bumpers and sliders are in the works as soon as possible.
I would highly recommend selling your current firestik and purchasing an NGP (no ground plane) kit to mount on your bumper. Not using the proper kit can and will burn up your CB.
NGP from firestik - http://www.wearecb.com/firestik-ngp-cb-antenna-kit.html
I would highly recommend selling your current firestik and purchasing an NGP (no ground plane) kit to mount on your bumper. Not using the proper kit can and will burn up your CB.
NGP from firestik - http://www.wearecb.com/firestik-ngp-cb-antenna-kit.html