Fire-Road Runner
 10-27-2014, 08:36 PM
#46
Seasoned Member
Join Date: Jul 2010
Location: NE FL
Posts: 337
Likes: 0
Received 0 Likes
on
0 Posts
Year: 1997
Model: Cherokee
Engine: 4.0
Mirrors look good! Weird that the harness is not long enough. Maybe you could check the harness on the one at the JY to see if there is a extension or something. If not, you could always extend the wires.
 10-30-2014, 11:56 PM
#47
Member
Thread Starter
Join Date: Sep 2014
Location: Mountain Town, USA
Posts: 180
Likes: 0
Received 0 Likes
on
0 Posts
Year: 1991
Model: Cherokee (XJ)
Engine: 4.0 6 Cyl
The one from the JY was like a 89 or something, so its probably just the way it was wired....ill honestly just extend the wires when I take out the gauge cluster to paint the grey to black.
 11-09-2014, 06:56 PM
#48
Member
Thread Starter
Join Date: Sep 2014
Location: Mountain Town, USA
Posts: 180
Likes: 0
Received 0 Likes
on
0 Posts
Year: 1991
Model: Cherokee (XJ)
Engine: 4.0 6 Cyl
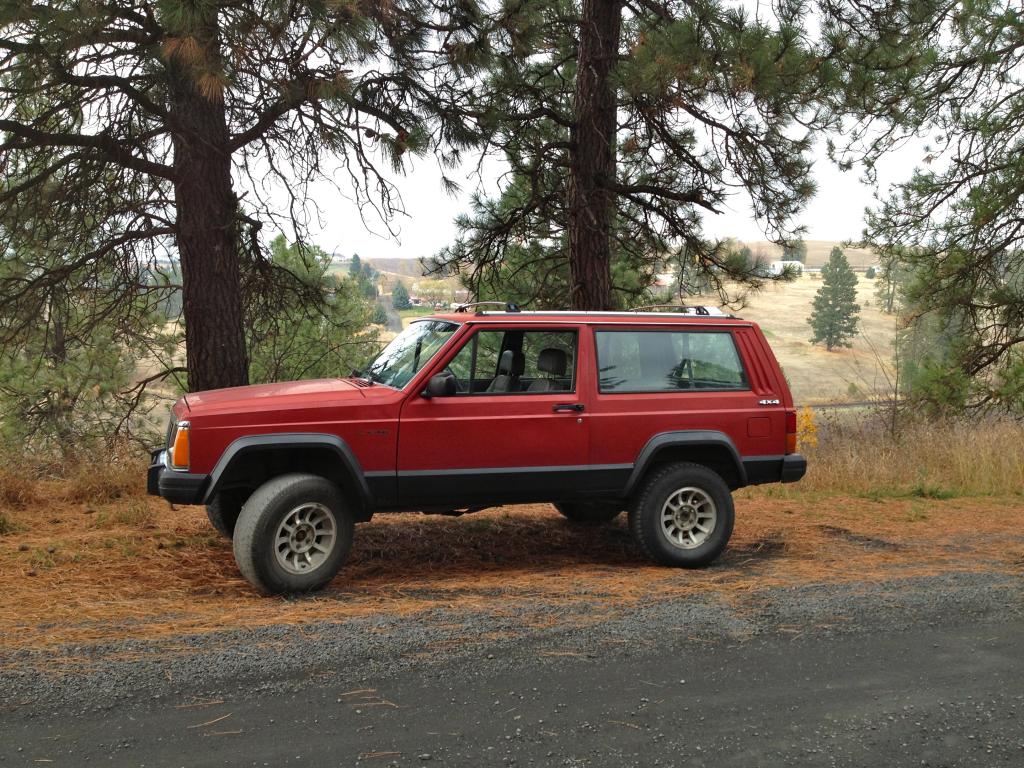
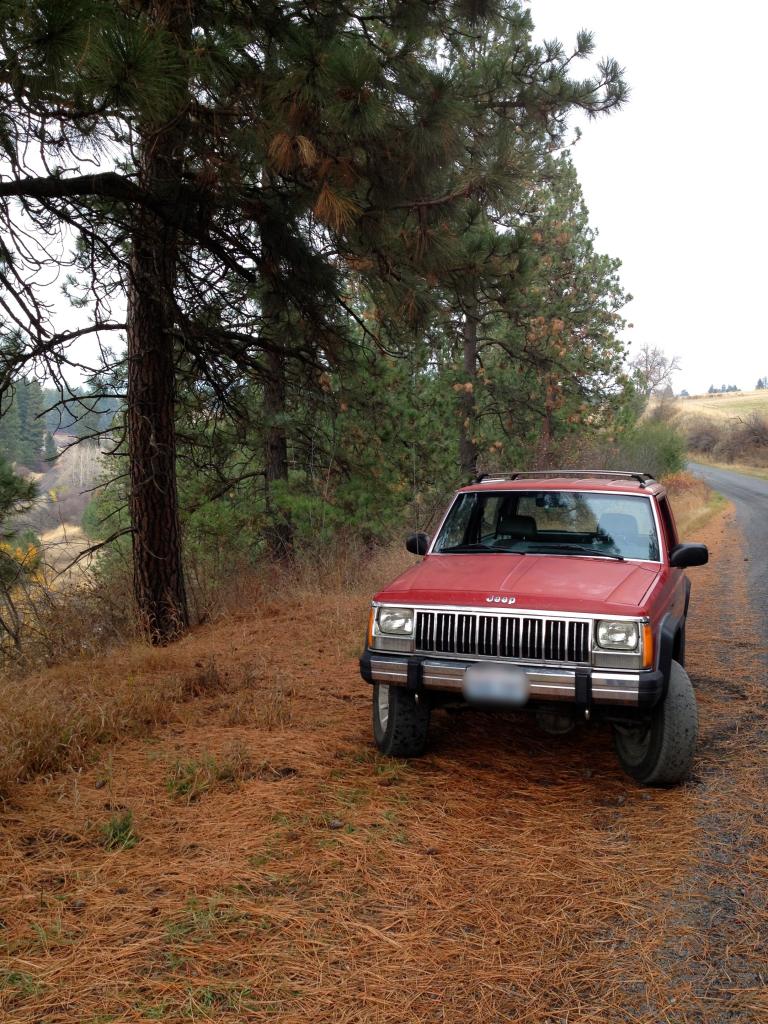
Well I finally got the turbines and second set of tires from the PO shop. I swapped them out. Im kinda liking the look of the turbines so far, although I wonder if I could sell the turbines for more $$$ than the black steelies. 
One of the tires is pretty bald so honestly....I just need to get a whole new set of tires. That way I can just start fresh.
I took the Jeep out on some back roads to get some better pics and to see how the different wheels/tires felt out on the highway. Here are some shots I got once I was up above the river:

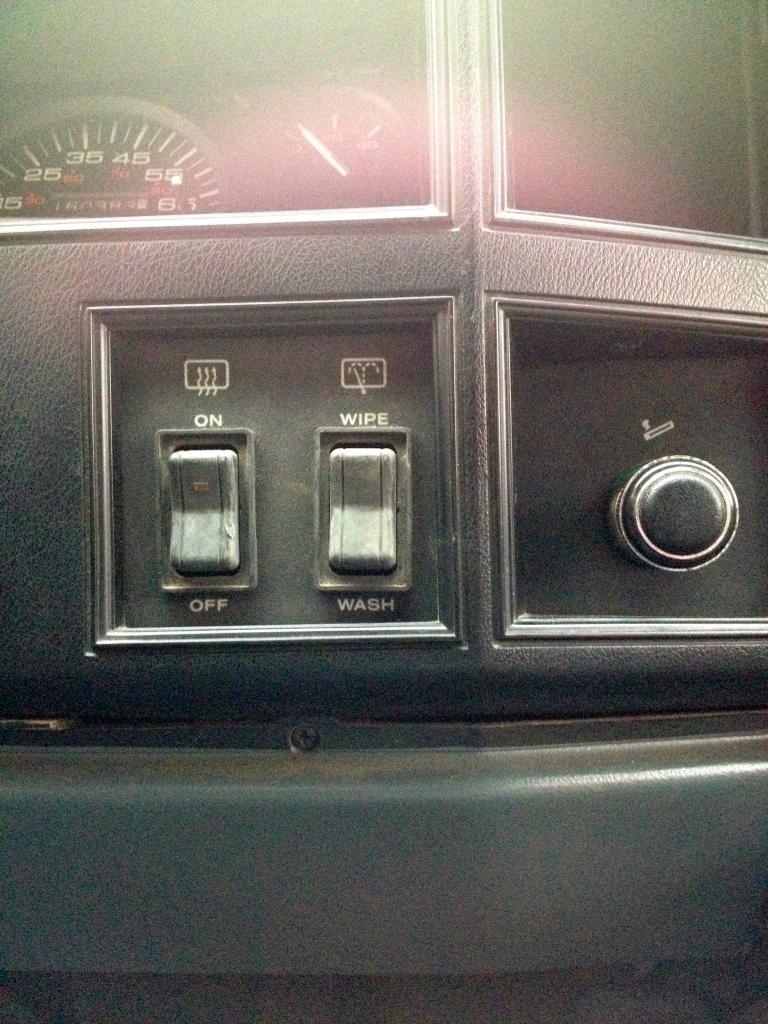
This weekend I finally finished some details on the dash. First off, I wanted to finish what I had tried to do a few weeks back....swap in the combination switch panel and remove the one on each side panels. The combo panel came out of a 89ish so I was pretty sure the wiring would be different, which obviously it is cause it wouldn't reach to the right side of the steering column. All I had to do is extend the wires. The main goal in the this was to keep it looking fairly stock as well as have a nice clean space for future switches without cutting into the dash in random places.
Here is a before:
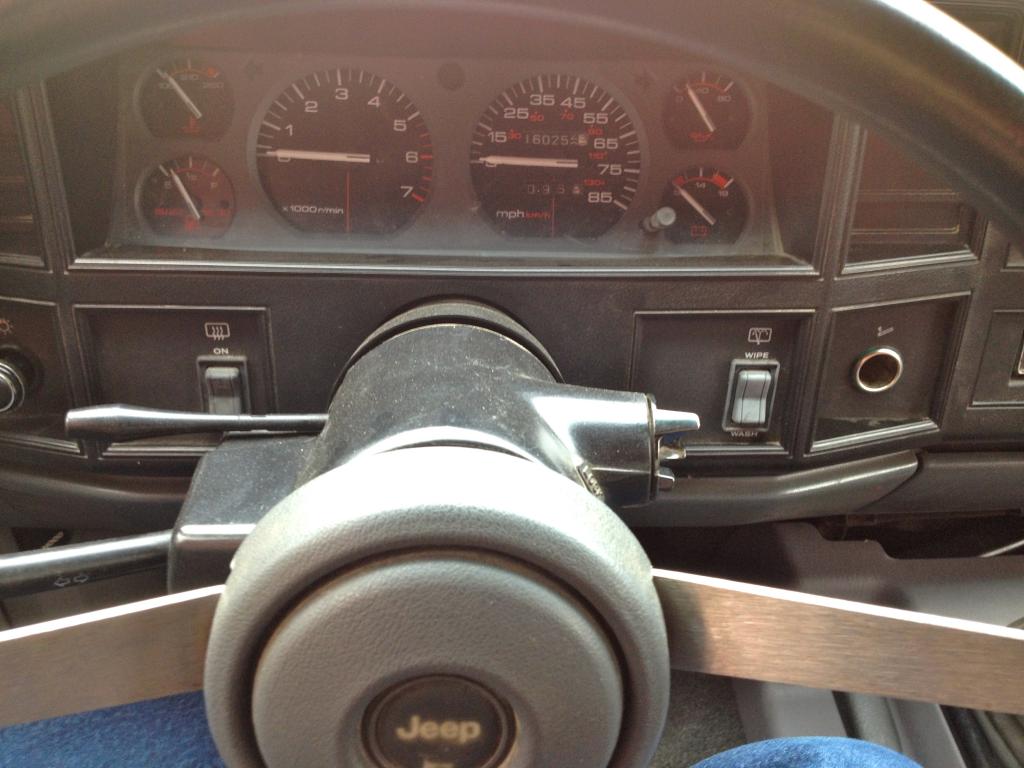
The 89 had what was basically a blank panel on the left side which I took off and used in mine after the switches were swapped over. [PS: dont mind how the switches and stuff look dirty, I still gotta detail clean all that stuff.]

Here is an after:
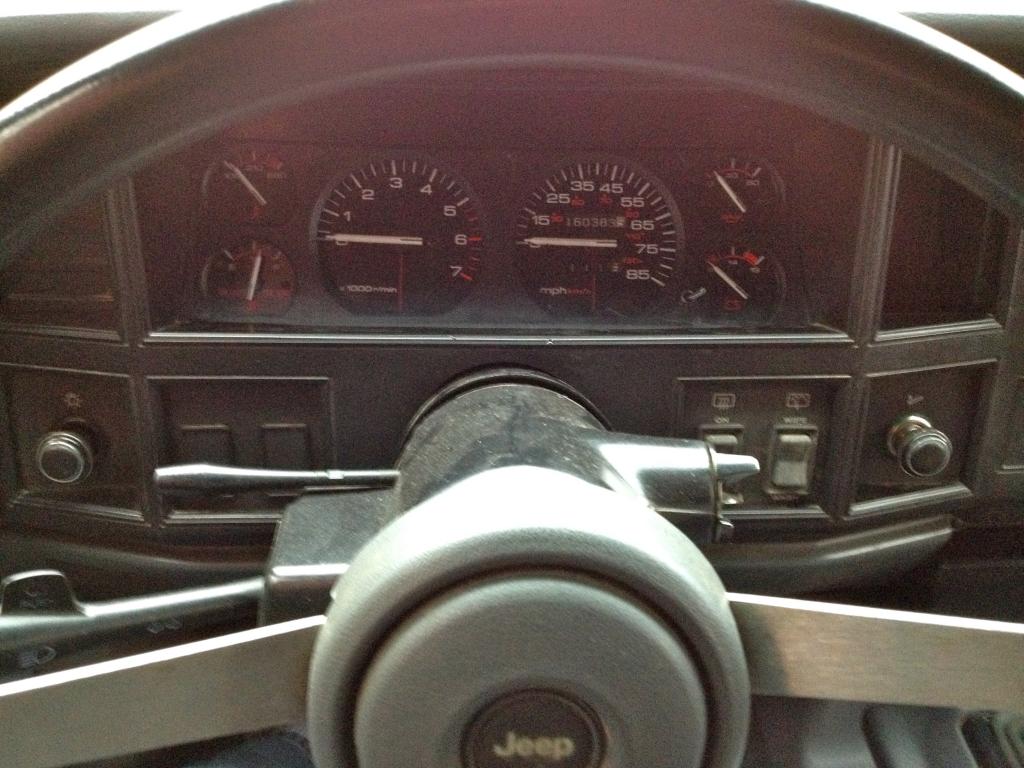
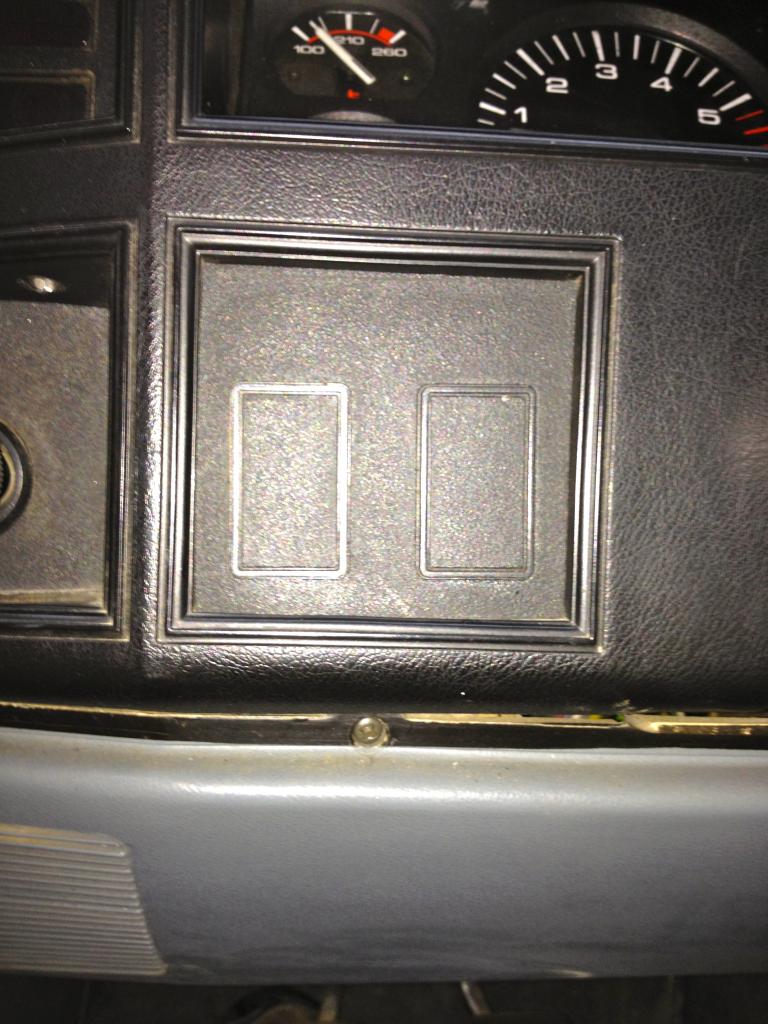
My final thoughts on this mod.....I love it. I love that it looks factory (because technically it was). And I love how simple it changes the dash. I also went ahead and removed the clock/blank panel from above the cigarette lighter. The clock didn't work and now I have a nice spot to use however.
On to the next one,
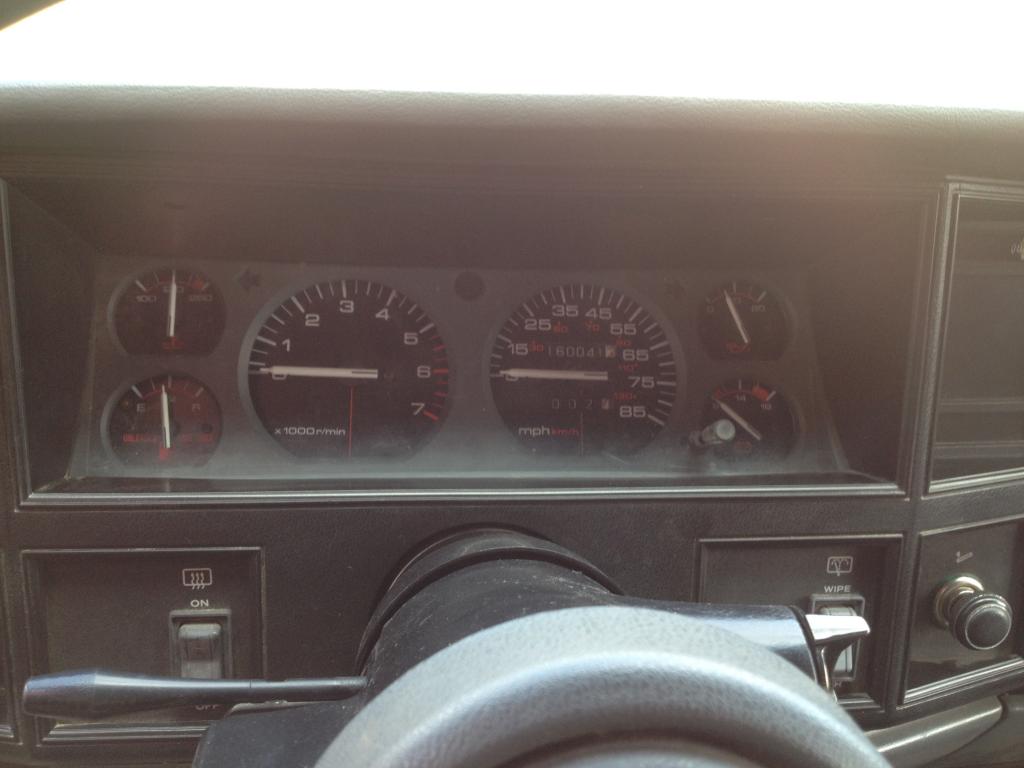
After doing the gauge swap the faceplate on the "new" set of gauges is gray while my "old" set was black. It's been bugging me ever since.
Here was before:
To paint it to match the other black of the dash I used a nice coat of Rustoleum Bed Coating. Now I know what your thinking...
"Great. Another one of those idiots who bed coats everything on his Jeep. "
...BUT...
...the nice thing about the Rustoleum stuff is that its only turns out "slightly" textured depending on how many coats you do.
Check it out:
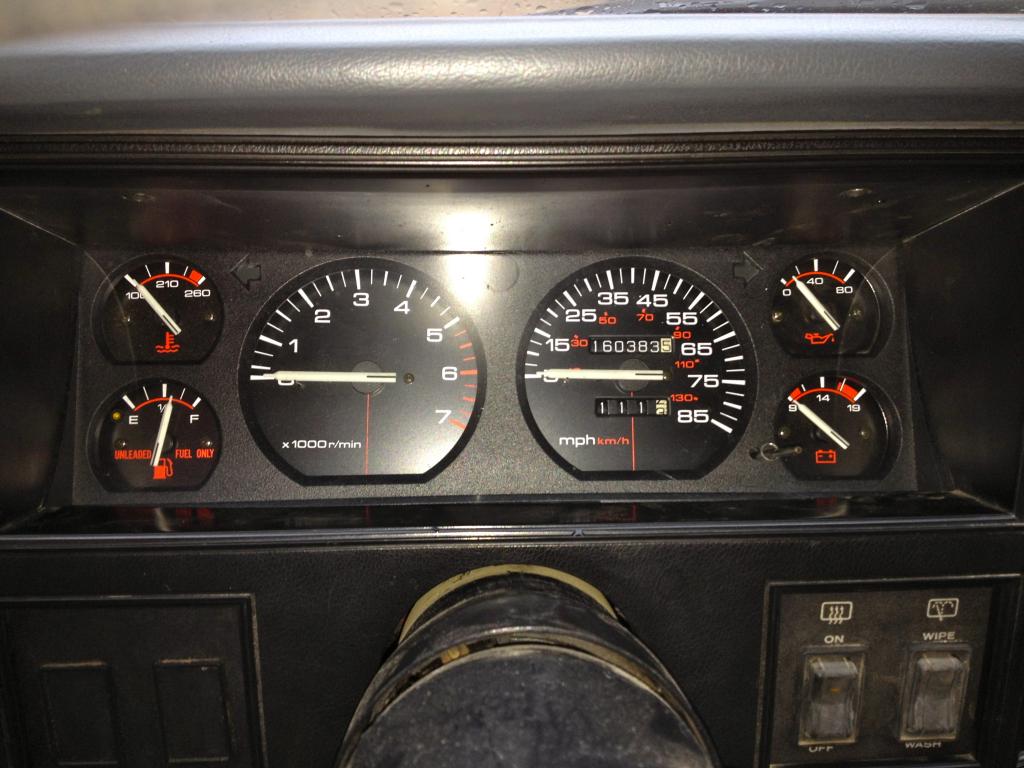
How sharp looking is that!?!
You gotta admit, it looks pretty nice. I love how great it turned out.
And finally, awhile back I was able to score this awesome plastic cover from an electrical truck. It was a cover for what seemed to be some type of scanner or receiver. Anywho now I just gotta decide where to mount it.
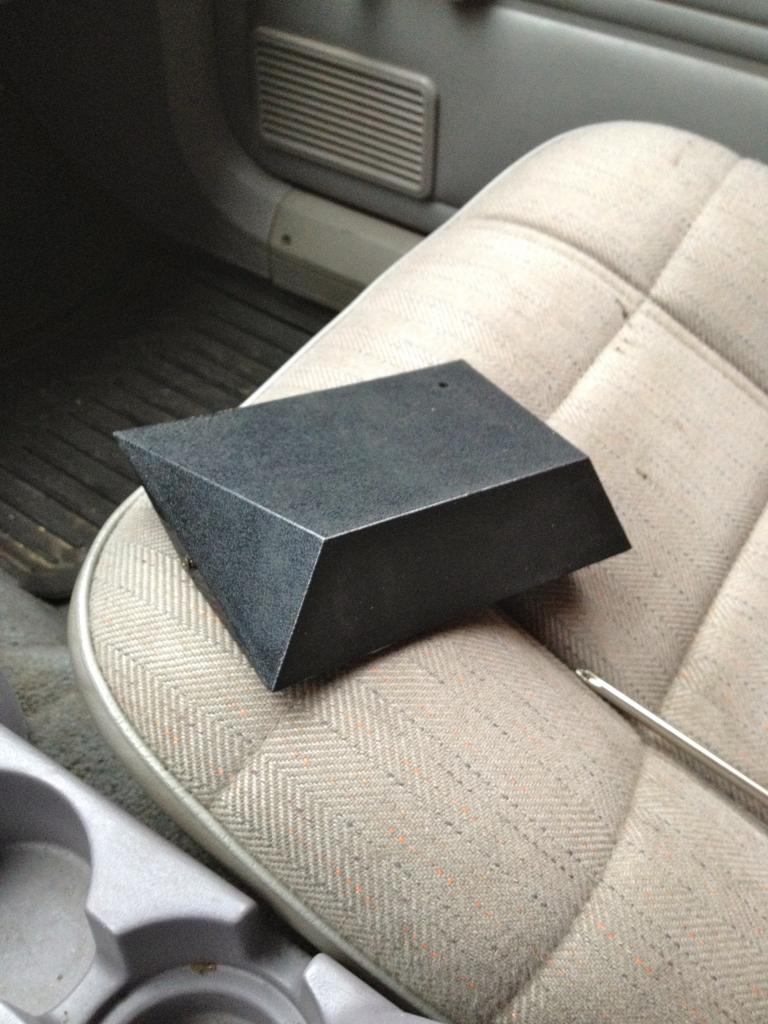
Here's what I'm thinking so far, attach it to any of the places listed below and use it to mount switches, gauges, cb, and just to expand my options. It literally fits perfectly in almost ANY of these spots.
Here are the spots Im trying to decide on:
A) flat on the front of the 97+ console in front of the shifter to cover the gap
B) on the roof right above the mirror
C) trim it down slightly and use it in place of where the removable ash tray is
D) trim it down slightly and cover the spot from the clock
Any thoughts or suggestions?

Until next time, keep Jeepin.....
One of the tires is pretty bald
I took the Jeep out on some back roads to get some better pics and to see how the different wheels/tires felt out on the highway. Here are some shots I got once I was up above the river:


This weekend I finally finished some details on the dash. First off, I wanted to finish what I had tried to do a few weeks back....swap in the combination switch panel and remove the one on each side panels. The combo panel came out of a 89ish so I was pretty sure the wiring would be different, which obviously it is cause it wouldn't reach to the right side of the steering column. All I had to do is extend the wires. The main goal in the this was to keep it looking fairly stock as well as have a nice clean space for future switches without cutting into the dash in random places.
Here is a before:

The 89 had what was basically a blank panel on the left side which I took off and used in mine after the switches were swapped over. [PS: dont mind how the switches and stuff look dirty, I still gotta detail clean all that stuff.]
Here is an after:


My final thoughts on this mod.....I love it. I love that it looks factory (because technically it was). And I love how simple it changes the dash. I also went ahead and removed the clock/blank panel from above the cigarette lighter. The clock didn't work and now I have a nice spot to use however.
On to the next one,
After doing the gauge swap the faceplate on the "new" set of gauges is gray while my "old" set was black. It's been bugging me ever since.
Here was before:

To paint it to match the other black of the dash I used a nice coat of Rustoleum Bed Coating. Now I know what your thinking...
"Great. Another one of those idiots who bed coats everything on his Jeep.
...BUT...
...the nice thing about the Rustoleum stuff is that its only turns out "slightly" textured depending on how many coats you do.
Check it out:

How sharp looking is that!?!
You gotta admit, it looks pretty nice. I love how great it turned out.
And finally, awhile back I was able to score this awesome plastic cover from an electrical truck. It was a cover for what seemed to be some type of scanner or receiver. Anywho now I just gotta decide where to mount it.

Here's what I'm thinking so far, attach it to any of the places listed below and use it to mount switches, gauges, cb, and just to expand my options. It literally fits perfectly in almost ANY of these spots.
Here are the spots Im trying to decide on:
A) flat on the front of the 97+ console in front of the shifter to cover the gap
B) on the roof right above the mirror
C) trim it down slightly and use it in place of where the removable ash tray is
D) trim it down slightly and cover the spot from the clock
Any thoughts or suggestions?
Until next time, keep Jeepin.....
11-10-2014, 10:02 PM
#52
Member
Thread Starter
Join Date: Sep 2014
Location: Mountain Town, USA
Posts: 180
Likes: 0
Received 0 Likes
on
0 Posts
Year: 1991
Model: Cherokee (XJ)
Engine: 4.0 6 Cyl
11-10-2014, 10:06 PM
#53
Member
Thread Starter
Join Date: Sep 2014
Location: Mountain Town, USA
Posts: 180
Likes: 0
Received 0 Likes
on
0 Posts
Year: 1991
Model: Cherokee (XJ)
Engine: 4.0 6 Cyl
Thanks! I appreciate that. Im glad my build thread is getting such positive feedback so far. I know its not as exciting as the builds sporting 37" tires, full exo-cage, and engine swap.
 11-10-2014, 10:08 PM
#54
Member
Thread Starter
Join Date: Sep 2014
Location: Mountain Town, USA
Posts: 180
Likes: 0
Received 0 Likes
on
0 Posts
Year: 1991
Model: Cherokee (XJ)
Engine: 4.0 6 Cyl
 11-12-2014, 03:10 AM
#55
Banned

Join Date: Jul 2014
Location: Las Vegas
Posts: 820
Likes: 0
Received 1 Like
on
1 Post
Year: 1997
Model: Cherokee
Engine: 4.0
I really like your approach and updates to the vehicle. I'm considering doing the black trim also...and I agree with several of the others the turbines look really good.
11-12-2014, 10:05 AM
#56
Member
Thread Starter
Join Date: Sep 2014
Location: Mountain Town, USA
Posts: 180
Likes: 0
Received 0 Likes
on
0 Posts
Year: 1991
Model: Cherokee (XJ)
Engine: 4.0 6 Cyl
If mine comes out half as good as yours, Id be happy!
 11-14-2014, 09:43 PM
#57
Newbie
Join Date: Nov 2014
Location: In the Wheat, Eastern Washington
Posts: 8
Likes: 0
Received 0 Likes
on
0 Posts
Year: 1993
Model: Grand Cherokee (ZJ)
Engine: 4.0
Nice thread! I hadn't realized how much you had actually done to your Jeep... and that rustoleum looks great on the rockers.
11-14-2014, 09:48 PM
#58
Member
Thread Starter
Join Date: Sep 2014
Location: Mountain Town, USA
Posts: 180
Likes: 0
Received 0 Likes
on
0 Posts
Year: 1991
Model: Cherokee (XJ)
Engine: 4.0 6 Cyl
Now we just gotta get you into another XJ...

Last edited by TMC; 11-14-2014 at 11:47 PM.
11-14-2014, 11:53 PM
#59
Newbie
Join Date: Nov 2014
Location: In the Wheat, Eastern Washington
Posts: 8
Likes: 0
Received 0 Likes
on
0 Posts
Year: 1993
Model: Grand Cherokee (ZJ)
Engine: 4.0


 11-14-2014, 11:57 PM
#60
Member
Thread Starter
Join Date: Sep 2014
Location: Mountain Town, USA
Posts: 180
Likes: 0
Received 0 Likes
on
0 Posts
Year: 1991
Model: Cherokee (XJ)
Engine: 4.0 6 Cyl
