Project Mutt
 01-06-2011, 05:36 PM
#1
Seasoned Member
Thread Starter

Join Date: Jan 2011
Location: Wrightstown, NJ
Posts: 309
Likes: 0
Received 0 Likes
on
0 Posts
Year: 1986 Comanche
Engine: Chevy 350
Okay so I'll start this off and slowly add to this post to get all the info in. This build has been a bit slow due to school (college student) since I'm on the whole quarter system and only get a week off between quarters. So here's the build...
I'm starting with a 1986 Jeep Comanche X, 2.8L V6, AX5, NP207, Dana 35/30HP, long bed with factory roll bar on 31's. I picked the Jeep up for $600 with a miss and was hoping she just needed a tune up, not the case... One of the cylinders was only running 25psi. I figured a valve was sticking so I ran seafoam through the engine and somehow managed to bed a pushrod. Pulled the top apart and checked all the pushrods and two were bent, so I bought two new pushrods. Still had the same issue then started making some horrible noises like a lifted collapsed or something. Got fed up and decided to not put any more money into a 125hp V6 so she got yanked. I sold the 31's for $300 and the AX5 for $150 so had $150 into the Jeep at that point, and the transformation started!
The first thing I did was add a lift. My old Cherokee had an 8" Rusty's Offroad long arm lift and when she got totaled, I decided to swap over parts of the lift. So the Comanche is sitting on 8.5" Rusty's Offroad front coils with an RE track bar for a TJ, a 3" drop pitman arm and the drop track bar bracket. I bought a set of BDS JK 4.5" lift short arms measuring them to be around the size I needed and they ended up moving the front axle forward about 2 inches... Did a SOA on the rear with being lazy and slapping a Cherokee axle in, which netted about 6" of lift. Also bought a set of IronMan4x4 2-3.5" lift shackles, these things are beefy. I won't be putting the shackles on until the drivetrain is in so I can level her out.
 01-06-2011, 05:47 PM
#3
Seasoned Member
Thread Starter
Join Date: Jan 2011
Location: Wrightstown, NJ
Posts: 309
Likes: 0
Received 0 Likes
on
0 Posts
Year: 1986 Comanche
Engine: Chevy 350
So after that fun lift, it was time to fix the floors. I ended up buying a full OEM Cherokee floor and just piece it in. My buddy works for a body shop so I got him to give me a hand putting the floor in. Due to the size of the floor and lack of space in the Comanche, he decided to cut the floor in half in order to get it in since it had to go in through the doors (unlike a Cherokee where the whole thing can be dropped in through the hatch).
So yea, the first problem...We found out that the Comanche floor pan is the same but the Comanche has a reinforcement rib welded on to the top of the floor to box in the frame rail below (everything in front of the firewall is the same minus the frame in front of the frame side LCA mount, that's where the frame on the Comanche is a lot larger). The second problem is we had to figure out the best way to do it since, due to the frame reinforcement, it won't sit in there perfectly. The third problem was that the floor was rotted into the firewall, so that had to be patched also.
So we cut off the back about 1.5 feet of the floor pan, cut the floor in half, and cut the floor pan just inside the reinforcements on the passenger side and half way up along the drivers side (as you can see in the pic, it was rusted over and beyond the reinforcement on the drivers side). Two days of working on it and the floor was in. I ended up putting Herculiner on the top and bottom of the floor to keep her from rusting.
If I were to do the floor again, would have cut it the same way to get her in but would have spent more time banging it all down to follow the original lines. Would have also drilled out the spot welds on the reinforcements and would have laid the whole section in and fabbed up a new reinforcement on top.
I'll have to find these pics...
01-06-2011, 05:49 PM
#4
Seasoned Member
Thread Starter
Join Date: Jan 2011
Location: Wrightstown, NJ
Posts: 309
Likes: 0
Received 0 Likes
on
0 Posts
Year: 1986 Comanche
Engine: Chevy 350

Also forgot to mention in the first post that those are 33x12.5R15 MTR's that the front has about 60-70% and rears about 40-50% with a brand new spare mounted on black steelies (or something along those lines). I picked the tires up for $200 and they went on the Jeep as soon as she was lifted.
01-06-2011, 05:53 PM
#5
Seasoned Member
Thread Starter
Join Date: Jan 2011
Location: Wrightstown, NJ
Posts: 309
Likes: 0
Received 0 Likes
on
0 Posts
Year: 1986 Comanche
Engine: Chevy 350
Here's a few more pics I stumbled across while trying to find those floor pan pictures. Can't edit and attach pictures...
The first pic is the IronMan4x4 shackles and second is the pic of tires and rims that were on the Jeep when I bought her.
The first pic is the IronMan4x4 shackles and second is the pic of tires and rims that were on the Jeep when I bought her.
01-06-2011, 06:00 PM
#6
Seasoned Member
Thread Starter
Join Date: Jan 2011
Location: Wrightstown, NJ
Posts: 309
Likes: 0
Received 0 Likes
on
0 Posts
Year: 1986 Comanche
Engine: Chevy 350
Floor pan pics! I first cleaned then primered the floor since that was all my buddy and I could get done the first day. Next I POR15'd it and then we fully welded the new floors to it, then I Herculined it.
01-06-2011, 06:04 PM
#7
Seasoned Member
Thread Starter
Join Date: Jan 2011
Location: Wrightstown, NJ
Posts: 309
Likes: 0
Received 0 Likes
on
0 Posts
Year: 1986 Comanche
Engine: Chevy 350
You can see in the last two pics that the apron under the battery box was rotted bad and the part the battery box was connected to was, well, still connected to the box and still is right now... I found a piece of scrap metal I had laying about and fully welded it in, threw a little sealer on the corners (not sure why but just felt better with it sealed for some reason at the time...) and then painted it. It doesn't look the best but the battery box and rad bracket hide it so I don't really care.
Trending Topics
01-06-2011, 06:22 PM
#8
Seasoned Member
Thread Starter
Join Date: Jan 2011
Location: Wrightstown, NJ
Posts: 309
Likes: 0
Received 0 Likes
on
0 Posts
Year: 1986 Comanche
Engine: Chevy 350
Okay so, the last part to really point out right now is the drivetrain. I found a conversion kit for a Chevy 350 off a guy on Craigslist that came with everything: Novak adapter to AX15, bell housing, all the little brackets and slave cylinder. This kit converts my internal slave to an external (if you really go wheeling with a stick shift, you know how valuable this is). Bought the whole kit for less than just the adapter cost new from Novak. My parents bought me the Novak motor mounts and brackets for my birthday since I liked how this bracket bolted better than the Advance Adapters kit, but was more expensive.
So the fun part, I figured out the hard way that '86 engine bays are different than the '87+ (they apparently changed the whole engine bay, frame rails and firewall to fit the 4.0L in '87). I ended up having to cut a tear drop shape in the passenger side bracket in order to get the engine to even fit into them, not to mention I had to egg out some of the mounting holes just so the bracket sits flat. There are so many bolts in each bracket that egging out a few holes concerns me in no way (there's 8 bolts and nuts holding the driver side bracket on and 4 or 6 holding the passenger side on).
The next issue was headers and radiator hoses. I wanted to run my stock radiator for the time being to see if it will cool the engine down (stick shift so it's only coolant running through there) so I bought a 360 degree swivel thermostat neck made by Edelbrock, that solved the mounting issue since I can now point the neck straight towards the top rad hose connection and can easily make a custom bracket to hold the hose under the crankshaft pulley.
The next part was the headers. Headers to fit in the '87+ from Novak were like $350 so they were out of the options since the engine bays are different. I could run truck headers but then the bolts are right against the firewall, which makes dropping the transmission and transfer case later on a royal pain. My buddies boss is a huge Chevy guy so I asked what kind of headers he had laying around and he said to come by and we'll find something. I got there and he has a wall of long tube headers and said choose a set, and gave me the headers, a few pulleys, a carb, valve covers, oil pan and a few other parts for $225, I couldn't say no. So the passenger side header fit perfect, avoided the motor mount by about 1/2", the driver side didn't. So I asked for another set and the opposite was the issue. This guy is cool as hell and gave me the two that fit just cause he wants to see this Jeep put together.
So another issue popped up with the long tubes, the oil filter doesn't fit now! I bought a remove filter kit from TransDapt and got the lines swapped out for the longer ones. I didn't trust the stock oil pump so bought a high volume (not flow!) pump to put in.
So after all that fun of finally finding parts, I'm in the process right now of picking up a set of brand new Crane 1.5 roller rockers and screw in studs, whenever I get the call tonight! I also got a 480 lift cam for the engine, with the engine.
Behind the engine is just going to be a stock AX15 and NP231. The guy I bought the setup from had a ZZ350 engine (350hp engine) in front of his AX15 and NP231 in the Wrangler and didn't have a single issue. With the setup I have, I'm going to be pushing around 300hp (hopefully not too much more) so it should all work out.
01-06-2011, 06:26 PM
#9
Seasoned Member
Thread Starter
Join Date: Jan 2011
Location: Wrightstown, NJ
Posts: 309
Likes: 0
Received 0 Likes
on
0 Posts
Year: 1986 Comanche
Engine: Chevy 350
With the snow that was coming, I had to build something to put the Comanche in so I can work on her during the winter. I had two canopies here putting up against eachother so they are 10'x40' but the roofs were deteriorated and wasn't all too warm in there when there was a roof. So the transformation of the canopies started! It took about 2 weeks but they were all bolted together and a roof was built. My brother ended up getting me a nice little 50k-80k btu/hr radiant propane heater to put in there, which is all nice and warm! So that is in front of the Jeep and I work right next to it.
01-06-2011, 06:38 PM
#10
Seasoned Member
Thread Starter
Join Date: Jan 2011
Location: Wrightstown, NJ
Posts: 309
Likes: 0
Received 0 Likes
on
0 Posts
Year: 1986 Comanche
Engine: Chevy 350
Okay, so that's basically where I'm at right now.
My plans for the Jeep are to sell these JK control arms, which will fund a long arm kit. I'm not too much of a fan of the bolt on kits so I'm going to make my own that sits higher (for a flatter stomach) and is a lot beefier. Not to mention that most of the kits won't fit with the Chevy 350 with the long tube headers.
You can see in the second picture of the enclosure the axles on the right, that's a set of Dana 60HP king pin and Sterling 10.25 out of an '89 F350. Those axles will be going under the Jeep in the next few months. With the bed on, there is no advantage of going to coils in the rear so the 10.25 will get new seals, brakes (disc brake conversion) and then will get the leaf brackets burned on and slapped right under. The front will be a lot more work but I'm still figuring that part out. Got most of the layout for the front axle all figured out in my head but the rest depends on if I go radius arm style (y-link), 3-link or 4-link on the front, that all depends on the space under there.
The tires will be a set of Humvee rims on the 37x12.5 MTR's with rock rings welded on the outside and PVC insert. The rims and tires are going to run about $1900 shipped to my door completely assembled so those are saved for later on down the line after I get a co-op job.
I still need to plate the frame (doesn't really need it too much but I'm building this to not break as I got sick of breaking stuff every weekend on the old Cherokee) then will be making a custom slider, bumpers, and will put an exo cage on the Jeep (why just protect yourself when you can protect the Jeep also). I will be running fender flares off the exo cage since I am keeping the axles full length.
This truck will be a street driven truck as well so everything is made to be as extreme as I can make it while still having road manners.
I also picked up a Bull Dog 8000lb winch off a buddy and bought a Tmax 9k cable and fairlead off a guy on Jeepforum to put on the new bumper, spent $104.50 total for everything shipped so I'm happy with that investment.
Think that's about it, ask any questions if you want!
01-11-2011, 09:57 PM
#14
Seasoned Member
Thread Starter
Join Date: Jan 2011
Location: Wrightstown, NJ
Posts: 309
Likes: 0
Received 0 Likes
on
0 Posts
Year: 1986 Comanche
Engine: Chevy 350
Yea, I know, slow build but money is really short right now until I sell some things.
Got the heater box and dash all bolted in, have the steering all together so it can move easily.
Been doing a lot of research into control arms. I've ended up choosing to go with a 3 link over the radius arm setup. I'm going to make a custom cross member with the lowers about half tucked up into it with the upper on the passenger side. Due to the V8 and long tube headers, plus the driveshaft on the drivers side, there is no more space on the drivers side for the arm. Plus I've seen many builds with the arm on the passenger side and there was really no difference between sides. For the time being, I'm going to hack up the mounts on my disco D30HP and build some on there till the funds let the D60HP get built. I will be trussing the axle and all that fun stuff.
The control arms are going to be made out of 2" x 0.25" DOM tubing with Ballistic Joints on all the ends. Going to keep the stock steering and the (RE I think?) adjustable track bar on there for the time being. Assuming the angles are good, those will stay on there till the D60HP goes in. I'm going to make the control arms so that the axle is moved forward a few inches and am going to trim the fenders and increase the wheel base a bit in the front to give a better approach angle.
I might be redesigning the control arms a bit when the D60HP goes in, maybe making them longer/shorter or whatever. If I end up doing that, this setup will go on my buddies Cherokee. If I don't then we're going to build him a custom setup like this once I iron out all the issues.
The only issue with this setup is I'm going to have to run some limiting straps and maybe a suck down winch later on, all matters how hardcore I want to get with the wheeling. Going to figure out all that fun once it gets built. I also have a sway bar and JKS disconnects to add to the front still for street driving, but again, once the control arms get built then these issues will get ironed out.
The main issue is funds...Anyone want to buy some parts?
04-29-2011, 01:15 PM
#15
Seasoned Member
Thread Starter
Join Date: Jan 2011
Location: Wrightstown, NJ
Posts: 309
Likes: 0
Received 0 Likes
on
0 Posts
Year: 1986 Comanche
Engine: Chevy 350
Didn't realize how long it was since I've posted up here in. Lots of progress though, still isn't running yet but am VERY close. Since it is a lot of info, I'm just going to copy and paste from my build on another forum (it'll be a few posts to fill it all in).
So for the engine, picked up a '73 Z28 motor and started the replacing! The heads were swapped out with late '70's (I think) Chevy truck heads that were the non-smog type, oil pump was swapped out for a high volume pump, heads were rebuilt while they were off, Edelbrock Performer intake was put on and a TransDapt oil filter relocation was slapped on (need to see on clearances now but might go back to just a regular filter).
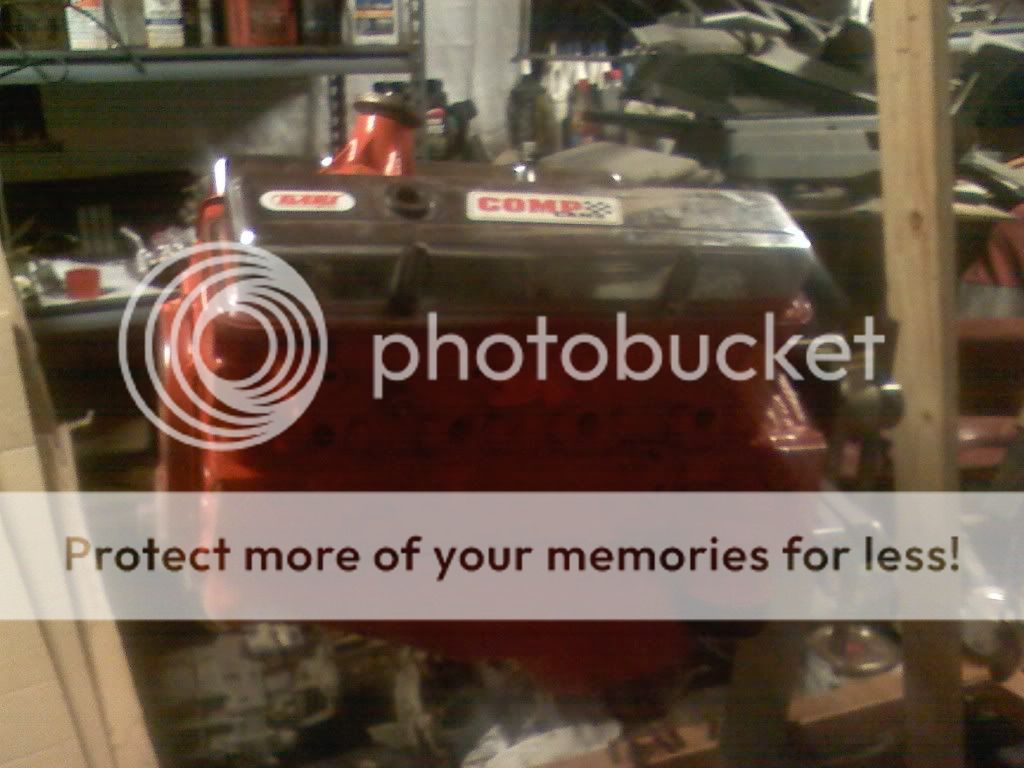
Then the motor was painted black.
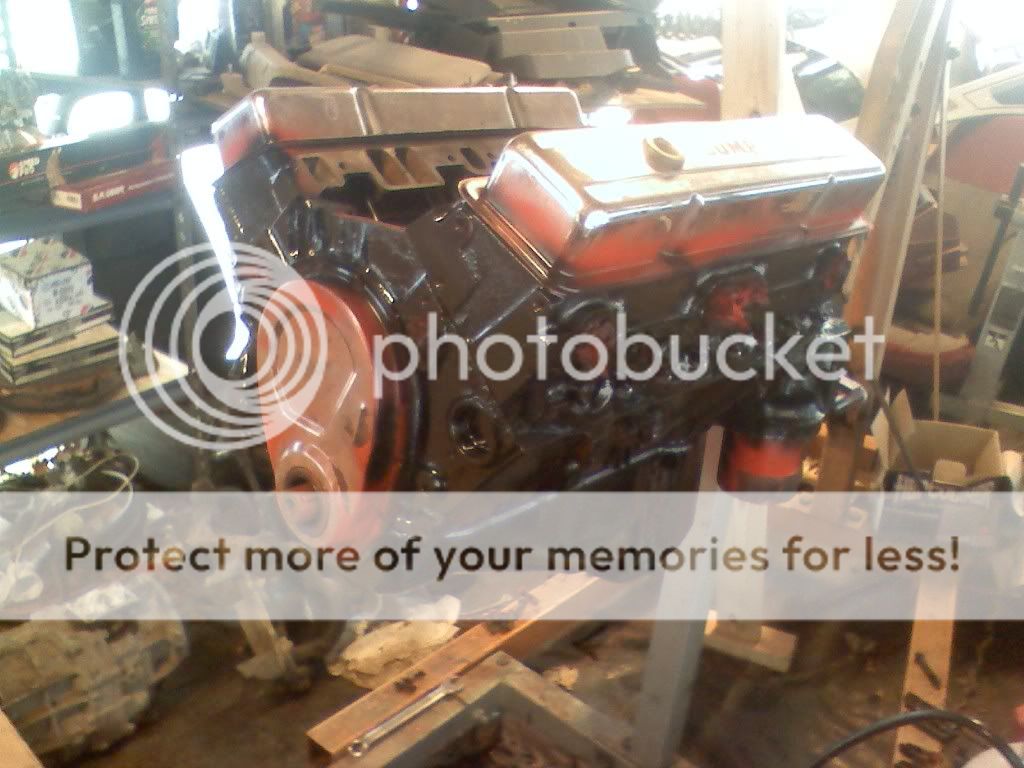
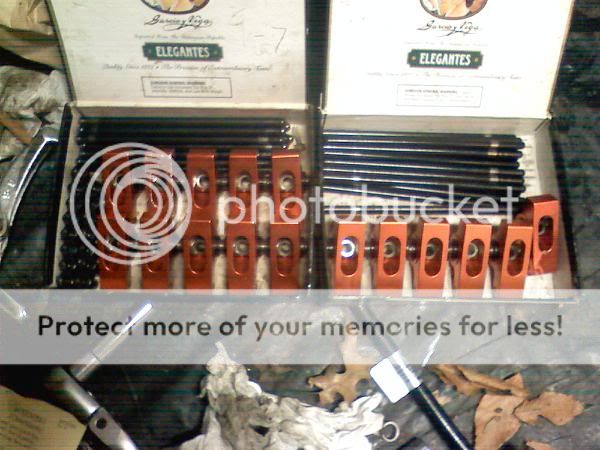
When I got that all ready to be dropped in, a buddy offered me a set of roller rockers, new lifters and hardened push rods for dirt cheap, I just couldn't say no...So the engine came back apart and put all those goodies in.
I had to get a custom bushing since I had the large nose AX15 (and apparently that's all special order parts...) so the trans got bolted to the engine for fitment.
So for the engine, picked up a '73 Z28 motor and started the replacing! The heads were swapped out with late '70's (I think) Chevy truck heads that were the non-smog type, oil pump was swapped out for a high volume pump, heads were rebuilt while they were off, Edelbrock Performer intake was put on and a TransDapt oil filter relocation was slapped on (need to see on clearances now but might go back to just a regular filter).
Then the motor was painted black.
When I got that all ready to be dropped in, a buddy offered me a set of roller rockers, new lifters and hardened push rods for dirt cheap, I just couldn't say no...So the engine came back apart and put all those goodies in.
I had to get a custom bushing since I had the large nose AX15 (and apparently that's all special order parts...) so the trans got bolted to the engine for fitment.