View Poll Results: Grille color


Multiple Choice Poll. Voters: 7. You may not vote on this poll
Project: Clockwork Orange
 05-10-2014, 12:47 AM
#1
Member
Thread Starter

Join Date: Sep 2009
Location: Colorado Springs, CO
Posts: 136
Likes: 0
Received 0 Likes
on
0 Posts
Year: 2000
Model: Cherokee
Engine: 4.0
I have been lurking around here for years, watching, reading, and picking up knowledge and ideas. I keep telling myself I am going to start a build thread on this project, and am finally trying to make myself do it, so here goes-
I have had a decent '00 XJ for about 7.5 years, which has served me well, but as we all know, they are never done.

I drove it for a long time as it was, but about a year and a half ago, started noticing some increasingly unsavory handling and such. Admittedly, I drove the crap out of it, and put about 90K on it in that 6 years. So, she got parked until last June, when I finally decided it was time to tear her apart, and largely go through the whole rig.
Now, before I get started, let me preface this entire build thread with a few important notes:
I will try to update as I can, but I have a lot of catching up to do just to get to where I am.
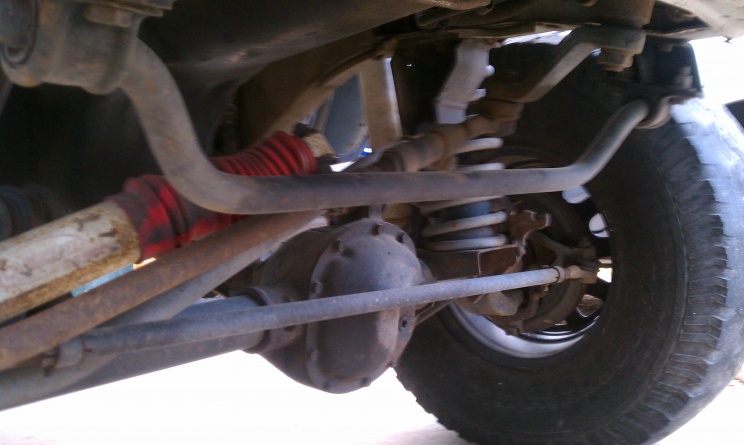
Where to start- The rig had an RE 5.5" short-arm on it when I bought it, which worked pretty well, but wasn't without it's issues. It did drive pretty solid at 80 on the hwy, with little to no vibes, death wobble, etc.
Some issues were that the sway bar mounts were ripped off the axle by the PO, the track bar bracket creaked and squeaked like crazy, the shackle angle was terrible, and it did eventually develop a rather bizarre vibration issue that I never could track down.

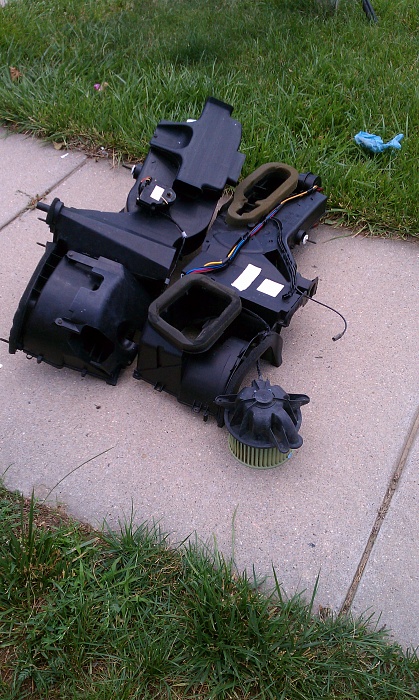
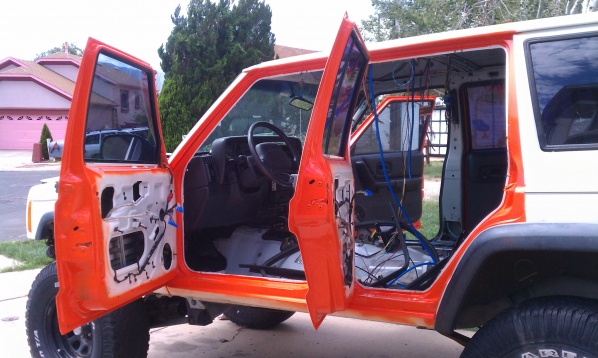
By the time I parked it, another big issue was the heater core had gone out, so that was one of the first things I tackled. Since I had been driving the rig for years, it had gotten pretty funky in the nooks and crannies. Since the dash had to come out, I figured it might as well all come out, and get a good cleaning.
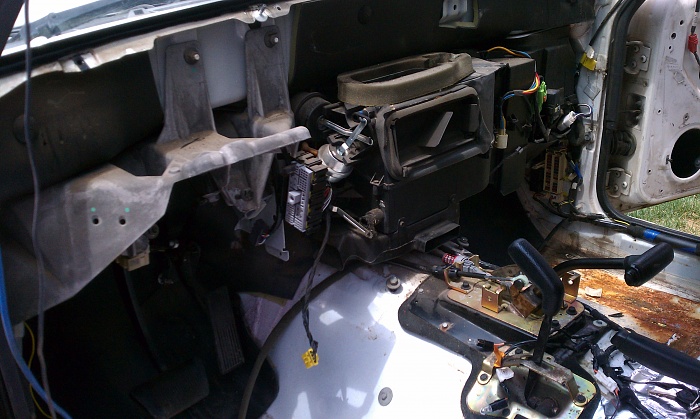
Once I got the outer part of the dash off, and pulled the carpet, I found that the leak had been worse than I thought.

I went ahead and pulled everything else out, and gave it all a good vac and scrub so I could see what I was dealing with.

Next was to grind off what rust I could, cut out the larger holes, and treat the rest. Then I went to the JY and cut the whole passenger front floor section out of another XJ, trimmed and beat it to fit, and burned it in. Then it all got a hefty coat of undercoating.
I have had a decent '00 XJ for about 7.5 years, which has served me well, but as we all know, they are never done.

I drove it for a long time as it was, but about a year and a half ago, started noticing some increasingly unsavory handling and such. Admittedly, I drove the crap out of it, and put about 90K on it in that 6 years. So, she got parked until last June, when I finally decided it was time to tear her apart, and largely go through the whole rig.
Now, before I get started, let me preface this entire build thread with a few important notes:
- One, this is going to be my daily driver, so by many standards, this will be a pretty mild build.
- That said, I still need it to be capable, while being dead-nuts reliable.
- I have been in Mountain Rescue for 21 years, and this will also be my primary response rig. Much of what I have done is geared specifically for that role, while keeping all the above in mind.
- I don't recreationally wheel. It really doesn't interest me, and I have zero desire to spend hundreds of hours, and thousands of dollars on my rig, just to take it out and beat on it. This will be used to to get me to places I want, and need to go, but more for the destination, than the journey.
I will try to update as I can, but I have a lot of catching up to do just to get to where I am.
Where to start- The rig had an RE 5.5" short-arm on it when I bought it, which worked pretty well, but wasn't without it's issues. It did drive pretty solid at 80 on the hwy, with little to no vibes, death wobble, etc.
Some issues were that the sway bar mounts were ripped off the axle by the PO, the track bar bracket creaked and squeaked like crazy, the shackle angle was terrible, and it did eventually develop a rather bizarre vibration issue that I never could track down.
By the time I parked it, another big issue was the heater core had gone out, so that was one of the first things I tackled. Since I had been driving the rig for years, it had gotten pretty funky in the nooks and crannies. Since the dash had to come out, I figured it might as well all come out, and get a good cleaning.

Once I got the outer part of the dash off, and pulled the carpet, I found that the leak had been worse than I thought.
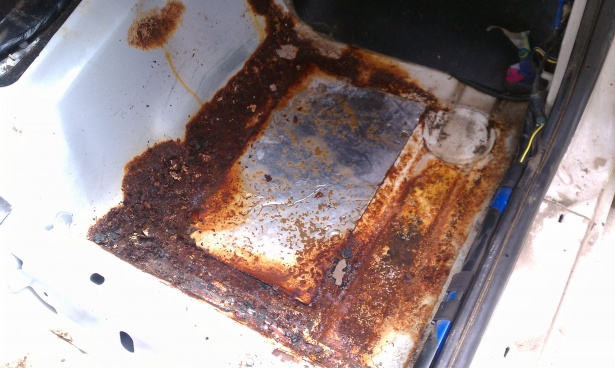
I went ahead and pulled everything else out, and gave it all a good vac and scrub so I could see what I was dealing with.
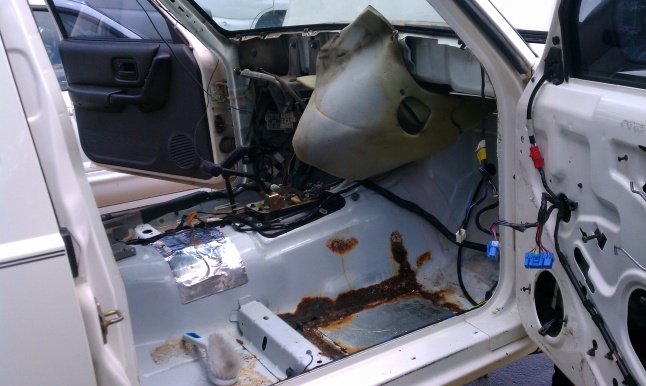
Next was to grind off what rust I could, cut out the larger holes, and treat the rest. Then I went to the JY and cut the whole passenger front floor section out of another XJ, trimmed and beat it to fit, and burned it in. Then it all got a hefty coat of undercoating.
Last edited by mntnresq; 05-10-2014 at 01:41 AM.
 05-10-2014, 01:06 AM
#2
Member
Thread Starter
Join Date: Sep 2009
Location: Colorado Springs, CO
Posts: 136
Likes: 0
Received 0 Likes
on
0 Posts
Year: 2000
Model: Cherokee
Engine: 4.0
Next, I pulled the heater box apart, cleaned everything out, and threw in new factory heater and A/C cores ($$ouch!!).
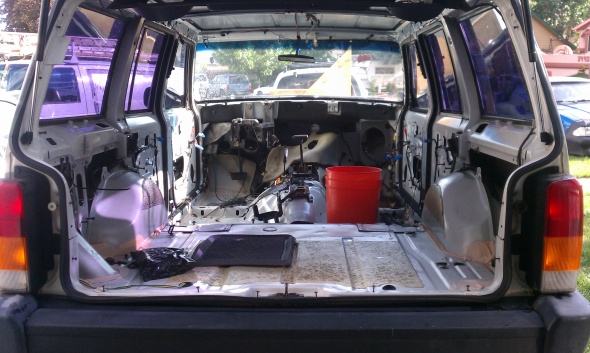
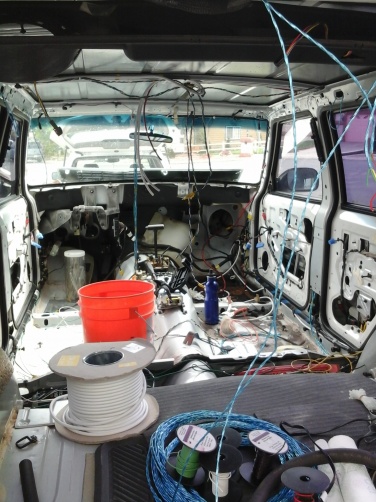
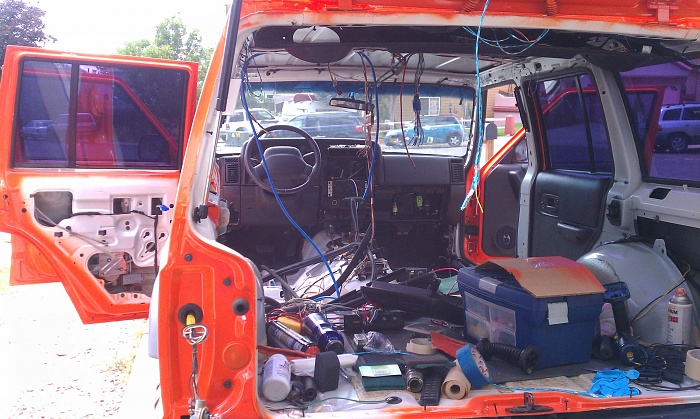
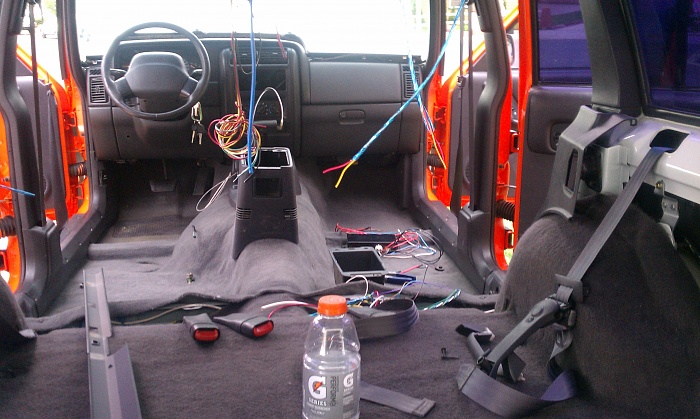
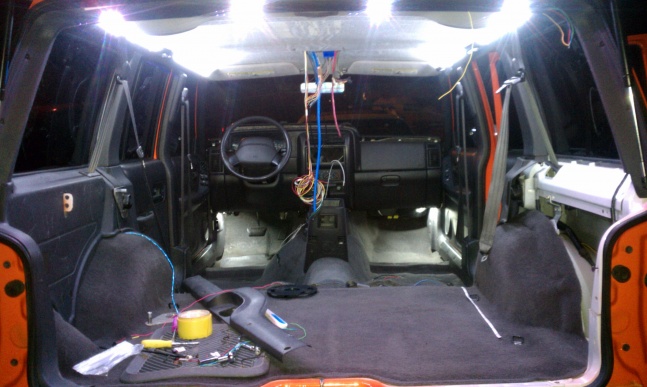
Then out came everything else, and I basically pressure washed out the interior, all the interior pieces, carpet, seats, etc.

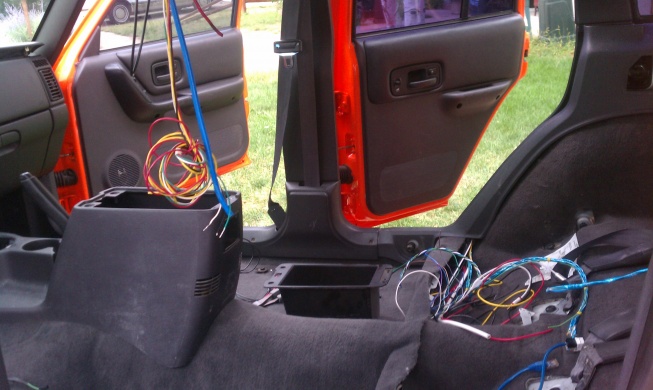
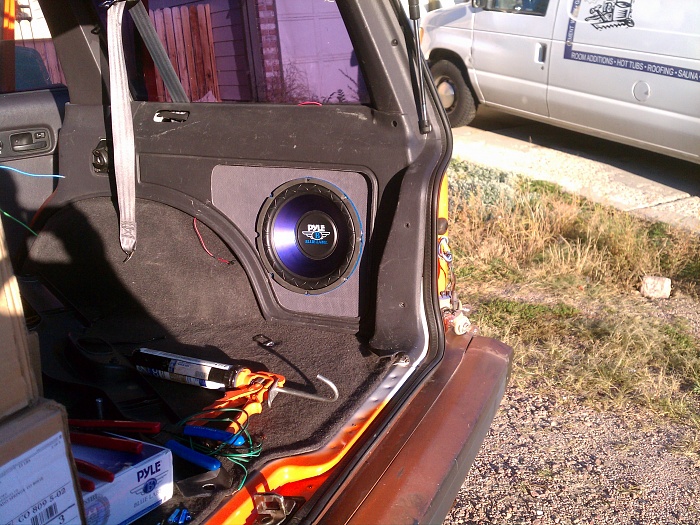
Knowing this is a SAR rig, and all the additional lights, radios, etc that I need to have, this was a great time to run most of the additional wiring I needed to. This may not look like much, but this took weeks, trying to route and secure everything through the recesses between body panels, B pillars, etc. All of the connections are soldered, heat shrunk, and properly terminated.

Once that was roughed in, I threw the dash back in before I completely forgot how things went together.
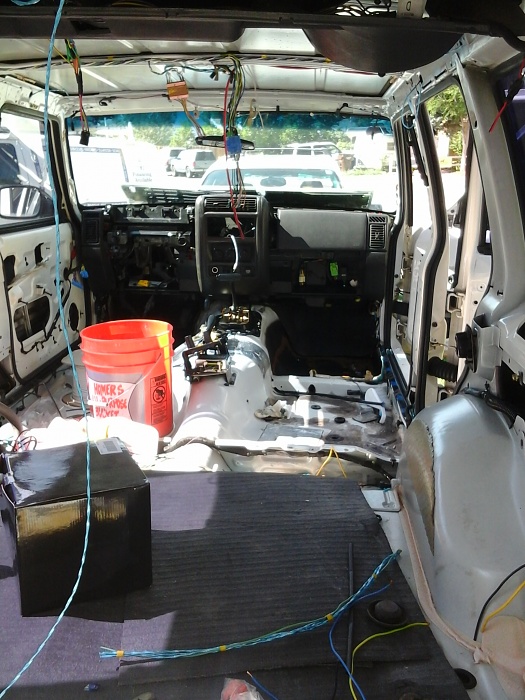
It was somewhere around this stage, where another stupid notion crept in. This was never originally in the plan, but once I started, there was no going back...


Then out came everything else, and I basically pressure washed out the interior, all the interior pieces, carpet, seats, etc.
Knowing this is a SAR rig, and all the additional lights, radios, etc that I need to have, this was a great time to run most of the additional wiring I needed to. This may not look like much, but this took weeks, trying to route and secure everything through the recesses between body panels, B pillars, etc. All of the connections are soldered, heat shrunk, and properly terminated.
Once that was roughed in, I threw the dash back in before I completely forgot how things went together.

It was somewhere around this stage, where another stupid notion crept in. This was never originally in the plan, but once I started, there was no going back...
Last edited by mntnresq; 05-10-2014 at 10:32 AM.
05-10-2014, 01:21 AM
#3
Member
Thread Starter
Join Date: Sep 2009
Location: Colorado Springs, CO
Posts: 136
Likes: 0
Received 0 Likes
on
0 Posts
Year: 2000
Model: Cherokee
Engine: 4.0
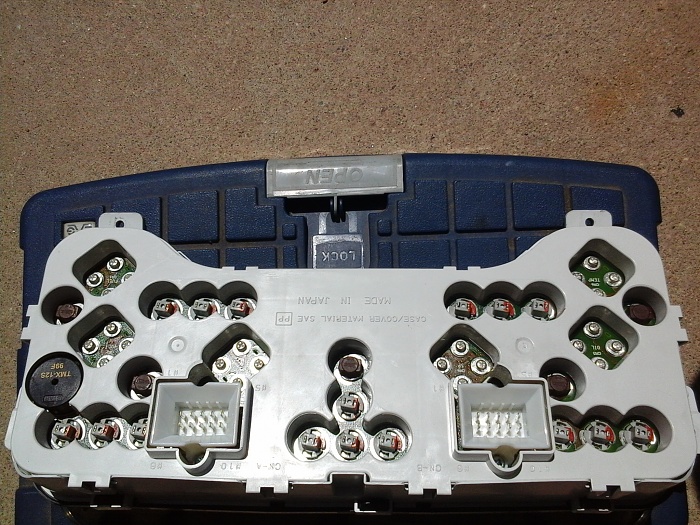
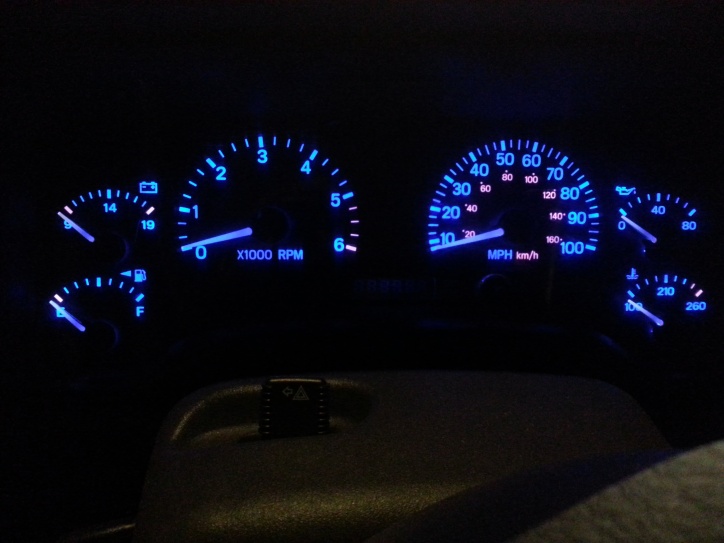
I also decided to do the LED swap for all of the lights in the interior, cluster, etc., with a nice blue hue.
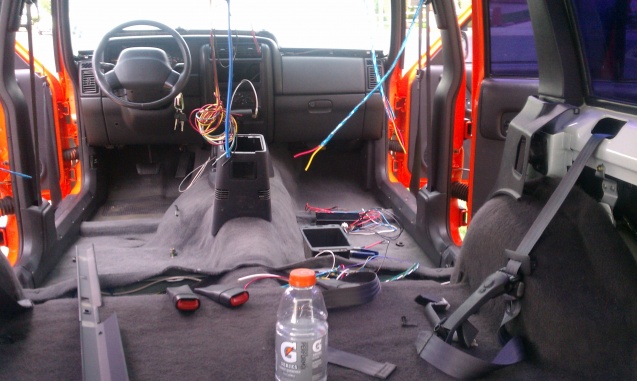
Then, once I was pretty comfortable with where all the wiring was going, swapped the upgraded speakers, and got all the jambs and such painted, I started throwing the interior back together.

Getting to this point represents two month's worth of work...

Then, once I was pretty comfortable with where all the wiring was going, swapped the upgraded speakers, and got all the jambs and such painted, I started throwing the interior back together.

Getting to this point represents two month's worth of work...
Last edited by mntnresq; 05-10-2014 at 01:24 AM.
05-10-2014, 01:37 AM
#4
Member
Thread Starter
Join Date: Sep 2009
Location: Colorado Springs, CO
Posts: 136
Likes: 0
Received 0 Likes
on
0 Posts
Year: 2000
Model: Cherokee
Engine: 4.0
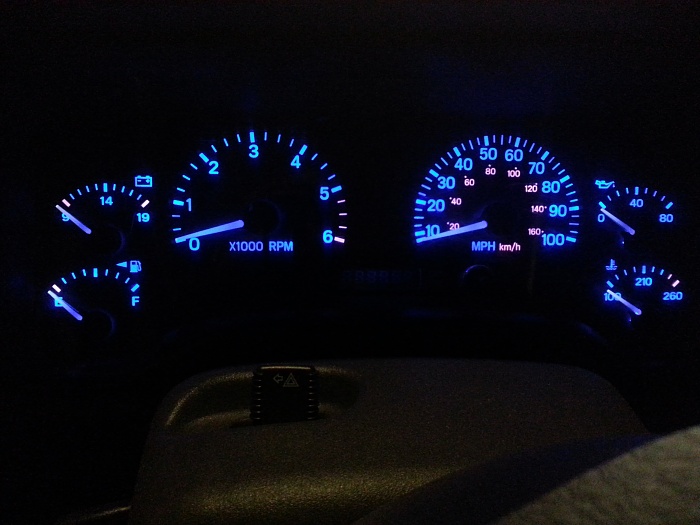
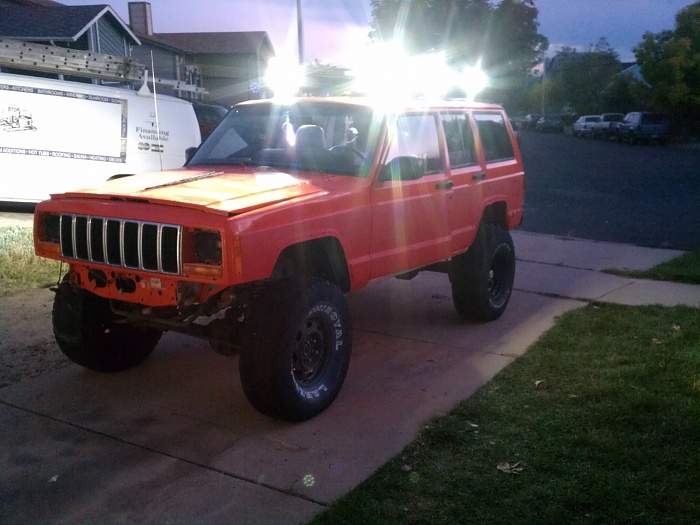
I was always disappointed with the terrible interior lighting in the Jeep, I could never find anything, read a map, etc with the pitifully wimpy stock lighting. So I fixed that.

Now I can work on my tan inside my truck at 3AM...
Now I can work on my tan inside my truck at 3AM...
05-10-2014, 01:53 AM
#5
Member
Thread Starter
Join Date: Sep 2009
Location: Colorado Springs, CO
Posts: 136
Likes: 0
Received 0 Likes
on
0 Posts
Year: 2000
Model: Cherokee
Engine: 4.0
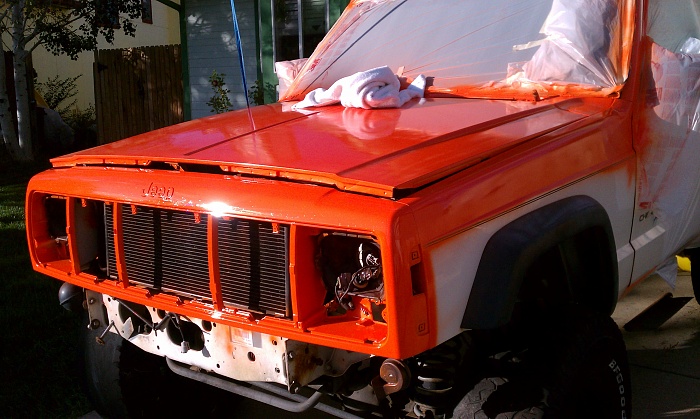
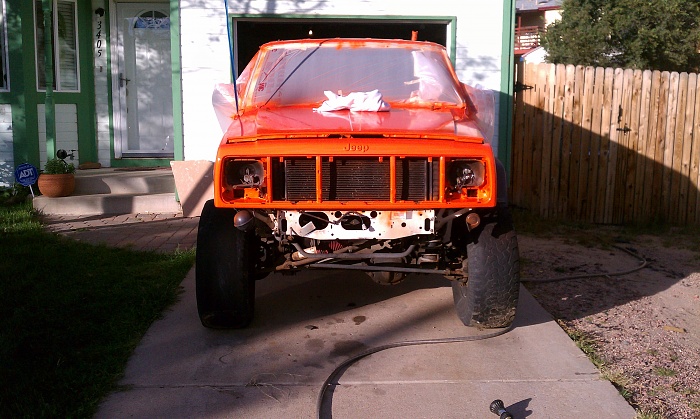
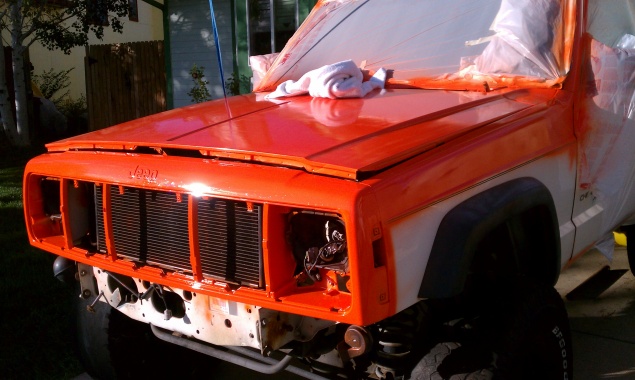
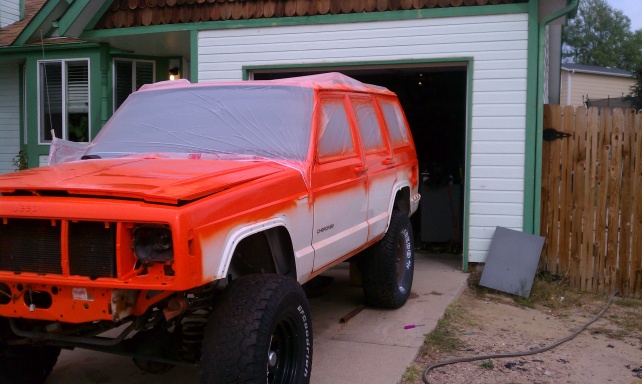
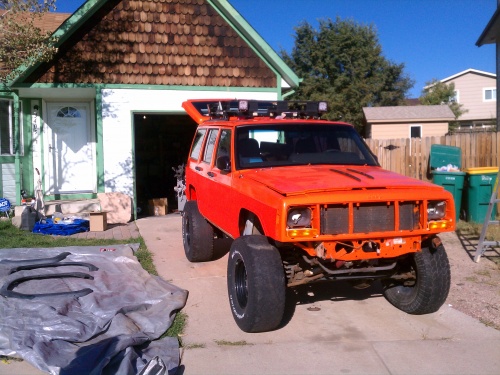
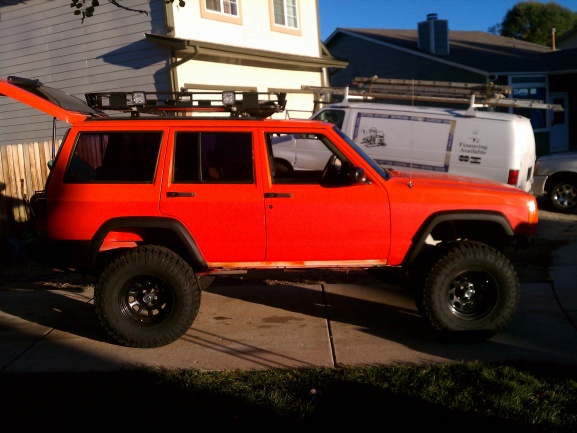
I moved to the exterior for a while, and started getting the other portions of the paint that needed to be sprayed. This all had to be done in sections- paint, dry, mask off, and then shoot the next section as only had a little bit of time at a shot to work on it. So, this all took about a week.


 05-10-2014, 02:13 AM
#6
Member
Thread Starter
Join Date: Sep 2009
Location: Colorado Springs, CO
Posts: 136
Likes: 0
Received 0 Likes
on
0 Posts
Year: 2000
Model: Cherokee
Engine: 4.0
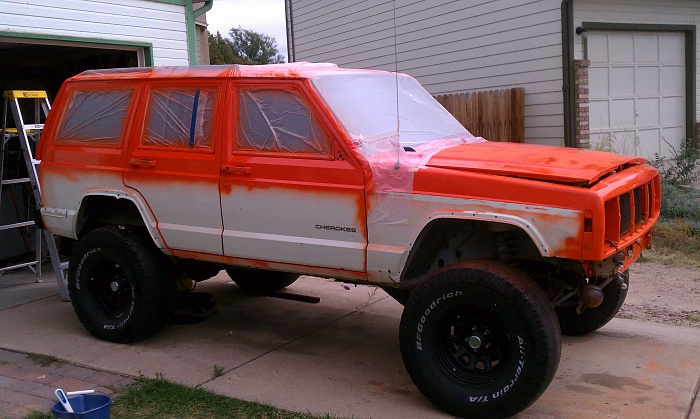
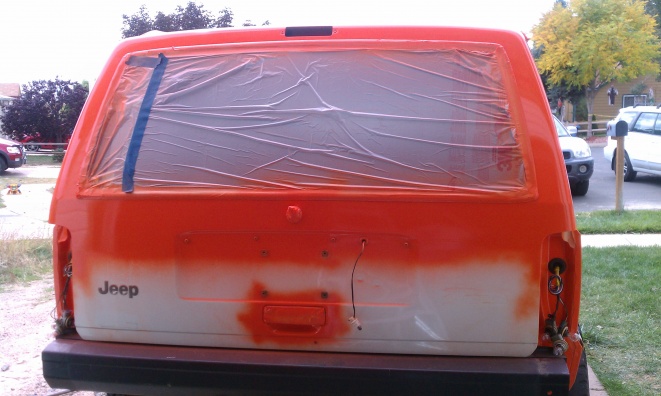
All that had to be finished before I could do the next portion-
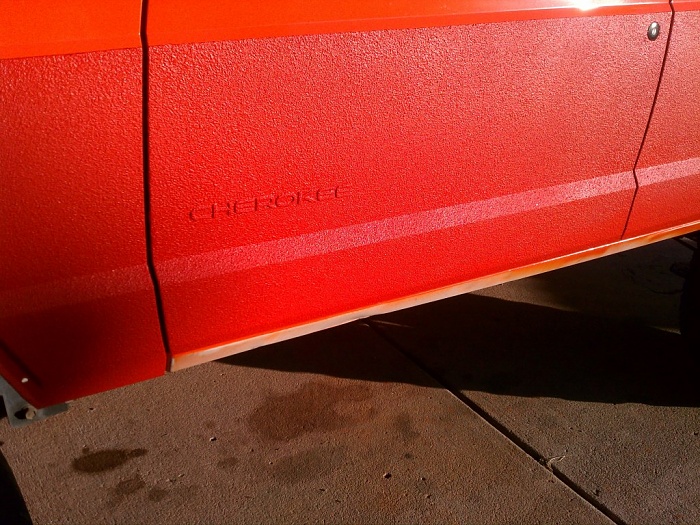


I don't have any pics of the process, as I had to move really fast to get it stripped before it started to cure. The rockers didn't get sprayed, as they are likely going to get cut out and some 2x4 or 6 steel will get burned in for sliders.
I started this rebuild at the end of June, this gets us to mid-October...
Last edited by mntnresq; 05-10-2014 at 02:18 AM.
05-10-2014, 08:18 AM
#7
Junior Member
I liked it until the bottom half of the paint didn't match the top. Other than that, looks good. What are you painting it with?
Trending Topics
05-10-2014, 09:19 AM
#8
05-10-2014, 09:22 AM
#9
Member
Thread Starter
Join Date: Sep 2009
Location: Colorado Springs, CO
Posts: 136
Likes: 0
Received 0 Likes
on
0 Posts
Year: 2000
Model: Cherokee
Engine: 4.0
Haha. Well, the color probably isn't for everyone, and honestly, about halfway through I started to wonder if I had made a huge mistake. But, I have noticed coincidentally that there a lot of new vehicles coming out in orange, since I have done this, so I guess I'm not totally crazy.
One other thing I forgot to mention in the beginning of the thread, is that this build is also being done as low budget as possible, using a lot of stuff I already had.
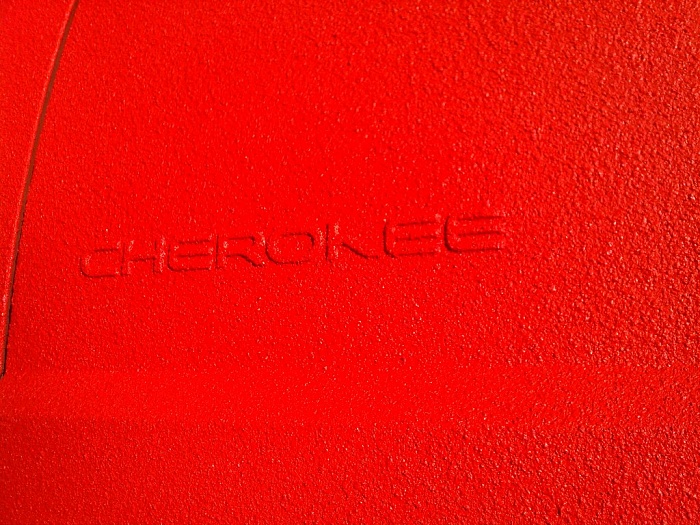
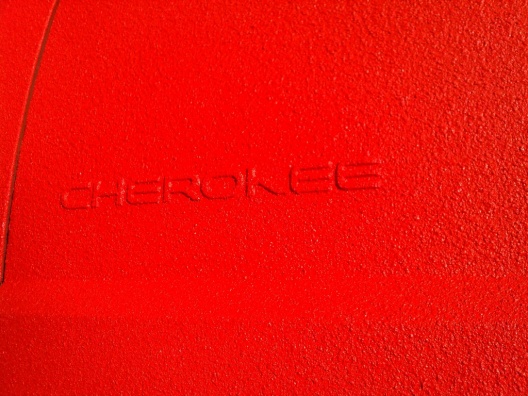
As for matching, they actually do match better than the pics would seem to indicate. The top half is all Rustoleum rattle can, and the lower half is Liner Extreeme bedliner (which I had, again driving the color decision). The liner took a few days to fully cure, and the color appeared more reddish until it did. The angle of the pic catches more shadow on the liner part, which also makes it look darker.

In most places you would probably never know it was rattle canned- I color sanded and buffed the whole thing after several coats. There will be times when lighting and angles may make it look different, but, eh- what do you want for free?
One other thing I forgot to mention in the beginning of the thread, is that this build is also being done as low budget as possible, using a lot of stuff I already had.
As for matching, they actually do match better than the pics would seem to indicate. The top half is all Rustoleum rattle can, and the lower half is Liner Extreeme bedliner (which I had, again driving the color decision). The liner took a few days to fully cure, and the color appeared more reddish until it did. The angle of the pic catches more shadow on the liner part, which also makes it look darker.
In most places you would probably never know it was rattle canned- I color sanded and buffed the whole thing after several coats. There will be times when lighting and angles may make it look different, but, eh- what do you want for free?
Last edited by mntnresq; 05-10-2014 at 09:24 AM.
05-10-2014, 10:07 AM
#10
Member
Thread Starter
Join Date: Sep 2009
Location: Colorado Springs, CO
Posts: 136
Likes: 0
Received 0 Likes
on
0 Posts
Year: 2000
Model: Cherokee
Engine: 4.0
I spent a couple weeks doing odds and end stuff around the rig, wiring, and I built a sealed sub box for the back, and got that installed.
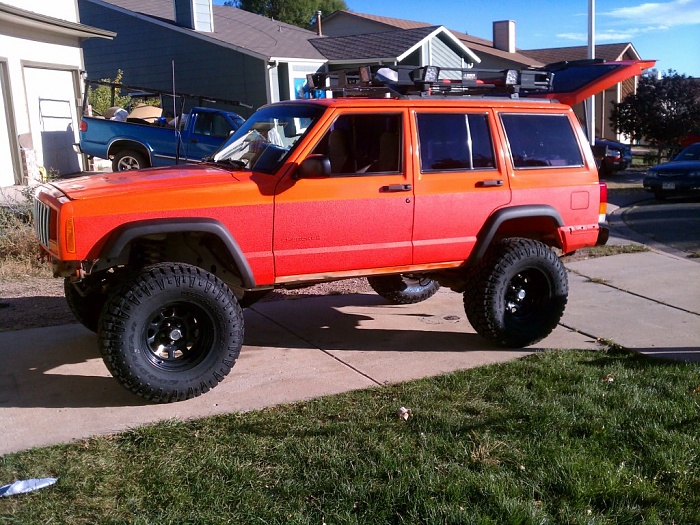
I guess I did this before the bedliner went on, but also I re-vamped roof rack. I took all apart, cleaned it, and welded what pieces together I could, that were originally pop-riveted, to make it more rigid. Then I ran much of the wiring for the rooftop lights, etc through the rack tubes. I replaced most of the fasteners with stainless, and installed the area lights, then threw it on top for a quick test.
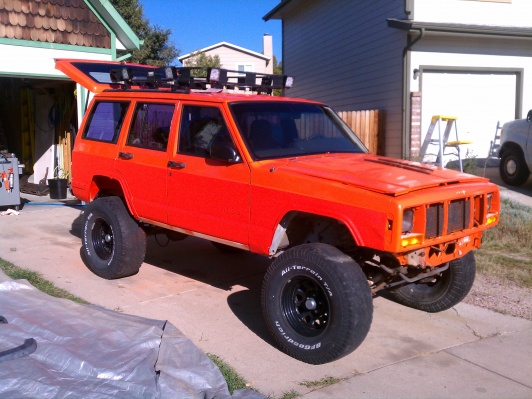
Then, she got some desperately needed new shoes. I also cleaned up the stock flares and rear bumper and re-sprayed those with an aerosol bedliner I found at HF. Eventually I will build a new rear bumper, and maybe add some armor, but this works for now.
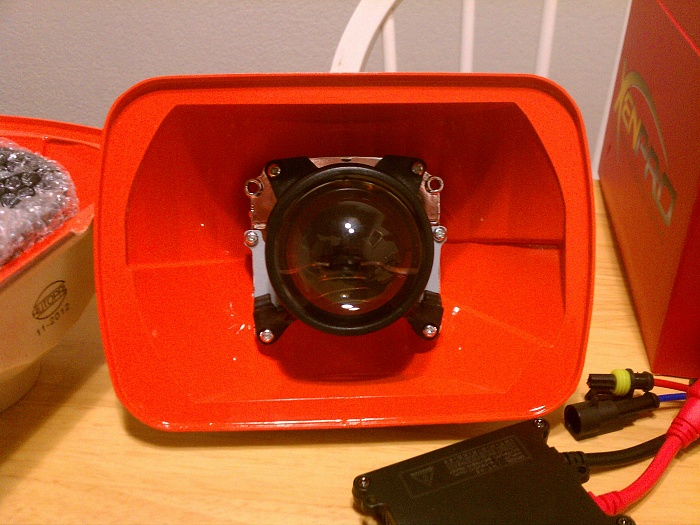
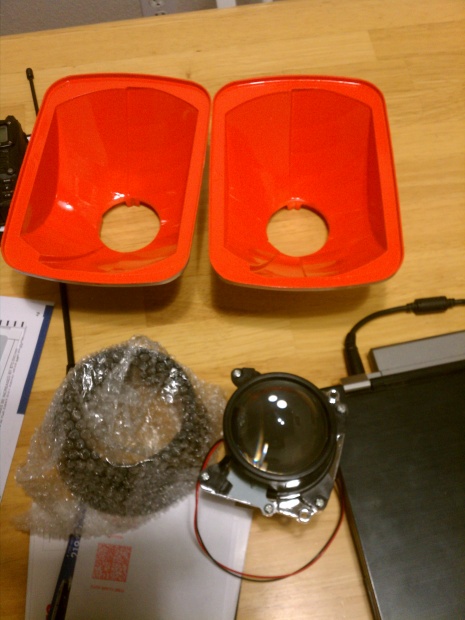
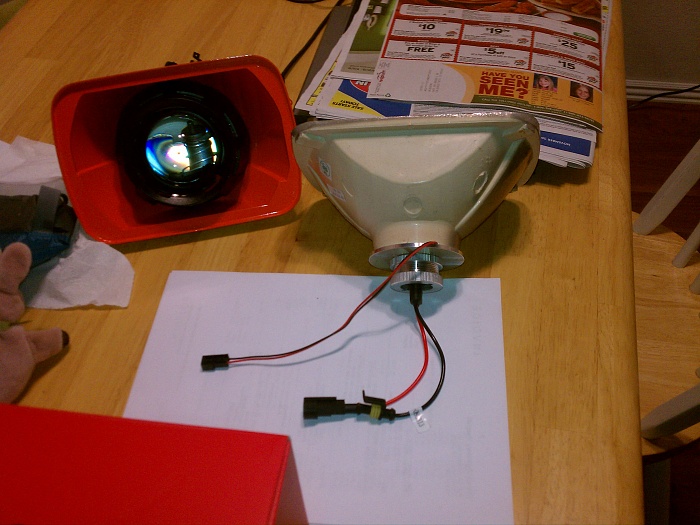
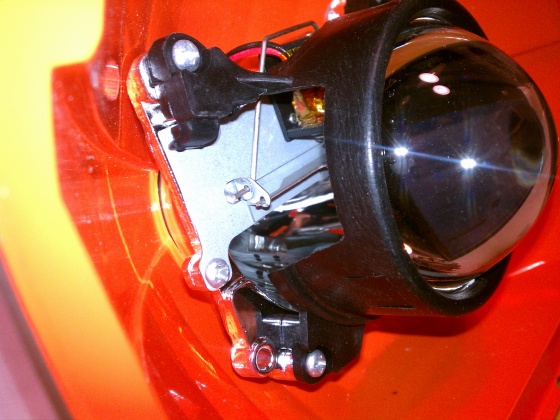
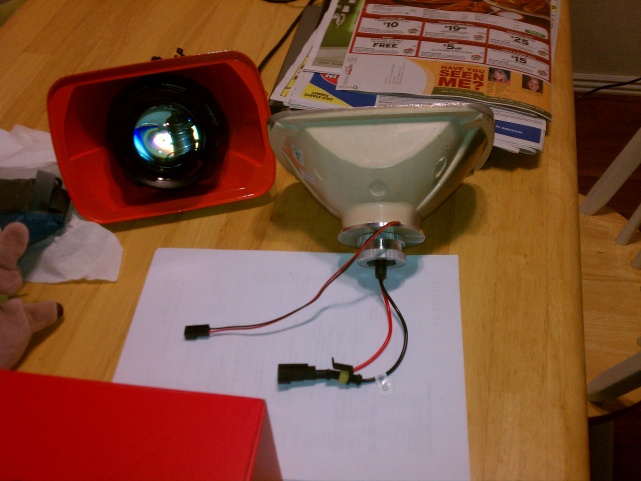
I also started working on the headlight upgrade to HID with proper projectors. I copied the setup of another CF user, as that worked for me, and again was pretty inexpensive for the quality of the output.


I guess I did this before the bedliner went on, but also I re-vamped roof rack. I took all apart, cleaned it, and welded what pieces together I could, that were originally pop-riveted, to make it more rigid. Then I ran much of the wiring for the rooftop lights, etc through the rack tubes. I replaced most of the fasteners with stainless, and installed the area lights, then threw it on top for a quick test.
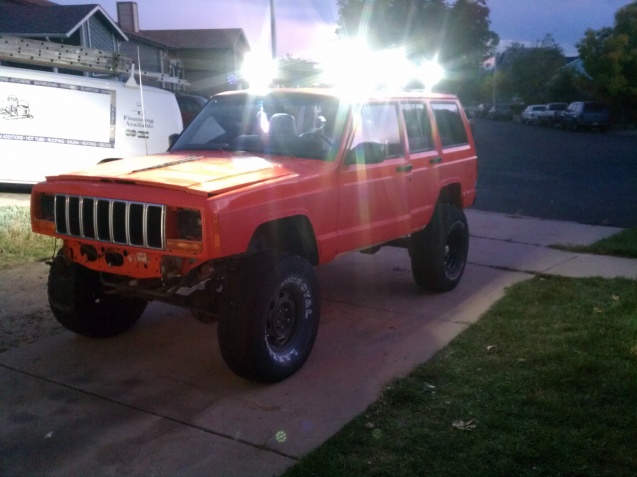
Then, she got some desperately needed new shoes. I also cleaned up the stock flares and rear bumper and re-sprayed those with an aerosol bedliner I found at HF. Eventually I will build a new rear bumper, and maybe add some armor, but this works for now.

I also started working on the headlight upgrade to HID with proper projectors. I copied the setup of another CF user, as that worked for me, and again was pretty inexpensive for the quality of the output.
 05-10-2014, 10:16 AM
#11
Member
Thread Starter
Join Date: Sep 2009
Location: Colorado Springs, CO
Posts: 136
Likes: 0
Received 0 Likes
on
0 Posts
Year: 2000
Model: Cherokee
Engine: 4.0
Some more-

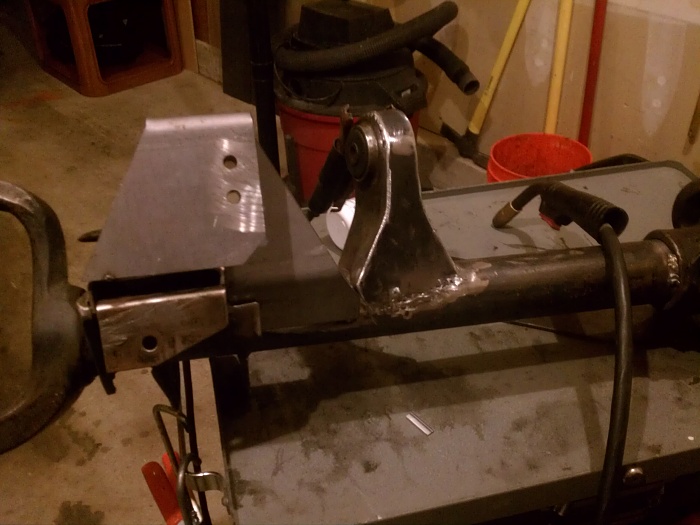
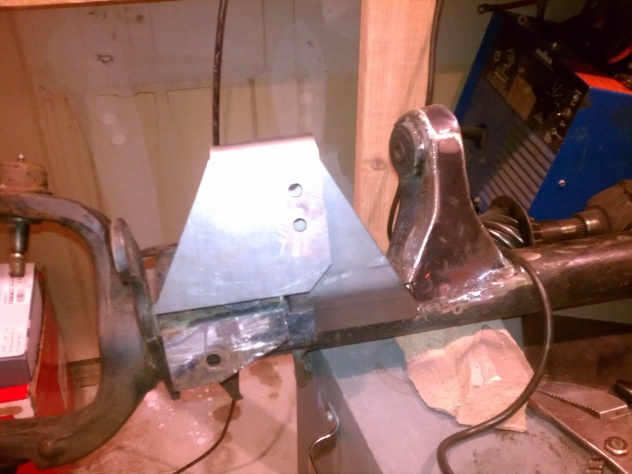
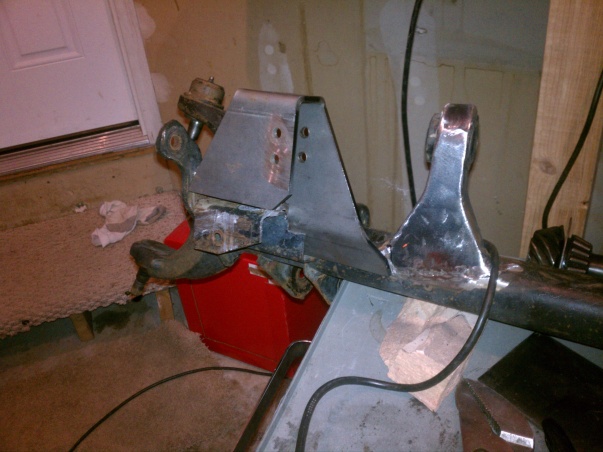
Around this time, I also started working on the HP D30 that I have had laying around for a few years. I stripped it down, cleaned it up, and started working on setting it up for the WJ knuckle swap, brakes, and OTK WJ steering setup.
I reinforced the CA mount.

Sizing up the new track bar bracket.

Around this time, I also started working on the HP D30 that I have had laying around for a few years. I stripped it down, cleaned it up, and started working on setting it up for the WJ knuckle swap, brakes, and OTK WJ steering setup.
I reinforced the CA mount.
Sizing up the new track bar bracket.
 05-10-2014, 10:27 AM
#12
Member
Thread Starter
Join Date: Sep 2009
Location: Colorado Springs, CO
Posts: 136
Likes: 0
Received 0 Likes
on
0 Posts
Year: 2000
Model: Cherokee
Engine: 4.0
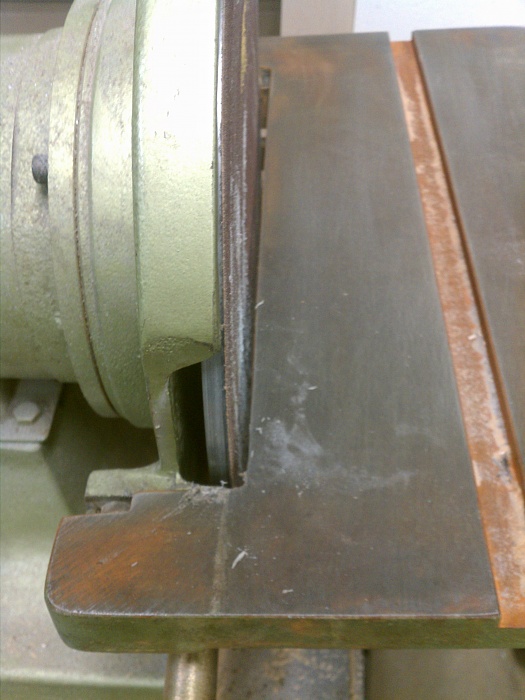
So, I also decided to fab up some LCA mount reinforcement tabs, as the stockers were tweaked a bit from the PO. I figured out a shape, plasma'ed them out, and went to clean them up on the big bench sander to prep for welding.
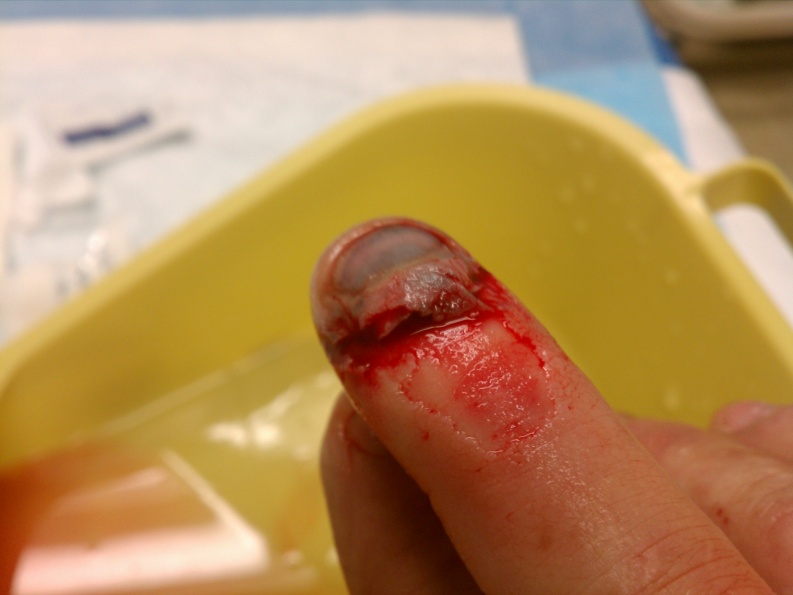
But, apparently fate decided that I needed to take some time off of the project..
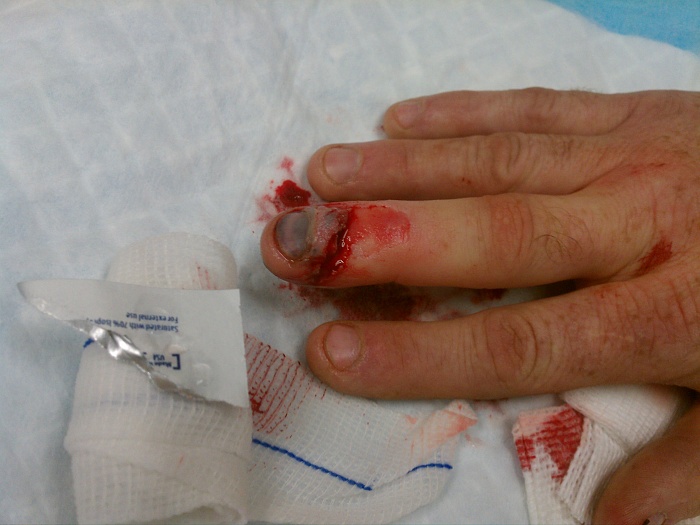
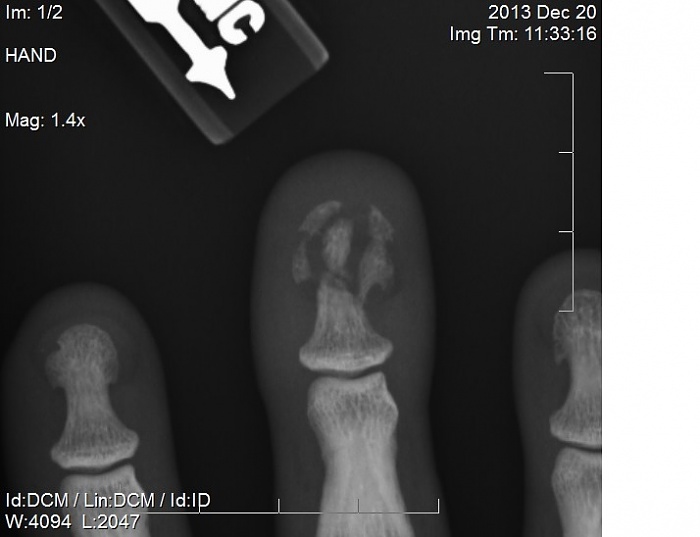
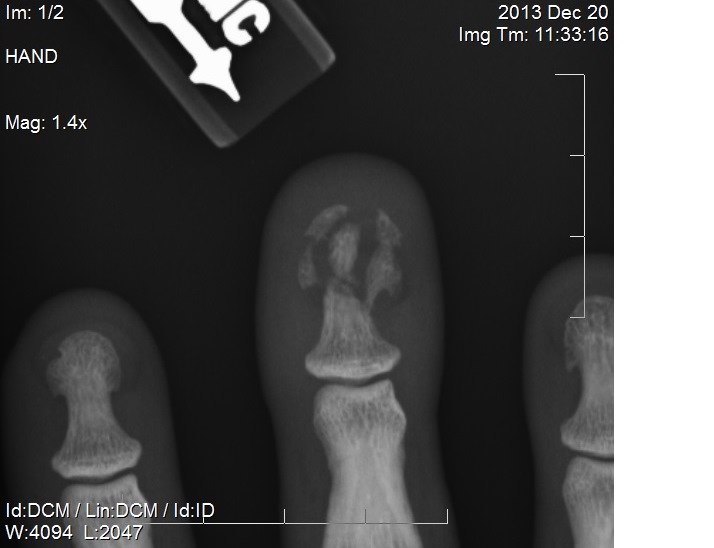
Yes, that's the OTHER end of my fingernail. The tip was about 85% severed.

If you are truly talented kids, you can fit your whole finger up to the first knuckle in that 1/8" gap between the disc and table. If you think you are being smart and safe by wearing gloves- you're not. You just get trapped in a big sander for 10 mins until someone can bring you a wrench to take the table off...
About three weeks out-

7 weeks-
But, apparently fate decided that I needed to take some time off of the project..

Yes, that's the OTHER end of my fingernail. The tip was about 85% severed.
If you are truly talented kids, you can fit your whole finger up to the first knuckle in that 1/8" gap between the disc and table. If you think you are being smart and safe by wearing gloves- you're not. You just get trapped in a big sander for 10 mins until someone can bring you a wrench to take the table off...

About three weeks out-
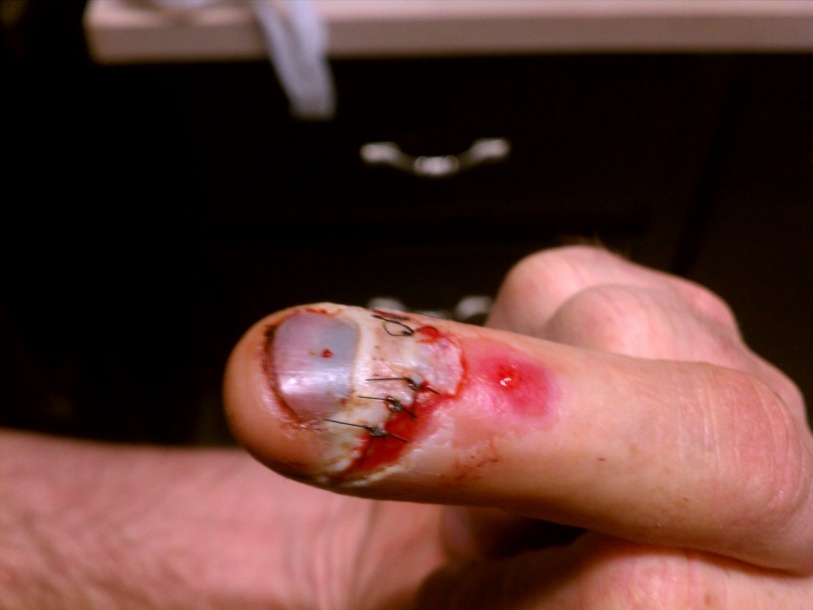
7 weeks-
Last edited by mntnresq; 05-10-2014 at 06:58 PM.
05-10-2014, 01:25 PM
#14
Member
Thread Starter
Join Date: Sep 2009
Location: Colorado Springs, CO
Posts: 136
Likes: 0
Received 0 Likes
on
0 Posts
Year: 2000
Model: Cherokee
Engine: 4.0
Haha, def not. Well, I am healed about as much as is going to be.. That actually happened on Nov 1st. My finger is about a 1/4" longer now, and has a really funky nail, but it still works.
I'm still trying to catch the build thread up to where the build currently is, but I'll get to it a little at a time.
I'm still trying to catch the build thread up to where the build currently is, but I'll get to it a little at a time.