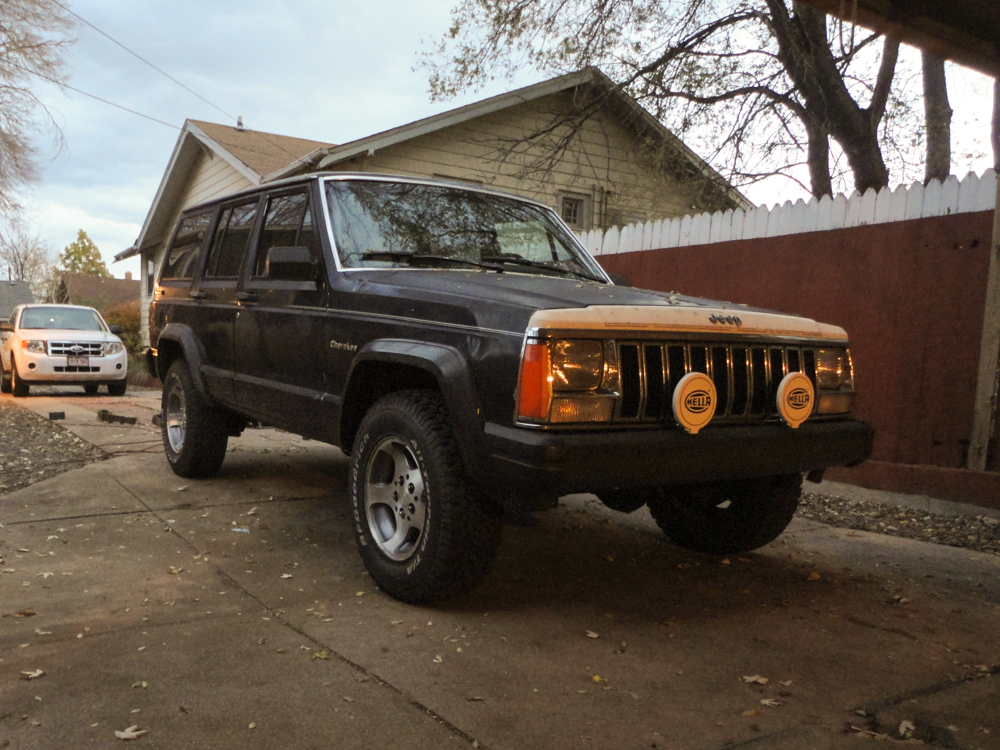
One Well Worn Jeep
 11-25-2013, 07:01 PM
#1
Newbie
Thread Starter

Join Date: Nov 2013
Location: Denver, CO
Posts: 18
Likes: 0
Received 0 Likes
on
0 Posts
Year: 1990
Model: Cherokee
Engine: 4.0
Earlier this year, I sold my low-mileage 350Z, my higher mileage Isuzu Rodeo, my BMW F650 and my Yamaha XJ600 and bought a Subaru Legacy. Yes, you read that right, a Subaru. See, I'm 35 years old, I have a 7-year old daughter, I divorced years ago, and I'm to that stage in my life where the years are beginning to move by more quickly, the pains are healing more slowly and the hangovers last much longer. My plan was to consolidate down to one mode of transportation, to clean up the loose ends in my life and to settle in as to speak.
This one-car, one man thing lasted about two months and I began to get the itch for another project. I don't know what to tell you; I can't control it. I NEED a project. I ache for a project. I yearn for a project. It controls me like an addict. My girl says I need help. I say, I need a Jeep.
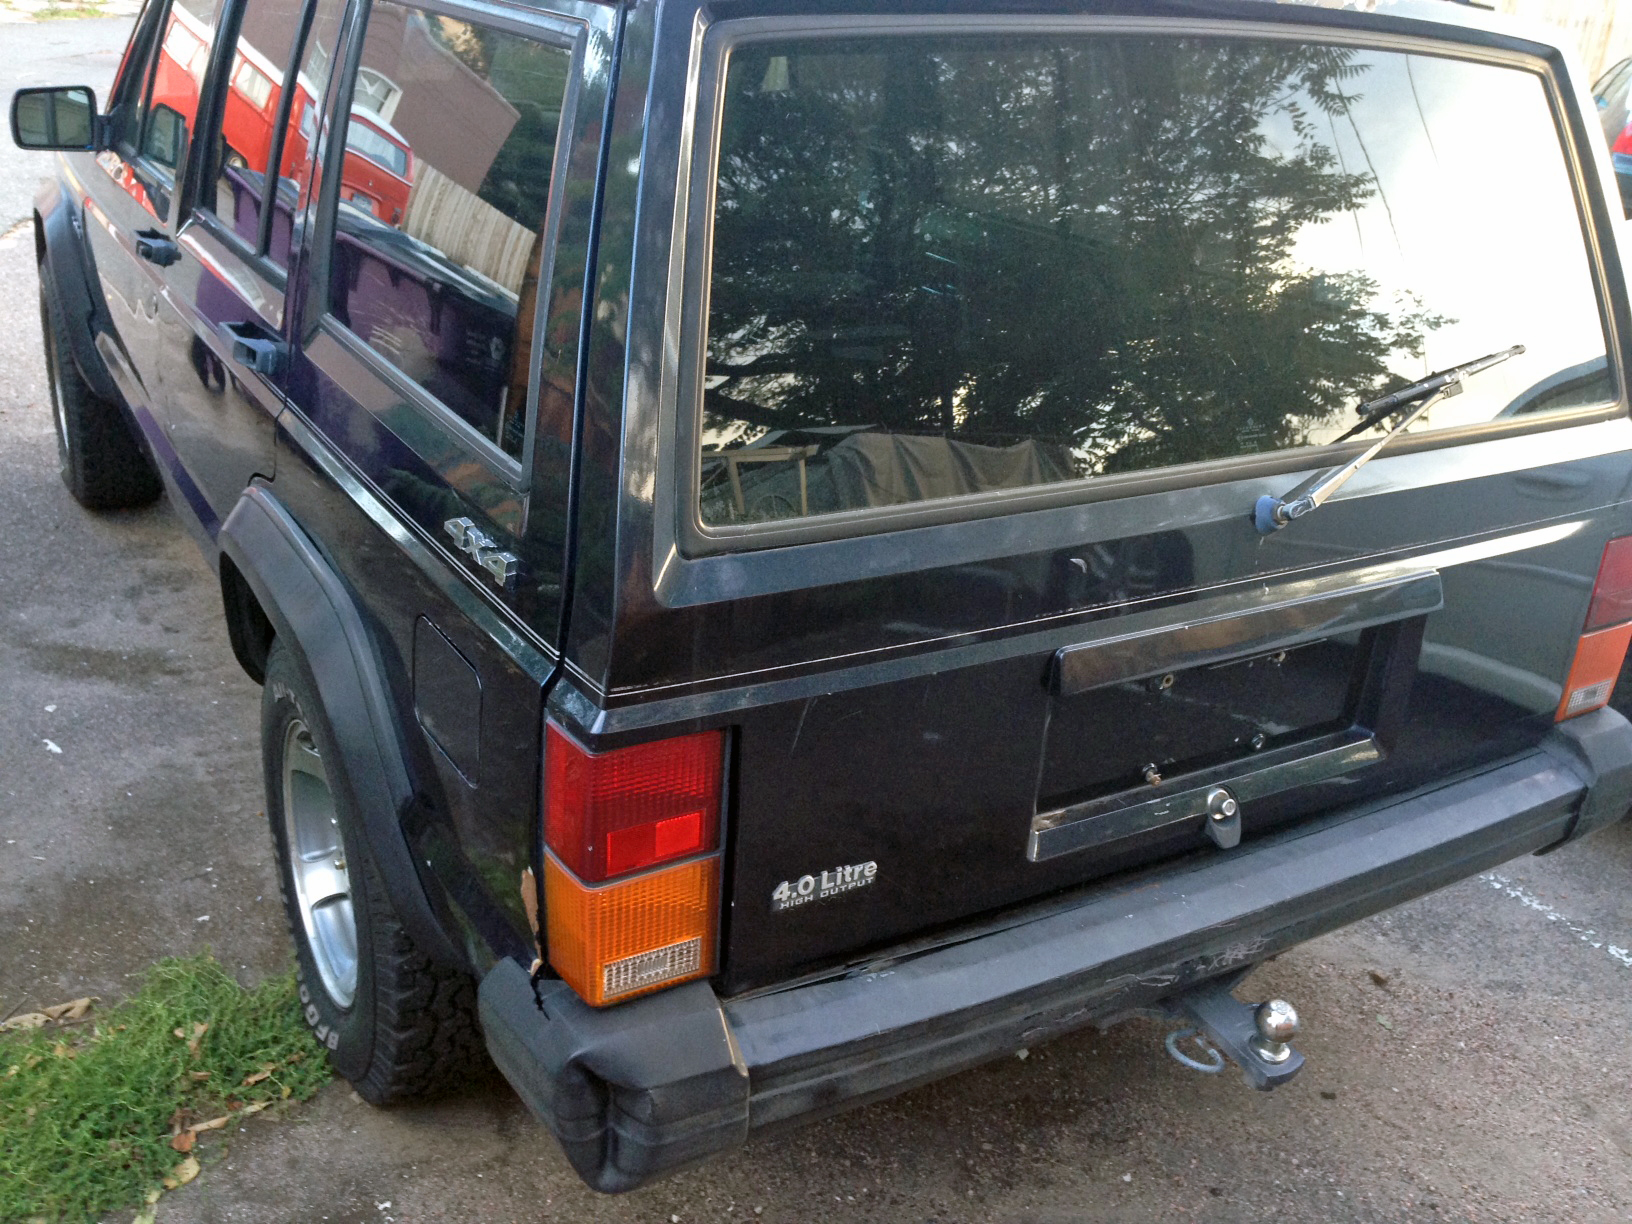
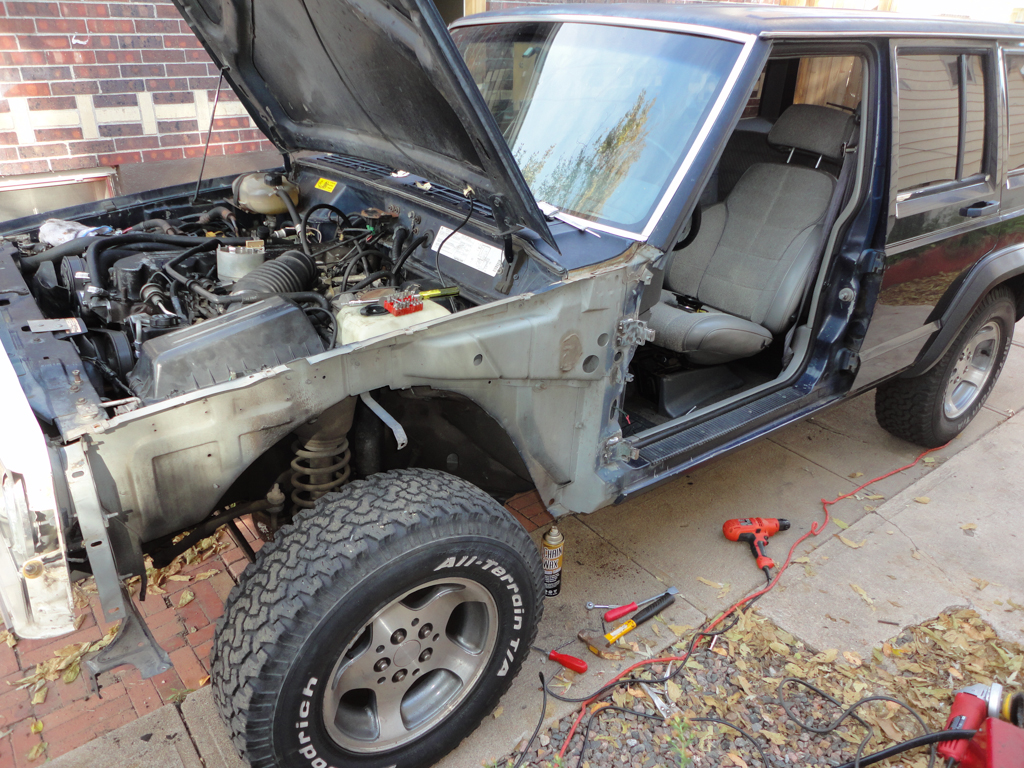
Once an idea is planted, it grows and it can't be stopped. It began, simply enough, with some casual browsing of Craigslist and went from there. After a few months of looking, dreaming, plotting and scheming, I decided it was time. While perusing CL on some idle Tuesday in mid October, I find a 1990 Jeep Cherokee with 257k miles. I make a mental note of it and keep looking, but this one sticks with me. A few days later, I text the gal who's selling it, make a low-ball offer and she accepts. It seems this girl bought it thinking she could drive it to gigs (with her gear in the back) and tool around in the snow. What she had forgotten is that Denver requires emission tests on vehicles and this one most certainly would not pass.
I hitched a ride with K and we picked it up after dark on Thursday. It started and ran. That's about it. A previous owner had added a push button for the starter. Push that, the engine cranked to life after 4 seconds or so, with the rattle of lifters without oil and off we went. The engine had lots of power, the transmission shifted smoothly and everything else DIDN'T work. No signals. No interior lights. No wipers. No heater. No radio. Broken window regulators. And a funk. A funk of hobo-pee and cigarettes. As you can undoubtedly can understand, I loved it. We drove the back roads and I went in the next day and got a title and a temp tag. I now have 60-days to get this old girl emission test ready.
Here are the photos from the ad:


This one-car, one man thing lasted about two months and I began to get the itch for another project. I don't know what to tell you; I can't control it. I NEED a project. I ache for a project. I yearn for a project. It controls me like an addict. My girl says I need help. I say, I need a Jeep.
Once an idea is planted, it grows and it can't be stopped. It began, simply enough, with some casual browsing of Craigslist and went from there. After a few months of looking, dreaming, plotting and scheming, I decided it was time. While perusing CL on some idle Tuesday in mid October, I find a 1990 Jeep Cherokee with 257k miles. I make a mental note of it and keep looking, but this one sticks with me. A few days later, I text the gal who's selling it, make a low-ball offer and she accepts. It seems this girl bought it thinking she could drive it to gigs (with her gear in the back) and tool around in the snow. What she had forgotten is that Denver requires emission tests on vehicles and this one most certainly would not pass.
I hitched a ride with K and we picked it up after dark on Thursday. It started and ran. That's about it. A previous owner had added a push button for the starter. Push that, the engine cranked to life after 4 seconds or so, with the rattle of lifters without oil and off we went. The engine had lots of power, the transmission shifted smoothly and everything else DIDN'T work. No signals. No interior lights. No wipers. No heater. No radio. Broken window regulators. And a funk. A funk of hobo-pee and cigarettes. As you can undoubtedly can understand, I loved it. We drove the back roads and I went in the next day and got a title and a temp tag. I now have 60-days to get this old girl emission test ready.
Here are the photos from the ad:
 11-25-2013, 07:07 PM
#2
Newbie
Thread Starter
Join Date: Nov 2013
Location: Denver, CO
Posts: 18
Likes: 0
Received 0 Likes
on
0 Posts
Year: 1990
Model: Cherokee
Engine: 4.0
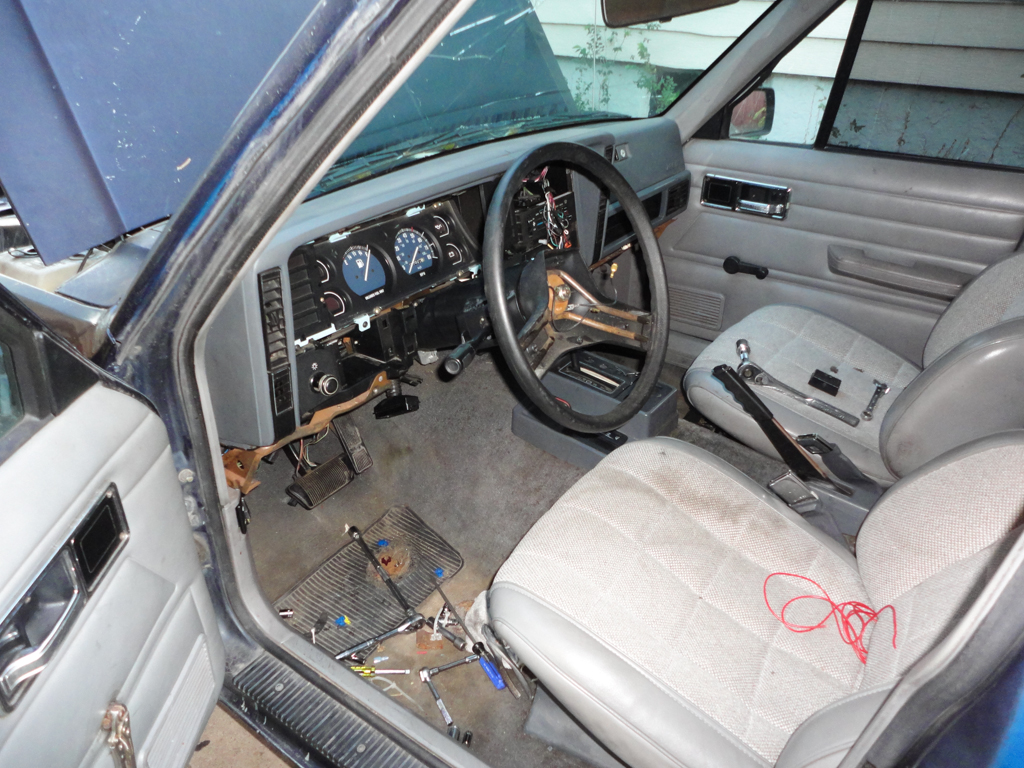
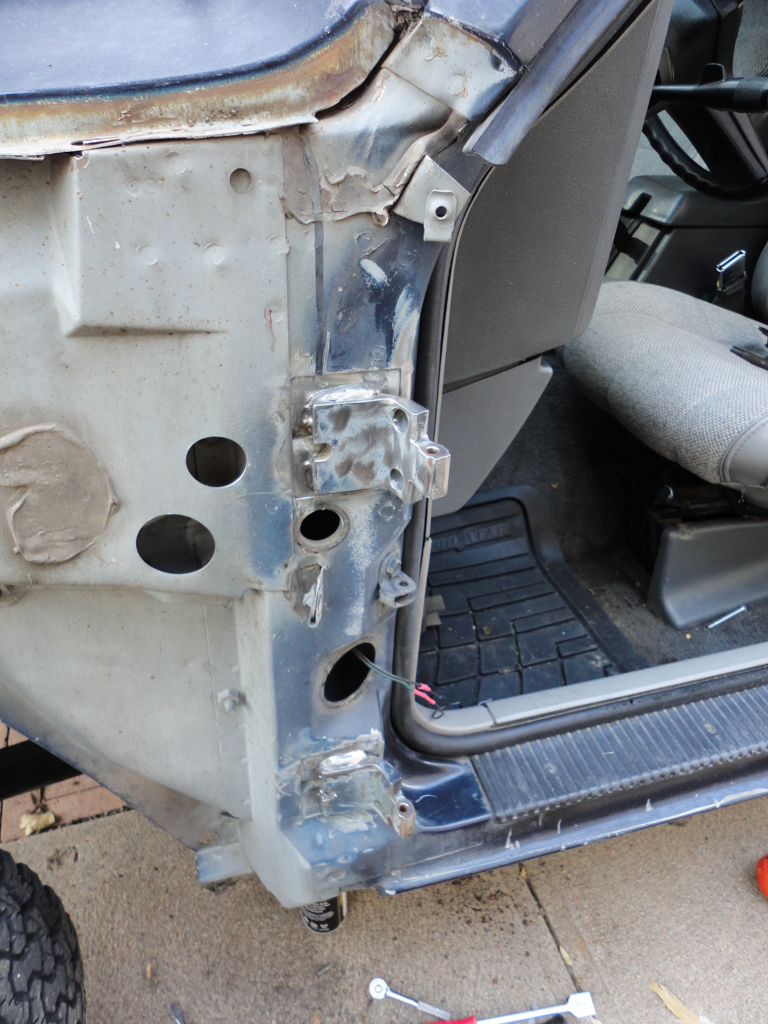
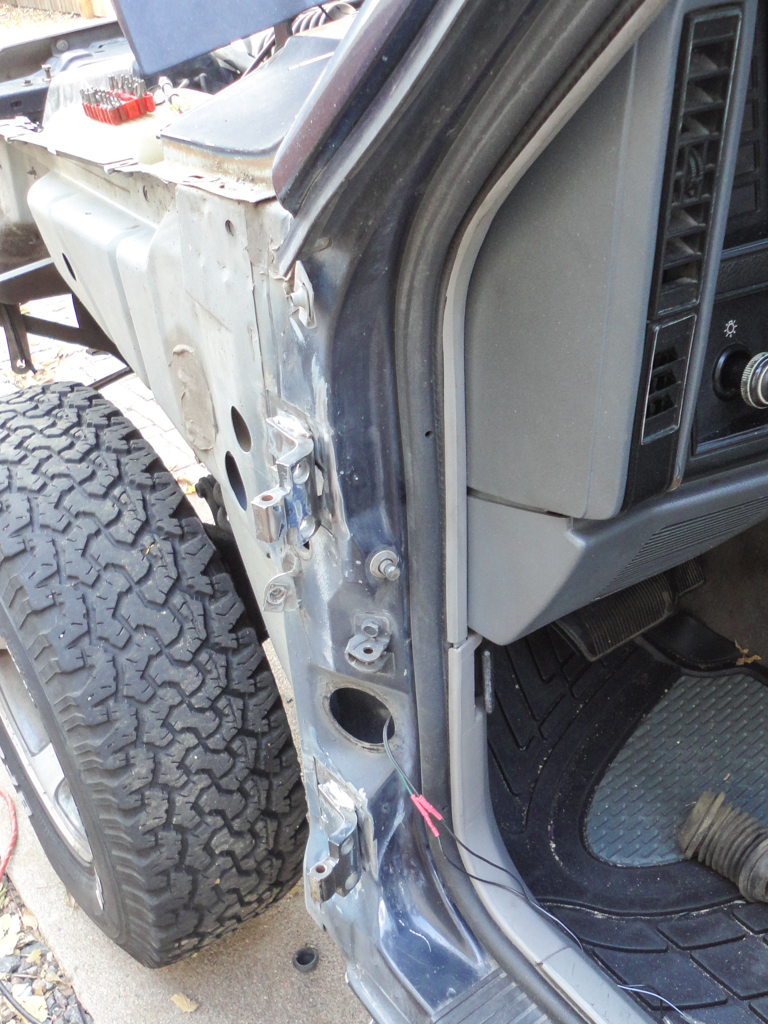
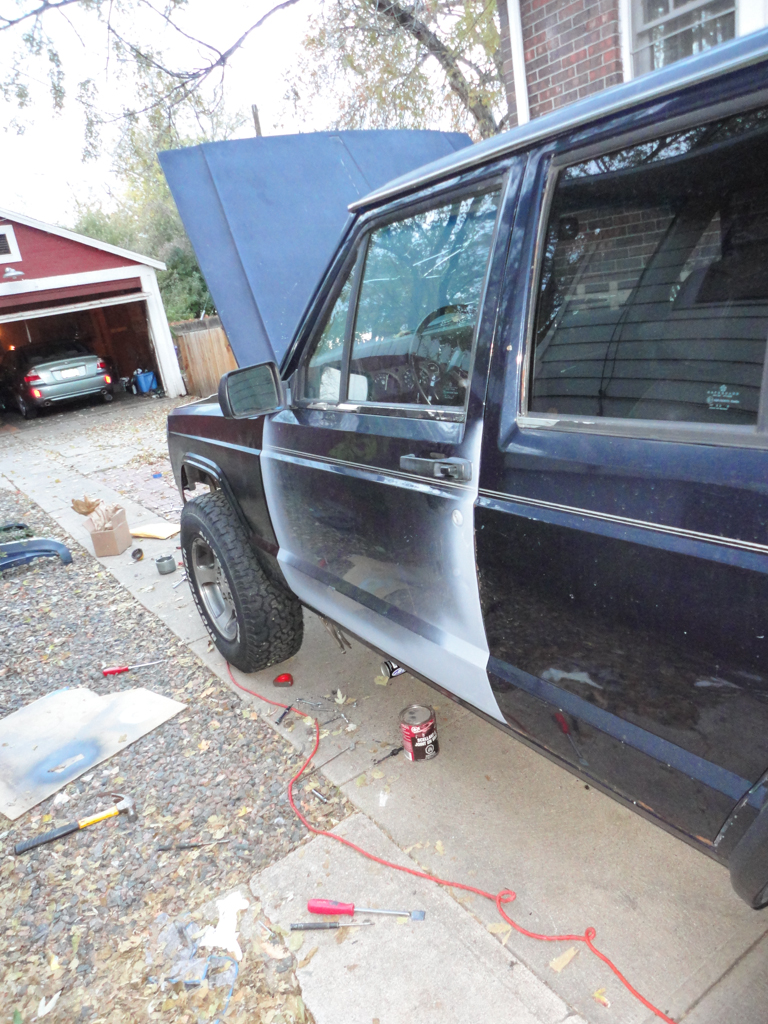
Having a title in my name and armed with a temp tag, it was time to start fixing things. The first order of business: wiring. Before I dare drive this on public roads, it needs signals and brake lights. You get the idea.
I began by repairing wires which were clearly broken, damaged or out of place.
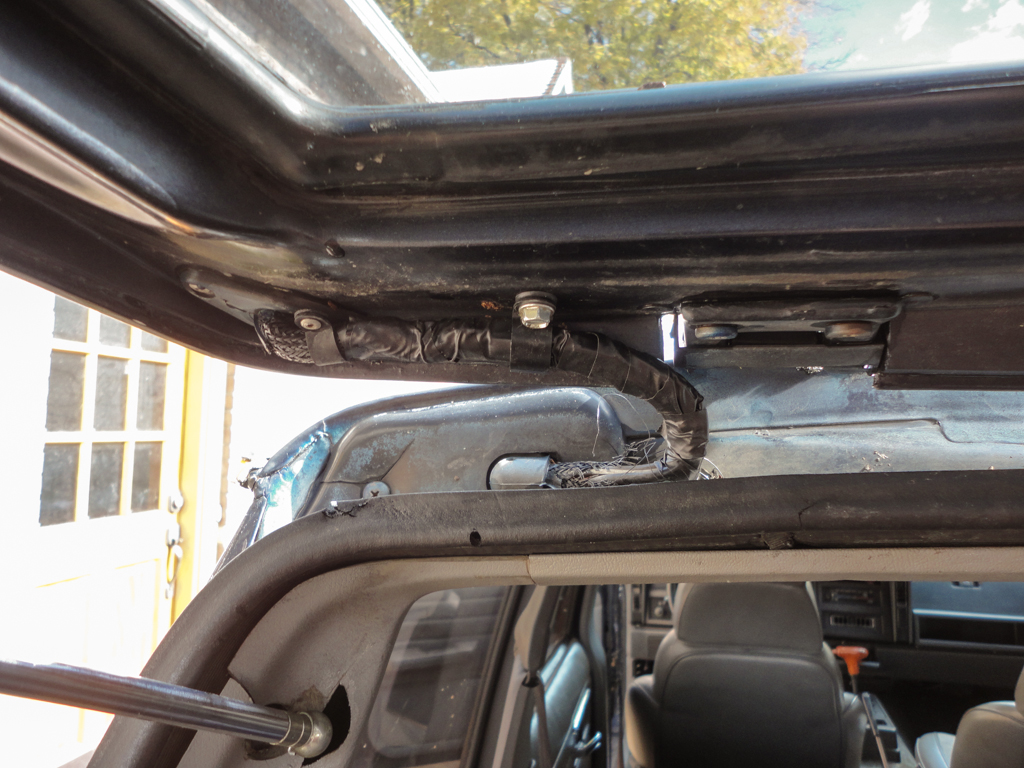
Hatch wiring, before:
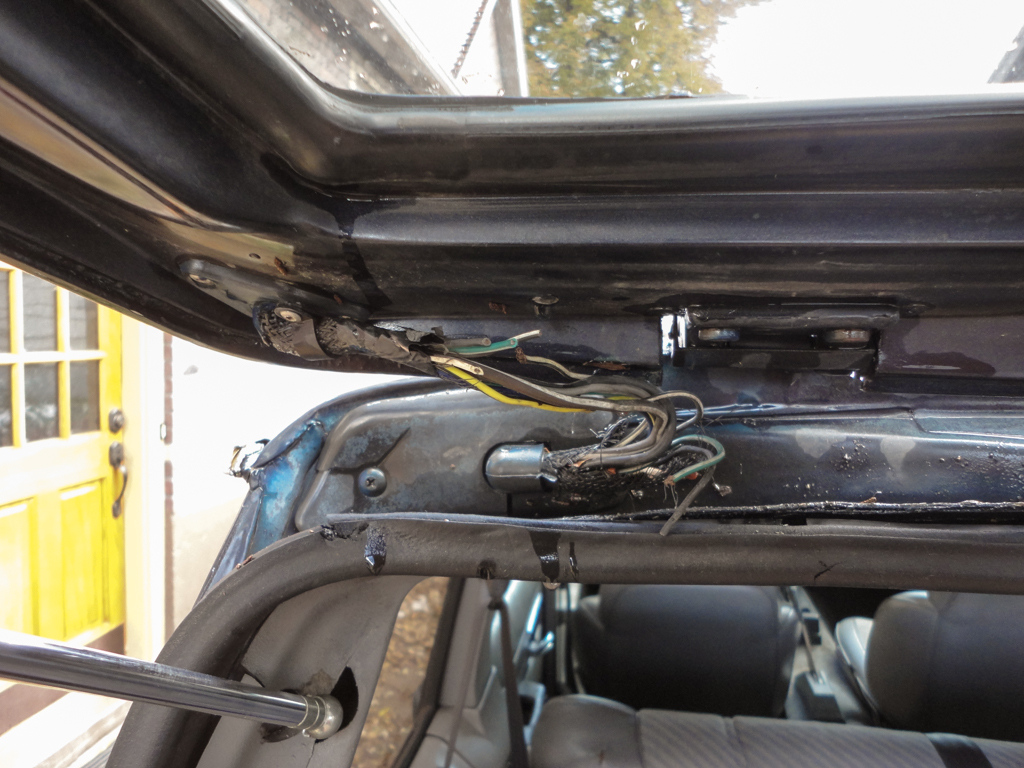
And after:
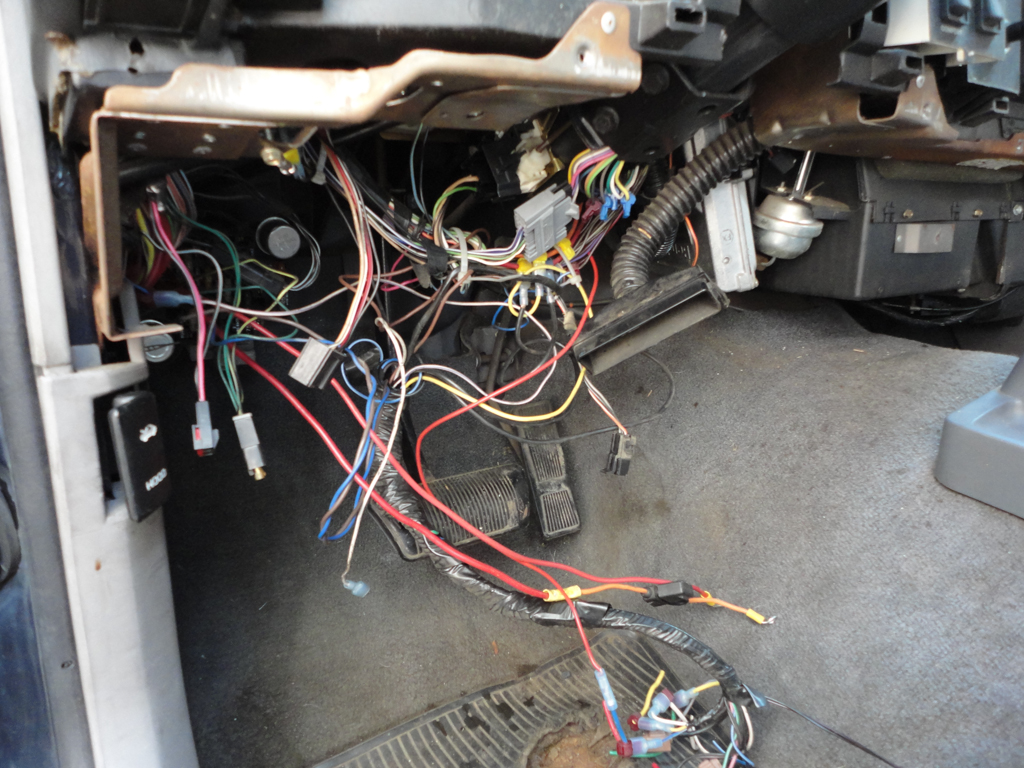
The rats-nest of wire-bodging under the dash. You can see the spiffy push-start button (more on that soon):
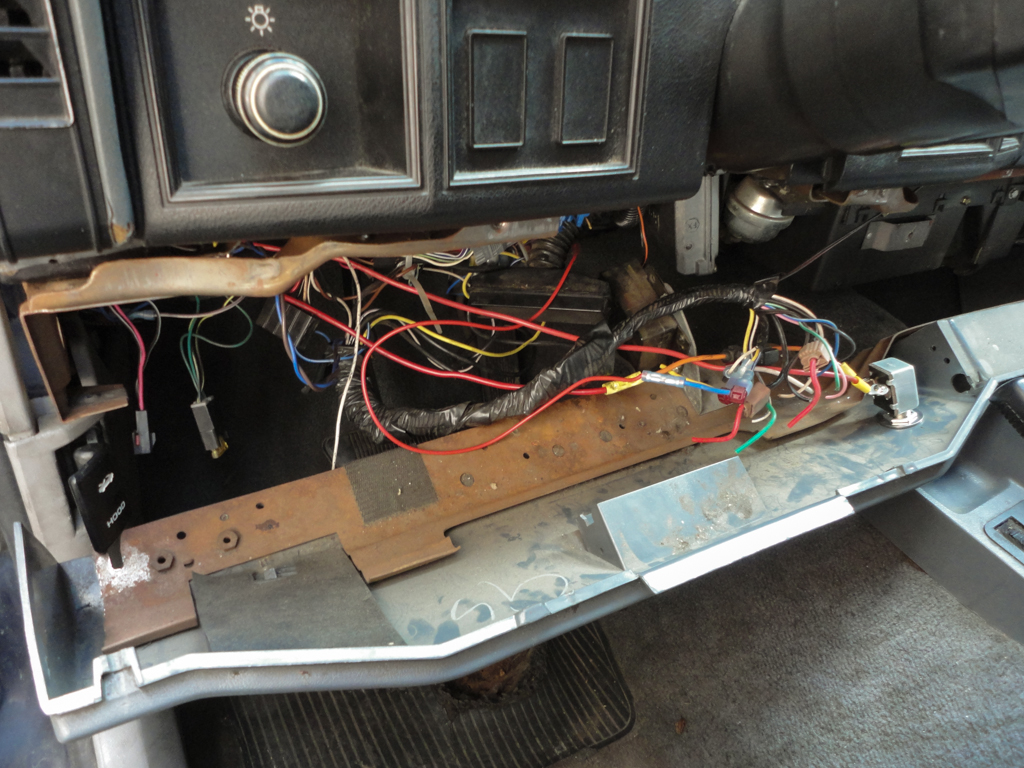
And what's left of the radio harness:
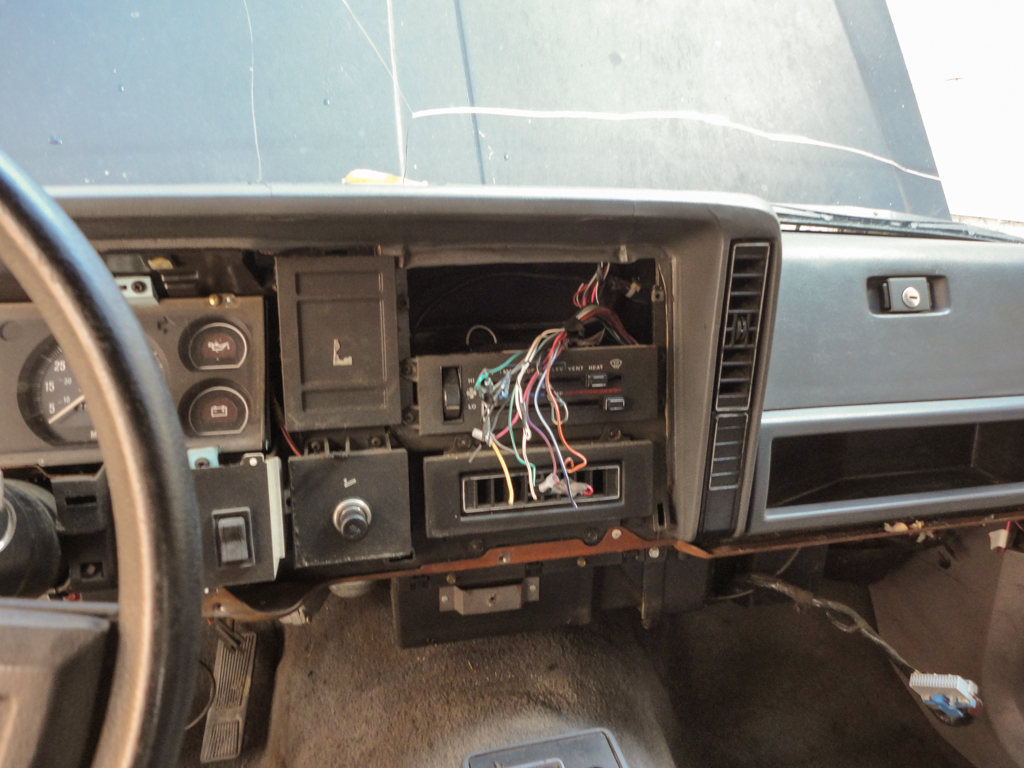
The switch removed. Much of the excess wiring under the dash appears to have come from a dealer-installed alarm or remote-starter. This will have to come out:
The wires for the push-button were 10-gauge and were routed similarly to stock (yeah right). You can see here that the switch simply connects the starter relay with the positive terminal of the battery. I suspect the ignition switch is worn out:

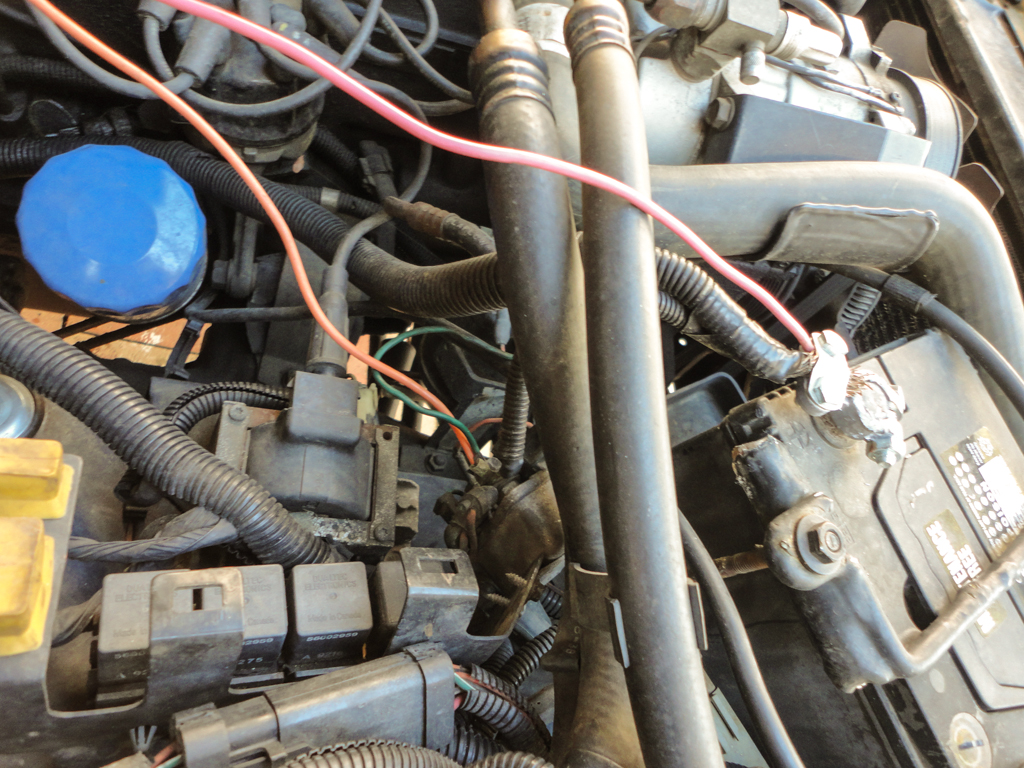
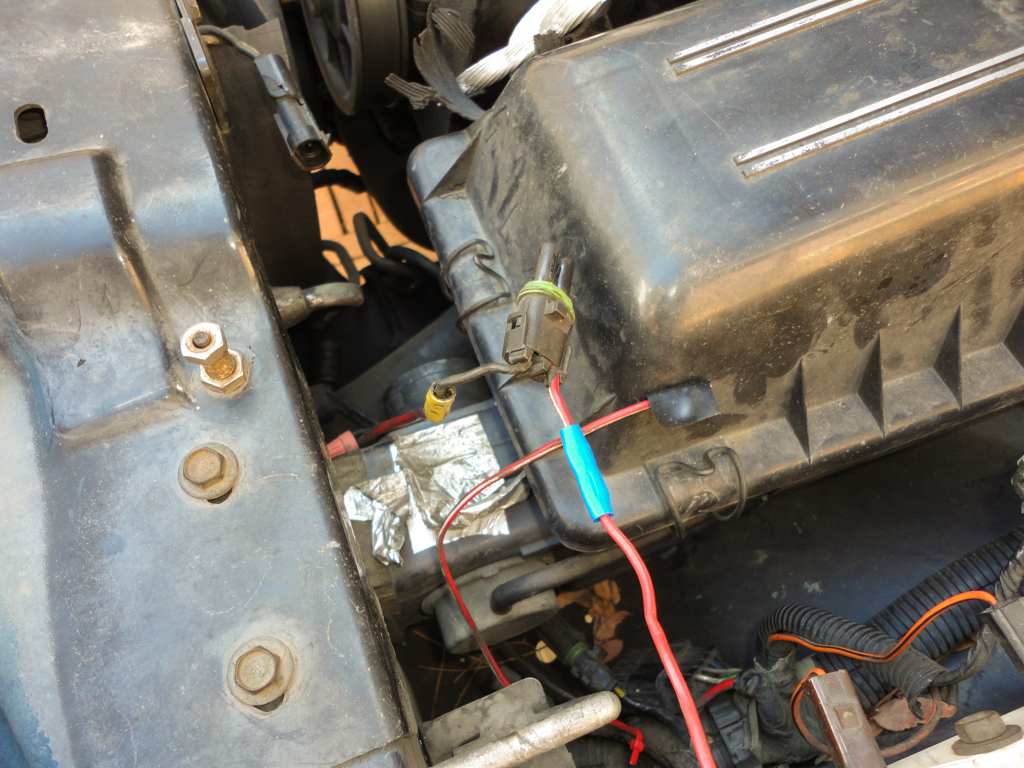
The gal I bought it from mentioned that it had been running hot and she took it to a mechanic who "adjusted the fan". What that really means is, the mechanic ( :?: ) wired the auxiliary fan to the ignition so it came on any time the ignition was in the on-position. A Band-Aid:
After some continuity checks, I was certain the ignition switch had failed. Napa had one in stock for $20. I rode the XJ (Seca II) over and brought one home. I had forgotten how cold 38F feels on the bike. To replace the ignition switch on a Jeep requires the column to be lowered. I also determined the signal switch had failed and bought one of those at Napa too. It was also cheap: $16.

Here we are in the middle of that installation:

With a new ignition switch and signal switch, all the accessory worked well (except the wipers) and the signals blinked as they should. Chalk one up for me! Here it is with the wiring cleaned up and the console ALMOST back together. I repaired the horn pad with some ABS cement and it was still drying:

I began by repairing wires which were clearly broken, damaged or out of place.
Hatch wiring, before:
And after:
The rats-nest of wire-bodging under the dash. You can see the spiffy push-start button (more on that soon):
And what's left of the radio harness:
The switch removed. Much of the excess wiring under the dash appears to have come from a dealer-installed alarm or remote-starter. This will have to come out:
The wires for the push-button were 10-gauge and were routed similarly to stock (yeah right). You can see here that the switch simply connects the starter relay with the positive terminal of the battery. I suspect the ignition switch is worn out:
The gal I bought it from mentioned that it had been running hot and she took it to a mechanic who "adjusted the fan". What that really means is, the mechanic ( :?: ) wired the auxiliary fan to the ignition so it came on any time the ignition was in the on-position. A Band-Aid:
After some continuity checks, I was certain the ignition switch had failed. Napa had one in stock for $20. I rode the XJ (Seca II) over and brought one home. I had forgotten how cold 38F feels on the bike. To replace the ignition switch on a Jeep requires the column to be lowered. I also determined the signal switch had failed and bought one of those at Napa too. It was also cheap: $16.
Here we are in the middle of that installation:
With a new ignition switch and signal switch, all the accessory worked well (except the wipers) and the signals blinked as they should. Chalk one up for me! Here it is with the wiring cleaned up and the console ALMOST back together. I repaired the horn pad with some ABS cement and it was still drying:
11-25-2013, 07:10 PM
#3
Newbie
Thread Starter
Join Date: Nov 2013
Location: Denver, CO
Posts: 18
Likes: 0
Received 0 Likes
on
0 Posts
Year: 1990
Model: Cherokee
Engine: 4.0
K and I got up early that first Saturday and drove the Jeep to the LKQ Pick-a-part. They had half a dozen Jeep Cherokees there. We scored a shifter handle, shifter plate, newer sun visors, a center console, a gauge cluster (with tach), a new dash trim piece and a glove box latch. I spent a few hours installing these while K took to cleaning out the inside. She spent hours scrubbing seats and carpeting and vacuuming and such. The results are much better than before, though, the headliner is really looking sore now. There WILL be a trip to the fabric store in the near future . . . :


Sunday morning, I talked K into going back to the junk yard. This time, we scored a passenger-side flare and complete header panel. The yard gouged me at $160 for these parts; ouch. I wasn't thrilled, but needed 'em and had already pulled them, so we paid and left.
Earlier in its life, the Jeep had hit something hard on the passenger side. Hard enough to bend the front end, smack the radiator into the fan and bend the front control arm mount. Here's the front-end before. The headlights literally pointed straight down and the grille was botched together with Chinese parts :


I pulled the front fender and pounded it out as best I could. I straightened the undercarriage damage and reset the door gap (so the door no longer hit the fender). I also installed the flare and fit the header panel. K provided support with wrenches, hardware and cheese sandwiches:


The driver-side door hinge welds are cracked and the door sags. This has resulted in damage to the fender and door. The driver door is also rusty and generally in rotten shape. It'll be replaced soon. I sourced a new fender and expect to have it Wednesday. When it arrives, I'll get after realigning the door, welding the hinges and fitting the new fender:


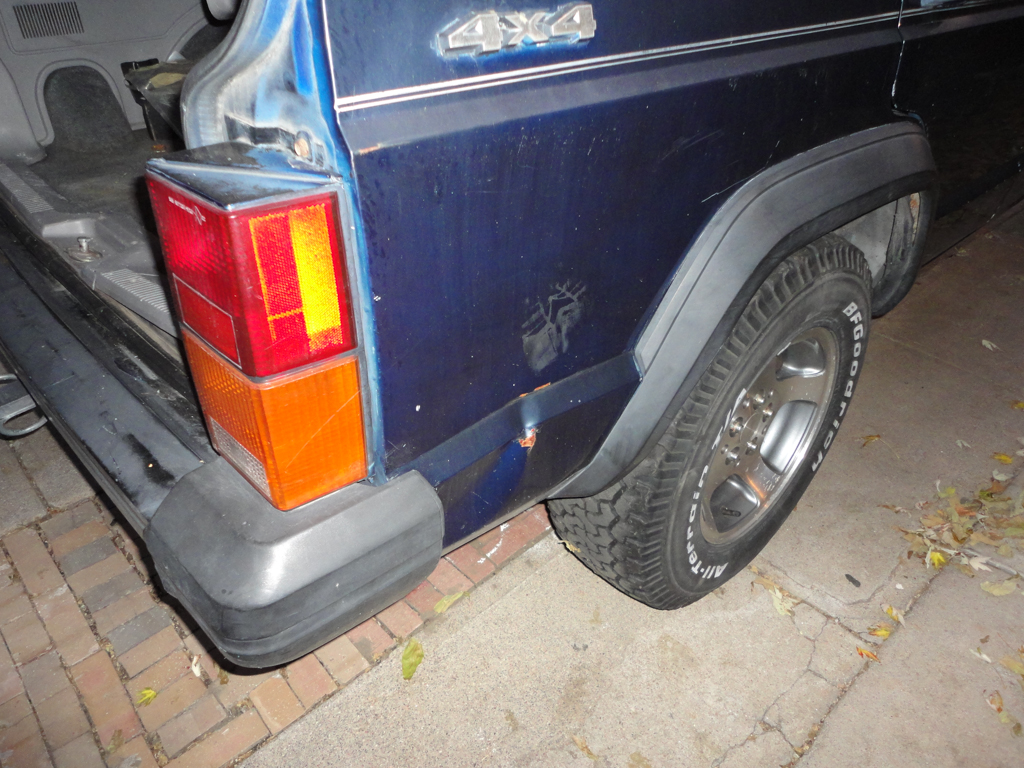
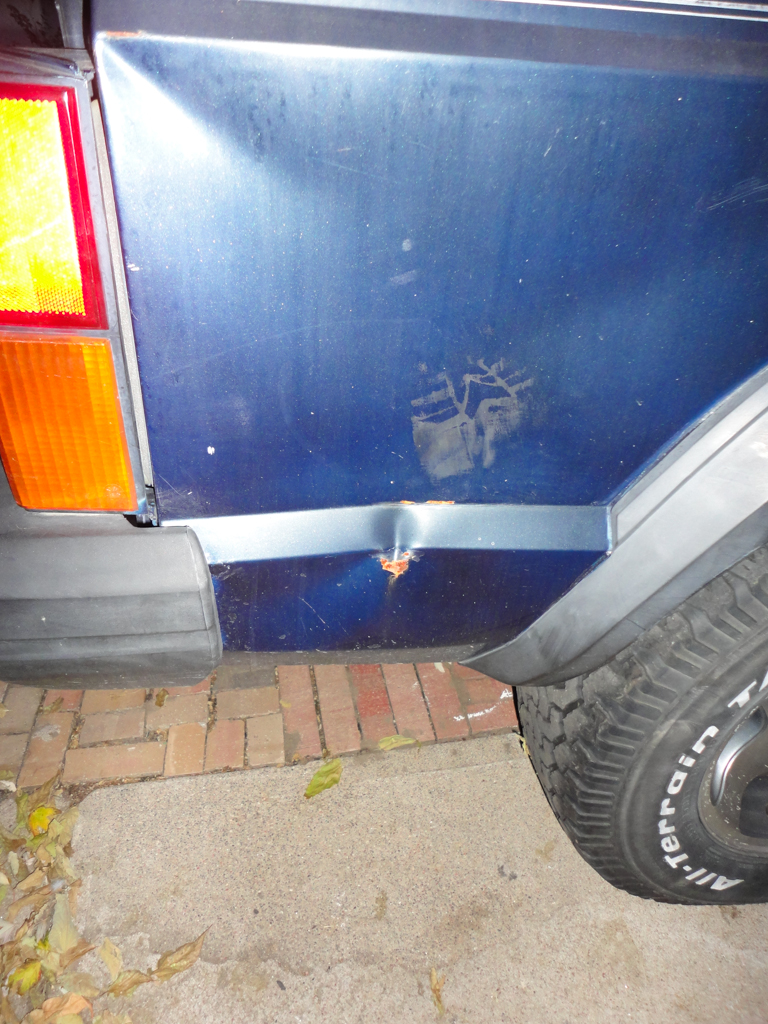
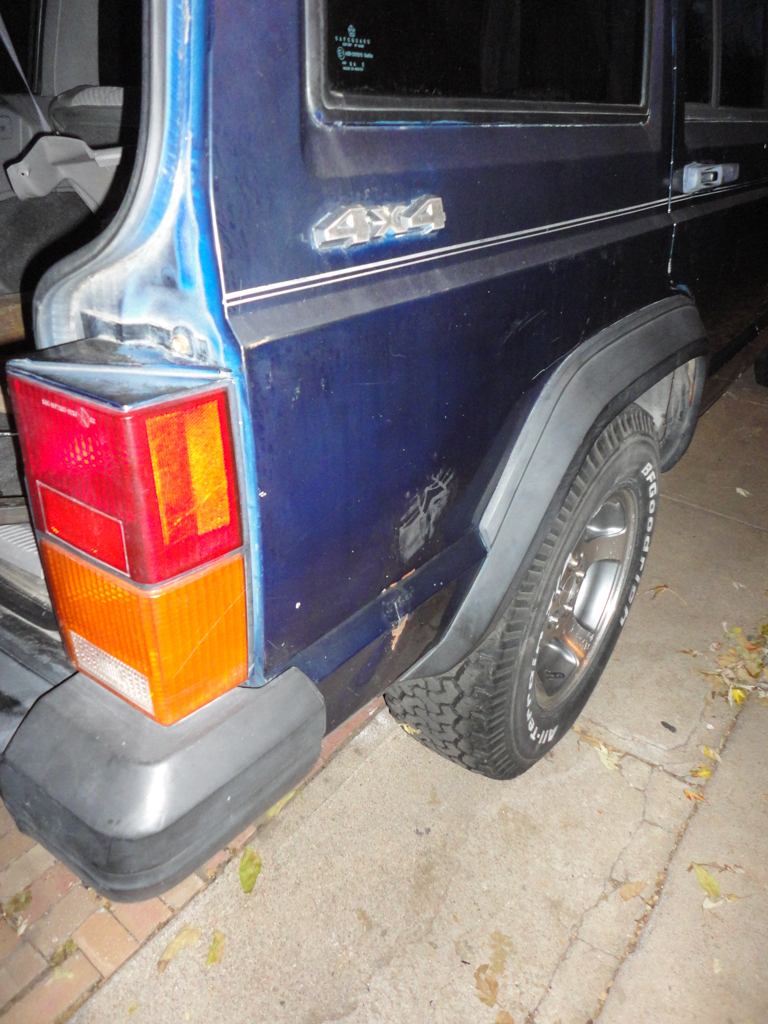
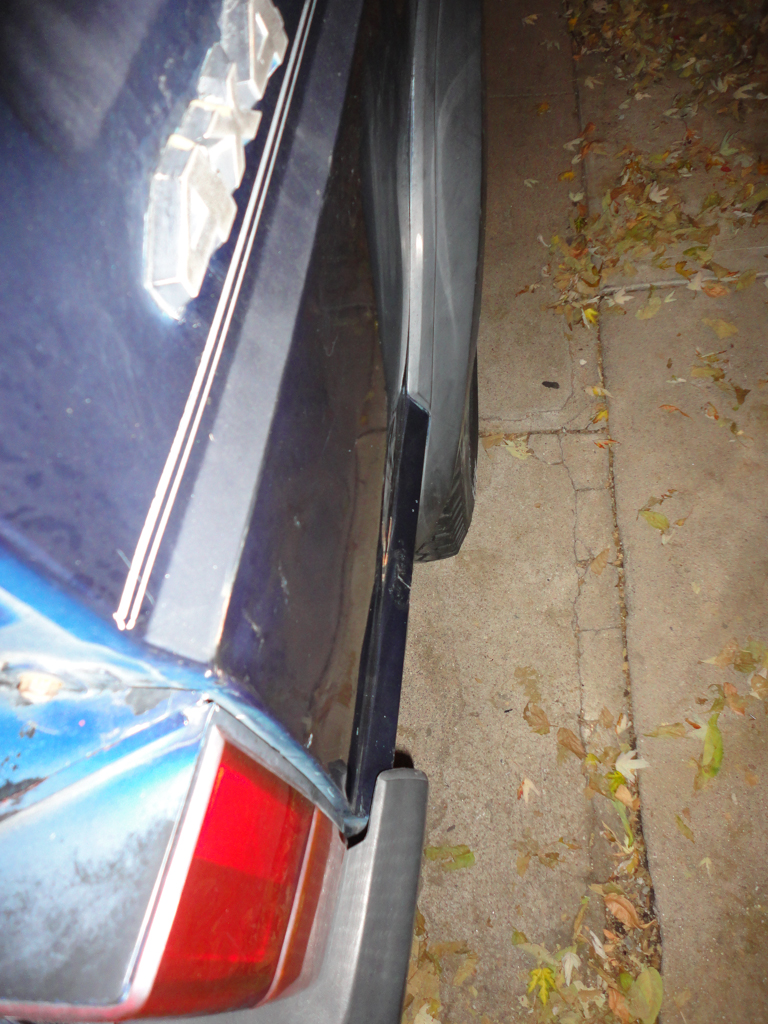
The rear of jeep has seen better days too. Someone backed into something with the driver-side rear and some a-hole kicked in the quarter panel on the passenger-side. These will be repaired by welding on studs and using a dent puller. More on that later:


Sunday morning, I talked K into going back to the junk yard. This time, we scored a passenger-side flare and complete header panel. The yard gouged me at $160 for these parts; ouch. I wasn't thrilled, but needed 'em and had already pulled them, so we paid and left.
Earlier in its life, the Jeep had hit something hard on the passenger side. Hard enough to bend the front end, smack the radiator into the fan and bend the front control arm mount. Here's the front-end before. The headlights literally pointed straight down and the grille was botched together with Chinese parts :
I pulled the front fender and pounded it out as best I could. I straightened the undercarriage damage and reset the door gap (so the door no longer hit the fender). I also installed the flare and fit the header panel. K provided support with wrenches, hardware and cheese sandwiches:
The driver-side door hinge welds are cracked and the door sags. This has resulted in damage to the fender and door. The driver door is also rusty and generally in rotten shape. It'll be replaced soon. I sourced a new fender and expect to have it Wednesday. When it arrives, I'll get after realigning the door, welding the hinges and fitting the new fender:
The rear of jeep has seen better days too. Someone backed into something with the driver-side rear and some a-hole kicked in the quarter panel on the passenger-side. These will be repaired by welding on studs and using a dent puller. More on that later:
Last edited by radare; 11-25-2013 at 07:12 PM.
11-25-2013, 07:14 PM
#4
Newbie
Thread Starter
Join Date: Nov 2013
Location: Denver, CO
Posts: 18
Likes: 0
Received 0 Likes
on
0 Posts
Year: 1990
Model: Cherokee
Engine: 4.0
As I mentioned before, the engine makes good power and the transmission shifts smoothly. Well, when driving home from the junkyard on Sunday, I noticed that as the engine oil gets hot, the rods start making a ruckus. Yep, rod bearing clearances are too wide. The lifters tick something fierce on startup and the whole thing leaks oil:
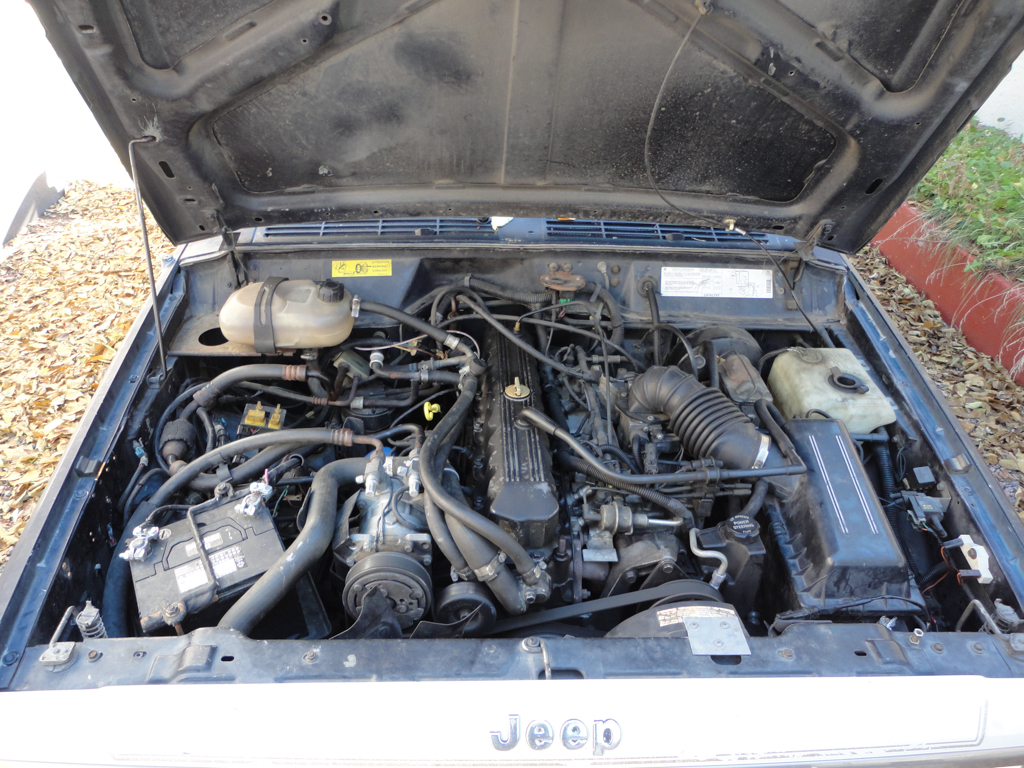
In its front-end hit, the radiator moved backwards into the fan. The previous owner didn't replace it, though; I wonder why it runs hot???
There is a new radiator in its future:

The auxiliary cooling fan was also badly damaged. The previous owner's repair method included some strap-aluminum and sheetmetal screws:

I have two options with the engine; this one won't make it through inspection. I can rebuild this one or buy a used engine and go that route. While browsing EBay, I found a lower mileage (100k) engine from a '95 Wrangler for a good price and decided to buy it. It'll be shipped to K's house on Wednesday and I plan to begin the engine swap next week. More on that later, too.
In its front-end hit, the radiator moved backwards into the fan. The previous owner didn't replace it, though; I wonder why it runs hot???
There is a new radiator in its future:
The auxiliary cooling fan was also badly damaged. The previous owner's repair method included some strap-aluminum and sheetmetal screws:
I have two options with the engine; this one won't make it through inspection. I can rebuild this one or buy a used engine and go that route. While browsing EBay, I found a lower mileage (100k) engine from a '95 Wrangler for a good price and decided to buy it. It'll be shipped to K's house on Wednesday and I plan to begin the engine swap next week. More on that later, too.
11-25-2013, 07:15 PM
#5
Newbie
Thread Starter
Join Date: Nov 2013
Location: Denver, CO
Posts: 18
Likes: 0
Received 0 Likes
on
0 Posts
Year: 1990
Model: Cherokee
Engine: 4.0
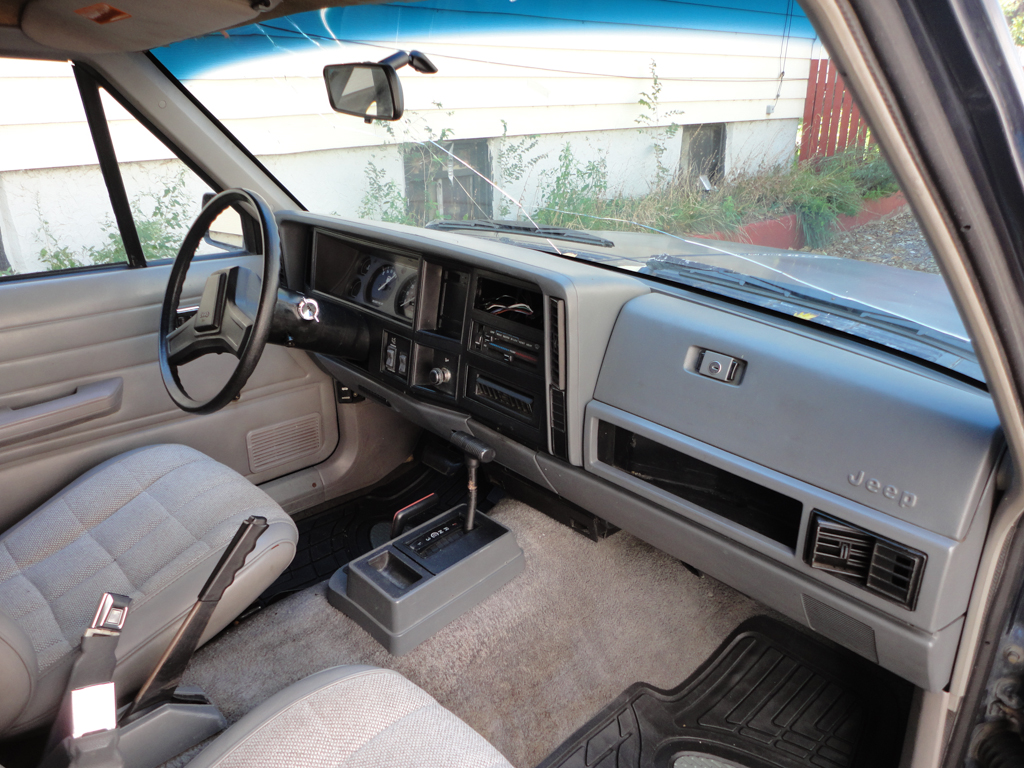
I came home tonight and decided to use the 50F weather and fleeting sunlight to install the center console that K and I scored from the local junk yard.
Installation was simple and this adds storage and ductwork/vents for rear-seat heat. Not the prettiest console out there but it fits this Jeep well. The shifter cover had some broken mounts; lucky for me it is made of ABS.


Installation was simple and this adds storage and ductwork/vents for rear-seat heat. Not the prettiest console out there but it fits this Jeep well. The shifter cover had some broken mounts; lucky for me it is made of ABS.
11-25-2013, 07:17 PM
#6
Newbie
Thread Starter
Join Date: Nov 2013
Location: Denver, CO
Posts: 18
Likes: 0
Received 0 Likes
on
0 Posts
Year: 1990
Model: Cherokee
Engine: 4.0
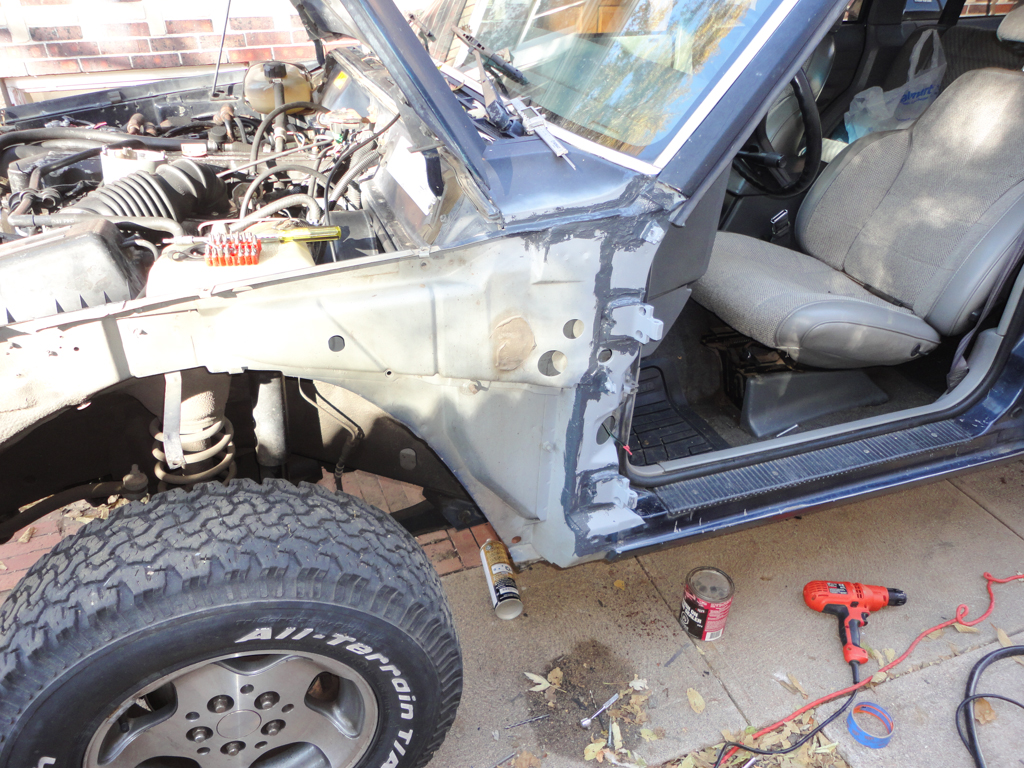
I took the day off to meet with a plumber about clearing the roots from my sewer. While I had the day off, I decided to tackle the sagging driver-side door and damaged fender. As you recall, the driver-side looked like this:
I began by pulling the driver side fender and door. This required me to remove the header panel and front bumper as well.
With the door off, I cleaned the putty out of the welds/hinge seams and inspected the welds. They were pulling away from the a-pillar like the pull-tab on a can of soda.
I measured the passenger side hinges (which weren't damaged and the door fit appropriately) and hammered the d-side hinges back into place. I then welded them using several passes. This added a ton of strength to the hinge area:

To protect the hinges from rust (until I get this thing painted), I primed the area with a sealer-primer and applied brushable seam sealer to all the locations where the factory had original sealed.
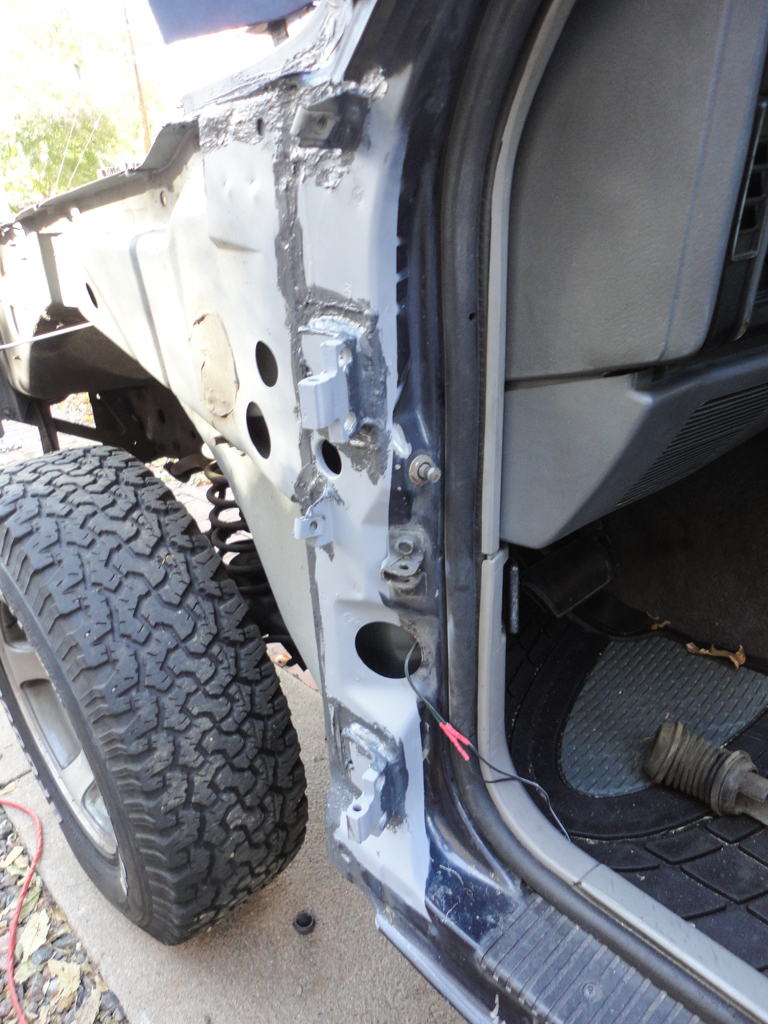
I also sealed up some of the panel connections on the unibody, while I was at it:
The stock hinge pins are 1/4" x 2.25" roll pins. I couldn't find that exact length locally and settled on a pair of 1/4" x 2" roll pins. This shortened them about 1/8" on each end. Here's the originals (worn) vs the new:
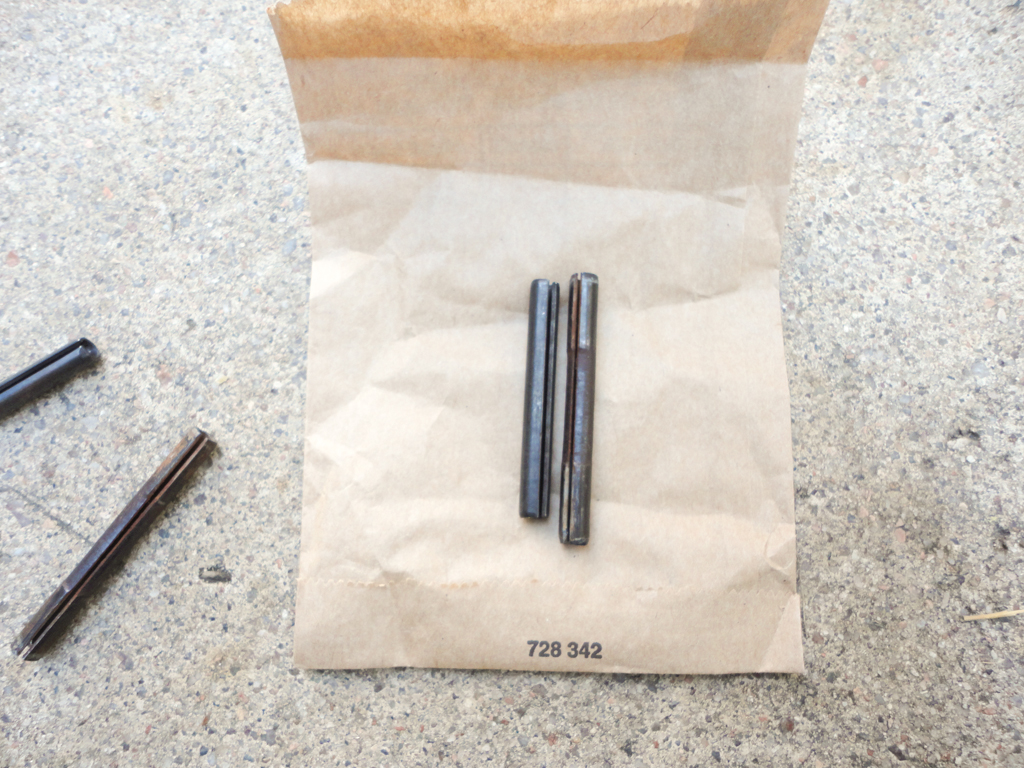
I drove the pins in and evened up the shortage top-to-bottom. They fit quite well and there is still a sizeable contact area:
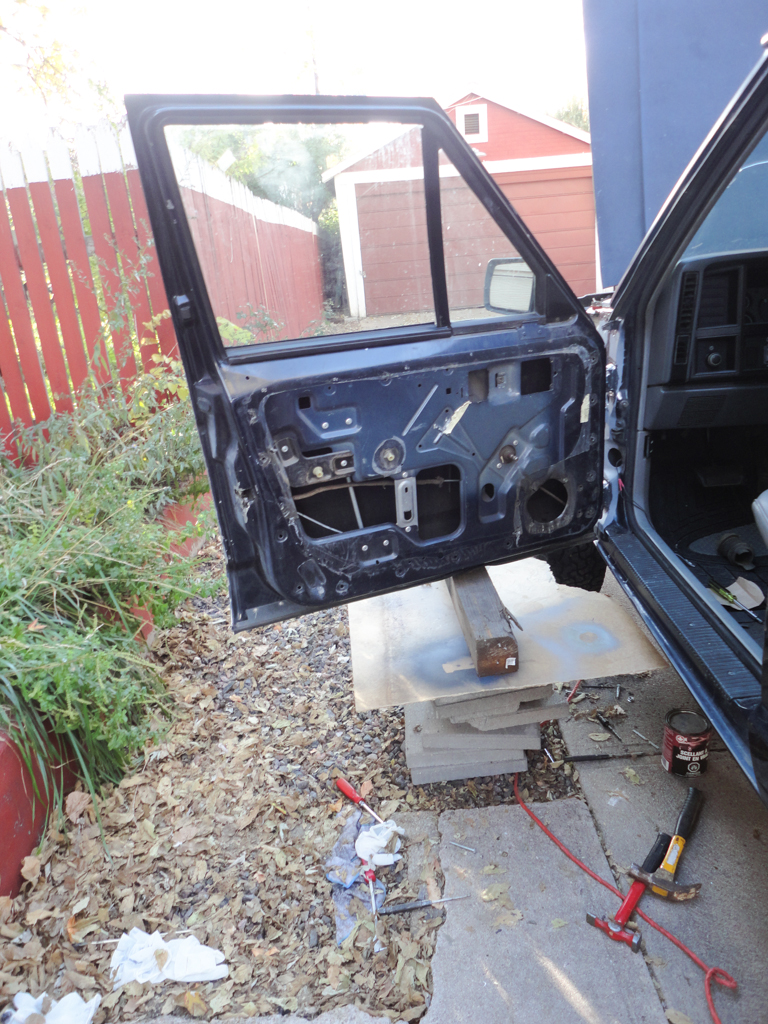
The door his surprisingly heavy and awkward; I used the helping hand of some garden pavers and a block of wood to hold it in place while attaching the screws for the hinges and making adjustments:
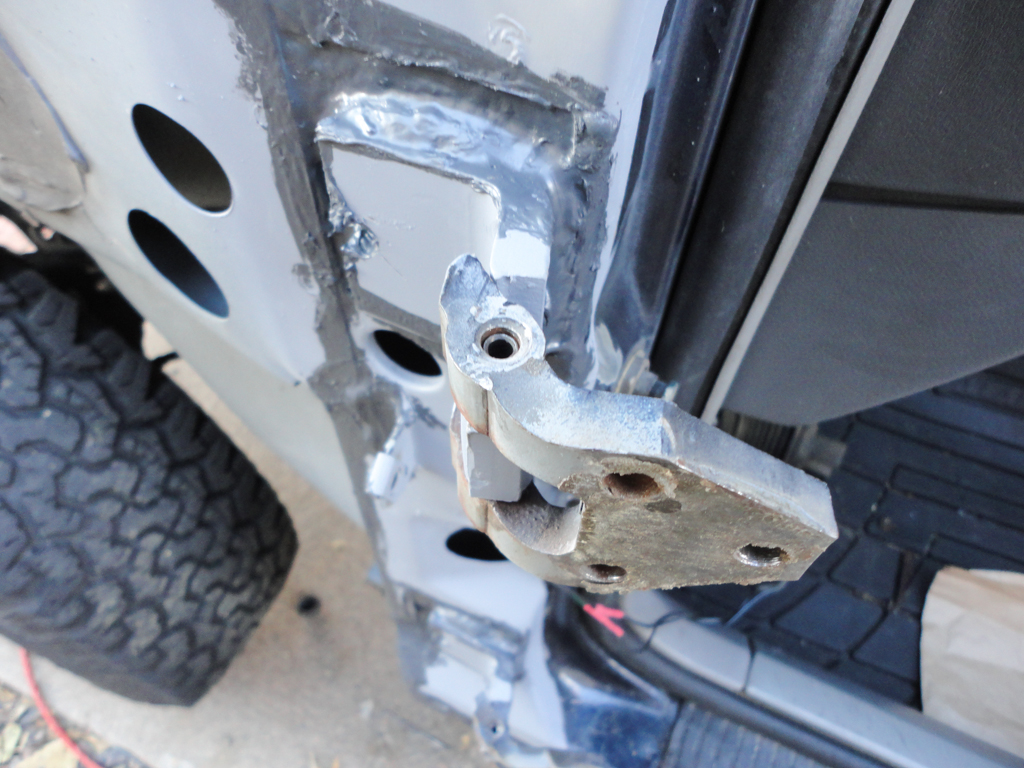
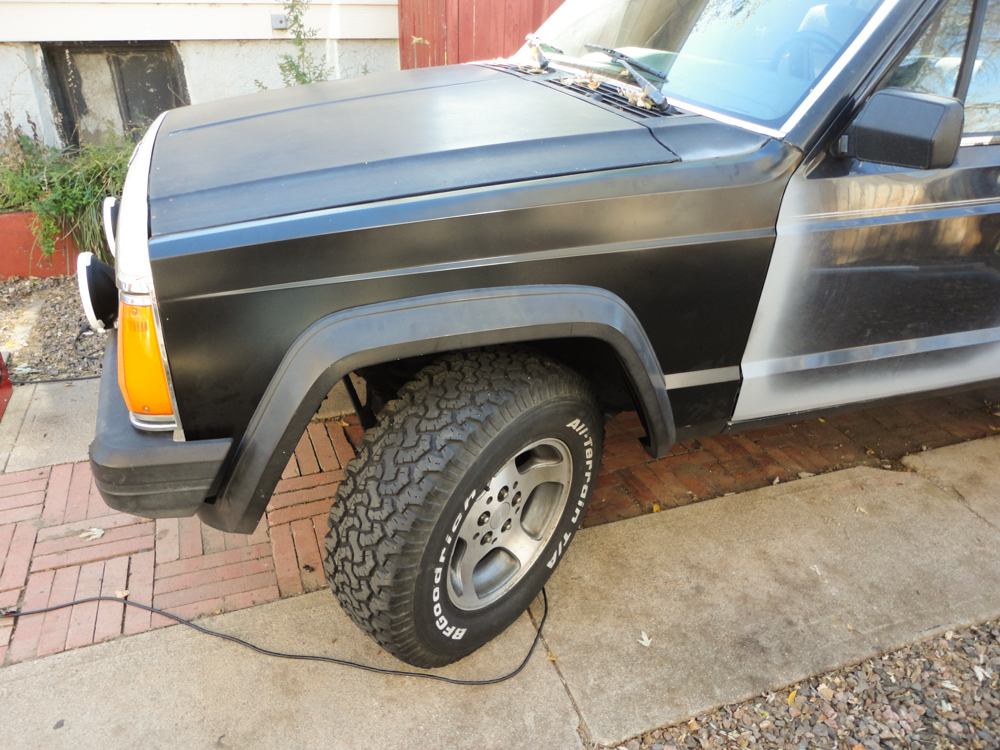
The driver door had a lot of rust on the outer skin. While it was off, I hit it with the cup-brush in the angle grinder. I gave it a quick coat of primer to protect it from rust until I can do body work. Ugly but effective. Here's the truck with the new (Chinese, unfortunately, to be replaced later with a good junkyard fender) fender. Everything lines up now, the door opens smoothly and closes gently and things look much better. Go me!

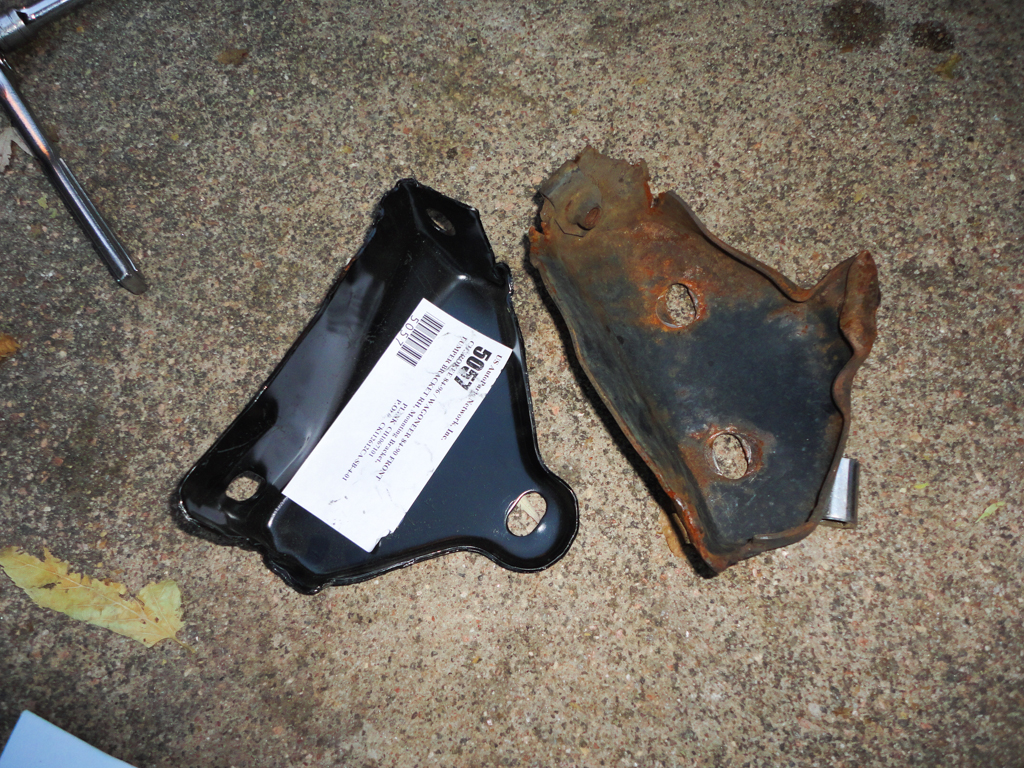
While I was finishing up, UPS dropped off the new right-hand bumper bracket. Here's the original (badly smashed) and new one next to each other. I used a long pipe to straighten the frame and got this to bolt up well.
 f
f
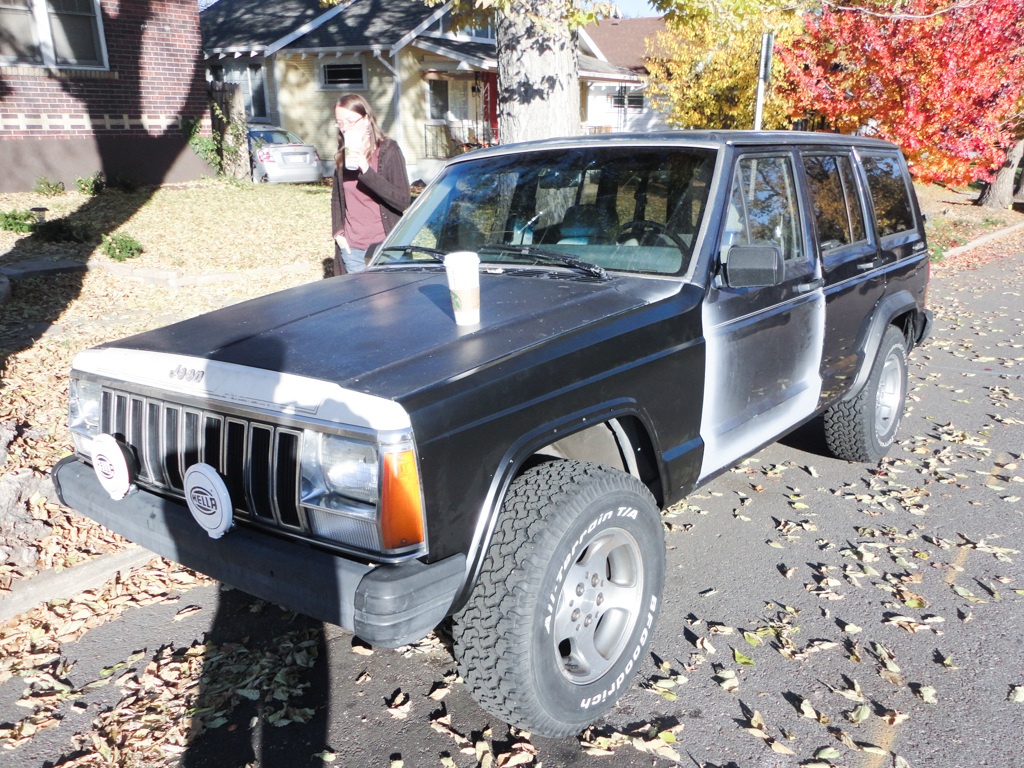
Here's the truck as she sits this morning. I'll be tackling the rear quarter panel damage next. Stay tuned.
I began by pulling the driver side fender and door. This required me to remove the header panel and front bumper as well.
With the door off, I cleaned the putty out of the welds/hinge seams and inspected the welds. They were pulling away from the a-pillar like the pull-tab on a can of soda.
I measured the passenger side hinges (which weren't damaged and the door fit appropriately) and hammered the d-side hinges back into place. I then welded them using several passes. This added a ton of strength to the hinge area:
To protect the hinges from rust (until I get this thing painted), I primed the area with a sealer-primer and applied brushable seam sealer to all the locations where the factory had original sealed.
I also sealed up some of the panel connections on the unibody, while I was at it:
The stock hinge pins are 1/4" x 2.25" roll pins. I couldn't find that exact length locally and settled on a pair of 1/4" x 2" roll pins. This shortened them about 1/8" on each end. Here's the originals (worn) vs the new:
I drove the pins in and evened up the shortage top-to-bottom. They fit quite well and there is still a sizeable contact area:
The door his surprisingly heavy and awkward; I used the helping hand of some garden pavers and a block of wood to hold it in place while attaching the screws for the hinges and making adjustments:
The driver door had a lot of rust on the outer skin. While it was off, I hit it with the cup-brush in the angle grinder. I gave it a quick coat of primer to protect it from rust until I can do body work. Ugly but effective. Here's the truck with the new (Chinese, unfortunately, to be replaced later with a good junkyard fender) fender. Everything lines up now, the door opens smoothly and closes gently and things look much better. Go me!
While I was finishing up, UPS dropped off the new right-hand bumper bracket. Here's the original (badly smashed) and new one next to each other. I used a long pipe to straighten the frame and got this to bolt up well.
fHere's the truck as she sits this morning. I'll be tackling the rear quarter panel damage next. Stay tuned.
11-25-2013, 07:18 PM
#7
Newbie
Thread Starter
Join Date: Nov 2013
Location: Denver, CO
Posts: 18
Likes: 0
Received 0 Likes
on
0 Posts
Year: 1990
Model: Cherokee
Engine: 4.0
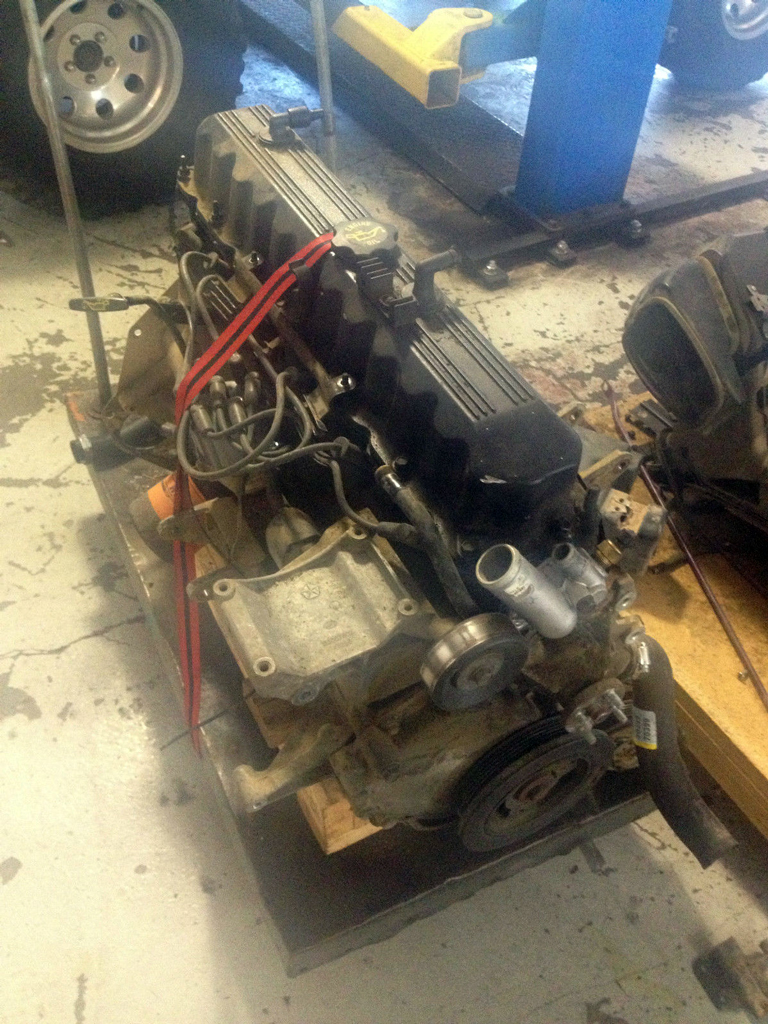
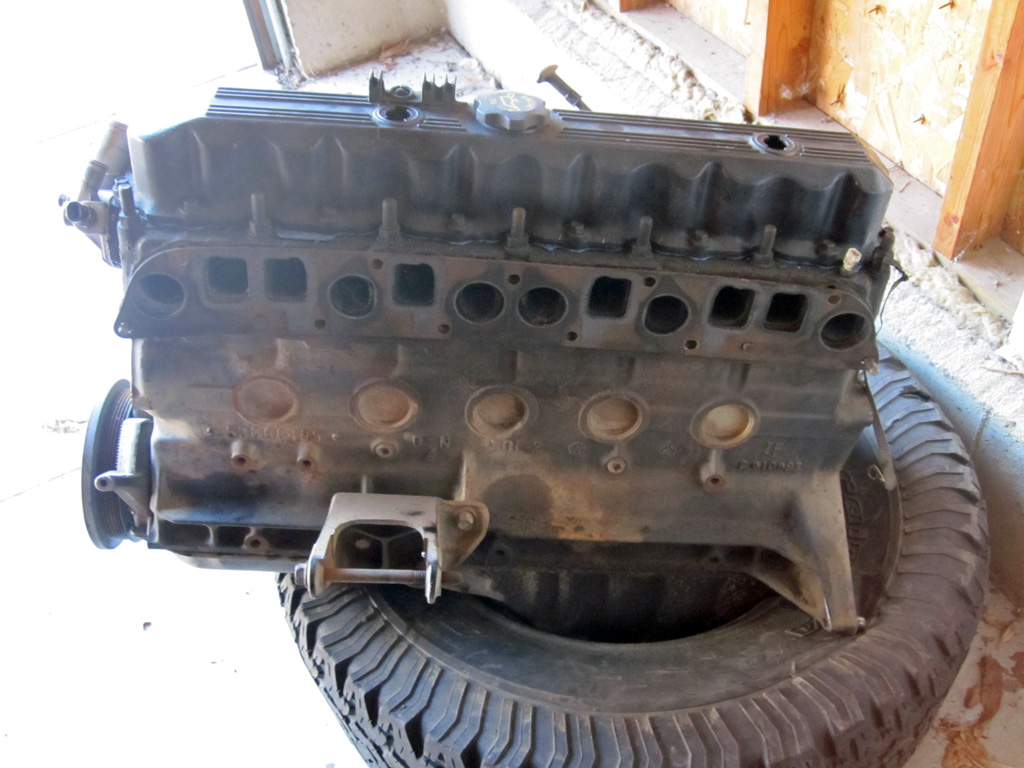
More on that used engine: It showed up (at K's house) and I got my first look at it last night. It looks pretty good for a 100k engine. The plan is to regasket it, replace the bearings and refresh the head (new valve seals, lap the valves, etc). More to come.

[img]http://www.xjrider.com/gallery/albums/userpics/10002/jeep_new_engine3.jpg
[/img]
[img]http://www.xjrider.com/gallery/albums/userpics/10002/jeep_new_engine3.jpg
[/img]
Trending Topics
11-25-2013, 07:19 PM
#8
Newbie
Thread Starter
Join Date: Nov 2013
Location: Denver, CO
Posts: 18
Likes: 0
Received 0 Likes
on
0 Posts
Year: 1990
Model: Cherokee
Engine: 4.0
I used the last fleeting moments of daylight after work on the p-side quarter panel. Some jerk kicked this in; you can see his shoe print square in the middle. I pulled the interior panel and pounded it out with a block of wood. I'll spend more time on it later but this is a good improvement.
Before:
After:
I also took the time to press the new leaf-spring bushings into the new leaf springs. Tomorrow I'll give this whole thing a coat of black paint and then start working on swapping out the leaves. The leaves that are currently on the truck are sagging pretty good and already have a helper spring installed. I'd imagine they're done after 260k miles. I'll be installing new bump stops and swaybar hardware at the same time. More on that later.
11-25-2013, 07:21 PM
#9
Newbie
Thread Starter
Join Date: Nov 2013
Location: Denver, CO
Posts: 18
Likes: 0
Received 0 Likes
on
0 Posts
Year: 1990
Model: Cherokee
Engine: 4.0
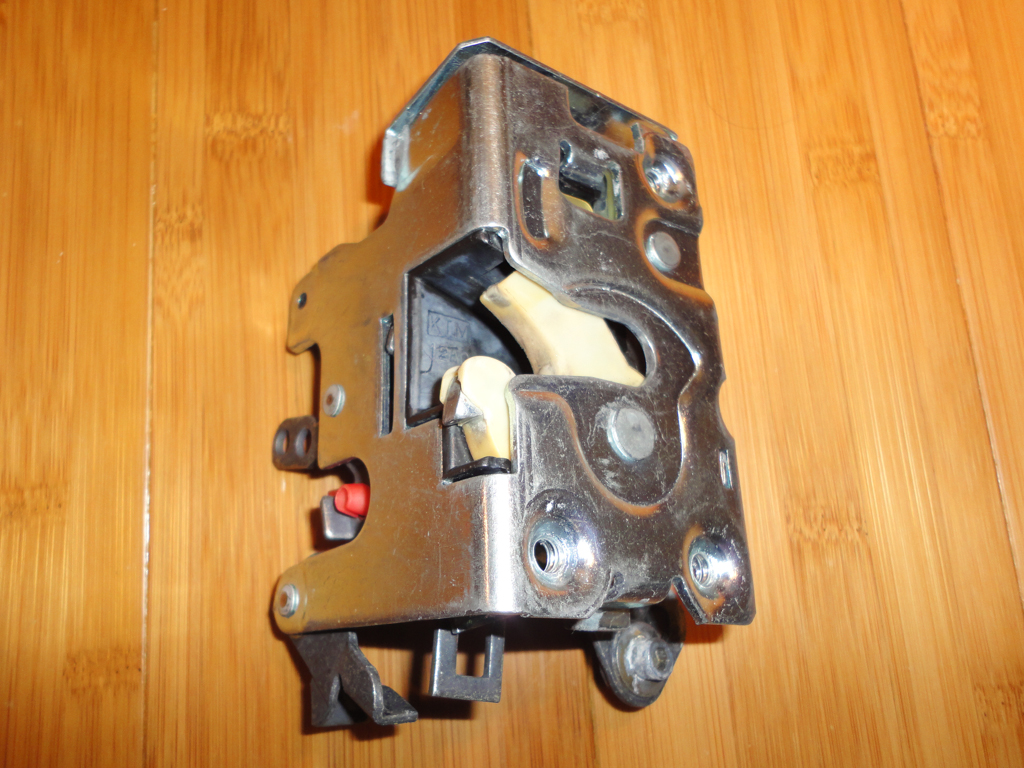
I pulled the front door latches and soaked them overnight in purple degreaser. They came out looking good. Installed them with new lock cylinders (the old ones had been busted with a screwdriver) and lubed up the mechanisms. Both doors now open and close quite nicely.

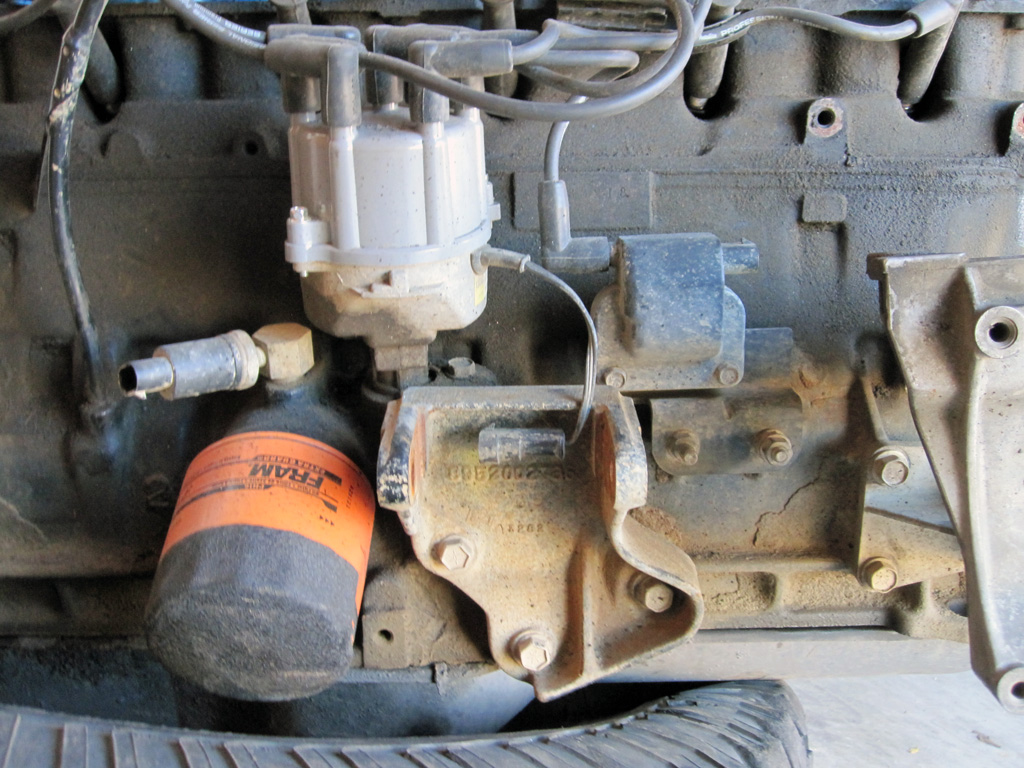
Also removed the botch job on the taillight wiring and restored functionality to the rear lights.
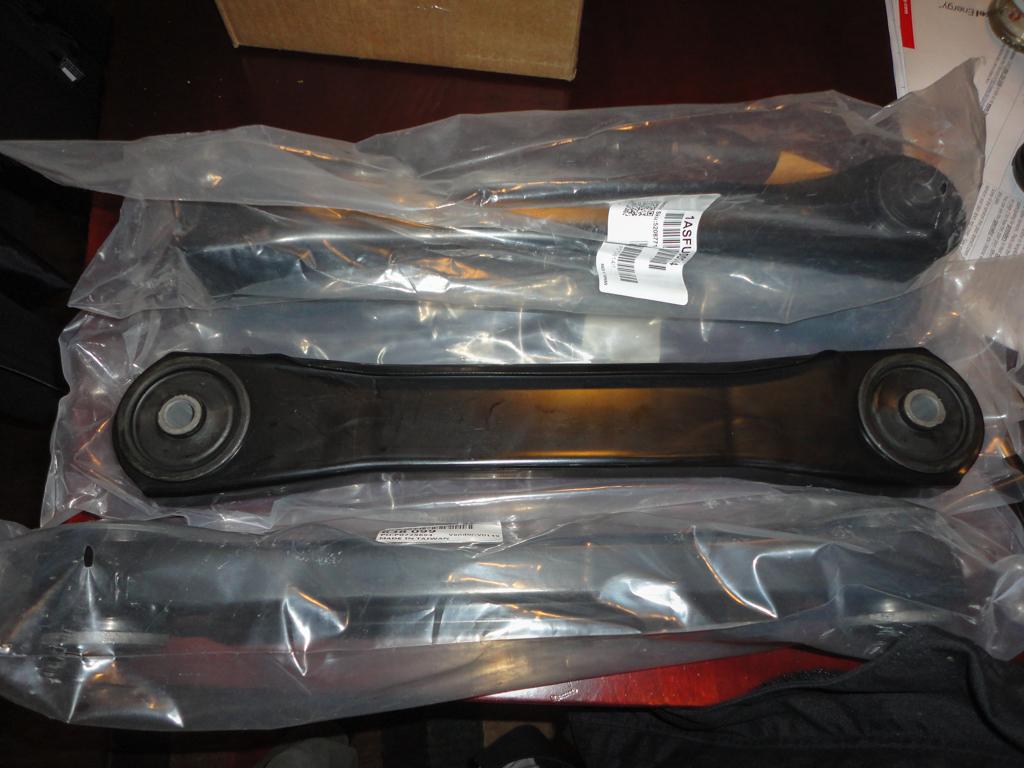
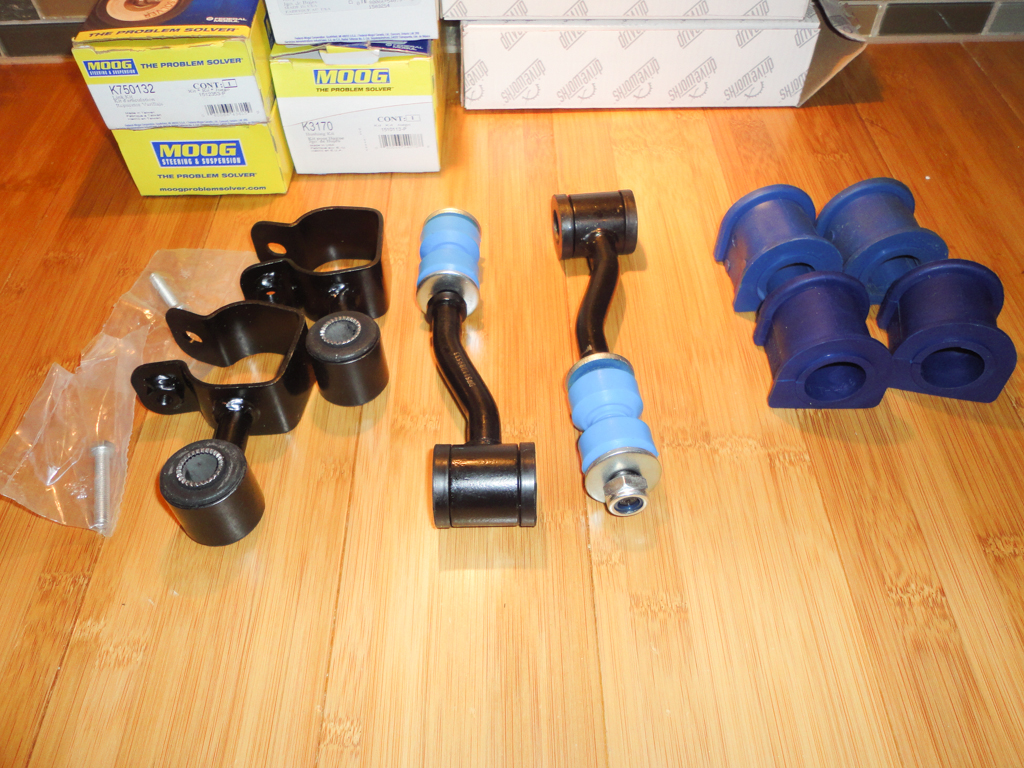
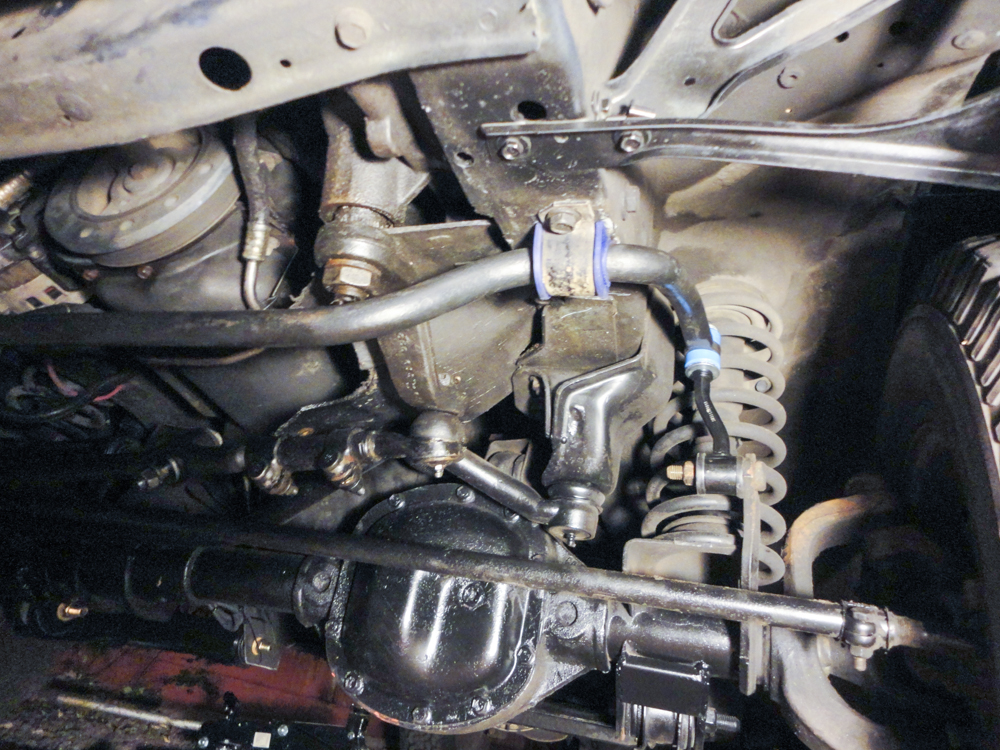
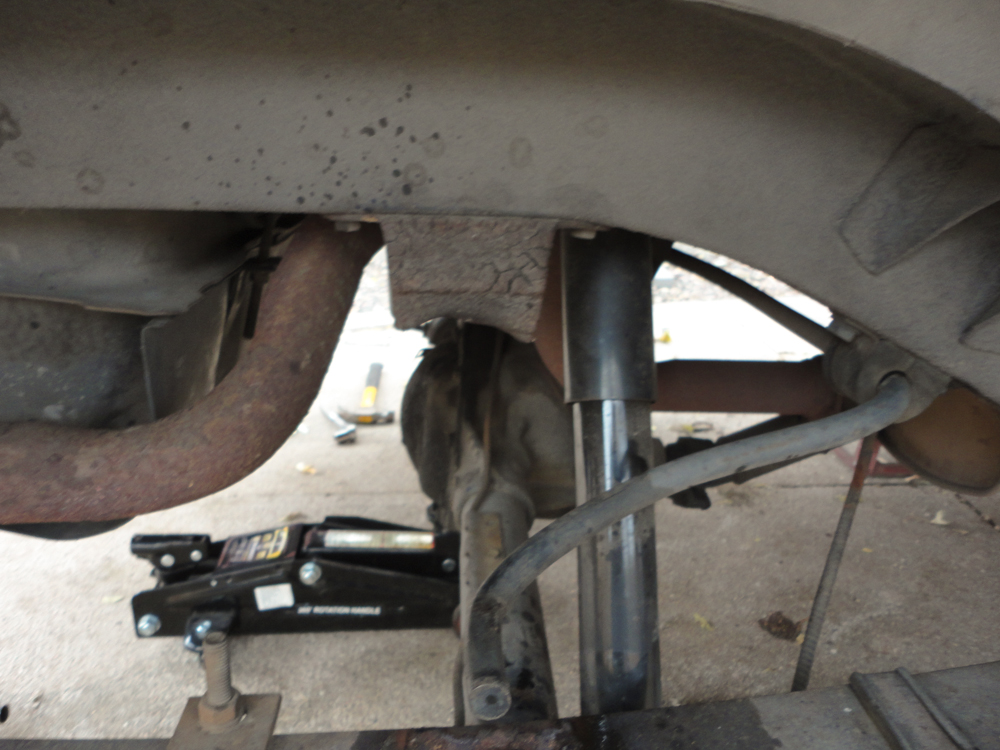
Finally, I have all the suspension parts: New leaf springs, leaf spring bushings, Prothane bump stops, front upper & lower control arms and new swaybar bushings/endlinks. I'll be replacing the shackles and front springs when I do a lift on it in early summer next year. When it warms up a bit, I'll pull apart the rear suspension, recondition things and install the new parts.
Also removed the botch job on the taillight wiring and restored functionality to the rear lights.
Finally, I have all the suspension parts: New leaf springs, leaf spring bushings, Prothane bump stops, front upper & lower control arms and new swaybar bushings/endlinks. I'll be replacing the shackles and front springs when I do a lift on it in early summer next year. When it warms up a bit, I'll pull apart the rear suspension, recondition things and install the new parts.
11-25-2013, 07:21 PM
#10
Newbie
Thread Starter
Join Date: Nov 2013
Location: Denver, CO
Posts: 18
Likes: 0
Received 0 Likes
on
0 Posts
Year: 1990
Model: Cherokee
Engine: 4.0
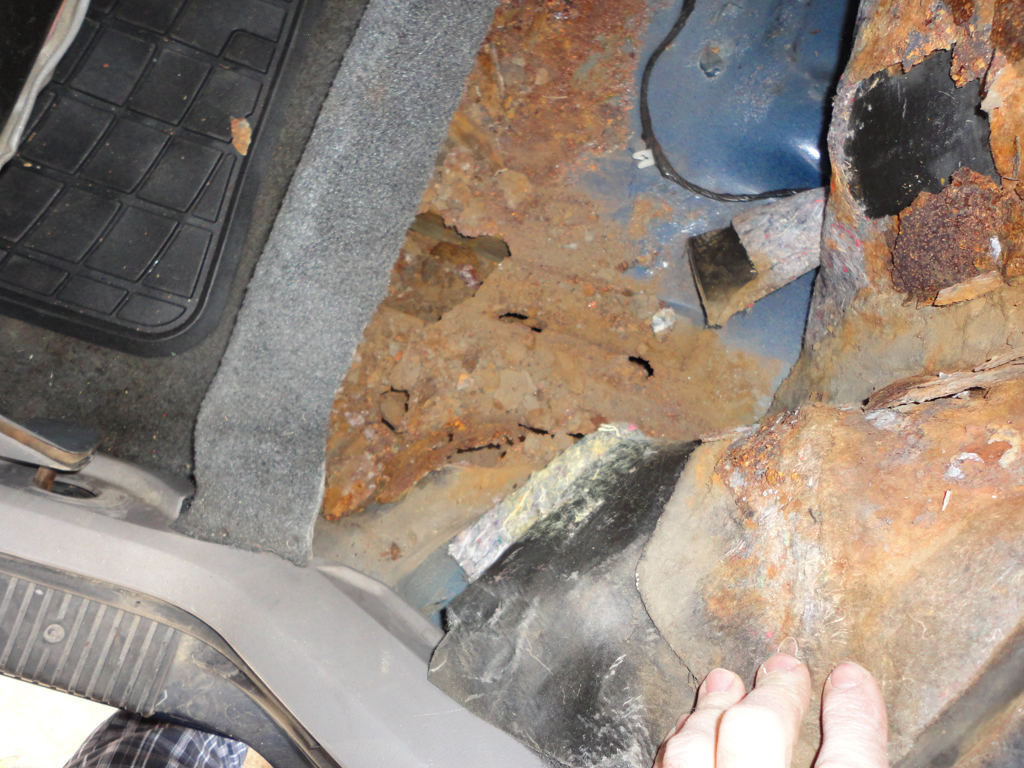
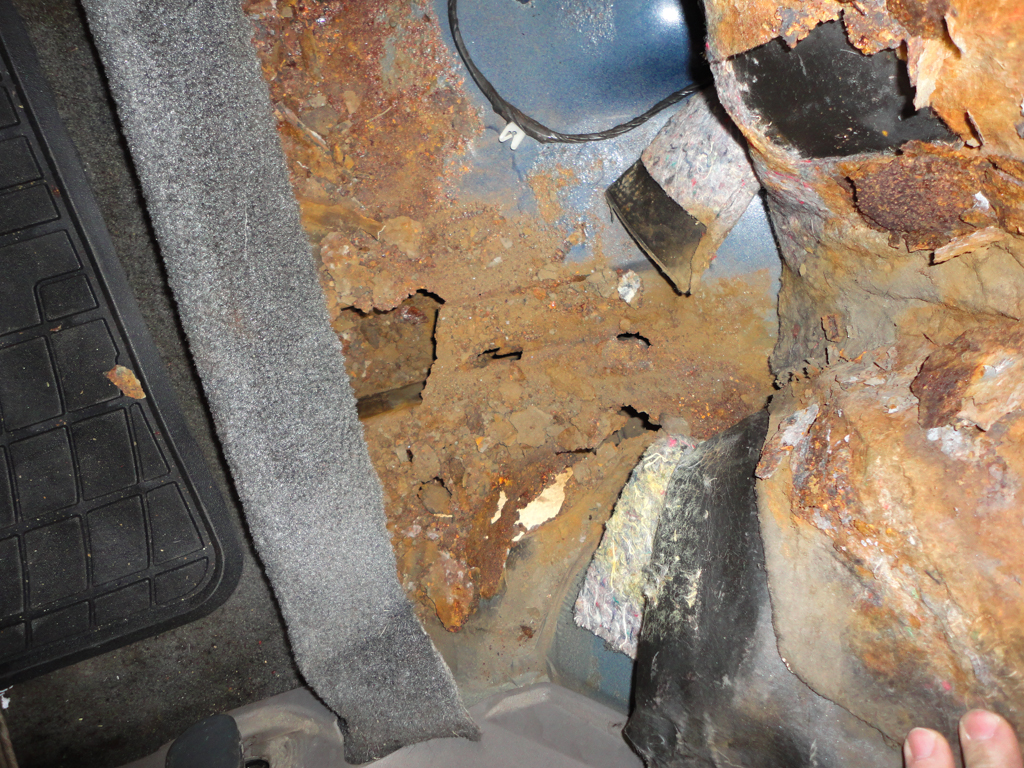
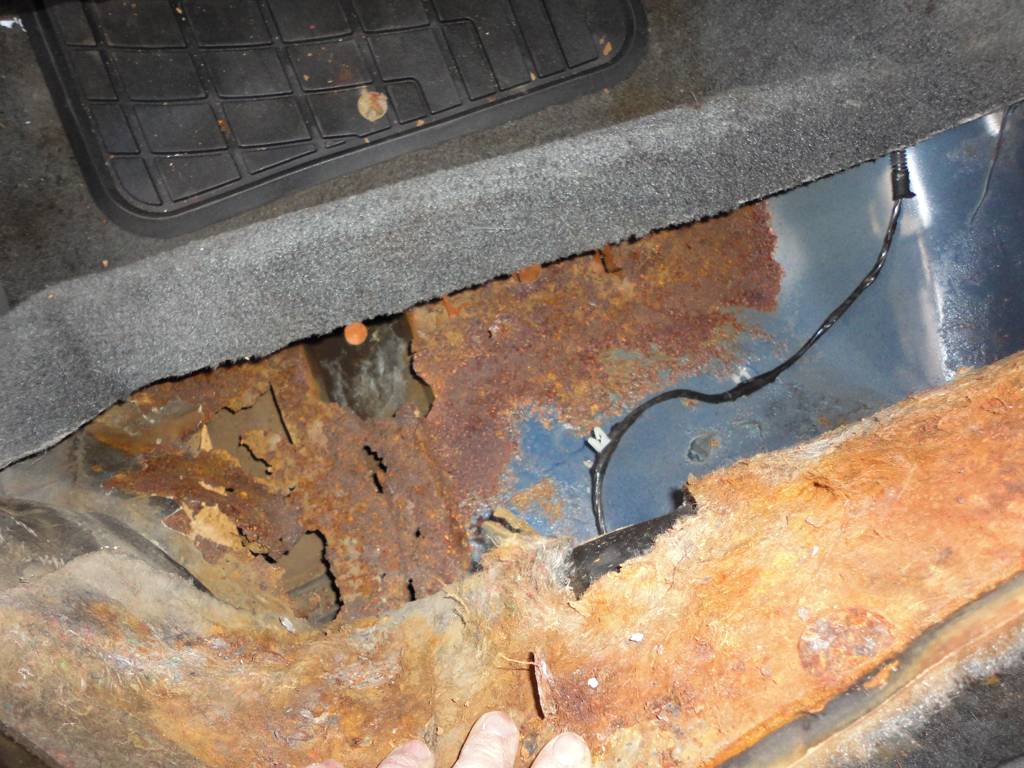
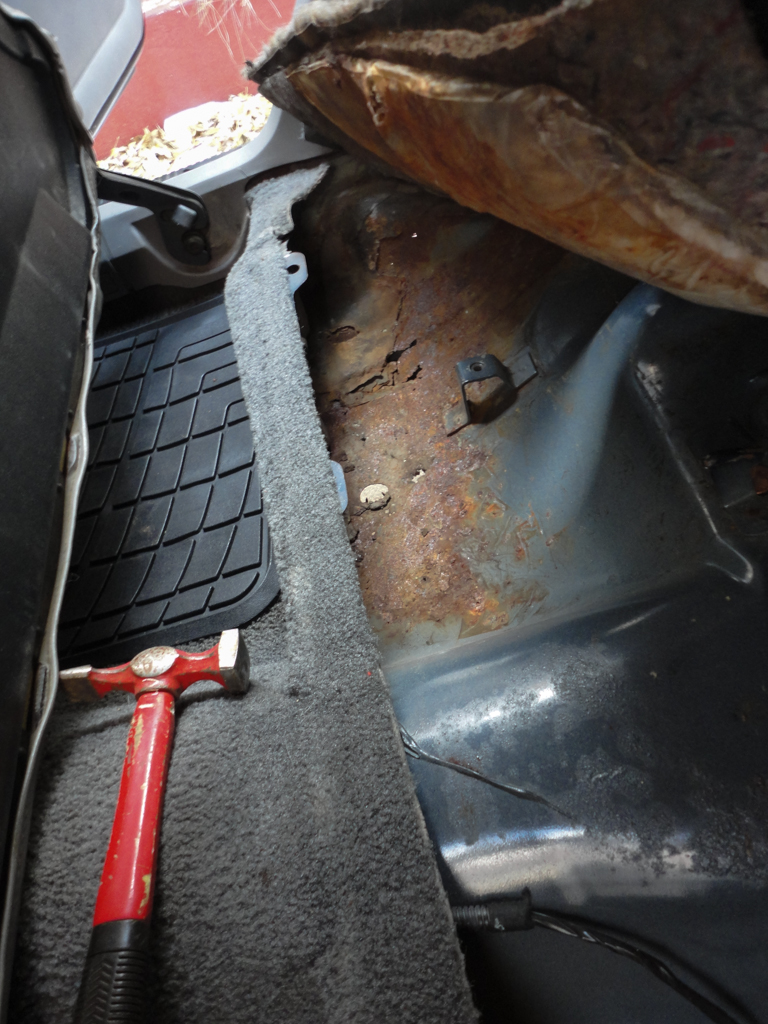
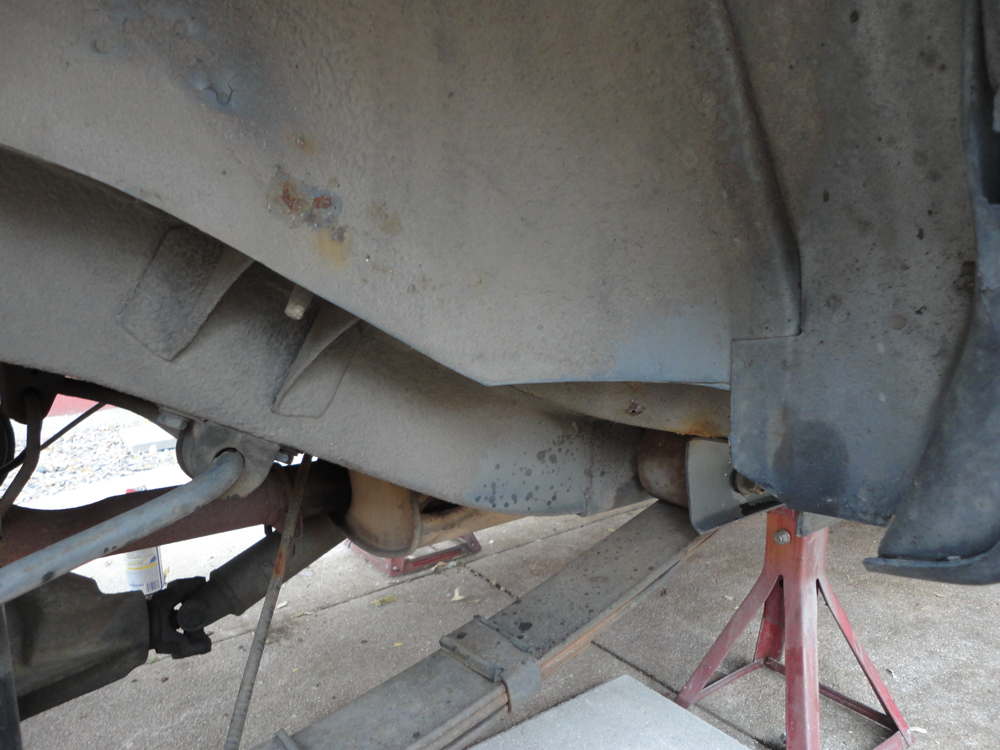
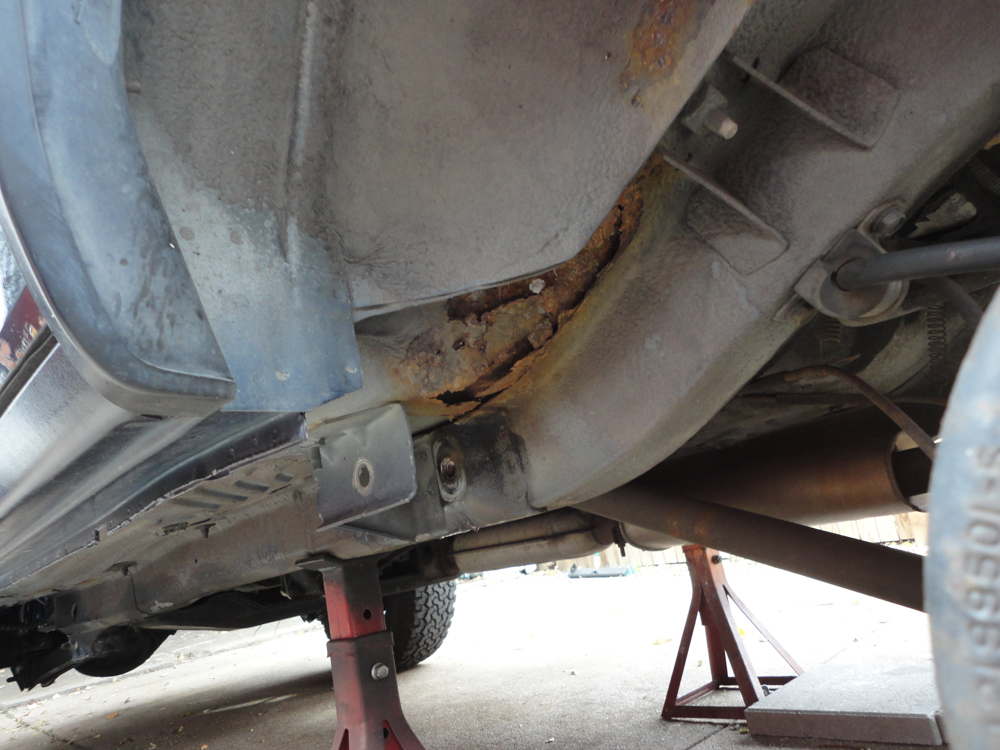
While under the Jeep, the other day (lubing up the leaf spring bolts in preparation for swapping the suspension), I noticed rust on the rear floorboards (I knew about rust on the d-side floorboard already). I pulled back the carpet and this is what I found. I'd imagine that I'll need to replace 24" square sections on both sides. This should be fun!
11-25-2013, 07:22 PM
#11
Newbie
Thread Starter
Join Date: Nov 2013
Location: Denver, CO
Posts: 18
Likes: 0
Received 0 Likes
on
0 Posts
Year: 1990
Model: Cherokee
Engine: 4.0
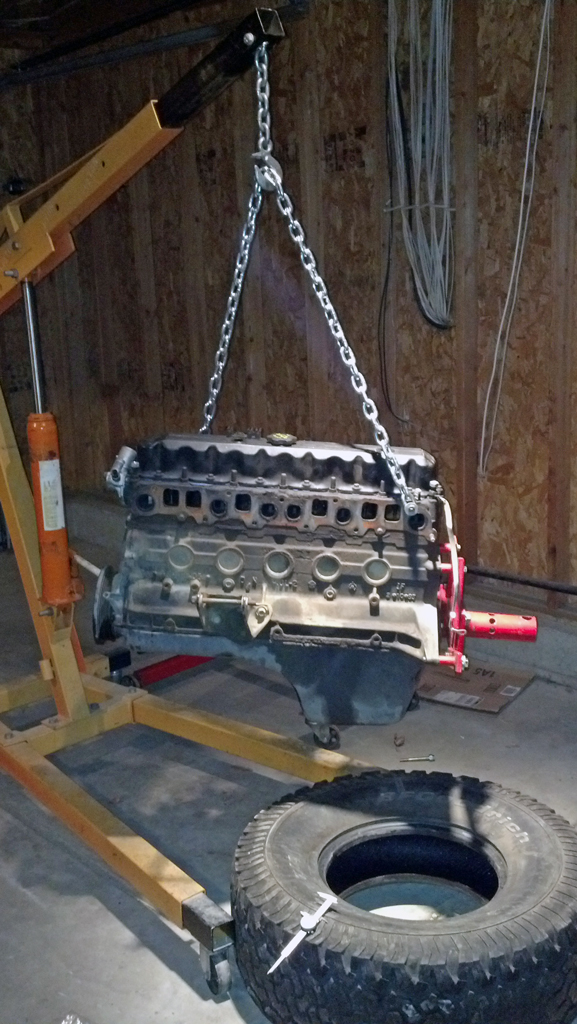
Managed to find the right bolts (at Ace) and get the engine on the stand.
I spent Halloween night (while K was handing out Candy to trick-or-treaters) scraping and brushing the oil/dirt/grime off the outside of the engine. Here it is after the first pass. I'll do this again and then wipe down the exterior with mineral spirits before starting disassembly.
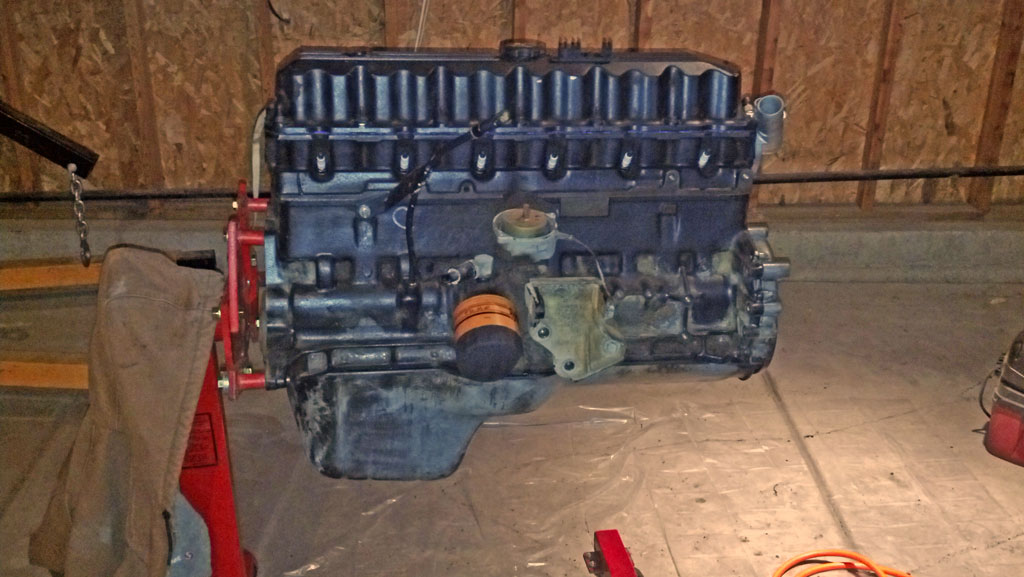
I spent Halloween night (while K was handing out Candy to trick-or-treaters) scraping and brushing the oil/dirt/grime off the outside of the engine. Here it is after the first pass. I'll do this again and then wipe down the exterior with mineral spirits before starting disassembly.
11-25-2013, 07:24 PM
#12
Newbie
Thread Starter
Join Date: Nov 2013
Location: Denver, CO
Posts: 18
Likes: 0
Received 0 Likes
on
0 Posts
Year: 1990
Model: Cherokee
Engine: 4.0
I had a busy and productive weekend and the Jeep kicked the crap out of me.
It all begin on Saturday. It was in the 60's, sunny, and snow in the forecast for next week; the perfect time to get some weld work done.
First order of business: fix the broken fender flare mounts and get the flare back on. When I took the flare off of the old fender, half of the rusted M5 bolts twisted off. I ground them off, drilled them out and welded in M6 bolts. A bit better.
Before:
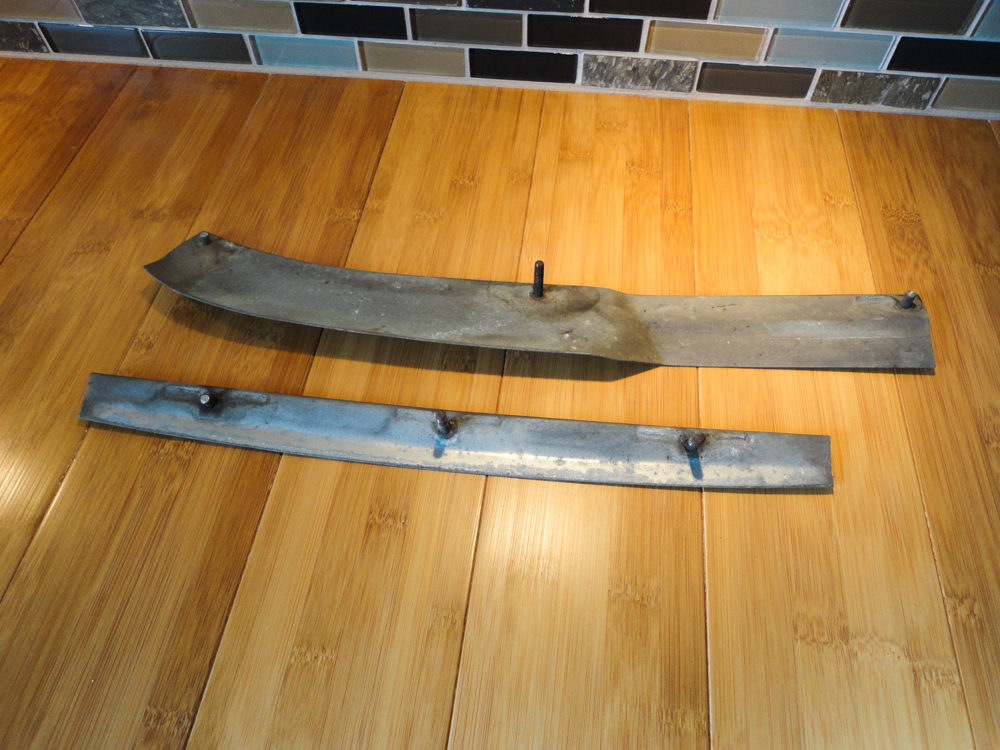
After:
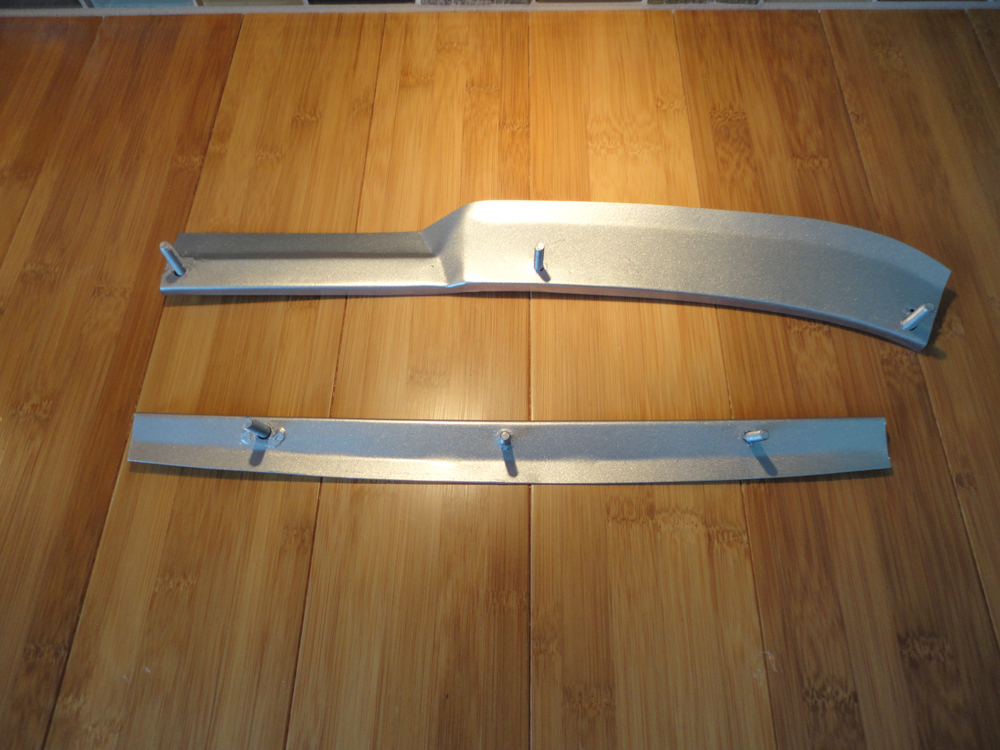
And installed the flare:
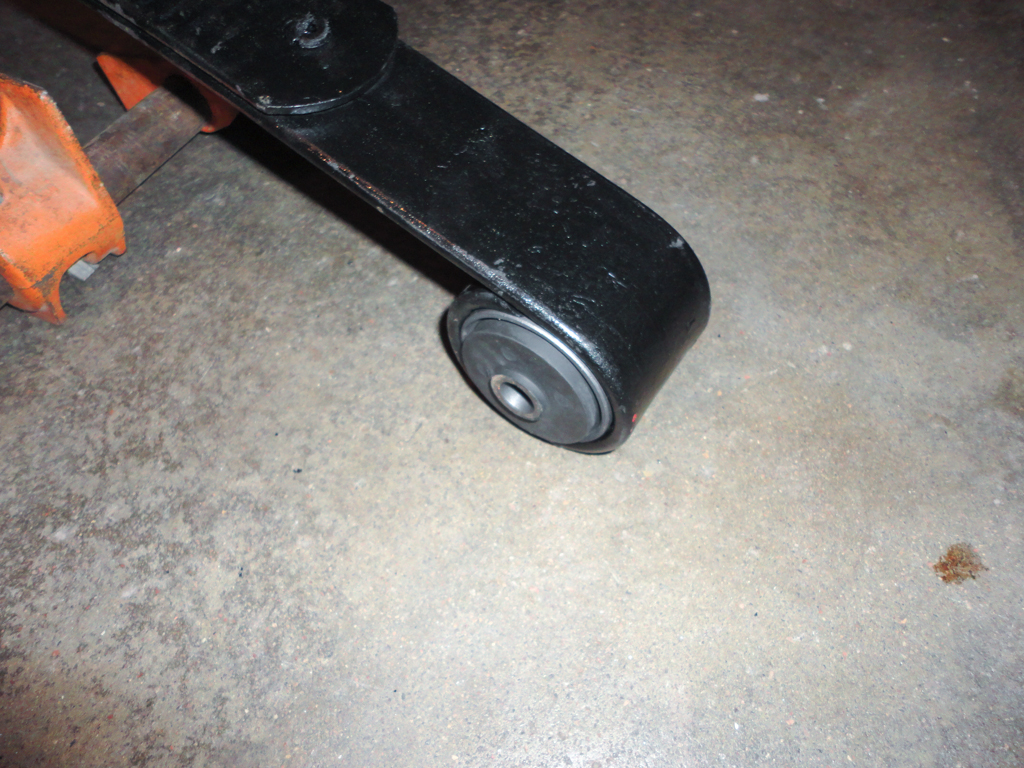
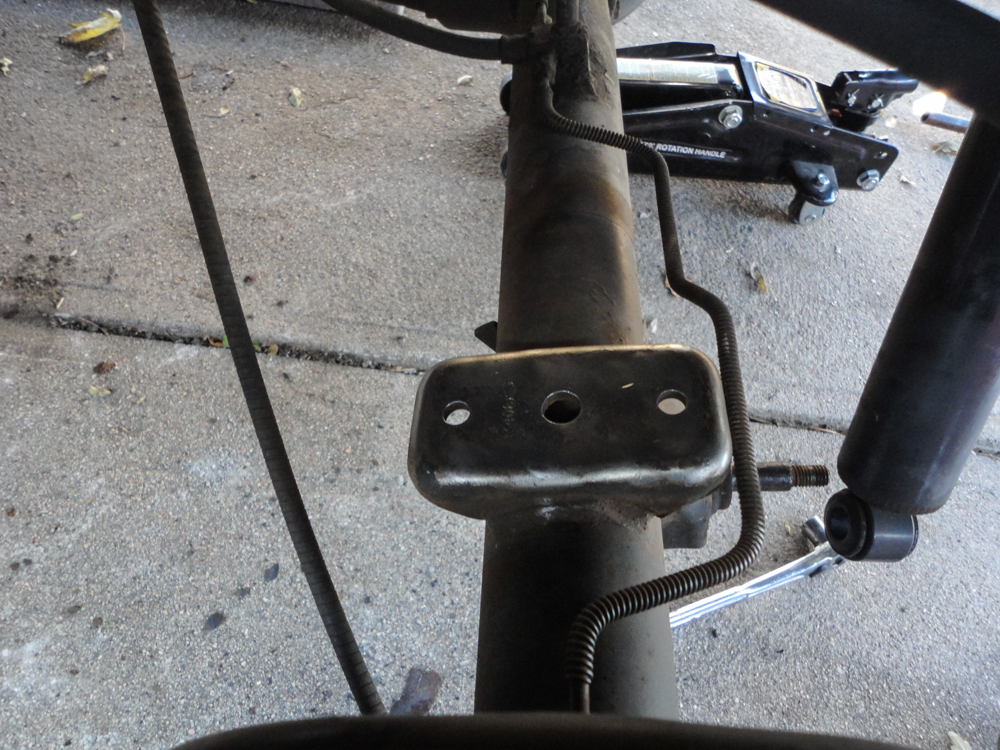
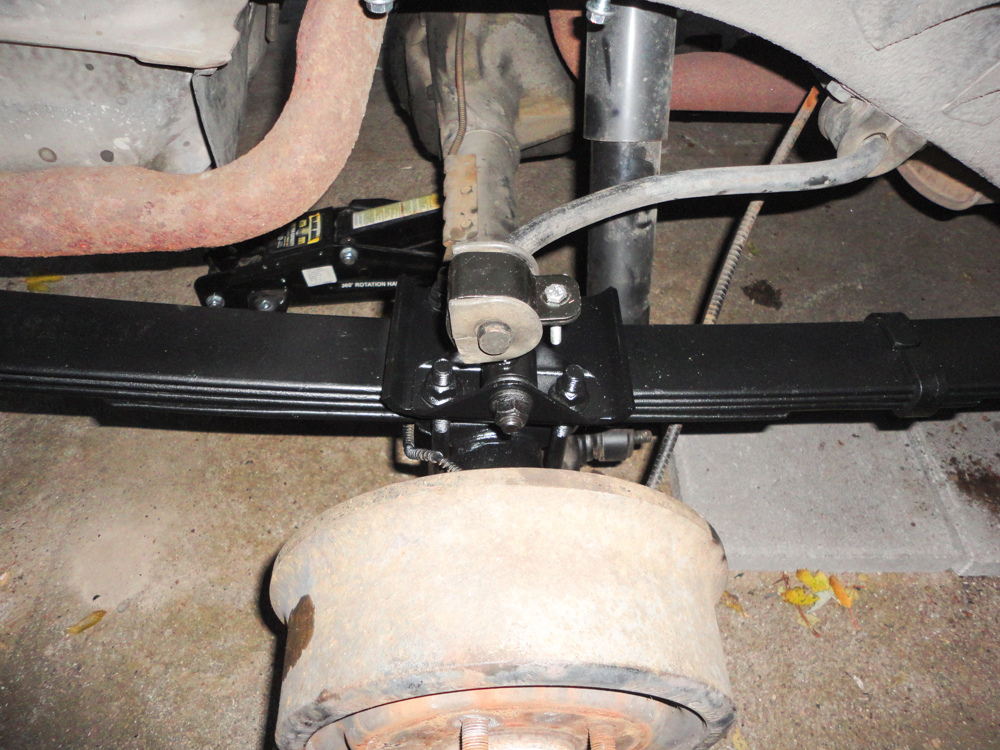
That looks better! While I had the welder out, I decided to tackle the bent lower control arm.
Here's my control arm mount, passenger side:
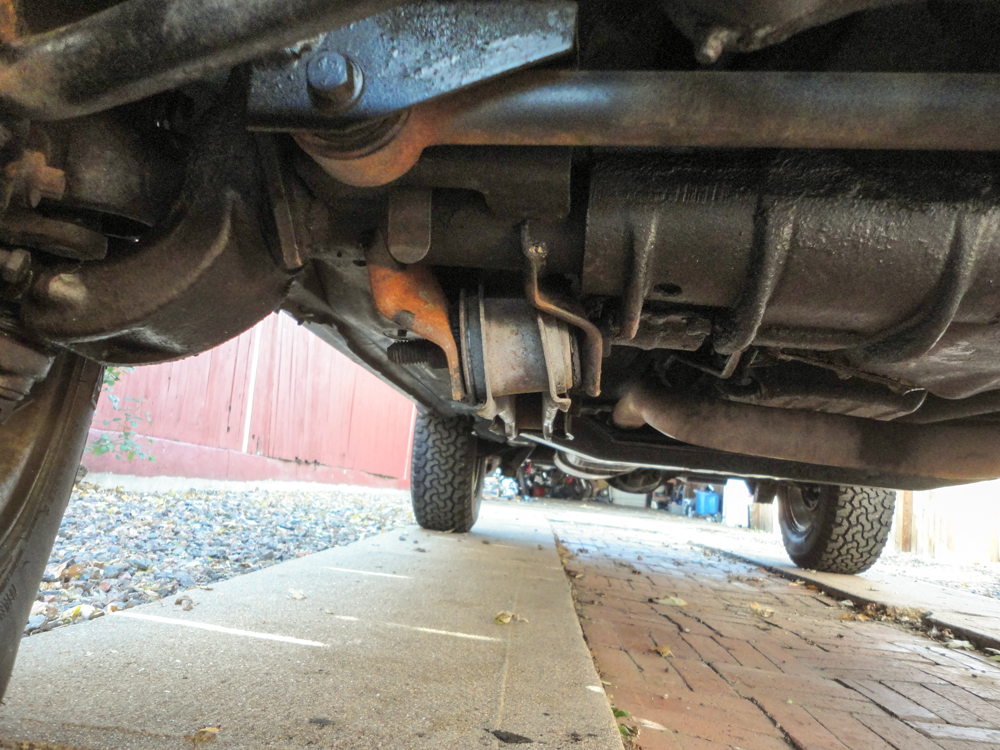
And what it should look like (driver side):
I removed the twisted lower control arm. The thing was so badly bent that I couldn't get the bolt out. A cut-off wheel in my angle grinder made quick work of it though:
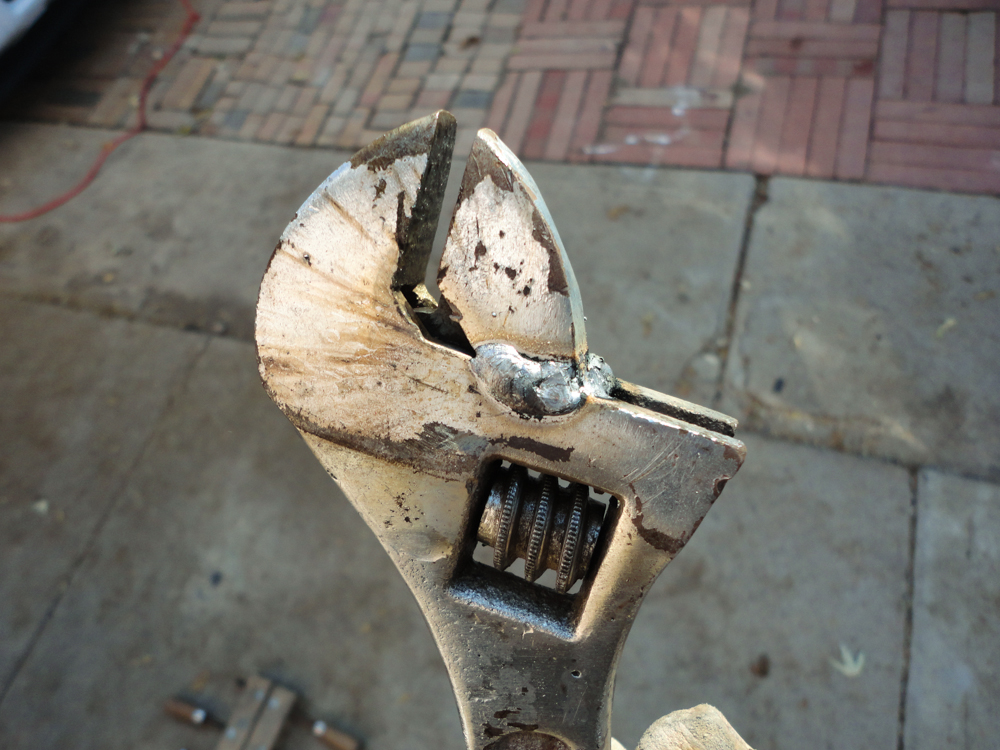
I took most of my tools over to K's house to work on the engine. I did have an old-busted adjustable wrench that I found in the street last year. Its adjuster was worn out and it would just slide. A quick weld fixed that!
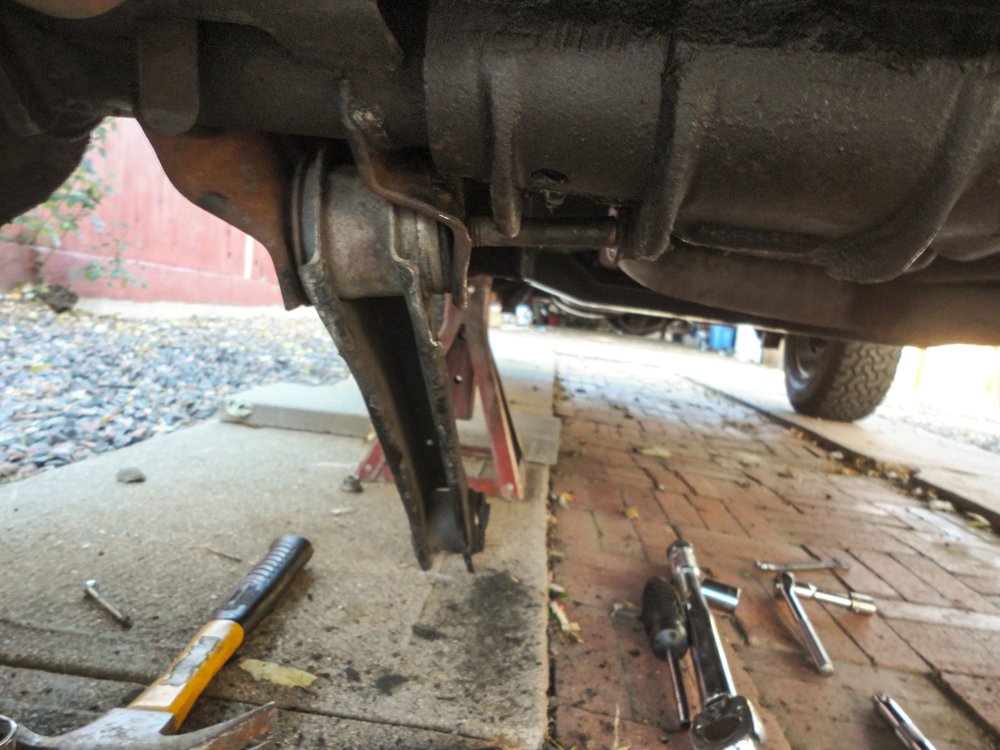
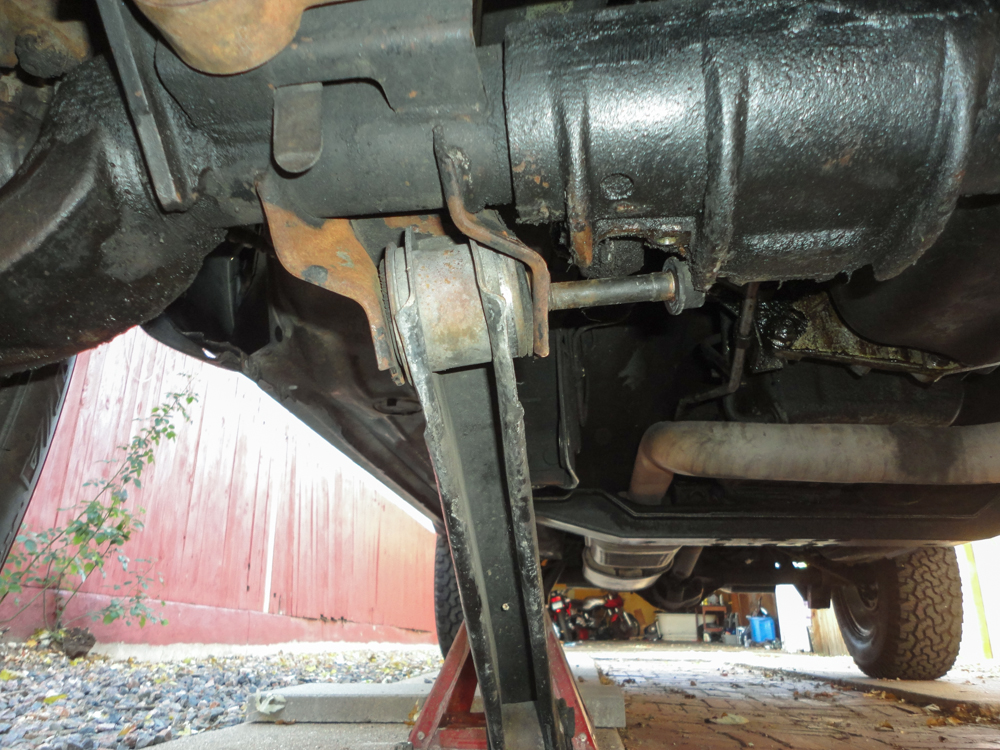
I used the adjustable wrench, a floor jack, a hammer, a pipe wrench and about 4 hours of hard labor and managed to straighten the control arm mount pretty well. I then boxed both mounts to increase their strength.
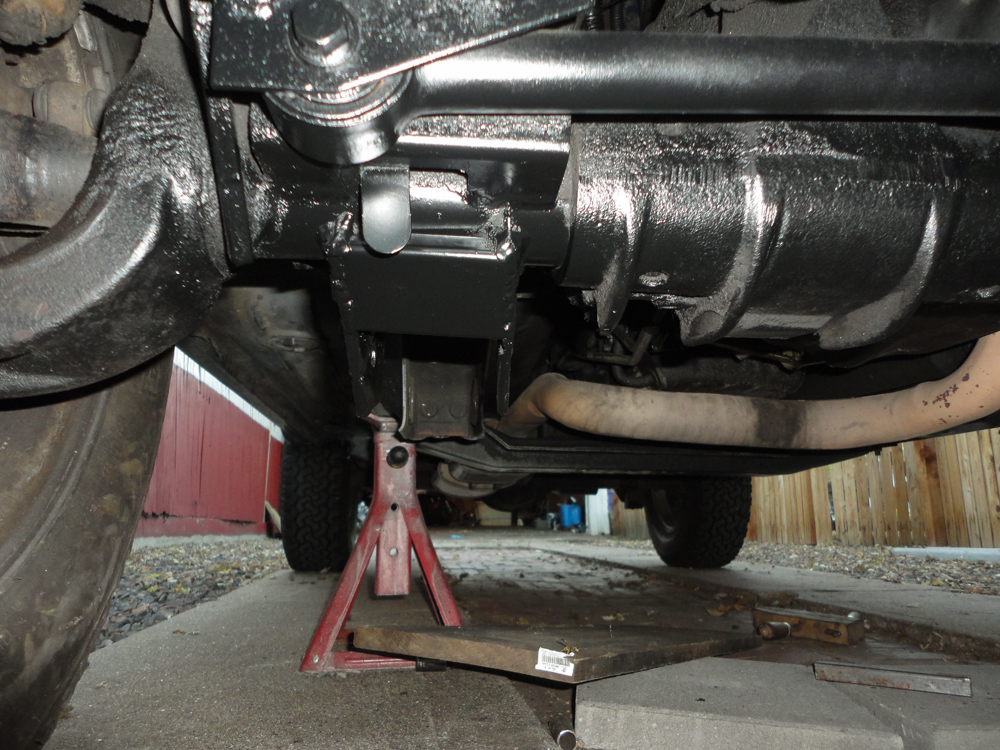
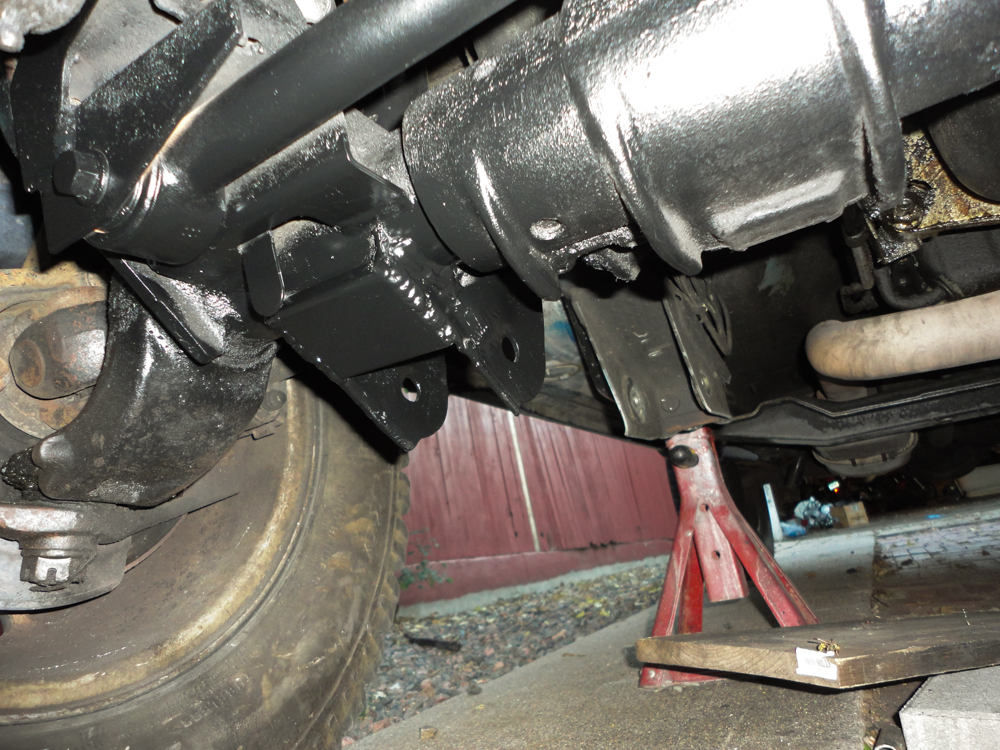
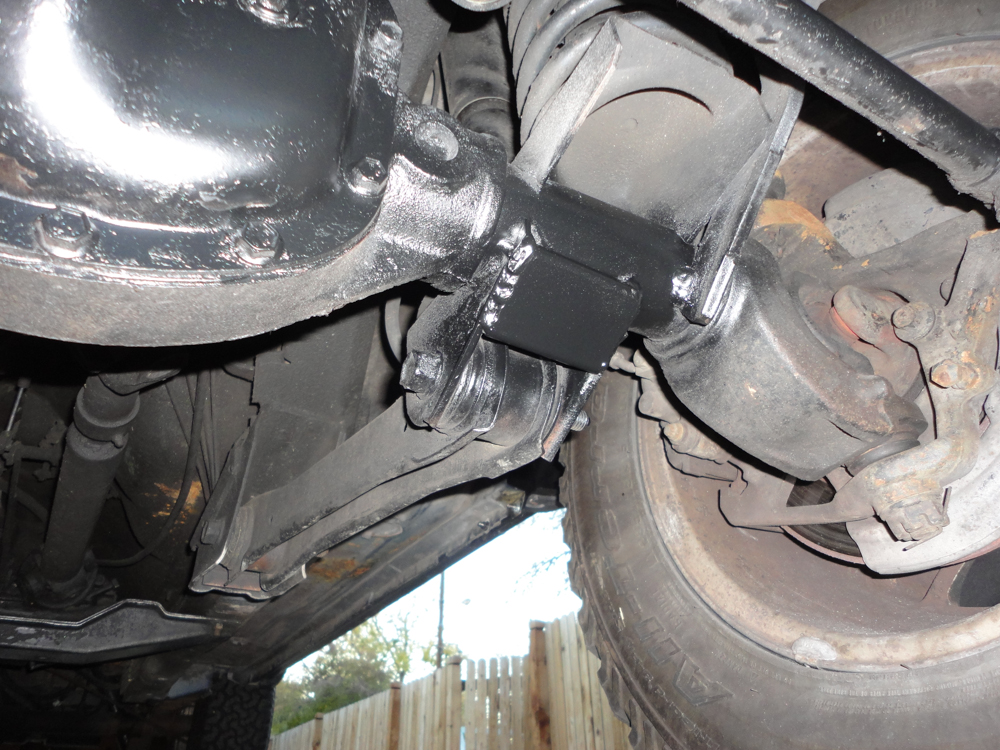
And installed the new arm with new hardware:
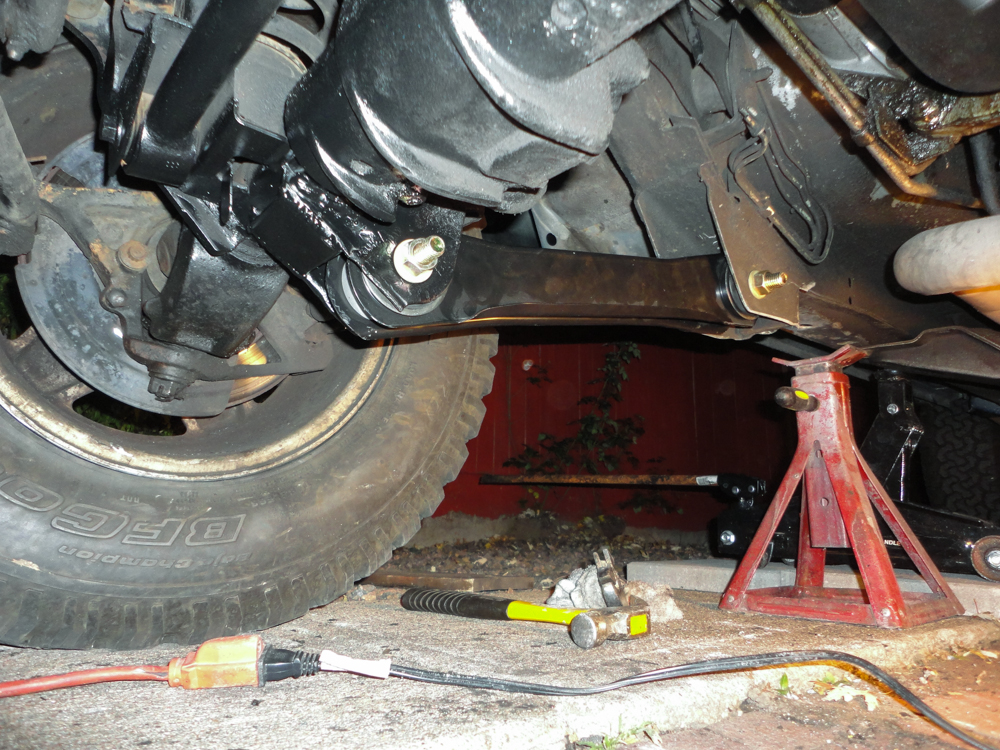
I finished Saturday by changing out the old-busted swaybar hardware with new Moog stuff.
I crawled in about 9 PM and took a shower. I'm pretty much bruised from head to toe but with it comes a good sense of satisfaction.
It all begin on Saturday. It was in the 60's, sunny, and snow in the forecast for next week; the perfect time to get some weld work done.
First order of business: fix the broken fender flare mounts and get the flare back on. When I took the flare off of the old fender, half of the rusted M5 bolts twisted off. I ground them off, drilled them out and welded in M6 bolts. A bit better.
Before:
After:
And installed the flare:
That looks better! While I had the welder out, I decided to tackle the bent lower control arm.
Here's my control arm mount, passenger side:
And what it should look like (driver side):
I removed the twisted lower control arm. The thing was so badly bent that I couldn't get the bolt out. A cut-off wheel in my angle grinder made quick work of it though:
I took most of my tools over to K's house to work on the engine. I did have an old-busted adjustable wrench that I found in the street last year. Its adjuster was worn out and it would just slide. A quick weld fixed that!
I used the adjustable wrench, a floor jack, a hammer, a pipe wrench and about 4 hours of hard labor and managed to straighten the control arm mount pretty well. I then boxed both mounts to increase their strength.
And installed the new arm with new hardware:
I finished Saturday by changing out the old-busted swaybar hardware with new Moog stuff.
I crawled in about 9 PM and took a shower. I'm pretty much bruised from head to toe but with it comes a good sense of satisfaction.
11-25-2013, 07:26 PM
#13
Newbie
Thread Starter
Join Date: Nov 2013
Location: Denver, CO
Posts: 18
Likes: 0
Received 0 Likes
on
0 Posts
Year: 1990
Model: Cherokee
Engine: 4.0
I woke up Sunday morning, sore as all get out, with the same thought on my brain: "It's going to snow tomorrow." I decided to use the 66 degree day and get some more outside-work done on the Jeep.
Today's project; leaf springs.
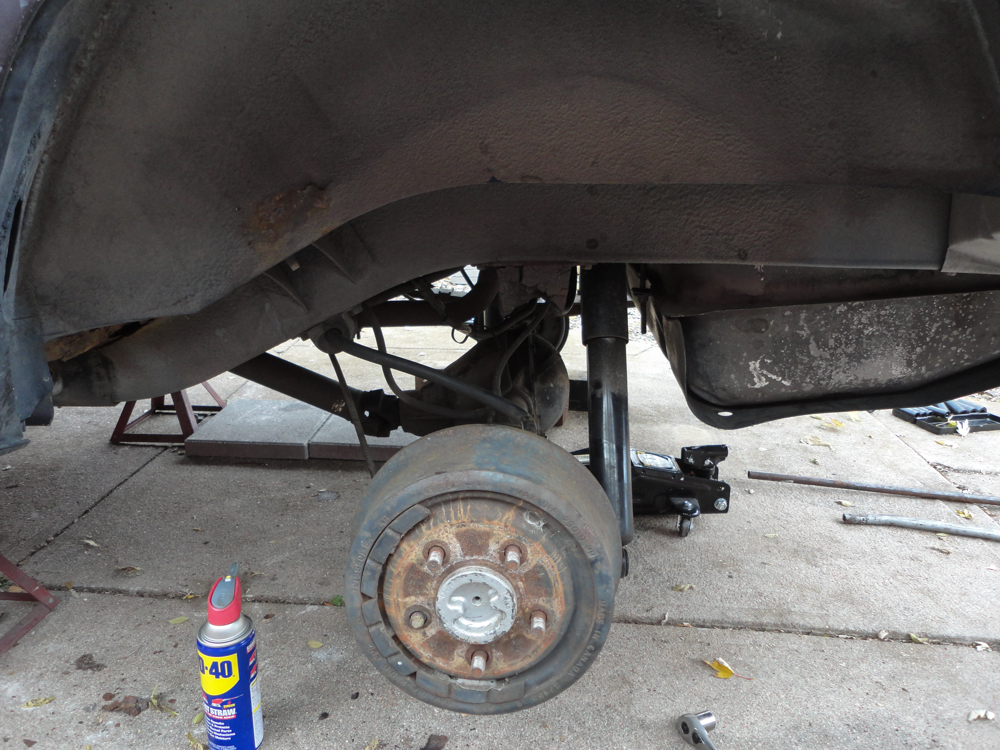
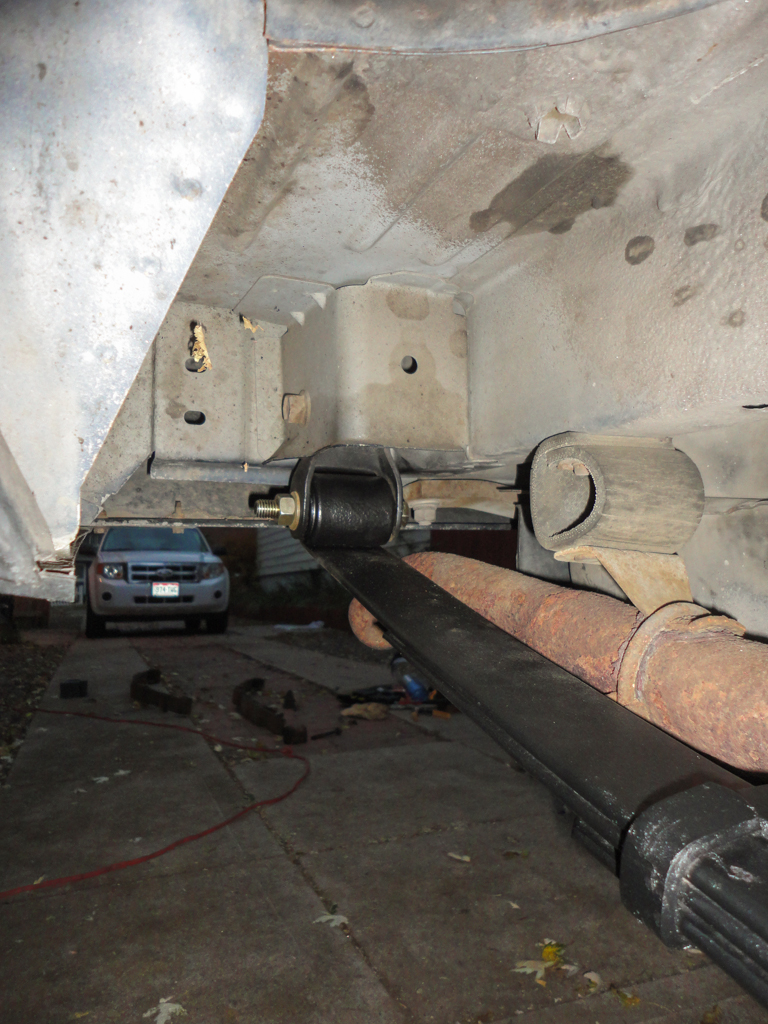
I put the Jeep up on jackstands and removed the wheels. I pulled apart the driver side; it came without incident. I then moved over to the passenger side. The rear came out fine but the front bushing was rusted solid to the bolt.
Left side off; right side stubborn:
The original bump stops aren't . . . stopping anything. They were both about half gone and rotten as can be. New ones on order:
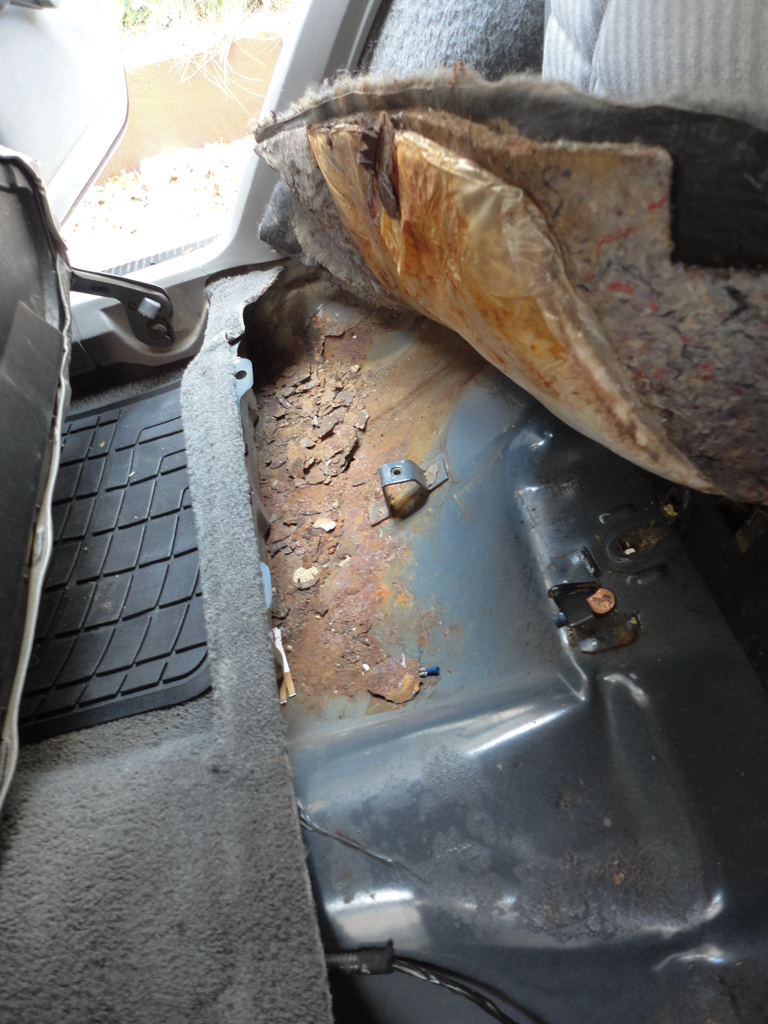
Rust on the passenger side. This is part of the same crop of rust that took the floorboards.
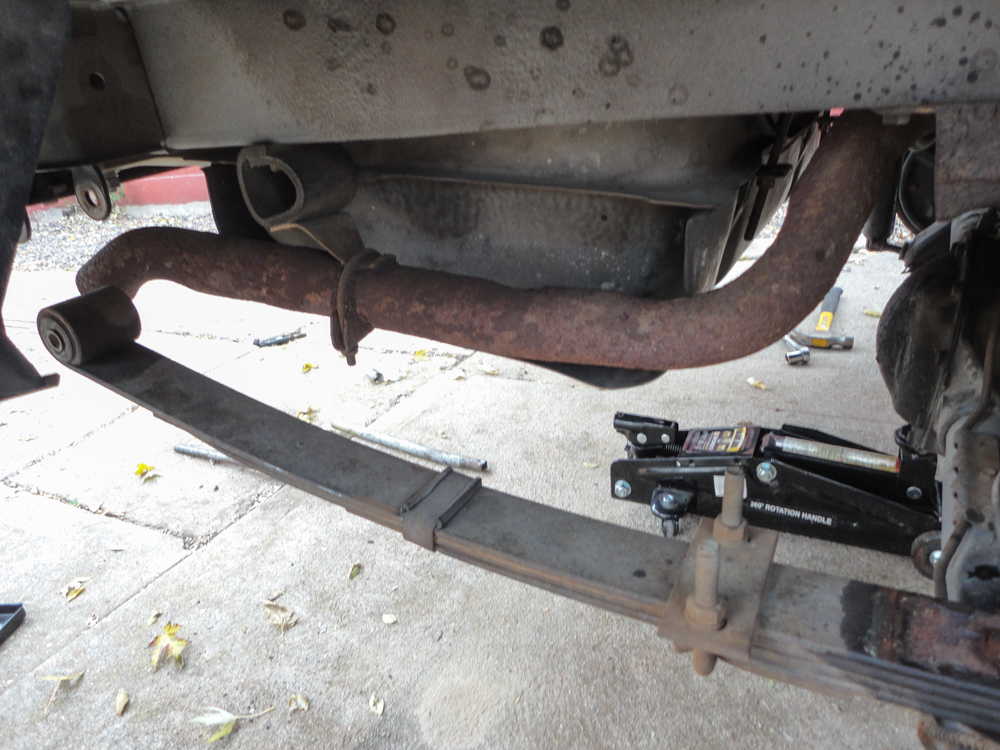
The stock tailpipe has seen better days. I tapped it with a ratchet and it crumbled. Looks like the muffler needs to go too. Might as well do the cat while I'm at it:
Rust on the driver's side. It's worse than the passenger side. Can you say . . . new floorboards . . . soon!
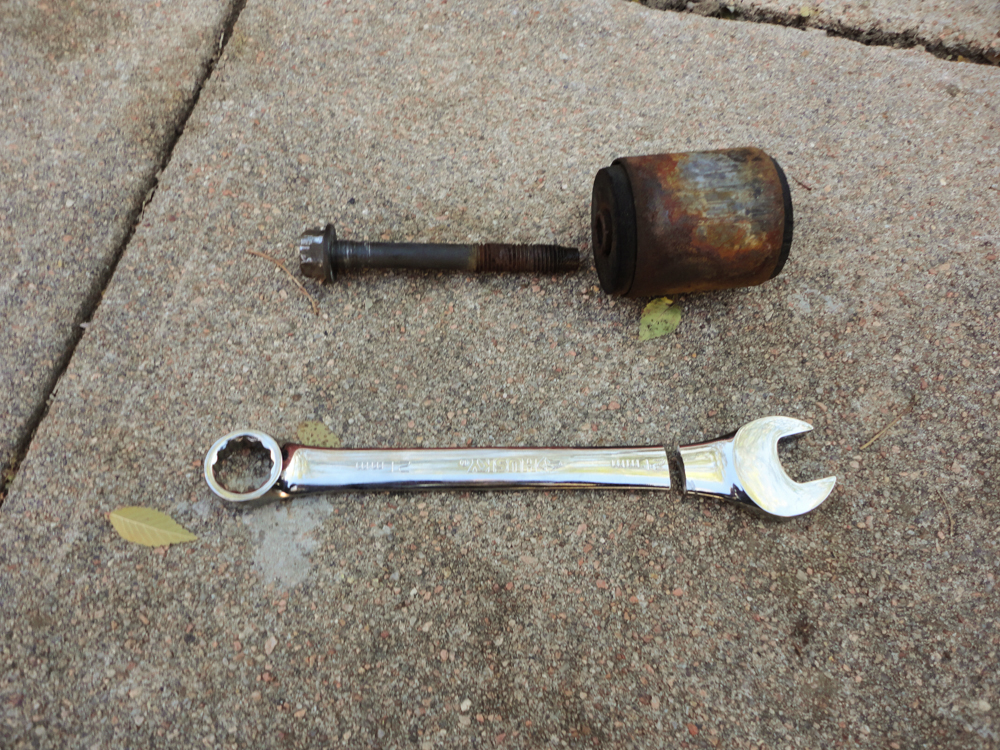
To get the passenger side leaf spring off, I ended up cutting off the end of the leaf, cutting the leaf off of the bushing, cutting the bushing off of the bolt and then hammering on the bolt until it broke loose. To get the bolt out, I ended up cutting the open-end of a box wrench off and using a pipe as a cheater. Took a lot of time and muscle but it worked.

All that effort for this; Rob-1, Jeep-0!:
With the leaves off, I cleaned up the axle perches and removed the old bump stops:
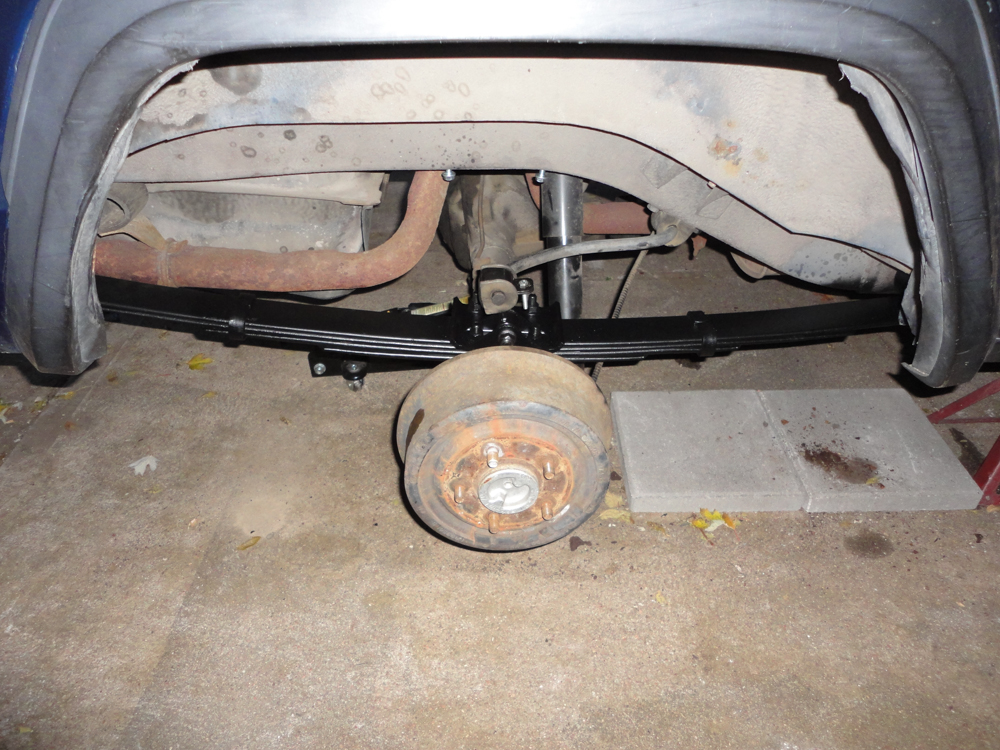
Here's the old leaf spring vs the new one. Off the Jeep, they look the same.

I cleaned up and painted all the parts that I'd removed, black, with some hardware-store rust paint. I had some trouble fitting the new leaves and aligning the axle but got it in the end. All buttoned up:
I ended up reusing the rear swaybar hardware; the ones Advance Auto gave me did not fit. Shocker, right?!

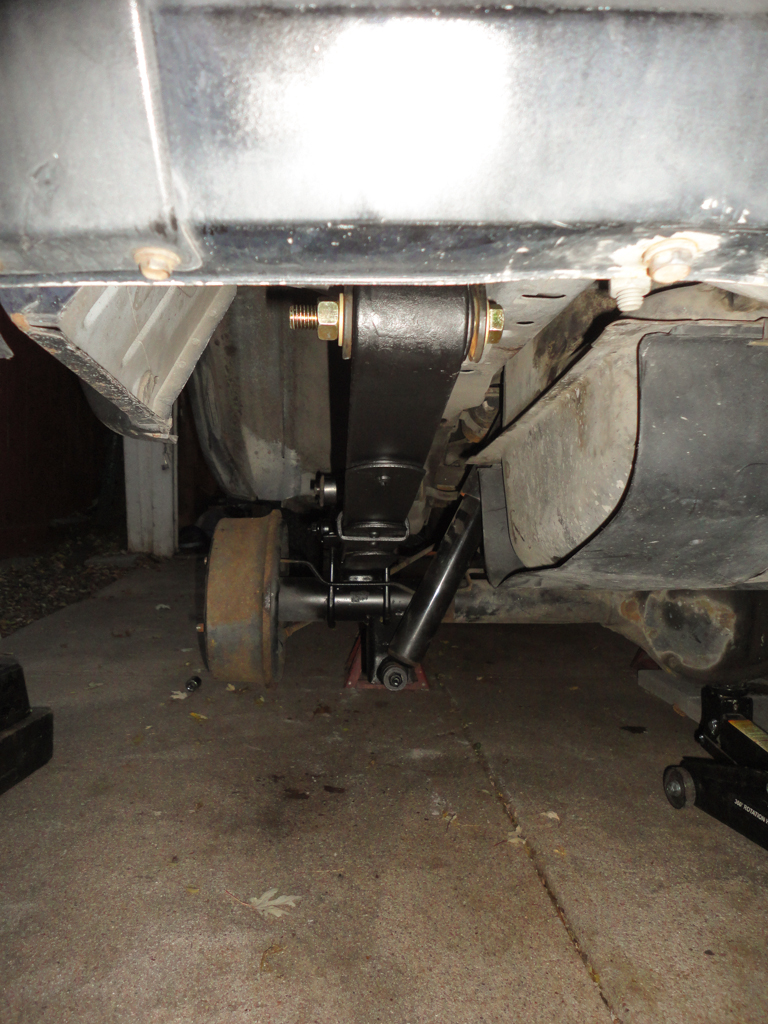
Here's the new stance: (No more sagging rear end)
Today's project; leaf springs.
I put the Jeep up on jackstands and removed the wheels. I pulled apart the driver side; it came without incident. I then moved over to the passenger side. The rear came out fine but the front bushing was rusted solid to the bolt.
Left side off; right side stubborn:
The original bump stops aren't . . . stopping anything. They were both about half gone and rotten as can be. New ones on order:
Rust on the passenger side. This is part of the same crop of rust that took the floorboards.
The stock tailpipe has seen better days. I tapped it with a ratchet and it crumbled. Looks like the muffler needs to go too. Might as well do the cat while I'm at it:
Rust on the driver's side. It's worse than the passenger side. Can you say . . . new floorboards . . . soon!
To get the passenger side leaf spring off, I ended up cutting off the end of the leaf, cutting the leaf off of the bushing, cutting the bushing off of the bolt and then hammering on the bolt until it broke loose. To get the bolt out, I ended up cutting the open-end of a box wrench off and using a pipe as a cheater. Took a lot of time and muscle but it worked.
All that effort for this; Rob-1, Jeep-0!:
With the leaves off, I cleaned up the axle perches and removed the old bump stops:
Here's the old leaf spring vs the new one. Off the Jeep, they look the same.
I cleaned up and painted all the parts that I'd removed, black, with some hardware-store rust paint. I had some trouble fitting the new leaves and aligning the axle but got it in the end. All buttoned up:
I ended up reusing the rear swaybar hardware; the ones Advance Auto gave me did not fit. Shocker, right?!
Here's the new stance: (No more sagging rear end)
11-25-2013, 07:27 PM
#14
Newbie
Thread Starter
Join Date: Nov 2013
Location: Denver, CO
Posts: 18
Likes: 0
Received 0 Likes
on
0 Posts
Year: 1990
Model: Cherokee
Engine: 4.0
As you may recall, my bumpstops looked like this:
I had some Prothane bumpstops (that I bought for the Isuzu Rodeo) which were the right height but the mounting holes were too far apart. After some thought, I decided to extend the holes with a round file and then melt away the polyurethane so I could get bolts in place. Here's the modified and original Prothane stops, side by side:
Clearance was tight with the wider tabs but I got them in there. New hardware was a must, of course:
11-25-2013, 07:28 PM
#15
Newbie
Thread Starter
Join Date: Nov 2013
Location: Denver, CO
Posts: 18
Likes: 0
Received 0 Likes
on
0 Posts
Year: 1990
Model: Cherokee
Engine: 4.0
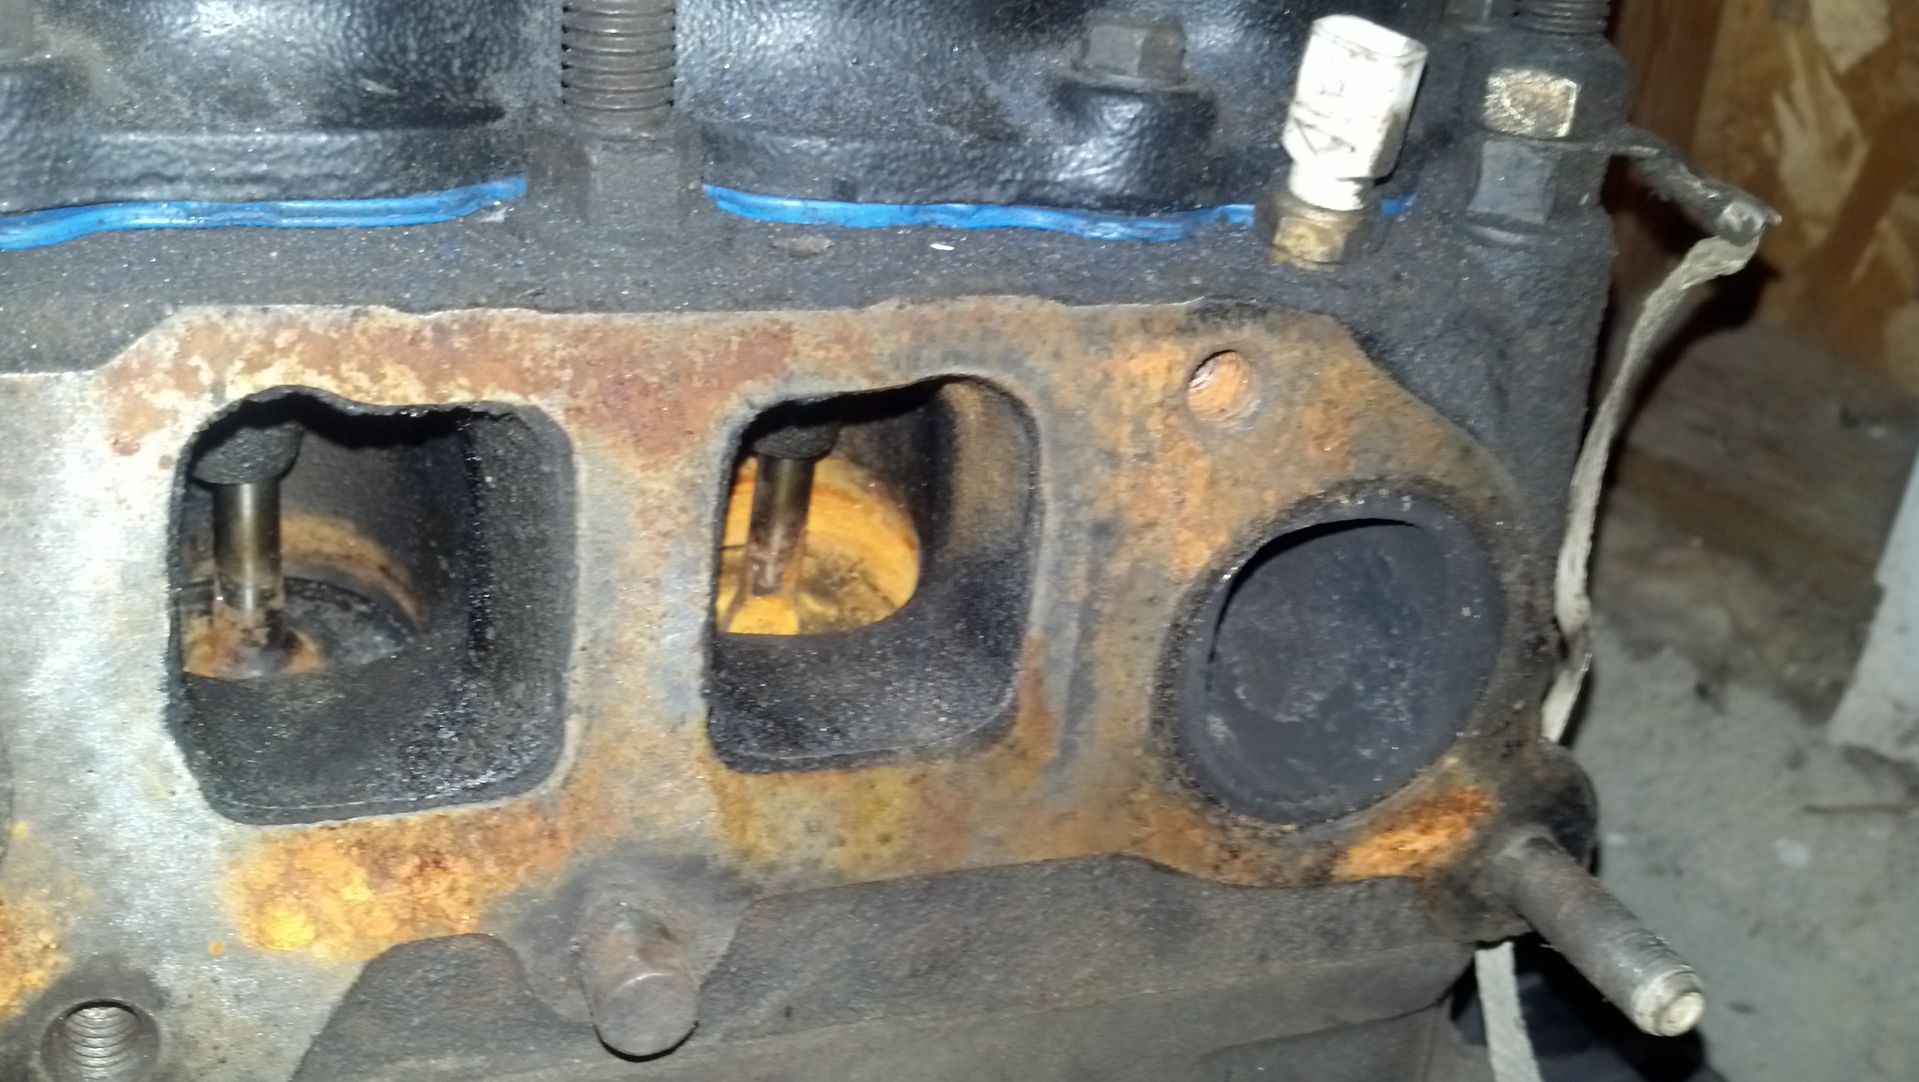
I have the "new" 4.0L engine half-way torn apart and have made a few discoveries which have changed the course of it's future. Based on the intake ports, I wasn't surprised to find this but still disappointed.
A look inside the intake ports shows rust on the intake valves:
The valvetrain seemed to be in good shape as-did the head. When the head came off, though, this is what I found:
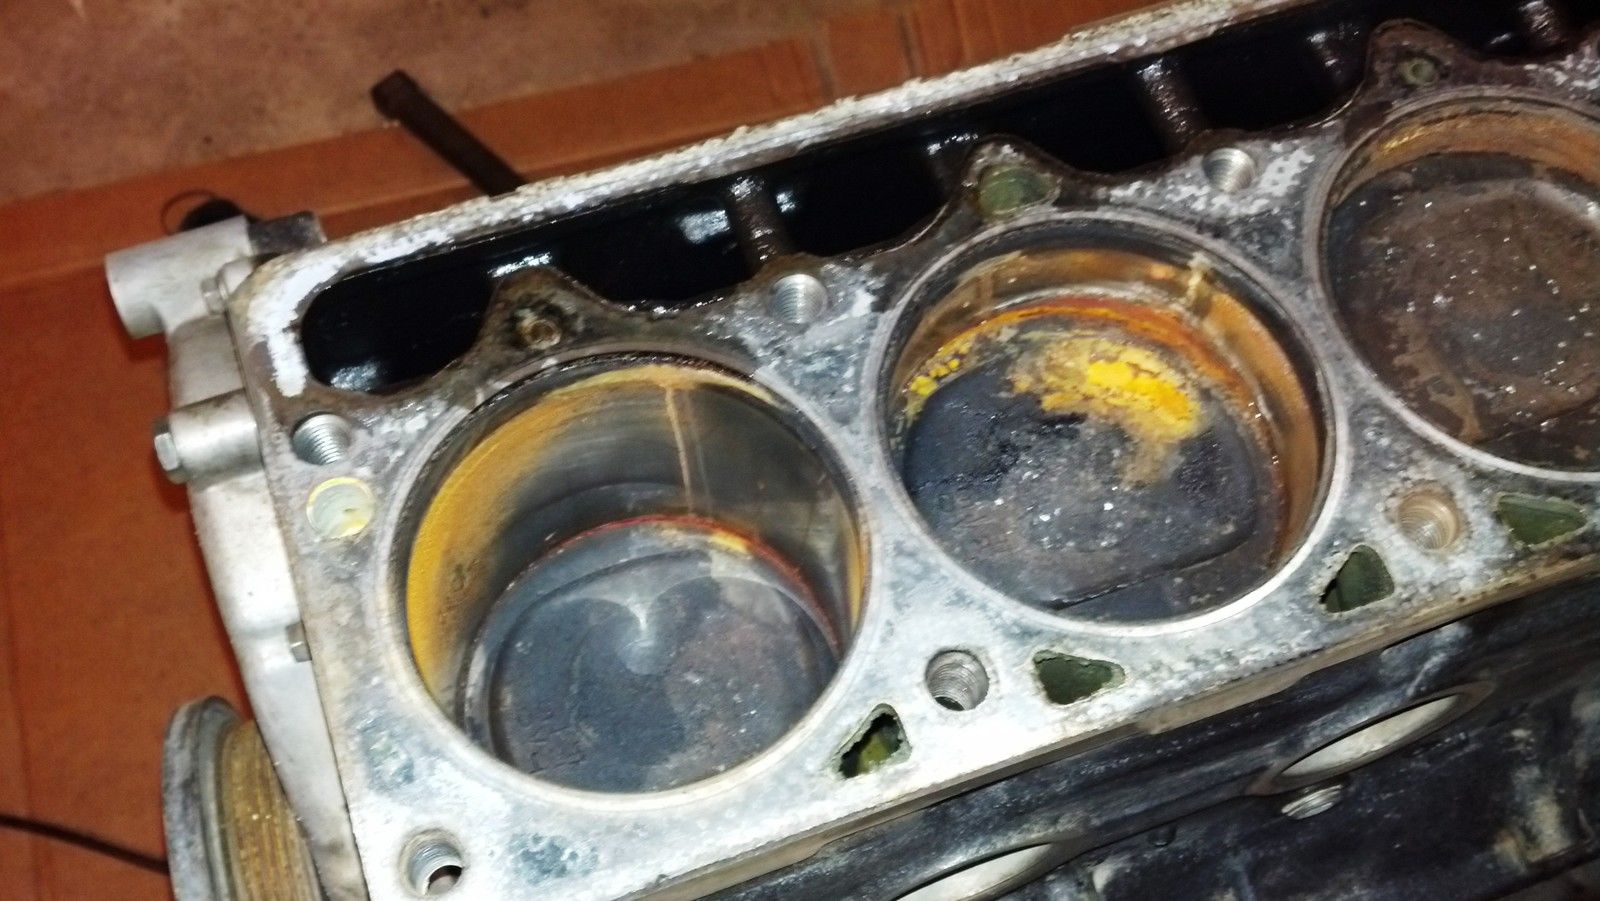
There is extensive rust in 3 of the 6 cylinders. I cleaned it out with PB Blaster and measured the cylinder bores. This block will need a 0.040" overbore. With that will come new pistons and a whole mess of other things. My plans include:
A look inside the intake ports shows rust on the intake valves:
The valvetrain seemed to be in good shape as-did the head. When the head came off, though, this is what I found:
There is extensive rust in 3 of the 6 cylinders. I cleaned it out with PB Blaster and measured the cylinder bores. This block will need a 0.040" overbore. With that will come new pistons and a whole mess of other things. My plans include:
- Take block to AMS for machine work. Have it cleaned and overbored 0.040". Have the gasket surface lightly decked and have new camshaft bearings installed.
- Have the rods cleaned/peened and have new 0.040" oversize pistons pressed in place.
- Have the crankshaft cleaned and ground/polished 0.010" undersize.
- Paint the block New Ford Grey and press in new freeze and galley plugs.
- Install new rear-main seal.
- Install crankshaft with new bearings.
- Install new oil pump.
- Install new camshaft and lifters.
- Install new timing chains and guides.
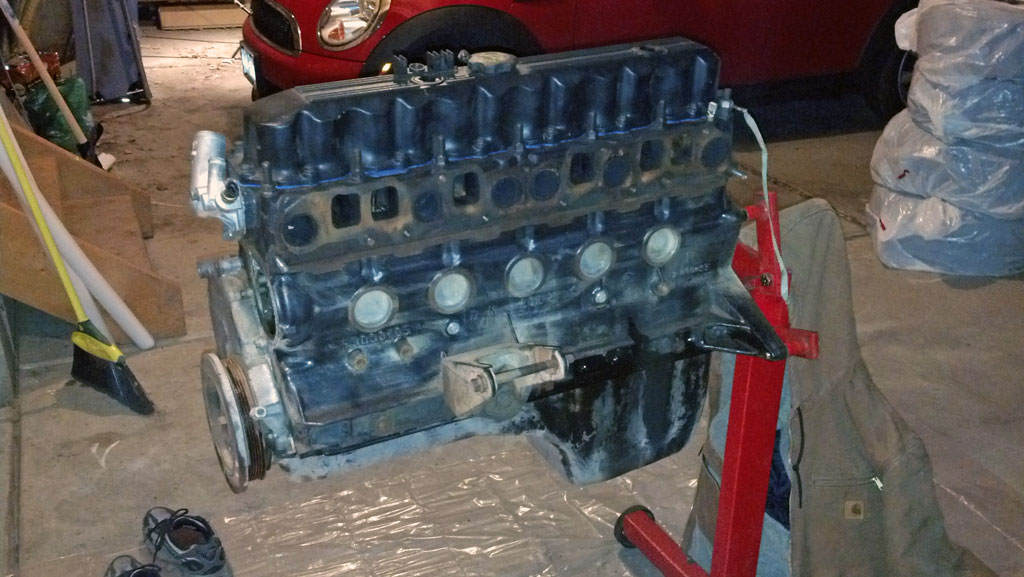
- Take cylinder head to AMS for machine work. Have head cleaned, valves ground and guides inspected. Assemble head with new valve seals and paint Ford Low-gloss Black.
- Install head with new head gasket & head bolts
- Paint valve cover and oil pan Low-gloss Black
- Button up engine with new gaskets.
- Install new water pump & thermostat.
- Recondition intake and exhaust manifolds
- Install new Bosch 4-hole injectors & new o-rings
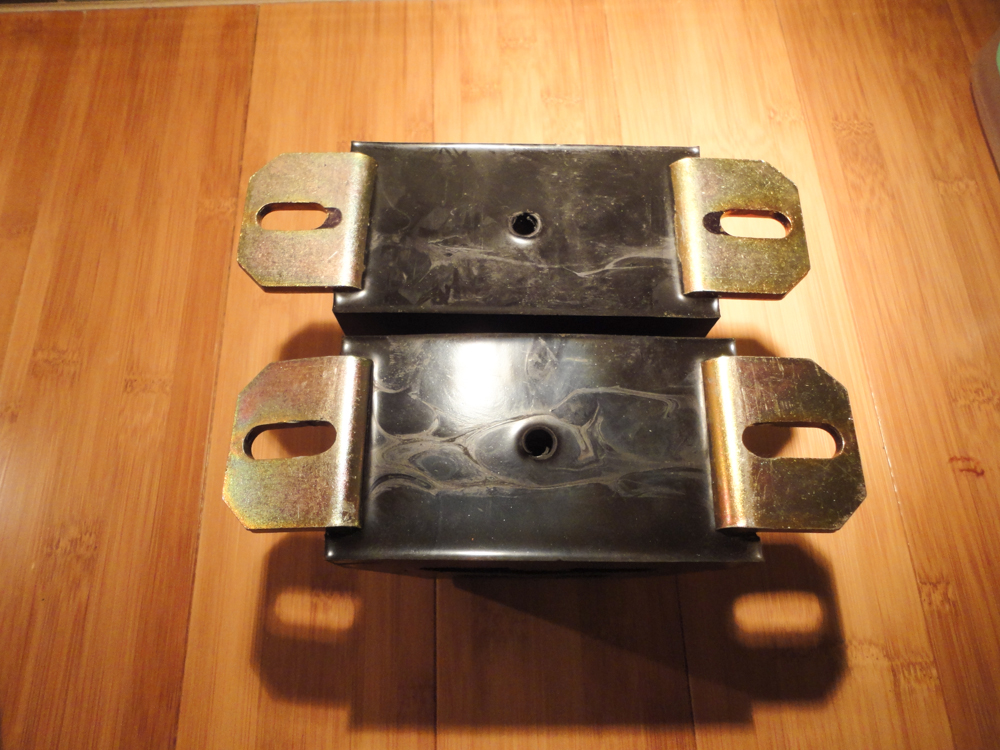
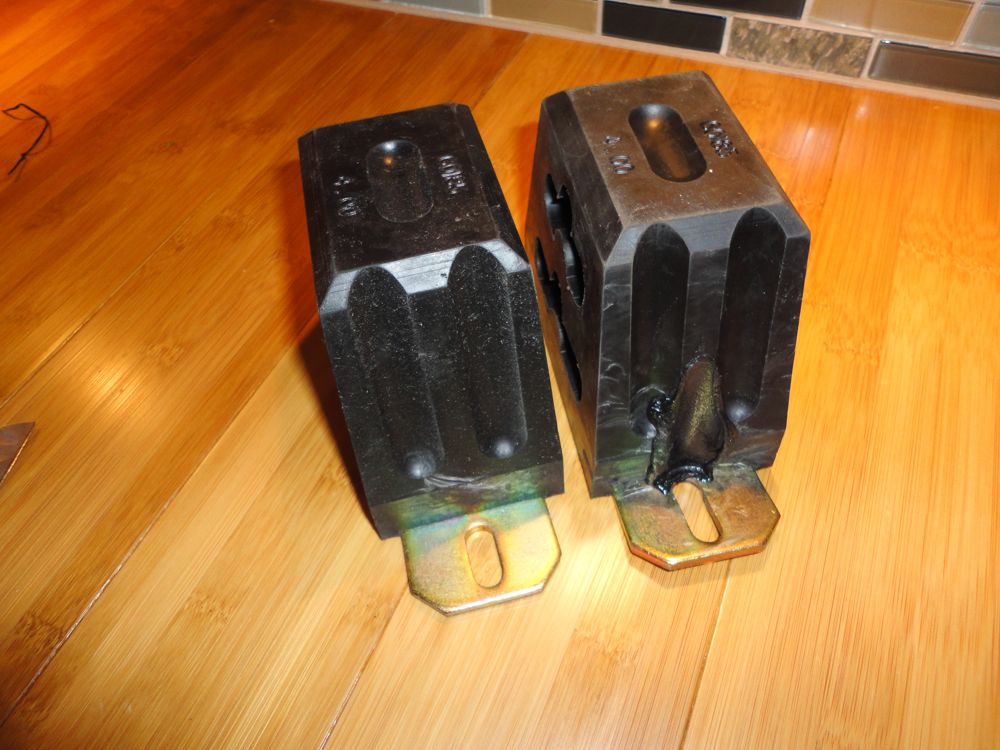
- Install engine with new poly engine mounts.
- Distributor cap, ignition rotor, plug wires and spark plugs
- Serpentine belt & pulleys
- Air filter and fuel filter
- Battery cables & battery
- Radiator & radiator hoses
- Vacuum lines, charcoal canister, EGR valve, MAP sensor & oxygen sensor.
- Exhaust system from manifold back (it's all rusted out).
- Steering box