Let the money spending begin
 09-29-2014, 06:28 PM
#61
Senior Member
Thread Starter

Join Date: May 2014
Location: Iroquois Ontario Canada
Posts: 946
Likes: 0
Received 0 Likes
on
0 Posts
Year: 1998
Model: Cherokee
Engine: 4.0
The floors are about 95% done now, all that is left it to make the extensions for a cut and fold style. I need to get the new quarters hung in place so I can get proper measurements and before I can hang the quarters I need to fix the inner fender wells on the rear. So it is going to be a full day on each side to get it done.
The big patch in the cargo area went fairly well, but I got a late start thanks to having to go buy a new angle grinder. I didn't take any pictures of the work in progress, or even the finished results. I was trying to save time hence the no pictures while working and it had gotten too dark by the time I finished up.
For such a small piece there was a fair amount of fabricating and a lot of test and trim till I was happy with the patch. I also had to fabricate a heat shield so I could weld in the patch where the filler neck passes through the frame. I was surprised to see that they didn't have that completely closed in inside the frame. I wedged a heavier gauge piece of steel in so it rested on each side of the frame and would act like a barrier yet not cut the filler neck hose.
The welds went well and I closed up all the outside seams with seam sealer. Then I went about installing my temporary track bar relocation bracket and I am sitting with the axle perfectly centered under the front end, well as close to perfect as I can measure. I get 17 3/8" from frame to outside edge of the tread on both sides so I am happy with that.
Tomorrow if it doesn't rain I will be taking on the PS quarter. I ran a piece of 2" painters take along the body line and will measure 7/16" down from the upper edge and that will be my cut line on the original quarter. The replacement quarter will get the same 2" painters tape treatment, but I wont trim back the 7/16" and just use the top of the tape as the cut line. My flange tool flanges in 7/16"+1/16 for the crease. I will flange the new quarter and slide the flange up under the original and weld the crease. Before I weld it in though I will hold it in place with 3 or 4 pop rivets so I can take the measurements I need to make the floor extensions and any measurements I need to repair the inner fender wells.
Even if it rains I should be able to find enough space in the garage to cut the new quarters, saving myself a step. Updated pictures to come as soon as I have daylight and no rain.
 10-01-2014, 01:34 PM
#62
Senior Member
Thread Starter
Join Date: May 2014
Location: Iroquois Ontario Canada
Posts: 946
Likes: 0
Received 0 Likes
on
0 Posts
Year: 1998
Model: Cherokee
Engine: 4.0
Yesterday was a bust, it was cloudy and looked like rain so I laid back down for a bit. Next thing I knew it was 4 in the afternoon, too many pain pills the night before I guess.
I finally cut out a quarter panel today and have already had the new one test fitted and made my templates to fix the inner fenders. I am figuring another 3-4 hours of fab work and I will have the new quarter welded in.
I finally cut out a quarter panel today and have already had the new one test fitted and made my templates to fix the inner fenders. I am figuring another 3-4 hours of fab work and I will have the new quarter welded in.
10-01-2014, 07:20 PM
#63
Senior Member
Thread Starter
Join Date: May 2014
Location: Iroquois Ontario Canada
Posts: 946
Likes: 0
Received 0 Likes
on
0 Posts
Year: 1998
Model: Cherokee
Engine: 4.0
Well that 3-4 hours turned in to 5 hours and I didn't get it finished I realized that I was going to run out of daylight so I stopped taking pictures and focused on working, so no pictures of the fabricated rear floor extensions and inner fender repair. too bad really because I was really proud of it considering the tools I had
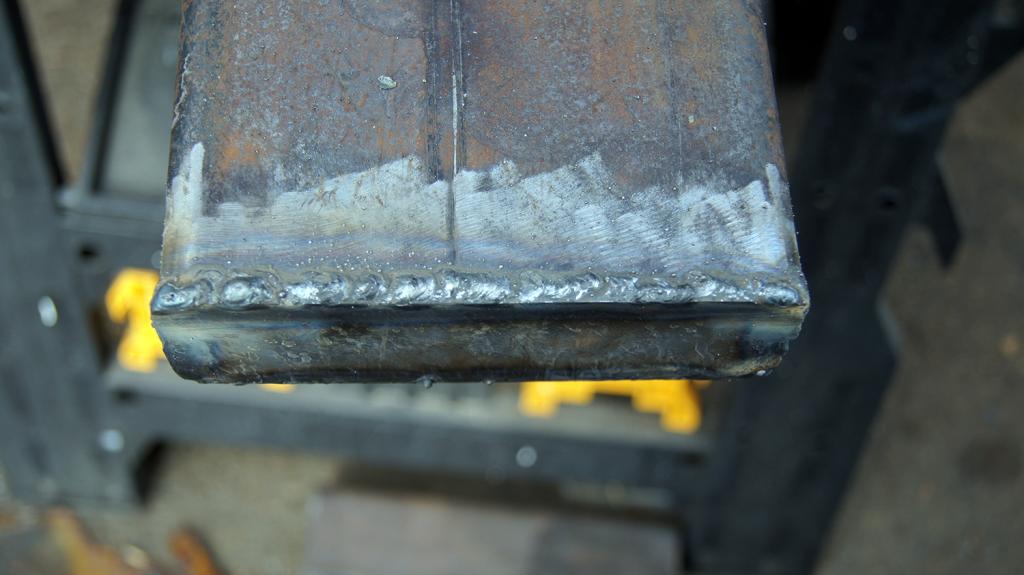
My welds on the quarter are a little heavy so I have a lot of grinding to do to smooth them out and some bondo to make it look pretty.
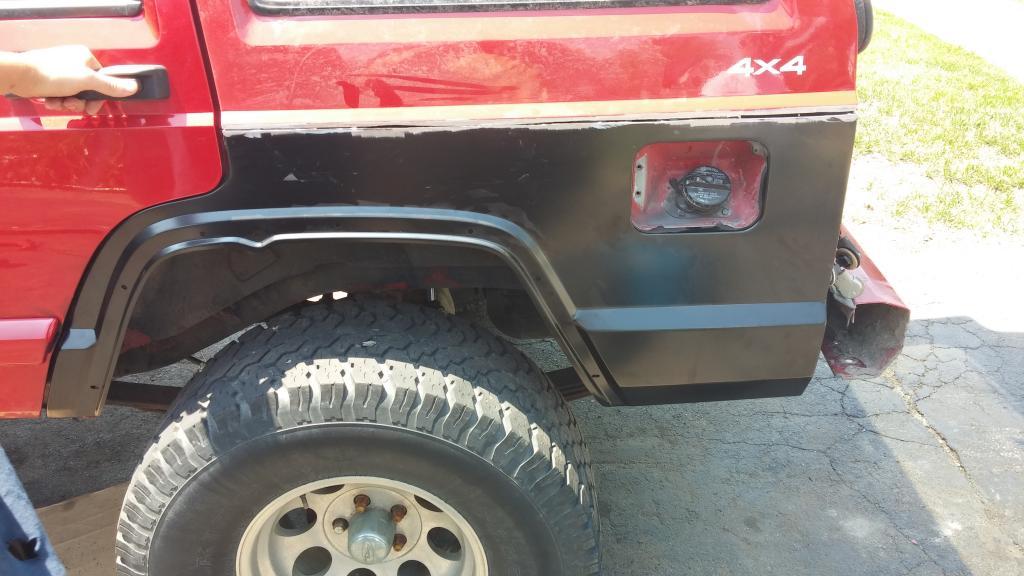
Still left to do on the passenger side is attach the inner fender to the quarter panel, close up the bottom of the floor extension, do a little trimming at the front of the rear wheel well, do any seam sealing that is still needed, and get the 6X2 up and in place.
Then I get to repeat the whole process on the drivers side
I realized that I was going to run out of daylight so I stopped taking pictures and focused on working, so no pictures of the fabricated rear floor extensions and inner fender repair. too bad really because I was really proud of it considering the tools I hadMy welds on the quarter are a little heavy so I have a lot of grinding to do to smooth them out and some bondo to make it look pretty.
Still left to do on the passenger side is attach the inner fender to the quarter panel, close up the bottom of the floor extension, do a little trimming at the front of the rear wheel well, do any seam sealing that is still needed, and get the 6X2 up and in place.
Then I get to repeat the whole process on the drivers side
10-01-2014, 08:59 PM
#64
Senior Member
Thread Starter
Join Date: May 2014
Location: Iroquois Ontario Canada
Posts: 946
Likes: 0
Received 0 Likes
on
0 Posts
Year: 1998
Model: Cherokee
Engine: 4.0
I did get some pictures today, and now that I have has supper and a little time to remember that I took them I can post them
First off this is what I had in store for me and why it took so long to get anything done.
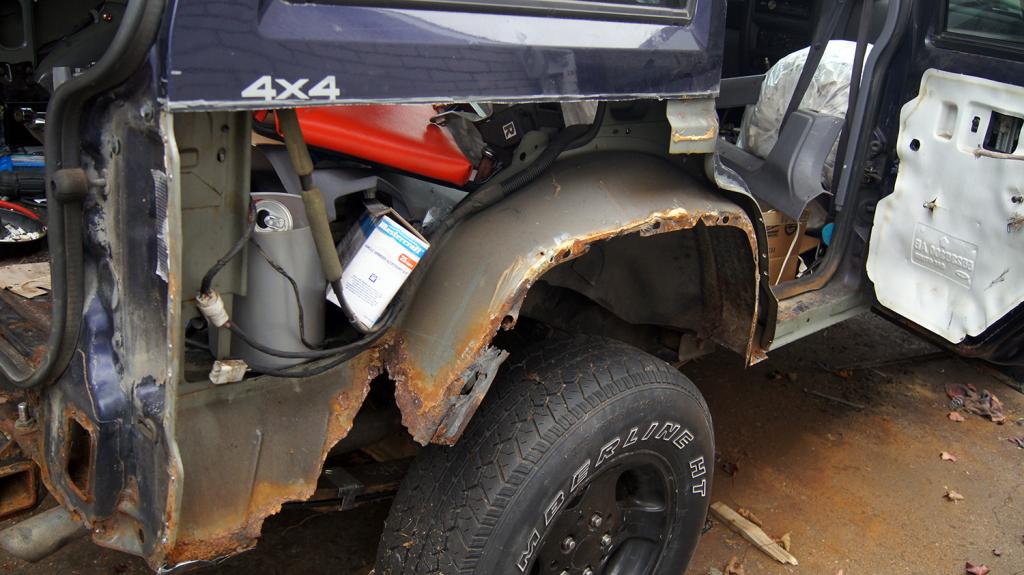
The inner fender wasn't as bad as I thought, other than a couple spots on the outer edge. The floor extension and back of the inner fender on the other hand were going to take some time to rebuild considering all I had for shaping was a pair of cross peen hammers and a post vise.
I cut away all the bad steel at the back of the inner fender and removed the floor extension all together, then the rough spots on the outer edge.
After that I cut the new quarter to fit, flanged it and put a few holes through for some pop rivets.
3 on the top, 2 in the door opening and 1 at the bottom at the back. They were only temporary so I could measure and make templates for the bits I needed to fabricate. I then drilled them out and moved to the next step.
I spent a huge amount of time making the template and fabricating the back part of the inner fender. I started to feel hungry so I took a break for lunch and that is when I realized it was already 2:30 and it starts to get dark here at 6:30 so that was the end of the pictures and the rest of the time was spent getting the quarter and inner pieces attached to the Jeep.
At 8:30 tomorrow morning I will be waking up the neighbors with the sound of grinding and a bit of drilling so I can weld the inner fender to the quarter panel. I am going to need another tube or 2 of seam seal so I can go back over every one of my welds so they are water tight, but that is for all welds not just the ones on the passenger side quarter panel.
First off this is what I had in store for me and why it took so long to get anything done.
The inner fender wasn't as bad as I thought, other than a couple spots on the outer edge. The floor extension and back of the inner fender on the other hand were going to take some time to rebuild considering all I had for shaping was a pair of cross peen hammers and a post vise.
I cut away all the bad steel at the back of the inner fender and removed the floor extension all together, then the rough spots on the outer edge.
After that I cut the new quarter to fit, flanged it and put a few holes through for some pop rivets.
3 on the top, 2 in the door opening and 1 at the bottom at the back. They were only temporary so I could measure and make templates for the bits I needed to fabricate. I then drilled them out and moved to the next step.
I spent a huge amount of time making the template and fabricating the back part of the inner fender. I started to feel hungry so I took a break for lunch and that is when I realized it was already 2:30
and it starts to get dark here at 6:30 so that was the end of the pictures and the rest of the time was spent getting the quarter and inner pieces attached to the Jeep.At 8:30 tomorrow morning I will be waking up the neighbors with the sound of grinding and a bit of drilling so I can weld the inner fender to the quarter panel. I am going to need another tube or 2 of seam seal so I can go back over every one of my welds so they are water tight, but that is for all welds not just the ones on the passenger side quarter panel.
10-02-2014, 07:23 PM
#65
Senior Member
Thread Starter
Join Date: May 2014
Location: Iroquois Ontario Canada
Posts: 946
Likes: 0
Received 0 Likes
on
0 Posts
Year: 1998
Model: Cherokee
Engine: 4.0
Not much in the way of pictures again today, a good chunk of it was spent figuring out how to finish of the floor extension. I also ground down my ugly welds on the quarter panel, it doesn't look much better after grinding It will have to do though. It is solid, and no holes, it is just going to take a lot more bondo than I would like to use
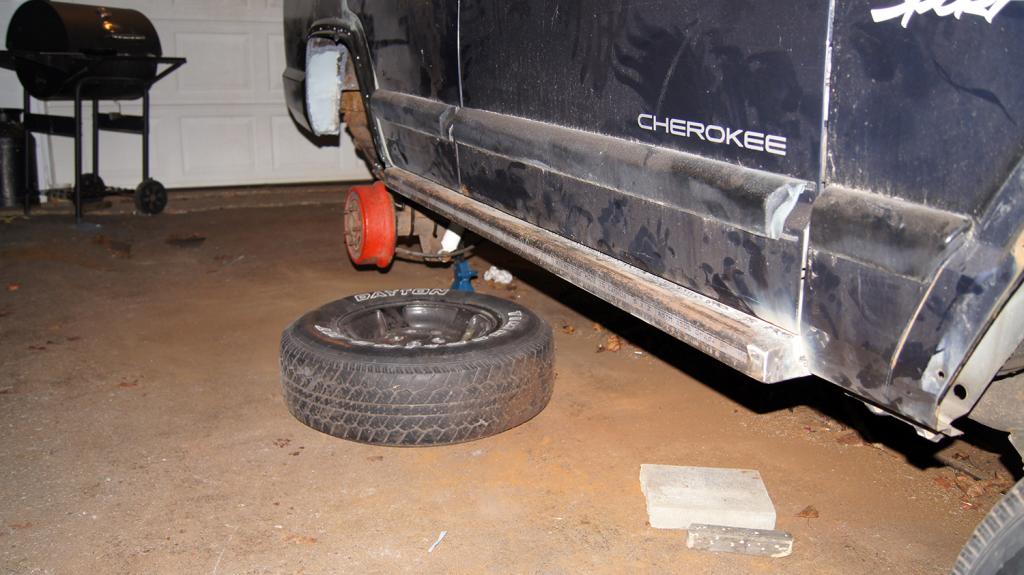
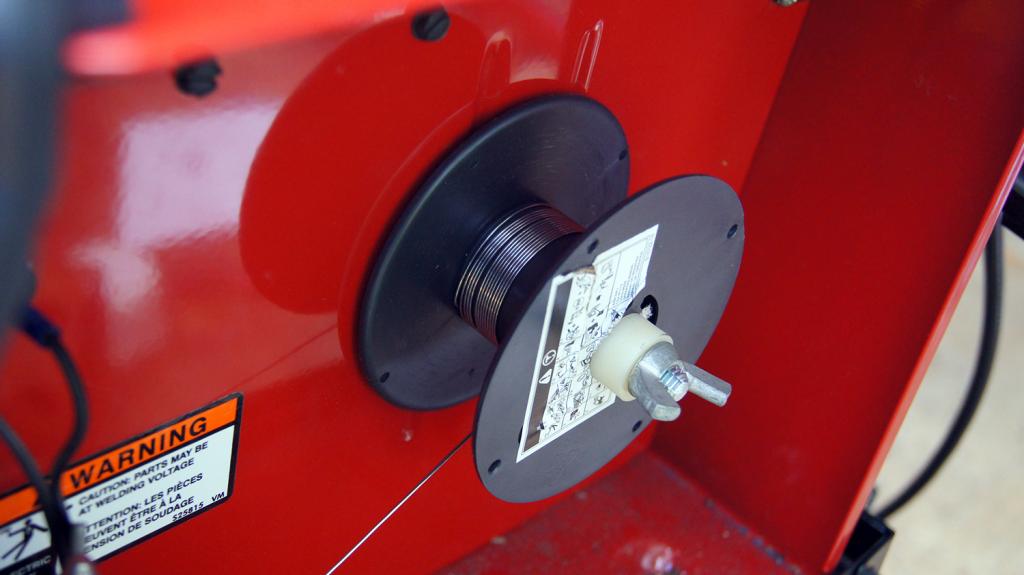
I then moved on to getting the 6X2 rocker installed. About 4" in to welding the 2" angle iron in I ran out of mig wire I was all set to go buy more when I realized that I was running low of gas too so I just switched back to flux core. It seems to work nicely on the heavier steel, it is just messy. I only got one picture of it in, and that was taken after dark so I can't show the welds. It is on solid I was standing on it and jumping up and down and it did not move or make any noise. I will inspect my welds tomorrow morning and do any touch ups it needs.
On tomorrows agenda is cutting out the drivers side rocker panel and doing as much prep work as I can. I am also going to start making templates and panels to fix the floor extension on the drivers side. Till I get around to picking up some more mig wire and fill the tank I am kind of at a stand still on body panel replacement. It doesn't stop me from getting all the spot welds cut though.
Lots of rain days and cooler weather in the forecast so I will have to work when I can while I can.
It will have to do though. It is solid, and no holes, it is just going to take a lot more bondo than I would like to useI then moved on to getting the 6X2 rocker installed. About 4" in to welding the 2" angle iron in I ran out of mig wire
I was all set to go buy more when I realized that I was running low of gas too so I just switched back to flux core. It seems to work nicely on the heavier steel, it is just messy. I only got one picture of it in, and that was taken after dark so I can't show the welds. It is on solid I was standing on it and jumping up and down and it did not move or make any noise. I will inspect my welds tomorrow morning and do any touch ups it needs.On tomorrows agenda is cutting out the drivers side rocker panel and doing as much prep work as I can. I am also going to start making templates and panels to fix the floor extension on the drivers side. Till I get around to picking up some more mig wire and fill the tank I am kind of at a stand still on body panel replacement. It doesn't stop me from getting all the spot welds cut though.
Lots of rain days and cooler weather in the forecast so I will have to work when I can while I can.
10-02-2014, 11:45 PM
#66
Seasoned Member
Join Date: Jan 2014
Location: Oak Lawn, Illinois
Posts: 484
Likes: 0
Received 1 Like
on
1 Post
Year: 1997
Model: Cherokee
Engine: 4.0
Looks great man! Cool to see someone else has replaced a quarter on one of these things. I thought I posted in here awhile back but I guess not. I replaced the driver quarter do to rust on my red jeep back in june before I rolled it in august. Heres a similar pic with old one cut off and new one mocked up.
I had bad rockers too and replaced them with 2x4. Pretty cool man, I'll be looking forward to see how it turns out when you get it all covered
I had bad rockers too and replaced them with 2x4. Pretty cool man, I'll be looking forward to see how it turns out when you get it all covered
10-03-2014, 07:09 AM
#67
Senior Member
Thread Starter
Join Date: May 2014
Location: Iroquois Ontario Canada
Posts: 946
Likes: 0
Received 0 Likes
on
0 Posts
Year: 1998
Model: Cherokee
Engine: 4.0
Is that a Key Parts quarter panel? the ones I got are and I found I had to finesse the dogleg in to place with a hammer. It was out by about an inch, but it could have been caused by shipping and not manufacturing.
I haven't test fit the drivers side one yet and probably wont till the next string of nice weather some time late next week. Fingers crossed I will have had the time to go get some more mig wire and autogas so I can go straight from test fit to welding.
I haven't test fit the drivers side one yet and probably wont till the next string of nice weather some time late next week. Fingers crossed I will have had the time to go get some more mig wire and autogas so I can go straight from test fit to welding.
10-03-2014, 10:12 AM
#68
Seasoned Member
Join Date: Jan 2014
Location: Oak Lawn, Illinois
Posts: 484
Likes: 0
Received 1 Like
on
1 Post
Year: 1997
Model: Cherokee
Engine: 4.0
Yes it's key parts. My dog leg was off a bit, it never quite matched up to the body line on the doors but I got over it, I never messed with it because I didnt want to mess up the panel
10-03-2014, 12:06 PM
#69
Senior Member
Thread Starter
Join Date: May 2014
Location: Iroquois Ontario Canada
Posts: 946
Likes: 0
Received 0 Likes
on
0 Posts
Year: 1998
Model: Cherokee
Engine: 4.0
I managed to get real close on the body line, but I also cut a few inches above it. If I hadn't taken a hammer to the dog leg I would have never gotten it on. It was gentle hits while I had it riveted across the top and at the bottom back. I had to move the dogleg forward so the bottom of it would slide into place. Once I got it there I slapped in another rivet and some more gentle tapping with the hammer I had a close to factory fit.
10-03-2014, 12:15 PM
#70
Senior Member
Thread Starter
Join Date: May 2014
Location: Iroquois Ontario Canada
Posts: 946
Likes: 0
Received 0 Likes
on
0 Posts
Year: 1998
Model: Cherokee
Engine: 4.0
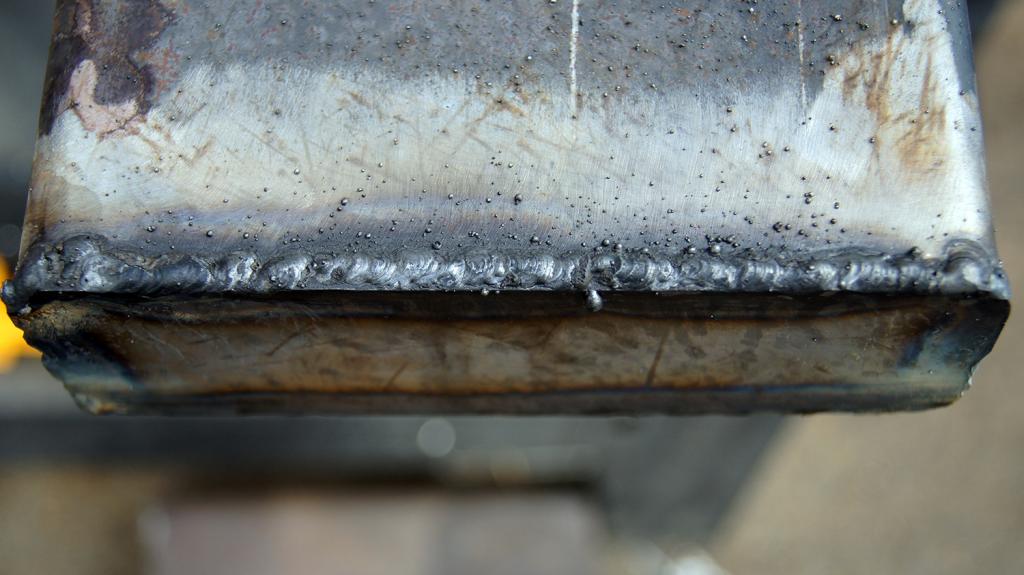
I didn't do much today before calling it quits. All I did was cut the drivers side rocker/slider to length and weld on the end caps. I got some of the better looking welds I have done yet.
Then I ran out of flux core wire too
I was going to throw some bondo on the welded seam today, but I can't find any of my body fill tools. Sure I could mix up the bondo and slap it on with a regular putty knife, but I get a better finish with the proper spreaders. Finding the air file would be nice too, but i can't find the hand file. I really need to clean out the garage again soon. It is just so hard to do when the interior from the Jeep is in there
10-03-2014, 03:29 PM
#71
Senior Member
Thread Starter
Join Date: May 2014
Location: Iroquois Ontario Canada
Posts: 946
Likes: 0
Received 0 Likes
on
0 Posts
Year: 1998
Model: Cherokee
Engine: 4.0
Couldn't leave well enough alone, I started making the passenger side quarter panel look good. I have a bit more filling and sanding to do, but I am not to far off using some filler primer to get it as smooth as I can do it. It is not like i am going for some sort of show Jeep, and besides if I started making the body perfect I would be at it all decade. I will try snap a picture or two later.
. I will try snap a picture or two later.
10-03-2014, 04:47 PM
#72
Seasoned Member
Join Date: Jan 2014
Location: Oak Lawn, Illinois
Posts: 484
Likes: 0
Received 1 Like
on
1 Post
Year: 1997
Model: Cherokee
Engine: 4.0
Rock sliders are looking good. I herculined my quarters so you couldn't even see any bondo or un even parts. It looked really good and used minimal bondo I probably could of paint matched it if i wanted to. Reminds me I need to pick up some 2x6..
10-03-2014, 05:48 PM
#73
Senior Member
Thread Starter
Join Date: May 2014
Location: Iroquois Ontario Canada
Posts: 946
Likes: 0
Received 0 Likes
on
0 Posts
Year: 1998
Model: Cherokee
Engine: 4.0
Here is what i did on the quarter panel seam today. I did find one of my spreaders, but it was the large one so I just cut it down to what I needed.

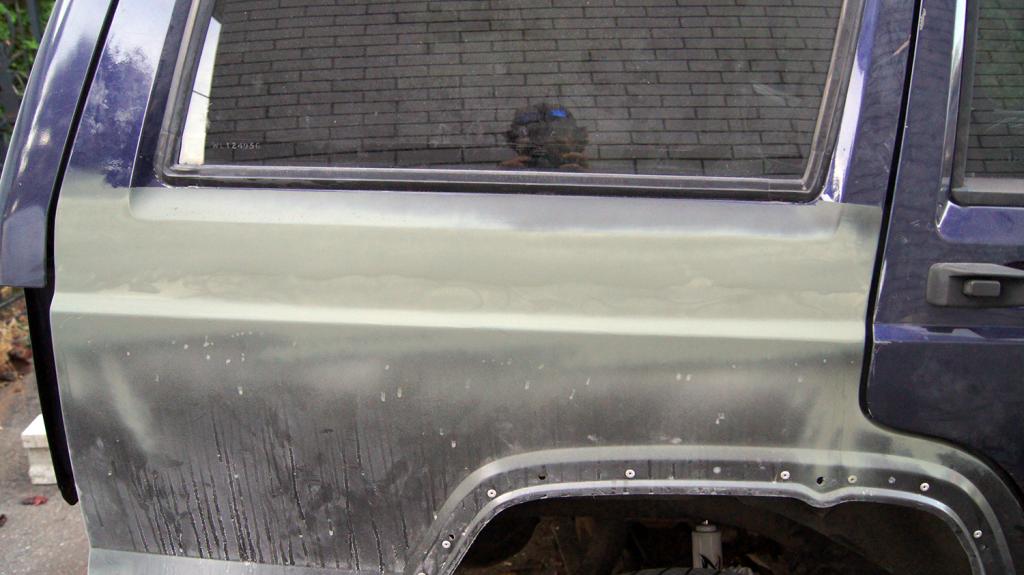
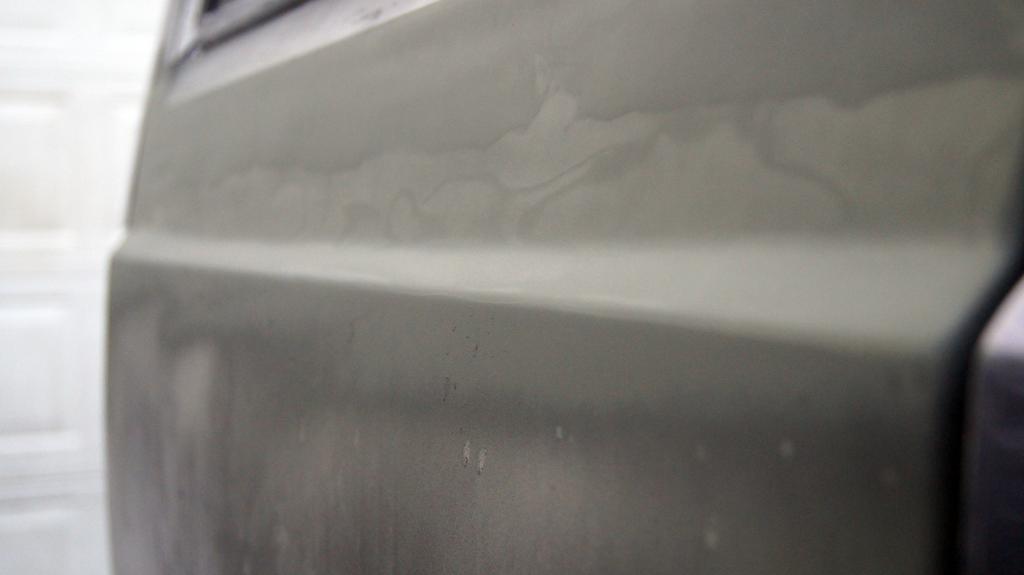
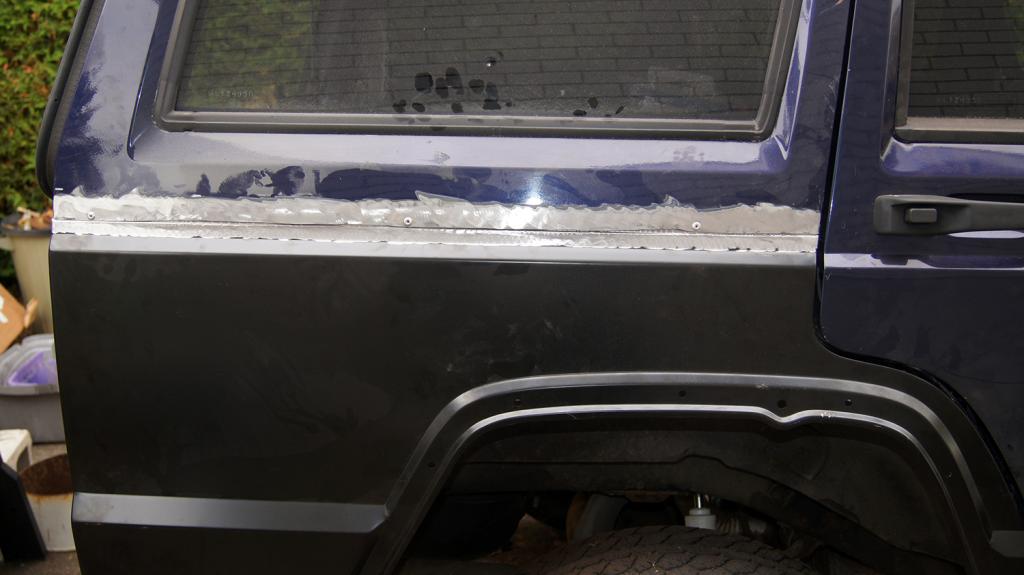
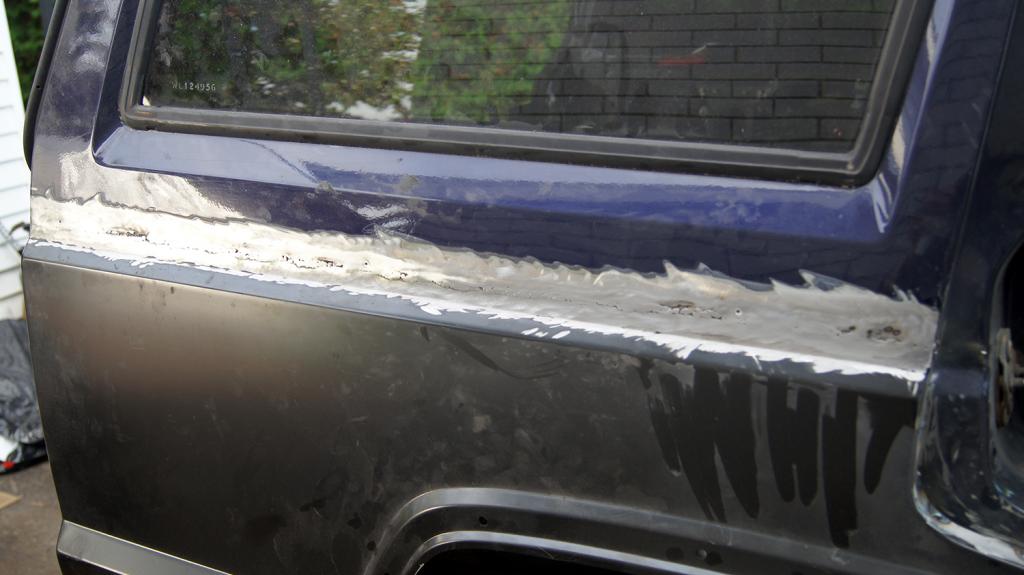
The pictures are a little deceiving, you can't see the high and low spots in the pictures, but if you look down the seam with your eye you can see them ever so slightly. Also it looks like the body line has some wobbles in the pictures, but it doesn't. It is just the difference where the primer is on body fill, bare steel, and purple paint. There is only 2 light coats of self etching primer on it right now. I still need to block sand and pick up some filler primer and some cheap black paint for the block sanding. There will always be high and low spots, but my goal is to make then as small as possible. As you can see I decided to rivet the inner fender to the quarter panel. I felt that was the best way because I could fill the space with seam sealer before riveting it.
I managed to scrounge enough money to buy a 1 lbs spool of flux core and a half sheet of body steel this evening so I am set to start on the drivers side the next spell of sunny weather we get. It is amazing how much change I had laying around between the TV, computer and other car I helps that there was quite a few $1 and $2 coins mixed in with then
The pictures are a little deceiving, you can't see the high and low spots in the pictures, but if you look down the seam with your eye you can see them ever so slightly. Also it looks like the body line has some wobbles in the pictures, but it doesn't. It is just the difference where the primer is on body fill, bare steel, and purple paint. There is only 2 light coats of self etching primer on it right now. I still need to block sand and pick up some filler primer and some cheap black paint for the block sanding. There will always be high and low spots, but my goal is to make then as small as possible. As you can see I decided to rivet the inner fender to the quarter panel. I felt that was the best way because I could fill the space with seam sealer before riveting it.
I managed to scrounge enough money to buy a 1 lbs spool of flux core and a half sheet of body steel this evening so I am set to start on the drivers side the next spell of sunny weather we get. It is amazing how much change I had laying around between the TV, computer and other car
I helps that there was quite a few $1 and $2 coins mixed in with then
10-03-2014, 05:53 PM
#74
Senior Member
Thread Starter
Join Date: May 2014
Location: Iroquois Ontario Canada
Posts: 946
Likes: 0
Received 0 Likes
on
0 Posts
Year: 1998
Model: Cherokee
Engine: 4.0
 .
10-07-2014, 01:40 PM
.
10-07-2014, 01:40 PM
#75
Senior Member
Thread Starter
Join Date: May 2014
Location: Iroquois Ontario Canada
Posts: 946
Likes: 0
Received 0 Likes
on
0 Posts
Year: 1998
Model: Cherokee
Engine: 4.0
I haven't done anything worth taking pictures of in the past few days. Just touched up some welds on the passenger side 6X2 rocker and did some seam sealing. Every time I go out to do some work I get rained out
I did manage to get the drivers side quarter cut out and the new on temporarily riveted in in between rain showers yesterday. I also ground the heads off a couple hinge bolts, front and rear door. I also did a little more digging into the existing rocker panel. Well I say rocker panel, but it is mostly rust Ultra Copper and bondo in the back. Nothing I can't repair, but i will need more than 40 minutes of no rain to make any real headway on it.
I am still shocked at the poor body repairs and the number of wood and drywall screws that have been used to do said repairs. Also the lack of foresight to cut back to good steel before slapping in a patch and some filler. So far I have only counted 4 rivets and over 25 screws used to hold in the inferior patches and fender flares.
The sun is out now so maybe I will head out and tackle cutting out the old rocker panels so I can see just how much fabrication I will need to do before installing the other 6X2.