Let the money spending begin
 09-20-2014, 08:28 AM
#46
Senior Member
Thread Starter

Join Date: May 2014
Location: Iroquois Ontario Canada
Posts: 946
Likes: 0
Received 0 Likes
on
0 Posts
Year: 1998
Model: Cherokee
Engine: 4.0
Yesterday I didn't really touch the Cherokee and I didn't take any pictures. I had an exhaust leak on the Stealth that I had to take care of first thing in the morning Nothing serious or hard to seal up, but I just decided I didn't want to work on anything after that
Now I wont get back to anything till Monday at the earliest, but I need to run out and pick up some 3/4"-1" angle for my rockers/sliders. I haven't decided which one yet, I need to do some more measuring tomorrow.
I have also decided to put the aal in my rear leaf packs. I am sitting level right now, but I am also going to weld up a rear bumper so that will pull the back down a bit. It should help on the odd times I pull a trailer. I am still looking at bumpers and tweaking my design, but once I get it close I will post the design.
Nothing serious or hard to seal up, but I just decided I didn't want to work on anything after thatNow I wont get back to anything till Monday at the earliest, but I need to run out and pick up some 3/4"-1" angle for my rockers/sliders. I haven't decided which one yet, I need to do some more measuring tomorrow.
I have also decided to put the aal in my rear leaf packs. I am sitting level right now, but I am also going to weld up a rear bumper so that will pull the back down a bit. It should help on the odd times I pull a trailer. I am still looking at bumpers and tweaking my design, but once I get it close I will post the design.
 09-22-2014, 09:49 AM
#47
Senior Member
Thread Starter
Join Date: May 2014
Location: Iroquois Ontario Canada
Posts: 946
Likes: 0
Received 0 Likes
on
0 Posts
Year: 1998
Model: Cherokee
Engine: 4.0
Just finished my 3rd cup of coffee, and am sitting here waiting for Purolator to show up with my Rack Krawler HD Tie rod that I ordered on the 21st of August
Once that shows up I have to make a run to Brockville to pick up some more steel for my 6X2 rocker/slider. Then I might tackle the AAL, but it is a little overcast and threatening rain today so that my have to wait till a nicer day.
I have to crawl under the Stealth again in the next day or two. I am still having a hell of a time trying to get the rear manifold to seal up at the down pipe. I have tried doubled up gaskets, doubled up gaskets with muffler cement, and most recently a single gasket with ultra copper. None have lasted more than 2 weeks of driving before blowing out Tomorrow morning I am going to try doubled up gaskets with ultra copper and if that doesn't work I will just order a set of 3SX long tube headers over the winter and say the hell with the down pipe and stock manifolds.
On a possitive note, while writing this my HD tie rod showed up , man that is one heavy piece of steel. Now all I need it a new set of tie rod ends and I can install that.
Once that shows up I have to make a run to Brockville to pick up some more steel for my 6X2 rocker/slider. Then I might tackle the AAL, but it is a little overcast and threatening rain today so that my have to wait till a nicer day.
I have to crawl under the Stealth again in the next day or two. I am still having a hell of a time trying to get the rear manifold to seal up at the down pipe. I have tried doubled up gaskets, doubled up gaskets with muffler cement, and most recently a single gasket with ultra copper. None have lasted more than 2 weeks of driving before blowing out
Tomorrow morning I am going to try doubled up gaskets with ultra copper and if that doesn't work I will just order a set of 3SX long tube headers over the winter and say the hell with the down pipe and stock manifolds.On a possitive note, while writing this my HD tie rod showed up
, man that is one heavy piece of steel. Now all I need it a new set of tie rod ends and I can install that.
09-22-2014, 08:31 PM
#48
Senior Member
Thread Starter
Join Date: May 2014
Location: Iroquois Ontario Canada
Posts: 946
Likes: 0
Received 0 Likes
on
0 Posts
Year: 1998
Model: Cherokee
Engine: 4.0
FFS I ordered a track bar relocation bracket from a Canadian retailer and got an email saying 2-3 weeks before it ships to me because it has to come from their USA warehouse I had the same thing happen with my quarter panels and tie rod. Ordered them on the 21 of August and got the quarter panels last week and the tie rod today
I think I will call tomorrow and cancel the order and just order from a US supplier and cut out the middle man. At least that way I will only have to wait 7-10 days before I get the parts I need.
I had the same thing happen with my quarter panels and tie rod. Ordered them on the 21 of August and got the quarter panels last week and the tie rod todayI think I will call tomorrow and cancel the order and just order from a US supplier and cut out the middle man. At least that way I will only have to wait 7-10 days before I get the parts I need.
09-23-2014, 11:17 AM
#49
Senior Member
Thread Starter
Join Date: May 2014
Location: Iroquois Ontario Canada
Posts: 946
Likes: 0
Received 0 Likes
on
0 Posts
Year: 1998
Model: Cherokee
Engine: 4.0
Called and canceled the order from the Canadian supplier this morning and ordered the same part from south of the Canadian border. It cost less, even with the higher shipping exchange and estimated duties. Even better is that I will receive it in under a week according to the person I was talking to when I ordered it.
So far this morning I have torqued all the rear suspension bolts to spec, marked out where I want to cut out the rest of the rocker panels, and am currently grinding away the torx bolts on the PS doors so I can get them out of the way to do some cutting.
I just came in to grab the camera while my slightly too small compressor fills up again. I can grind with the die grinder for about 4 minutes then there isn't enough pressure to turn it fast enough to make a difference.
Pictures coming this evening if every thing goes as planned.
09-23-2014, 06:38 PM
#50
Senior Member
Thread Starter
Join Date: May 2014
Location: Iroquois Ontario Canada
Posts: 946
Likes: 0
Received 0 Likes
on
0 Posts
Year: 1998
Model: Cherokee
Engine: 4.0
So let see, what have I done on this since I started the thread? Not a whole lot till this last week or two.
It started off with a Zone 3" AAL lift kit. My intentions were to just lift the front and the rear shocks in the back, but then I got looking at it and decided what the heck, might as well do the AAL too. Boy what a headache that was. No broke bolts, but I did break a lower shock mount on the drivers side. I torqued everything in the back to spec this morning, still waiting to do the front. I am waiting on a track bar relocation bracket to get the front end back to where it should be till I can afford a proper adjustable bar.
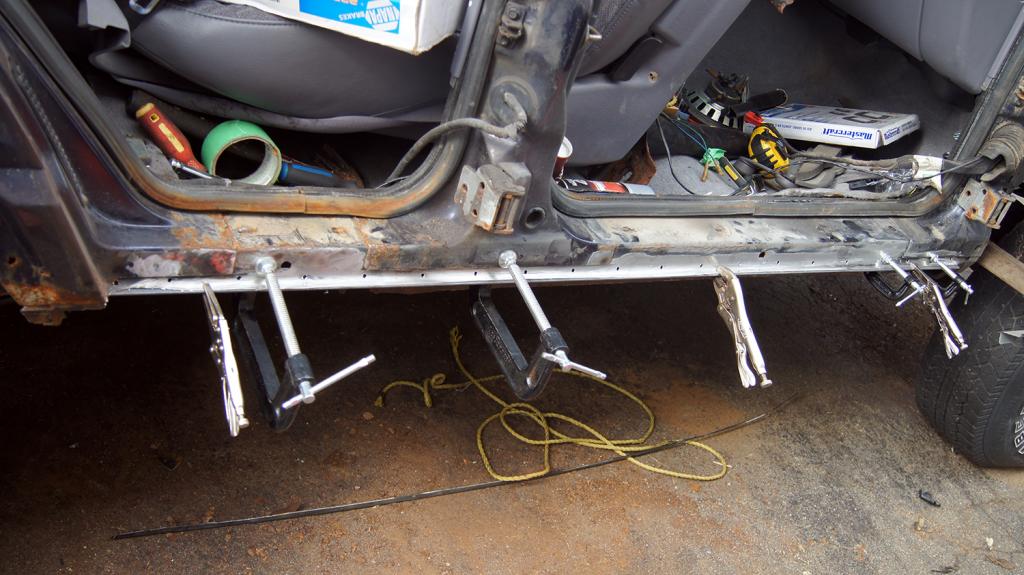
Ignore the junk and parts inside the Jeep, I am a little strapped for space right now
The front lifted 3"
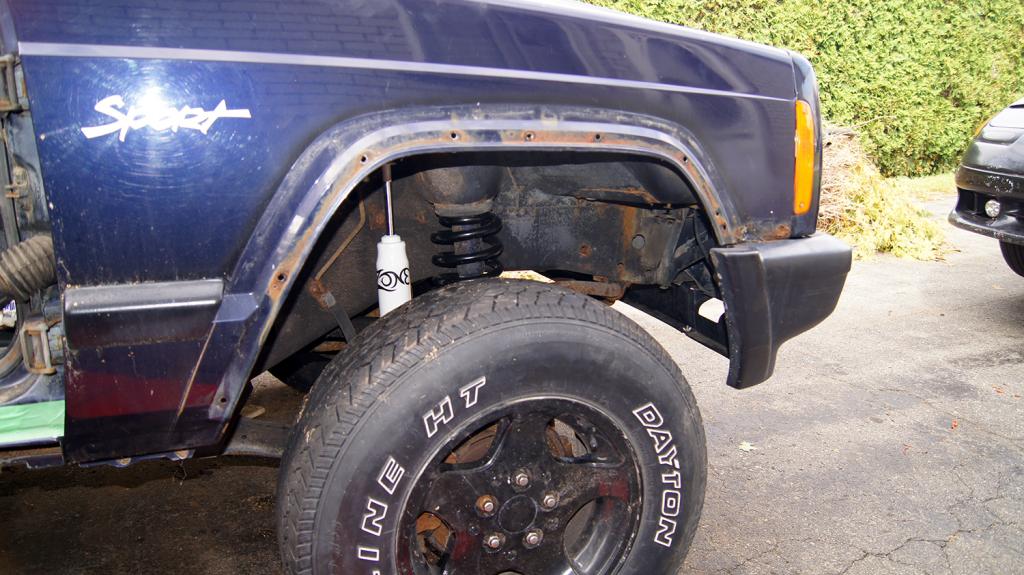
The rear with the AAL and shock installed
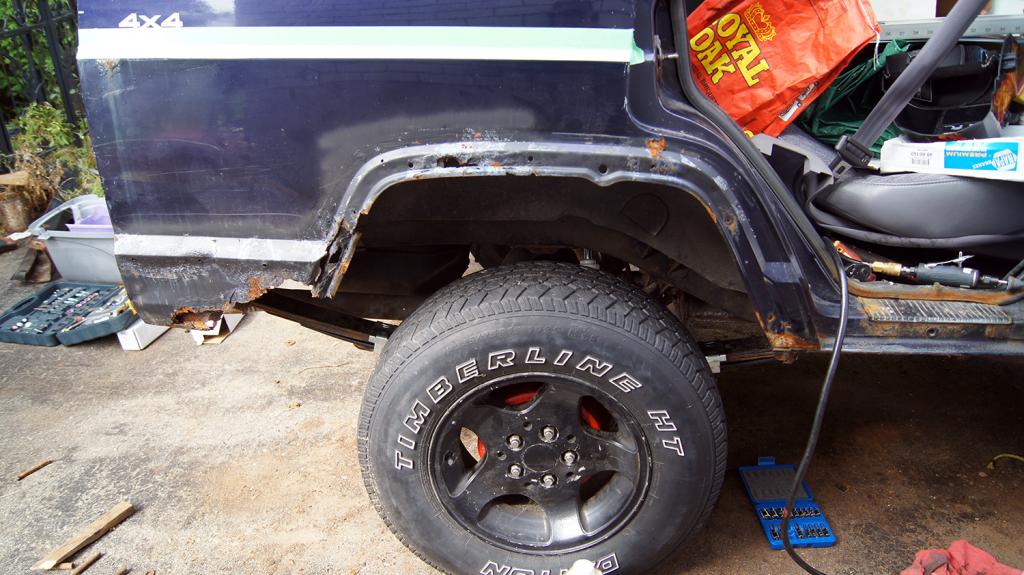
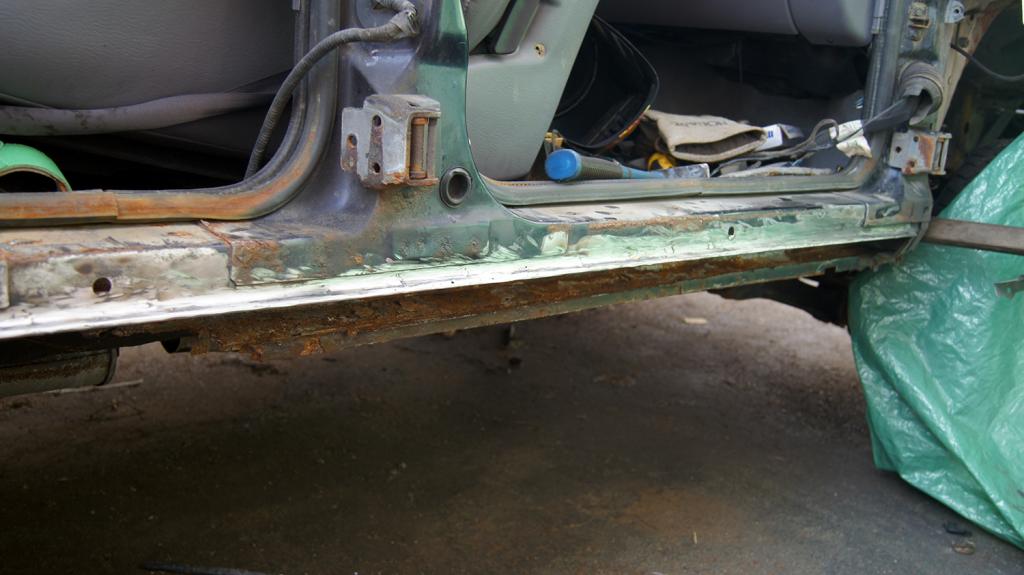
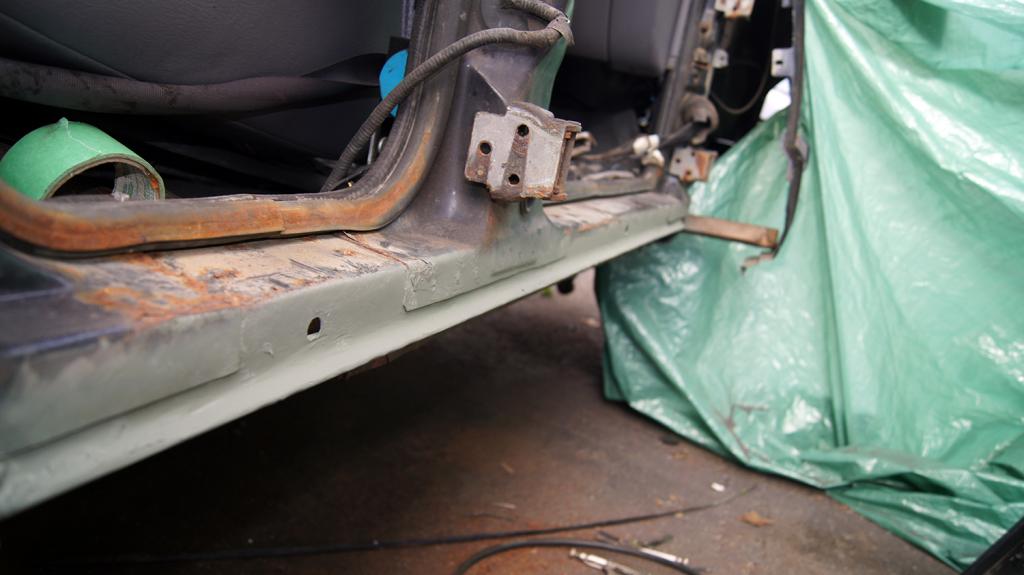
After getting the rear end torqued I moved on to the rocker panel upgrade. As you may have noticed in the previous picture I had already cut out the PS rocker. It was a quick and rough cut and I needed to clean it up a bit. Before i could dig into that I needed to get the doors out of the way. Got the front of fairly easy, but had to use my T40 socket and a 1/4" wrench to turn it on the shaft all while holding the door closed enough to keep the socket in the bolt. The rear door on the other hand fought me hard. Top three bolts came out, bottom three were all rust welded in place. I ended up grinding the heads off them, then drilling out and tapping the nut plate, Drill presses are awsome
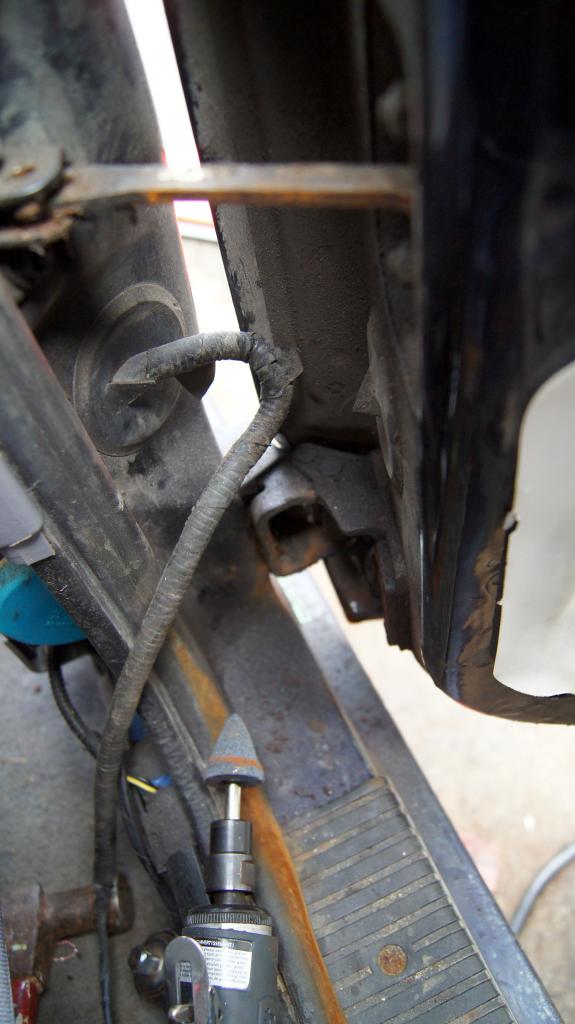
grinding away the bolt heads with a die grinder
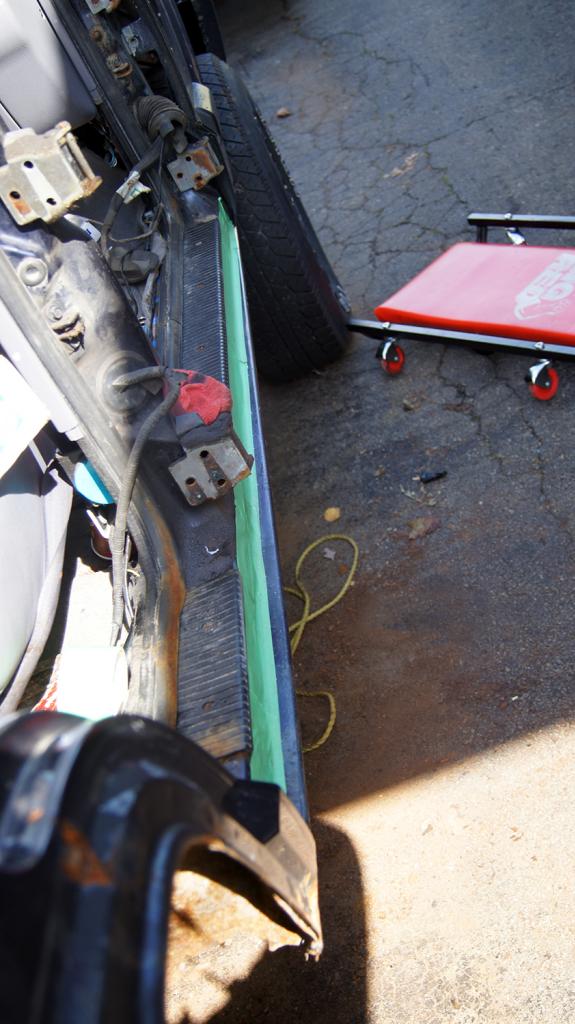
Once I got the doors off I could clean up my cut. I am welding a section of 3/4"x1/8" angle in to give me something to weld the 2"x6"x3/16" tube to. In hind sight I should have went with 1" angle just to get a little more run up the inside.
To get a fairly straight line I measured out 1/2" and laid down some tape as a cutting guide
Once I had it cut I cleaned off all the paint, primer, and rust. Then I drilled holes approximately 1/2" up to simulate spot welds. They are just there to attach the angle to the side. I held everything in place with vise grips and clamps.
I then welded in all the holes and started welding the seam to fully secure the angle to the Jeep.
No pictures of the welds before grinding, but they were ugly. There were some good spots, but the ugly ones out weighed them, Then there was the fact that I forgot to turn on the gas when I started and didn't realize it till I was almost passed the front door After much cleaning I had the angle solidly attached and looking OK
There are a few spots that I need to go back and touch again, but I will do that when I weld in the tubing.
That is when I called it a day. What ate up so much time was grinding with the die grinder. My little compressor doesn't deliver the proper CFM for it so it is grind for a bit wait, grind for a bit, wait, and so on till you get the head off the bolt. Each bolt took about 75 minutes.
Tomorrow I will be cleaning up the rust on the inside of the rockers, front section is good but the rear might need some help. I will know better after I start grinding and cutting. I have a piece of 2"x1/8" angle to weld in the back for support then it will be cutting and test fitting the tubing. I was originally going to run the tubing from wheel opening to wheel opening, but decided that would be too much work for the time I have. I will be going from the front of the door to the rear wheel opening now.
I finished up the day by giving all the bare metal a coat of self etching primer to try keep the rust at bay between work sessions.
It started off with a Zone 3" AAL lift kit. My intentions were to just lift the front and the rear shocks in the back, but then I got looking at it and decided what the heck, might as well do the AAL too. Boy what a headache that was. No broke bolts, but I did break a lower shock mount on the drivers side. I torqued everything in the back to spec this morning, still waiting to do the front. I am waiting on a track bar relocation bracket to get the front end back to where it should be till I can afford a proper adjustable bar.
Ignore the junk and parts inside the Jeep, I am a little strapped for space right now
The front lifted 3"
The rear with the AAL and shock installed
After getting the rear end torqued I moved on to the rocker panel upgrade. As you may have noticed in the previous picture I had already cut out the PS rocker. It was a quick and rough cut and I needed to clean it up a bit. Before i could dig into that I needed to get the doors out of the way. Got the front of fairly easy, but had to use my T40 socket and a 1/4" wrench to turn it on the shaft all while holding the door closed enough to keep the socket in the bolt. The rear door on the other hand fought me hard. Top three bolts came out, bottom three were all rust welded in place. I ended up grinding the heads off them, then drilling out and tapping the nut plate, Drill presses are awsome
grinding away the bolt heads with a die grinder
Once I got the doors off I could clean up my cut. I am welding a section of 3/4"x1/8" angle in to give me something to weld the 2"x6"x3/16" tube to. In hind sight I should have went with 1" angle just to get a little more run up the inside.
To get a fairly straight line I measured out 1/2" and laid down some tape as a cutting guide
Once I had it cut I cleaned off all the paint, primer, and rust. Then I drilled holes approximately 1/2" up to simulate spot welds. They are just there to attach the angle to the side. I held everything in place with vise grips and clamps.
I then welded in all the holes and started welding the seam to fully secure the angle to the Jeep.
No pictures of the welds before grinding, but they were ugly. There were some good spots, but the ugly ones out weighed them, Then there was the fact that I forgot to turn on the gas when I started and didn't realize it till I was almost passed the front door
After much cleaning I had the angle solidly attached and looking OKThere are a few spots that I need to go back and touch again, but I will do that when I weld in the tubing.
That is when I called it a day. What ate up so much time was grinding with the die grinder. My little compressor doesn't deliver the proper CFM for it so it is grind for a bit wait, grind for a bit, wait, and so on till you get the head off the bolt. Each bolt took about 75 minutes.
Tomorrow I will be cleaning up the rust on the inside of the rockers, front section is good but the rear might need some help. I will know better after I start grinding and cutting. I have a piece of 2"x1/8" angle to weld in the back for support then it will be cutting and test fitting the tubing. I was originally going to run the tubing from wheel opening to wheel opening, but decided that would be too much work for the time I have. I will be going from the front of the door to the rear wheel opening now.
I finished up the day by giving all the bare metal a coat of self etching primer to try keep the rust at bay between work sessions.
09-24-2014, 06:10 PM
#52
Senior Member
Thread Starter
Join Date: May 2014
Location: Iroquois Ontario Canada
Posts: 946
Likes: 0
Received 0 Likes
on
0 Posts
Year: 1998
Model: Cherokee
Engine: 4.0
Obviously you don't live in Ontario Canada and have to deal with the winter weight lose program the government puts all winter driven cars on
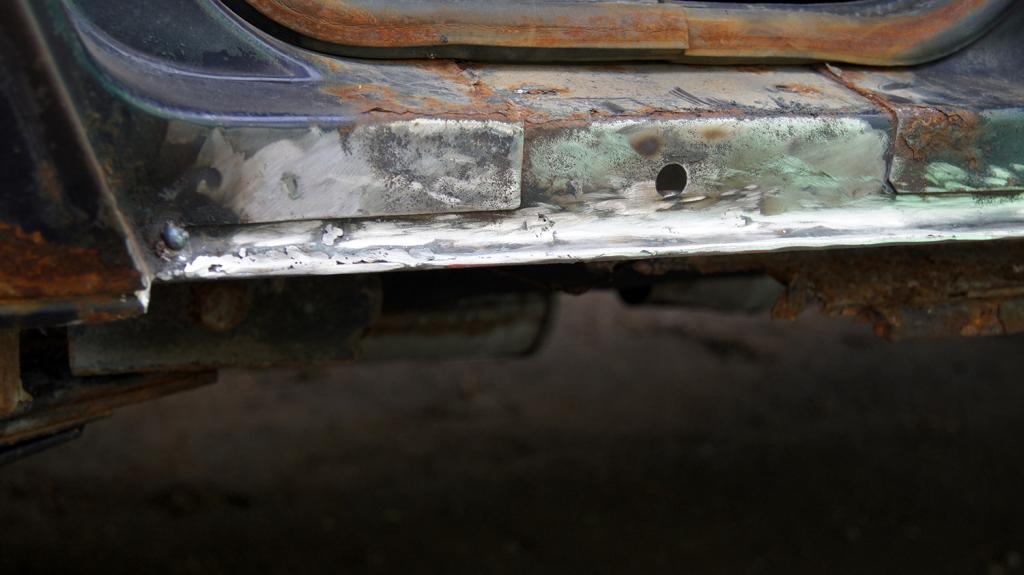
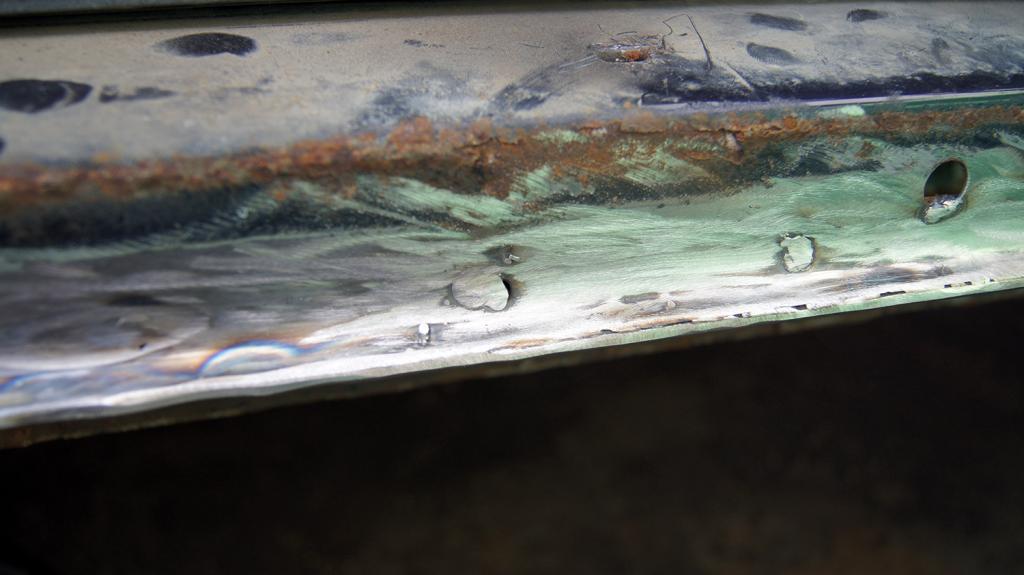
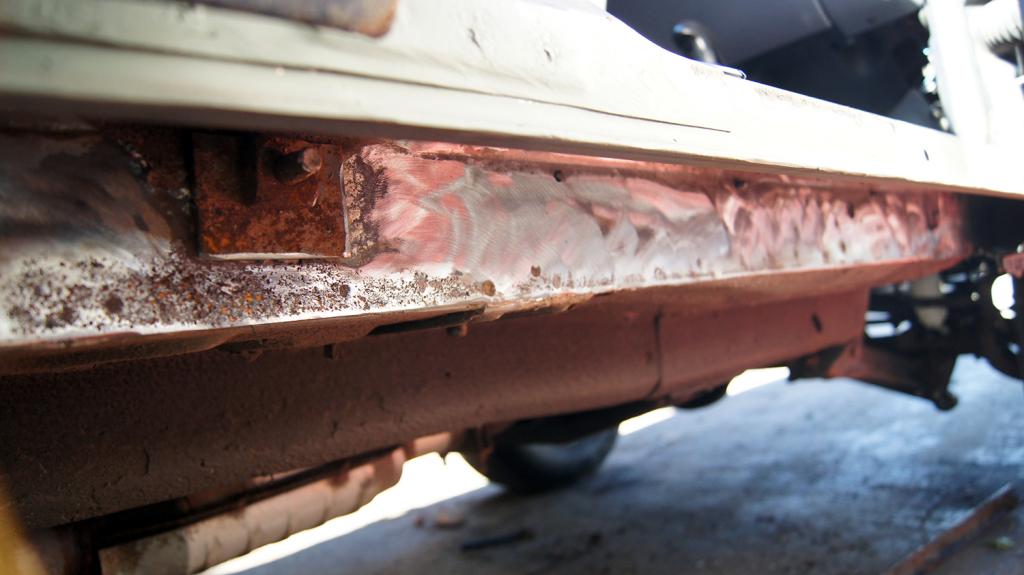
It is impossible to find an XJ without rust up here and for the $400 I paid for this one I can't complain. The rust visible in the rocker pictures is deceiving, it was just the lip on the inner rocker that was bad and I was cutting that out for the 6X2X3/16 conversion any how. After cutting and grinding all I will need to patch is a small, 2X3 piece of body steel near the rear fender. I have new quarter panels to replace the rusted out ones and the rust on the door sills is just surface rust.
I couldn't find floor extensions to replace what isn't there now, but I will just bend up some body steel and simulate the cut and fold so many people do to these things. My bumper plans have side extensions that go into that area any how so even if I did have the floor pan extensions they would have been wasted.
I got volunteered to do some things today so I didn't make a whole lot of progress and no pictures. All I did was cut off the offending lip on the inner rocker and grind away all the surface rust and any paint and primmer that was in there. I then measured and cut my 2" angle to length and cut the notch for the seat belt anchor. I then drilled 3/16" holes every 3" on the bottom and side. I will be doing rosebud welds in them to tack the piece in place then stitching it along the top and bottom edge to solidly attach it to the body. I rough cut the 6x2 tonight as well. I am thinking of leaving it a few inches short of the wheel opening so if I ever install a set of cut out flares I wont have to cut and cap the 6X2 again.
I might cut out the PS quarter tomorrow to give myself a little more working room. That all depends on how much time I have and if the weather holds for a couple more days.
I will take some pictures of what i did today first thing tomorrow before I get started again.
09-25-2014, 10:58 AM
#53
Senior Member
Thread Starter
Join Date: May 2014
Location: Iroquois Ontario Canada
Posts: 946
Likes: 0
Received 0 Likes
on
0 Posts
Year: 1998
Model: Cherokee
Engine: 4.0
Forgot to turn the camera off yesterday, so no battery this morning It is OK though because all I have done today is cut out the caps for the 6X2 weld one end on and grind it all smooth. Welding with gas is so much nicer
I have to do some painting for the neighbor then I will get back to the Jeep between coats. When I get back to it the battery should be charged and I can take some pictures of what I did yesterday and what I get accomplished today.
It is OK though because all I have done today is cut out the caps for the 6X2 weld one end on and grind it all smooth. Welding with gas is so much nicerI have to do some painting for the neighbor then I will get back to the Jeep between coats. When I get back to it the battery should be charged and I can take some pictures of what I did yesterday and what I get accomplished today.
09-25-2014, 02:19 PM
#55
Senior Member
Thread Starter
Join Date: May 2014
Location: Iroquois Ontario Canada
Posts: 946
Likes: 0
Received 0 Likes
on
0 Posts
Year: 1998
Model: Cherokee
Engine: 4.0
A lot more than it is worth. It isn't so much the cost of importing a car it is the headache and paper work to do it. By the time I have it all done and ready for the road/trail I might have $1500 into it including purchase price. I doubt that I would be able to find one for that that will be in the equivalent shape of this one finished.
I do have the luxury of being able to do 95% of the work myself and am saving a bundle on labor.
I do have the luxury of being able to do 95% of the work myself and am saving a bundle on labor.
09-25-2014, 07:08 PM
#56
Senior Member
Thread Starter
Join Date: May 2014
Location: Iroquois Ontario Canada
Posts: 946
Likes: 0
Received 0 Likes
on
0 Posts
Year: 1998
Model: Cherokee
Engine: 4.0
Not a lot of physical progress today, but there was a lot of satisfaction in what I did do.
First off pictures from yesterday. All I did was some cleanup on the inner rocker.
Cut off the lower lip and ground away all the dirt rust and what ever else was there.The red tint is just the reflection of my creeper
Lots of good steel to weld to, but I do need to do a bit of repair to the back section. It shouldn't take more than a hour to cut out and welding some new sheet metal.
Next I got to work on making a 6x2 rocker/slider. After a lot of trimming and cleaning I was set to go with proper measurements. I cut my steel to length then made some end caps to weld in place.

The blue is not heat induced, it is layout dye. I know my welds are not perfect, but they are getting better. I am only using a 120V MIG so I ground a 45� on the edges of the tubing did a double pass weld. After grinding away the excess weld I still had a solid joint
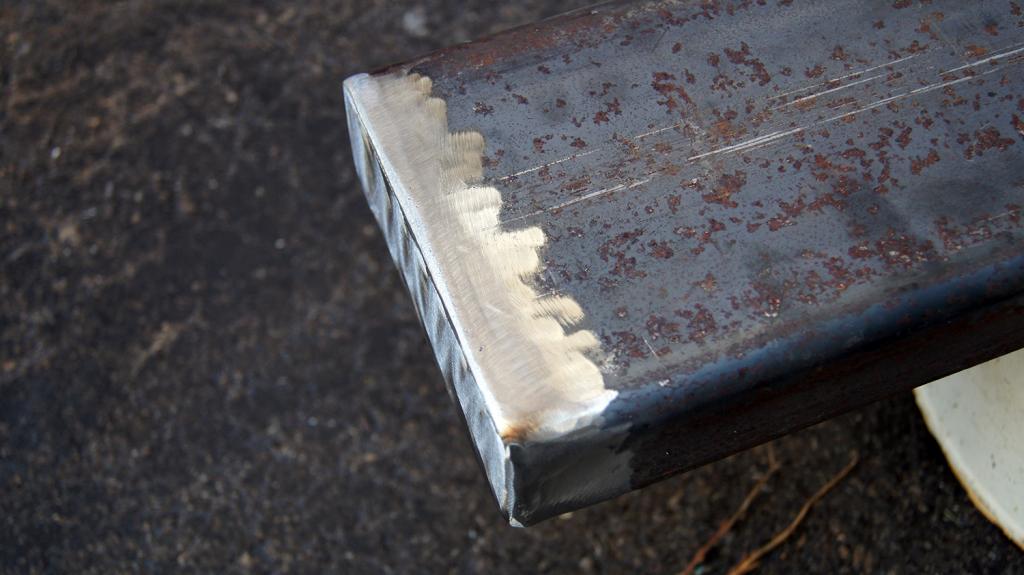
I did this to both ends and then did a test fit with the caps welded in place

Al lthat time measuring and grinding then measuring 6 or 7 times more paid off in the end and I had a perfect fit. The front edge is in line with the front of the door, and the rear edge slides up nicely behind the inner fender.

I decided to go short in the front because I didn't want to mess with cutting the fender, and short in the back so if I decide to add a set of cutout flares I don't have to worry about the rocker/sliders being in the way.
Tomorrow will be mostly cleaning and more prep work to weld in the 2" angle iron. I still need to clean up any under coating near where I will be welding, and I have to get everything that is in the Jeep out of it before welding anything I can just roll the carpet over to the center once I have everything else out of the way. Once i have that done it will just be a simple thing of setting the height of the angle iron and welding it in then I will be ready to weld in the rocker/slider. I am going to tackle the quarter panel before I weld those in though. With any luck I will have the passenger side buttoned up and ready for paint and bedliner by Monday.
First off pictures from yesterday. All I did was some cleanup on the inner rocker.
Cut off the lower lip and ground away all the dirt rust and what ever else was there.The red tint is just the reflection of my creeper
Lots of good steel to weld to, but I do need to do a bit of repair to the back section. It shouldn't take more than a hour to cut out and welding some new sheet metal.
Next I got to work on making a 6x2 rocker/slider. After a lot of trimming and cleaning I was set to go with proper measurements. I cut my steel to length then made some end caps to weld in place.
The blue is not heat induced, it is layout dye. I know my welds are not perfect, but they are getting better. I am only using a 120V MIG so I ground a 45� on the edges of the tubing did a double pass weld. After grinding away the excess weld I still had a solid joint
I did this to both ends and then did a test fit with the caps welded in place
Al lthat time measuring and grinding then measuring 6 or 7 times more paid off in the end and I had a perfect fit. The front edge is in line with the front of the door, and the rear edge slides up nicely behind the inner fender.
I decided to go short in the front because I didn't want to mess with cutting the fender, and short in the back so if I decide to add a set of cutout flares I don't have to worry about the rocker/sliders being in the way.
Tomorrow will be mostly cleaning and more prep work to weld in the 2" angle iron. I still need to clean up any under coating near where I will be welding, and I have to get everything that is in the Jeep out of it before welding anything
I can just roll the carpet over to the center once I have everything else out of the way. Once i have that done it will just be a simple thing of setting the height of the angle iron and welding it in then I will be ready to weld in the rocker/slider. I am going to tackle the quarter panel before I weld those in though. With any luck I will have the passenger side buttoned up and ready for paint and bedliner by Monday.
09-26-2014, 07:07 AM
#57
Senior Member
Thread Starter
Join Date: May 2014
Location: Iroquois Ontario Canada
Posts: 946
Likes: 0
Received 0 Likes
on
0 Posts
Year: 1998
Model: Cherokee
Engine: 4.0
Well today I have to get up the nerve to cut out a quarter panel I need to replace both of them, and need to get them off so I can repair the inner fenders and floor pan extensions. We have been having a beautiful week here, perfect for working on the Jeep in the driveway, but I know those wont last much longer so I have to get my butt in gear.
I was going to give my hand a try at butt welding body panels, but my brother had a nice air powered flange tool. My plan now is to flange the new panel and slide the 7/16" flange up under the original panel, like a shingle, and fill the small seam with weld. It will be slow going welding body steel. Even though my little 120V MIG welder can do it, it is still a case of 100s of little tack/stitch welds to minimize warpage. I do have a 3" x 1" x 12" aluminum bar to put behind the seam to act as a heat sink, just not sure how to hold it there without punching holes through the panel and none of my magnets are strong enough to hold it.
While I am cleaning out the junk and parts i have inside the Jeep I will be thinking about how to get the aluminum to say in place while I weld. Maybe a wood wedge
Time to get to it, starting on the passenger side because it is more accessible from the inside than the drivers side.
I need to replace both of them, and need to get them off so I can repair the inner fenders and floor pan extensions. We have been having a beautiful week here, perfect for working on the Jeep in the driveway, but I know those wont last much longer so I have to get my butt in gear.I was going to give my hand a try at butt welding body panels, but my brother had a nice air powered flange tool. My plan now is to flange the new panel and slide the 7/16" flange up under the original panel, like a shingle, and fill the small seam with weld. It will be slow going welding body steel. Even though my little 120V MIG welder can do it, it is still a case of 100s of little tack/stitch welds to minimize warpage. I do have a 3" x 1" x 12" aluminum bar to put behind the seam to act as a heat sink, just not sure how to hold it there without punching holes through the panel and none of my magnets are strong enough to hold it.
While I am cleaning out the junk and parts i have inside the Jeep I will be thinking about how to get the aluminum to say in place while I weld. Maybe a wood wedge
Time to get to it, starting on the passenger side because it is more accessible from the inside than the drivers side.
09-27-2014, 06:01 PM
#58
Senior Member
Thread Starter
Join Date: May 2014
Location: Iroquois Ontario Canada
Posts: 946
Likes: 0
Received 0 Likes
on
0 Posts
Year: 1998
Model: Cherokee
Engine: 4.0
I still haven't gotten the nerve to cut out that first quarter panel so I tackled the floor pans instead. First I had to clean all the junk, tools and parts out of the inside, then pull the front carpet. I knew i had a hole on the drivers side, and I thought the passenger side was good. After some surface rust removal on the passenger side I found out I was wrong about no holes. Nothing big, and unless you stabbed the screwdriver in just the right place you would have never known without the grinding first. It turned out that right at the frame edge was a ton of little holes.
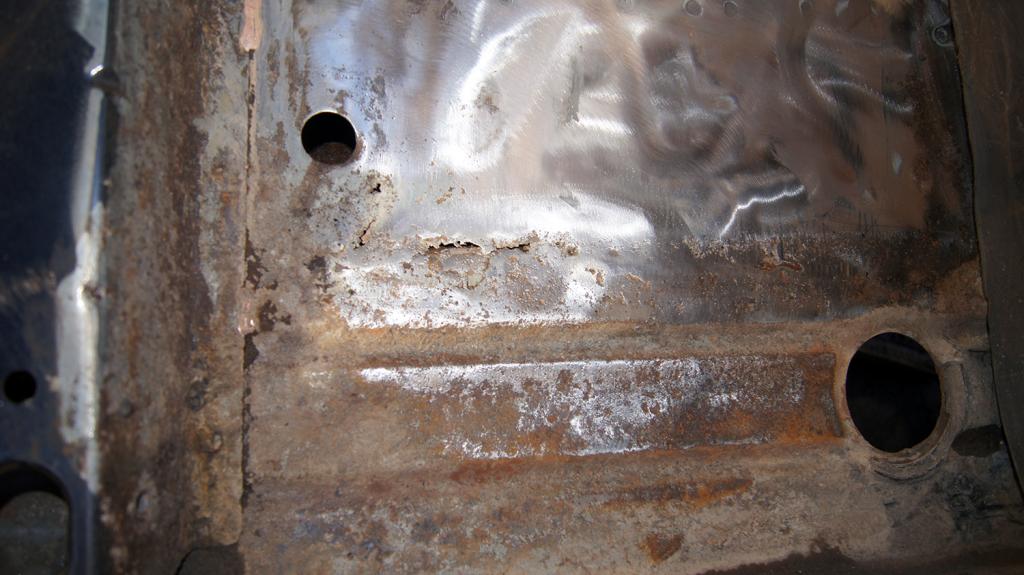
Still not as bad as most of the Canadian floor pans I have seen, and since it was inside the frame rail it would never be seen in a safety inspection, I could have left well enough alone. Thing is I knew it was there and I had to patch it. I cut out what I thought was all the offending material and cut a patch to butt weld in. I didn't cut far enough and ended up blowing a lot of holes through the floor and that led to some of the worst welds I have seen And that was with my little welder set as low as it would go. I spent a lot of time inspecting for tiny holes with a plug in florescent light last night. I put the light under the floor and looked for the pin holes of light shining through. All the little zaps to fill the holes ended up putting the welder in thermal shut down and I never finished till this morning.
Once I finished up the passenger side patch I tackled the drivers side. I was expecting a lot more of the same because it looked worse than the passenger side. To my surprise it wasn't. Sure it had a bigger more visible hole, but the rust was contained to a smaller area.
The visible hole to the right of the pictures didn't grow that much while grinding and the screwdriver test only went through the floor once near the transmission tunnel.
This time I was taking no chances, I cut 1" outside where I found good metal. I then cut my patch 7/16" bigger than the hole and flange the edges. I punched holes in the flange and tacked the patch in place through the holes and used my 1.5 pound cross peen hammer to keep the warps to a minimum. I followed the spots welds up by welding around the overlap of the patch.
Still not the greatest looking welds, but I didn't blow through the floor once I still have to grind down the welds and give it a coat of primer or something tomorrow. I know it looks like there is a lot of rust still on the floor and in the nooks and crannies, but about 75% of that is just rust dust from grinding. My shop vac decided it needed a break from blowing fresh air in while I was grinding and still wasn't working when I finished welding.
Tomorrow I will either get on to that quarter panel or dig into the rear floor, The passenger side looks almost as good as the day it came out of the factory, but near the filler neck there is a ton of surface rust. Pregrinding it passed the screwdriver test, but so did the front passenger pan. Only time and grinding will tell the real story.
With the welding out of the way for the day I did a bunch of yard work, but finished off the day by test fitting the track bar relocation bracket. I pulled the front of the Jeep over with a ratchet strap and would measure frame to outside tread with each click on the strap. I managed to get it dead on and loosely bolted in the bracket. I need to drill the supporting bolt hole still so nothing shifts, but even with things loose I only came out of center by 1/16" when I released the strap. Next spring when I get an adjustable track bar I should be able to get the front end bang on again.
so I tackled the floor pans instead. First I had to clean all the junk, tools and parts out of the inside, then pull the front carpet. I knew i had a hole on the drivers side, and I thought the passenger side was good. After some surface rust removal on the passenger side I found out I was wrong about no holes. Nothing big, and unless you stabbed the screwdriver in just the right place you would have never known without the grinding first. It turned out that right at the frame edge was a ton of little holes.Still not as bad as most of the Canadian floor pans I have seen, and since it was inside the frame rail it would never be seen in a safety inspection, I could have left well enough alone. Thing is I knew it was there and I had to patch it. I cut out what I thought was all the offending material and cut a patch to butt weld in. I didn't cut far enough and ended up blowing a lot of holes through the floor and that led to some of the worst welds I have seen
And that was with my little welder set as low as it would go. I spent a lot of time inspecting for tiny holes with a plug in florescent light last night. I put the light under the floor and looked for the pin holes of light shining through. All the little zaps to fill the holes ended up putting the welder in thermal shut down and I never finished till this morning.Once I finished up the passenger side patch I tackled the drivers side. I was expecting a lot more of the same because it looked worse than the passenger side. To my surprise it wasn't. Sure it had a bigger more visible hole, but the rust was contained to a smaller area.
The visible hole to the right of the pictures didn't grow that much while grinding and the screwdriver test only went through the floor once near the transmission tunnel.
This time I was taking no chances, I cut 1" outside where I found good metal. I then cut my patch 7/16" bigger than the hole and flange the edges. I punched holes in the flange and tacked the patch in place through the holes and used my 1.5 pound cross peen hammer to keep the warps to a minimum. I followed the spots welds up by welding around the overlap of the patch.
Still not the greatest looking welds, but I didn't blow through the floor once
I still have to grind down the welds and give it a coat of primer or something tomorrow. I know it looks like there is a lot of rust still on the floor and in the nooks and crannies, but about 75% of that is just rust dust from grinding. My shop vac decided it needed a break from blowing fresh air in while I was grinding and still wasn't working when I finished welding.Tomorrow I will either get on to that quarter panel or dig into the rear floor, The passenger side looks almost as good as the day it came out of the factory, but near the filler neck there is a ton of surface rust. Pregrinding it passed the screwdriver test, but so did the front passenger pan. Only time and grinding will tell the real story.
With the welding out of the way for the day I did a bunch of yard work, but finished off the day by test fitting the track bar relocation bracket. I pulled the front of the Jeep over with a ratchet strap and would measure frame to outside tread with each click on the strap. I managed to get it dead on and loosely bolted in the bracket. I need to drill the supporting bolt hole still so nothing shifts, but even with things loose I only came out of center by 1/16" when I released the strap. Next spring when I get an adjustable track bar I should be able to get the front end bang on again.
09-28-2014, 09:12 AM
#59
Senior Member
Thread Starter
Join Date: May 2014
Location: Iroquois Ontario Canada
Posts: 946
Likes: 0
Received 0 Likes
on
0 Posts
Year: 1998
Model: Cherokee
Engine: 4.0
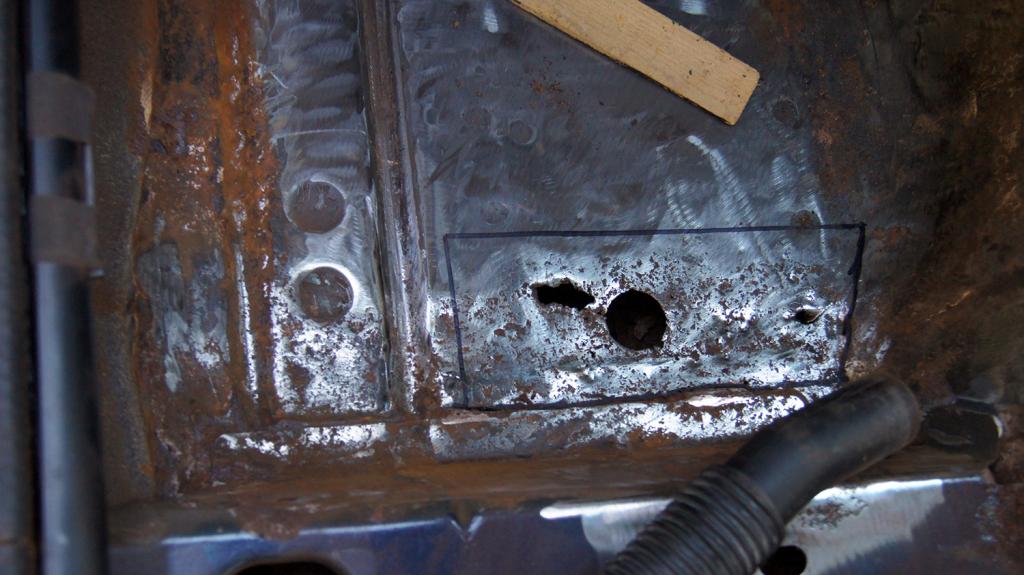
Found the worst rust hole yet, and of course it is right in a spot I didn't want to weld No pictures yet, but it is in the cargo area floor right next to and under the cover for the filler neck, and spreads out to the outside edge of the frame rail. I am guessing it will be a 6"x6" patch once I get back to solid steel.
I might just seam seal and rivet this one. Seam seal looks to be the cause of this spot too. There is no sealer under the edge of the filler neck cover right where the rust comes from. Plenty on top, but nothing to keep salt and water from sitting and festering in between the cover and floor pan.
I am going to pull off the cover and get a better look at what I have to work with before taking pictures.
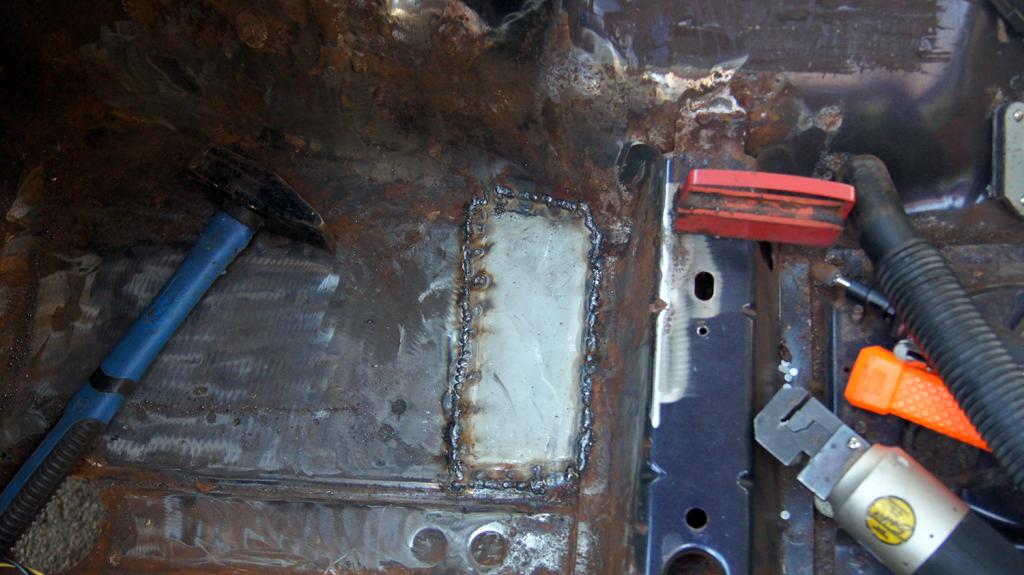
*UPDATE*
I still haven't ground anything, but I did a lot of scrapping and pounding and I have roughly a 9.5"X14" piece of cargo area floor to replace. That gets me to solid steel but also takes me from inner fender well to tailgate. Pretty much most of the area in the picture.
With the patch being so large I think I can safely weld it in, but i will have to cut it out carefully so I can preserve the the factory hole locations.
You can see where the floor is completely gone, that is where there was no seam sealer. All that was there was some very flaked rusty metal that i picked away with my fingers.
This is the last of the interior rust patches. Thankfully the other side is good. BTW the rust outside the yellow area is just dust from the carpet and can be wiped off with a dry finger and exposes pristine factory purple paint
No pictures yet, but it is in the cargo area floor right next to and under the cover for the filler neck, and spreads out to the outside edge of the frame rail. I am guessing it will be a 6"x6" patch once I get back to solid steel.I might just seam seal and rivet this one. Seam seal looks to be the cause of this spot too. There is no sealer under the edge of the filler neck cover right where the rust comes from. Plenty on top, but nothing to keep salt and water from sitting and festering in between the cover and floor pan.
I am going to pull off the cover and get a better look at what I have to work with before taking pictures.
*UPDATE*
I still haven't ground anything, but I did a lot of scrapping and pounding and I have roughly a 9.5"X14" piece of cargo area floor to replace. That gets me to solid steel but also takes me from inner fender well to tailgate. Pretty much most of the area in the picture.
With the patch being so large I think I can safely weld it in, but i will have to cut it out carefully so I can preserve the the factory hole locations.
You can see where the floor is completely gone, that is where there was no seam sealer. All that was there was some very flaked rusty metal that i picked away with my fingers.
This is the last of the interior rust patches. Thankfully the other side is good. BTW the rust outside the yellow area is just dust from the carpet and can be wiped off with a dry finger and exposes pristine factory purple paint
Last edited by SG Mason; 09-28-2014 at 10:18 AM.
09-28-2014, 04:24 PM
#60
Senior Member
Thread Starter
Join Date: May 2014
Location: Iroquois Ontario Canada
Posts: 946
Likes: 0
Received 0 Likes
on
0 Posts
Year: 1998
Model: Cherokee
Engine: 4.0
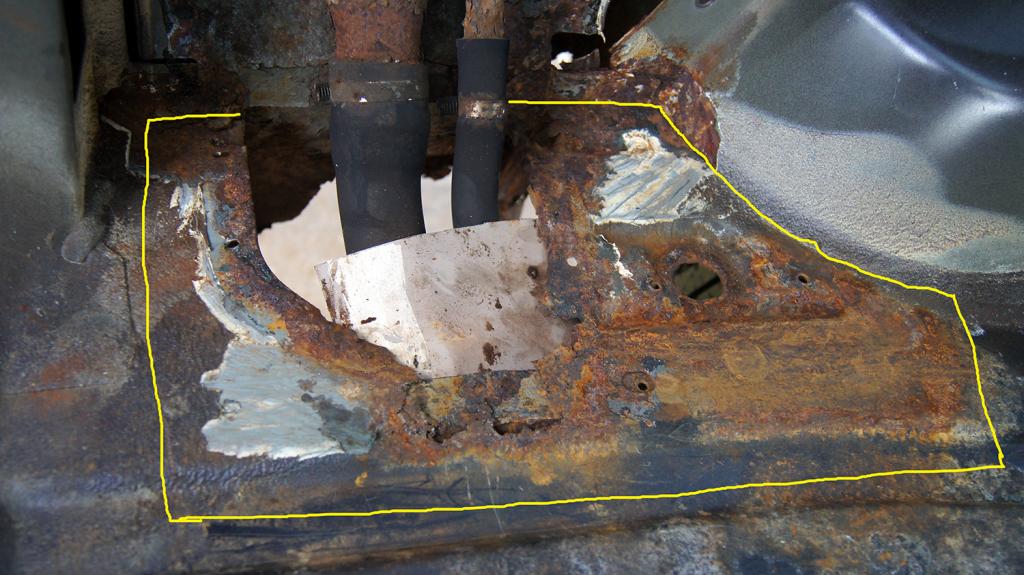
I managed to get the bad spot cut out. It took a bit and had to use a multitude of tools to get it out, but it is out and I have good steel to weld to all around. Well other than the floor extension. I was cutting away some quarter panel to get to it from behind and it looks like it would be a fairly easy piece to reproduce, but all that came to an end real quick. My angle grinder finally gave up the ghost and the drive gears stripped outWith no load it will spin up but as soon as you touch the cutting wheel to anything solid it stops without throwing a spark.
I am finding the angle grinder the most important tool in this endeavor and to loose it made me stop working for the day. I was hoping to have the steel for the patch cut out and shaped today along with the floor extension. Guess that is going to have to wait till tomorrow now when i can pick up a new angle grinder.
With no load it will spin up but as soon as you touch the cutting wheel to anything solid it stops without throwing a spark.I am finding the angle grinder the most important tool in this endeavor and to loose it made me stop working for the day. I was hoping to have the steel for the patch cut out and shaped today along with the floor extension. Guess that is going to have to wait till tomorrow now when i can pick up a new angle grinder.