Fallon's Build Thread

 03-04-2014, 07:13 PM
#182
Member
Thread Starter
Join Date: Sep 2013
Location: White Springs, FL
Posts: 161
Likes: 0
Received 0 Likes
on
0 Posts
Year: 1990
Model: Cherokee
Engine: 4.0
Nearly 2"
I can see the advantages of radius arms, and I think they look cool, but they are a pain to adjust with a bushing at one end. If I ever build another set of longarms, I will seriously consider 3 linking the axle with joints at both ends. Being able to reach up and twist the arms to adjust length is worth the expense to me.
I can see the advantages of radius arms, and I think they look cool, but they are a pain to adjust with a bushing at one end. If I ever build another set of longarms, I will seriously consider 3 linking the axle with joints at both ends. Being able to reach up and twist the arms to adjust length is worth the expense to me.
03-05-2014, 08:13 PM
#183
Member
Thread Starter
Join Date: Sep 2013
Location: White Springs, FL
Posts: 161
Likes: 0
Received 0 Likes
on
0 Posts
Year: 1990
Model: Cherokee
Engine: 4.0
My SYE kit arrived today. I keep proving to myself how ignorant I am. I wonder when that is going to stop? It didn't say on the website, and I didn't know to ask, that the vacuum disconnect for the front axle won't work with this kit. Have to get a cable actuator. Oh well... the price of wisdom.
03-05-2014, 09:05 PM
#184
CF Veteran
Join Date: Aug 2010
Location: Greensboro
Posts: 1,220
Received 0 Likes
on
0 Posts
Year: 1992
Model: Cherokee
Engine: 4.0L
The vacuum disconnect doesn't work with an sye? That sounds wrong but I don't have the disconnect axle so I don't exactly know why it wouldn't work. But, what some do is eliminate the disconnect by replacing the 2 piece passenger side with a single shaft and seal from the newer d30.
03-06-2014, 04:33 PM
#185
Member
Thread Starter
Join Date: Sep 2013
Location: White Springs, FL
Posts: 161
Likes: 0
Received 0 Likes
on
0 Posts
Year: 1990
Model: Cherokee
Engine: 4.0
The vacuum disconnect doesn't work with an sye? That sounds wrong but I don't have the disconnect axle so I don't exactly know why it wouldn't work. But, what some do is eliminate the disconnect by replacing the 2 piece passenger side with a single shaft and seal from the newer d30.
The factory vacuum connections on the NP231 nose-cone are not on the SYE kit. It does have the speedo connection, however. The instructions say I will have to use a cable-type actuator or 1-pc axle.
03-06-2014, 08:15 PM
#186
CF Veteran
Join Date: Aug 2010
Location: Greensboro
Posts: 1,220
Received 0 Likes
on
0 Posts
Year: 1992
Model: Cherokee
Engine: 4.0L
well you have a couple options...
1) manually lock the axle and call it good
http://emeraldgreen97.wordpress.com/...isconnect-mod/
2) Buy or create your own posi lock
http://www.jeepforum.com/forum/f12/h...ite-up-595515/
3) Delete the disconnect and replace 2 piece shaft with single shaft. You will need a 1 piece shaft and this seal
http://eastcoastgearsupply.com/i-713...rsion-2-0.html
This was all a quick search and I'm sure if I dug a hair further there is probably a how-to on the 1 piece conversion. Hope all this helps
04-02-2014, 05:03 PM
#189
Member
Thread Starter
Join Date: Sep 2013
Location: White Springs, FL
Posts: 161
Likes: 0
Received 0 Likes
on
0 Posts
Year: 1990
Model: Cherokee
Engine: 4.0
Trying to locate some angle to build the side reinforcement brackets. And hunting for some motivation! The weather is already turning off hot around here. 85* this week. I am starting to sweat!
08-02-2015, 01:56 AM
#191
Member
Thread Starter
Join Date: Sep 2013
Location: White Springs, FL
Posts: 161
Likes: 0
Received 0 Likes
on
0 Posts
Year: 1990
Model: Cherokee
Engine: 4.0
Yes, Sir! You're right. I will get that done pretty soon. We have been working, on and off, on the XJ, and I have some pics to post up. Always something new creating issues, but we just keep chipping away. Family, work, and life in general sidetrack the Jeep work frequently. But we're much closer!
I hope everybody is well. Welcome to summertime in Florida!
I hope everybody is well. Welcome to summertime in Florida!
08-02-2015, 06:33 PM
#192
Member
Thread Starter
Join Date: Sep 2013
Location: White Springs, FL
Posts: 161
Likes: 0
Received 0 Likes
on
0 Posts
Year: 1990
Model: Cherokee
Engine: 4.0
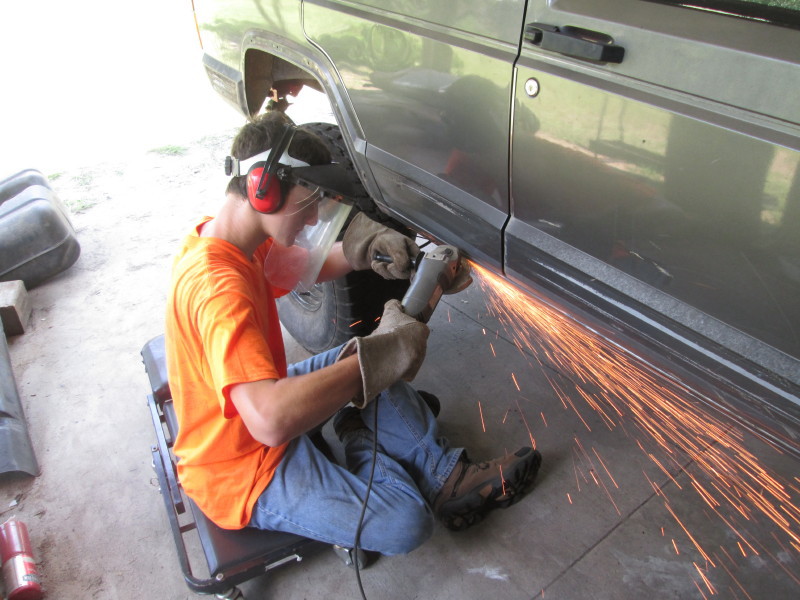
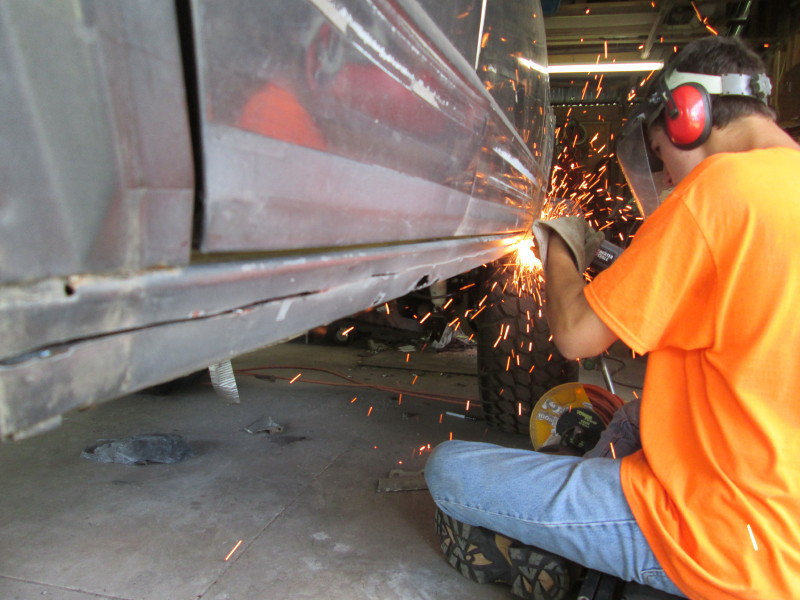
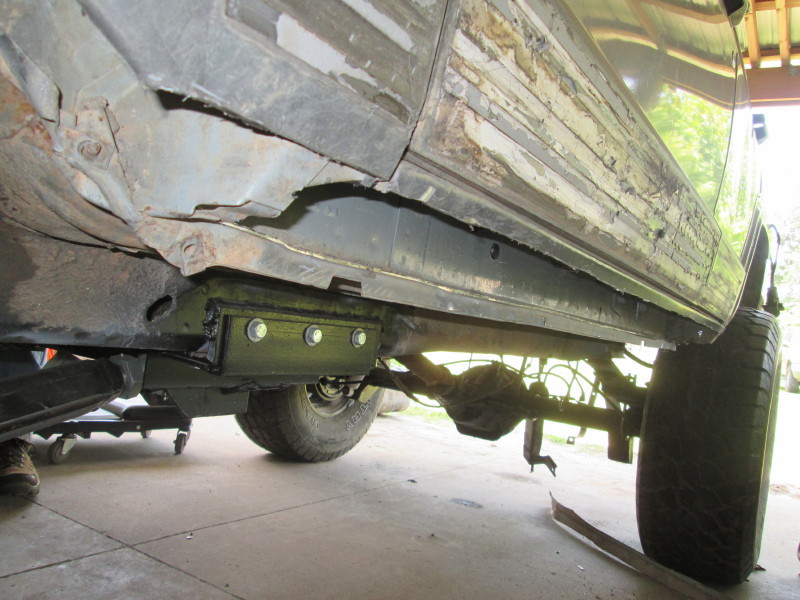
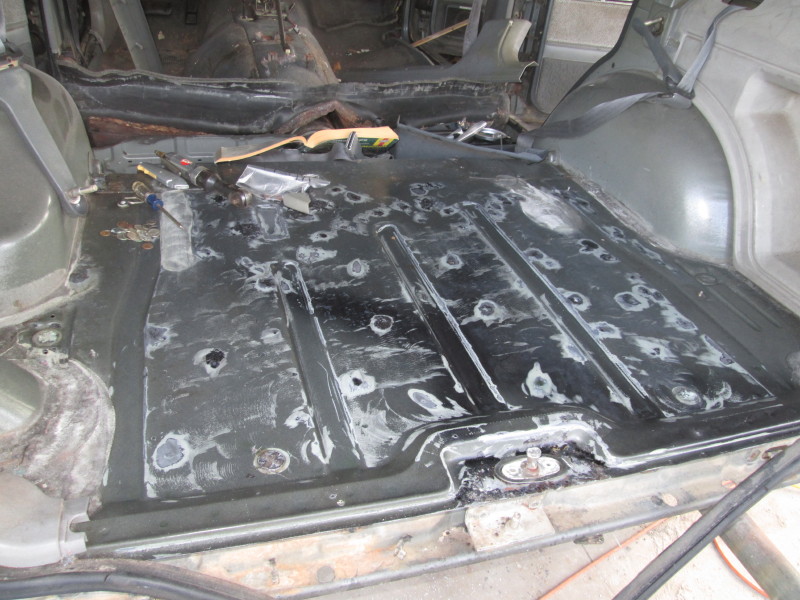
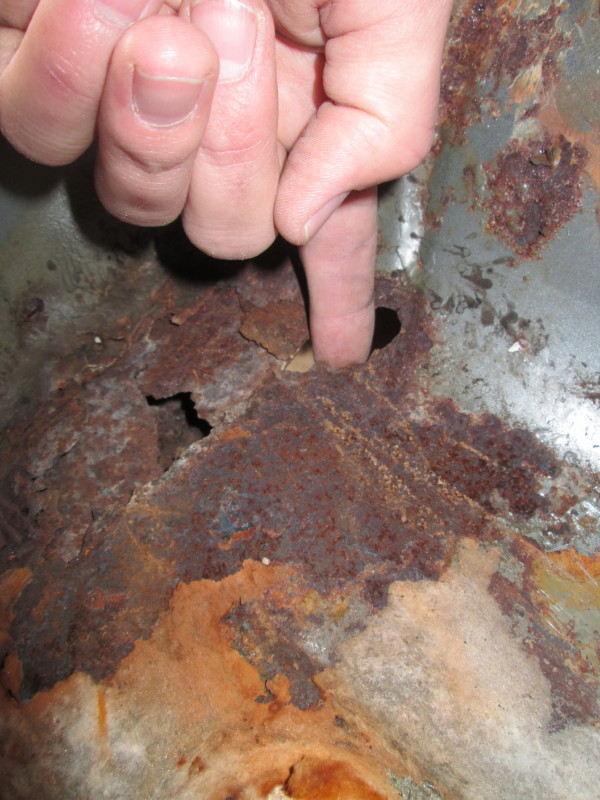
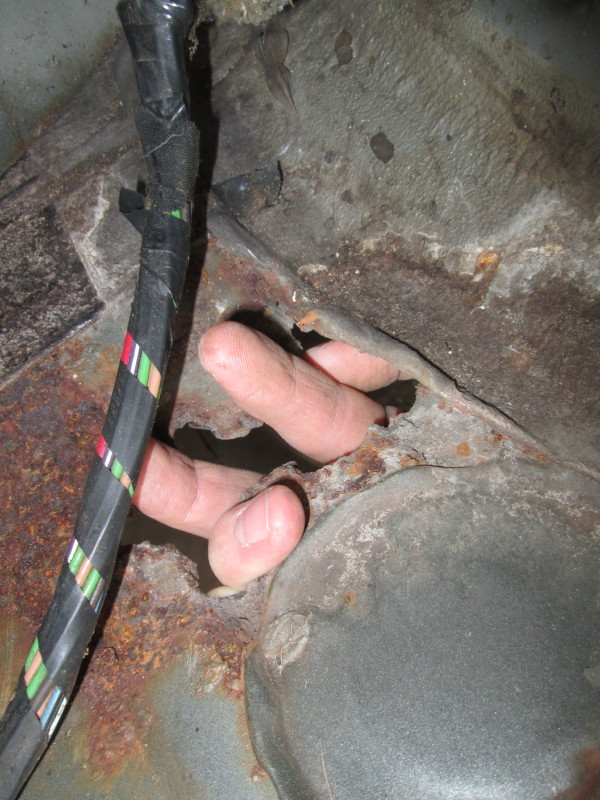
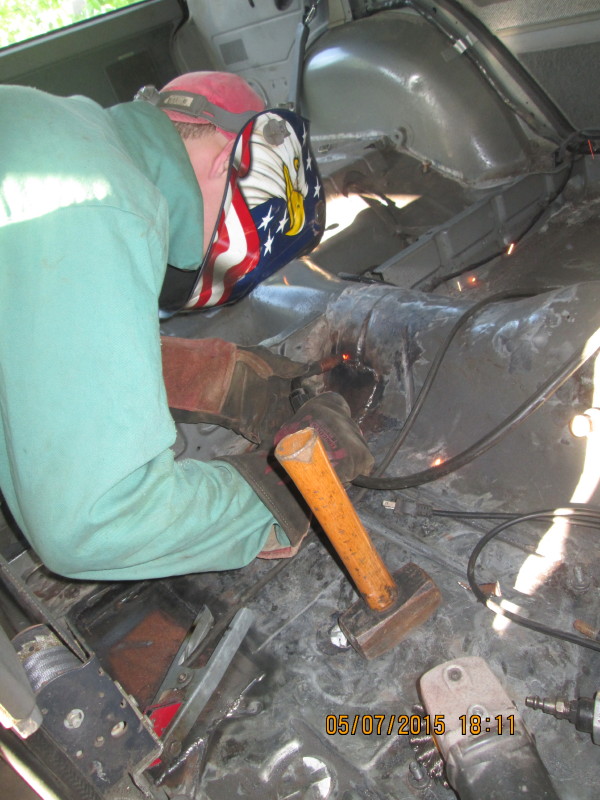
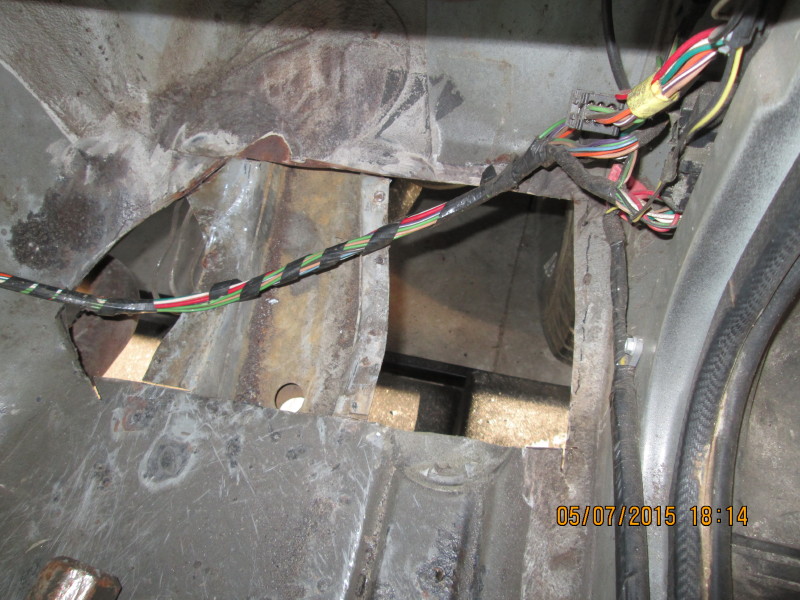
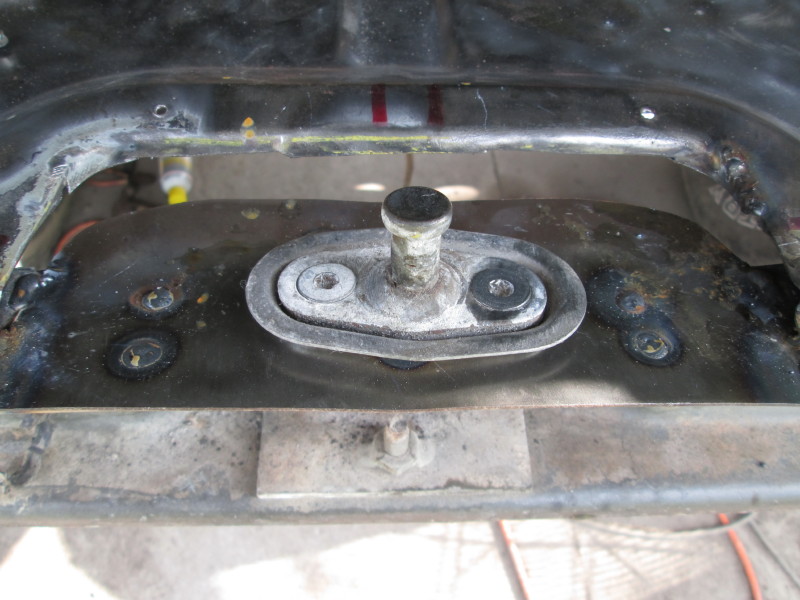
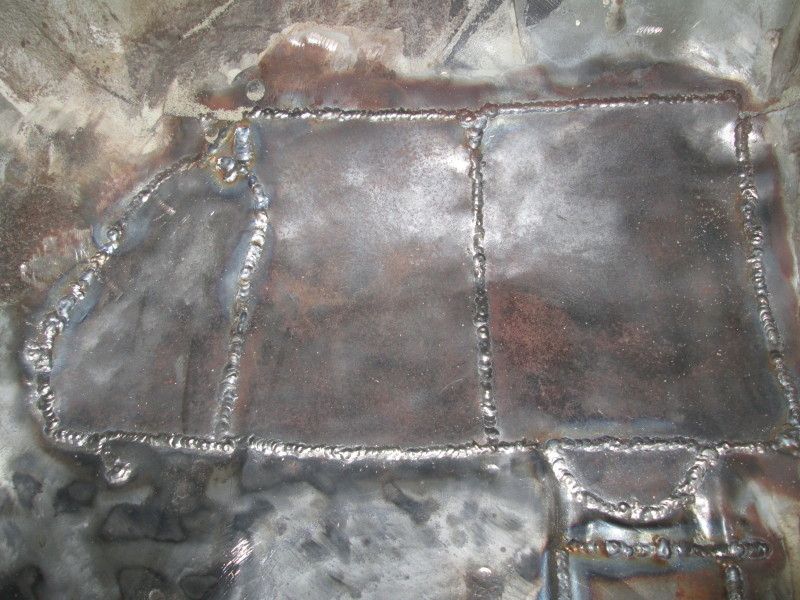
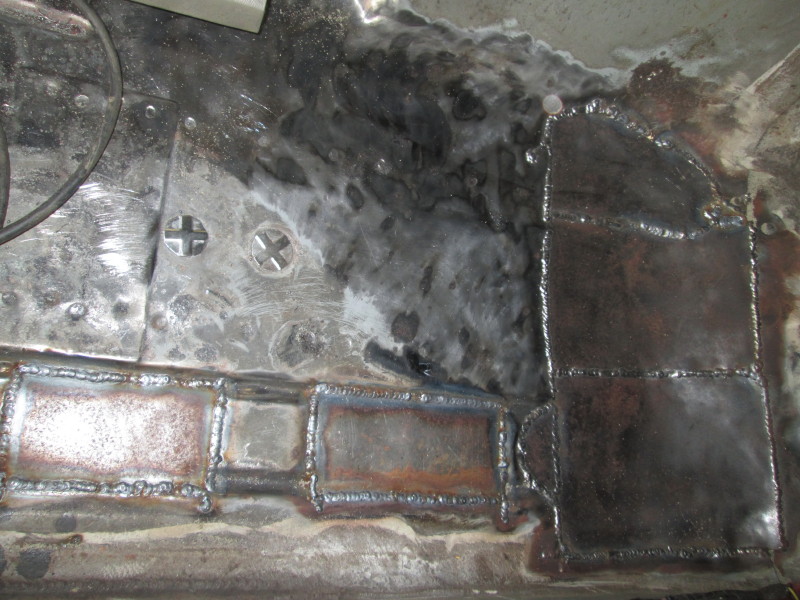
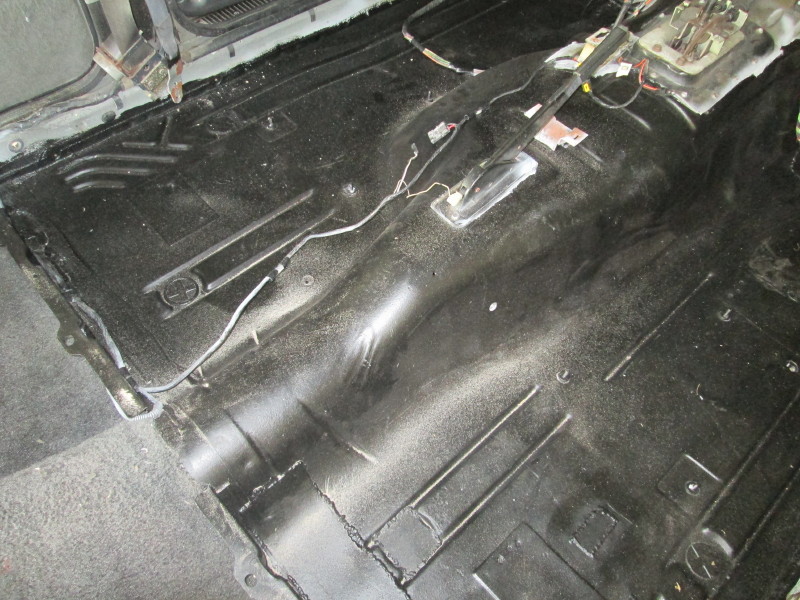
Here are some pics of the rust issues we found when we got further into the Jeep. We discovered the rust while working underneath, building the longarms. After pulling out the carpet we found some serious stuff, and that lead me to removing the gas tank. Then I found a hole in the gas tank, under one of the straps!
Plus more rust above the gas tank in the bed.
Here's what it looks like up front. Most of the bad rust is on the passenger side.
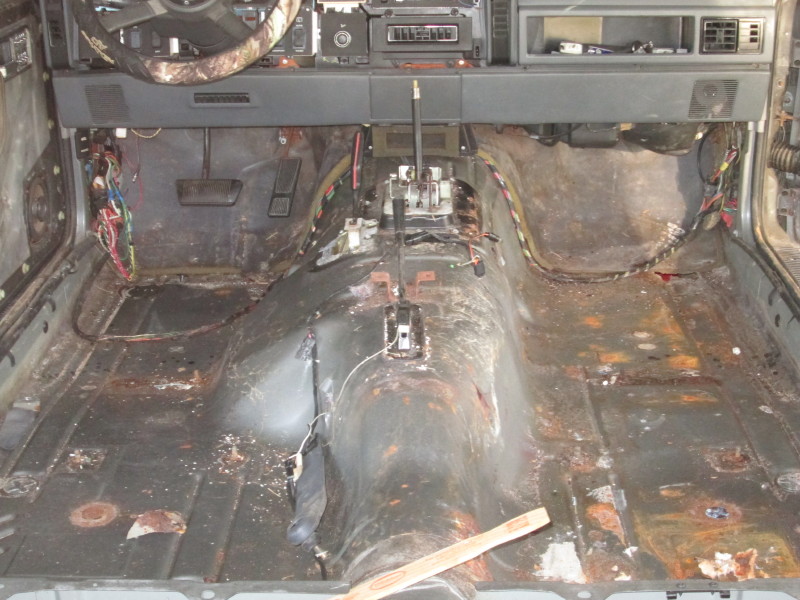
This is in the floor pan PS.
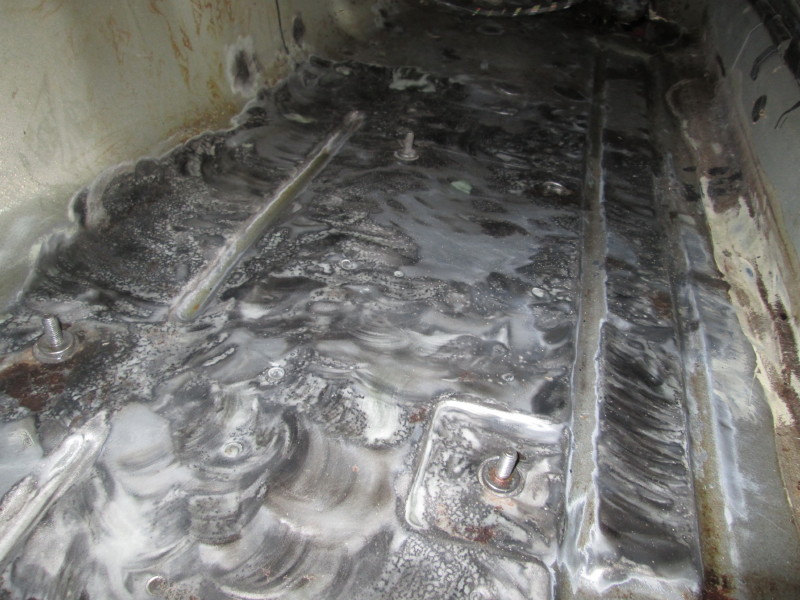
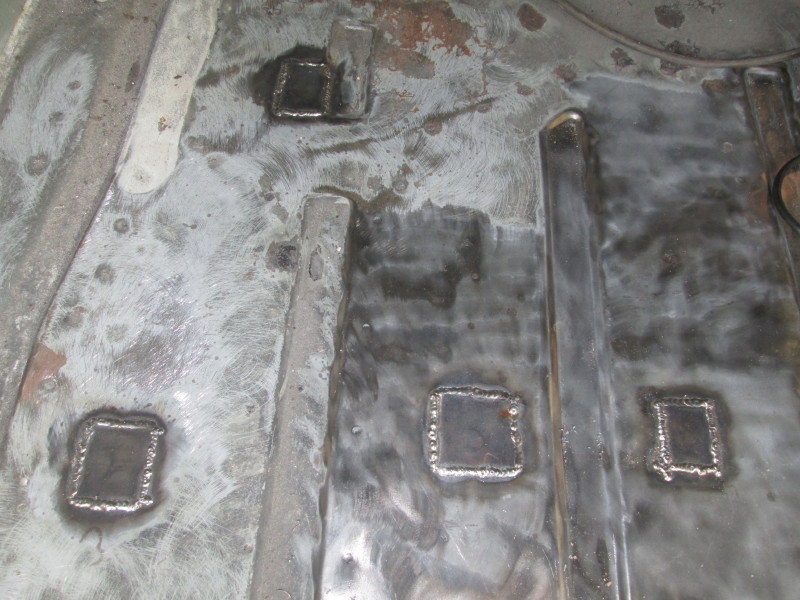
Started wire-wheeling everything.
My son Clay welding patch panels.
The hole after removing the rust from PS floor pan.
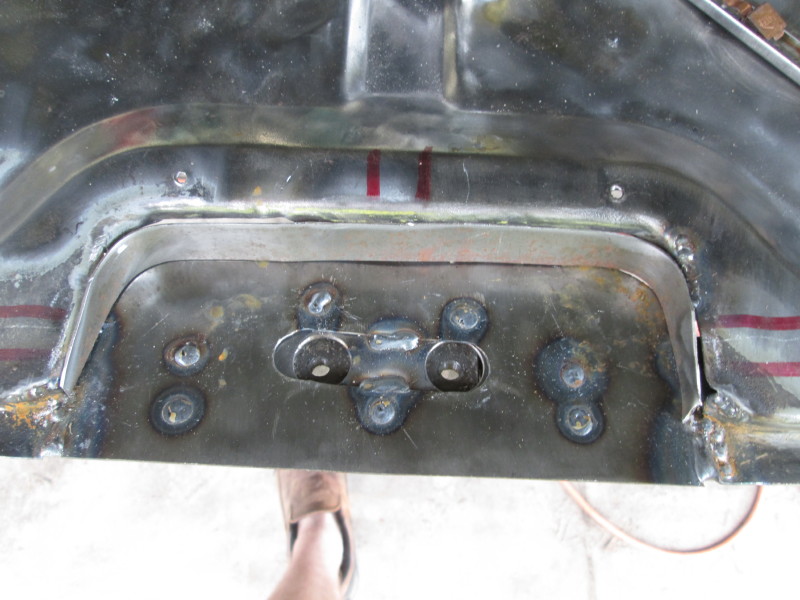
Rebuilding the hatch latch.
Patches...
For some reason I don't have a pic of the finished hatch latch, but it came out really well.
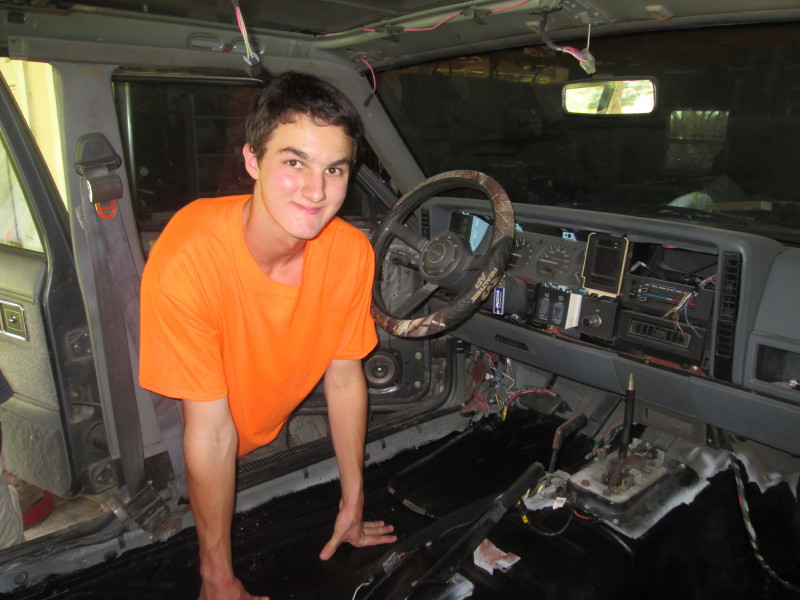
And Fallon after he Osphoed everything and painted with Rustoleum Rusty Metal Primer.
Does anybody have any experience with how long welded patches will realistically last, after chemically treating and coating??
Sorry for the ultra-long delay on an update!
Plus more rust above the gas tank in the bed.

Here's what it looks like up front. Most of the bad rust is on the passenger side.

This is in the floor pan PS.


Started wire-wheeling everything.

My son Clay welding patch panels.

The hole after removing the rust from PS floor pan.

Rebuilding the hatch latch.

Patches...


For some reason I don't have a pic of the finished hatch latch, but it came out really well.

And Fallon after he Osphoed everything and painted with Rustoleum Rusty Metal Primer.

Does anybody have any experience with how long welded patches will realistically last, after chemically treating and coating??
Sorry for the ultra-long delay on an update!
08-02-2015, 06:37 PM
#193
Member
Thread Starter
Join Date: Sep 2013
Location: White Springs, FL
Posts: 161
Likes: 0
Received 0 Likes
on
0 Posts
Year: 1990
Model: Cherokee
Engine: 4.0
I pulled the gas tank out of the '97 donor XJ. It is larger and poly. It is also OBDII. Fallon's XJ is OBDI. Has anybody ever converted and OBDII tank to an OBDI system? Can I simply wire in the fuel pump plug and go? Or should I buy a new tank? I never knew it before now, but all of our local JYs punch holes in the gas tank when they get a vehicle, for EPA reasons. No JY gas tanks! Got a JY here with a dozen XJs. I was disappointed!
08-02-2015, 07:14 PM
#194
Member
Thread Starter
Join Date: Sep 2013
Location: White Springs, FL
Posts: 161
Likes: 0
Received 0 Likes
on
0 Posts
Year: 1990
Model: Cherokee
Engine: 4.0
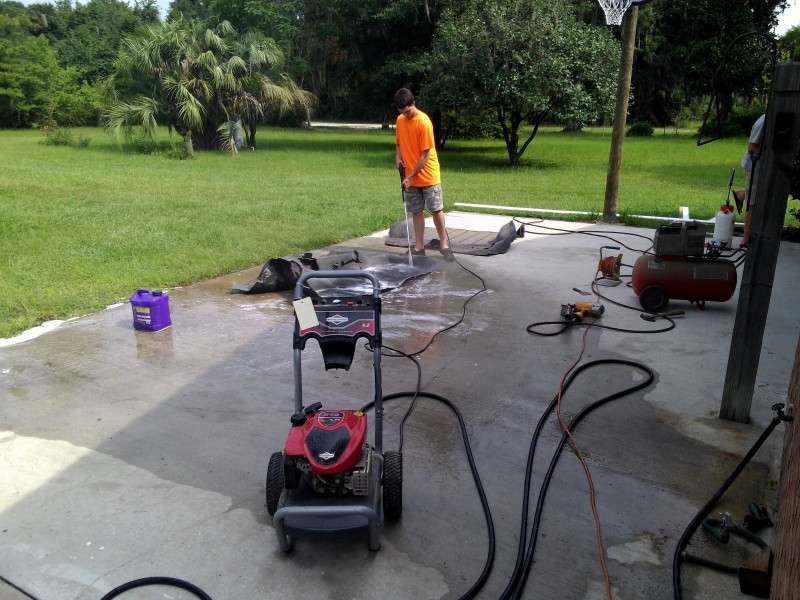
I know I'm bombarding you with pics and questions, but I got excited about building Jeeps again!
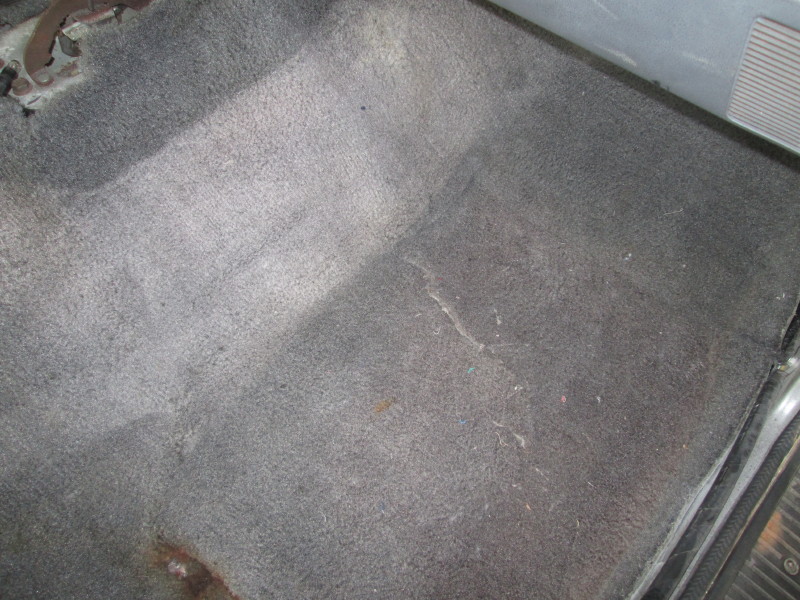
Here are some pics of the carpet cleaning and reinstall.
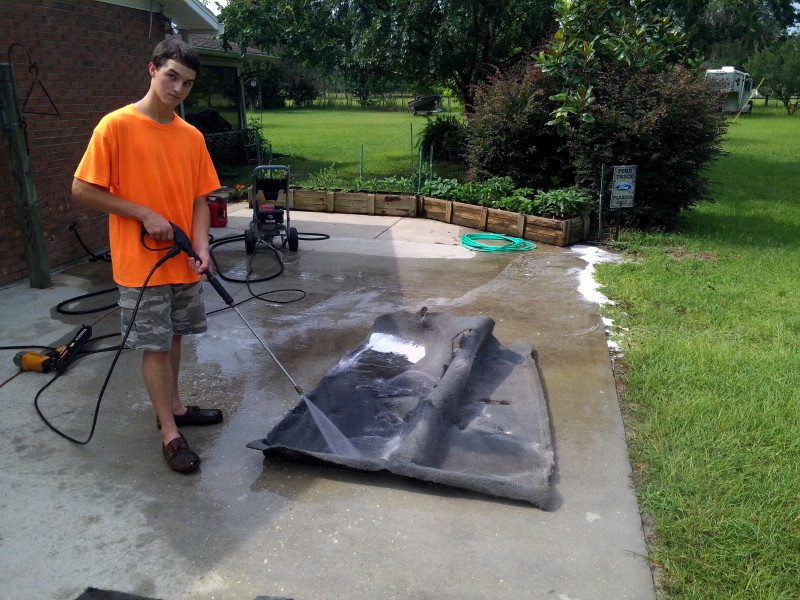
Fallon pressure-washing the carpet.
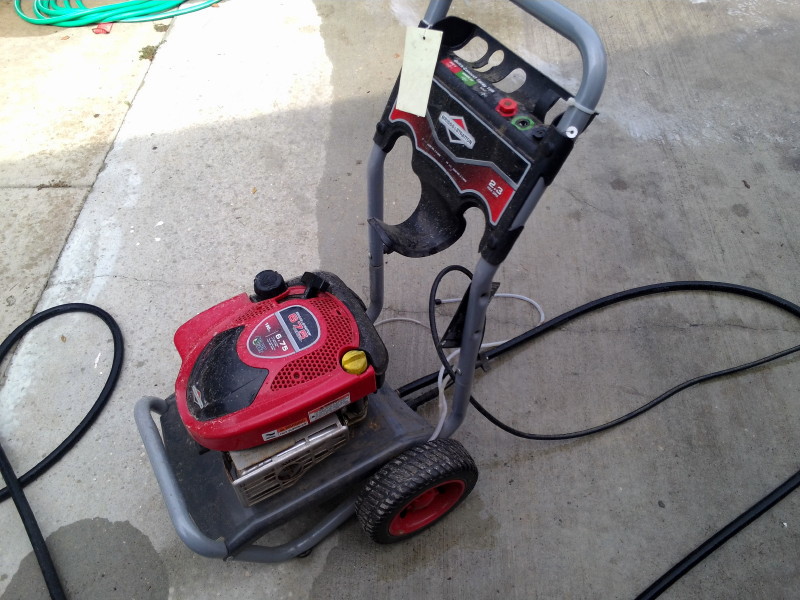
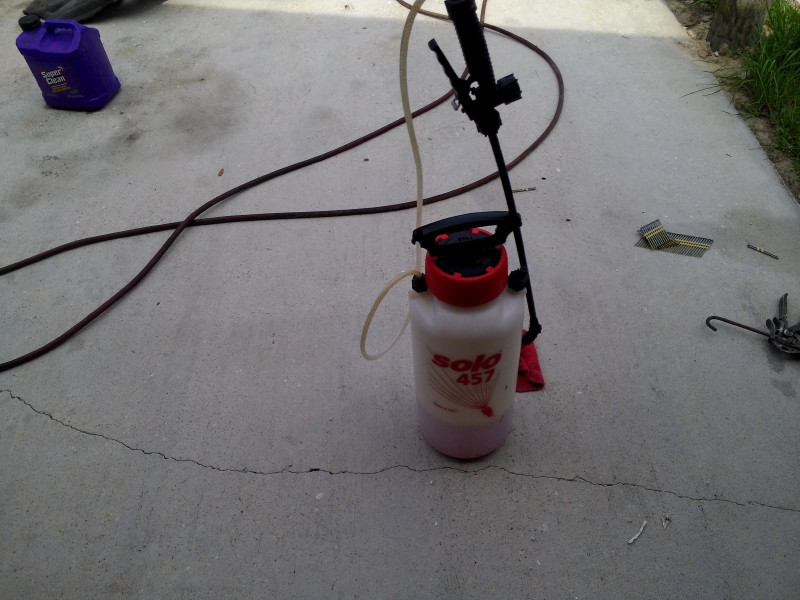
Things we used.
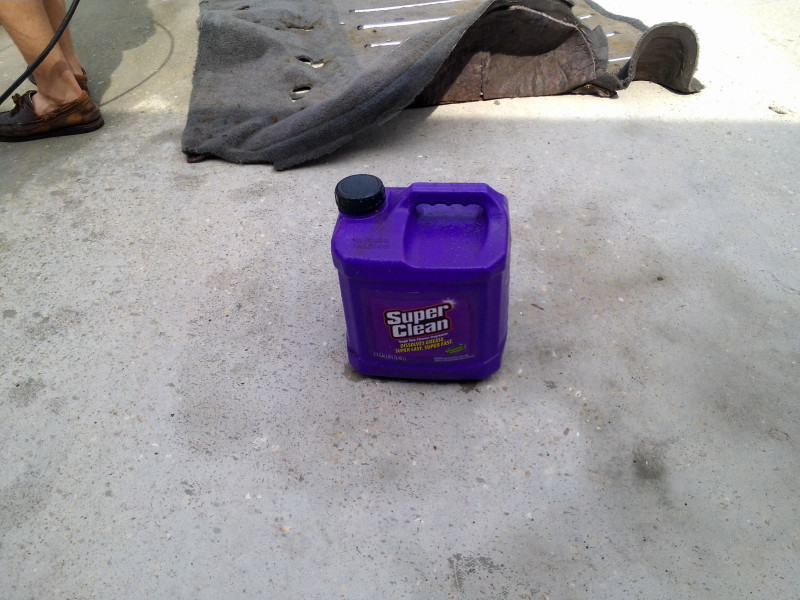
Saturated the carpet with diluted soap (the Castrol soap is very good stuff!), let it sit, then sprayed with water until the soap was gone.
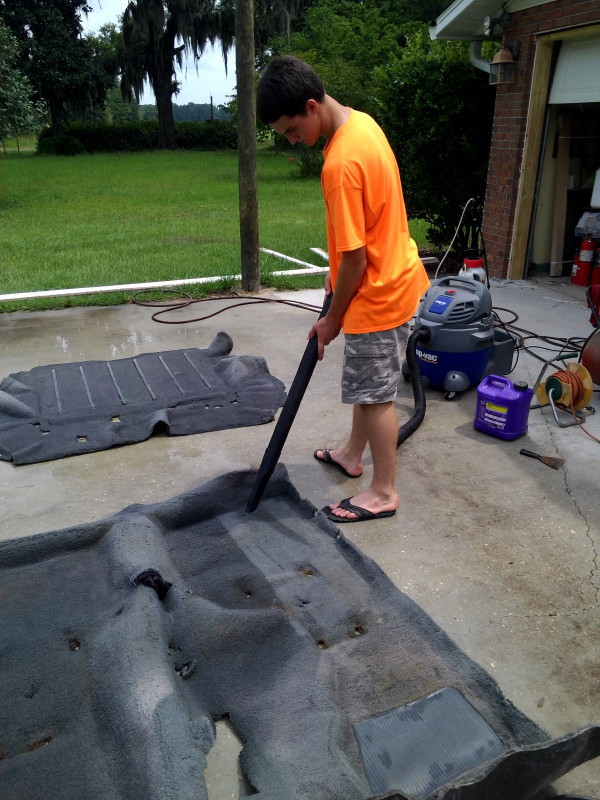
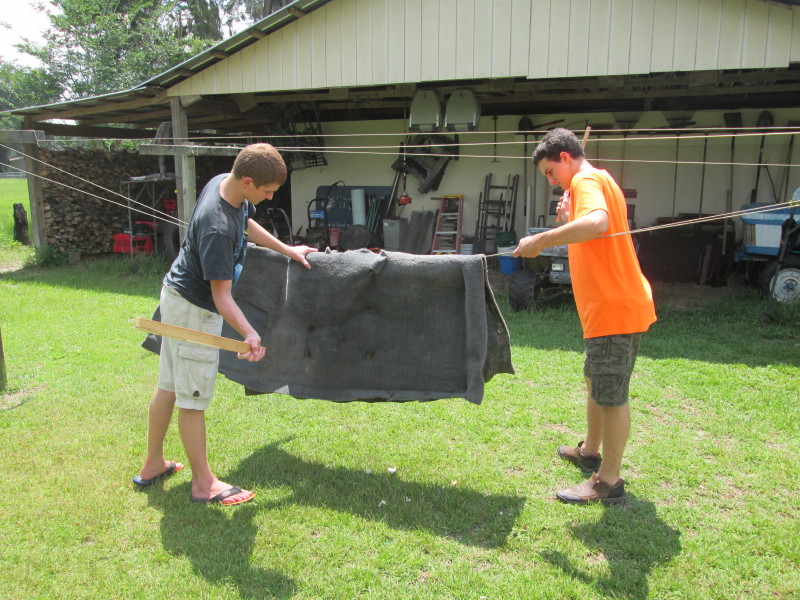
Sucked up what we could with the Shop-Vac, then hung the carpet to dry for a couple of days.
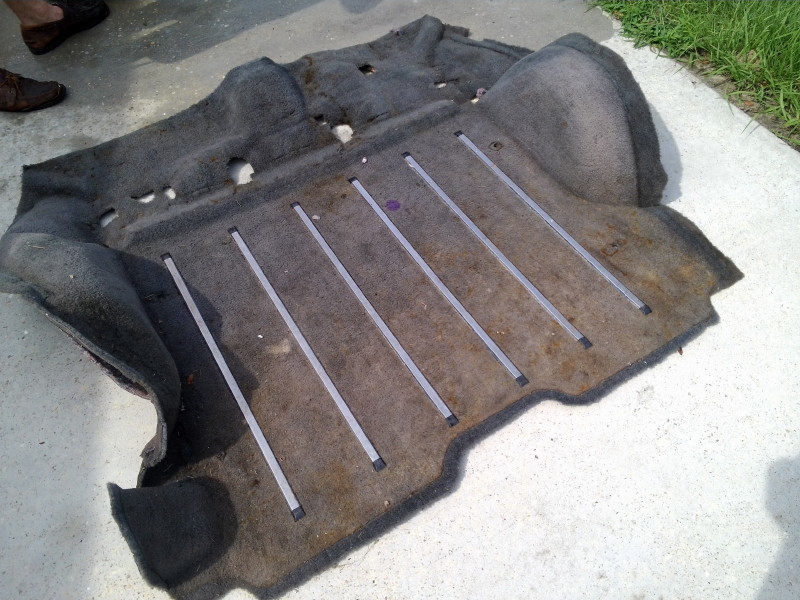
Before...
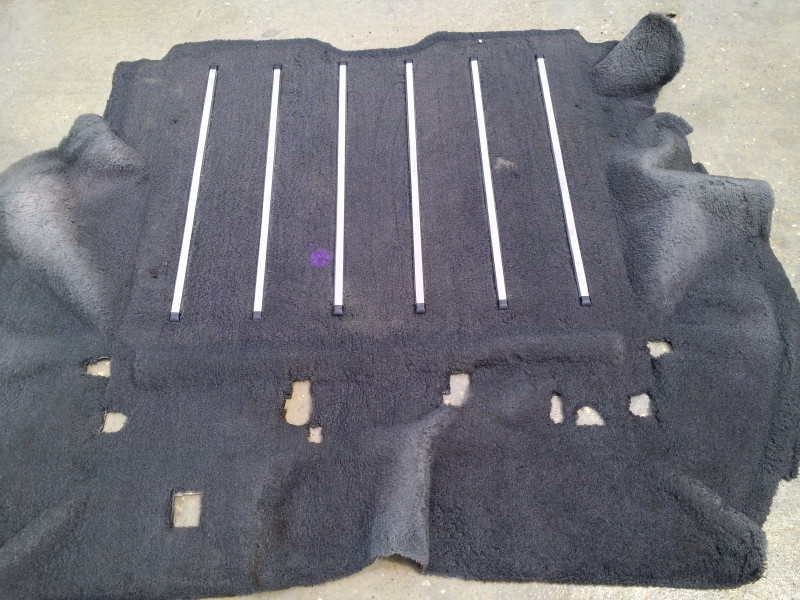
After...
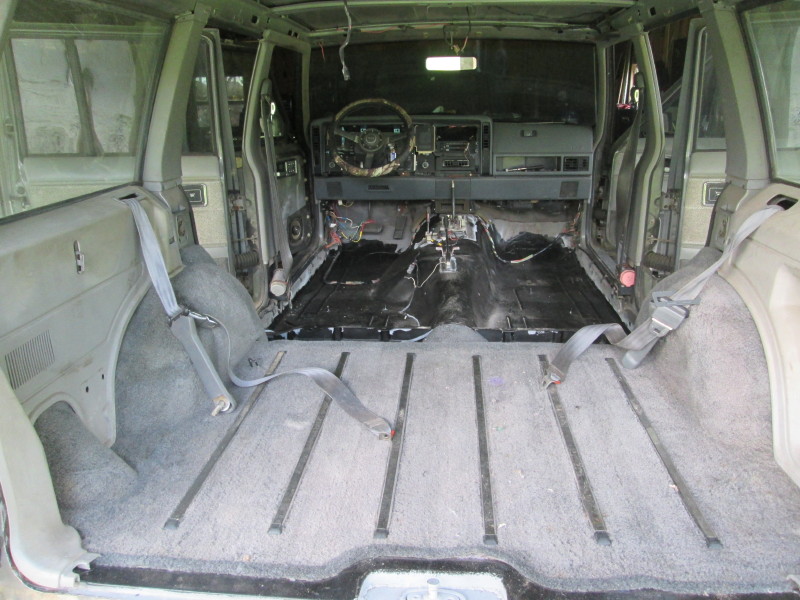
Back in place.
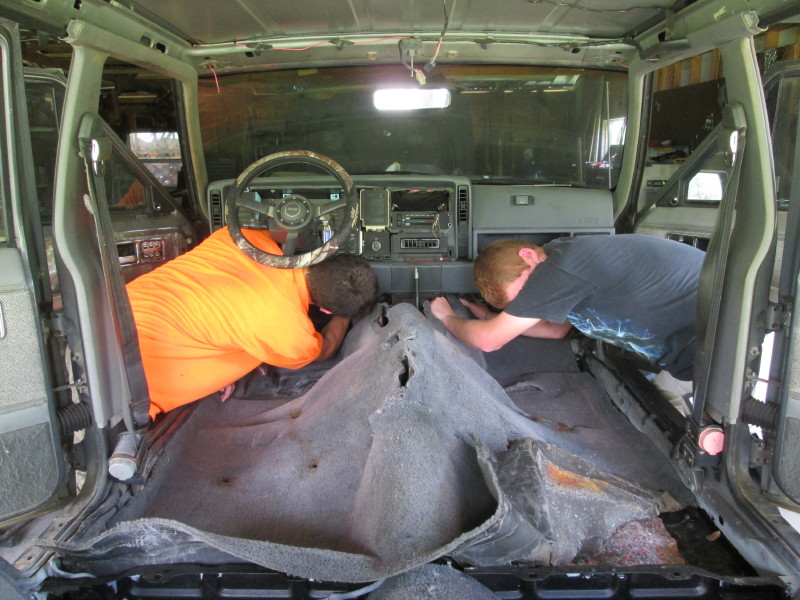
This is all sand from trying to reinstall the front carpet. I was amazed there was still so much of it. So we pulled it back out and beat the carpet.
Fallon and younger brother Cameron beating the carpet! They beat it so much they tore it up!!
Boys installing front section.
Tear in front PS floorboard (from the beating). I was gonna buy him a new carpet kit, but Fal said it would be covered with a floor mat. He wants to buy something else with the money. If you do this just don't be so vigorous with the stick!
Have to get a final pic...
Here are some pics of the carpet cleaning and reinstall.
Fallon pressure-washing the carpet.

Things we used.


Saturated the carpet with diluted soap (the Castrol soap is very good stuff!), let it sit, then sprayed with water until the soap was gone.

Sucked up what we could with the Shop-Vac, then hung the carpet to dry for a couple of days.

Before...

After...

Back in place.

This is all sand from trying to reinstall the front carpet. I was amazed there was still so much of it. So we pulled it back out and beat the carpet.

Fallon and younger brother Cameron beating the carpet! They beat it so much they tore it up!!

Boys installing front section.

Tear in front PS floorboard (from the beating). I was gonna buy him a new carpet kit, but Fal said it would be covered with a floor mat. He wants to buy something else with the money. If you do this just don't be so vigorous with the stick!

Have to get a final pic...
08-02-2015, 07:30 PM
#195
Member
Thread Starter
Join Date: Sep 2013
Location: White Springs, FL
Posts: 161
Likes: 0
Received 0 Likes
on
0 Posts
Year: 1990
Model: Cherokee
Engine: 4.0
And here Fallon is in the early stages of building his rock sliders. The rocker was rotting on pass. side, so he cut it out. This will be the same as so many others have done, so no big deal. Snapped a chalk line and he went at it.