In deep with DAT JEEP -- Lots of pictures
#407
Seasoned Member
Thread Starter
Join Date: Sep 2015
Location: Rochester, MN
Posts: 363
Likes: 0
Received 3 Likes
on
3 Posts
Year: 1998
Model: Cherokee
Engine: 4.0 L6

Cleaned up Dat Jeep's interior just in time for a camping/night Catfish fishing weekend.
Last edited by 98jeepster_xj; 07-16-2016 at 08:23 AM.
#409
Seasoned Member
Thread Starter
Join Date: Sep 2015
Location: Rochester, MN
Posts: 363
Likes: 0
Received 3 Likes
on
3 Posts
Year: 1998
Model: Cherokee
Engine: 4.0 L6

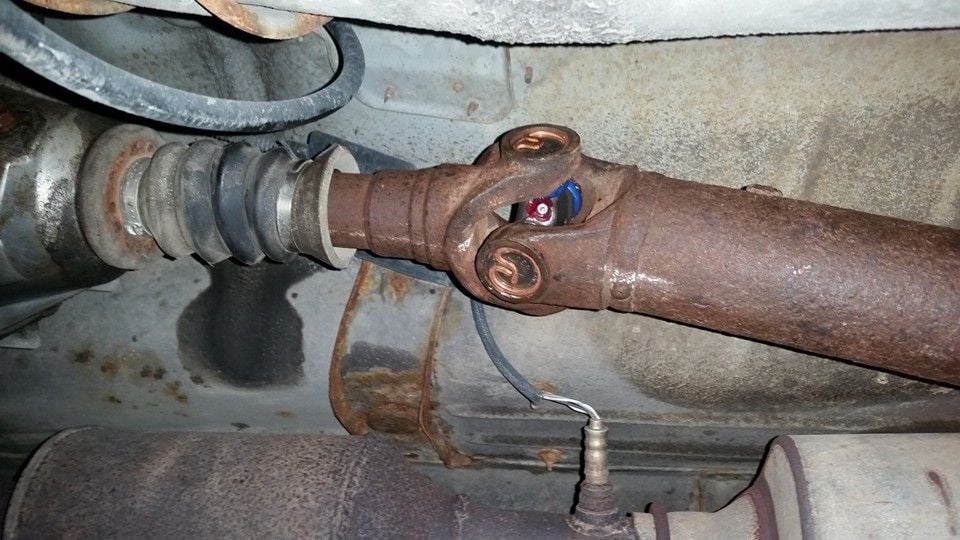
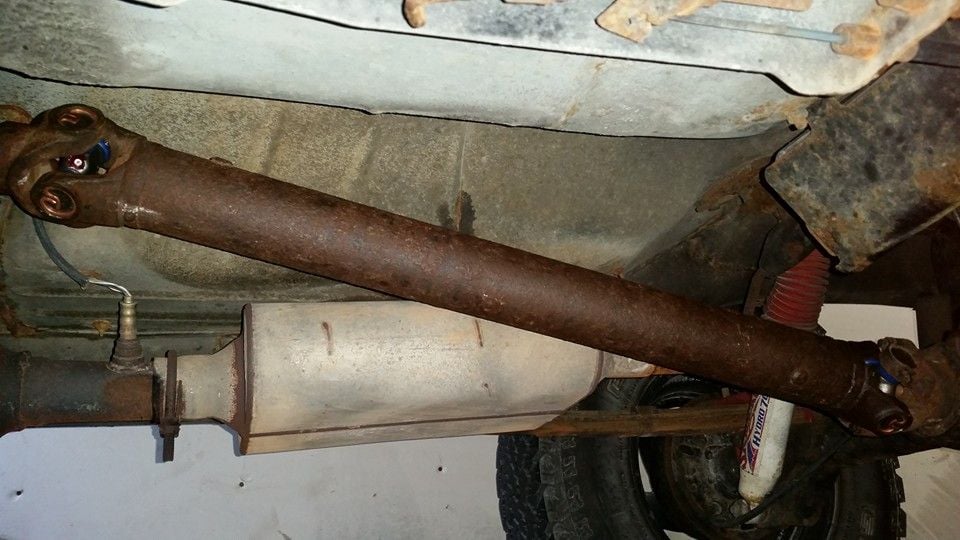
I replaced both the rear drive shaft U joints with the same Spicer 5-153x joints as the front shaft.
Blue lock-tite the bolt threads to prevent bolts self-removing.
I used my new 20 Ton press this time around instead of the hand press, worked much smoother.
Reinstalled and gave everything a healthy shot of grease.
Total shop time 30-45 minutes (including me forgetting to chock the wheels and having the Jeep roll out of the garage with me underneath - oops
 )
)Which reminds me: PRO TIP: Before removing the rear drive shaft remember to put the Jeep in either 4WD, apply the e-brake or chock the wheels to prevent the Jeep from rolling away while you are underneath!
Happy wrenching!
Last edited by 98jeepster_xj; 07-24-2016 at 11:23 AM.
#410
CF Veteran
Join Date: Oct 2013
Location: Greenville, SC
Posts: 5,920
Likes: 0
Received 190 Likes
on
165 Posts
Year: 1999
Model: Cherokee(XJ)
Engine: 4.0
I replaced both the rear drive shaft U joints with the same Spicer 5-153x joints as the front shaft. Blue lock-tite the bolt threads to prevent bolts self-removing. I used my new 20 Ton press this time around instead of the hand press, worked much smoother. Reinstalled and gave everything a healthy shot of grease. Total shop time 30-45 minutes (including me forgetting to chock the wheels and having the Jeep roll out of the garage with me underneath - oops  ) Which reminds me: PRO TIP: Before removing the rear drive shaft remember to put the Jeep in either 4WD, apply the e-brake or chock the wheels to prevent the Jeep from rolling away while you are underneath! Happy wrenching!
 ) Which reminds me: PRO TIP: Before removing the rear drive shaft remember to put the Jeep in either 4WD, apply the e-brake or chock the wheels to prevent the Jeep from rolling away while you are underneath! Happy wrenching!
#411
Seasoned Member
Thread Starter
Join Date: Sep 2015
Location: Rochester, MN
Posts: 363
Likes: 0
Received 3 Likes
on
3 Posts
Year: 1998
Model: Cherokee
Engine: 4.0 L6


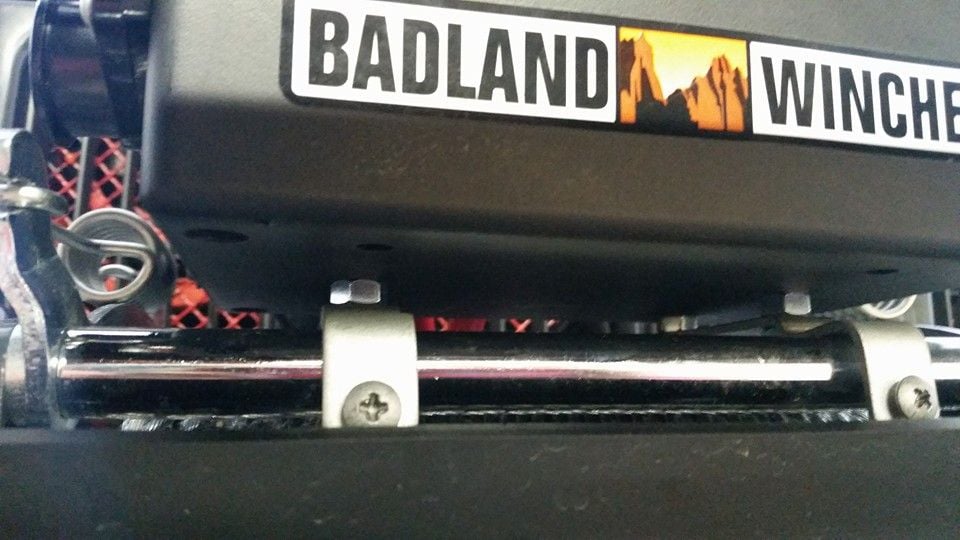
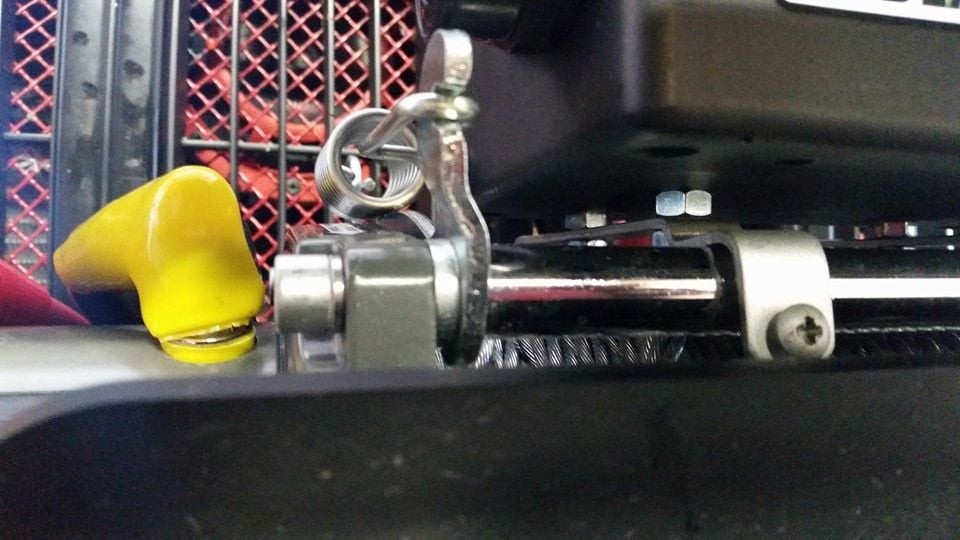


Added additional 1/4" nut spacer and re-drilled new mounting holes 1" offset to allow wires enough space to run between the grille and box.
Also, while I had the box apart, I added my wiring for my in-cab winch controller (future).
Now the controller box sits facing the correct way and allows for easy access to use the remote trigger.
#412
Seasoned Member
Thread Starter
Join Date: Sep 2015
Location: Rochester, MN
Posts: 363
Likes: 0
Received 3 Likes
on
3 Posts
Year: 1998
Model: Cherokee
Engine: 4.0 L6
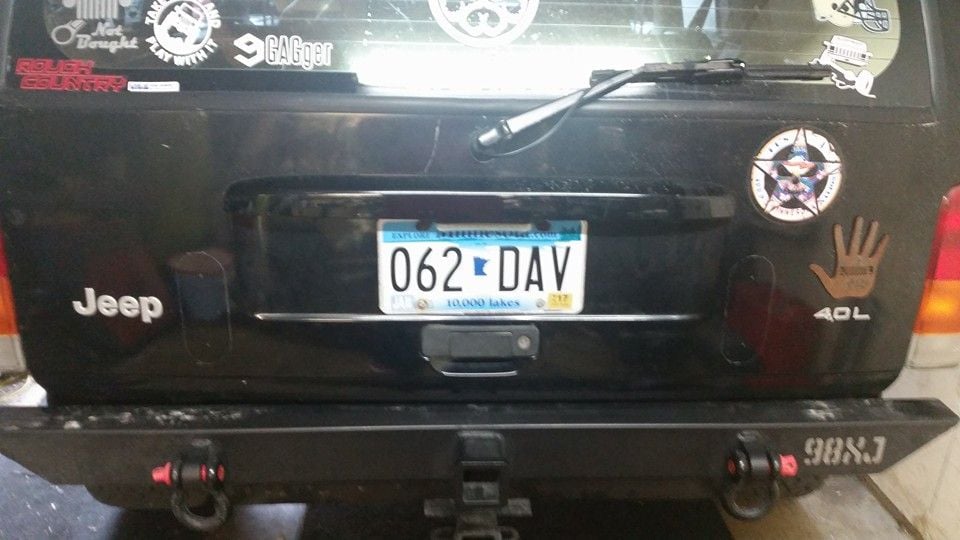

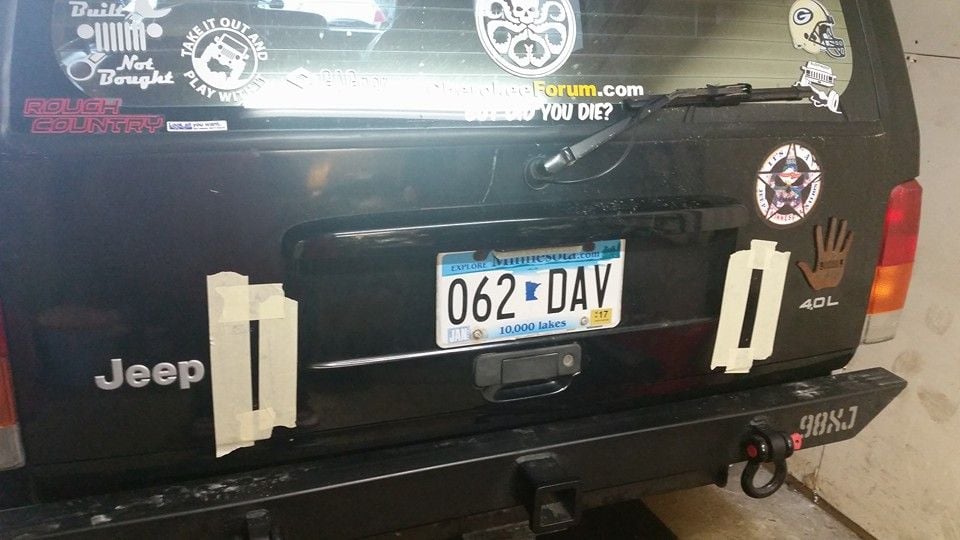


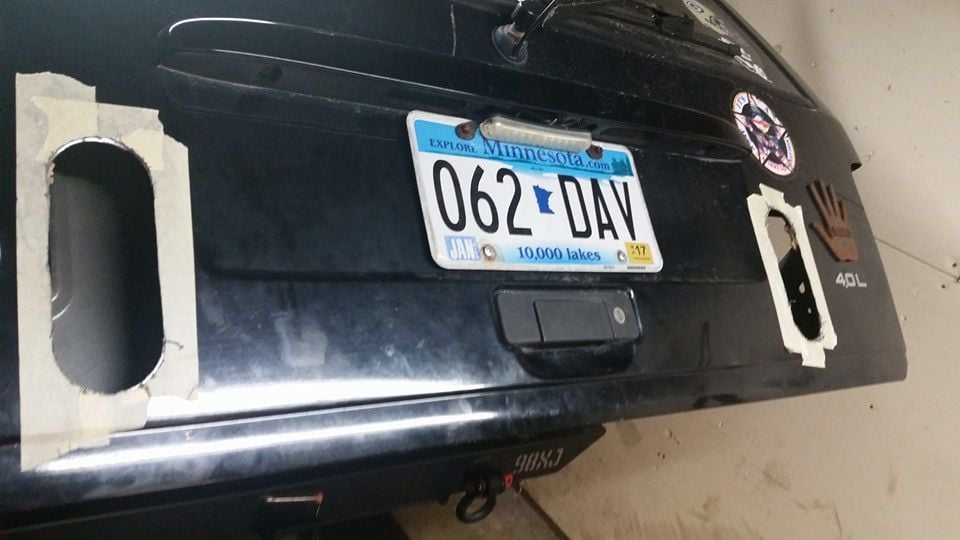


Ordered the LED lights here: http://www.ebay.com/itm/301927320497?_trksid=p2057872.m2749.l2649&ssPageName=STRK%3AMEBIDX%3AIT
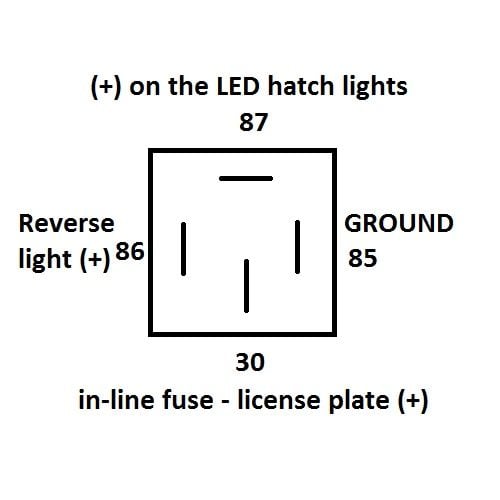
Wired the lights using a relay including an in-line fuse.
The relay is only given power when the lights are on via the license plate hot wire.
The lights are triggered when the Jeep is put into reverse and the lights are on.
The additional reverse lights greatly increase nighttime visibility when reversing.
The LED lights used are standard oval trailer lights, easily replaceable if damaged.
If anyone is wondering: the hole saw used was 2-1/2" with the hole centers spaced 4-1/4" apart, giving the outside-outside measurement 6-3/4".
The relay is wired as follows:
30 - in-line fuse - license plate light (+)
85 - Ground
86 - (+) reverse light wire
87 - (+) on the LED hatch lights
Last edited by 98jeepster_xj; 07-28-2016 at 09:48 PM.
#415
CF Veteran
Join Date: Feb 2015
Location: North Carolina
Posts: 1,528
Likes: 0
Received 2 Likes
on
2 Posts
Year: 1993
Model: Cherokee
Engine: 4.0
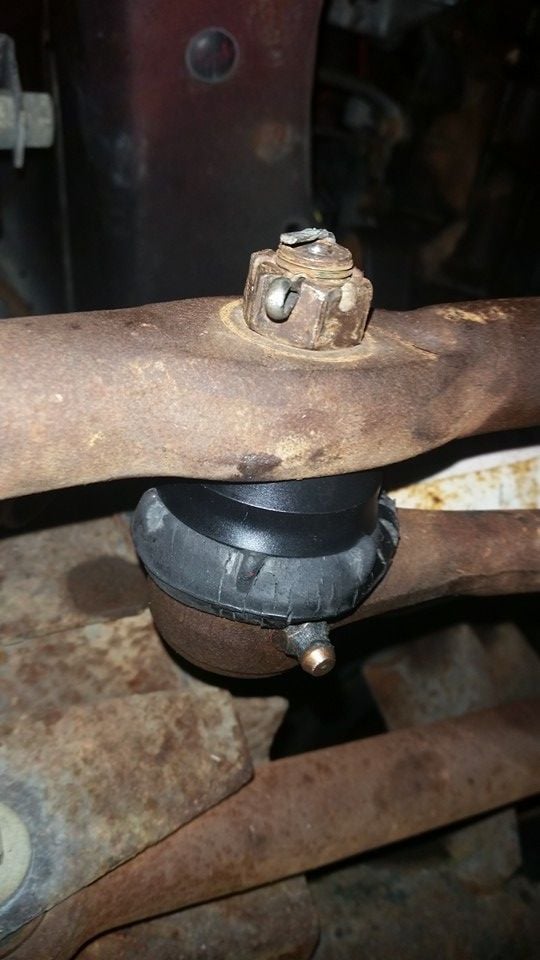
The Cure! - Available here from Ruffstuff Specialties Also did a grease job while I was down there.
#417
Seasoned Member
Thread Starter
Join Date: Sep 2015
Location: Rochester, MN
Posts: 363
Likes: 0
Received 3 Likes
on
3 Posts
Year: 1998
Model: Cherokee
Engine: 4.0 L6
I noticed more of a difference when I tightened steering box gear.
See video here:
#418
CF Veteran
Join Date: Feb 2015
Location: North Carolina
Posts: 1,528
Likes: 0
Received 2 Likes
on
2 Posts
Year: 1993
Model: Cherokee
Engine: 4.0
After taking Dat Jeep out for a few drives I don't really notice any significant difference in the steering, but it is slightly less sloppy/loose/tighter. I noticed more of a difference when I tightened steering box gear. See video here: Video Link: https://www.youtube.com/watch?v=qtXQvVNg6vI
#419
CF Veteran
Join Date: Jan 2015
Location: Minnesota
Posts: 2,152
Likes: 0
Received 7 Likes
on
7 Posts
Year: 1999
Model: Cherokee
Engine: 4.0L
Originally Posted by 98jeepster_xj
After taking Dat Jeep out for a few drives I don't really notice any significant difference in the steering, but it is slightly less sloppy/loose/tighter.
I noticed more of a difference when I tightened steering box gear.
See video here:
I noticed more of a difference when I tightened steering box gear.
See video here:
#420
CF Veteran
Join Date: Feb 2015
Location: North Carolina
Posts: 1,528
Likes: 0
Received 2 Likes
on
2 Posts
Year: 1993
Model: Cherokee
Engine: 4.0
On my ZJ, I was running aresFab one ton steering and it had pretty sloppy steering, so I used the cure but I used it on the passenger tie rod on the knuckle and that made a huge difference.. Maybe give it a try there. The slop in the steering is caused by the drag link rotating the tie rod before it turns the vehicle, if you put it on the outer tie rod, the tie rod can't roll at all.


