Building on an Enlisted Budget..
 11-01-2014, 04:20 PM
#61
Member
Thread Starter
Join Date: May 2012
Location: Hayesville, NC
Posts: 244
Likes: 0
Received 1 Like
on
1 Post
Year: 2000
Model: Cherokee
Engine: 4.0L I6
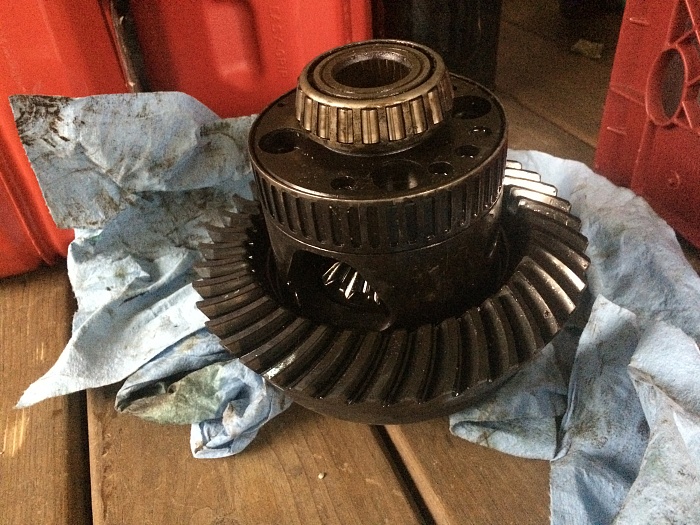
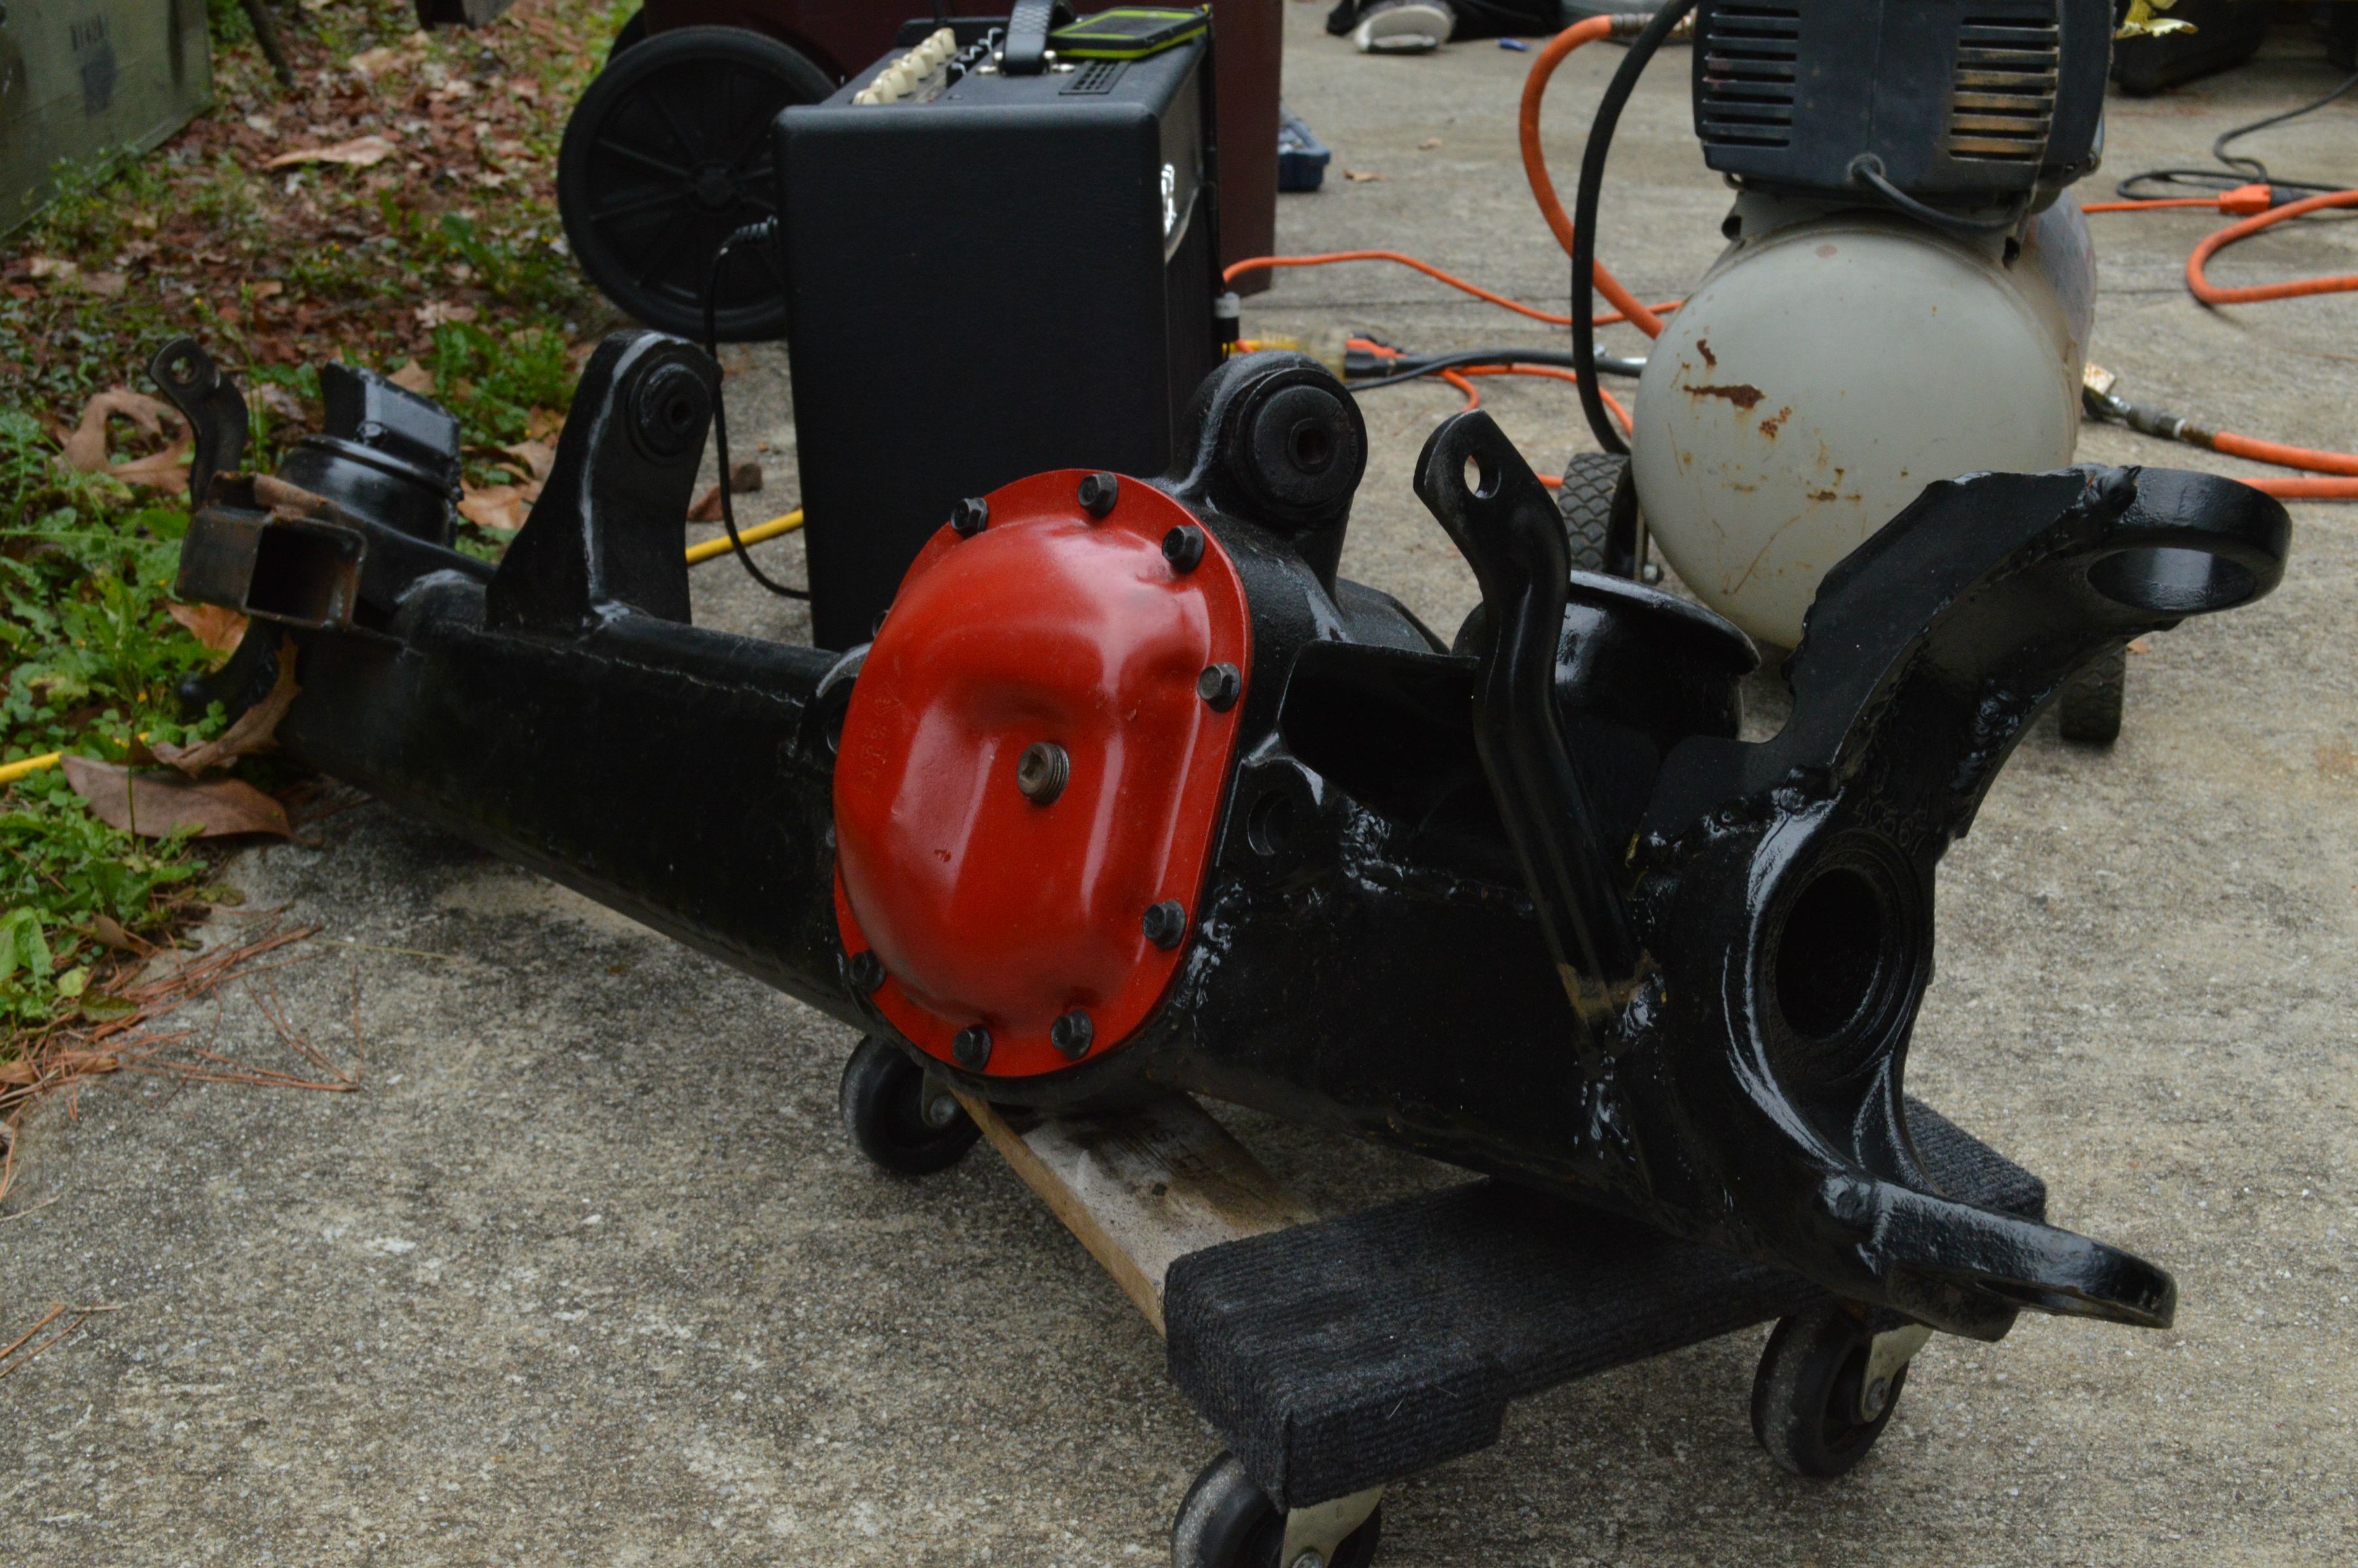
Today has definitely been a good one. It may be cold, raining outside, and I have no first gear or overdrive but damn it do I now have a Volvo locker! 
Annnd my Farmer Johnson Offroad light bar brackets came in today!
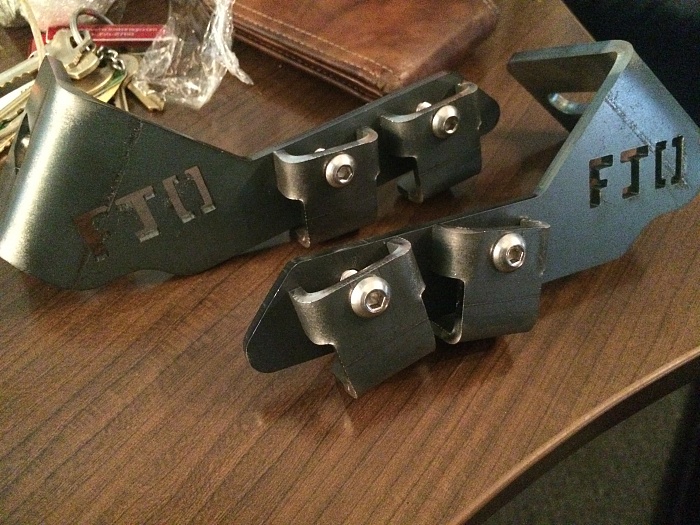

Annnd my Farmer Johnson Offroad light bar brackets came in today!

 11-01-2014, 06:25 PM
#62
THE Admin

Join Date: Sep 2010
Location: Lantana, Fl
Posts: 34,036
Received 231 Likes
on
187 Posts
Year: 1996
Model: Cherokee (XJ)
Engine: 4.Slow
You can clean the same way as injectors. Apply power with a little 9V battery to keep needle open then spray something as Electronic cleaner through the body. Easy, simple and cheap. Lol
11-01-2014, 07:00 PM
#63
Member
Thread Starter
Join Date: May 2012
Location: Hayesville, NC
Posts: 244
Likes: 0
Received 1 Like
on
1 Post
Year: 2000
Model: Cherokee
Engine: 4.0L I6
Oh yes I tested the spare solenoids and one of them doesn't click. There are two that look identical and the third is different. I'm assuming the odd one out is the overdrive solenoid. Is there a difference between A and B or are they literally the same unit? Its one of the same looking ones that won't work.
Last edited by KevinC506; 11-01-2014 at 07:03 PM.
11-10-2014, 02:53 PM
#64
Member
Thread Starter
Join Date: May 2012
Location: Hayesville, NC
Posts: 244
Likes: 0
Received 1 Like
on
1 Post
Year: 2000
Model: Cherokee
Engine: 4.0L I6
So I fixed my transmissions issues this weekend. It was a loose wire or two at the TPS plug. You could play with the wire and it would affect the idle. I was also having some "cutting out" like symptoms when I would get up and go on the pedal. So I replaced the plug and spliced the wires in and viola. Fixed everything. I knew the TPS was a major contributor of information to the transmission, but didn't know it was having that big of an affect to it. Lessons have been learned.
 11-15-2014, 10:23 PM
#66
Member
Thread Starter
Join Date: May 2012
Location: Hayesville, NC
Posts: 244
Likes: 0
Received 1 Like
on
1 Post
Year: 2000
Model: Cherokee
Engine: 4.0L I6
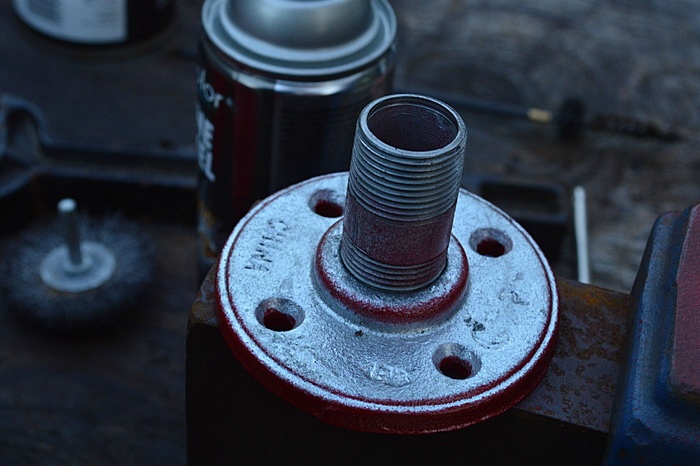
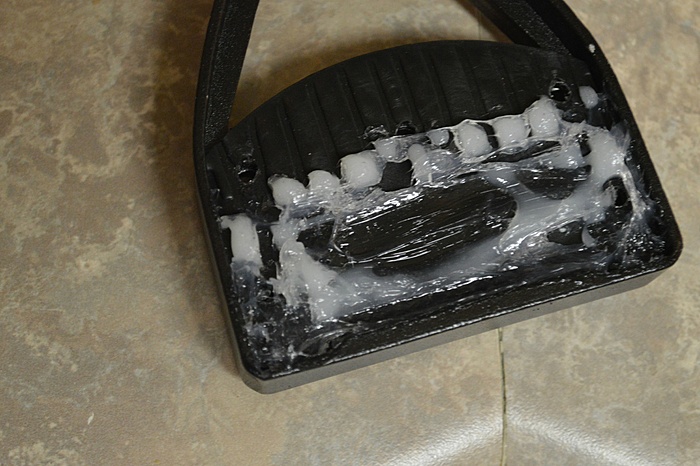
Put in my prothanes today and new stock bumpstops. To stop the bumpstop from poking into the protane I used your typical 3/4" pipe flange and about 2" long pipe. Wrapped the pipe in duct tape to get the correct thickness for it to fit nice and snug in the prothane. Cheap and effective.
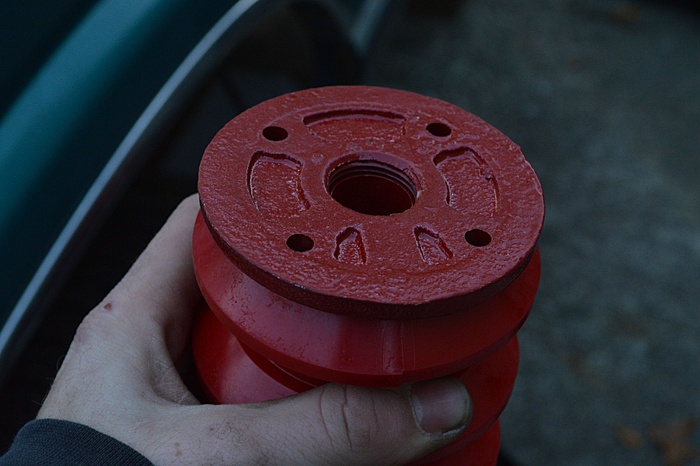
I'm running about a 1 1/2" Air gap (coil spring not shown for picture purposes). This seems to work for the time being. I'll have to do some field testing to make sure.
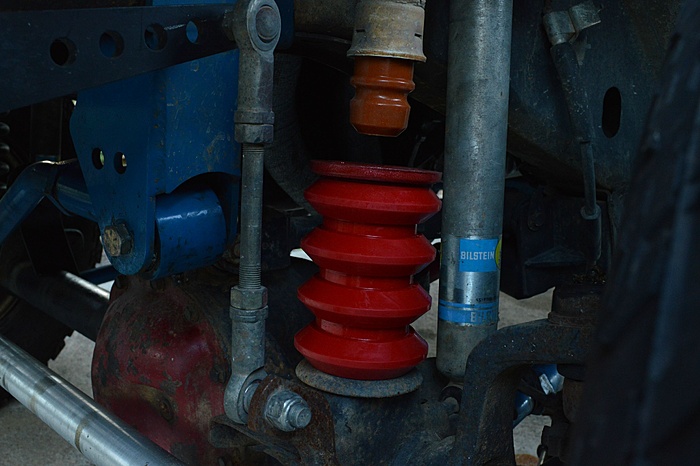


I'm running about a 1 1/2" Air gap (coil spring not shown for picture purposes). This seems to work for the time being. I'll have to do some field testing to make sure.

Last edited by KevinC506; 11-15-2014 at 10:26 PM.
11-22-2014, 09:13 PM
#67
Member
Thread Starter
Join Date: May 2012
Location: Hayesville, NC
Posts: 244
Likes: 0
Received 1 Like
on
1 Post
Year: 2000
Model: Cherokee
Engine: 4.0L I6
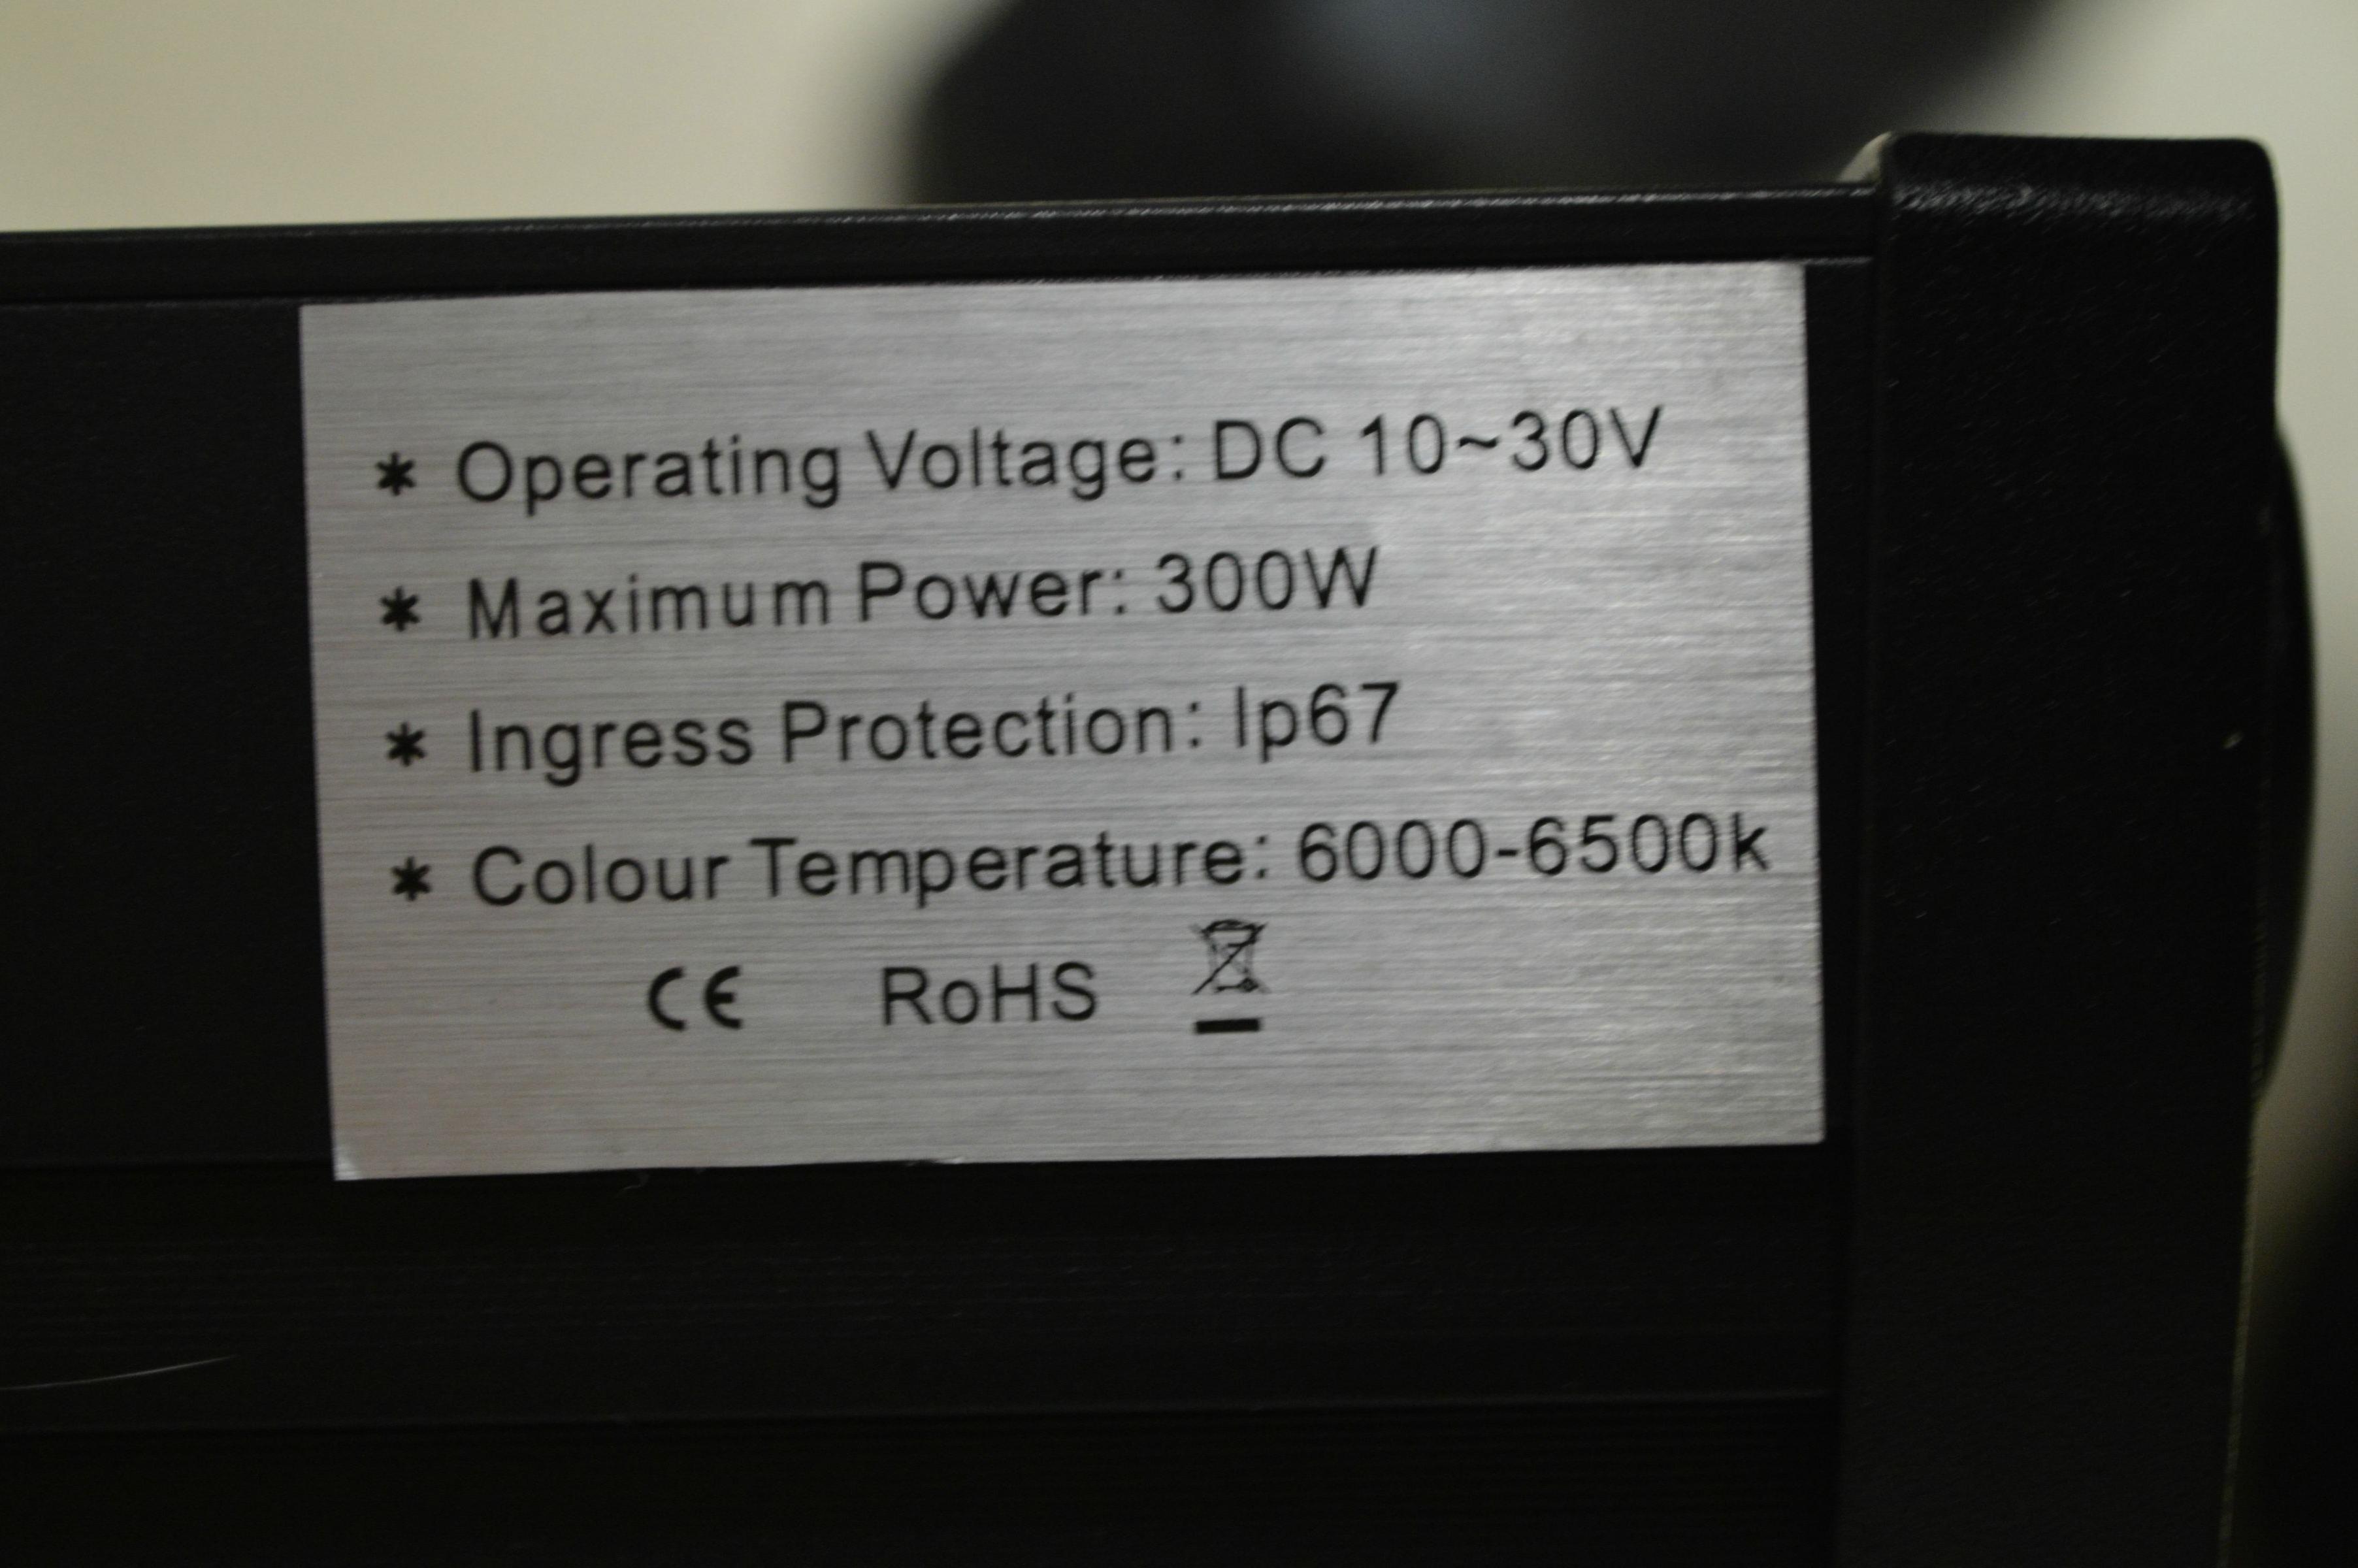
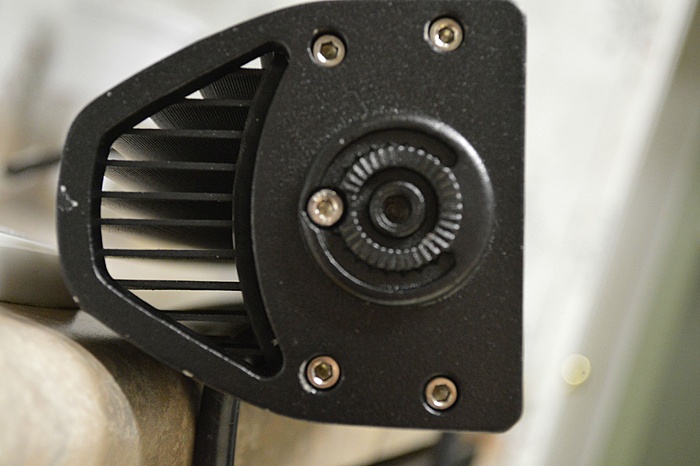
I recently got one of the Eyourlife LED 52" light bars off amazon. I've read many reviews and saw one that my friend got. I must say I am sold on it. Here is my take on it. Apparently moisture builds up on the inside of it after awhile. So to combat this you have to open it up and seal it up yourself with silicone of some fashion. After all of the my searching I couldn't find a detailed review with pictures of these things. So I decided I'd try and document this the best I can.
First off I paid $110 for it. Shipped to my door.
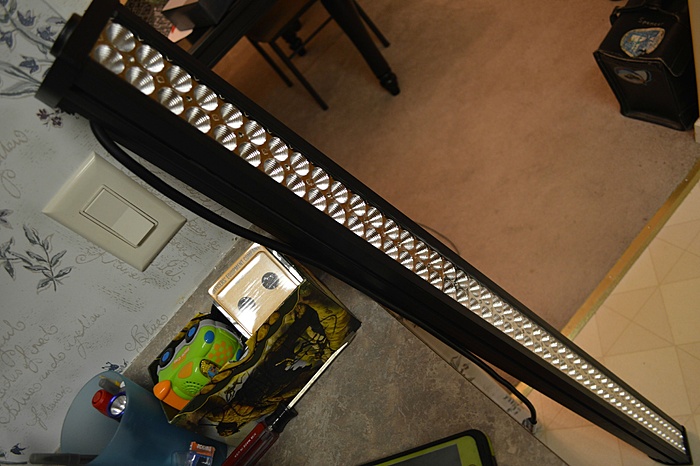

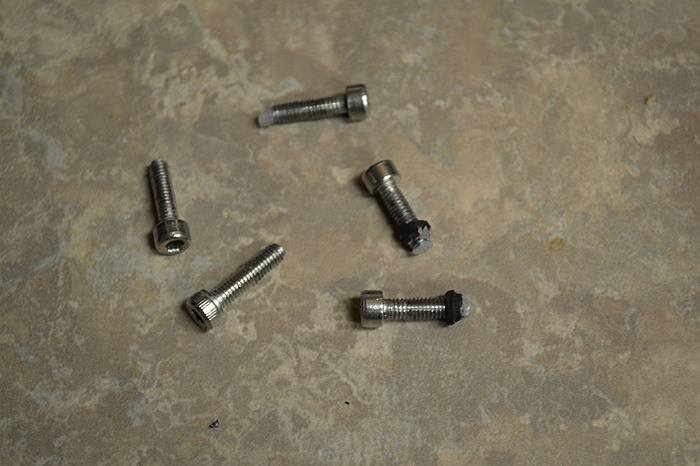
Each end is capped and held in with 5 allen head bolts. Note the gasket sealer on the bolts.
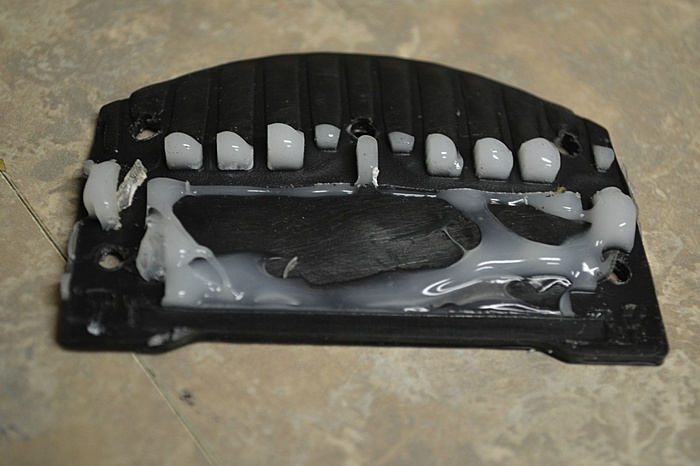
When you open it up you see what silicone sealing was already there. Now I'm not sure if they changed it up and made the seal better or not, but by the looks of it, it doesn't look too bad. It does have an IP rating of 67 anyways. The silicone is on a rubber seal "gasket" sort of thing.
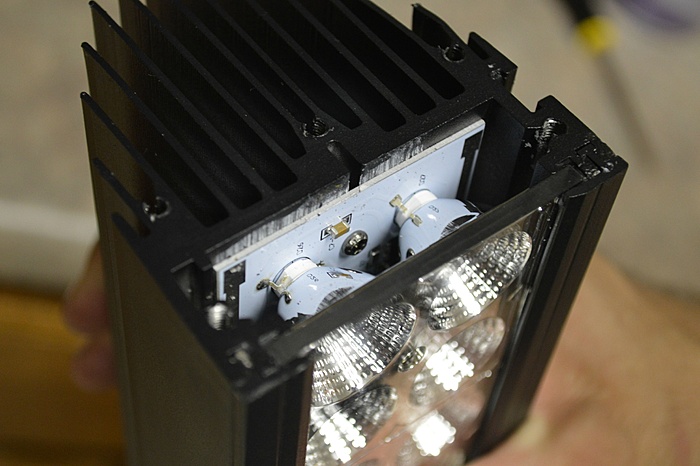
When looking into the light bar you can clearly see that all of it is off a circuit board. On the end where the wires are you can see where the wires soldered into the board.

I simply put a hefty amount of clear silicone all over it. Probably was a little over kill with it, but too much can't hurt in this case.
My first impression of it tells me it seems very solid and strong. Google some reviews and you'll see that people have had such great success with these. I can see why.
Installation wise, my answer was simple. Farmer Johnson Offroad light bar mounts. Cheaper than the rest yet extremely stout. Don't waste money on the $100 competitors.
Friend's XJ with the mounts.
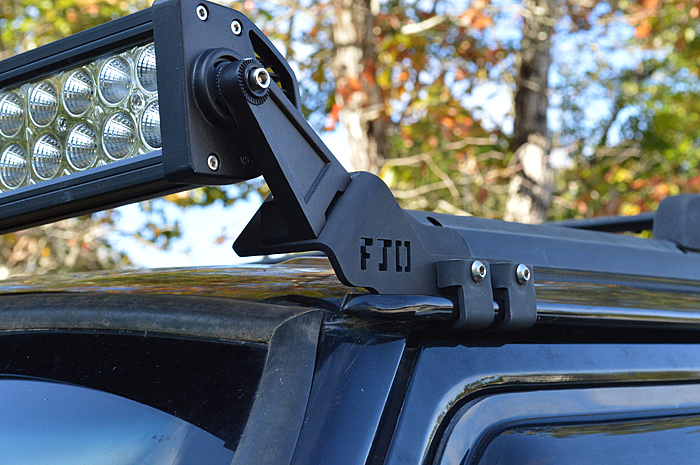
The light bar comes with these mounts. I had to shave down one side of them to make them fit using the FJO brackets but thats totally avoidable! Just swap the brackets to the opposite side so the flat piece is toward the outside. I chose not to for a narrower track, but thats just me.
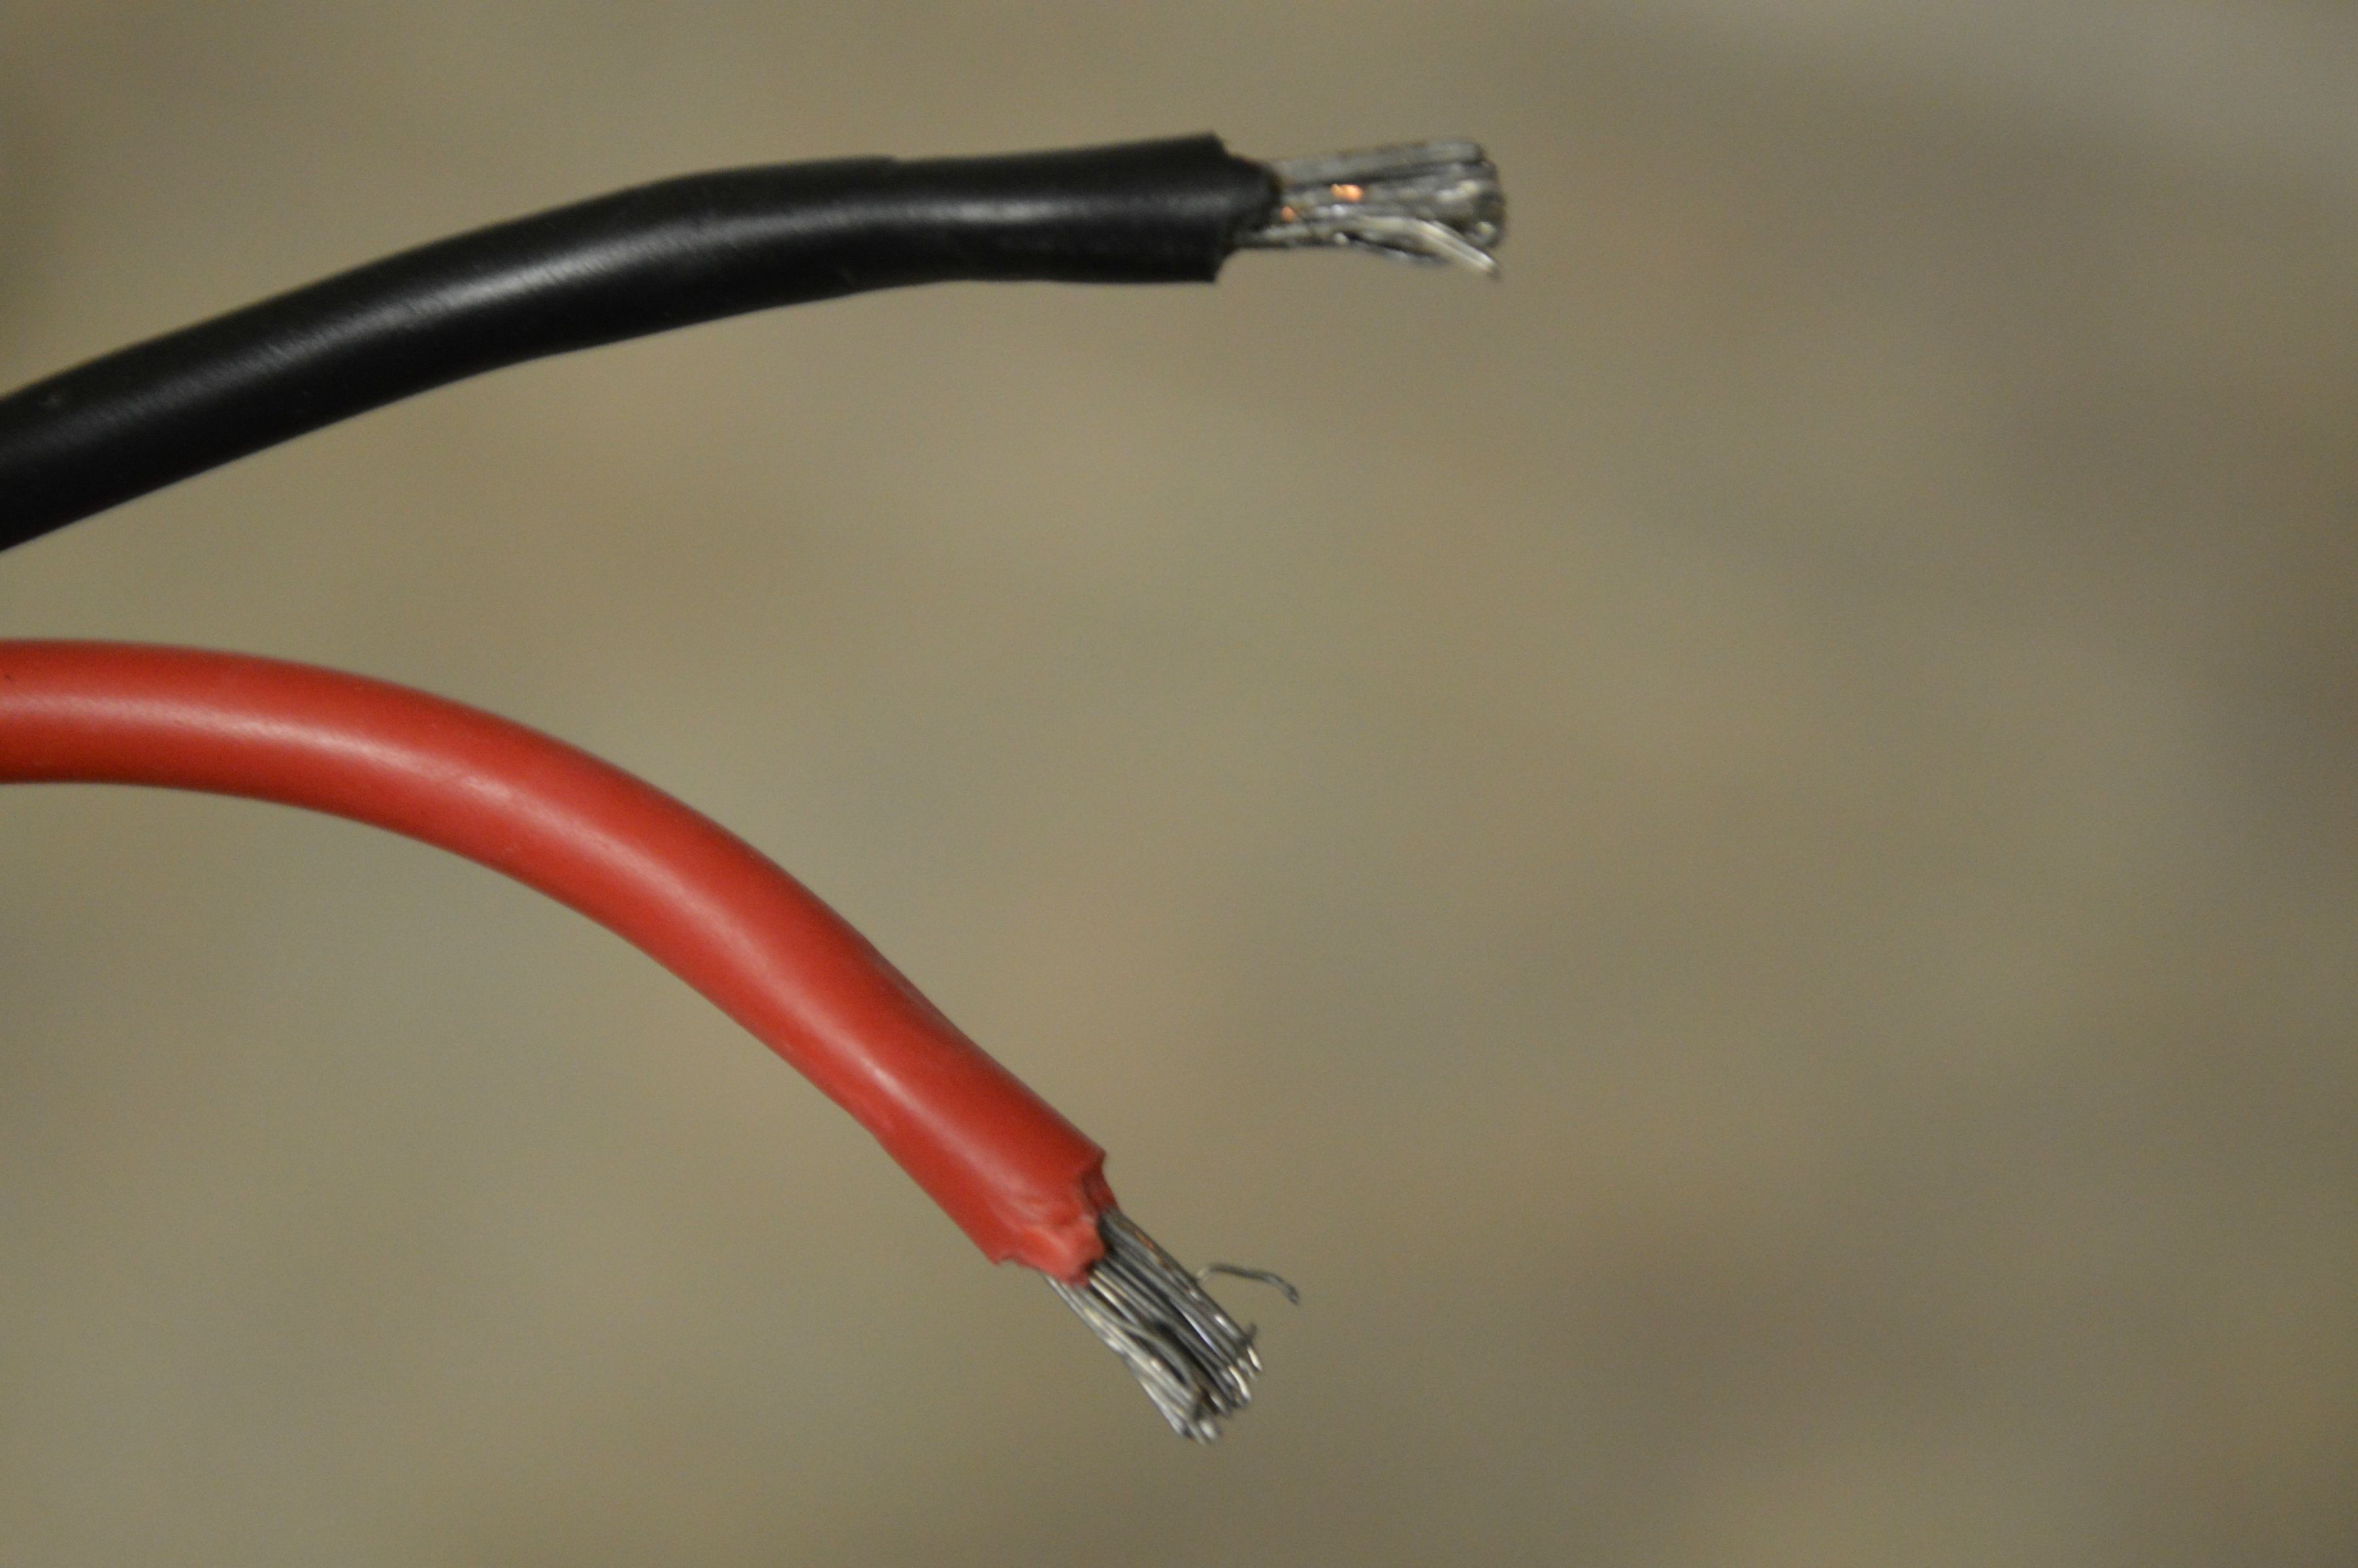
The light bar uses aluminum wire rather than copper if thats a thing to you. Over such a short distance I guess thats negligible.
The wires run the length of the passenger A pillar rather well. I suffed the load wire along the window seal into the engine bay. From there to my accessory PDC next to the stock one, and then relayed. Because relaying your lights is the correct thing to do!!
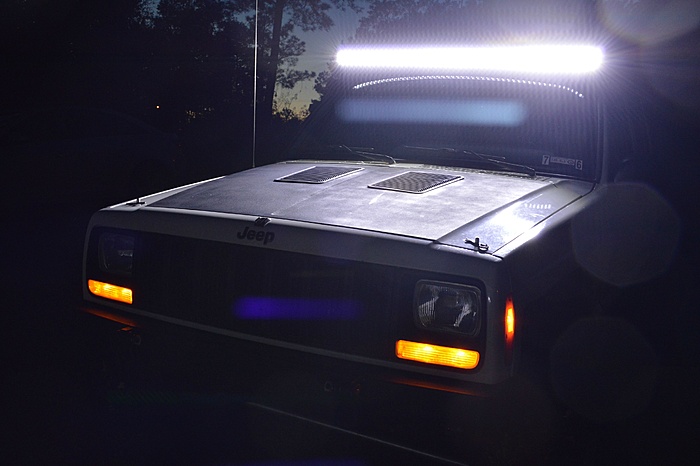
Without further adieu... Please note its bright as hell.
There is an important thing I must mention. I only seal the ends up. Not the glass. I looked closely at it and even had a buddy confirm that it is pretty darn sealed and glued in there. No getting that thing out with out breaking something. If I find that moisture is still an issue, I'll take a second look on how that could be done.
If you have any questions about it or want to see any specific pics of it all jus let me know. I'll keep an update on the light bar and how it performs.
I'm sure there will be more cinematic pictures taken at a later time. I did just wash and wax the jeep today and it looks superb I must say.
First off I paid $110 for it. Shipped to my door.


Each end is capped and held in with 5 allen head bolts. Note the gasket sealer on the bolts.


When you open it up you see what silicone sealing was already there. Now I'm not sure if they changed it up and made the seal better or not, but by the looks of it, it doesn't look too bad. It does have an IP rating of 67 anyways. The silicone is on a rubber seal "gasket" sort of thing.

When looking into the light bar you can clearly see that all of it is off a circuit board. On the end where the wires are you can see where the wires soldered into the board.


I simply put a hefty amount of clear silicone all over it. Probably was a little over kill with it, but too much can't hurt in this case.

My first impression of it tells me it seems very solid and strong. Google some reviews and you'll see that people have had such great success with these. I can see why.
Installation wise, my answer was simple. Farmer Johnson Offroad light bar mounts. Cheaper than the rest yet extremely stout. Don't waste money on the $100 competitors.
Friend's XJ with the mounts.

The light bar comes with these mounts. I had to shave down one side of them to make them fit using the FJO brackets but thats totally avoidable! Just swap the brackets to the opposite side so the flat piece is toward the outside. I chose not to for a narrower track, but thats just me.
The light bar uses aluminum wire rather than copper if thats a thing to you. Over such a short distance I guess thats negligible.
The wires run the length of the passenger A pillar rather well. I suffed the load wire along the window seal into the engine bay. From there to my accessory PDC next to the stock one, and then relayed. Because relaying your lights is the correct thing to do!!
Without further adieu... Please note its bright as hell.

There is an important thing I must mention. I only seal the ends up. Not the glass. I looked closely at it and even had a buddy confirm that it is pretty darn sealed and glued in there. No getting that thing out with out breaking something. If I find that moisture is still an issue, I'll take a second look on how that could be done.
If you have any questions about it or want to see any specific pics of it all jus let me know. I'll keep an update on the light bar and how it performs.
I'm sure there will be more cinematic pictures taken at a later time. I did just wash and wax the jeep today and it looks superb I must say.
Last edited by KevinC506; 11-23-2014 at 06:24 PM.

 12-06-2014, 09:17 PM
#72
Seasoned Member
Join Date: Aug 2011
Location: Michigan--> SOCAL--> Eastern Carolina--> Middle Tennessee
Posts: 264
Likes: 0
Received 0 Likes
on
0 Posts
Year: 01,01,99,98,97,97,96,94,90MJ,90MJ,86MJ
Model: Cherokee
Engine: 4.0
Great build
Last edited by lil01cherokee; 12-06-2014 at 09:25 PM.
12-06-2014, 09:37 PM
#73
CF Veteran
Join Date: Aug 2012
Location: oregon
Posts: 1,592
Likes: 0
Received 0 Likes
on
0 Posts
Year: 1993
Model: Cherokee
Engine: 4.0 ho 99 intake ps pump 1" tb spacer 62mm bored tb eletric fans and more
I thought about the volvo locker when I had the hp30 but went to the bronco axle interested in seeing how you like it and how hard it was to do
12-06-2014, 11:16 PM
#74
Senior Member

Join Date: Dec 2010
Location: Michigan (Home state) Stationed in Montana
Posts: 882
Likes: 0
Received 2 Likes
on
2 Posts
Year: 1993
Model: Grand Cherokee
Engine: 5.2L MPI V8 (318)
I like the build a lot man! Building mine on an E-3 budget myself, so I feel your pain! Auto hobby shop on base is my savior up here too haha.
12-07-2014, 09:15 AM
#75
Member
Thread Starter
Join Date: May 2012
Location: Hayesville, NC
Posts: 244
Likes: 0
Received 1 Like
on
1 Post
Year: 2000
Model: Cherokee
Engine: 4.0L I6
Yeah we have one too but they closed the metal/body shop where I spent 90% of my time welding. Thats where I built my axle. Apparently they don't have any more money to keep it open. I hope yours isn't having the same issue. That place is an asset!