Building on an Enlisted Budget..


 09-17-2014, 02:19 PM
#33
Member
Thread Starter
Join Date: May 2012
Location: Hayesville, NC
Posts: 244
Likes: 0
Received 1 Like
on
1 Post
Year: 2000
Model: Cherokee
Engine: 4.0L I6
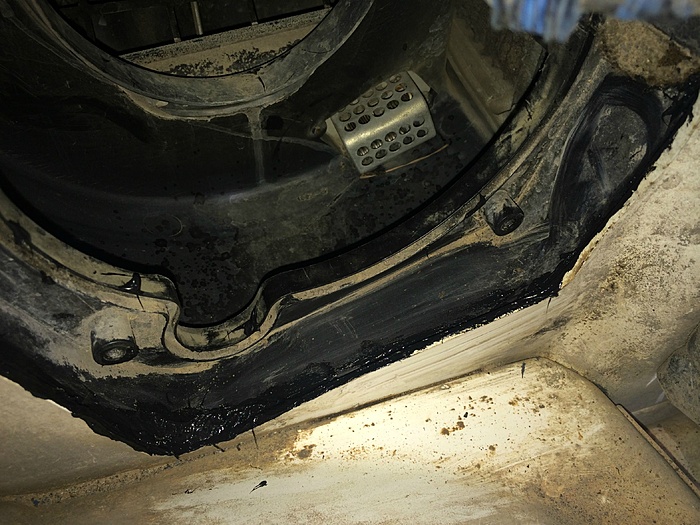
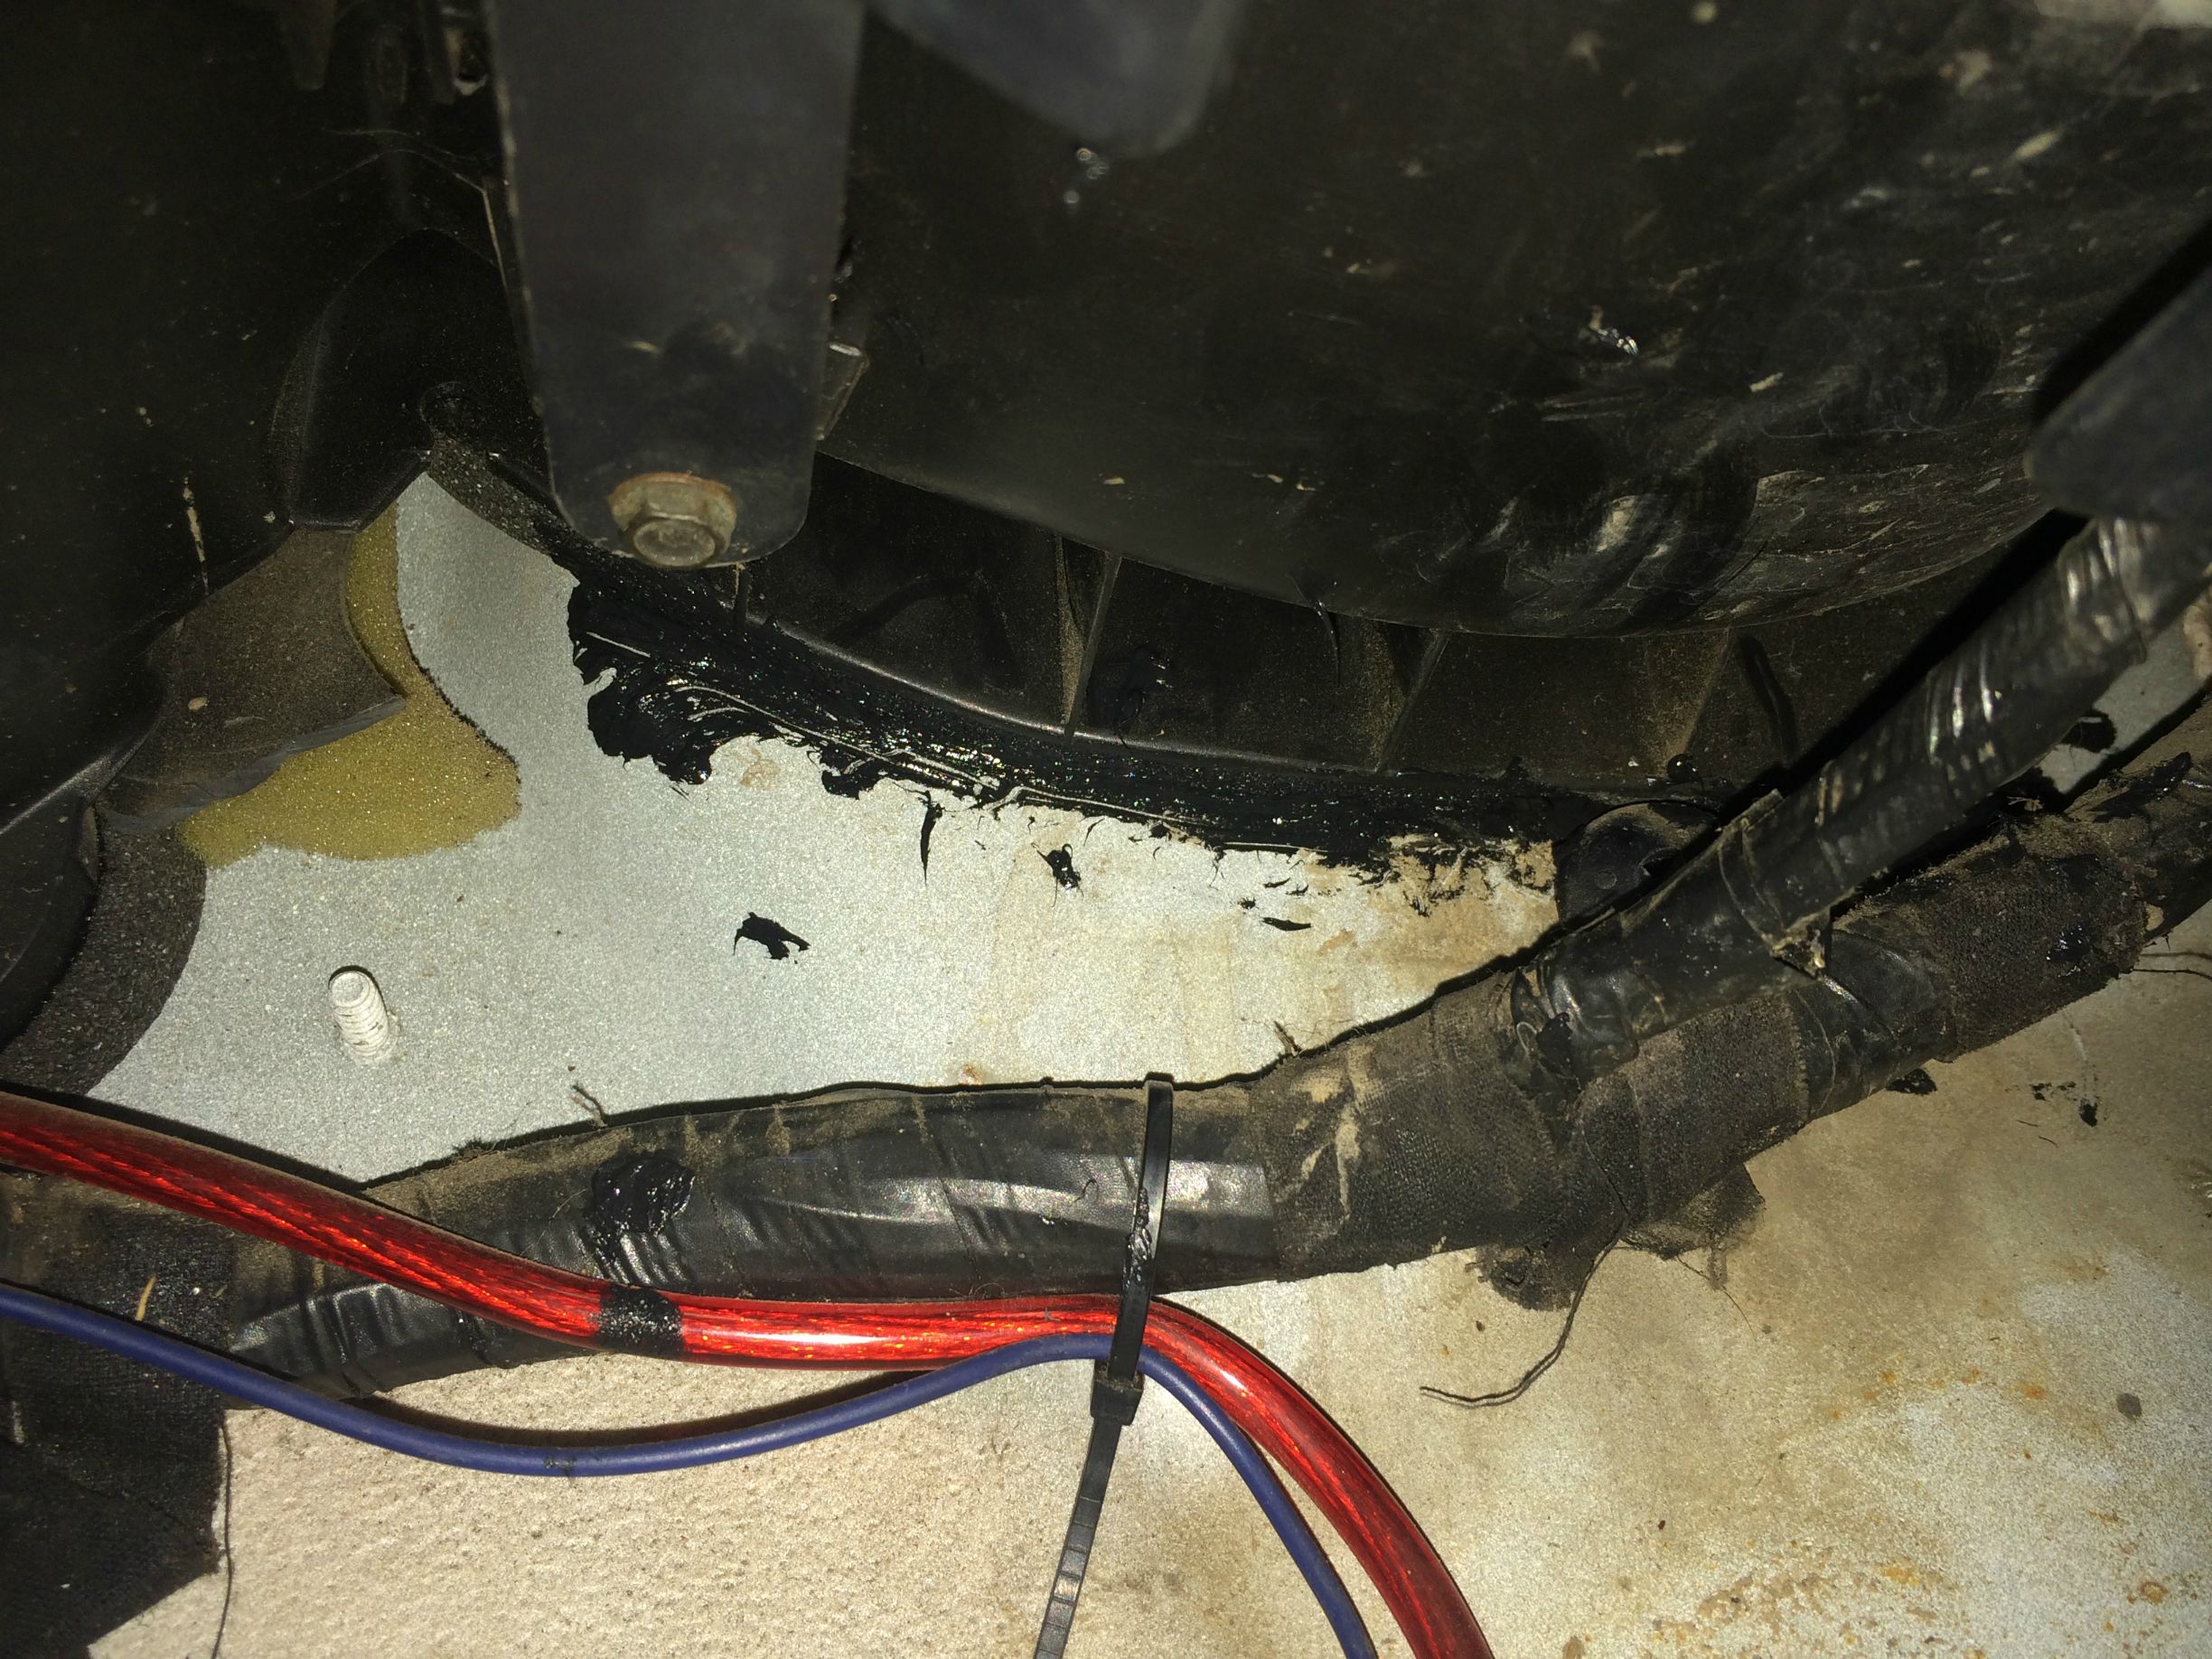
For the last few years since I've bought it, I've been dealing with the notorious passenger floorboard leak.
So finally all these days later I actually got around to finding the culprit. I kick myself because it was a pretty obvious thing to figure out if I wasn't such a lazy dumb dumb.
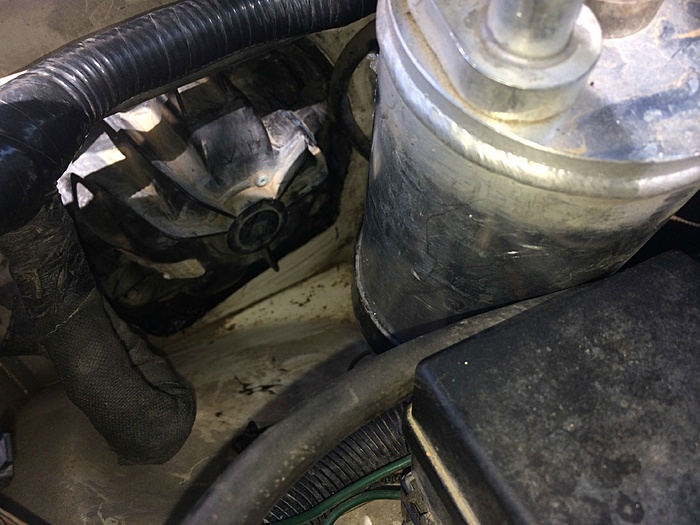
I bought a gallon of water and just dumped it on the windshield near the passenger side. Nothing. Moved to inside the engine bay and poured a lot above the blower motor. Bingo. Saw Niagara Falls inside under the dash. It was the Blower Motor seal for me.
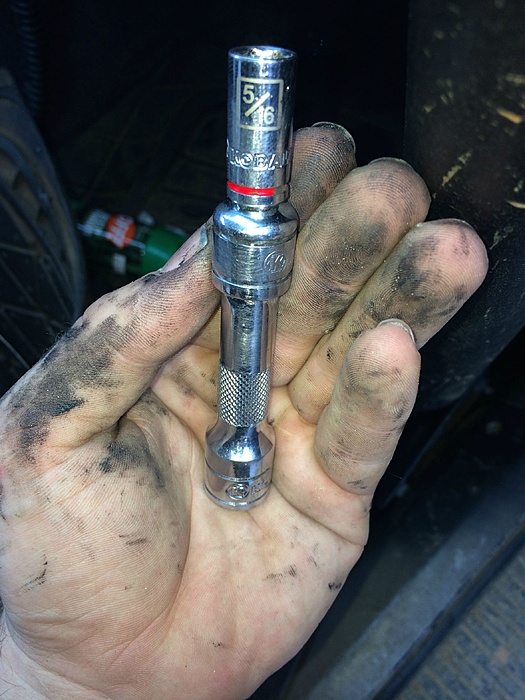
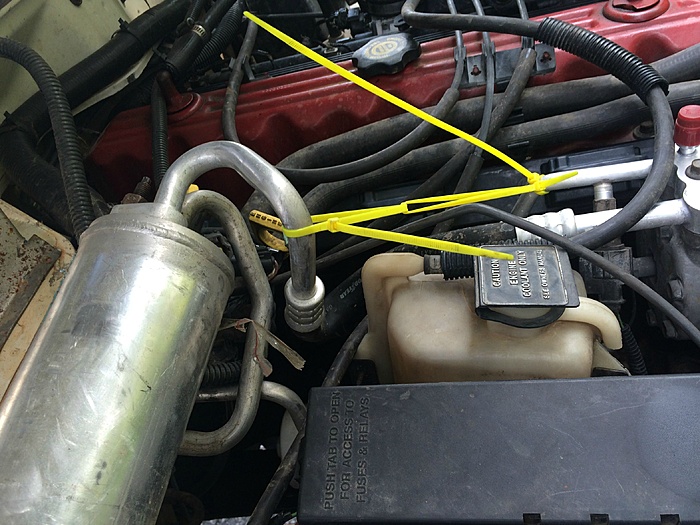
The tools I used for this project was very straight forward. A 5/16 with a small extension and a ratchet is almost all you really need. Maybe some zip ties as you will see..
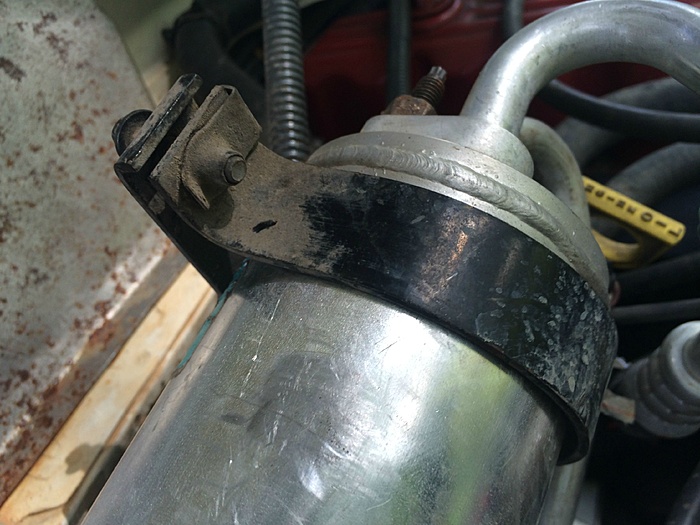
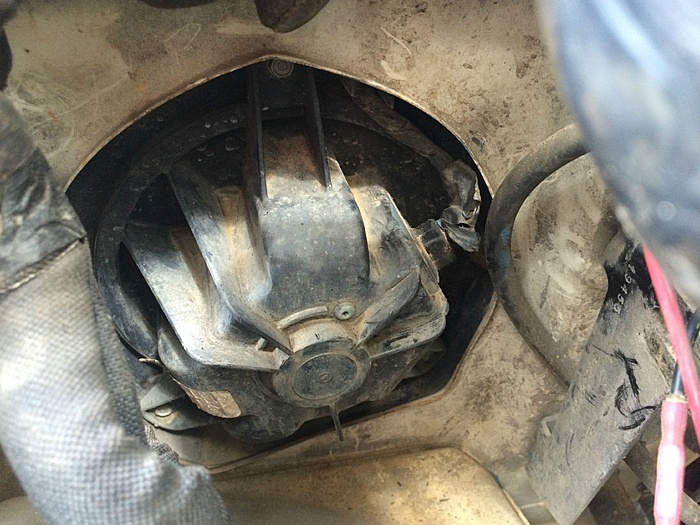
As you can see here, this is where it all was coming from.

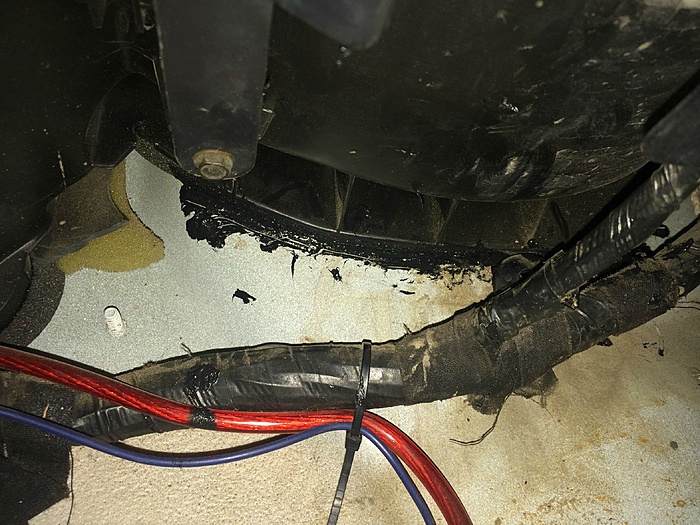
Time to remove it. Started by unbolting the Evaporator from the bracket.
I pushed the evaporator out the way and used zip ties to hold it up and out of the way.
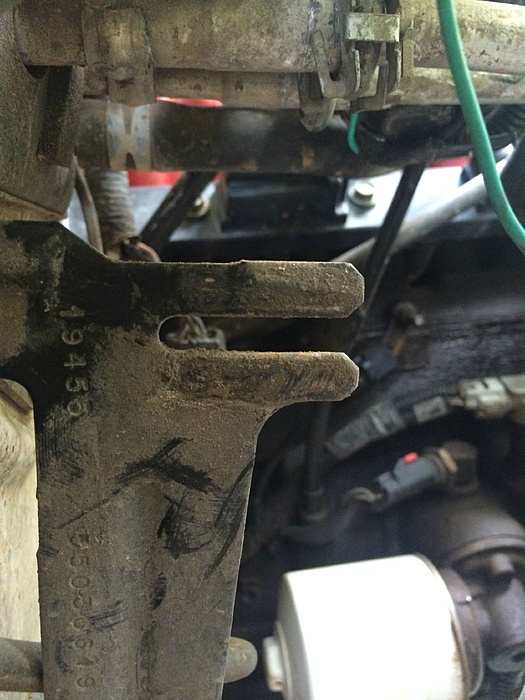
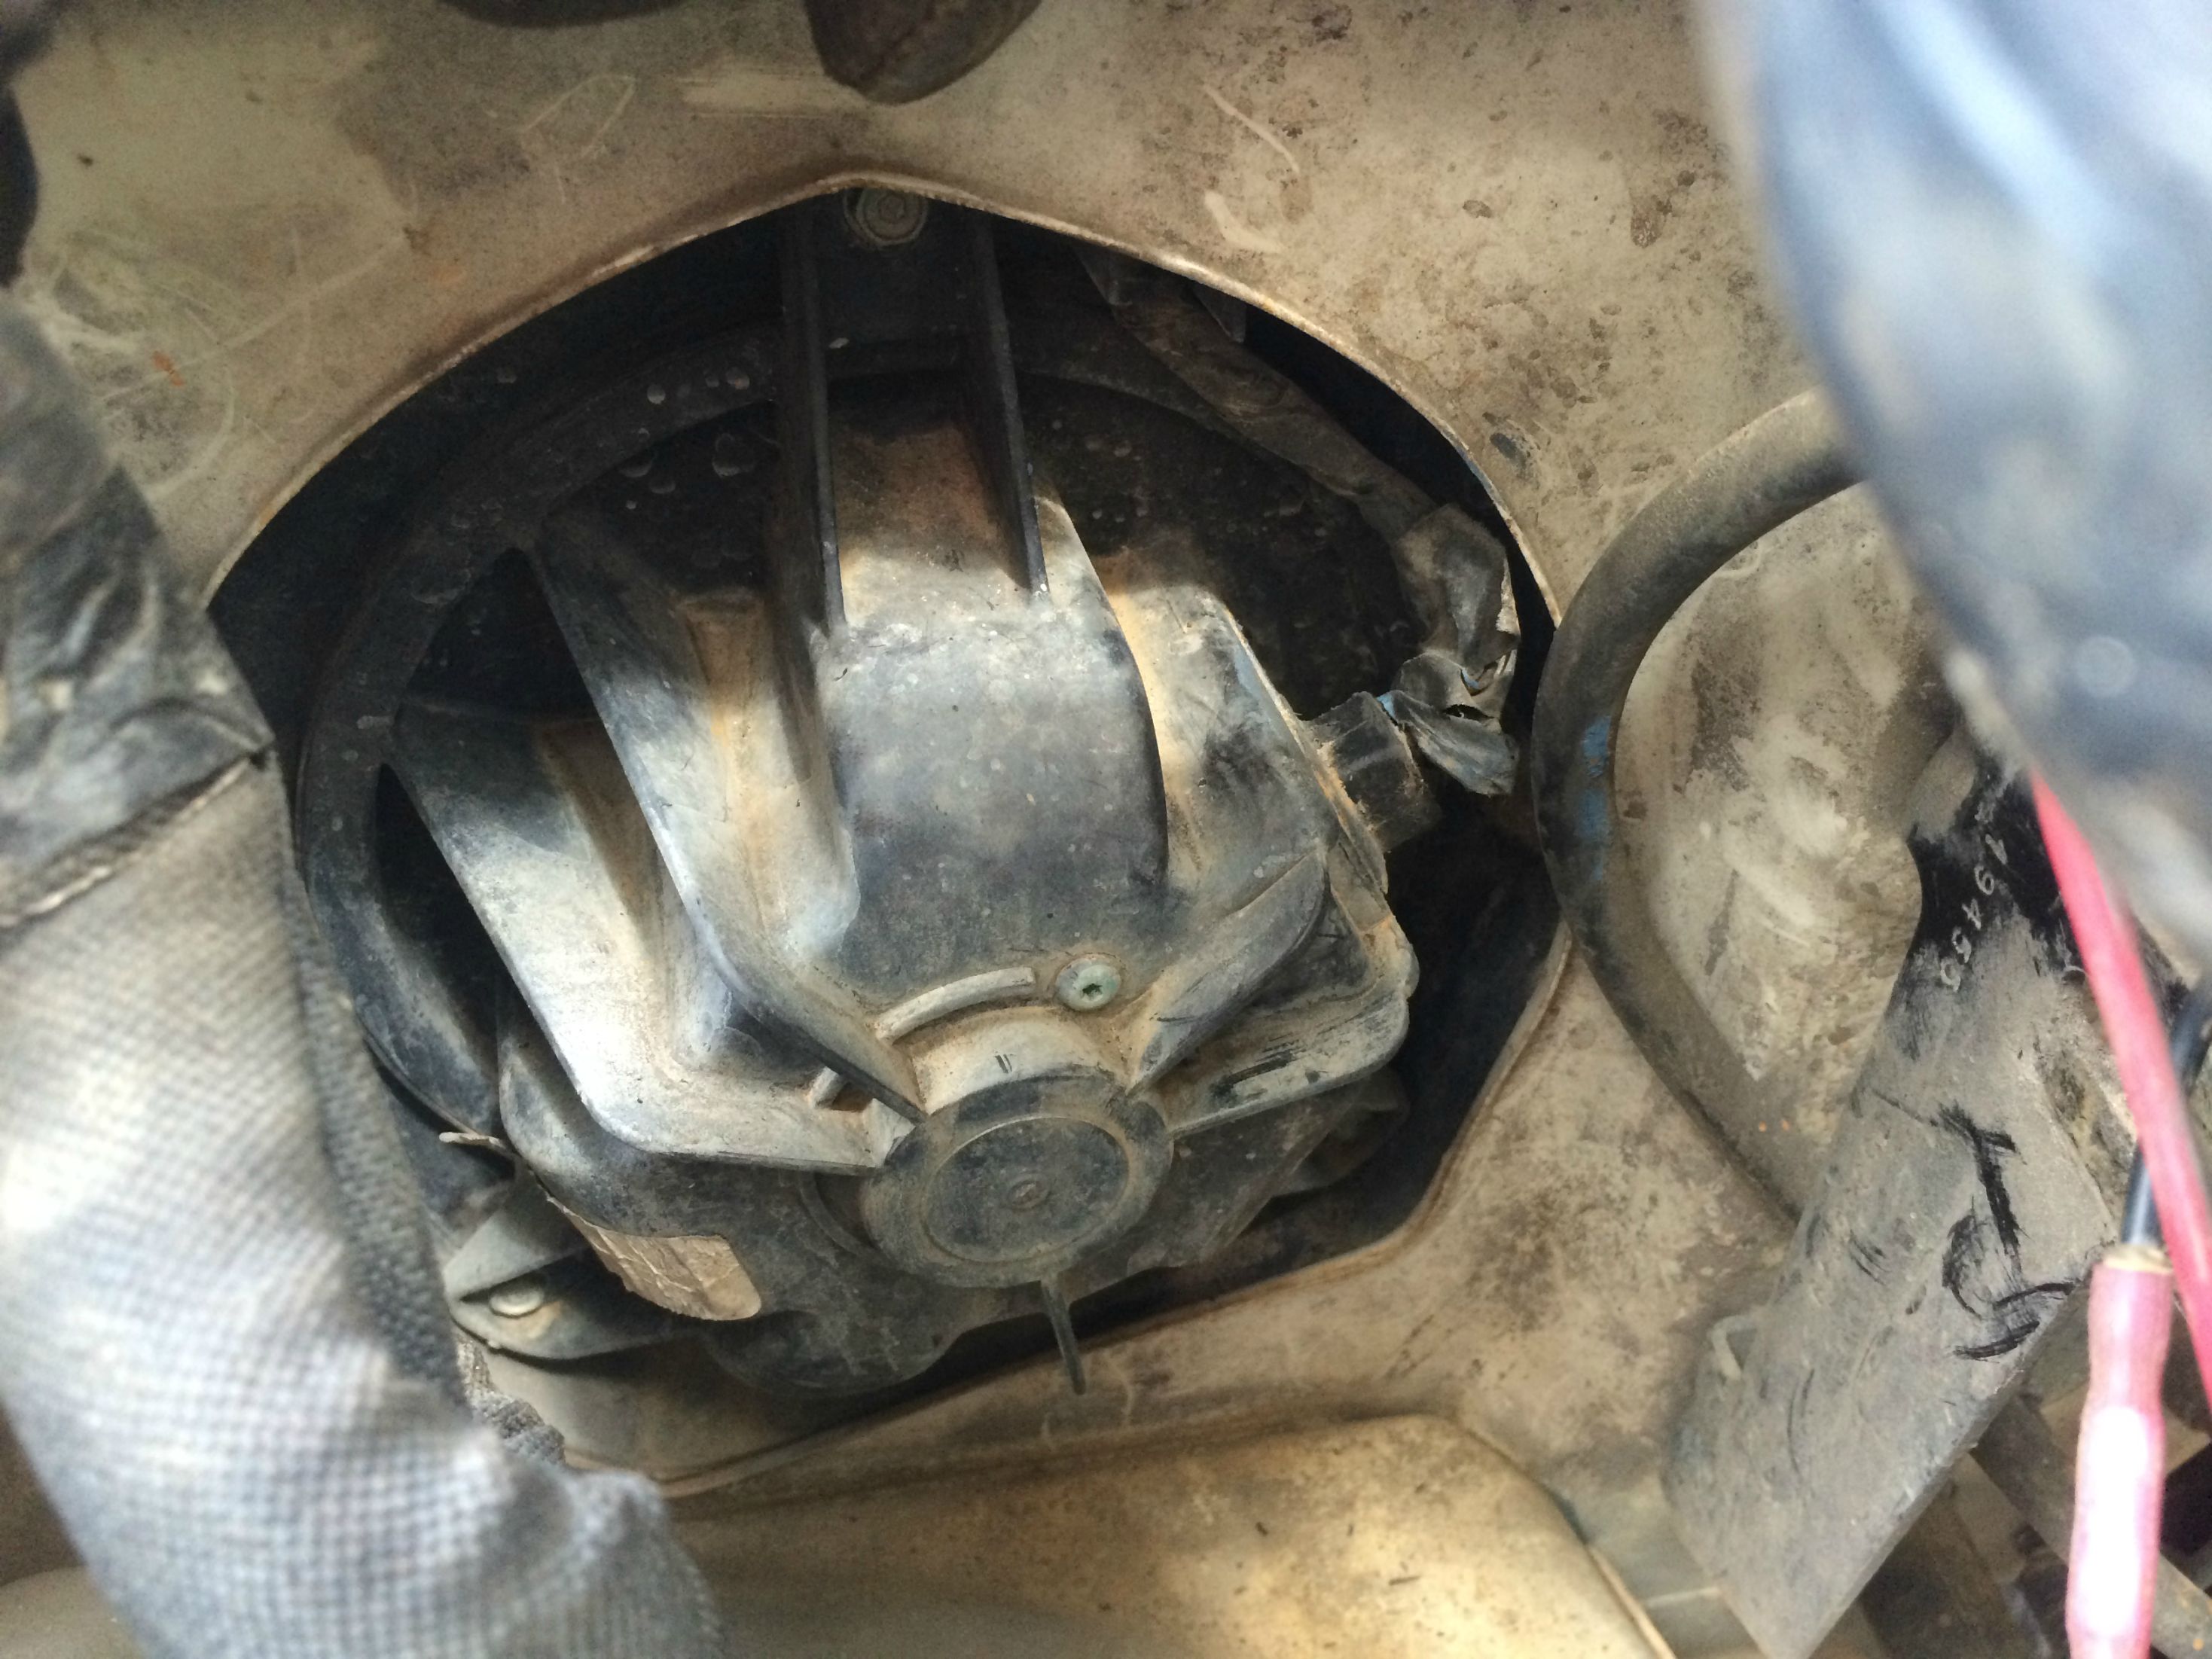
Once that is done, you will need to unscrew three 5/16 self tapers. One at the top of the blower and two on the bottom on either side. You can kind of see them in the picture.
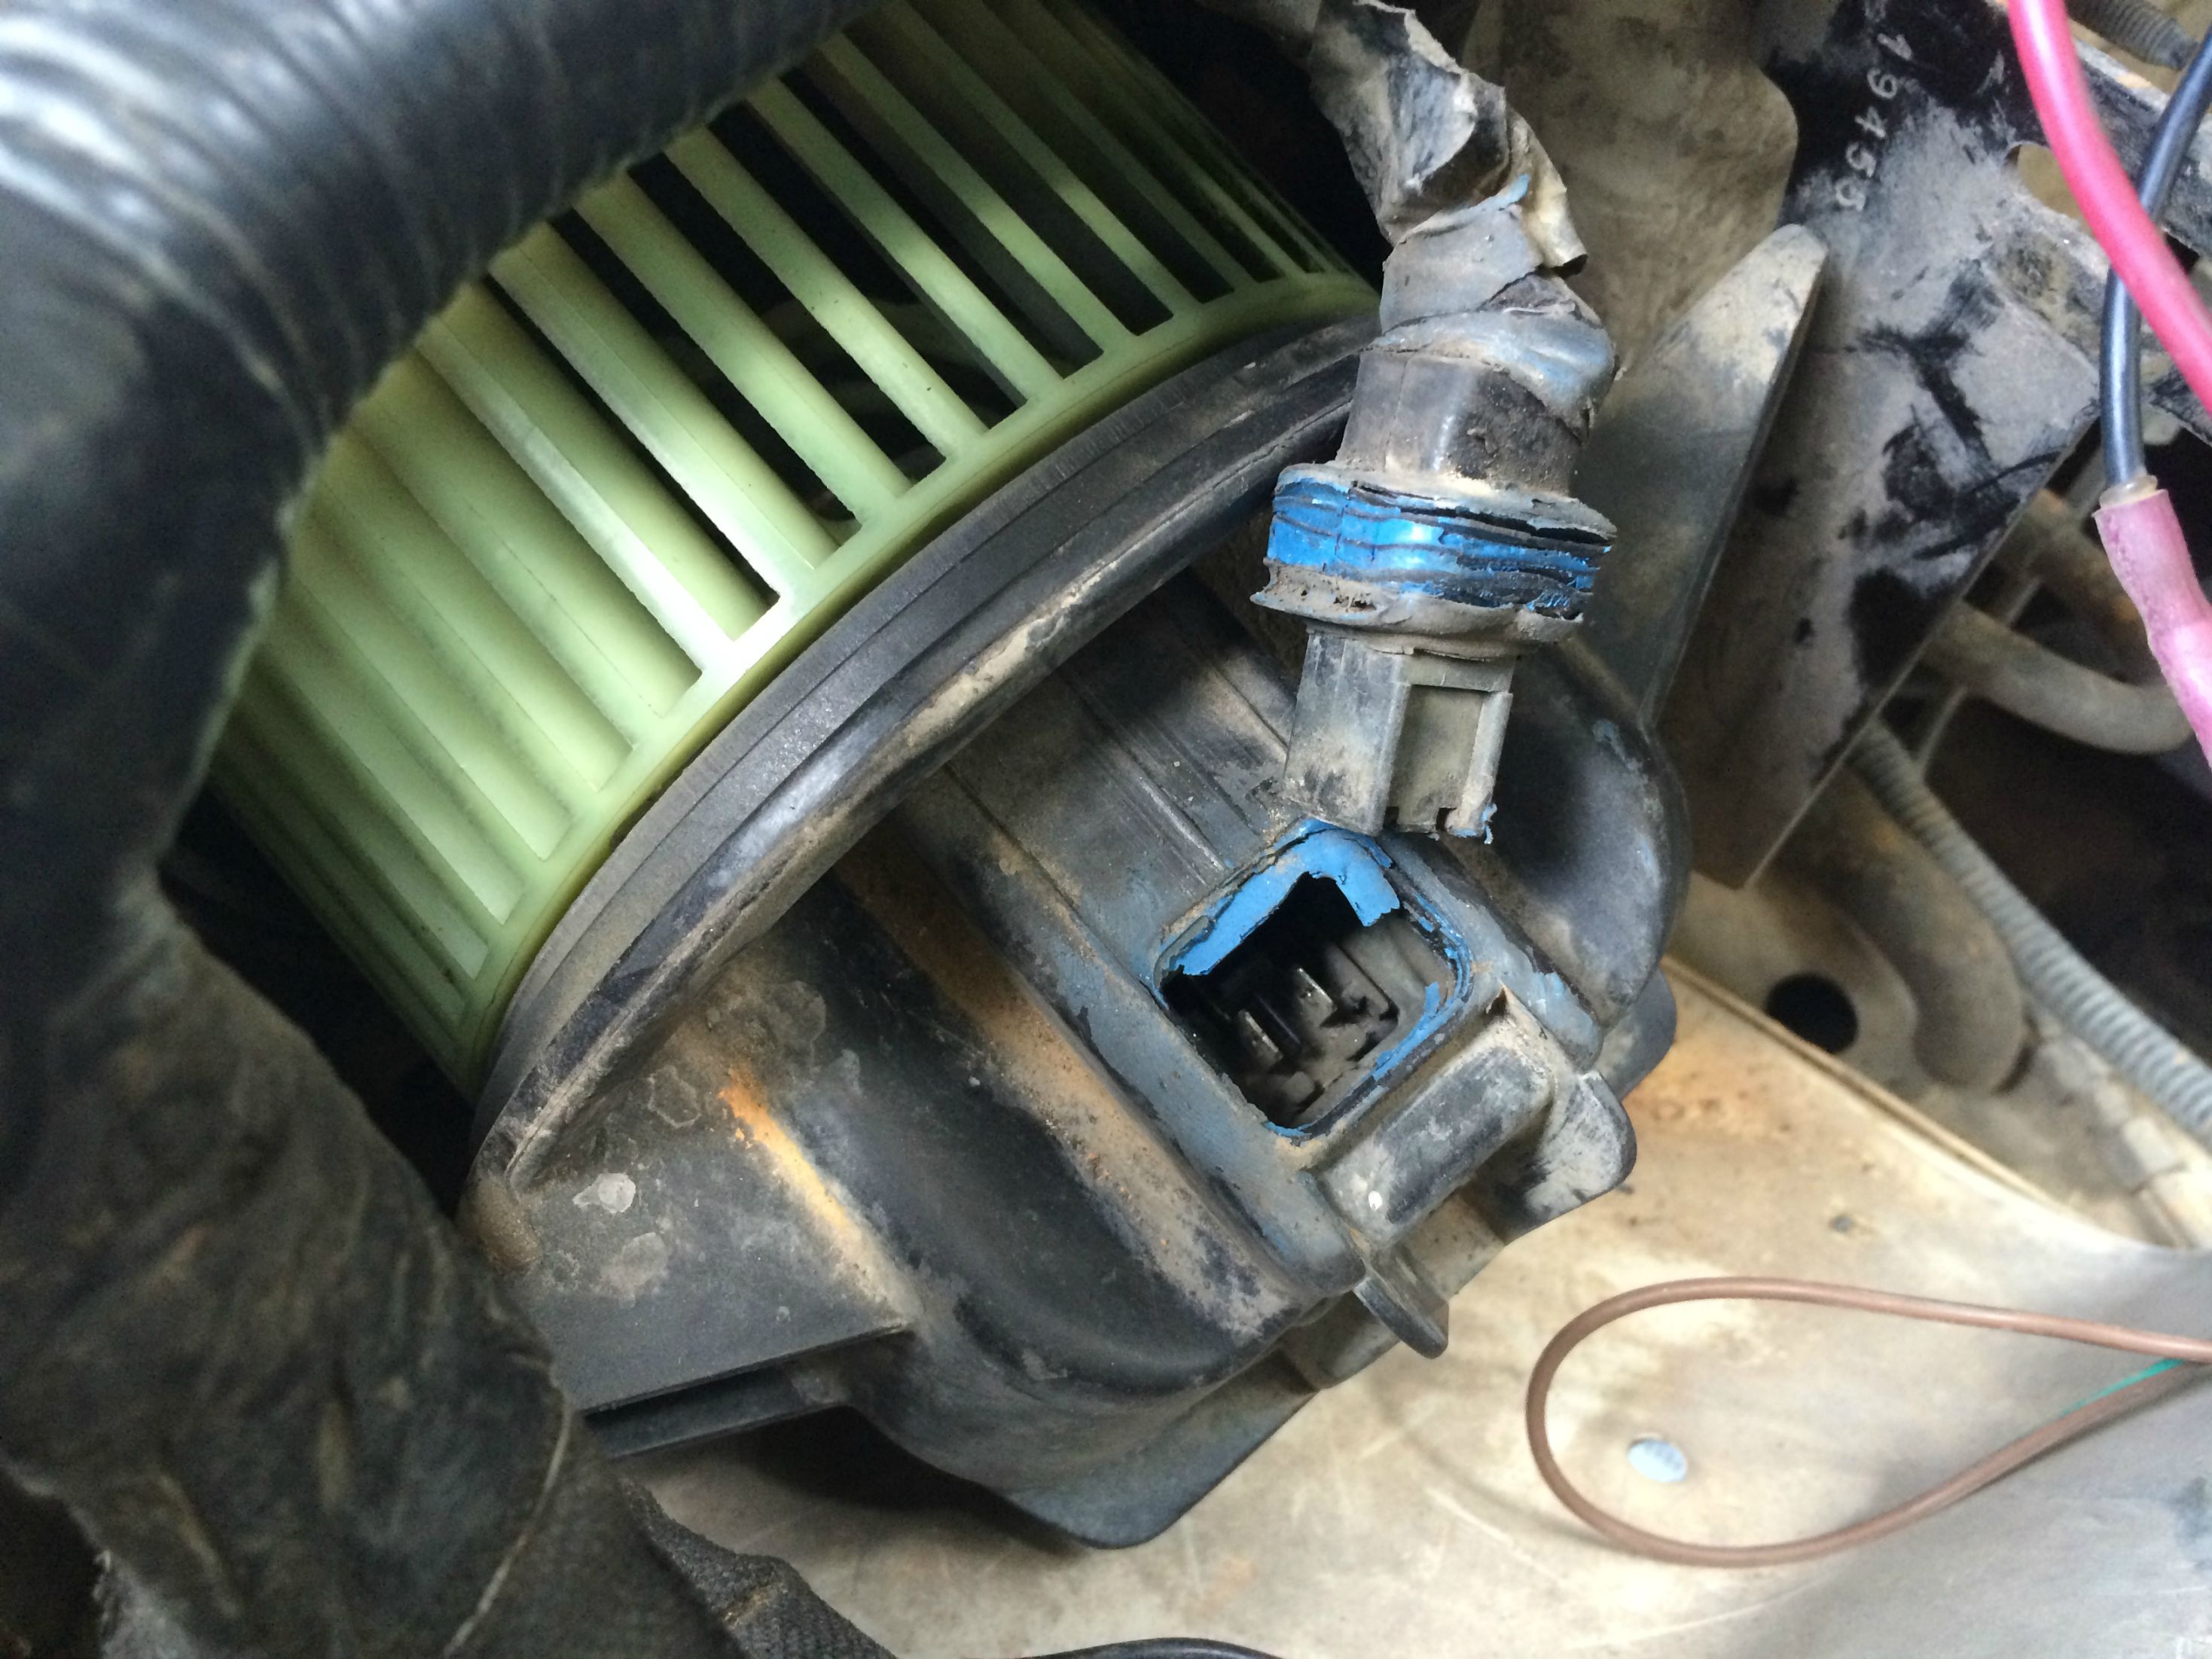
It will take some finagling to remove it but for me it was really easy. I read that some have issues getting it out. Once I got the top part out I just lifted the whole thing up so the bottom would clear. Easy Peasy. The wire plug simply pulls out, not clips or anything. Just move it forward and backward and pull outward.

If anything the hardest part of removal was maneuvering the blower around the wiring harness and PDC.
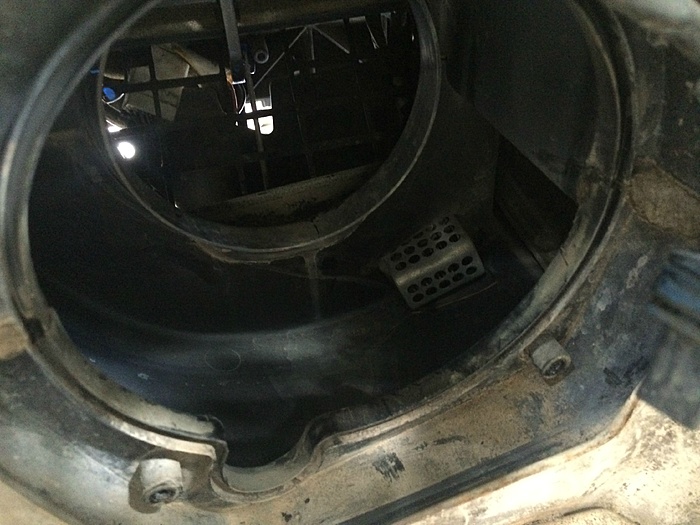
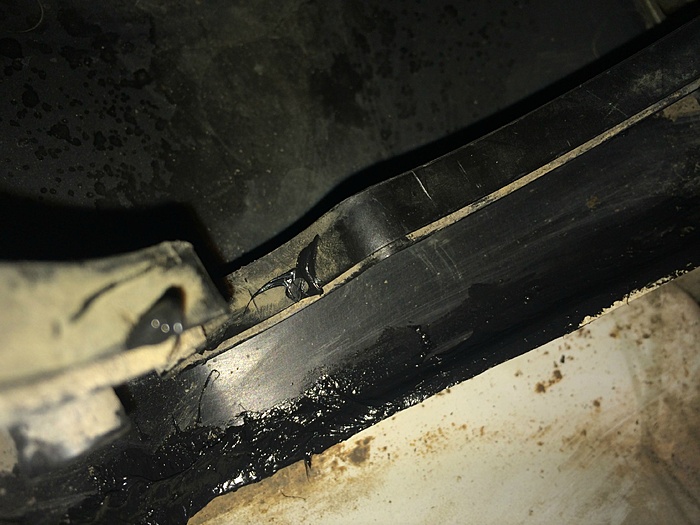
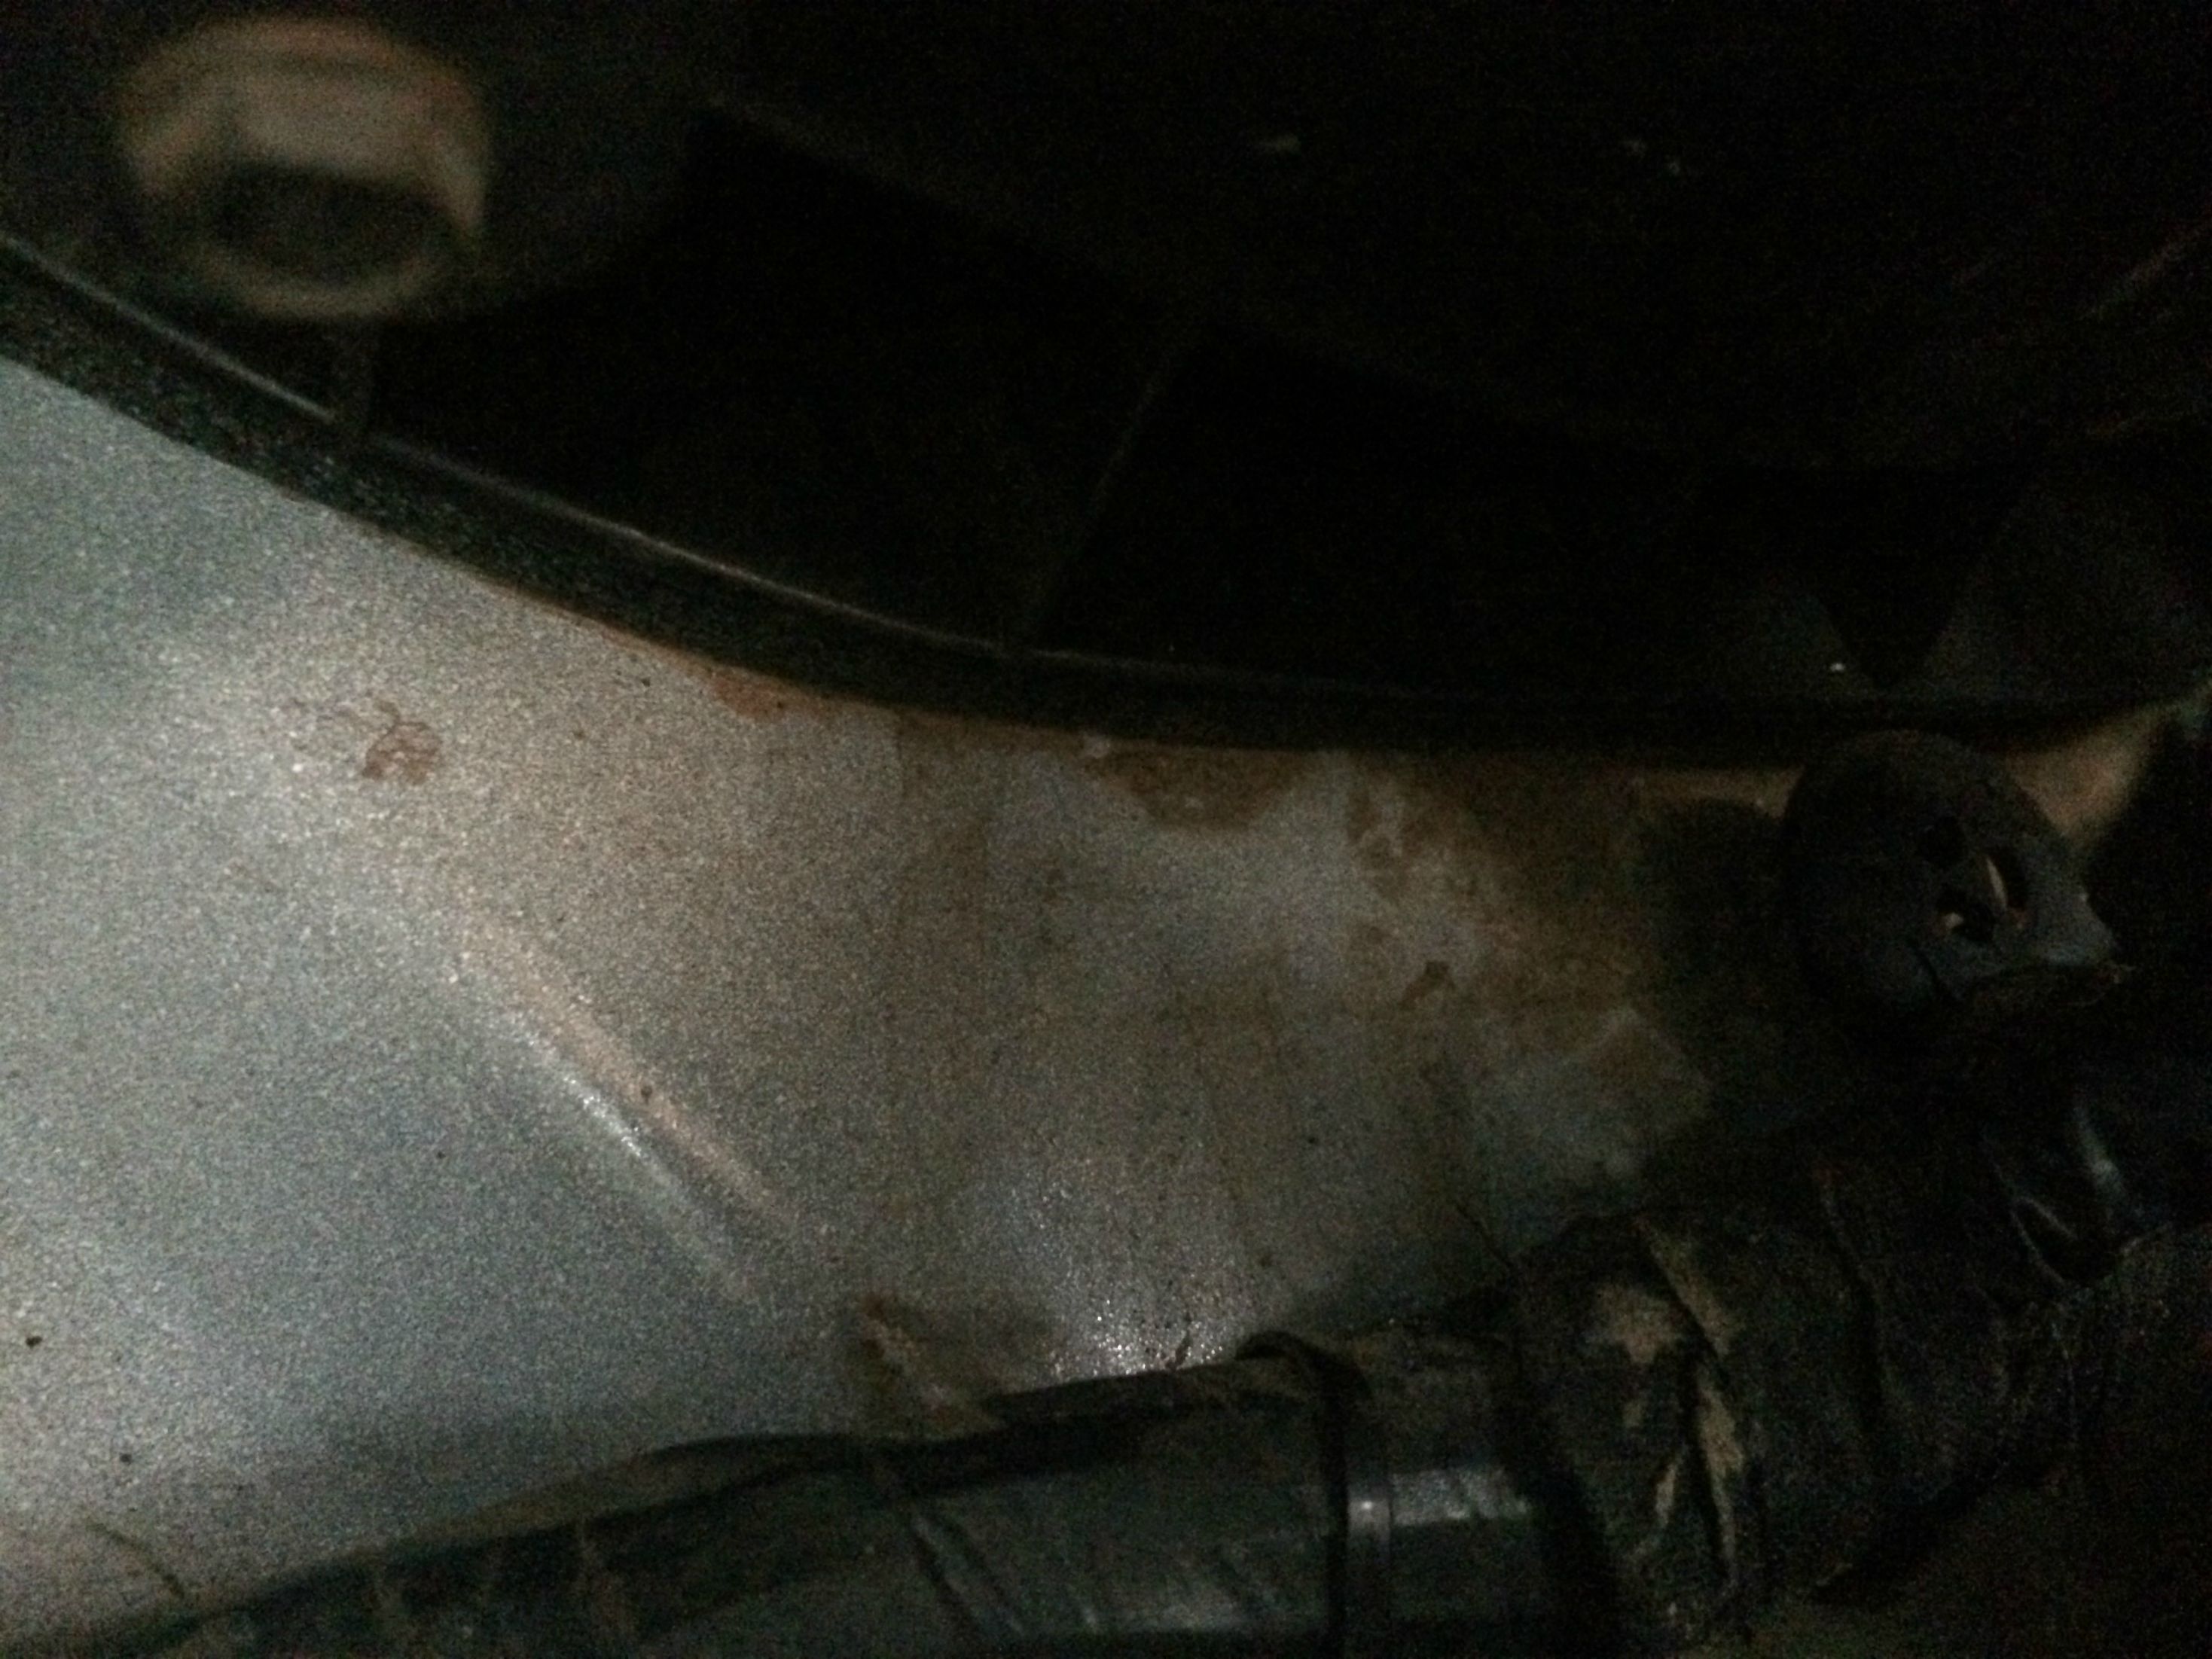
And she's out! Now we can access the seam very easily. The point of leak is where the inside meets the body. I didn't get a good picture of it but you will see what I'm talking about when its done.
Can we fix it? Yes we can!
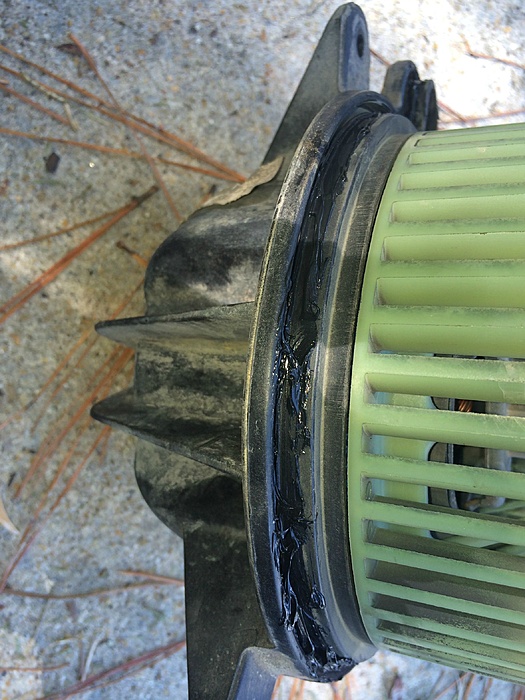
How? Black RTV of course. That was my choice at least. Use what you wish.
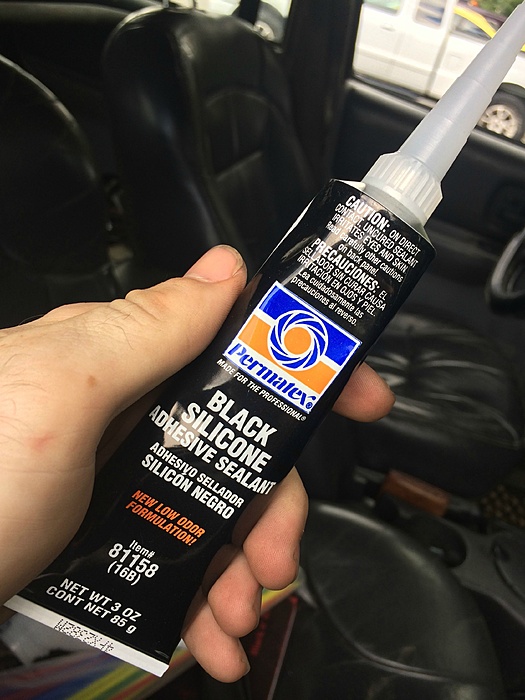
I wasn't sure to what extent or how much RTV to use so I just kept adding more and more until I felt like it was bulletproof. I wasn't taking any chances. I even did the inside underneath it because why not.
This wasn't totally necessary but I didn't it anyway. I put some around the blower as well. Just because. What are ya gonna do, fire me?
Time to put it all back together.
It sits nice and flush with the screw holes so it wasn't that hard to screw it all back together. The bottom left was a little annoying because you have no backspace for the ratchet to fit. A swivel joint would definitely work.
And boom! Bobs your uncle.
Please do note, that I have not officially tested to see if this fixed the leak. I will report back the results. It has been raining a lot here so I'm sure I'll get my chance shortly.
I was surprised how easy this went. Only took me about an hour to do start to finish. Then again, from what I've researched people have had a hard time with some of it. Not me. I didn't even have to remove the A/C evaporator.
As always. Results may very.
So finally all these days later I actually got around to finding the culprit. I kick myself because it was a pretty obvious thing to figure out if I wasn't such a lazy dumb dumb.
I bought a gallon of water and just dumped it on the windshield near the passenger side. Nothing. Moved to inside the engine bay and poured a lot above the blower motor. Bingo. Saw Niagara Falls inside under the dash. It was the Blower Motor seal for me.
The tools I used for this project was very straight forward. A 5/16 with a small extension and a ratchet is almost all you really need. Maybe some zip ties as you will see..

As you can see here, this is where it all was coming from.
Time to remove it. Started by unbolting the Evaporator from the bracket.


I pushed the evaporator out the way and used zip ties to hold it up and out of the way.

Once that is done, you will need to unscrew three 5/16 self tapers. One at the top of the blower and two on the bottom on either side. You can kind of see them in the picture.
It will take some finagling to remove it but for me it was really easy. I read that some have issues getting it out. Once I got the top part out I just lifted the whole thing up so the bottom would clear. Easy Peasy. The wire plug simply pulls out, not clips or anything. Just move it forward and backward and pull outward.
If anything the hardest part of removal was maneuvering the blower around the wiring harness and PDC.
And she's out! Now we can access the seam very easily. The point of leak is where the inside meets the body. I didn't get a good picture of it but you will see what I'm talking about when its done.

Can we fix it? Yes we can!
How? Black RTV of course. That was my choice at least. Use what you wish.

I wasn't sure to what extent or how much RTV to use so I just kept adding more and more until I felt like it was bulletproof. I wasn't taking any chances. I even did the inside underneath it because why not.


This wasn't totally necessary but I didn't it anyway. I put some around the blower as well. Just because. What are ya gonna do, fire me?

Time to put it all back together.
It sits nice and flush with the screw holes so it wasn't that hard to screw it all back together. The bottom left was a little annoying because you have no backspace for the ratchet to fit. A swivel joint would definitely work.
And boom! Bobs your uncle.

Please do note, that I have not officially tested to see if this fixed the leak. I will report back the results. It has been raining a lot here so I'm sure I'll get my chance shortly.
I was surprised how easy this went. Only took me about an hour to do start to finish. Then again, from what I've researched people have had a hard time with some of it. Not me. I didn't even have to remove the A/C evaporator.
As always. Results may very.


 09-20-2014, 02:20 PM
#35
Member
Thread Starter
Join Date: May 2012
Location: Hayesville, NC
Posts: 244
Likes: 0
Received 1 Like
on
1 Post
Year: 2000
Model: Cherokee
Engine: 4.0L I6
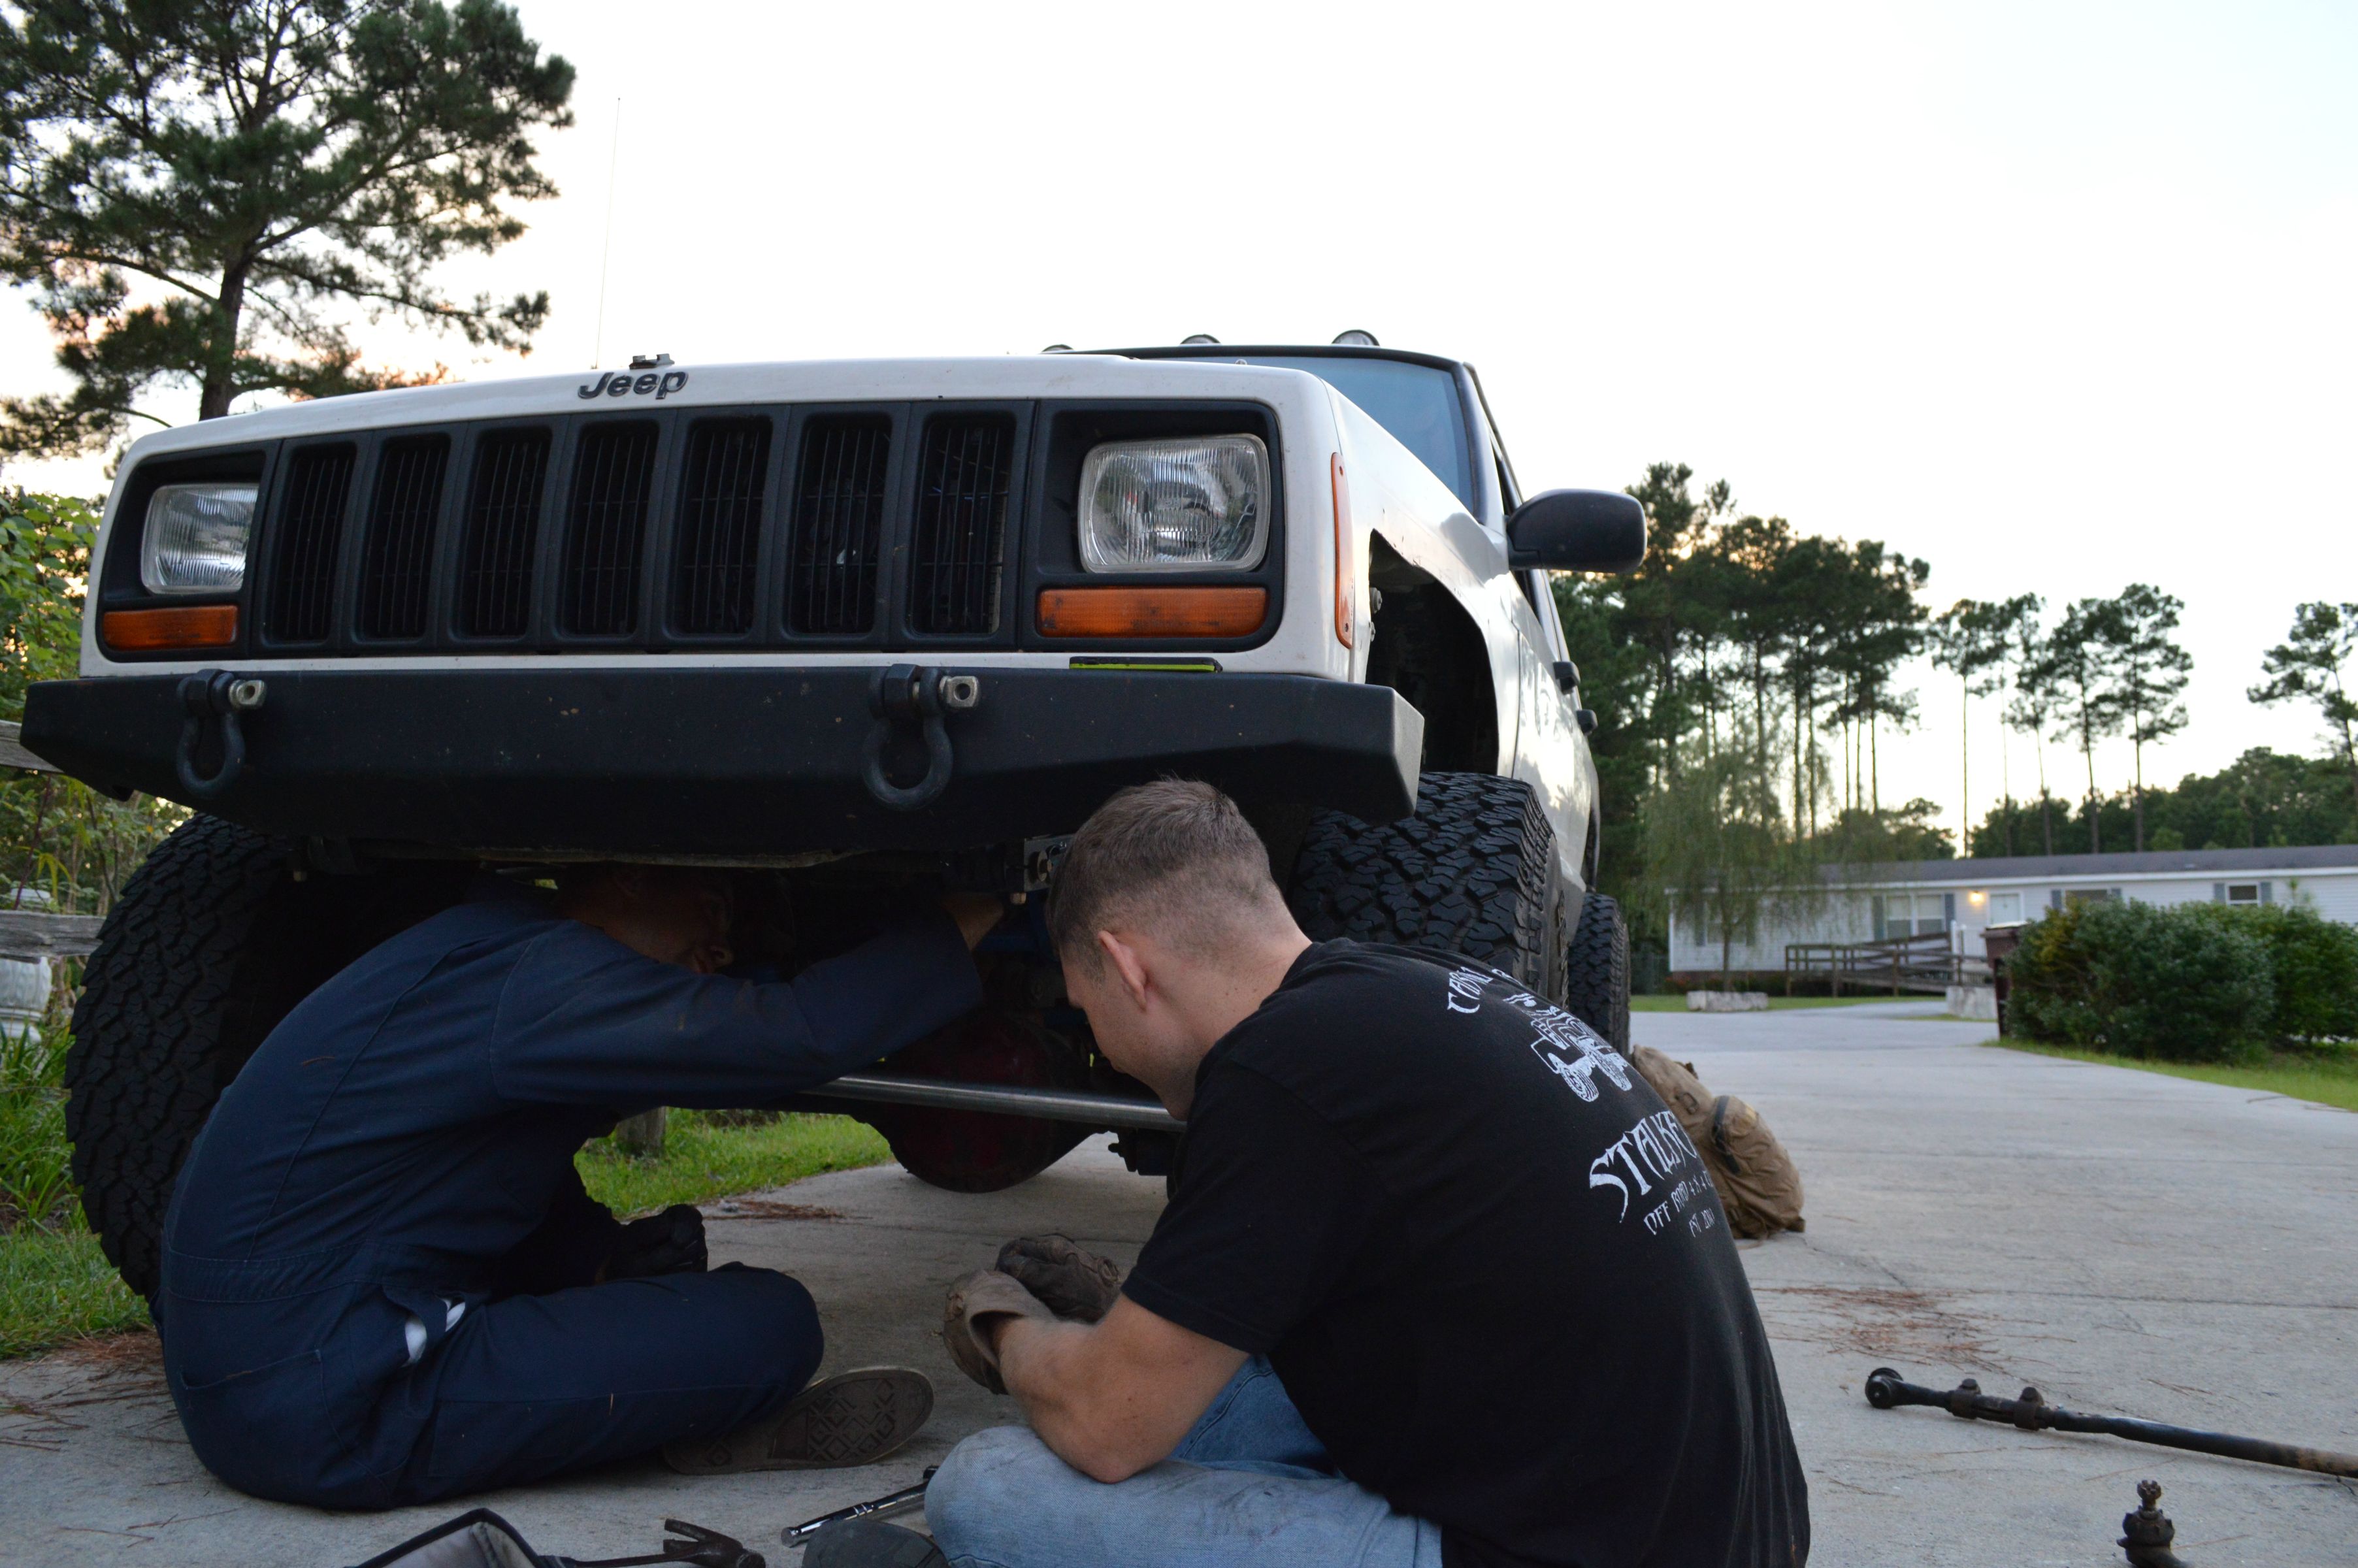
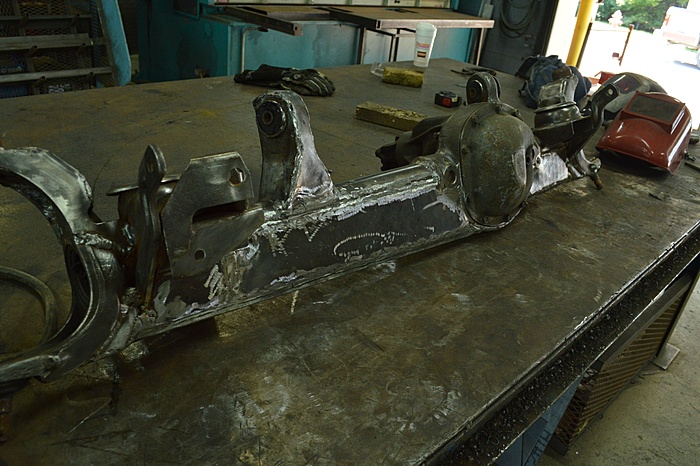
Started the under truss today. Gonna finish tomorrow, taking it slow so i don't risk warping the axle tube. Might of pushed it a little today but oh well lol. Overall not too shabby.
Also by no means are my friend and I expert welders. We do what we can.

I also plan on reinforcing the upper control arm mount and track bar mount. That will be done tomorrow as well.
Also by no means are my friend and I expert welders. We do what we can.

I also plan on reinforcing the upper control arm mount and track bar mount. That will be done tomorrow as well.
09-21-2014, 03:08 PM
#36
Member
Thread Starter
Join Date: May 2012
Location: Hayesville, NC
Posts: 244
Likes: 0
Received 1 Like
on
1 Post
Year: 2000
Model: Cherokee
Engine: 4.0L I6
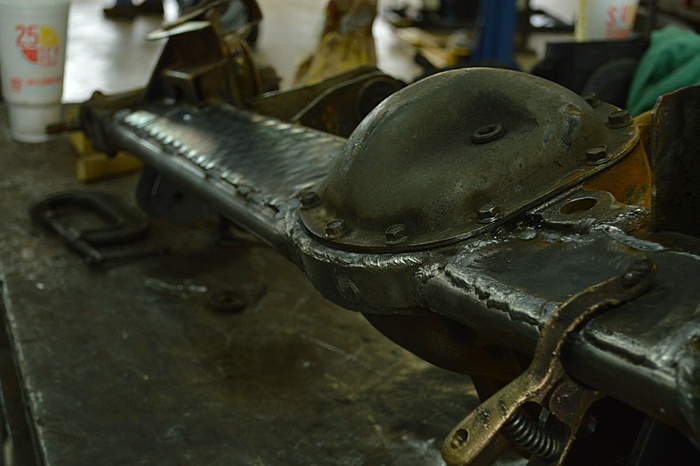
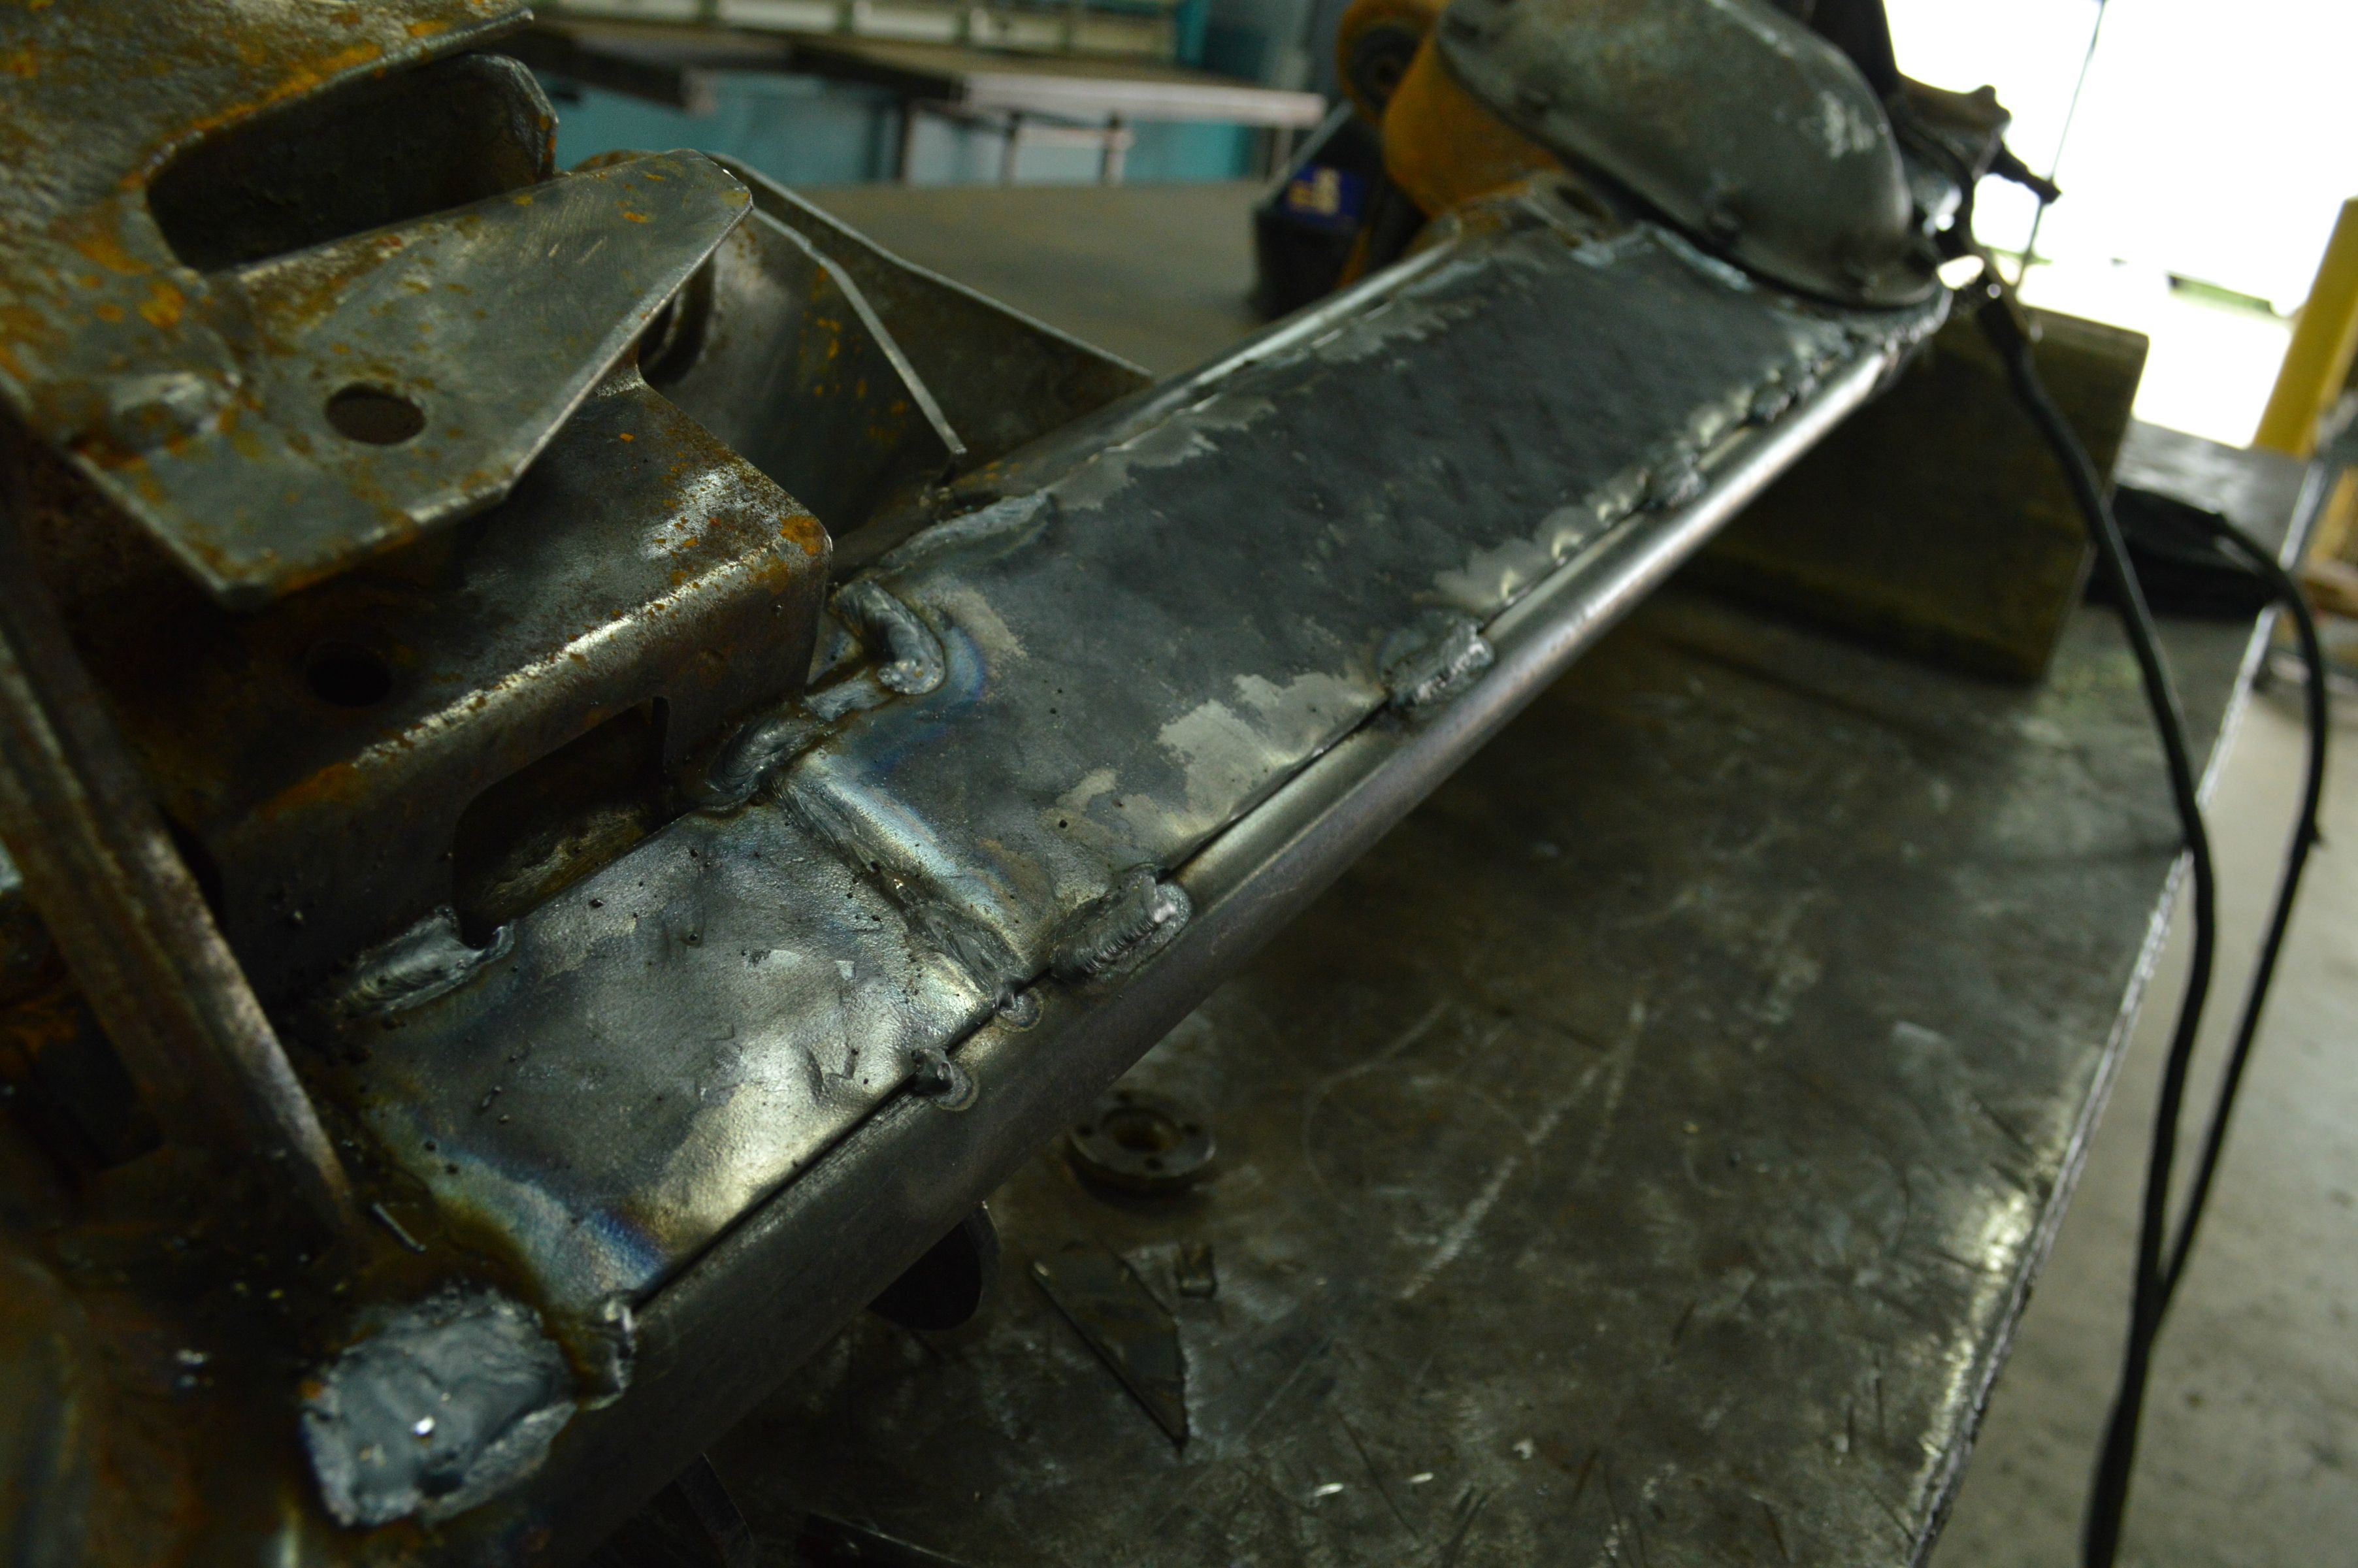
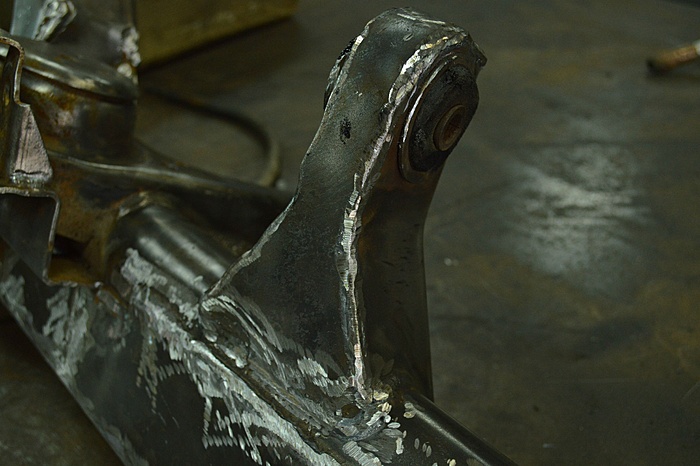
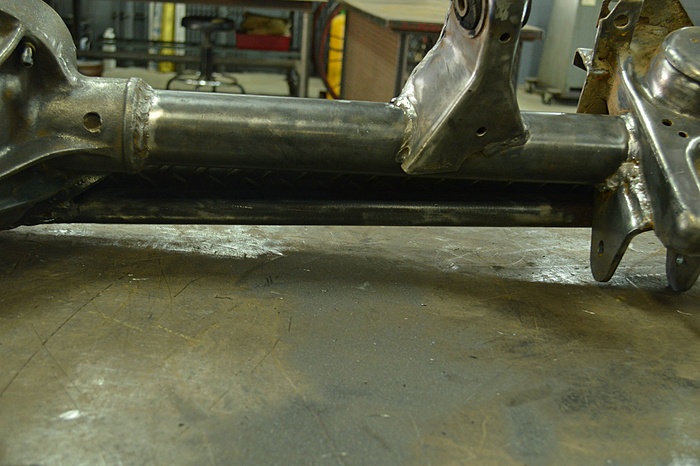
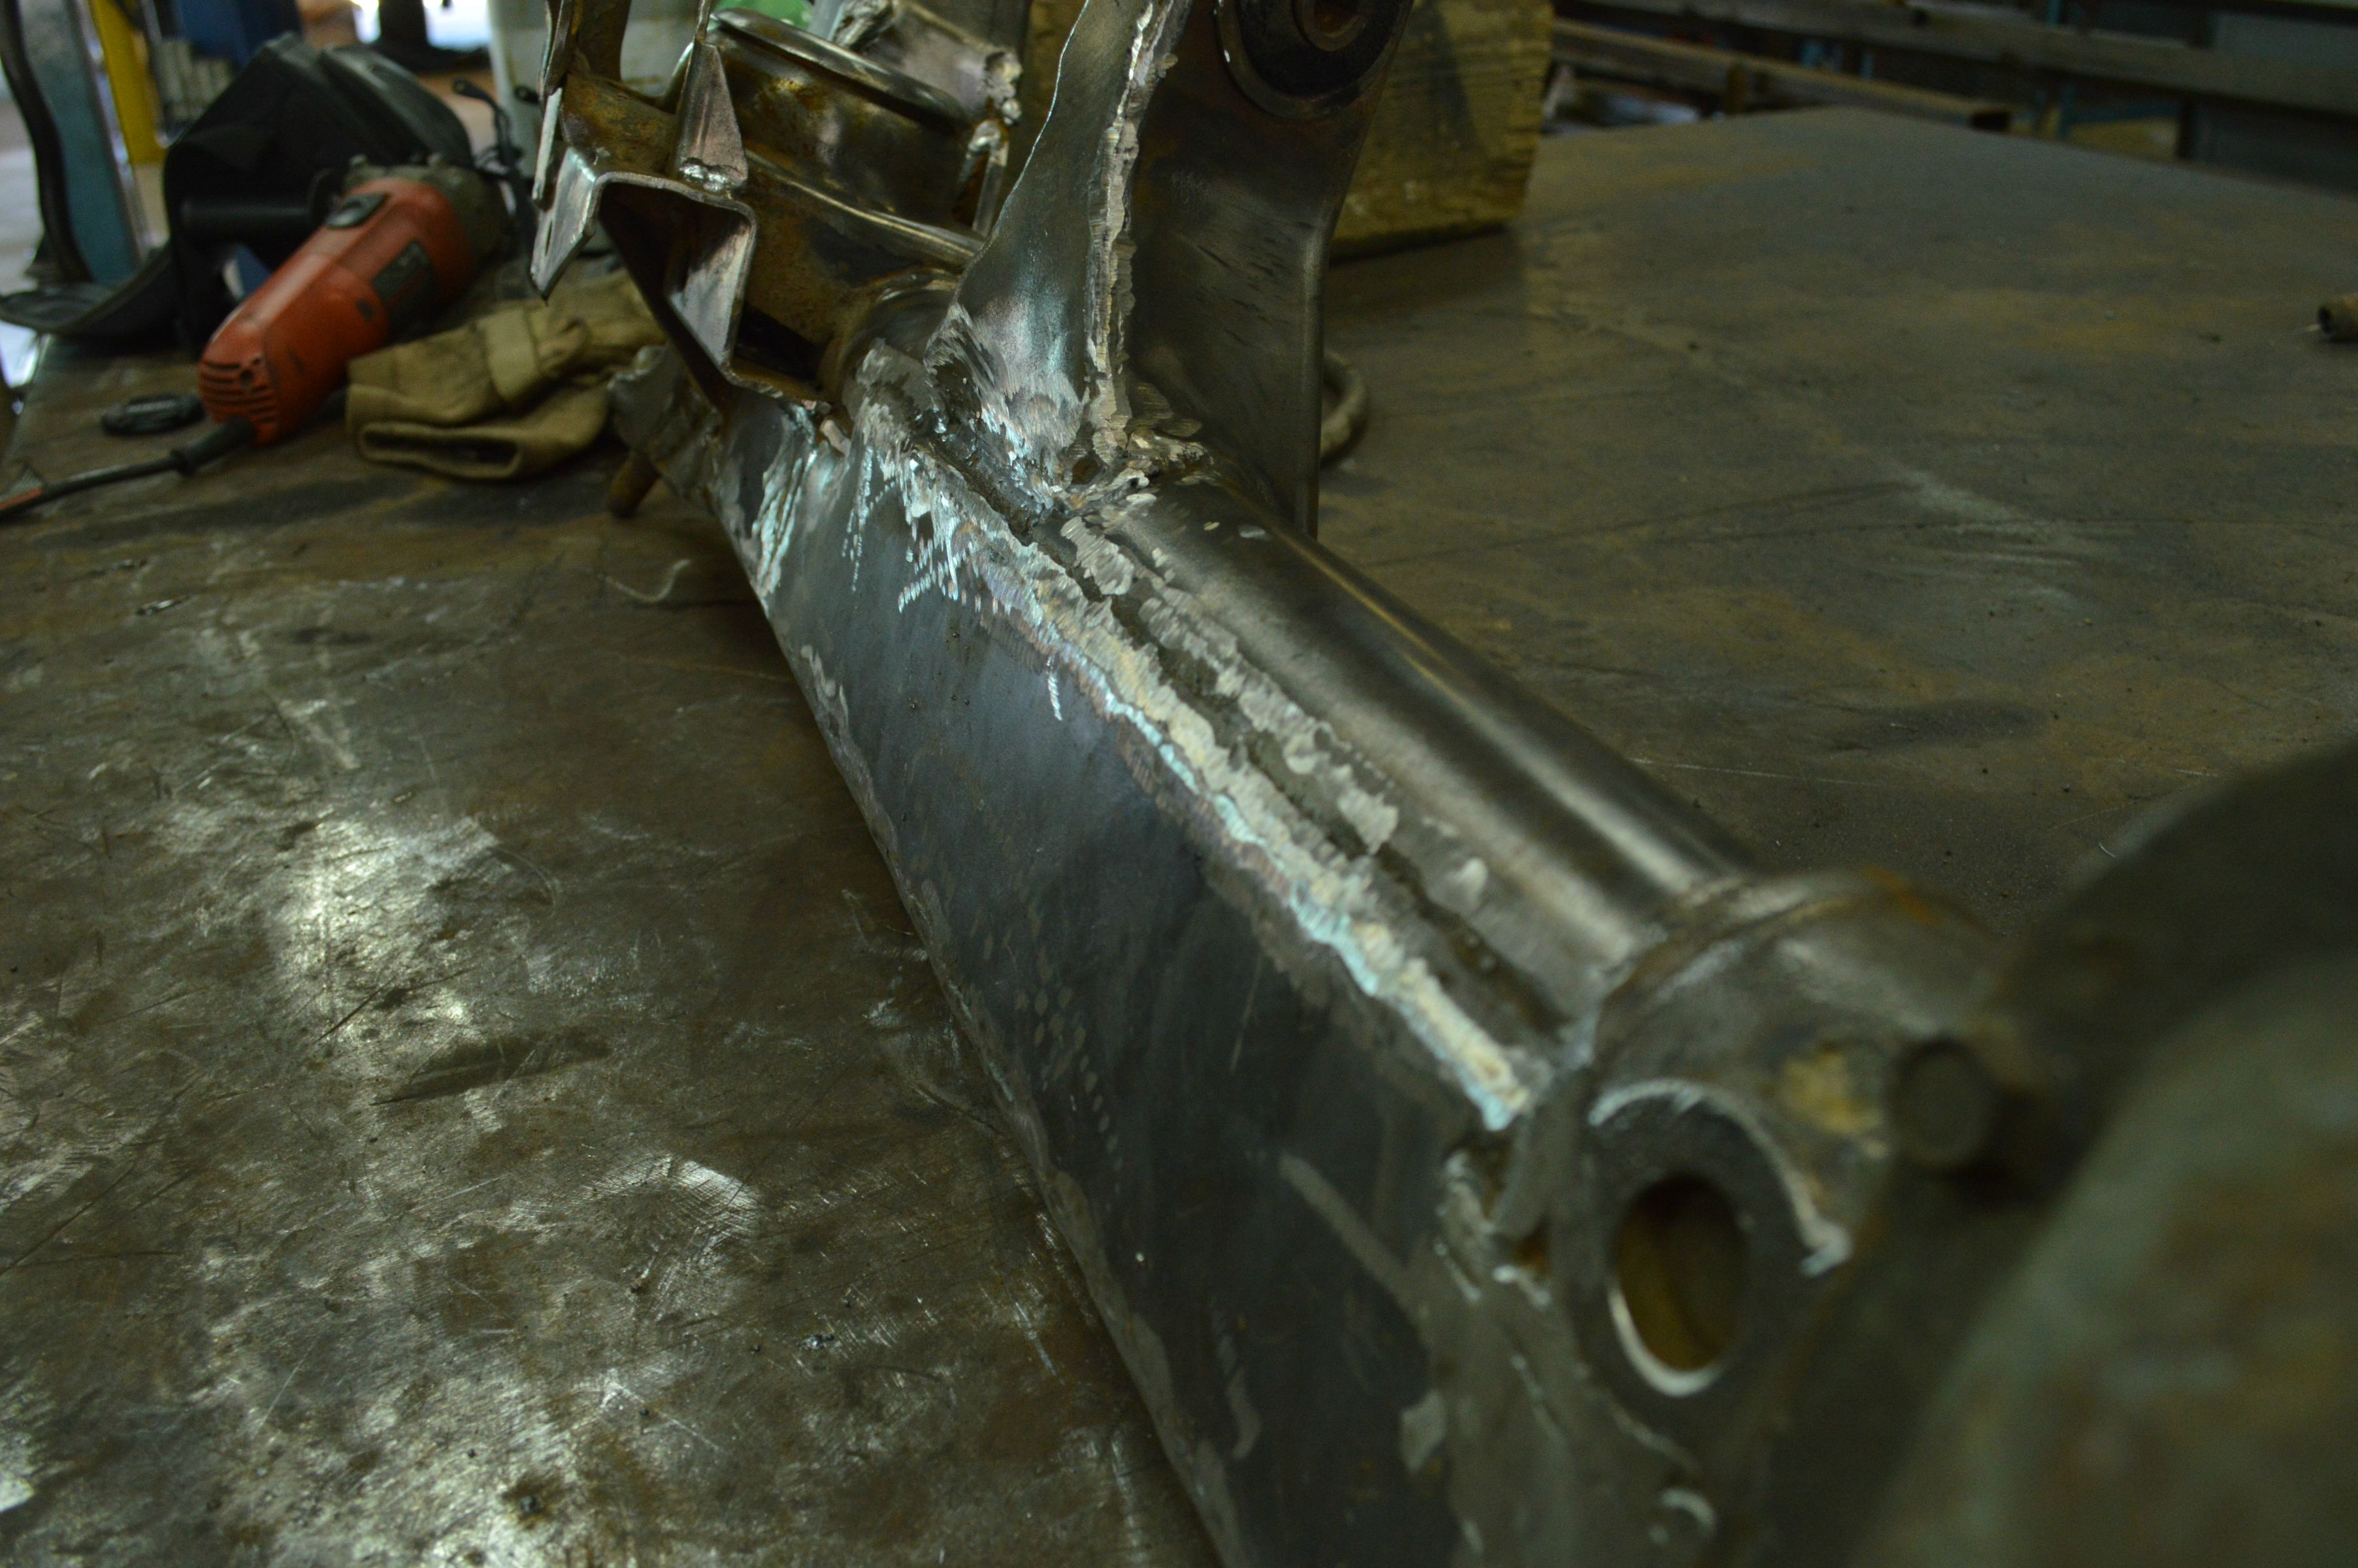
Finished the truss today. I'm very pleased with the results. 
Also reinforced the upper control arm mount a bit. Next weekend I'll be modifying the track bar mount a little bit and that should be all she wrote welding wise on this thing.

I'm tired of this phase of the build yet it's the funnest. I just wanna regear it already and put on new balljoints, knuckles, and PAINT!
One step at a time.
Also reinforced the upper control arm mount a bit. Next weekend I'll be modifying the track bar mount a little bit and that should be all she wrote welding wise on this thing.


I'm tired of this phase of the build yet it's the funnest. I just wanna regear it already and put on new balljoints, knuckles, and PAINT!
One step at a time.
09-26-2014, 10:59 PM
#37
Member
Thread Starter
Join Date: May 2012
Location: Hayesville, NC
Posts: 244
Likes: 0
Received 1 Like
on
1 Post
Year: 2000
Model: Cherokee
Engine: 4.0L I6
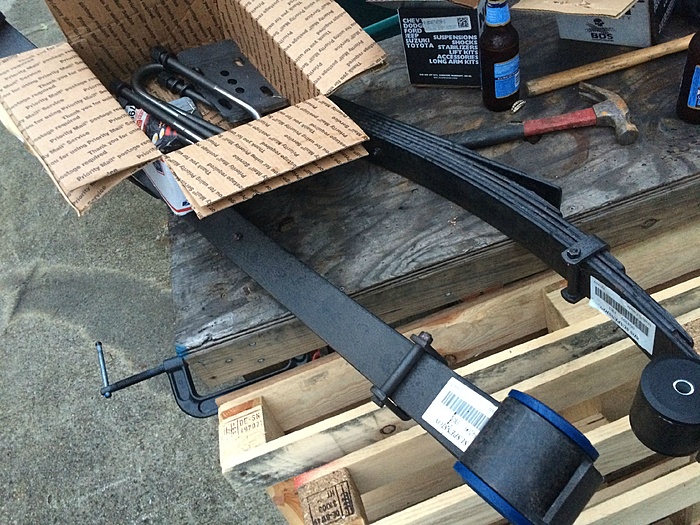
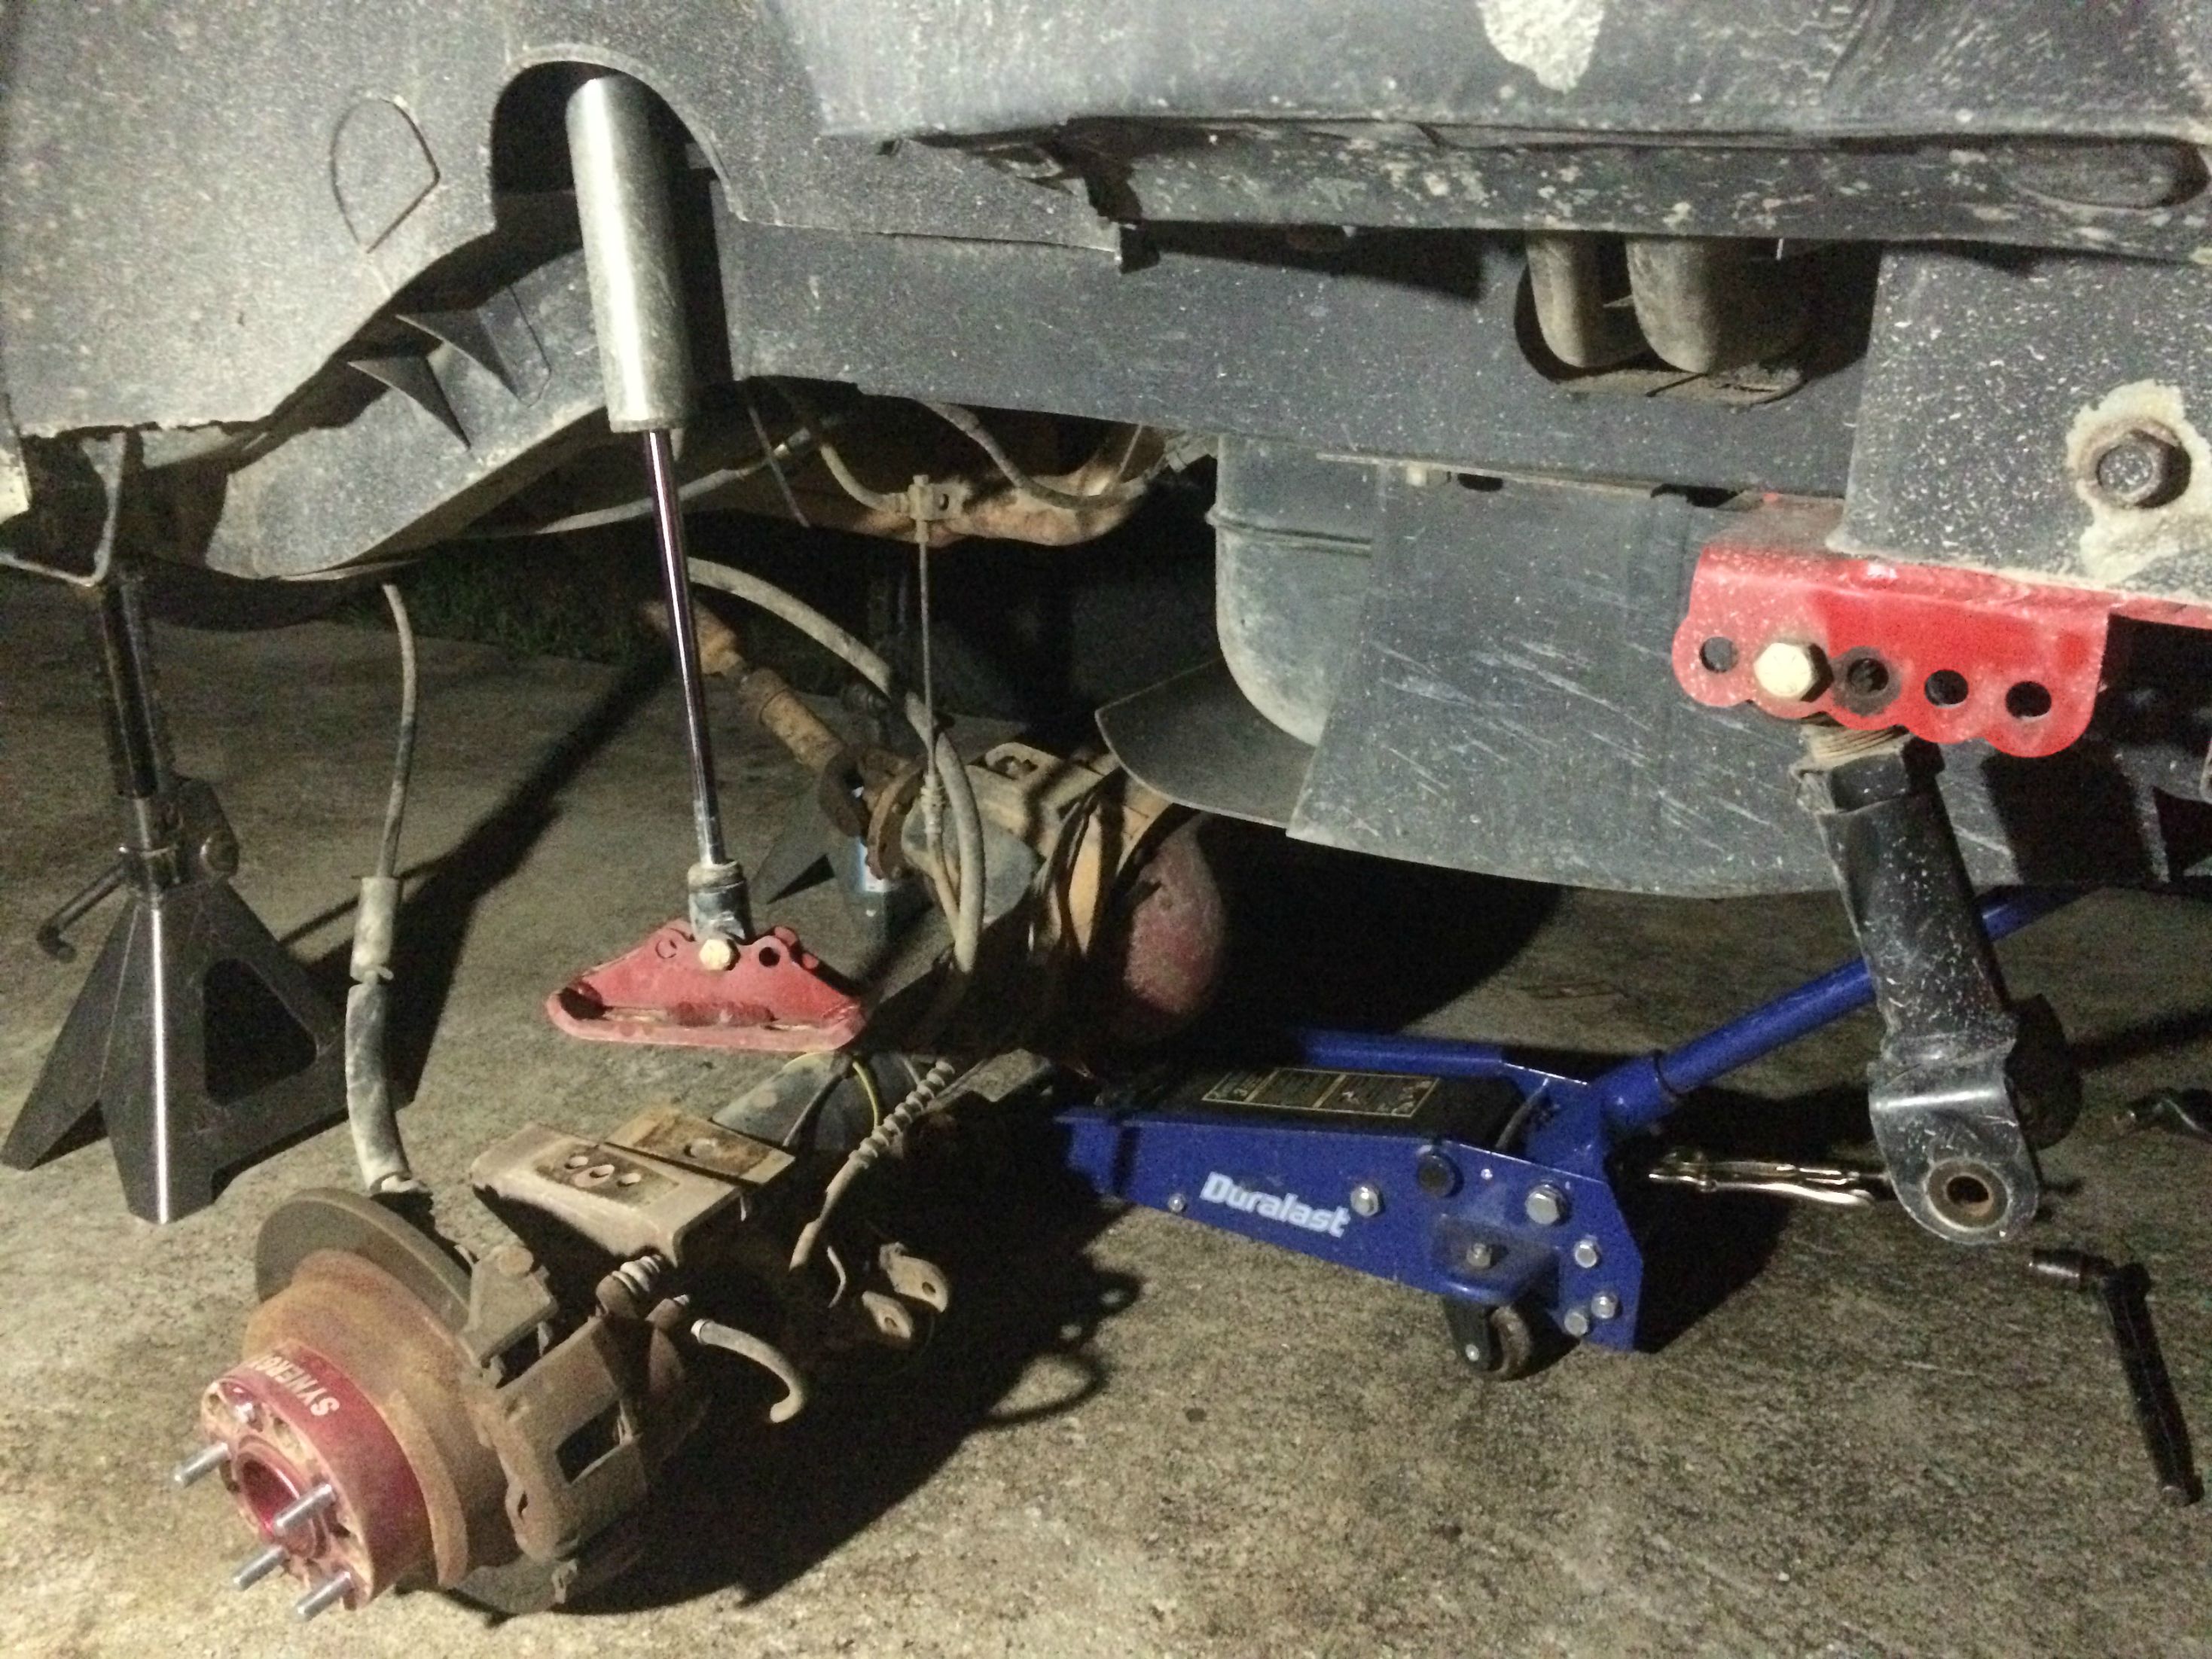
Scored some brand new BDS 3" leaf packs and Ubolts with plates for a whopping $150.
Of course I have to dig right into the installation.
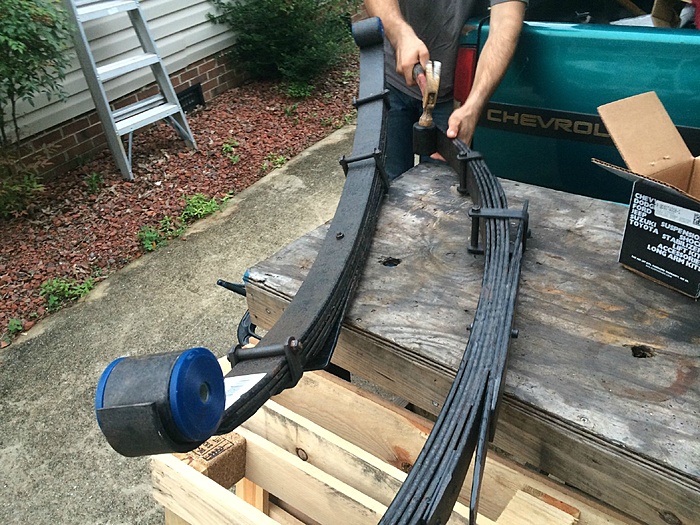
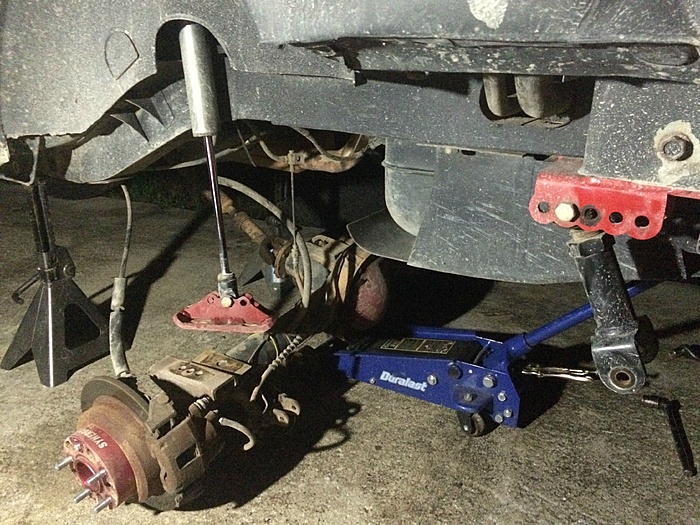
Gonna stop here tonight and finish up tomorrow. I finally get to fix my pinion angle nonsense thats been driving me up a wall.
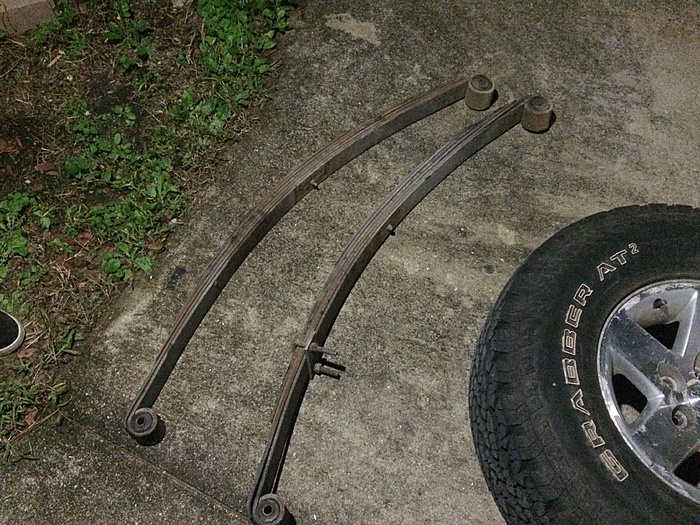
In other news my friend and I also tonight managed to break off a severely stuck cheapo lug nut that rounded off on the rear driver wheel. We kept putting this task off and failed a few times before but we finally go the darn thing off. Kinda had to to drop the leaf springs. I know, I should of known better than to put cheap made horribly in china out of crap metal lug nuts on. I have learned my lesson the hard and frustrating way.
Of course I have to dig right into the installation.


Gonna stop here tonight and finish up tomorrow. I finally get to fix my pinion angle nonsense thats been driving me up a wall.
In other news my friend and I also tonight managed to break off a severely stuck cheapo lug nut that rounded off on the rear driver wheel. We kept putting this task off and failed a few times before but we finally go the darn thing off. Kinda had to to drop the leaf springs. I know, I should of known better than to put cheap made horribly in china out of crap metal lug nuts on. I have learned my lesson the hard and frustrating way.
09-26-2014, 11:56 PM
#38
CF Veteran
Join Date: Oct 2013
Location: Greenville, SC
Posts: 5,920
Likes: 0
Received 190 Likes
on
165 Posts
Year: 1999
Model: Cherokee(XJ)
Engine: 4.0
I don't know if you said something about how the rear shocks are mounted and I just missed it.... But that doesn't look factory to me
09-27-2014, 08:55 AM
#39
Member
Thread Starter
Join Date: May 2012
Location: Hayesville, NC
Posts: 244
Likes: 0
Received 1 Like
on
1 Post
Year: 2000
Model: Cherokee
Engine: 4.0L I6

 09-27-2014, 09:16 PM
#42
Member
Thread Starter
Join Date: May 2012
Location: Hayesville, NC
Posts: 244
Likes: 0
Received 1 Like
on
1 Post
Year: 2000
Model: Cherokee
Engine: 4.0L I6
Thanks!
Hey you never know what tomorrow brings. If you were to ask me back in February if I saw myself putting in a cage I would laugh and say absolutely not, thats way above my level. But sometimes things just fall into place and you never know what life has in store.
I didn't get here by myself. I have good friends and lots of patience to thank. If I learned something its take your time and do it right and don't conform to social standards of appearance. Just do you and how you want it. I'm building a Dana 30..why? cause thats how I want to roll. Many would abject and many would applaud. It's whatevs.
Thats my .02. Rant over lol.
09-27-2014, 10:08 PM
#43
CF Veteran
Join Date: Oct 2013
Location: Greenville, SC
Posts: 5,920
Likes: 0
Received 190 Likes
on
165 Posts
Year: 1999
Model: Cherokee(XJ)
Engine: 4.0
Thanks! Hey you never know what tomorrow brings. If you were to ask me back in February if I saw myself putting in a cage I would laugh and say absolutely not, thats way above my level. But sometimes things just fall into place and you never know what life has in store. I didn't get here by myself. I have good friends and lots of patience to thank. If I learned something its take your time and do it right and don't conform to social standards of appearance. Just do you and how you want it. I'm building a Dana 30..why? cause thats how I want to roll. Many would abject and many would applaud. It's whatevs. Thats my .02. Rant over lol.
09-27-2014, 10:39 PM
#44
Member
Thread Starter
Join Date: May 2012
Location: Hayesville, NC
Posts: 244
Likes: 0
Received 1 Like
on
1 Post
Year: 2000
Model: Cherokee
Engine: 4.0L I6
As far as my build goes. The route I'm taking is somewhat modeled after a Ultra4/trailrig/dailydriver. I say ultra4 only because I love going fast off road (who doesn't?
 ) and my friend and I are tied in with the East Coast Offroad Racing Series and have been to a couple races. This is all I drive, so I'm kinda pushing it to the limit as to what I can economically and physically run as a daily driver. I love the challenge.
 If you wanna see anything more in depth, just ask.
09-27-2014, 11:08 PM
#45
CF Veteran
Join Date: Oct 2013
Location: Greenville, SC
Posts: 5,920
Likes: 0
Received 190 Likes
on
165 Posts
Year: 1999
Model: Cherokee(XJ)
Engine: 4.0
Whoaaa no bueno! Sorry to hear that. I hope things are good now. As far as my build goes. The route I'm taking is somewhat modeled after a Ultra4/trailrig/dailydriver. I say ultra4 only because I love going fast off road (who doesn't?) and my friend and I are tied in with the East Coast Offroad Racing Series and have been to a couple races. This is all I drive, so I'm kinda pushing it to the limit as to what I can economically and physically run as a daily driver. I love the challenge. If you wanna see anything more in depth, just ask.
) and my friend and I are tied in with the East Coast Offroad Racing Series and have been to a couple races. This is all I drive, so I'm kinda pushing it to the limit as to what I can economically and physically run as a daily driver. I love the challenge. If you wanna see anything more in depth, just ask.