BT's 1998 Build Thread
 07-20-2011, 07:56 AM
#16
Member
Thread Starter
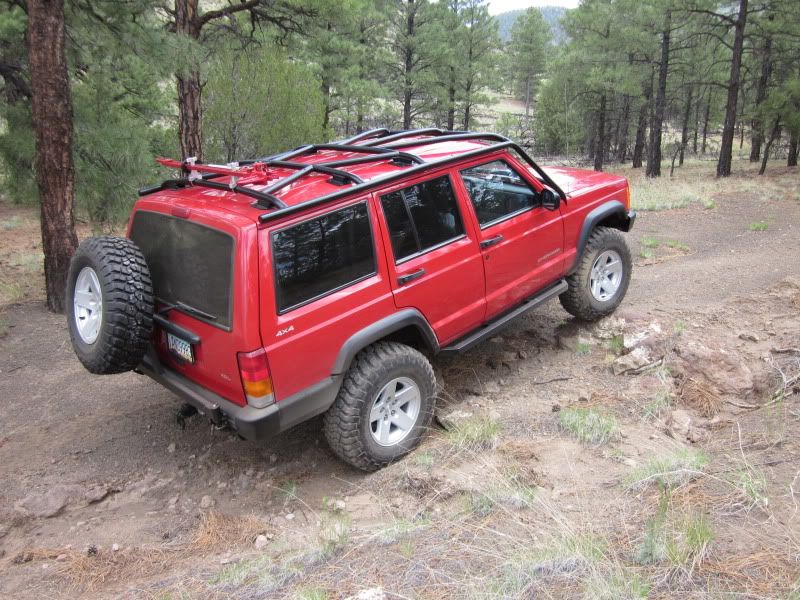
Thanks everybody. We had our Expedition for 8 years, so it had long been paid for. I sold it outright before buying the XJ so I had a decent wad of cash to put into the Jeep. So far I'm still into this project less $$ than I sold our Expedition for. I'm just about done with the mods for the time being. I want to get the tire carrier on, then just enjoy driving and wheeling this for awhile. Maybe next year when I get a little extra cash I'll re-gear it and install lockers. These 3.55 gears are marginal with the 32" tires.
 07-22-2011, 02:08 PM
#17
Member
Thread Starter
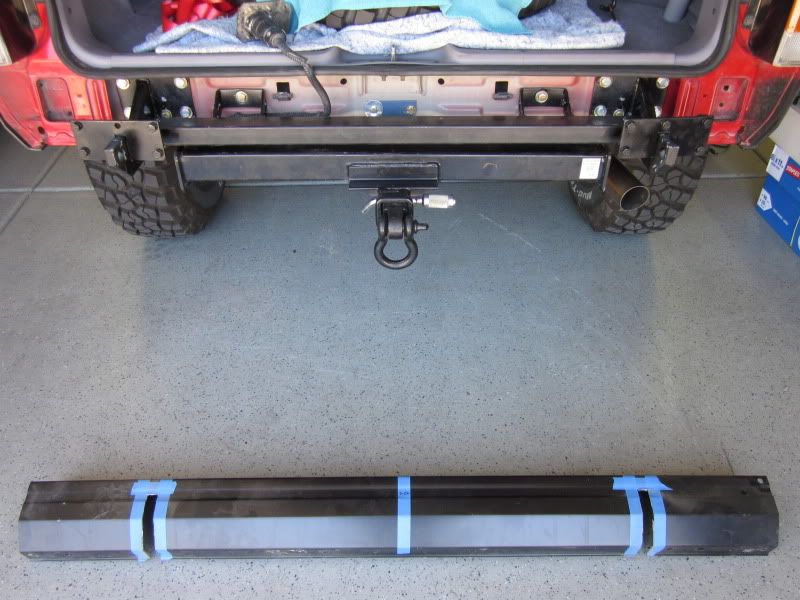
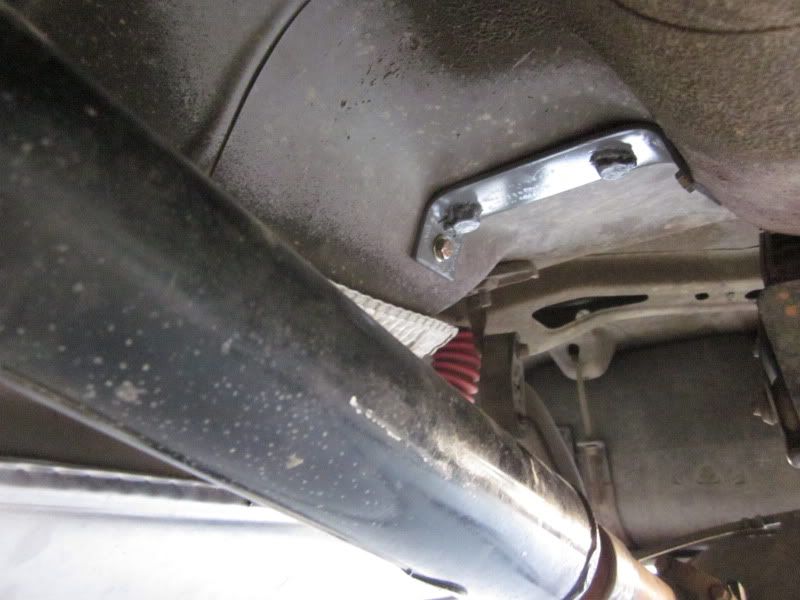
After much cussing and scraped knuckles, I finally have the structural part of the Tailbone installed. Fits great and it's plenty sturdy - it's attached to the unibody/subframe with 23 fasteners. If I had to do it again, I'd just drop the gas tank instead of trying to convince myself it would be easier not to. Before it was all said and done, I had to drop the hitch, drop and modify the gas tank skid, and even at that about half the fasteners are squeezed in between the gas tank and the rear unibody where they're nearly impossible to reach. It's done now though, and it's definitely a quality product. Hope to get the bumper skin reinstalled and hang the tire carrier tonight or tomorrow.
07-22-2011, 05:52 PM
#19
Member
Thread Starter
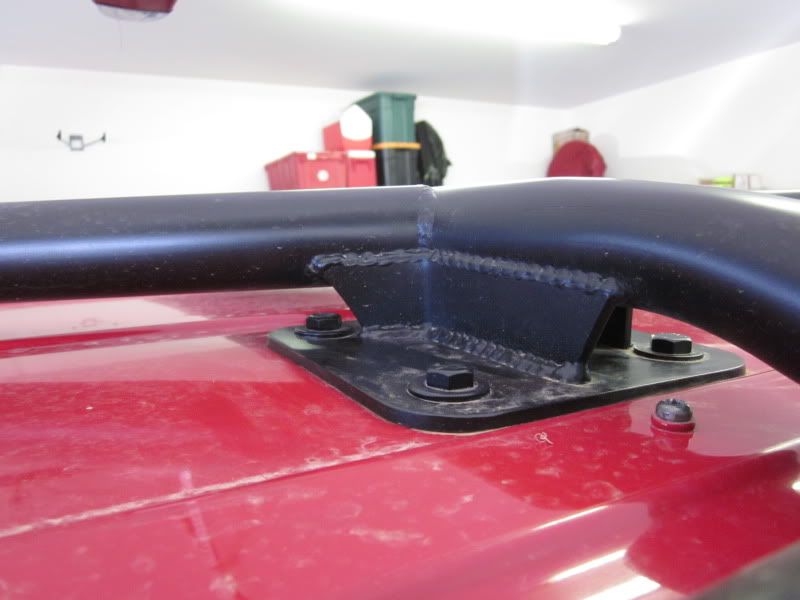
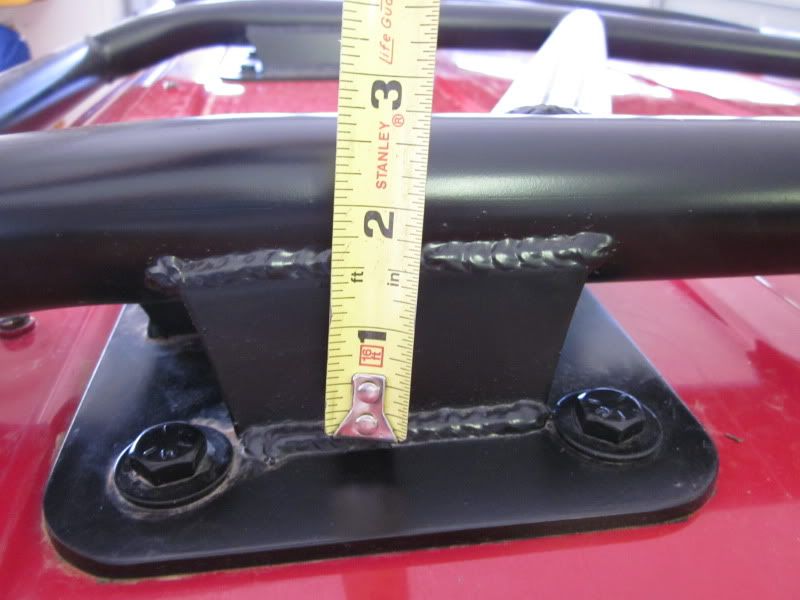
6" x 6" plates inside and out with the sheetmetal sandwiched in between, then about a 1.5" bracket to raise the exo tubing away from the body. Same with the floor, it's sandwiched between plates and the front A-Pillar down bars are tied into the rock rails.
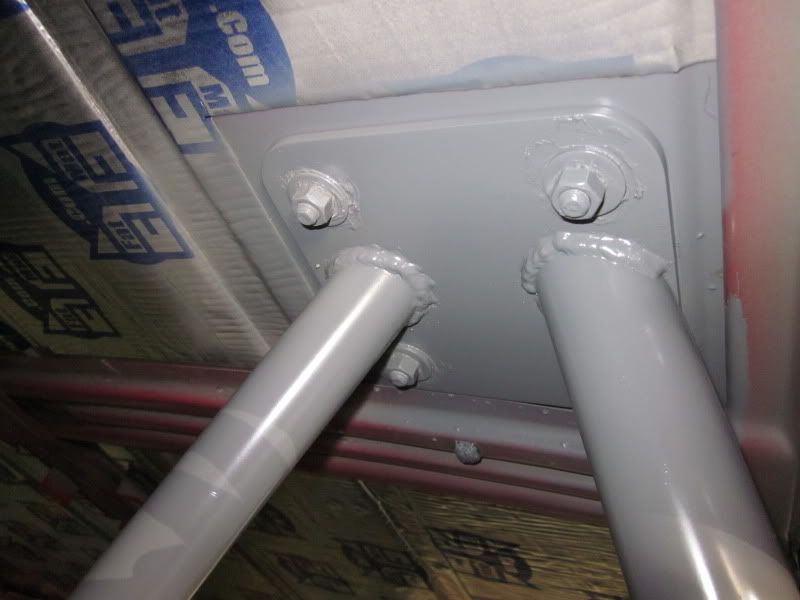
I pulled all the bolts out and caulked around each hole before I painted it. Hopefully it's waterproof. If not, at least it doesn't rain much in Arizona.
I pulled all the bolts out and caulked around each hole before I painted it. Hopefully it's waterproof. If not, at least it doesn't rain much in Arizona.
07-24-2011, 01:07 AM
#20
Member
Thread Starter
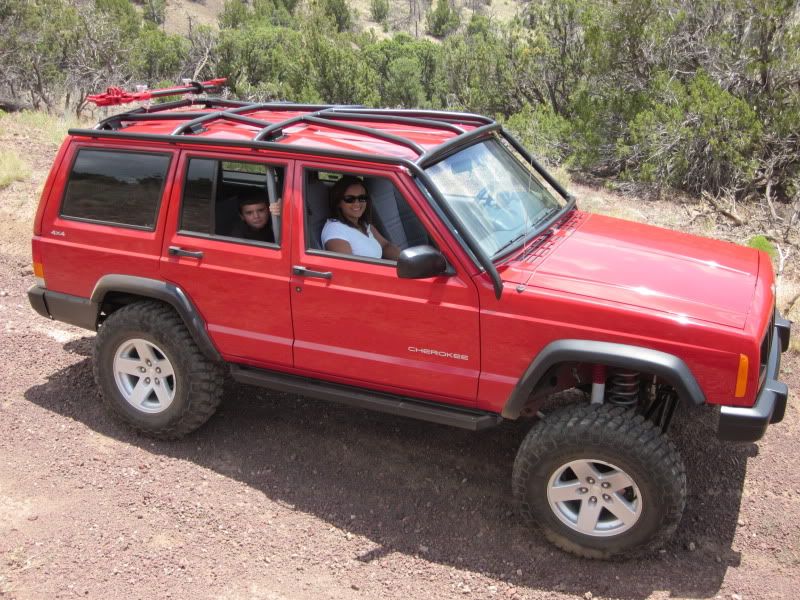
Got the Tailbone all mounted and hung the spare. Also mounted the jack to the cage. Not sure I like it up there - still thinking about mounting it inside behind the back seat. Took the family up north of Flagstaff to get out of the heat for the day.
 07-24-2011, 10:22 AM
#23
Member
Thread Starter
It was a little over $2k parts and labor. I pulled the interior before I brought it in. Hunter pulled the front end off, welded up the cage and re-installed the fenders, etc. I sealed everything up, painted it and did the interior myself. It was a lot of $$, but I knew it would be going in. I plan on keeping this thing forever, so to me it was worth it. I have a welder, but I don't have a bender (or the experience) and I really don't have the time for that big of a project anyway. Generally, I do my own work, but the cage was more than I wanted to tackle and this looks way better than anything I could have done. I look at the cage as the foundation for anything else I might ever want to do with this project. I'm really happy with it.

 07-24-2011, 11:12 AM
#26
Member
Thread Starter
 09-03-2011, 11:58 PM
#27
Member
Thread Starter
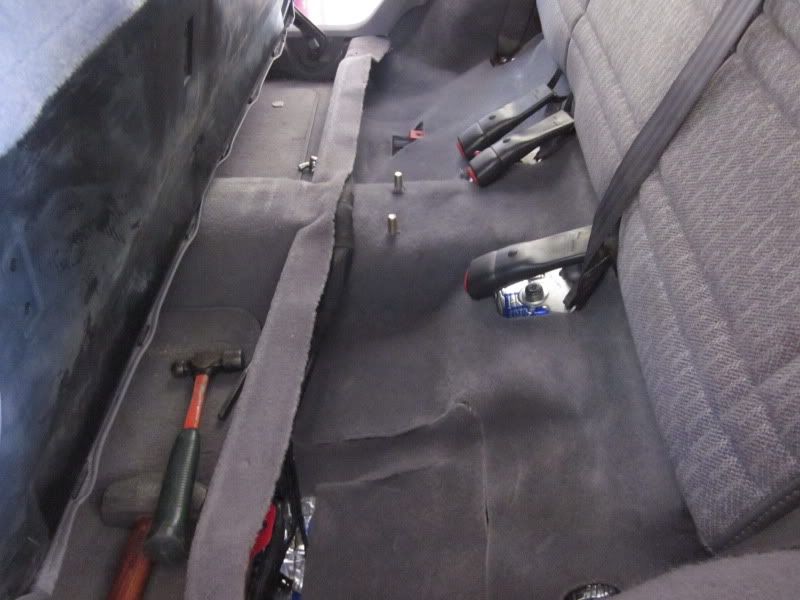
Well, I have a little update. I mentioned before I wasn't really thrilled about having the jack mounted to the rollcage outside the Jeep. It was easy to get to up there, but I was always worried it would get stolen sooner or later. Also it kinda reminded me of some ricer with the big spoiler mounted on the back of his Honda. Today I decided to see if I could make it fit under the back seat. I knew of other guys who keep their hi-lift's under there, but every one I've seen is just thrown under the seat and isn't attached to anything. I don't like loose heavy stuff inside the Jeep in case of a wreck or rollover, so I decided to build a mount for it under the back seat. It's a tight fit, but with the baseplate removed from the jack and some maneuvering, it fits perfectly and looks almost factory. It's plenty sturdy and easy to remove the jack if the need arises. Total cost was about $6 and a few hours of my time.
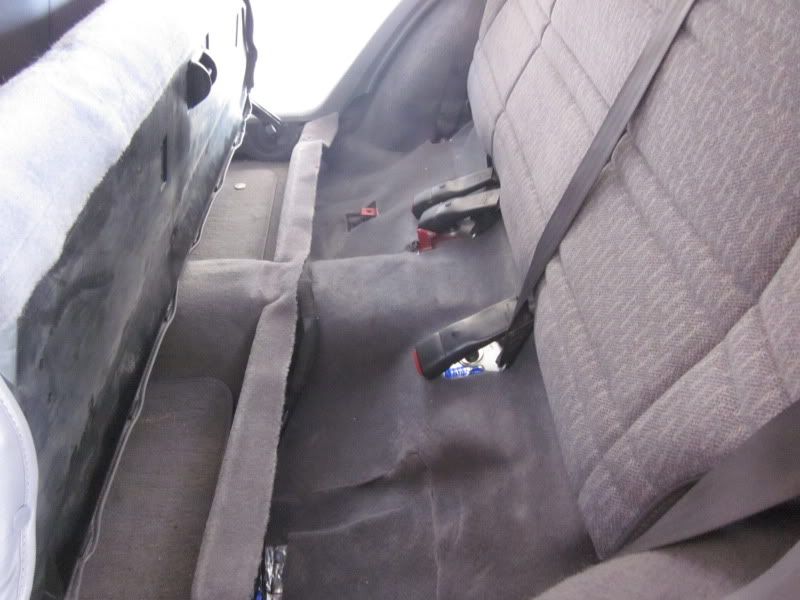
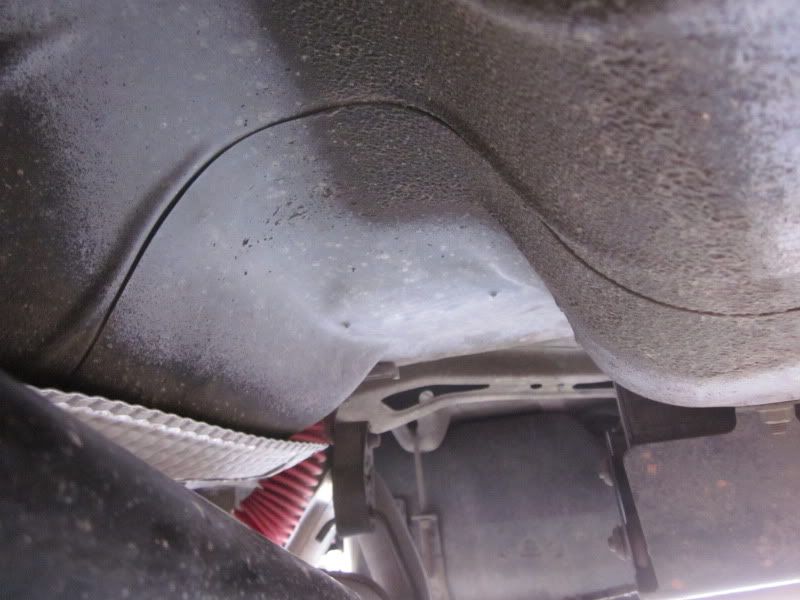
Here's how it looked under the back seat before I started.
I started with a 2" x 9 1/2" piece of flat 3/16" stock.

I used my high dollar metal bender to put some bends in to fit the contour of the floorpan underneath the seat.
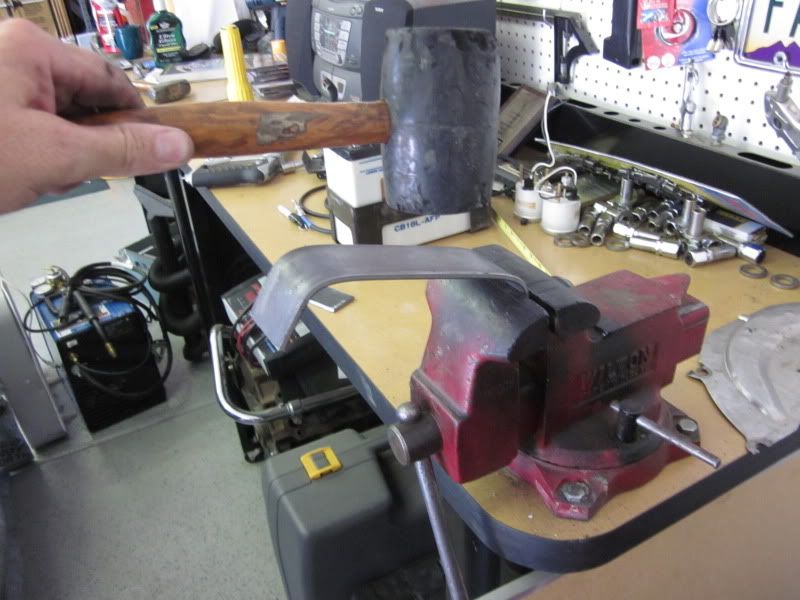
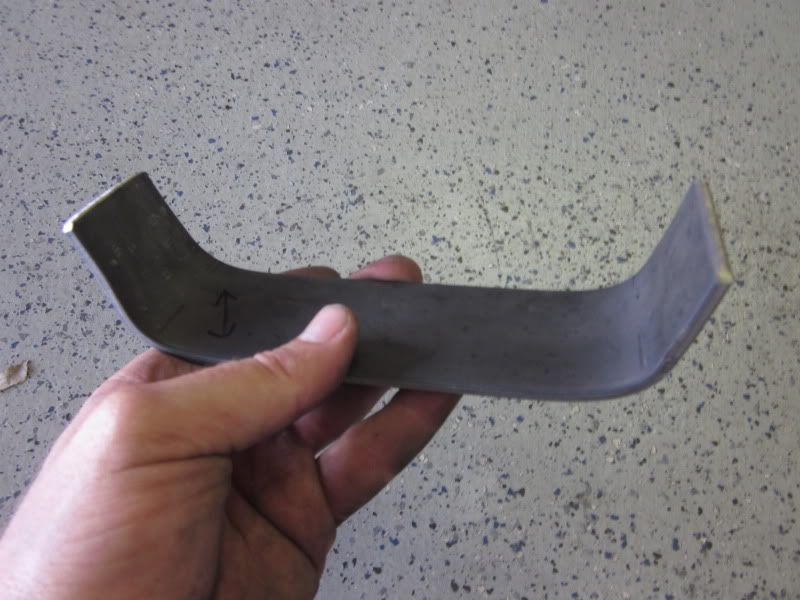
I ended up with this.
I had to hammer down the hump in the floor about 1/4" to gain enough clearance for the jack to fit between the seat and the floor. It didn't take much. Then I laid the jack in place and center punched where I planned to drill the holes for the mounting bolts.
Next, I drilled holes in each end of my bracket to mount it to the floor, then drilled two more holes to align with those I had already drilled in the floor. I ran 1/2" x 2-1/2" grade 8 bolts through the center holes in the bracket and welded them in place. My welds came out fugly I guess because I didn't take time to clean up the steel. I'm not proud of how they look, but they'll hold.
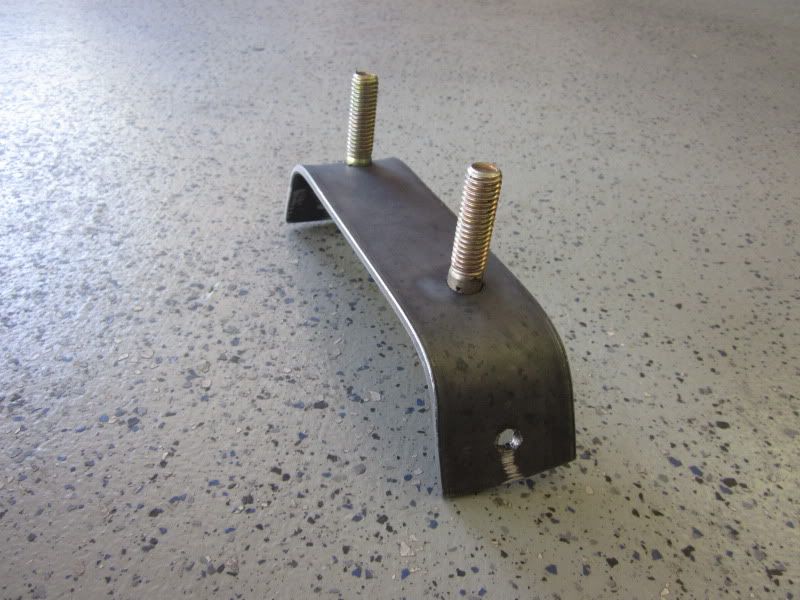
With the bracket in place, I drilled two more holes in the floor to install the bolts in the end of the bracket which will hold it in place when the jack is removed.
After cutting the carpet for the bolts to go through, this it what I ended up with. Looks stock except for the two bolts sticking through the carpet.
After mounting the jack, I used 1/2" stainless wing nuts to hold it in place.
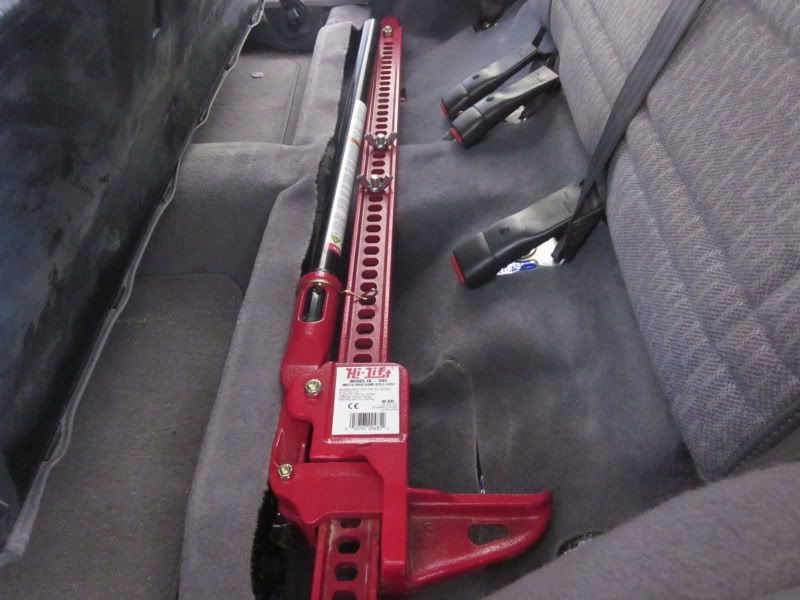
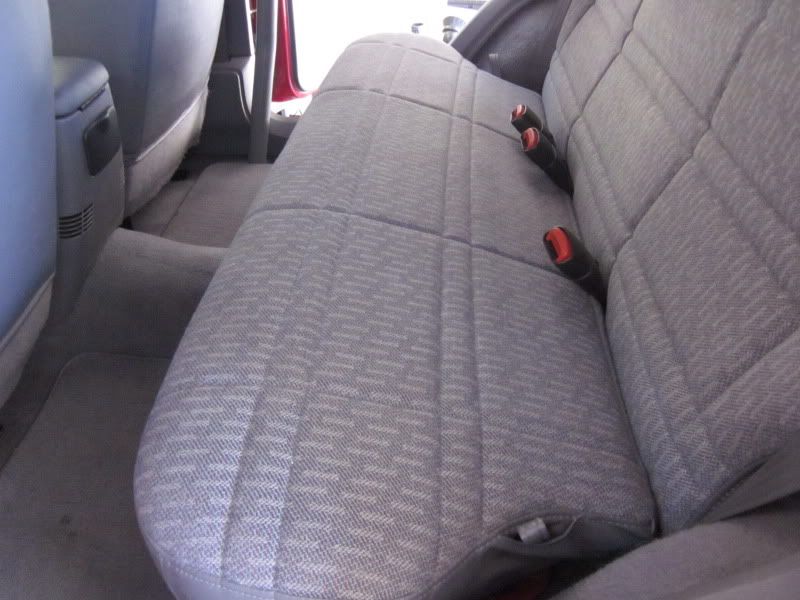
The seat sits down and latches just like it always did and you don't even know the jack is under there.
Here's how it looked under the back seat before I started.
I started with a 2" x 9 1/2" piece of flat 3/16" stock.
I used my high dollar metal bender to put some bends in to fit the contour of the floorpan underneath the seat.
I ended up with this.
I had to hammer down the hump in the floor about 1/4" to gain enough clearance for the jack to fit between the seat and the floor. It didn't take much. Then I laid the jack in place and center punched where I planned to drill the holes for the mounting bolts.
Next, I drilled holes in each end of my bracket to mount it to the floor, then drilled two more holes to align with those I had already drilled in the floor. I ran 1/2" x 2-1/2" grade 8 bolts through the center holes in the bracket and welded them in place. My welds came out fugly I guess because I didn't take time to clean up the steel. I'm not proud of how they look, but they'll hold.
With the bracket in place, I drilled two more holes in the floor to install the bolts in the end of the bracket which will hold it in place when the jack is removed.
After cutting the carpet for the bolts to go through, this it what I ended up with. Looks stock except for the two bolts sticking through the carpet.
After mounting the jack, I used 1/2" stainless wing nuts to hold it in place.
The seat sits down and latches just like it always did and you don't even know the jack is under there.
Last edited by Brent T; 09-04-2011 at 12:00 AM.
09-16-2011, 11:58 AM
#28
Member
Thread Starter
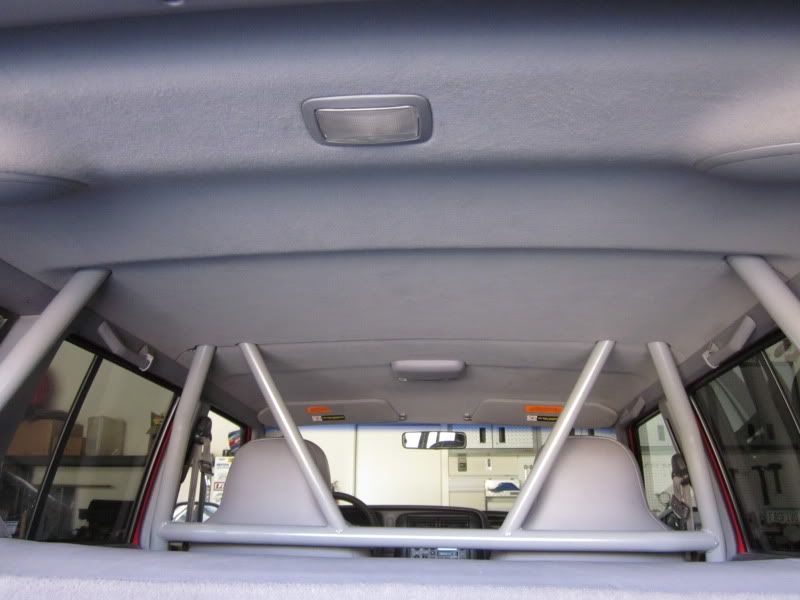
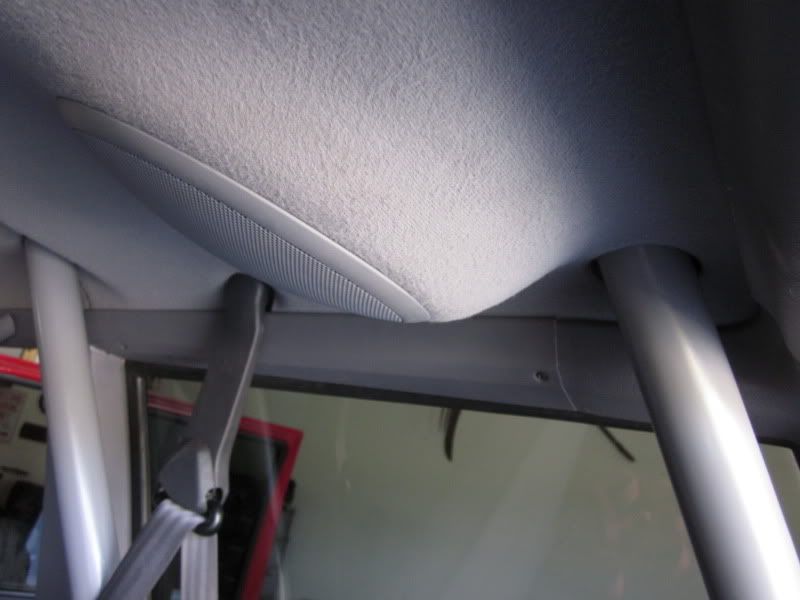
Finally got the nerve to cut up my headliner so I could install it. I used an old one cut into four pieces to make patterns then got to work on mine. Turned out pretty good. Not perfect, but looks pretty clean I think. I had to cut my headliner into two pieces to get it in, then make all the cuts to fit around the cage. Still need to get a piece of H-moulding to connect the two halves.

09-16-2011, 03:04 PM
#29
CF Veteran
Join Date: Apr 2011
Location: Memphis
Posts: 1,107
Likes: 0
Received 0 Likes
on
0 Posts
Year: 2001
Model: Cherokee
Engine: 4.0l
god bless that thing is clean. time for some 4pt harnesses and a cb radio then you will be set for the trails.
i think maybe later down the road, some bushwacker cutouts would really complete your jeep. but just my opinion, nice work btw
i think maybe later down the road, some bushwacker cutouts would really complete your jeep. but just my opinion, nice work btw
09-16-2011, 03:14 PM
#30
Member
Thread Starter
Hey thanks. CB and harnesses are on my short list. No Bushwhackers though - they're just not my cup of tea. Maybe the flatties, but if I do that, I'll probably build my own. I've trimmed all I can off the stock flares, but it still rubs sometimes when it's flexed. I tweaked the sheetmetal on the front edge of the rear wheelwell last time I had it out.