'99 "The Jeep"
 08-24-2012, 09:46 PM
#61
CF Veteran
Thread Starter
Join Date: Jan 2010
Location: Virginia Beach by way of Michigan
Posts: 5,482
Likes: 0
Received 24 Likes
on
24 Posts
Made my doors "drop in" style for much easier removal/re-install.
Cut the lower hinges on the door:

Cut down bolts in place:

Messy welds, but they work:
top

bottom

Cut the lower hinges on the door:
Cut down bolts in place:
Messy welds, but they work:
top
bottom
 09-04-2012, 02:30 PM
#62
CF Veteran
Thread Starter
Join Date: Jan 2010
Location: Virginia Beach by way of Michigan
Posts: 5,482
Likes: 0
Received 24 Likes
on
24 Posts
From this past weekend:
Passenger side axle seal is finally fully seated and is no longer leaking! (Thanks Red82 for being there to help).
Today:
Installed a 60mm throttle body, cleaned all the sensor connections, and put new di-electric grease on them. I can definitely feel the difference in throttle response and smoothness.
Last edited by no rdplz; 09-04-2012 at 03:23 PM.
09-04-2012, 07:26 PM
#64
CF Veteran
Thread Starter
Join Date: Jan 2010
Location: Virginia Beach by way of Michigan
Posts: 5,482
Likes: 0
Received 24 Likes
on
24 Posts
I was able to salvage the seal but of course still had to pull out the carrier just to get to it. It was just barely crooked so that little tiny gap was just letting diff fluid pour out.
On another note, I have yet again changed tires. The BFG M/T's ended having horrid RF readings and made driving at anything over 55mph impossible. SOOOOO, found a guy on Craigslist that was looking for some trail tires and was giving up some 33x10.5 A/T's with only 800 miles on them. Only issue was that they were 15's, so that meant losing the Rubi's and switching to Grizzley's. I love the Rubi's, but in reality, a 15" tire cost less, and I know I'm eventually gonna bigger anyway, so I basically have brand new tires now that only cost me the time to help swap his tires onto my Jeep and my tires onto his. All in all, worth it IMO.
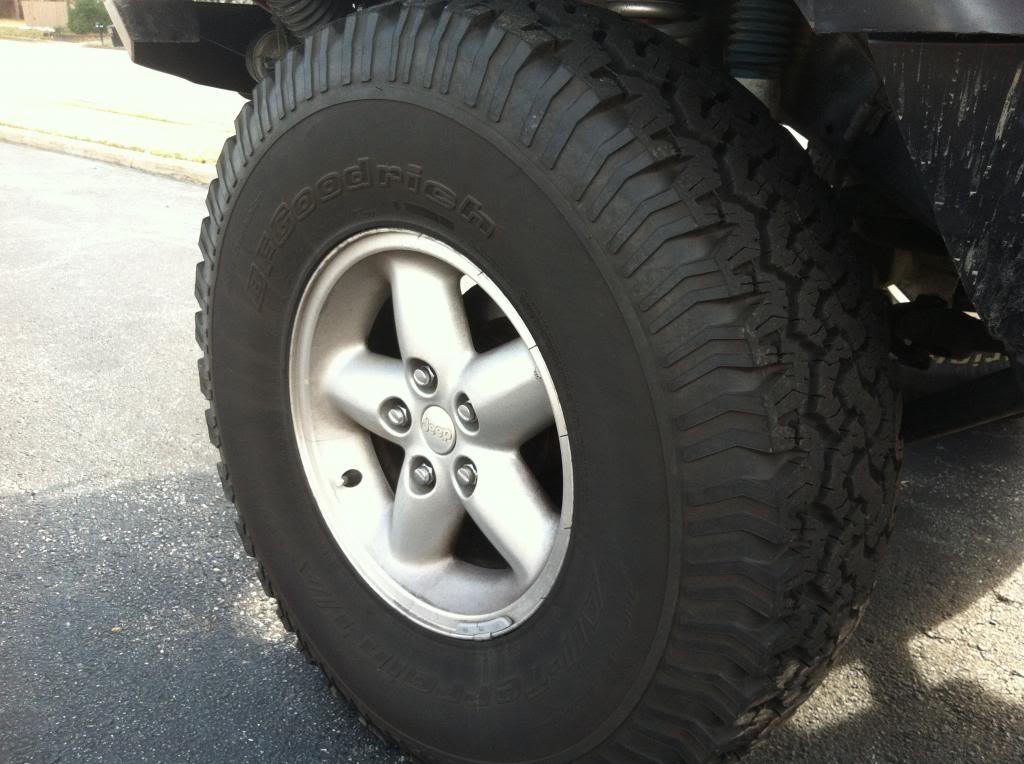
On another note, I have yet again changed tires. The BFG M/T's ended having horrid RF readings and made driving at anything over 55mph impossible. SOOOOO, found a guy on Craigslist that was looking for some trail tires and was giving up some 33x10.5 A/T's with only 800 miles on them. Only issue was that they were 15's, so that meant losing the Rubi's and switching to Grizzley's. I love the Rubi's, but in reality, a 15" tire cost less, and I know I'm eventually gonna bigger anyway, so I basically have brand new tires now that only cost me the time to help swap his tires onto my Jeep and my tires onto his. All in all, worth it IMO.
Last edited by no rdplz; 08-30-2014 at 10:11 PM.
09-28-2012, 06:50 PM
#65
CF Veteran
Thread Starter
Join Date: Jan 2010
Location: Virginia Beach by way of Michigan
Posts: 5,482
Likes: 0
Received 24 Likes
on
24 Posts
Finally got around to what was going to be a false floor and instead became a storage box. Decided to change it up cuz I wanted to be able to remove it if need be without too much trouble. It keeps all my stuff locked up and if anyone wants to steal it their gonna have a tough time as they'll quite have a load to carry. Helped Red82 with his as well, but unfortunately the batteries for my cordless stuff died and the charger decided to overheat so we got his almost done. Most of the material was free (Stained .75" oak counter top grade ply wood and 2x4 studs) so I figured, why not use some of it? Bought a couple pieces of 1x6 for the frame and a case of brad nails and decided to just use the oak ply wood as the box floor and lids. So, enough with the talking and onto what you really want...the pictures:
This is what I started with: your basic bedlined cargo area that allows everything to slide around and make all kinds of noise and a huge mess when out on the trails. By the time you finally do find what you need in that mess you're cussing up a storm and ready to just forget about it.
To avoid the above experience yet again, I came up with a simple design: 1 large compartment, 1 small, and one sub box


The sub box has some rattles, which was to be expected, so I'll end up throwing some dynomat in there to help out with sound quality.
Anyway, also decided to let my OCD show a little by matching the 23.5* angle of the back seat so there's no wasted space between the bottom of the seat and storage box.
Red82 came over and used some of the 2x4's I had as well as some of the ply wood to make his own storage box.

Got the lids made and put on as well as the sub set in to test it out and see just how bad it sounded. Also offset it so I have room for my GHB and a couple of 2 gallon water jugs on the side.

Installed a tab and swing arm on each lid so I can lock them up.

Finally, the large storage area with the basic Jeeper's tool bag, my winch remote, and a few other miscellaneous objects, the small storage area with recovery gear and "road side emergency fix" materials, and the final product all locked up.


This is what I started with: your basic bedlined cargo area that allows everything to slide around and make all kinds of noise and a huge mess when out on the trails. By the time you finally do find what you need in that mess you're cussing up a storm and ready to just forget about it.
To avoid the above experience yet again, I came up with a simple design: 1 large compartment, 1 small, and one sub box
The sub box has some rattles, which was to be expected, so I'll end up throwing some dynomat in there to help out with sound quality.
Anyway, also decided to let my OCD show a little by matching the 23.5* angle of the back seat so there's no wasted space between the bottom of the seat and storage box.
Red82 came over and used some of the 2x4's I had as well as some of the ply wood to make his own storage box.
Got the lids made and put on as well as the sub set in to test it out and see just how bad it sounded. Also offset it so I have room for my GHB and a couple of 2 gallon water jugs on the side.
Installed a tab and swing arm on each lid so I can lock them up.
Finally, the large storage area with the basic Jeeper's tool bag, my winch remote, and a few other miscellaneous objects, the small storage area with recovery gear and "road side emergency fix" materials, and the final product all locked up.
Last edited by Gee oh Dee; 07-24-2013 at 05:55 PM.
10-06-2012, 04:34 PM
#66
CF Veteran
Thread Starter
Join Date: Jan 2010
Location: Virginia Beach by way of Michigan
Posts: 5,482
Likes: 0
Received 24 Likes
on
24 Posts
IRO double shear adjustable track bar came in the mail!
Here's what I had:

Procomp Adjustable with a heim joint. I've had this thing for less than 8k miles and the heim is completely shot. Called Procomp and they said, "Well, Mr. Taylor, since the heim was functioning properly at the time of installation, we will not warranty it due to it being a 'wearable part'." I can understand that, even though I think it's a bunch of poo-doo that they won't cover one of their parts that failed in under 8k miles. So, I asked how much a new one was. "Our cheapest vendor sells them for $110, Mr. Taylor." So, I figured, rather than spend over $100 on a part that may fail again and need to be replaced, I'll just get IRO's for a shade under $200 before shipping.
So, I start by removing the factory bracket on the uni-body rail. That comes off with no issues. I then go to remove the bolt on the axle end. I'm no idiot, so I grab my 11/16's box end and my 16mm box end and get ready to remove that bolt and its respective nut when low and behold, I can't get my 11/16's on the nut inside the axle bracket. Why? Because Jeep apparently thought it'd be hilarious to put an opening that makes you think, "Oh, I can get my wrench on the nut through there", but then put a lip on that opening that makes it impossible, crushing all hope you had of getting this job done quickly. It's enough to make a pastor want to cuss (trust me, I know. I'm a pastor. And I nearly cussed.)
Rather than letting a tirade of blasphemy and vulgarity spew forth from my mouth, I used one of my favorite tools: my angle grinder. The lip is gone and I have easy access to the axle bracket nut.

From there it was just a matter of pulling the thing out of there.

Now it was time for the new stuff. The new Bracket from IRO for the upper joint:

And after a quick assembly, the track bar itself:

Let me tell you, this thing is a beast. It's big. It's heavy. It could easily be used as a means of seriously injuring someone with a single blow to any part of their body. I would not be surprised if one the next horror movies features this thing as the main villain's blunt-force weapon of choice.
After some quick measuring and final adjusting, the axle is centered and I'm good to go.

BUT THAT'S NOT ALL FOLKS!
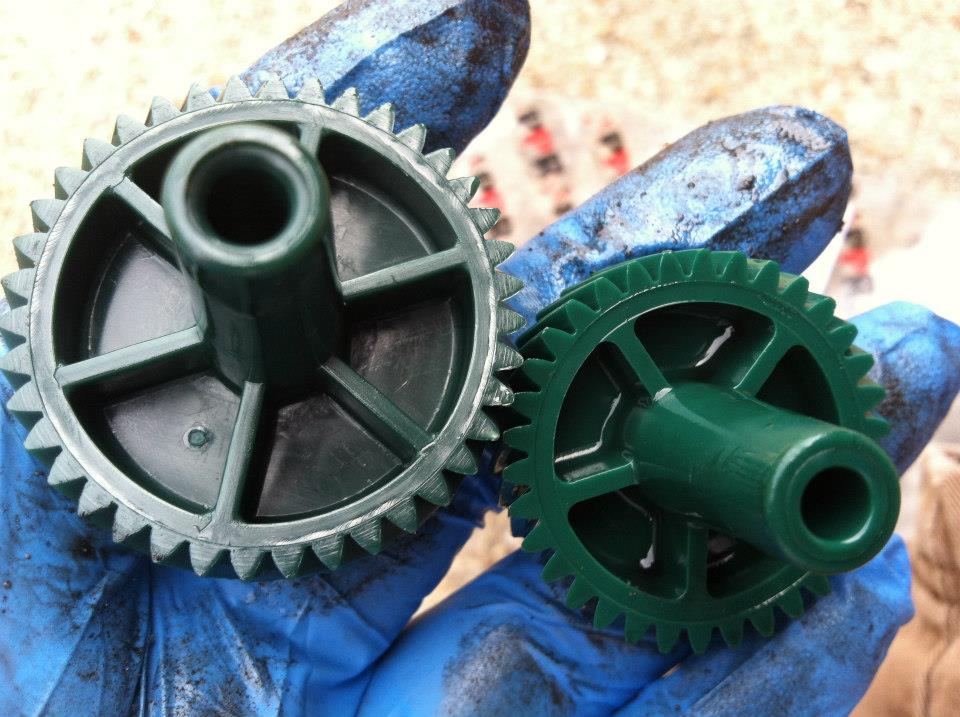
Also in my mailbox was this little piece of upgrade:

New 39 tooth speedo gear due to 4.56's and 33's.
This is honestly one of the easiest things to swap out. If you don't know how to do it, here you go...
Unlock the sensor clip (little red tab unlocks it) located at the rear of the transfer case.

slide the sensor off and remove the retaining clip bolt.

Pull the housing out and swap in the new gear (it's so much bigger!).

Okay, now before you just go and put the housing back in, take a look at the removed housing. Notice those numbers Along the gear housing (red arrow is pointing to one set)? Yeah, you need to pay attention to those. Those are for the number of teeth the gear has. There are 3 sets of numbers: 26-31, 32-38, 39-47. You need to find the set that has your new gear tooth count in it.
afbef48e-91a4-4dd5-9d07-6cd93e67914b_zpsf050dd73.jpg?t=1375728691
When you put the housing back it, first, put a little RTV on the o-ring. It likes to tear when reinstalling the housing, so save yourself some trouble and make sure it seals all the way. Okay, now, you'll notice a little mark on the t-case right where the housing plugs in. You need to line the numbers your gear fits in with that mark. From there it's just reassembly. Easy enough. Took me about 10 minutes to swap it out.
Here's what I had:
Procomp Adjustable with a heim joint. I've had this thing for less than 8k miles and the heim is completely shot. Called Procomp and they said, "Well, Mr. Taylor, since the heim was functioning properly at the time of installation, we will not warranty it due to it being a 'wearable part'." I can understand that, even though I think it's a bunch of poo-doo that they won't cover one of their parts that failed in under 8k miles. So, I asked how much a new one was. "Our cheapest vendor sells them for $110, Mr. Taylor." So, I figured, rather than spend over $100 on a part that may fail again and need to be replaced, I'll just get IRO's for a shade under $200 before shipping.
So, I start by removing the factory bracket on the uni-body rail. That comes off with no issues. I then go to remove the bolt on the axle end. I'm no idiot, so I grab my 11/16's box end and my 16mm box end and get ready to remove that bolt and its respective nut when low and behold, I can't get my 11/16's on the nut inside the axle bracket. Why? Because Jeep apparently thought it'd be hilarious to put an opening that makes you think, "Oh, I can get my wrench on the nut through there", but then put a lip on that opening that makes it impossible, crushing all hope you had of getting this job done quickly. It's enough to make a pastor want to cuss (trust me, I know. I'm a pastor. And I nearly cussed.)
Rather than letting a tirade of blasphemy and vulgarity spew forth from my mouth, I used one of my favorite tools: my angle grinder. The lip is gone and I have easy access to the axle bracket nut.
From there it was just a matter of pulling the thing out of there.
Now it was time for the new stuff. The new Bracket from IRO for the upper joint:
And after a quick assembly, the track bar itself:
Let me tell you, this thing is a beast. It's big. It's heavy. It could easily be used as a means of seriously injuring someone with a single blow to any part of their body. I would not be surprised if one the next horror movies features this thing as the main villain's blunt-force weapon of choice.
After some quick measuring and final adjusting, the axle is centered and I'm good to go.
BUT THAT'S NOT ALL FOLKS!
Also in my mailbox was this little piece of upgrade:
New 39 tooth speedo gear due to 4.56's and 33's.
This is honestly one of the easiest things to swap out. If you don't know how to do it, here you go...
Unlock the sensor clip (little red tab unlocks it) located at the rear of the transfer case.
slide the sensor off and remove the retaining clip bolt.
Pull the housing out and swap in the new gear (it's so much bigger!).
Okay, now before you just go and put the housing back in, take a look at the removed housing. Notice those numbers Along the gear housing (red arrow is pointing to one set)? Yeah, you need to pay attention to those. Those are for the number of teeth the gear has. There are 3 sets of numbers: 26-31, 32-38, 39-47. You need to find the set that has your new gear tooth count in it.
afbef48e-91a4-4dd5-9d07-6cd93e67914b_zpsf050dd73.jpg?t=1375728691
When you put the housing back it, first, put a little RTV on the o-ring. It likes to tear when reinstalling the housing, so save yourself some trouble and make sure it seals all the way. Okay, now, you'll notice a little mark on the t-case right where the housing plugs in. You need to line the numbers your gear fits in with that mark. From there it's just reassembly. Easy enough. Took me about 10 minutes to swap it out.
Last edited by no rdplz; 08-30-2014 at 10:18 PM.
10-18-2012, 10:32 PM
#67
CF Veteran
Thread Starter
Join Date: Jan 2010
Location: Virginia Beach by way of Michigan
Posts: 5,482
Likes: 0
Received 24 Likes
on
24 Posts
So for the past 2 months my Driver's window has been in the down position. This is not due to 2 months of beautiful-sunshine filled days. It's due to the fact that I had my doors off on what was supposed to be a nice sunshine filled day, and instead it decided to rain. 
This isn't really a big deal unless of course the connection plugs for the door electronics get wet while driving home to put the doors on.
I didn't realize this had happened (I didn't even see any water in the Jeep at all) and put my doors back on, replugging the connections together. Started the Jeep, heard a "pop" and none of my windows worked. Checked the fuse and saw it was blown. Put in a new one and my front passenger window and and both rear windows worked, but only from their respective switches. The driver's switch wasn't even getting any power.
So, time to do some digging and find the issue.
After about 2 hours of searching, I couldn't find anything wrong. Even my volt meter said I should be getting power.
I gave up and decided to just get an entirely different loom and see if that would in fact fix my dilemma - which I was confident it would. Tried Junkyards, Craigslist, and various forums - no one had the loom I needed. Finally, found it on here last week. Thank you CF!
Got it in the mail today, and after 15 minutes of work, I have a "new" driver's door wiring loom and a working window
Last edited by no rdplz; 10-21-2013 at 10:22 PM.
12-06-2012, 09:11 PM
#68
CF Veteran
Thread Starter
Join Date: Jan 2010
Location: Virginia Beach by way of Michigan
Posts: 5,482
Likes: 0
Received 24 Likes
on
24 Posts
You know the P51 Mustang? Yeah? Well if not, here's a picture for you to drool over...

Yeah, gorgeous. One of the most amazing things to ever be created by man. Pretty awesome. It looks awesome. It flies awesome. It blows stuff up pretty awesomely. And it especially sounds awesome. What isn't awesome is when it sounds like there's one of these in the cargo area of your XJ.
The culprit? Well, let's just say I came as close as you can to completely grenading a rear diff without completely killing everything in it. The cause of all my problems were the springs in my Powertrax no-slip:

Yup. Those things. The two big ones weren't too bad, just a little worn. From there the Long skinny ones were shot. And then you get to the four small ones. Four you ask? Yeah there are more than 4 because each of them were broken and all those pieces were moving around inside my diff. The final casualty list:
Locker springs
Axle seals
All bearings
Yup, all of them shot. Thankfully I got to it before the gears got chewed up. So now I have a much improved rear axle and thankfully, no more P51 engine noise emanating from the rear of my XJ.
Yeah, gorgeous. One of the most amazing things to ever be created by man. Pretty awesome. It looks awesome. It flies awesome. It blows stuff up pretty awesomely. And it especially sounds awesome. What isn't awesome is when it sounds like there's one of these in the cargo area of your XJ.
The culprit? Well, let's just say I came as close as you can to completely grenading a rear diff without completely killing everything in it. The cause of all my problems were the springs in my Powertrax no-slip:
Yup. Those things. The two big ones weren't too bad, just a little worn. From there the Long skinny ones were shot. And then you get to the four small ones. Four you ask? Yeah there are more than 4 because each of them were broken and all those pieces were moving around inside my diff. The final casualty list:
Locker springs
Axle seals
All bearings
Yup, all of them shot. Thankfully I got to it before the gears got chewed up. So now I have a much improved rear axle and thankfully, no more P51 engine noise emanating from the rear of my XJ.
Last edited by no rdplz; 12-06-2012 at 10:03 PM.
12-07-2012, 07:00 AM
#72
the sensor thats in your hand. you or some anyone know what part number that is. i converted my xj to 4wd and the transfer case that i put in it came with the 2 wire sensor and my xj has the 3 wire plug. i need one! i see a number but, i just can't make it out.
sorry to thread jack
[QUOTE=no rdplz;2062987]
slide the sensor off and remove the retaining clip bolt.
Pull the housing out and swap in the new gear (it's so much bigger!).
QUOTE]
sorry to thread jack
[QUOTE=no rdplz;2062987]
slide the sensor off and remove the retaining clip bolt.
Pull the housing out and swap in the new gear (it's so much bigger!).
QUOTE]
Last edited by Gee oh Dee; 07-24-2013 at 05:59 PM.
12-07-2012, 08:28 AM
#73
CF Veteran
Thread Starter
Join Date: Jan 2010
Location: Virginia Beach by way of Michigan
Posts: 5,482
Likes: 0
Received 24 Likes
on
24 Posts
It was still buzzy. The box wasn't MDF so it's to be expected. I'm a big sound quality guy and I just just couldn't take it so I ended up pulling the sub out of the box and getting a true enclosure for it. Plus I have more storage now.
12-07-2012, 08:38 AM
#74
No, I don't lick fish.
kinda figured as much... thanks for the info... still trying to figure out how exactly I wanna build mine... I think i'm gonna go with a glass enclosure in the cubby
12-20-2012, 10:36 AM
#75
CF Veteran
Thread Starter
Join Date: Jan 2010
Location: Virginia Beach by way of Michigan
Posts: 5,482
Likes: 0
Received 24 Likes
on
24 Posts
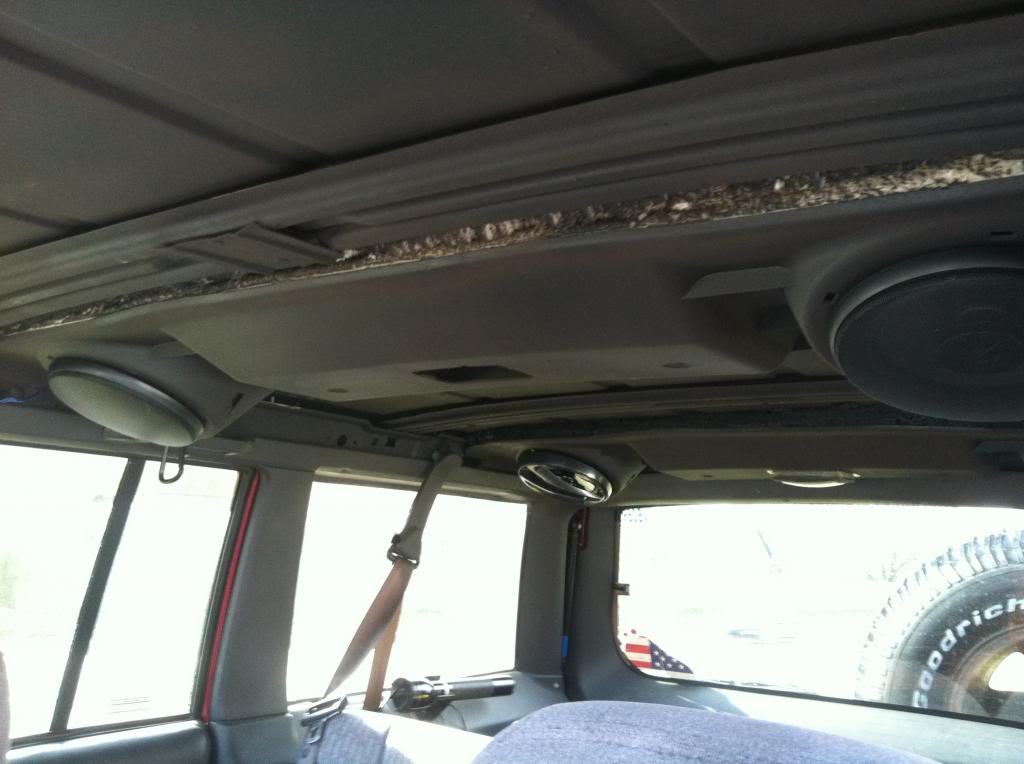
Ever since I went doorless, I've had no front speakers seeing how they're mounted in the doors and in order to take the doors off, the speakers must be disconnected. I still have yet to make one complete quick disconnect for the wiring looms, but that's currently just 3 plugs on the driver side and 4 on the passenger. Not bad, but it gets annoying as well. So, what to do about the absent tunes up front? The answer? A 2nd sound bar of course! Snagged it from a XJ at the boneyard for $7, bought new Pioneer 6.5's, ran the wiring up through the dash, behind the a-pillar trim and along the roof to the "new" sound bar. Finally back to a 4-speaker, 1-sub audio set up.
Also bought a GoPro for $80 thanks to a killer Walmart.com deal. It's just the base GoPro, not the 2, or the Hero, or 3, or whatever they're at now, But hey, it's a GoPro and I can now have HD footage of my offroading adventures. Centered the mount on the dash and it works beautifully. Now I need to go buy more mounts.
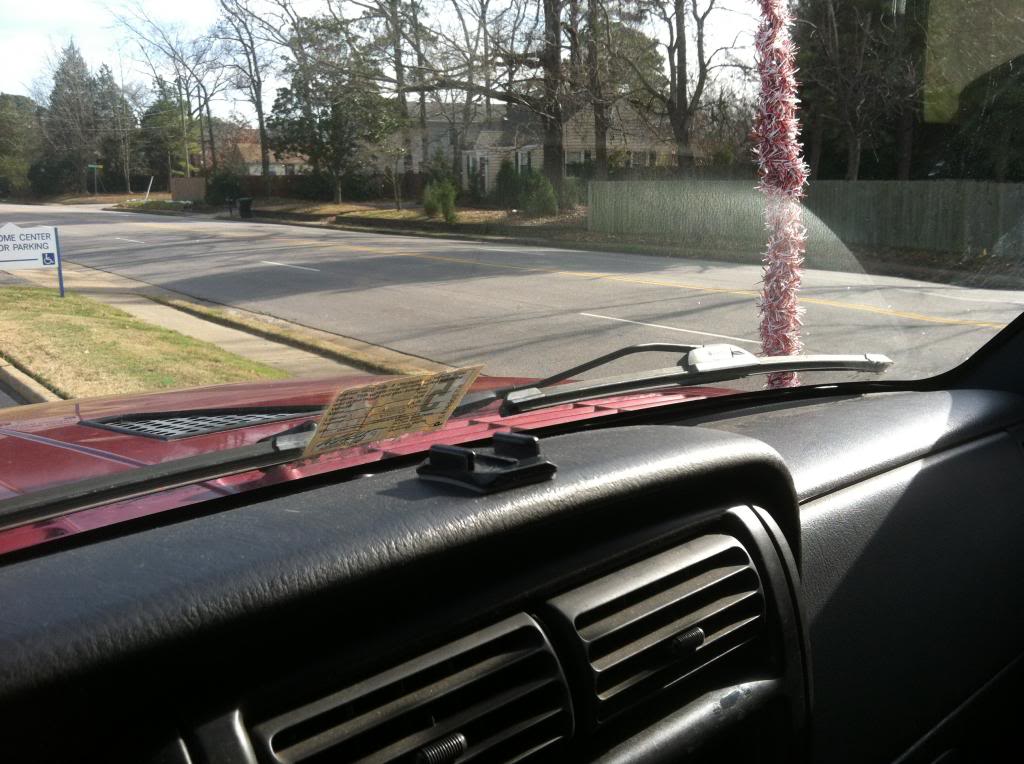
Also bought a GoPro for $80 thanks to a killer Walmart.com deal. It's just the base GoPro, not the 2, or the Hero, or 3, or whatever they're at now, But hey, it's a GoPro and I can now have HD footage of my offroading adventures. Centered the mount on the dash and it works beautifully. Now I need to go buy more mounts.
Last edited by no rdplz; 08-30-2014 at 10:21 PM.