96 XJ: The Wheeling Beer Can


 11-15-2015, 01:39 PM
#18
Junior Member
Thread Starter
Join Date: Oct 2015
Location: Paso Robles Ca
Posts: 36
Likes: 0
Received 0 Likes
on
0 Posts
Year: 1996
Model: Cherokee
Going bigger so the old axles are for sale if anyone is interested.
http://slo.craigslist.org/pts/5317206809.html
http://slo.craigslist.org/pts/5317206809.html
11-16-2015, 12:57 AM
#19
CF Veteran
Join Date: Sep 2013
Location: California
Posts: 1,552
Likes: 0
Received 7 Likes
on
7 Posts
Year: 91
Model: Cherokee
Engine: 4.0
Going bigger so the old axles are for sale if anyone is interested.
http://slo.craigslist.org/pts/5317206809.html
http://slo.craigslist.org/pts/5317206809.html
 11-17-2015, 08:14 PM
#21
Junior Member
Thread Starter
Join Date: Oct 2015
Location: Paso Robles Ca
Posts: 36
Likes: 0
Received 0 Likes
on
0 Posts
Year: 1996
Model: Cherokee
 ).
). 
So now the plan is to get the new ones swapped in before new years! The original plan was a 44/9" that were laying around the shop but then my boyfriend got a killer deal on a dana 60. So as of now that is the plan!
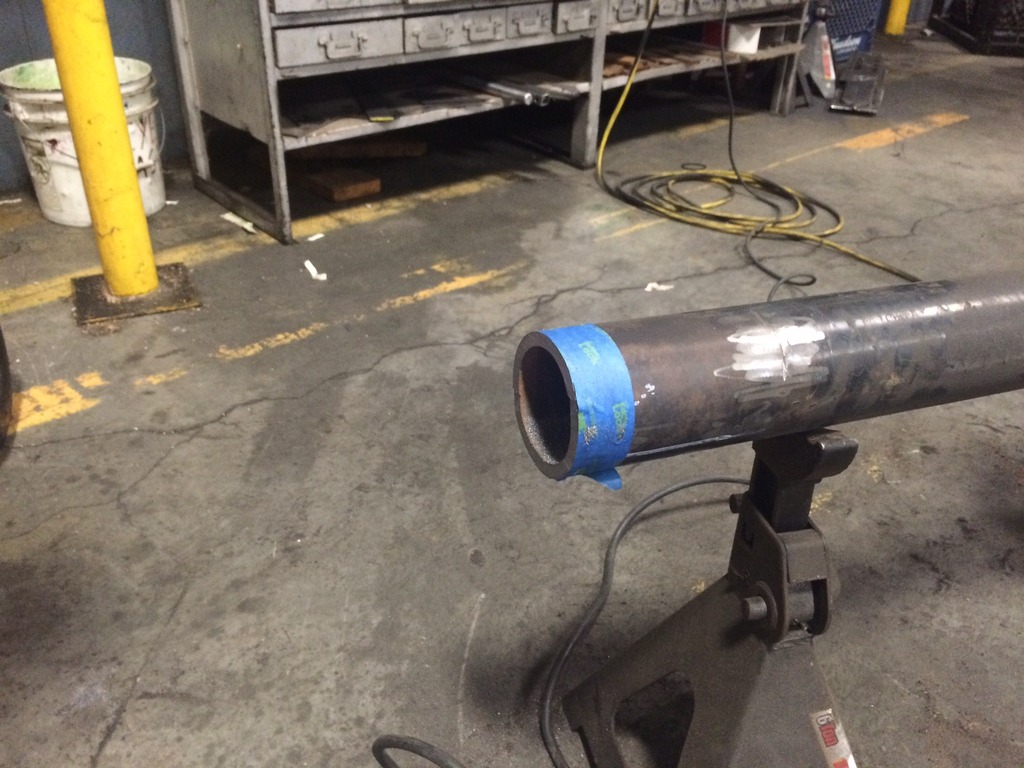
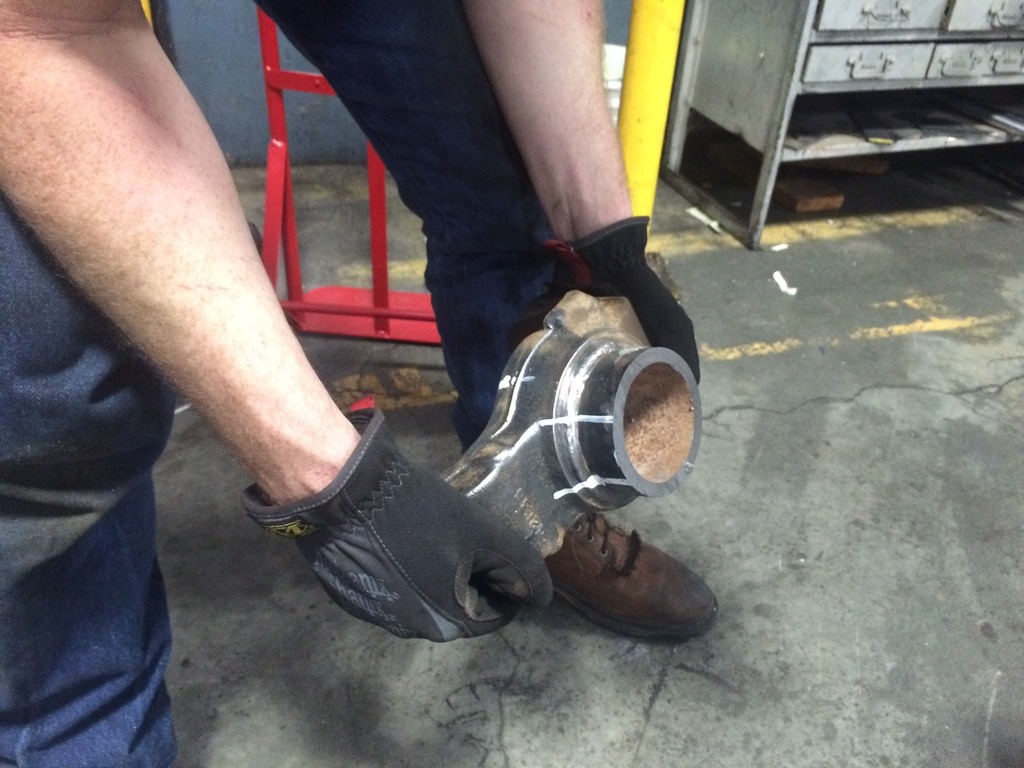
He also got an awesome deal on a np241 DLD at the junkyard. With a little experimenting and a lot of luck we were able to swap the fixed yoke parts from a 241D with a cracked housing into it. First step was to pull the case apart.


The first difference between the two was the diameter of the output shaft pilot bearing. The 241d is the smaller one in this pic. I couldn't use the input gear from the 241d because the gear pitch on the planetary was different.

The outer diameter of the bearings was different as well.

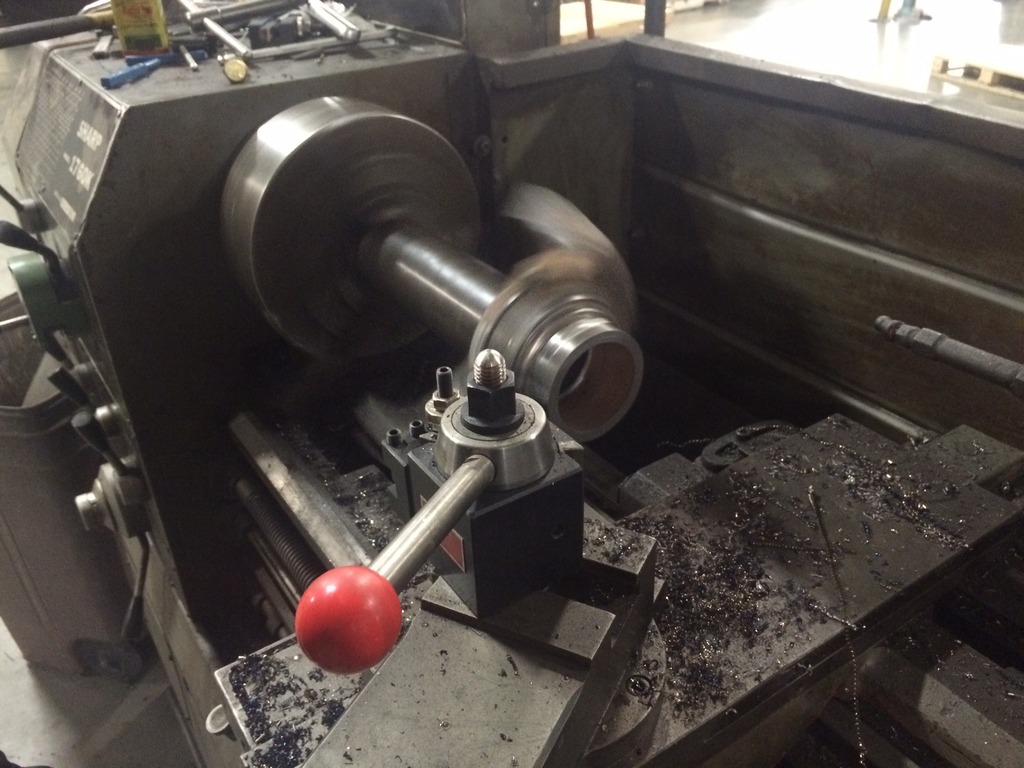
We had looked online but couldn't find the right size bearing to adapt it so my boyfriend machined an adapter out of steel. The adapter had a 1.627 OD and a 1.498 ID.

Then I pressed the bearing into the adapter and the assembly into the input shaft of the 241dld.

The 241dld used a journal bearing on the output shaft where the chain gear rides. And the 241d uses needle bearings. But the chain gear ID was the same size on both so we swapped the needle bearings from the 241d onto the 241dld chain drive gear.

The tail housing on the 241 dld is in two pieces so we needed to make a new seal housing. The seal housing also needs to retain the output bearing. I found a part from an old machine that happened to be the perfect size. All that was left was to modify for the seal and drill the bolt pattern.


We also need to plug the 3 holes left from its previous application. I realize most people won't have a cracked 241d laying around but in my case it was a really cheap way to get a fixed yoke, driver drop 241 with a 23 spline input and the correct bolt pattern for a jeep. In the end I have a bolt in six planetary wide chain case with 32 spline outputs for about $200 and half a days work.
11-23-2015, 11:49 PM
#22
Junior Member
Thread Starter
Join Date: Oct 2015
Location: Paso Robles Ca
Posts: 36
Likes: 0
Received 0 Likes
on
0 Posts
Year: 1996
Model: Cherokee
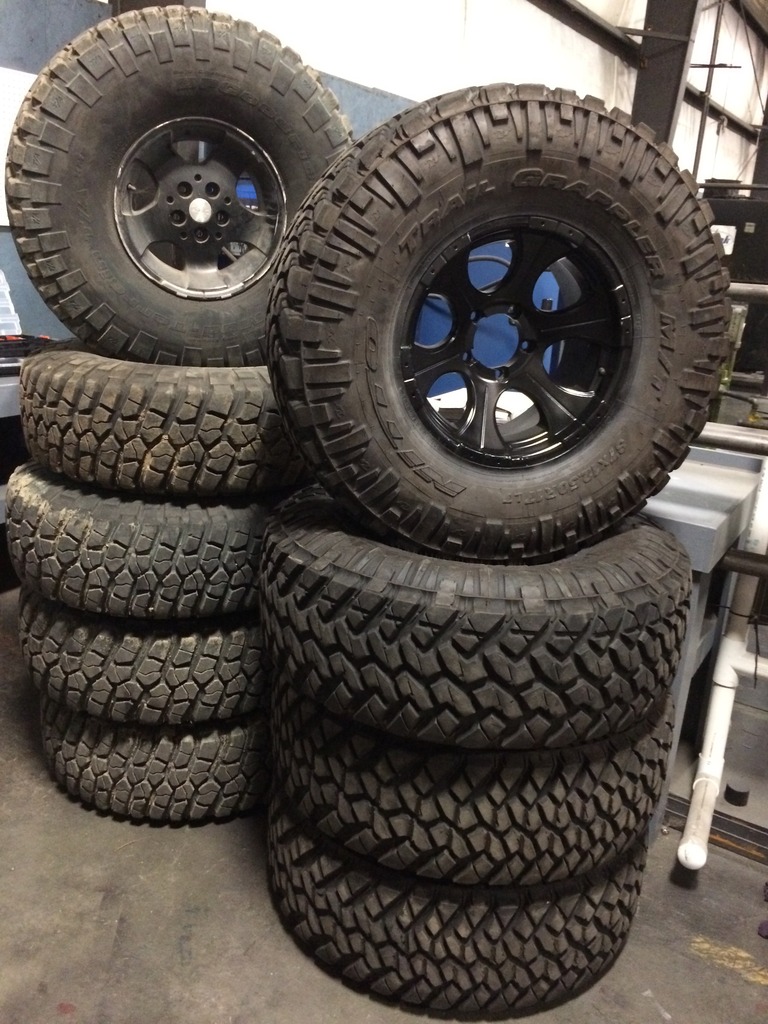
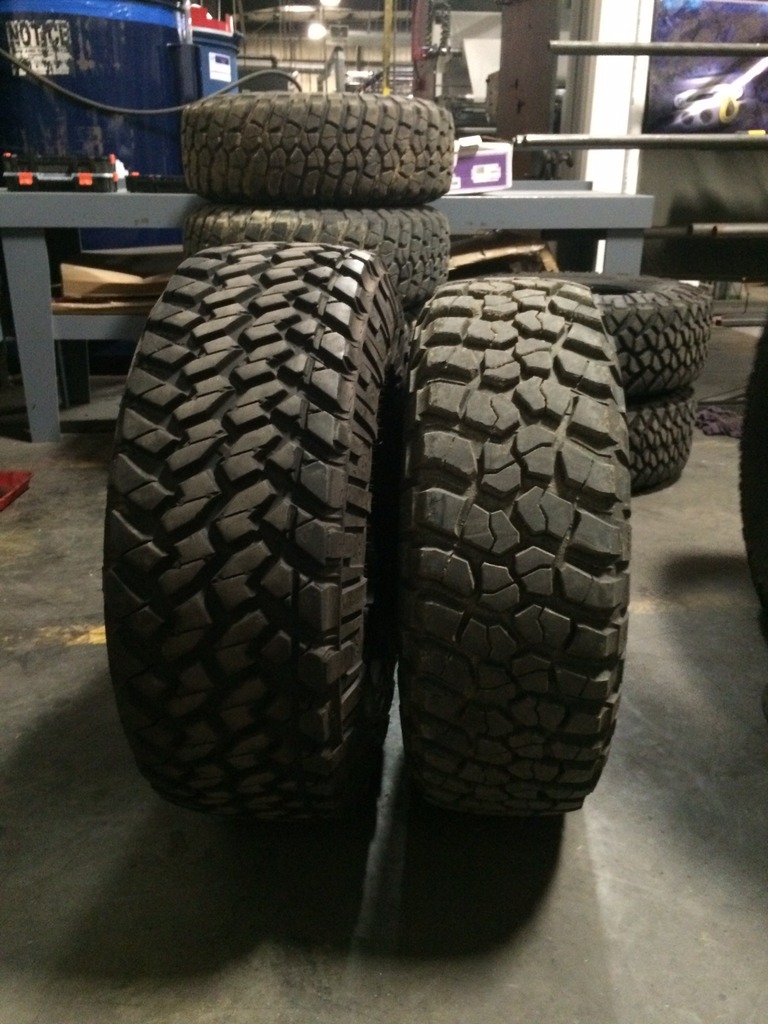
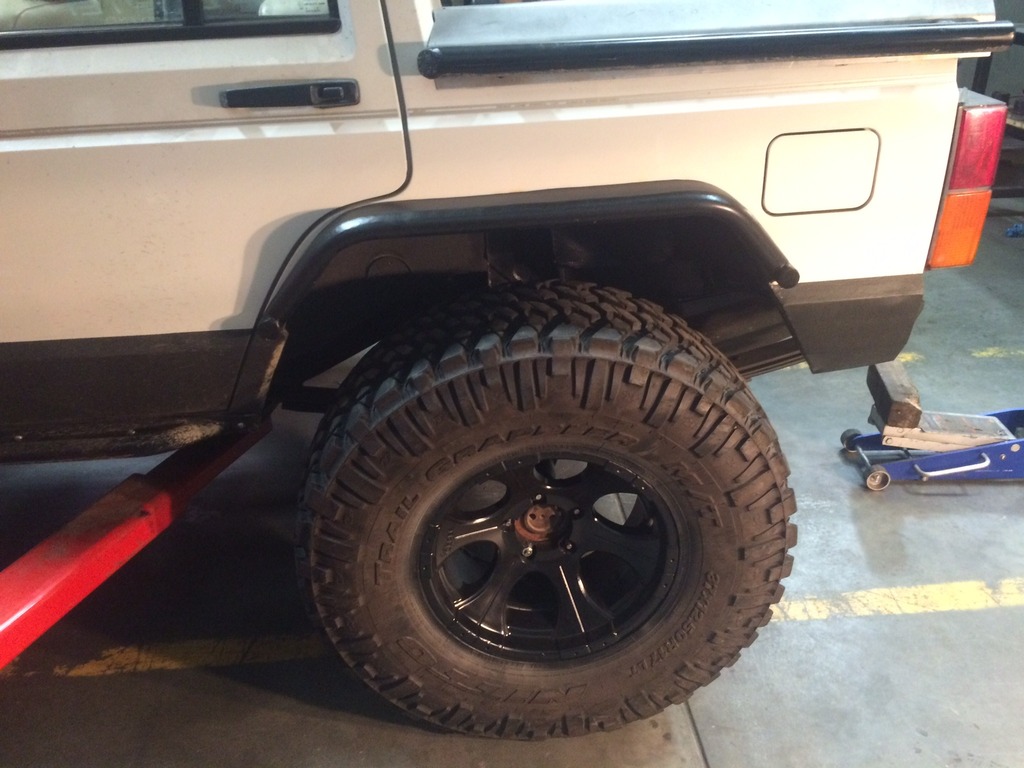
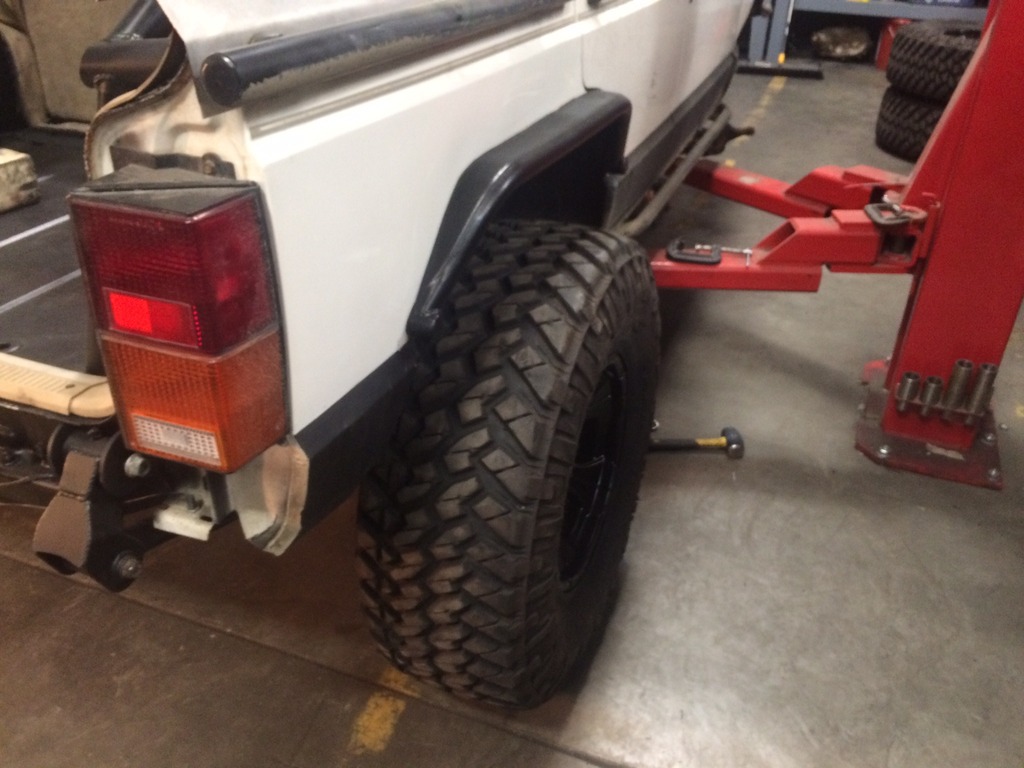
Had another productive weekend at the shop! On Friday morning I drove up to the bay area and picked up a set of 37" Nitto trail grapplers. I had heard good things about Chassis Unlimited, which is located in Livermore, so I decided to swing by. It turns out they had almost all of the stuff I needed and the owner was super awesome. He gave us a tour of their shop (all of their products are made in house) and gave me a killer deal, koozies and a t-shirt!
Now that I had the tires it was time to make room for them. Here's a pic of the old vs the new. The new ones came on 8 lug dodge wheels so I picked up a set of alloys off craigslist, painted them black and swapped them out.
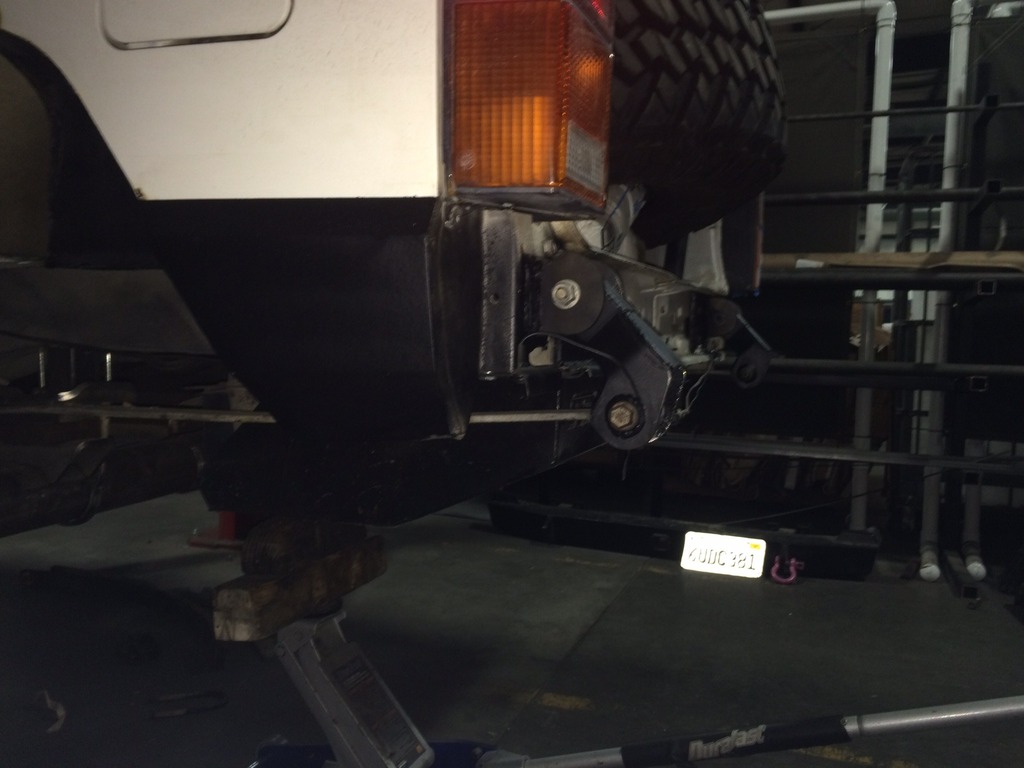
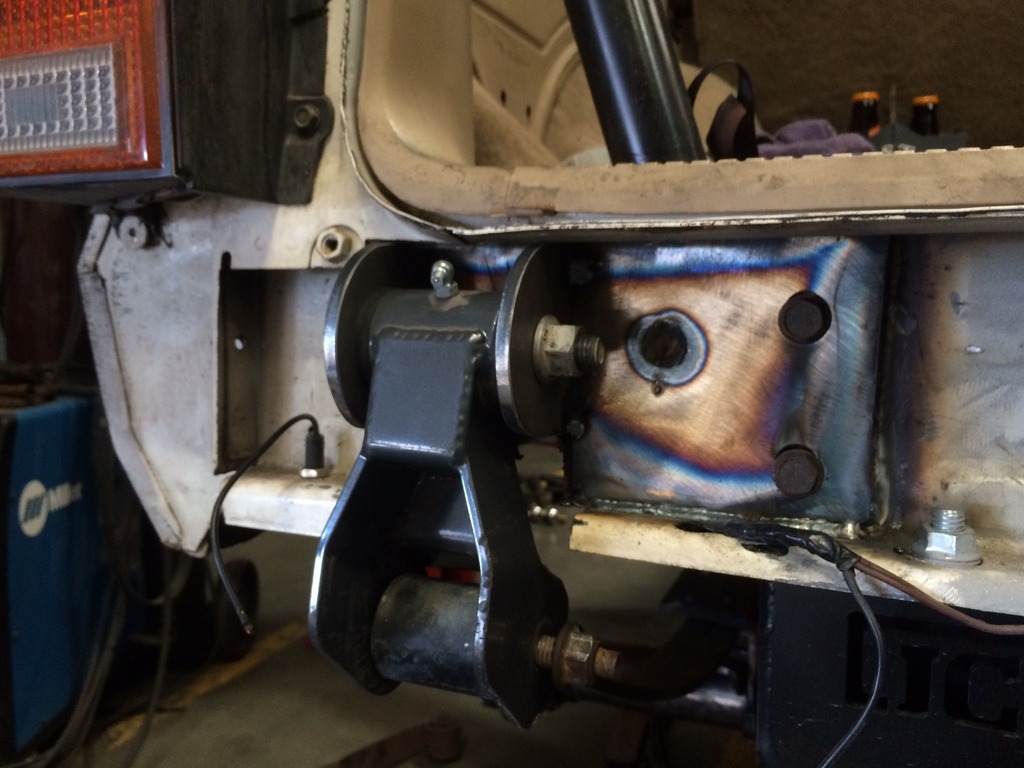
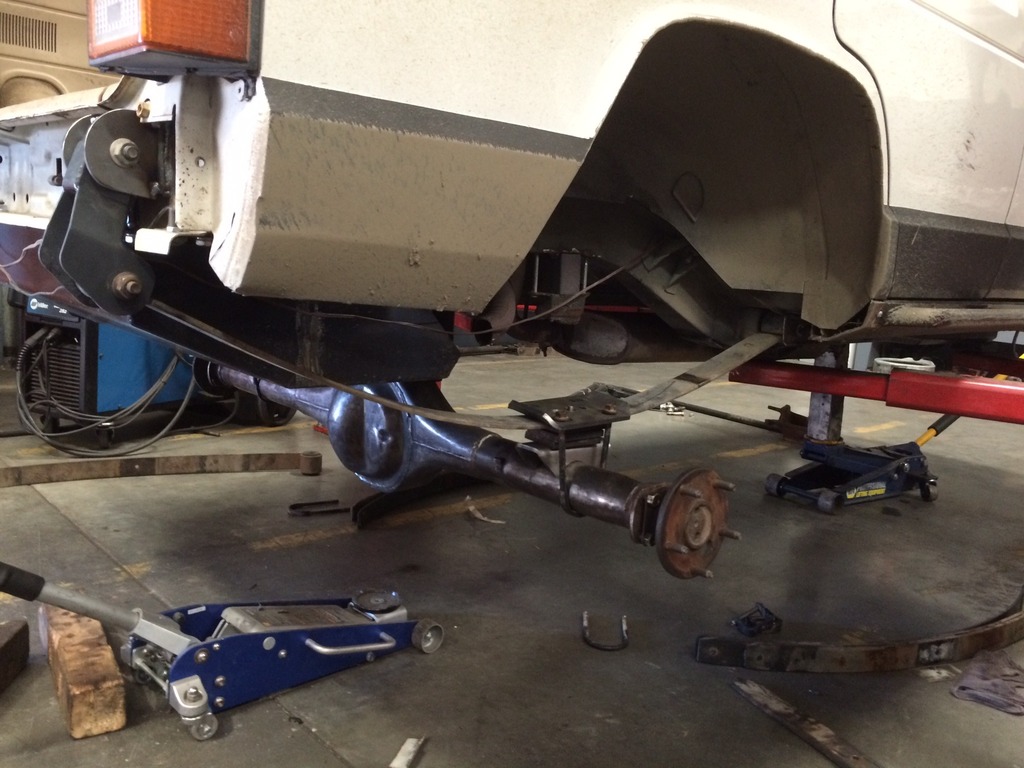
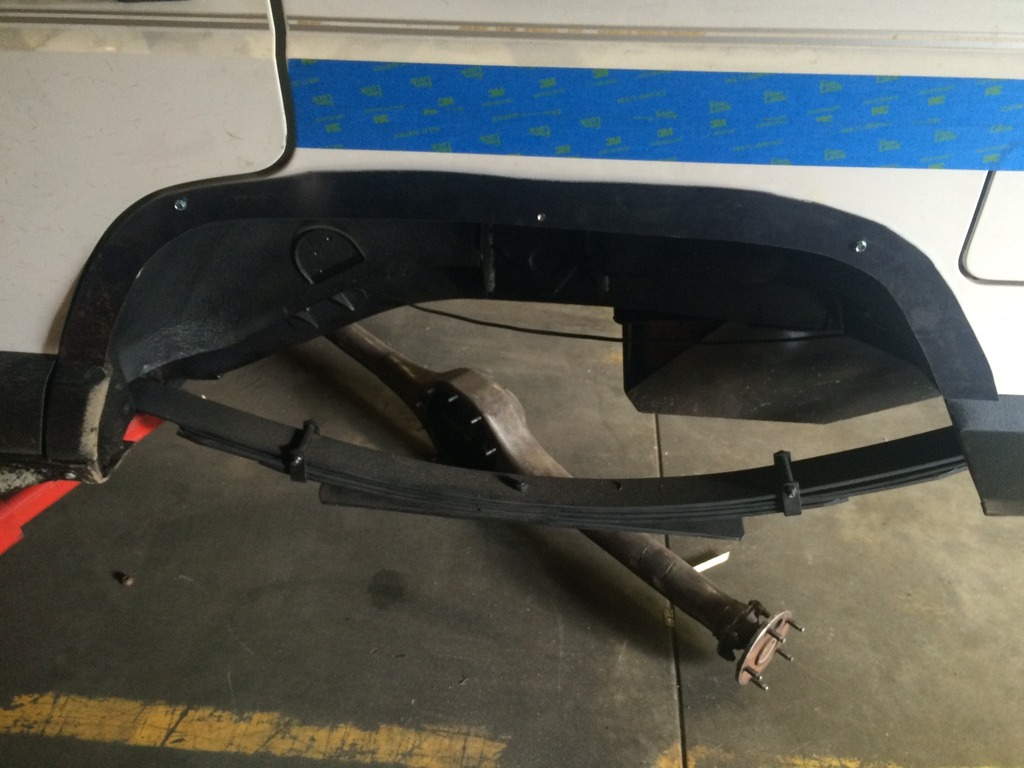
I had gotten a set of leaf springs from an explorer at the junk yard. They are 4" longer than the stock xj leafs so the current brackets weren't going to work. They are 2" longer in the front half so it gave me 2" of wheel base stretch. We moved my synergy shackles to the back, flipped them backwards, notched out the body and welded them in. My bumper should fit back on with a little grinding.
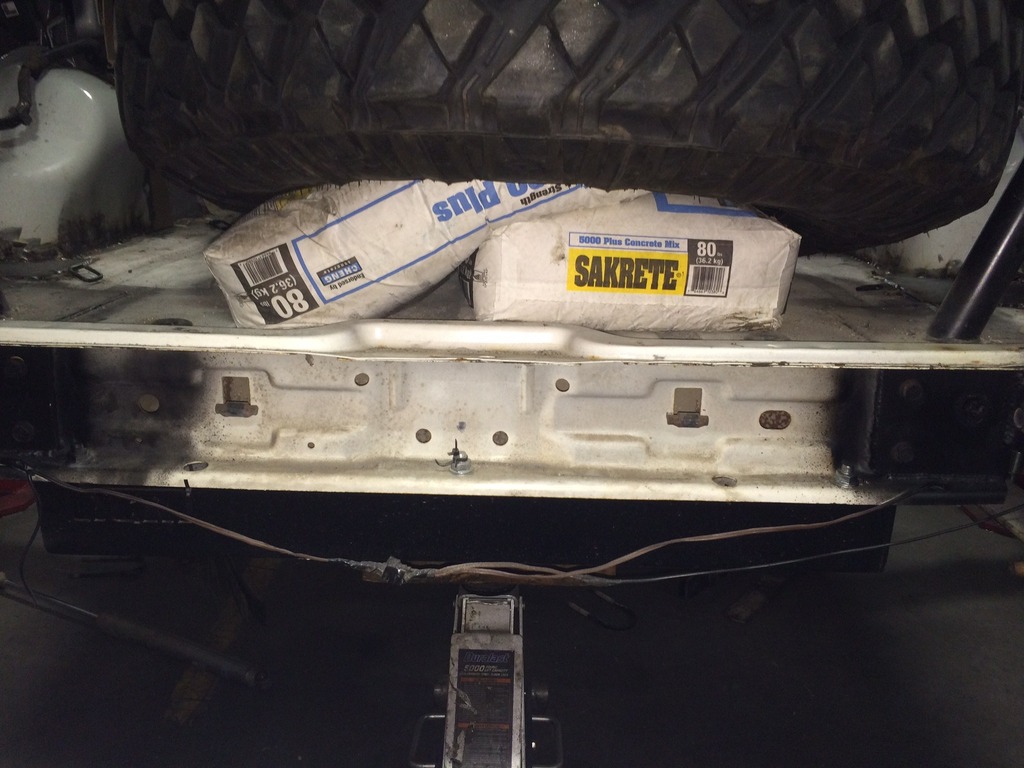
In order to get to full bump we had to weigh the back of the Jeep down. Luckily I had a few bags of concrete and plenty of tires laying around.
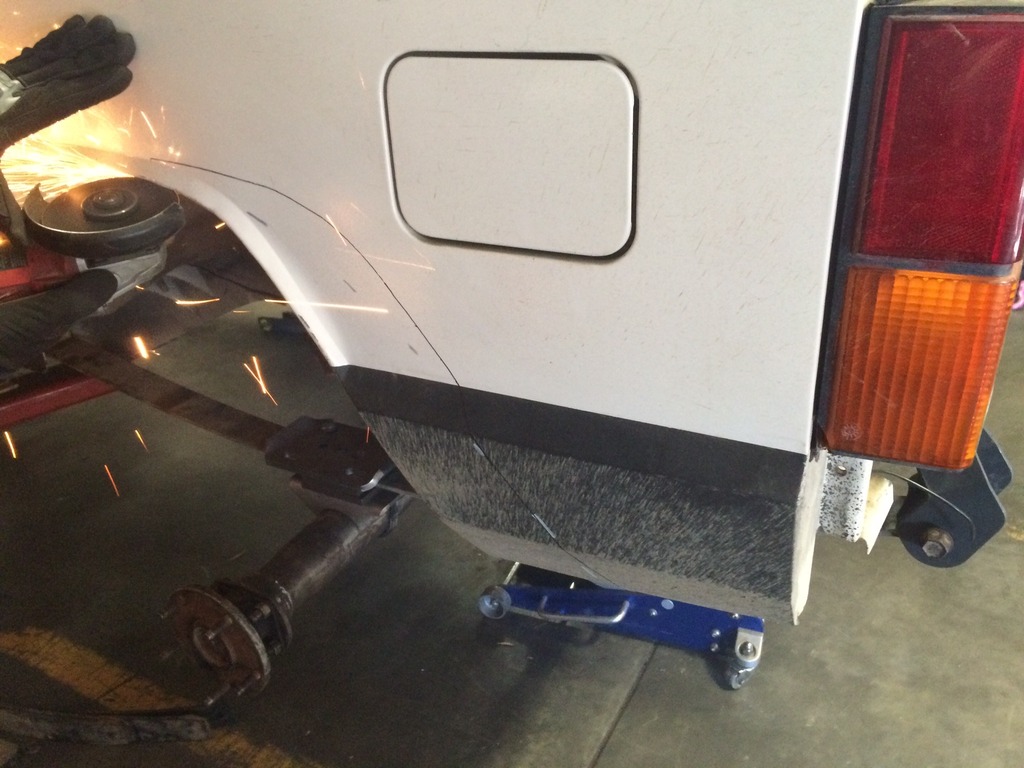
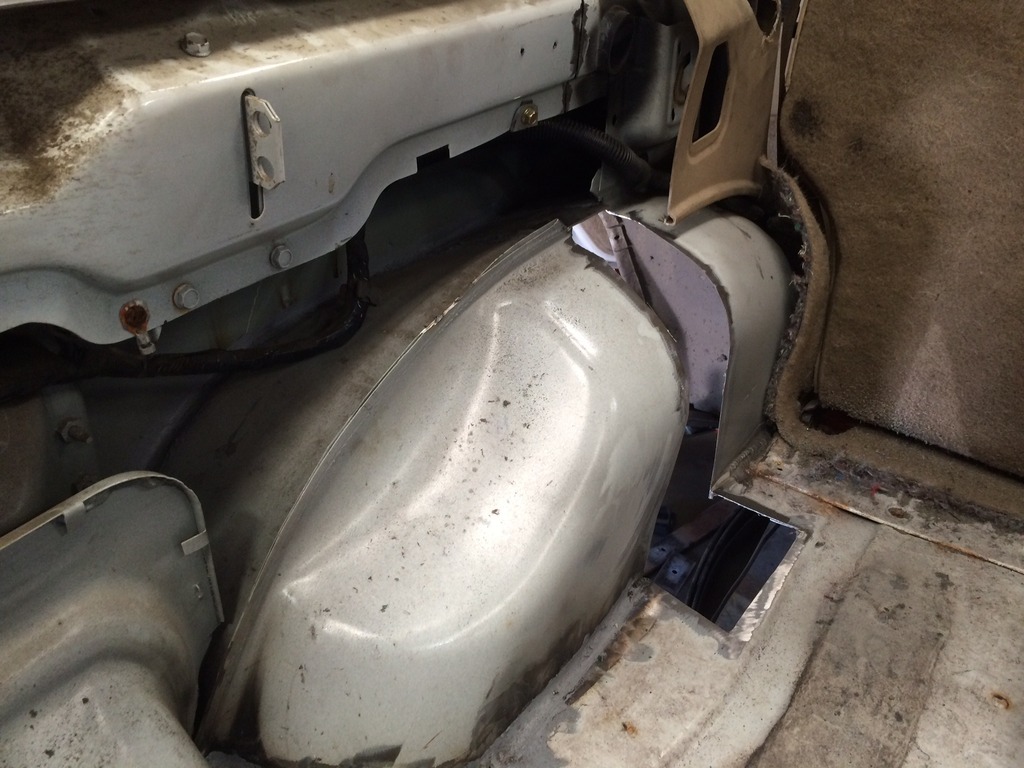
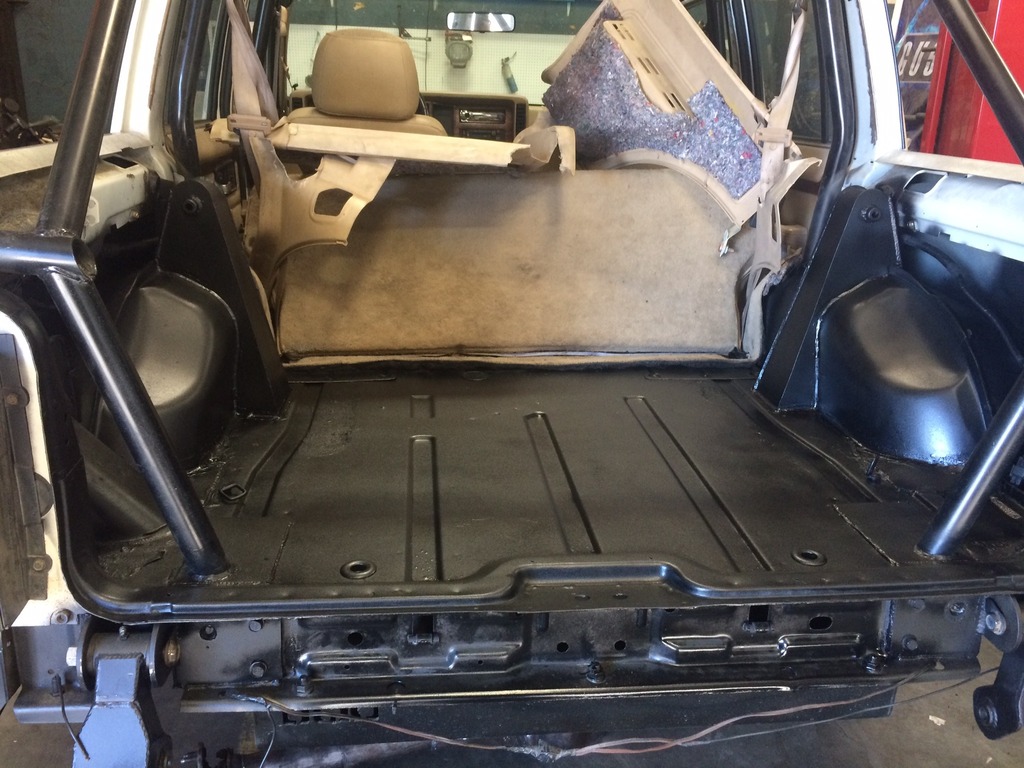
Then it was time to cut the inner fenders!
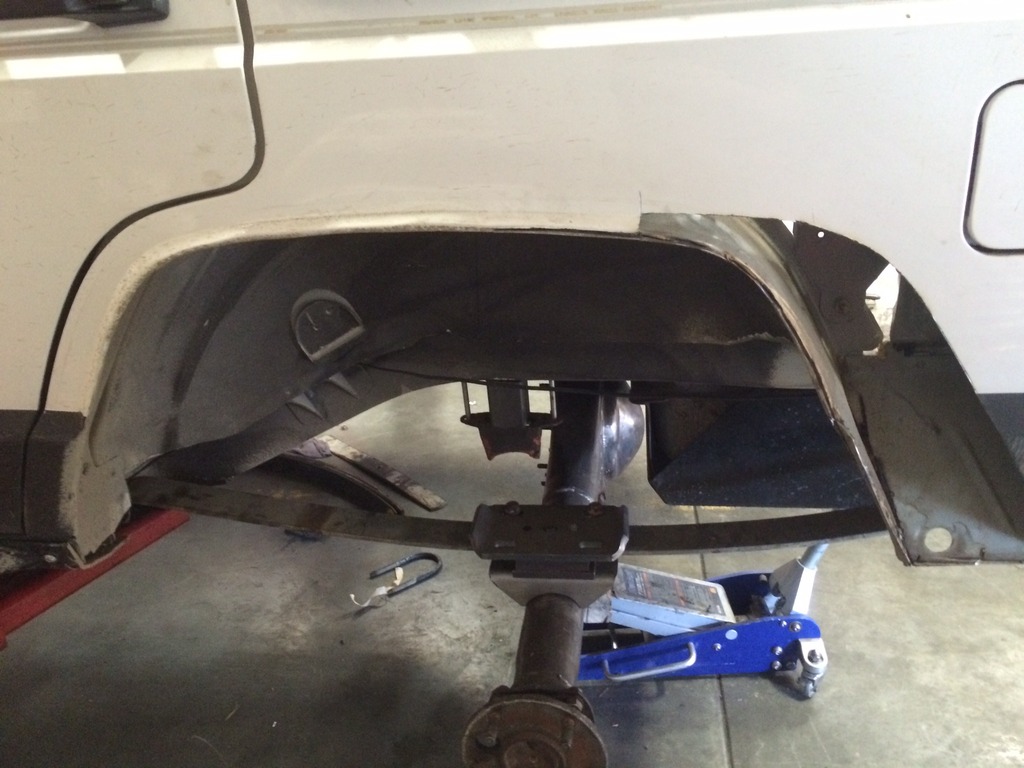
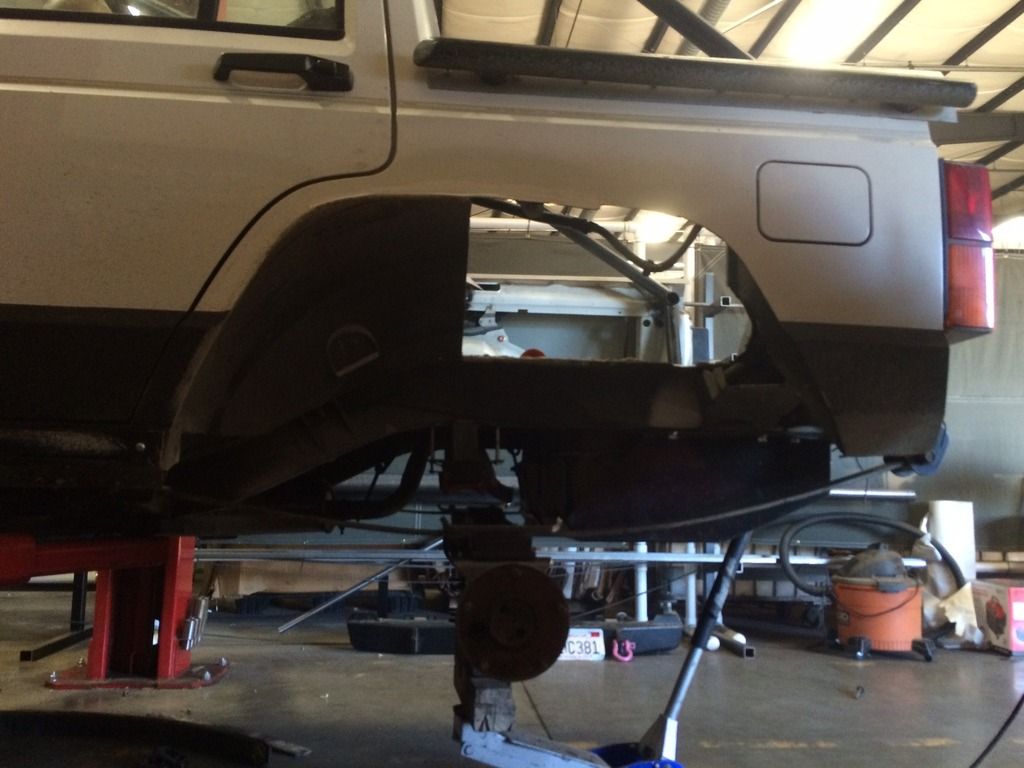
Then we slid the inner fender back and welded it back in.
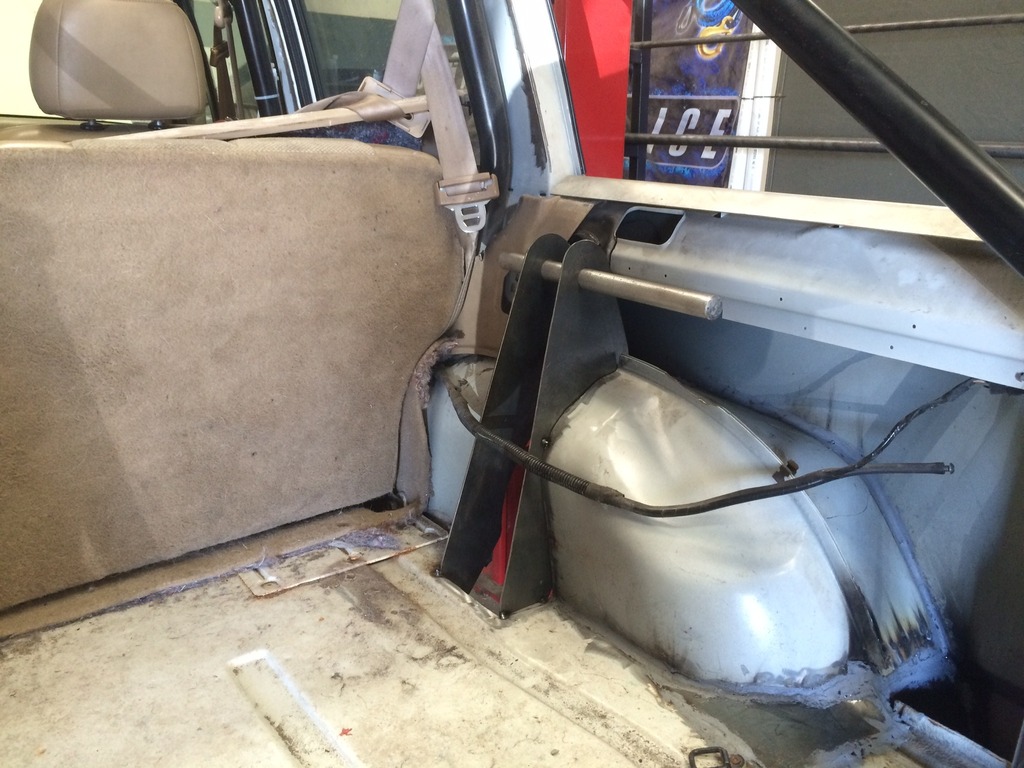
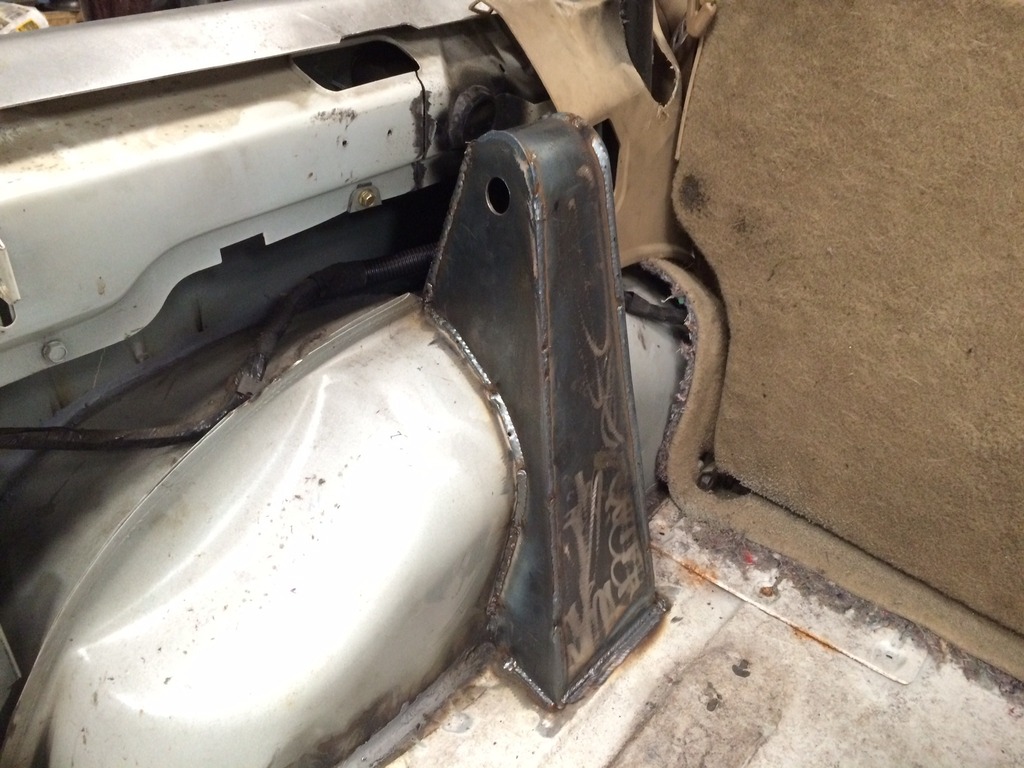
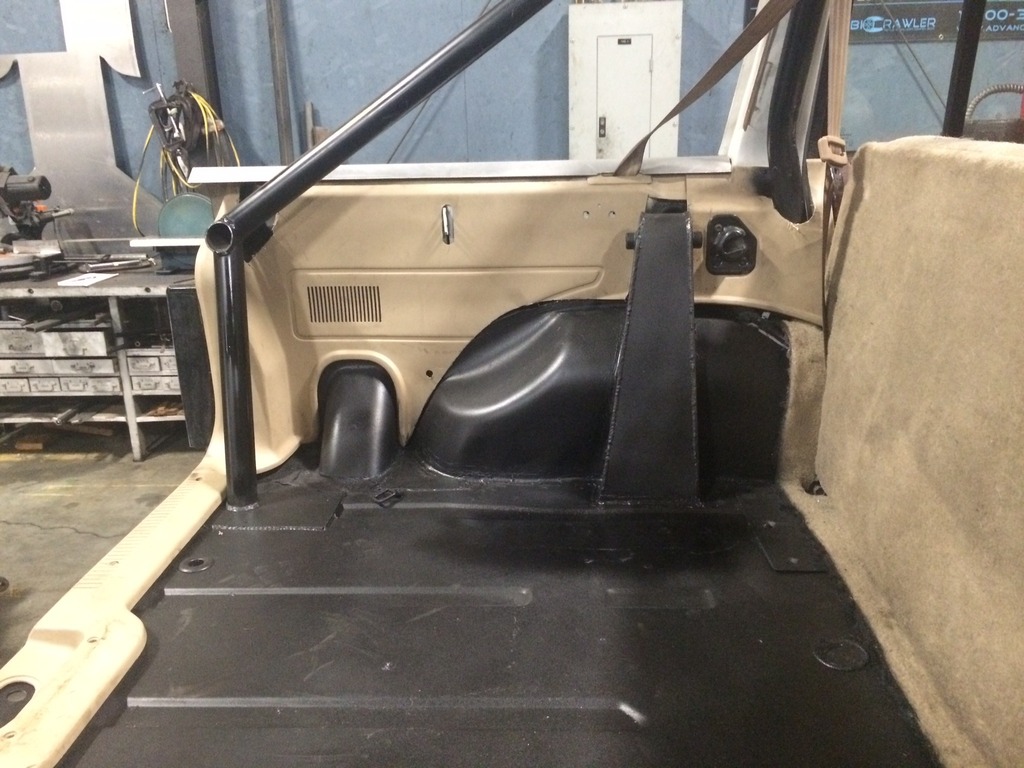
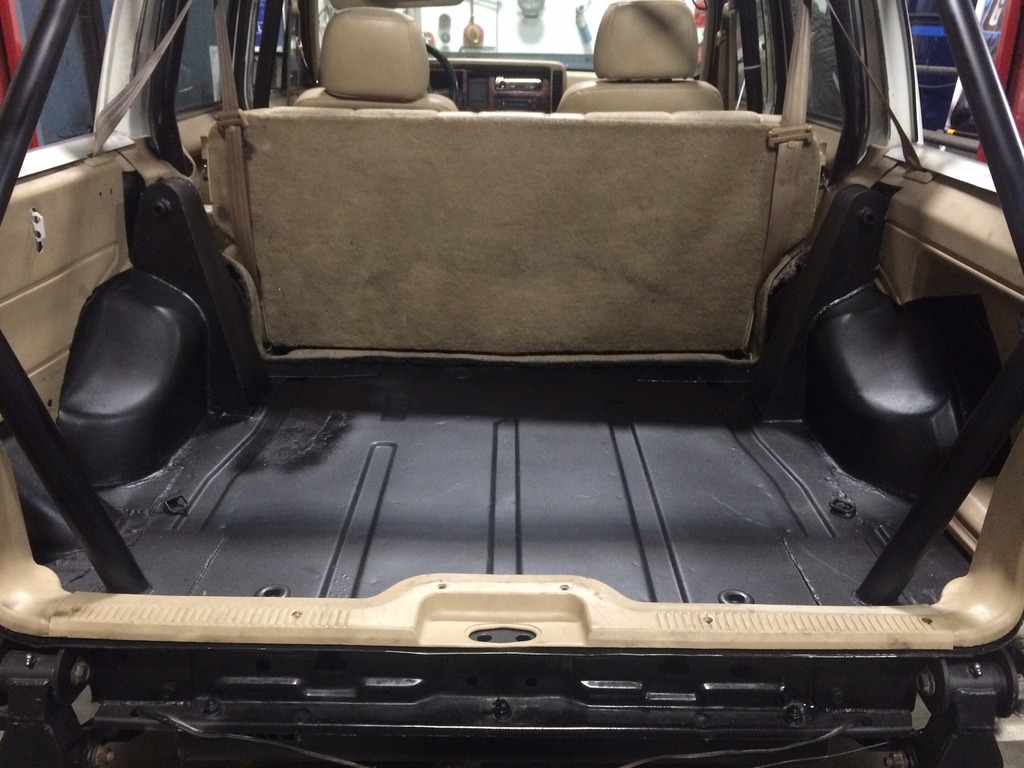
Next up was building the shock towers. I wanted the rear to be sealed and to keep as much bed space as possible.

Then it got a coat of bed liner and with a little modification the plastic panels went back in.
Now that I had the tires it was time to make room for them. Here's a pic of the old vs the new. The new ones came on 8 lug dodge wheels so I picked up a set of alloys off craigslist, painted them black and swapped them out.


I had gotten a set of leaf springs from an explorer at the junk yard. They are 4" longer than the stock xj leafs so the current brackets weren't going to work. They are 2" longer in the front half so it gave me 2" of wheel base stretch. We moved my synergy shackles to the back, flipped them backwards, notched out the body and welded them in. My bumper should fit back on with a little grinding.


In order to get to full bump we had to weigh the back of the Jeep down. Luckily I had a few bags of concrete and plenty of tires laying around.

Then it was time to cut the inner fenders!


Then we slid the inner fender back and welded it back in.

Next up was building the shock towers. I wanted the rear to be sealed and to keep as much bed space as possible.


Then it got a coat of bed liner and with a little modification the plastic panels went back in.


 12-03-2015, 10:16 AM
#23
Junior Member
Thread Starter
Join Date: Oct 2015
Location: Paso Robles Ca
Posts: 36
Likes: 0
Received 0 Likes
on
0 Posts
Year: 1996
Model: Cherokee
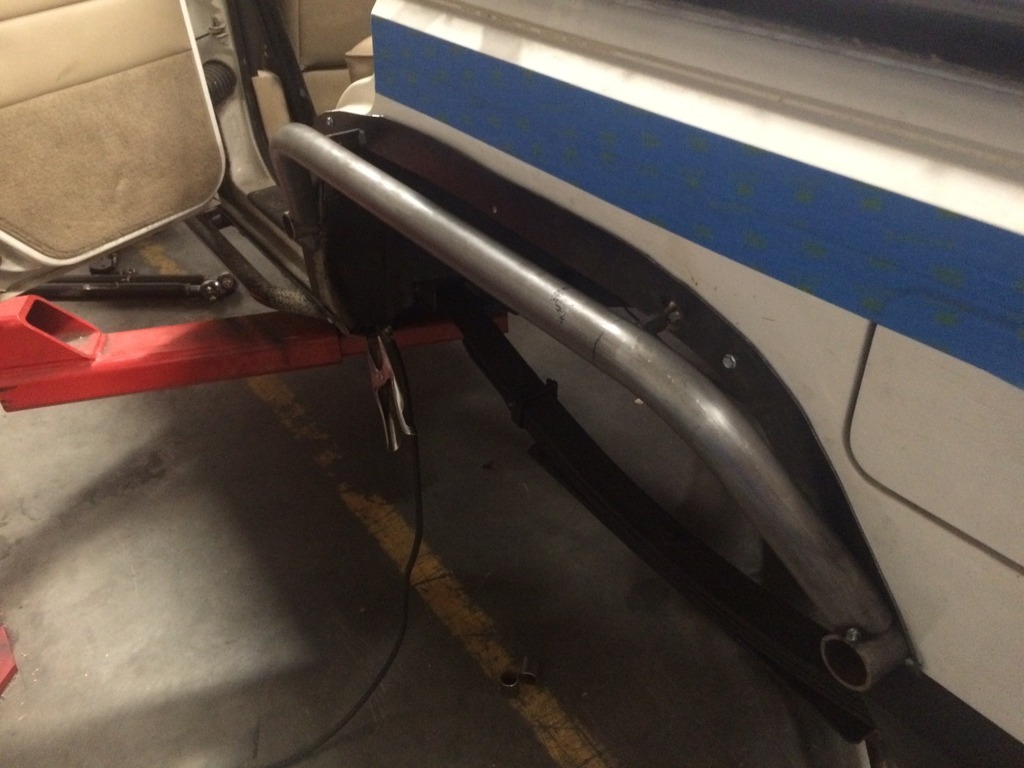
Thanksgiving break gave me a chance to procrastinate studying for finals and work on the Jeep some more! After opening up the rear fenders I didn't like how unfinished they looked. Some searching online for "cherokee tube fenders" led me to this build thread which ended up being my inspiration. Riley was skeptical so I took lead on this project.
The first step was to roughly trace out a piece of sheet metal that surrounded the opening with a slight lip hanging over the inner edge. Then I just used a couple of self tappers to hold it in place.
Then I bent up a tube and tacked it in place. Originally I was going to try and make the tube have a tight bend on both ends that tied into the backing plate I had made. However, the first one ended up getting cut a little too short to do that so I made them in the same way that I had tied the cage into the front of my Jeep.
Then I traced out a piece of sheet metal and used c-clamps to bend it into the proper spot before tacking it all.
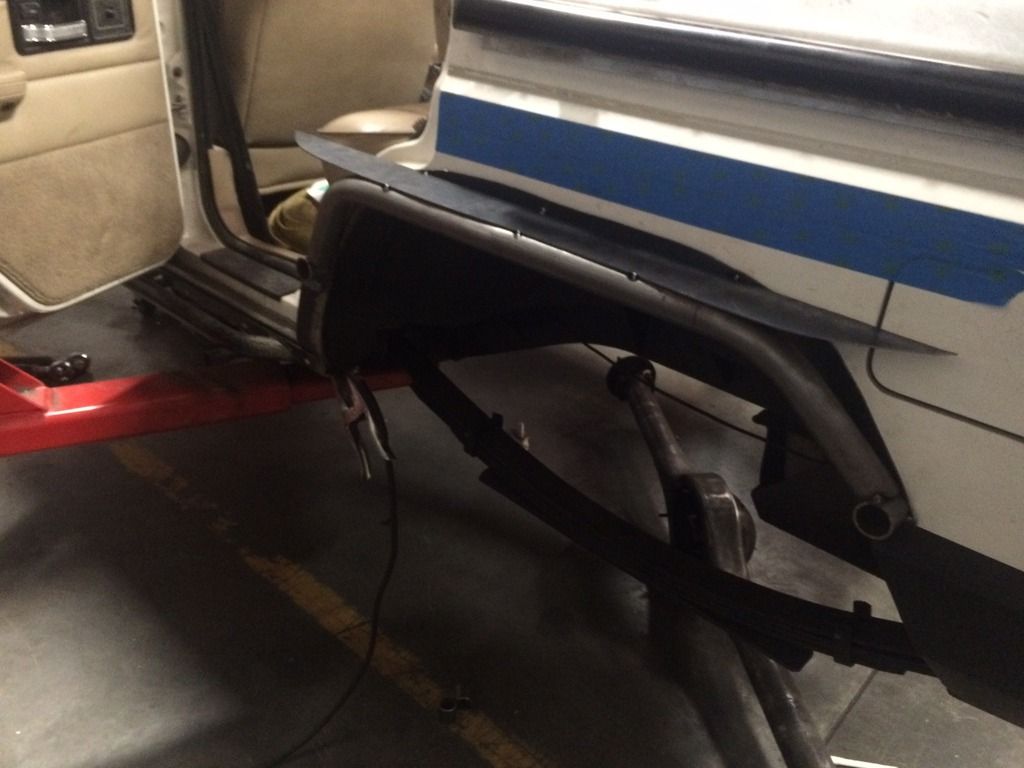
Then I removed the entire thing and had Riley fully weld on the top of the outer seam and on the underside of the inner seam. After a solid 30 minutes of grinding I was able to get it smoothed out and looking like this...

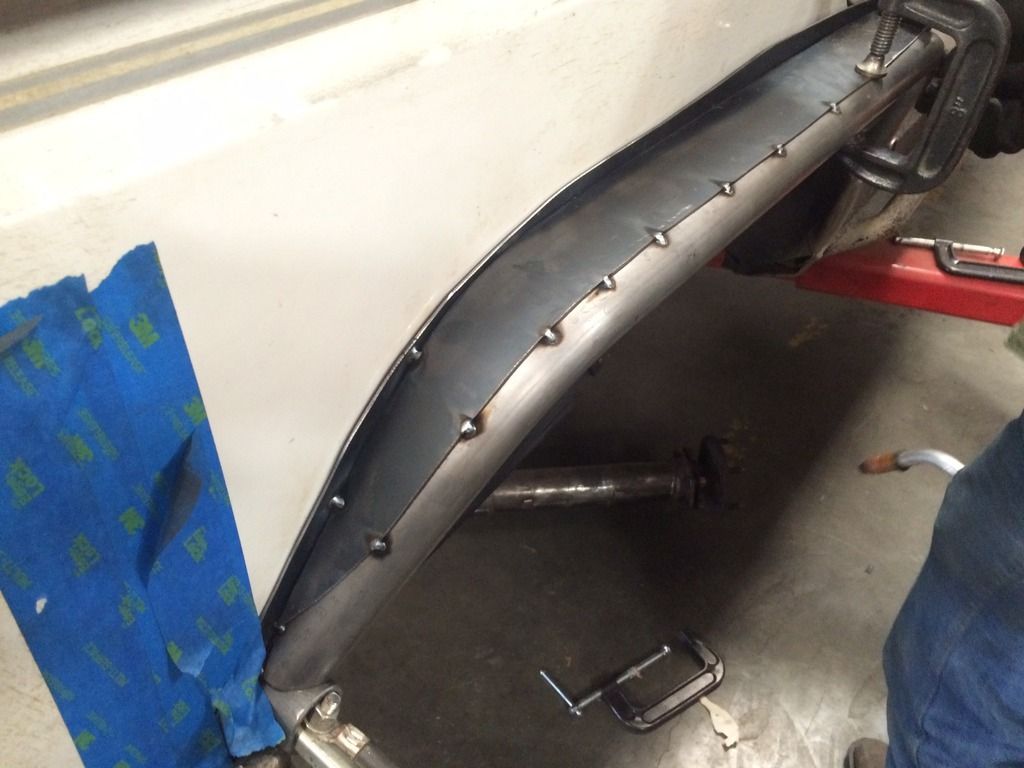
Then they got a coat of primer and two coats of Rustoleum Truck Bed Liner. I re-attached it with the self tappers and had Riley fully weld the inside along the edge of the wheel opening. He also used two plates to tie it back into the spot where the cage was welded to the fender and the shock tower.
They seem relatively sturdy and should hold up as long as I don't catch the end caps on rocks.
The first step was to roughly trace out a piece of sheet metal that surrounded the opening with a slight lip hanging over the inner edge. Then I just used a couple of self tappers to hold it in place.

Then I bent up a tube and tacked it in place. Originally I was going to try and make the tube have a tight bend on both ends that tied into the backing plate I had made. However, the first one ended up getting cut a little too short to do that so I made them in the same way that I had tied the cage into the front of my Jeep.

Then I traced out a piece of sheet metal and used c-clamps to bend it into the proper spot before tacking it all.


Then I removed the entire thing and had Riley fully weld on the top of the outer seam and on the underside of the inner seam. After a solid 30 minutes of grinding I was able to get it smoothed out and looking like this...

Then they got a coat of primer and two coats of Rustoleum Truck Bed Liner. I re-attached it with the self tappers and had Riley fully weld the inside along the edge of the wheel opening. He also used two plates to tie it back into the spot where the cage was welded to the fender and the shock tower.


They seem relatively sturdy and should hold up as long as I don't catch the end caps on rocks.
12-03-2015, 10:34 AM
#24
Junior Member
Thread Starter
Join Date: Oct 2015
Location: Paso Robles Ca
Posts: 36
Likes: 0
Received 0 Likes
on
0 Posts
Year: 1996
Model: Cherokee
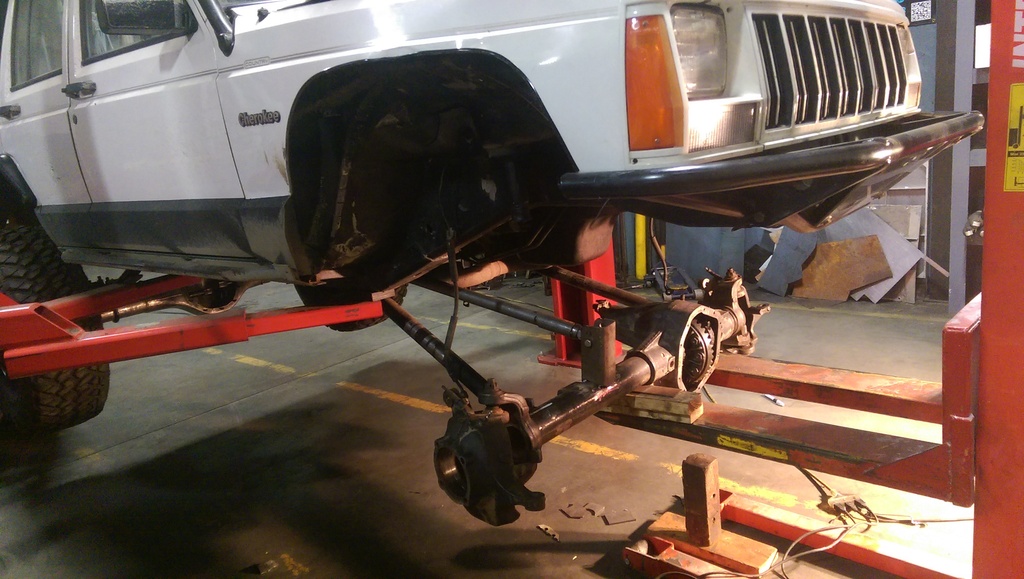
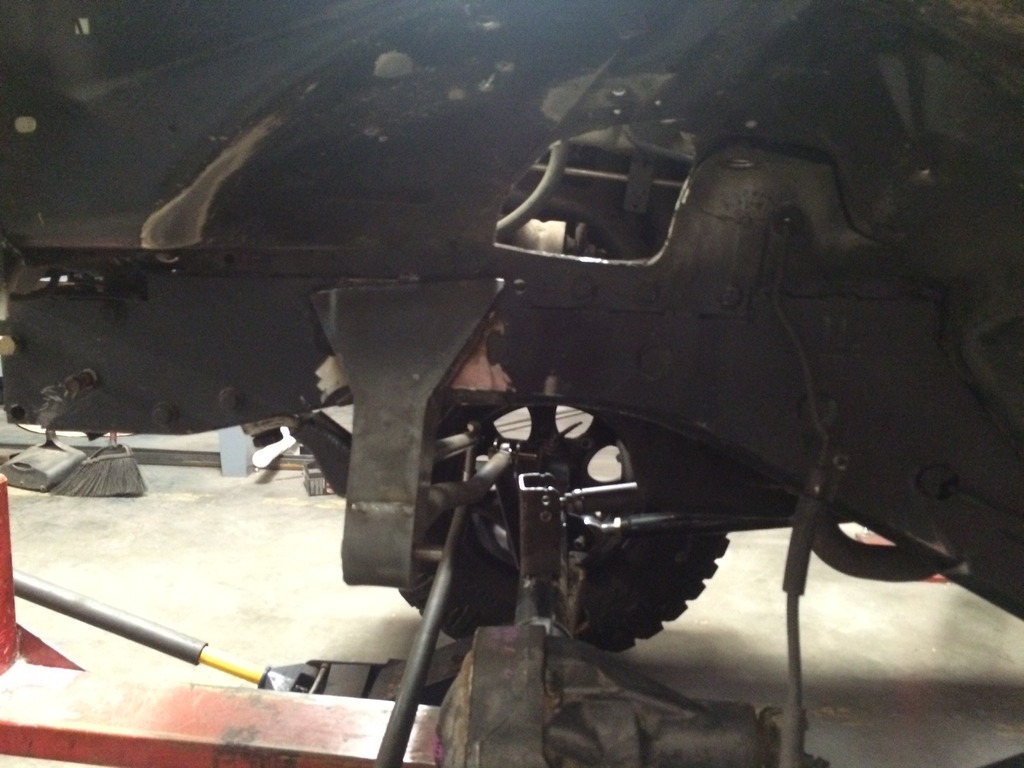
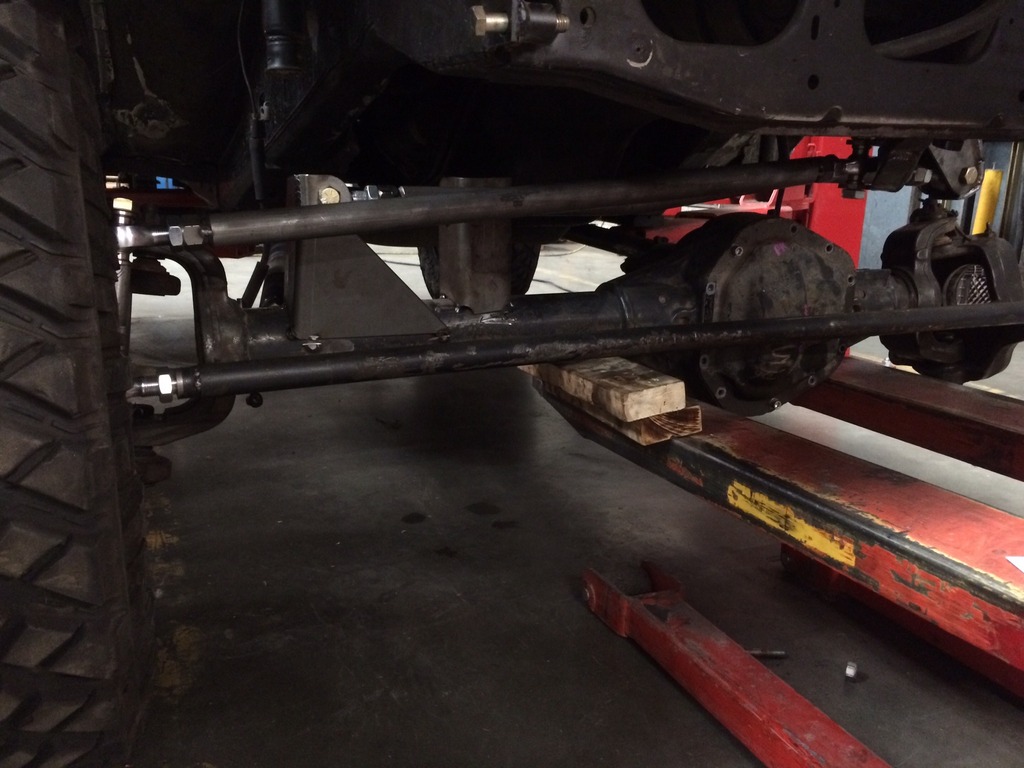
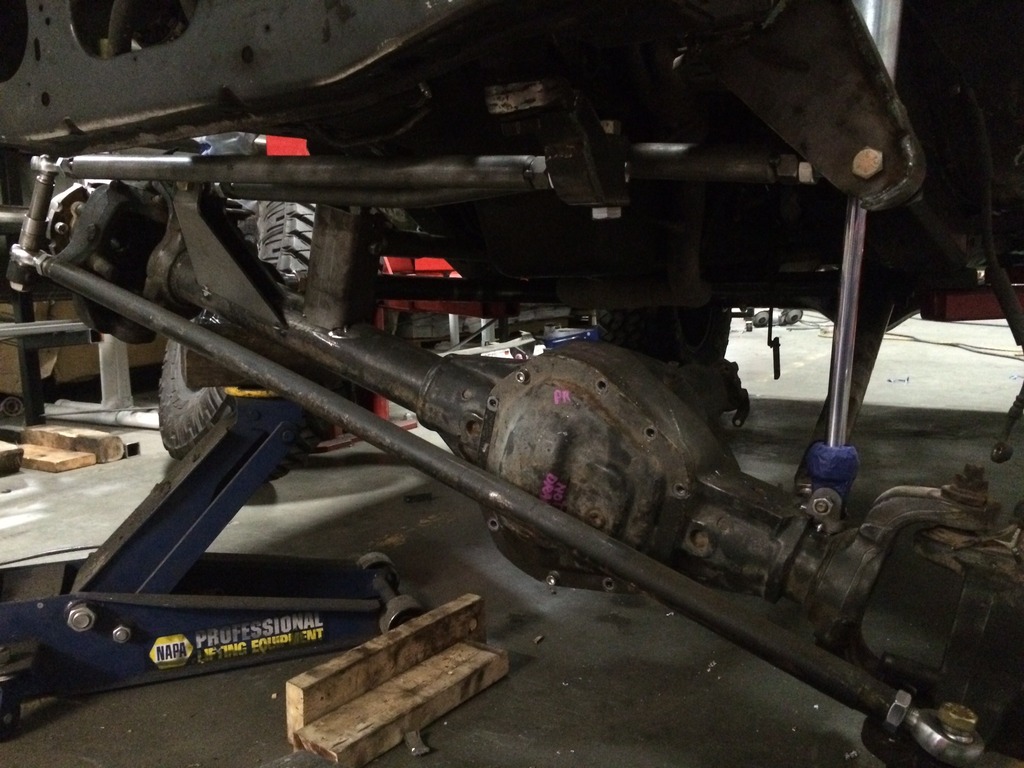
Once the fenders were done it was time to start mocking up the front suspension. After pricing out building a 44 I decided that it just made more sense to use the Super Duty 60 that Riley had gotten from the junkyard a few weeks past. I wanted to narrow it so that it was closer in width to the 9" (which is 65" wms). The original width of the long side axle shaft was 37.62" so we cut 3" off the long side to get it to 34.56", which is the length of a 78-79 Ford D60. This gave me an overall width of 68".
To cut the weld off and press out the axle tube from the inner C Riley tacked a piece of tube on the other side and held it from that so that he could get the tool in close enough to fully cut the welds.
Then we pressed out the piece of axle tube.
To make sure that my caster wasn't affected we made sure to line the inner C back up with the marks we had made before cutting.
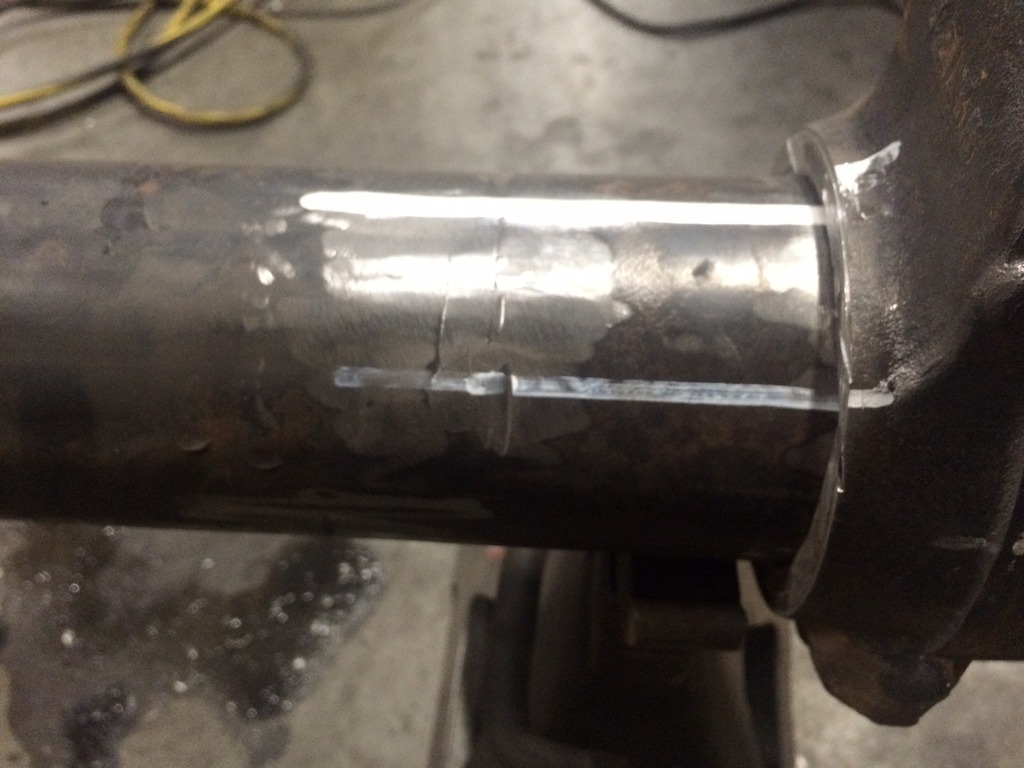
Then Riley welded it back on. Now I just need to find a 78-79 D60 axle shaft to throw in it.


To cut the weld off and press out the axle tube from the inner C Riley tacked a piece of tube on the other side and held it from that so that he could get the tool in close enough to fully cut the welds.

Then we pressed out the piece of axle tube.

To make sure that my caster wasn't affected we made sure to line the inner C back up with the marks we had made before cutting.


Then Riley welded it back on. Now I just need to find a 78-79 D60 axle shaft to throw in it.
12-03-2015, 10:52 AM
#25
Junior Member
Thread Starter
Join Date: Oct 2015
Location: Paso Robles Ca
Posts: 36
Likes: 0
Received 0 Likes
on
0 Posts
Year: 1996
Model: Cherokee
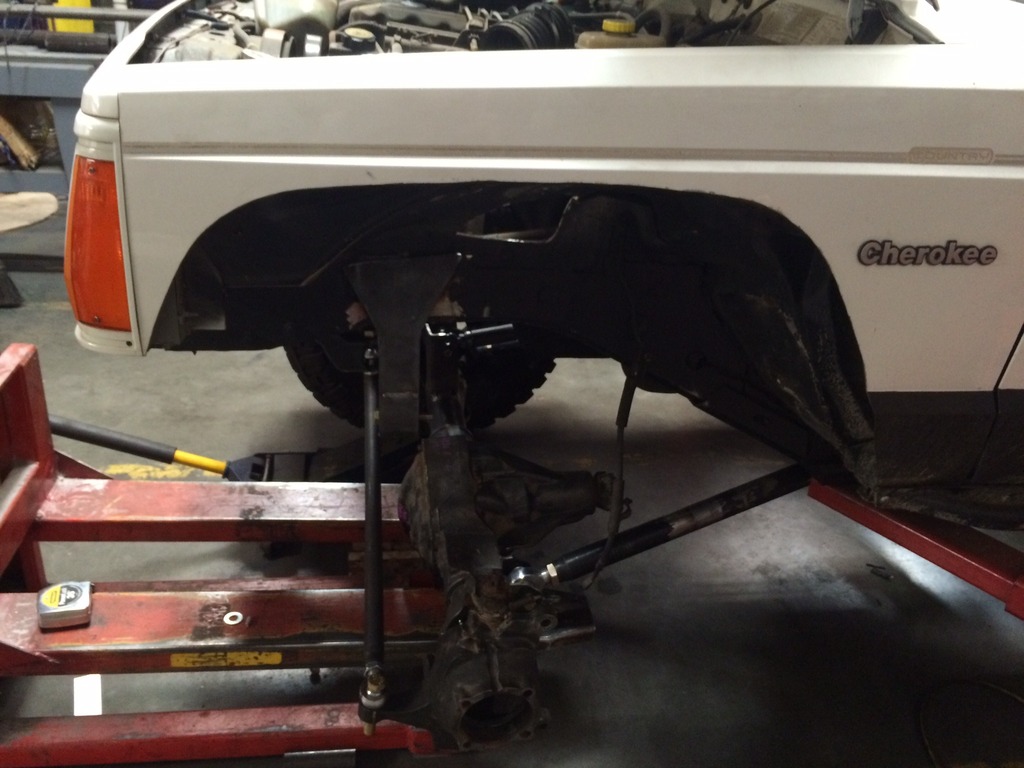
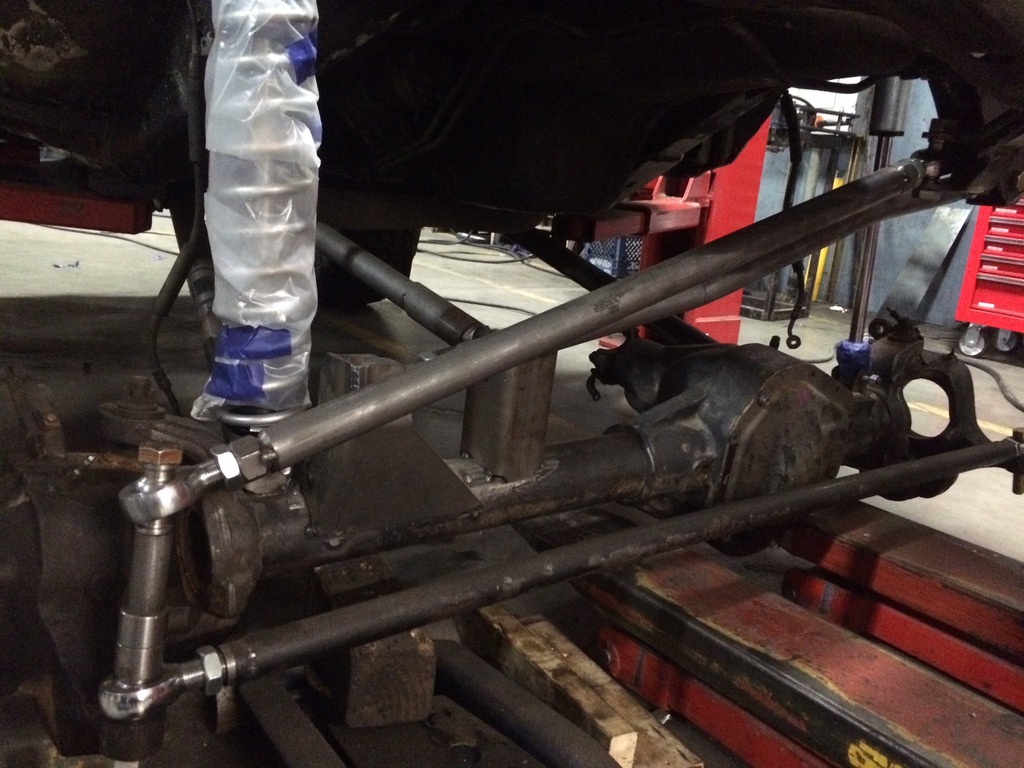
Next up was mocking up the front suspension. I wanted to try and re-use my lower links but they needed to be a bit longer so that I can stretch the front. Riley helped me sleeve and lengthen them 2".

Then we tacked on axle side brackets and put them in using my old frame side brackets.
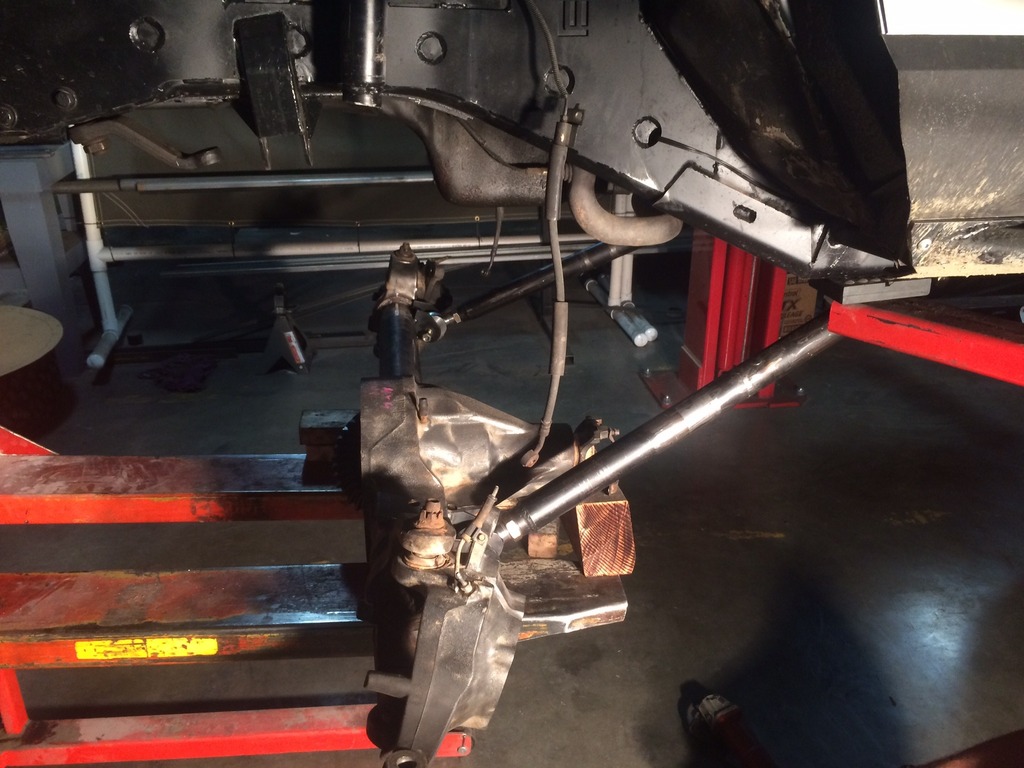
The original bracket that I had used on the frame side is a Synergy 3-Link bracket so the upper link went in fairly quick. We are waiting on some tube so for now it is just a mock-up upper link.
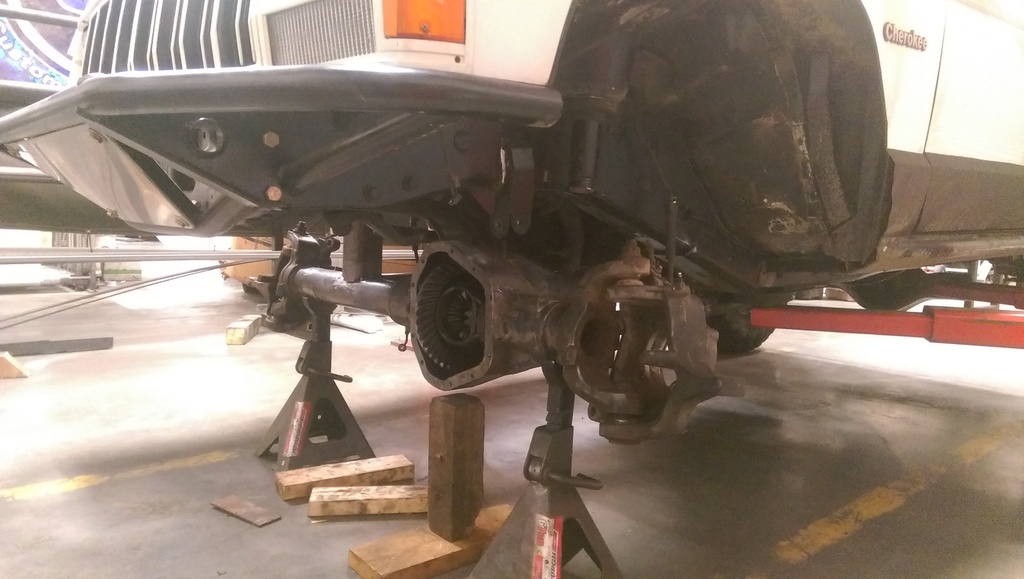
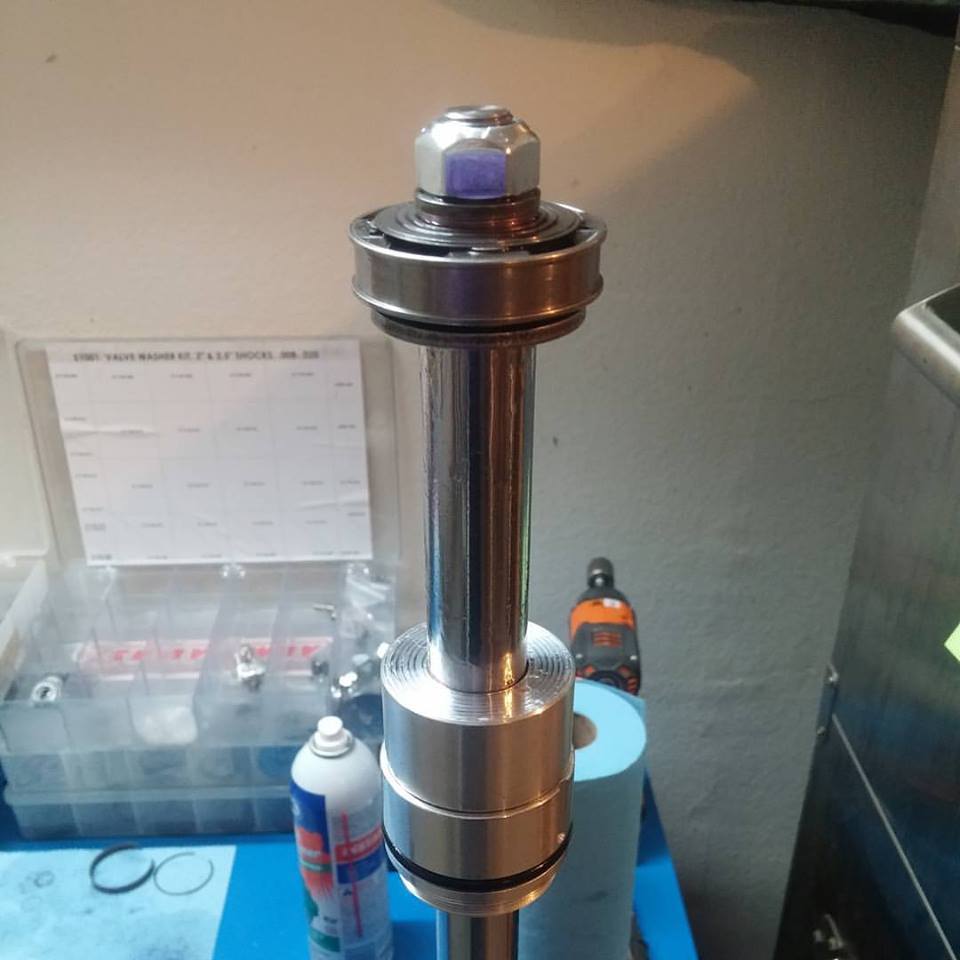
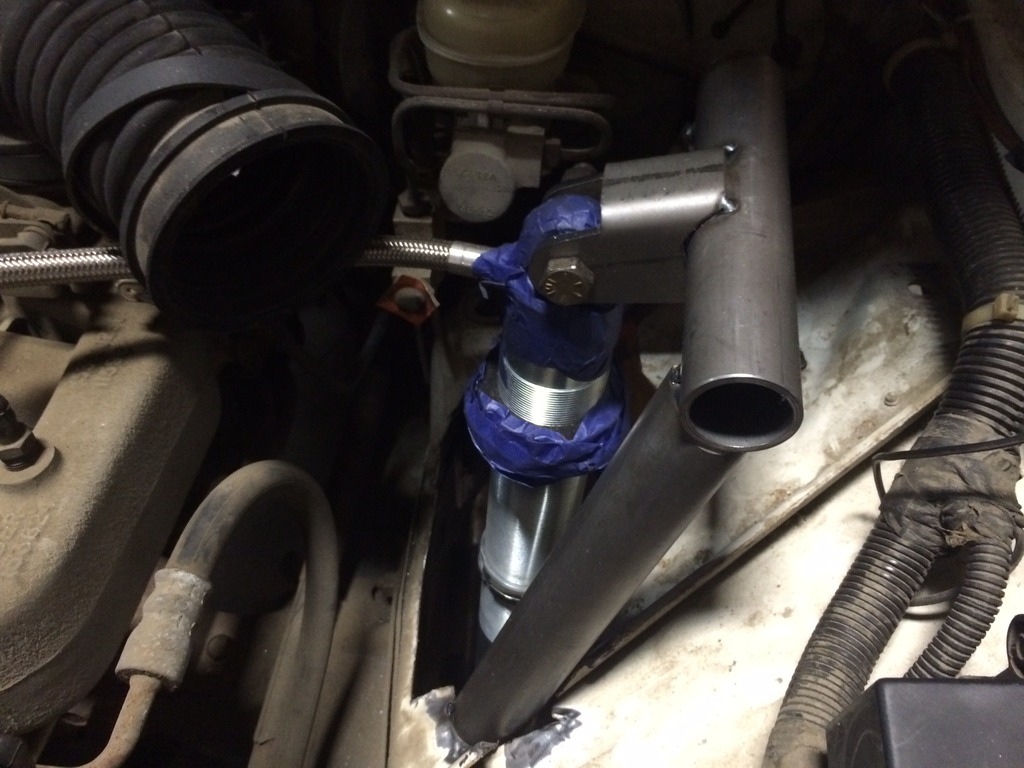
The original plan was to use coil springs and some Fox shocks that I had laying around. But as we were standing there trying to figure out where to put them Riley said the thing that we had both been thinking. Why not just go with coilovers? So I decided that I would be okay with only eating rice and potatoes for the next year and pulled the trigger on a set of pre-tuned Fox 2.0x14" remote resi coilovers. Accutune Offroad took my order on Monday and was able to get them tuned and delivered to my door today (3 days later). We cycled the suspension a bit and it looks like I will have 6.5" of up-travel in the front and 5" of up-travel in the rear. My total travel in the front should be somewhere around 14".
Here's a pic of them tuning my shocks.
Not only are my shocks arriving today, but so are my winch and gears. With finals next week I don't think I am going to be getting much studying done this weekend

Then we tacked on axle side brackets and put them in using my old frame side brackets.

The original bracket that I had used on the frame side is a Synergy 3-Link bracket so the upper link went in fairly quick. We are waiting on some tube so for now it is just a mock-up upper link.


The original plan was to use coil springs and some Fox shocks that I had laying around. But as we were standing there trying to figure out where to put them Riley said the thing that we had both been thinking. Why not just go with coilovers? So I decided that I would be okay with only eating rice and potatoes for the next year and pulled the trigger on a set of pre-tuned Fox 2.0x14" remote resi coilovers. Accutune Offroad took my order on Monday and was able to get them tuned and delivered to my door today (3 days later). We cycled the suspension a bit and it looks like I will have 6.5" of up-travel in the front and 5" of up-travel in the rear. My total travel in the front should be somewhere around 14".
Here's a pic of them tuning my shocks.

Not only are my shocks arriving today, but so are my winch and gears. With finals next week I don't think I am going to be getting much studying done this weekend
 12-03-2015, 02:52 PM
#28
Junior Member

Join Date: Nov 2015
Location: New Hampshire
Posts: 70
Likes: 0
Received 0 Likes
on
0 Posts
Year: 2001
Model: Cherokee
Engine: 242 CID 4.0 Inline 6 Chrysler MPI "High Output"
Innovative design, problem solving and fabrications.
A very well thought out build.
A very well thought out build.
01-15-2016, 01:21 PM
#29
Junior Member
Thread Starter
Join Date: Oct 2015
Location: Paso Robles Ca
Posts: 36
Likes: 0
Received 0 Likes
on
0 Posts
Year: 1996
Model: Cherokee
Took my last two finals today which means it's time to engage full throttle fab mode to get this thing done by new years. Last year we were hustling to get Riley's CJ done, now he gets to return the favor and pull some all nighters with me
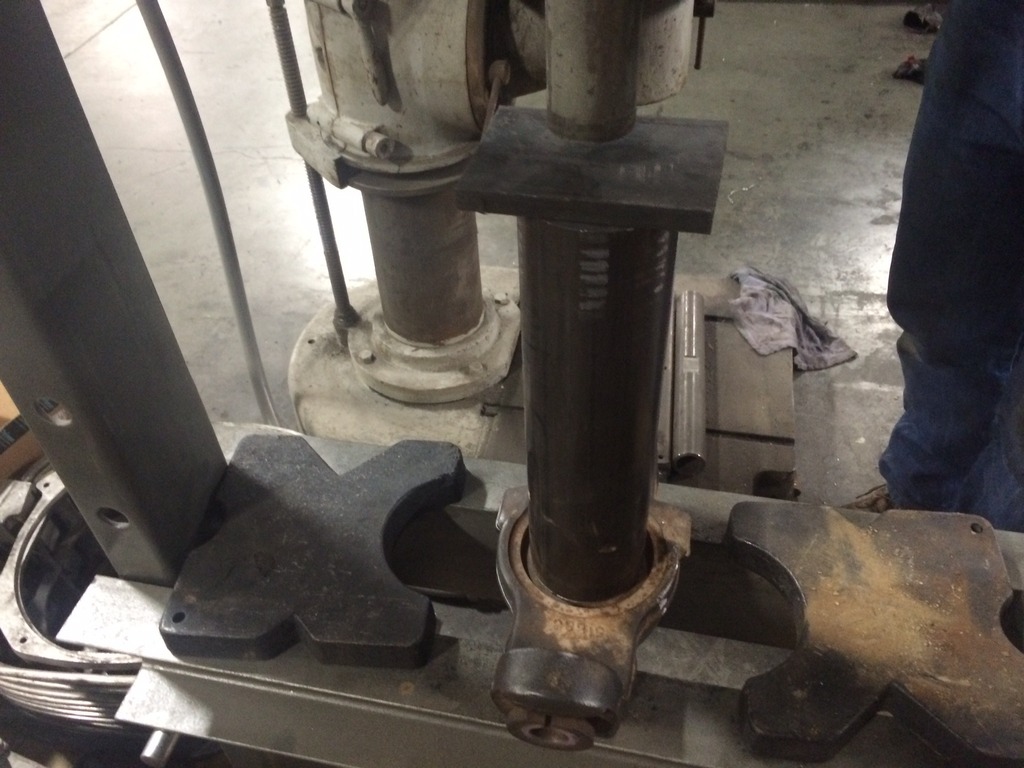
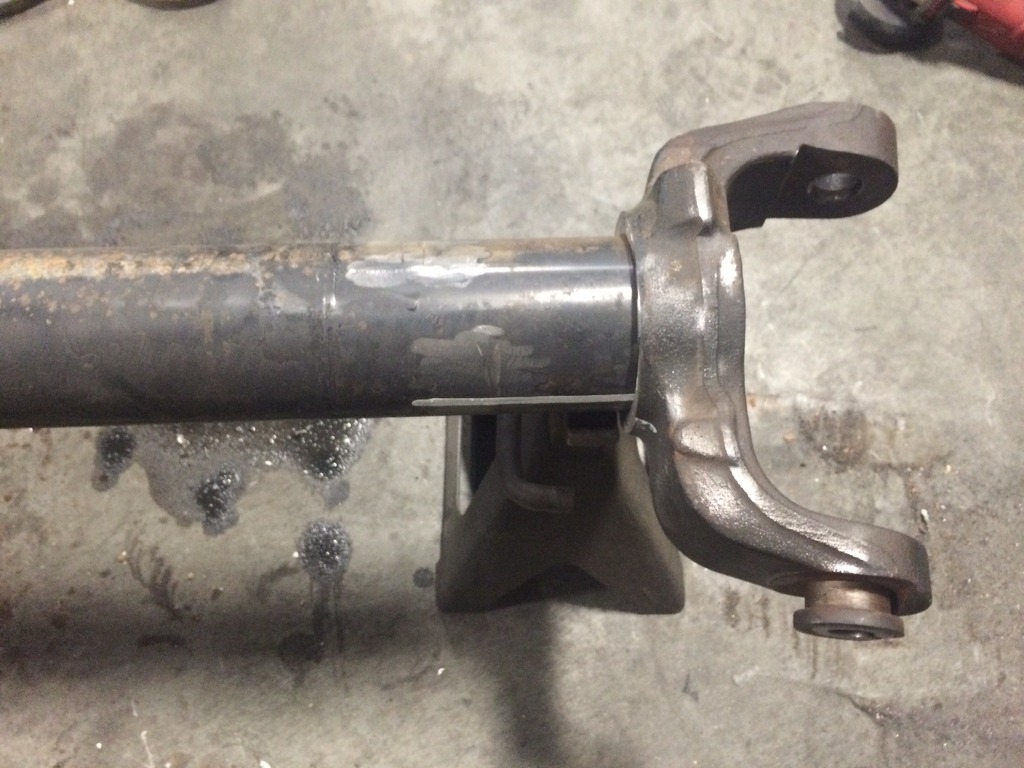
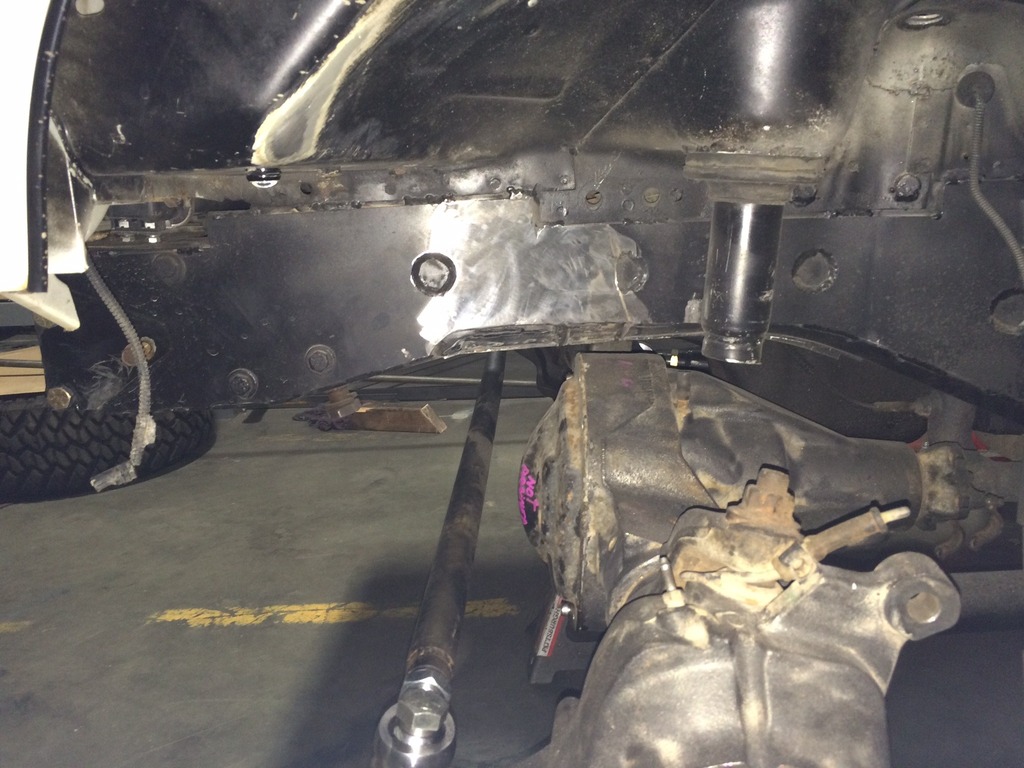
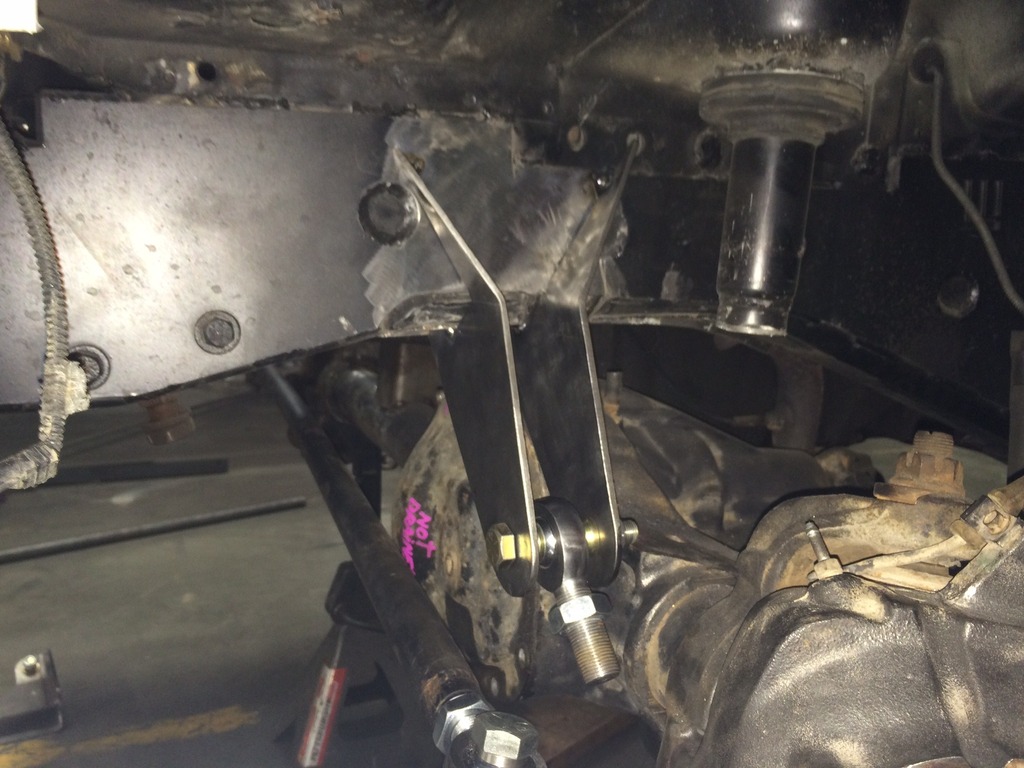
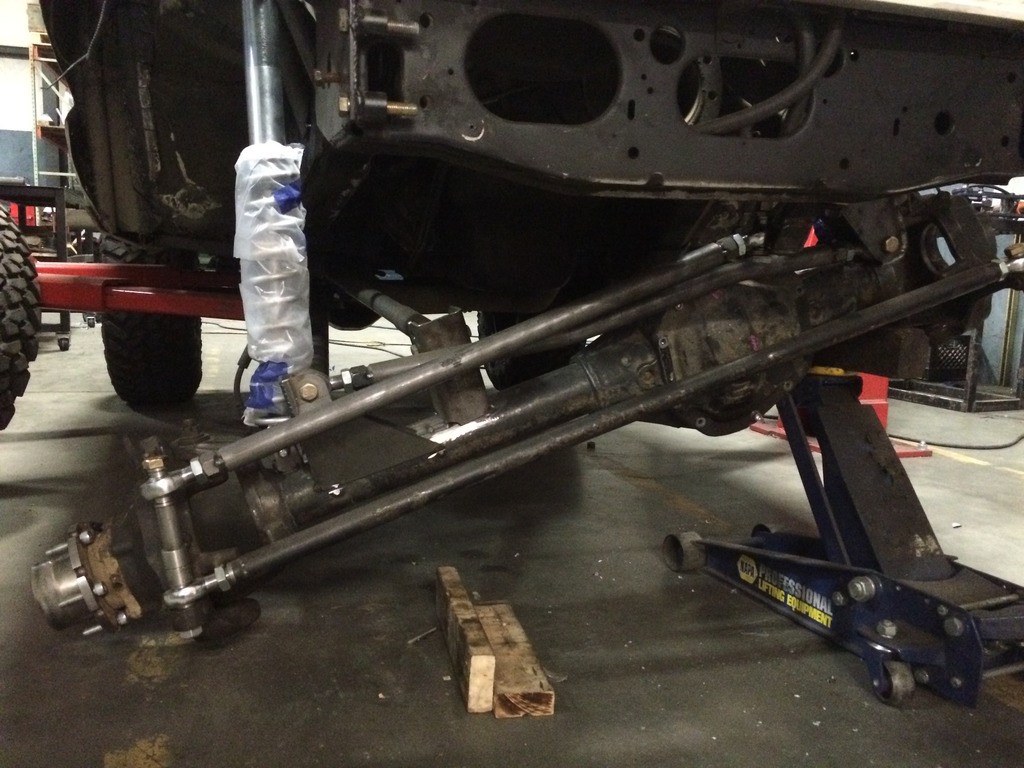
With the tie rod in it was time to work on the track bar and drag link. The old track bar bracket wasn't usable because of the stretch so it got cut off and a new one was made. To make it the same length as the drag link it has to be 3 inches away from the frame. To keep the track bar parallel to the ground the bracket also puts it 5 inches down.
Then I got to work cutting the fenders... again... to make room for my new tires.
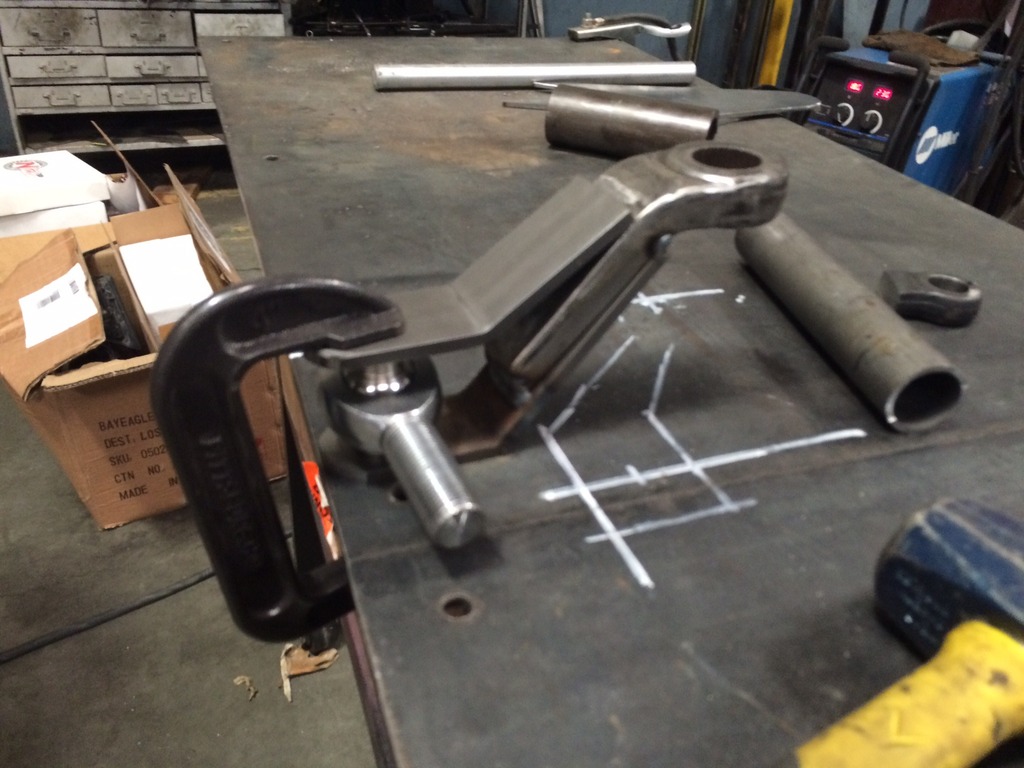
In order to make the track bar clear the dif and the oil pan at full bump it needed to get two bends. The rod end on the frame side will get wobble stops to limit rotation. Next up was making the pitman arm. We couldn't use the stock one because it did not have enough drop to get the drag link and track bar parallel.
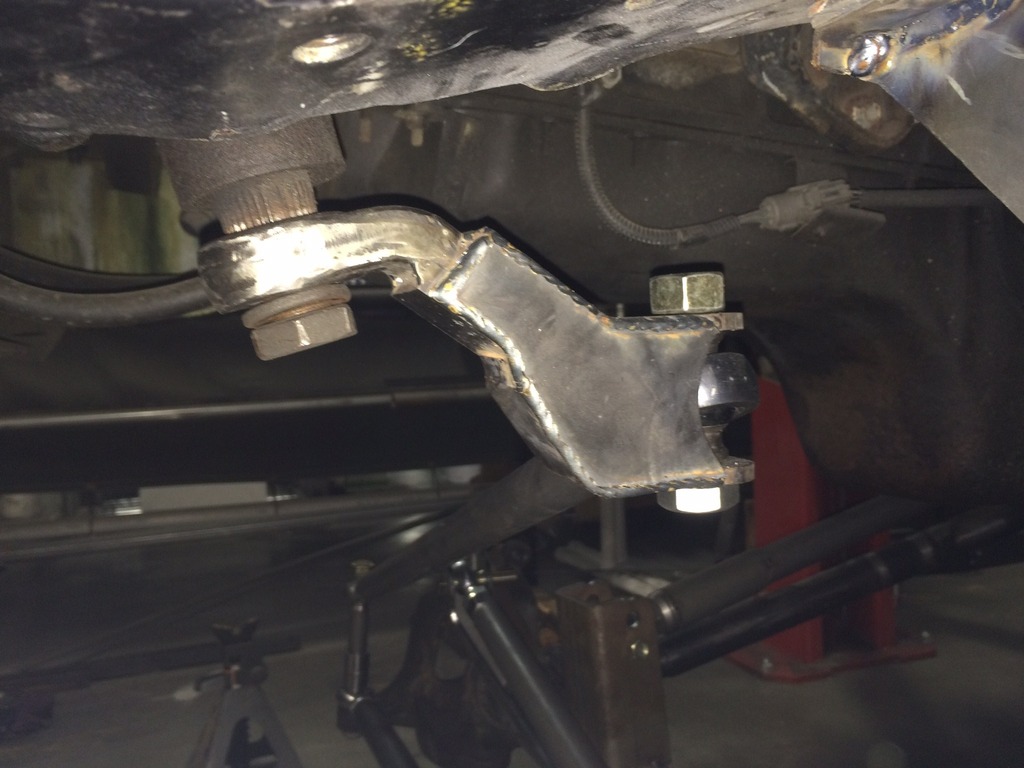
With the tie rod in it was time to work on the track bar and drag link. The old track bar bracket wasn't usable because of the stretch so it got cut off and a new one was made. To make it the same length as the drag link it has to be 3 inches away from the frame. To keep the track bar parallel to the ground the bracket also puts it 5 inches down.


Then I got to work cutting the fenders... again... to make room for my new tires.

In order to make the track bar clear the dif and the oil pan at full bump it needed to get two bends. The rod end on the frame side will get wobble stops to limit rotation. Next up was making the pitman arm. We couldn't use the stock one because it did not have enough drop to get the drag link and track bar parallel.


 01-15-2016, 01:22 PM
#30
Junior Member
Thread Starter
Join Date: Oct 2015
Location: Paso Robles Ca
Posts: 36
Likes: 0
Received 0 Likes
on
0 Posts
Year: 1996
Model: Cherokee
To make room for the coilovers Riley cut out the old bump stops. The 1.5" die for his bender can only do 110 degree bends so we weren't able to bend a shock hoop tight enough. Version 2 ended up looking like this...
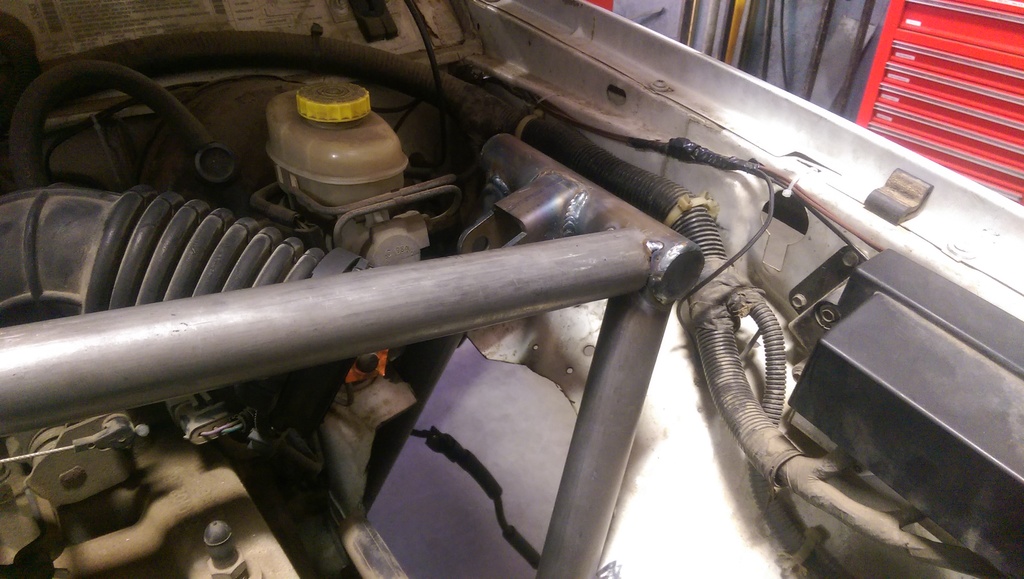
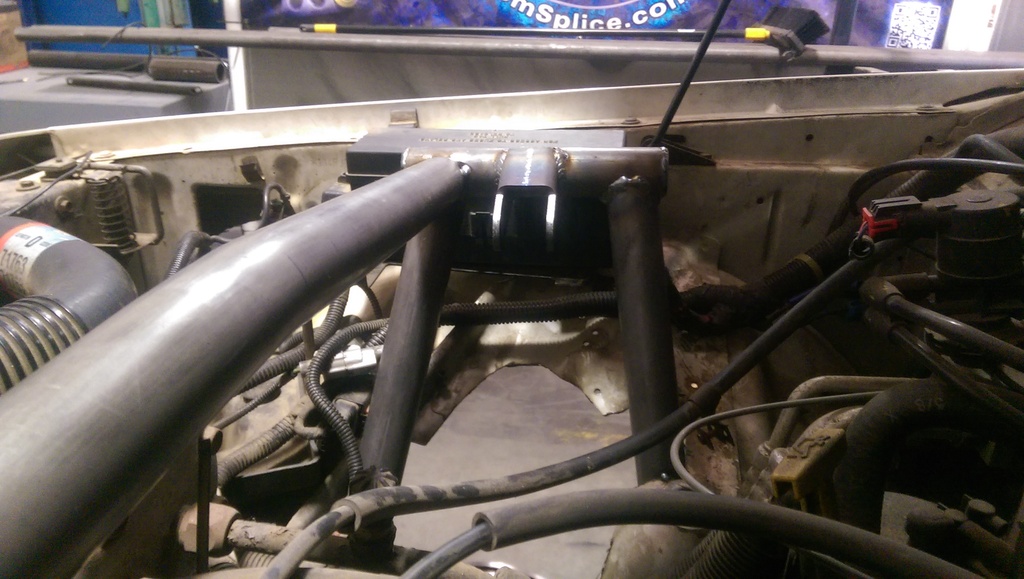
The tube that runs across the engine is going to get flanges welded on so that it can be removed.
Here's full droop...
Full flex...
I'm super happy with how it turned out. I wanted to keep my roll center high and my antisquat below 100% with maximized up-travel and a low ride height.


The tube that runs across the engine is going to get flanges welded on so that it can be removed.
Here's full droop...

Full flex...


I'm super happy with how it turned out. I wanted to keep my roll center high and my antisquat below 100% with maximized up-travel and a low ride height.