96 XJ: The Wheeling Beer Can
 10-07-2015, 03:44 PM
#1
Junior Member
Thread Starter
Join Date: Oct 2015
Location: Paso Robles Ca
Posts: 36
Likes: 0
Received 0 Likes
on
0 Posts
Year: 1996
Model: Cherokee
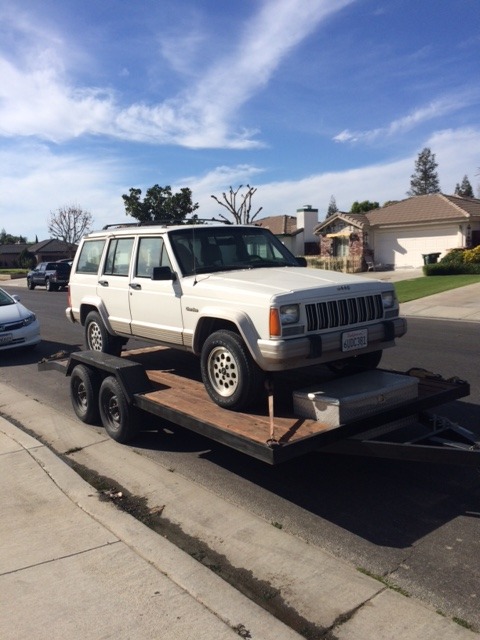
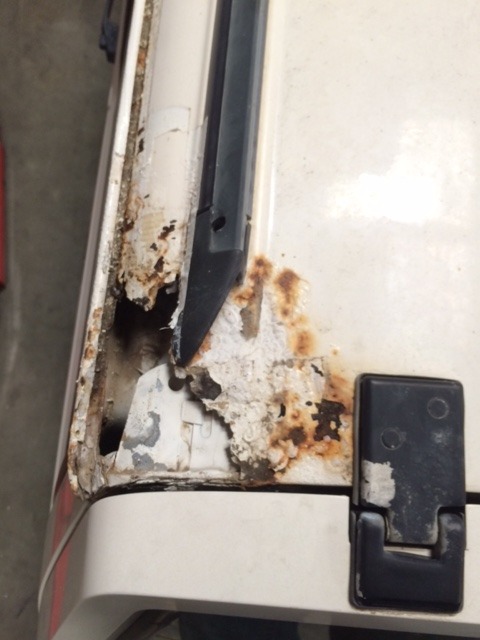
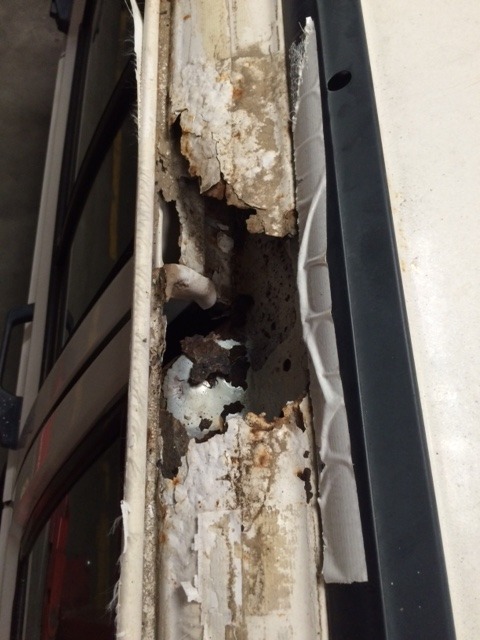
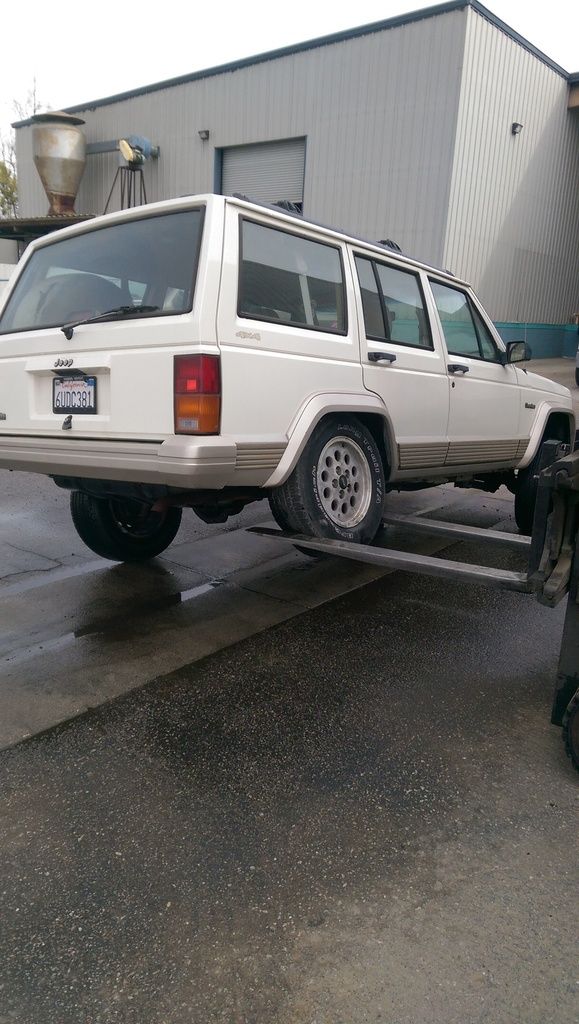
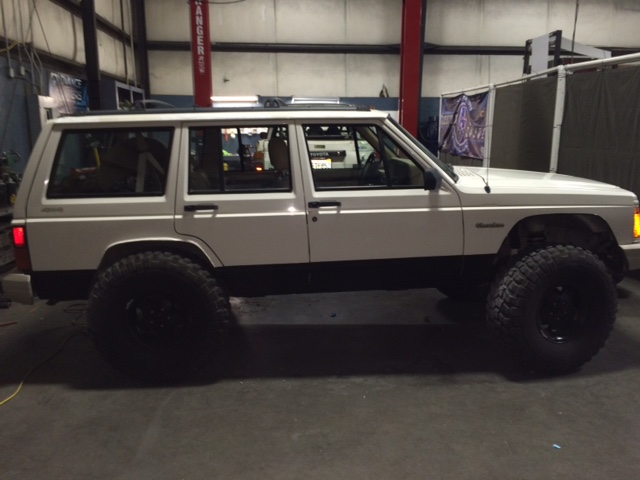
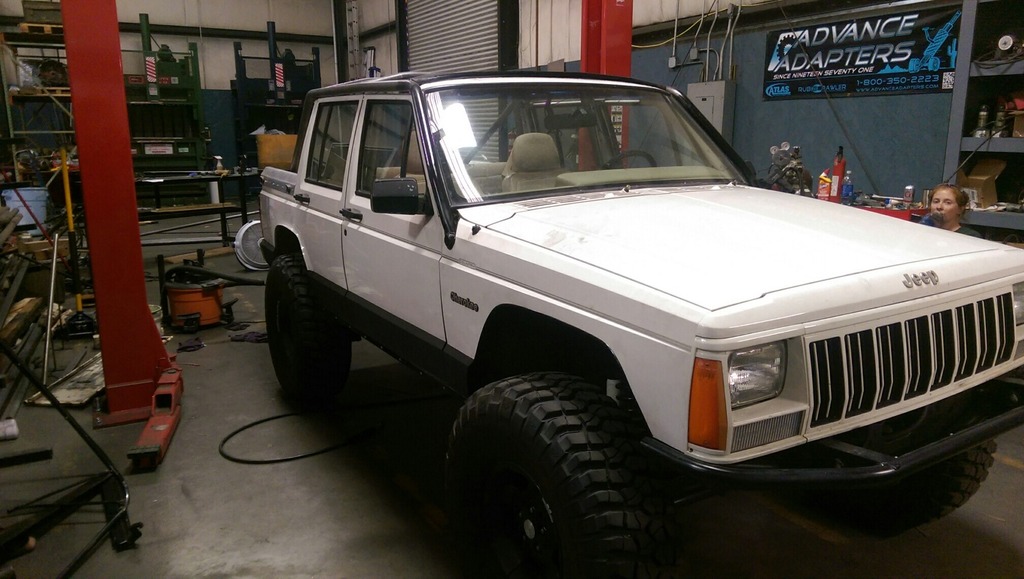
I sold my 94 toyota pickup and decided it was time to try out a Jeep! I drove to Bakersfield the Sunday before finals week and got myself a 1996 Cherokee Country with a 4.0, 140k miles and AW4 trans for $1200. It has a high pinion Dana 30 in the front and a Chrysler 8.25 in the rear currently geared to 3.55. Only catch, you can almost stick your hand through the roof in a few places. Needless to say it will be getting a super sexy bikini top in the future. The goal is to take it from a mall crawler to something I can do the Rubicon in within the next few months.
Full flex while still totally stock.
It hadn't been driven in over a year so first step was to take it on some back roads, get it to pass smog and register it. Then I got to cutting... The old man gold plastic fender flares were the first thing to go in the trash.
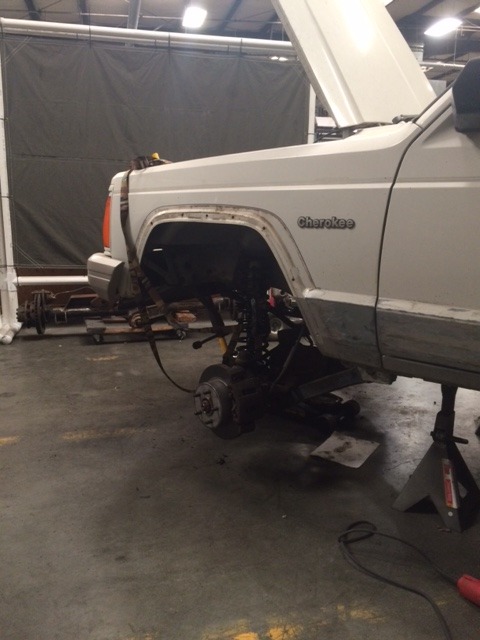
The rear was a little harder because there are structural pinch welds along the entire fender. These got cut in between each weld and then hammered in.

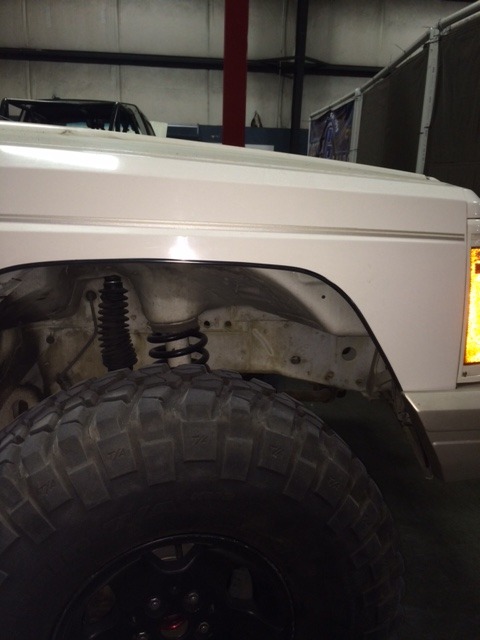
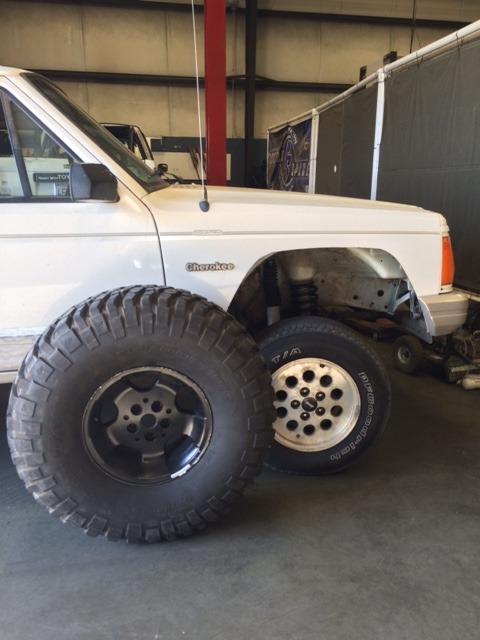
Now it was time to find a way to stuff some 35" BFG KM2's in it. To lift the front I bought Synergy 3.5" lift springs and then put in Pro Comp JK shocks that I got for free in the tire sale. To lift the rear it first got the Synergy long travel shackles. This didn't lift it quite enough so it looked like this...
As much as the thought of having a pre-runner turns me on, I put an end to that quickly. So next came some 2.75" Old Man Emu lift springs to replace the stock leaf pack.
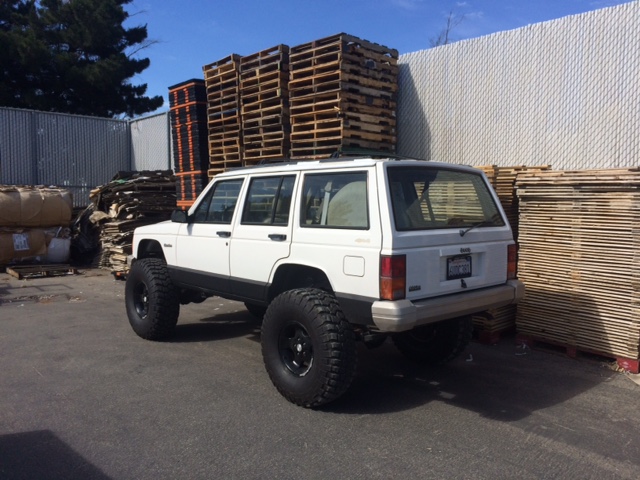
Here is how it flex's now.

Rough Country extended sway bar links with quick disconnects for the front are currently in the mail. The rear sway bar got taken out and thrown across the parking lot. Also in the mail is Ruff Stuff's frame plating kit, which will be getting installed asap. Shortly after it will be getting Liquid Iron Industries front frame and steering box reinforcement kit. I picked up a Ford 8.8 with limited slip that will eventually be going in the rear and then I'm going to regear to 4.56. Not sure whether or not I'm going to keep the limited slip or go with a real locker. It will also be getting new bumpers and some china lights.
I'm excited to have my own project that I can learn as I go on. Hopefully it will be Rubicon ready by the end of the summer!


Full flex while still totally stock.

It hadn't been driven in over a year so first step was to take it on some back roads, get it to pass smog and register it. Then I got to cutting... The old man gold plastic fender flares were the first thing to go in the trash.


The rear was a little harder because there are structural pinch welds along the entire fender. These got cut in between each weld and then hammered in.

Now it was time to find a way to stuff some 35" BFG KM2's in it. To lift the front I bought Synergy 3.5" lift springs and then put in Pro Comp JK shocks that I got for free in the tire sale. To lift the rear it first got the Synergy long travel shackles. This didn't lift it quite enough so it looked like this...

As much as the thought of having a pre-runner turns me on, I put an end to that quickly. So next came some 2.75" Old Man Emu lift springs to replace the stock leaf pack.

Here is how it flex's now.

Rough Country extended sway bar links with quick disconnects for the front are currently in the mail. The rear sway bar got taken out and thrown across the parking lot. Also in the mail is Ruff Stuff's frame plating kit, which will be getting installed asap. Shortly after it will be getting Liquid Iron Industries front frame and steering box reinforcement kit. I picked up a Ford 8.8 with limited slip that will eventually be going in the rear and then I'm going to regear to 4.56. Not sure whether or not I'm going to keep the limited slip or go with a real locker. It will also be getting new bumpers and some china lights.
I'm excited to have my own project that I can learn as I go on. Hopefully it will be Rubicon ready by the end of the summer!
Last edited by clatter; 10-07-2015 at 03:55 PM. Reason: add more pics
 10-07-2015, 03:46 PM
#2
Junior Member
Thread Starter
Join Date: Oct 2015
Location: Paso Robles Ca
Posts: 36
Likes: 0
Received 0 Likes
on
0 Posts
Year: 1996
Model: Cherokee
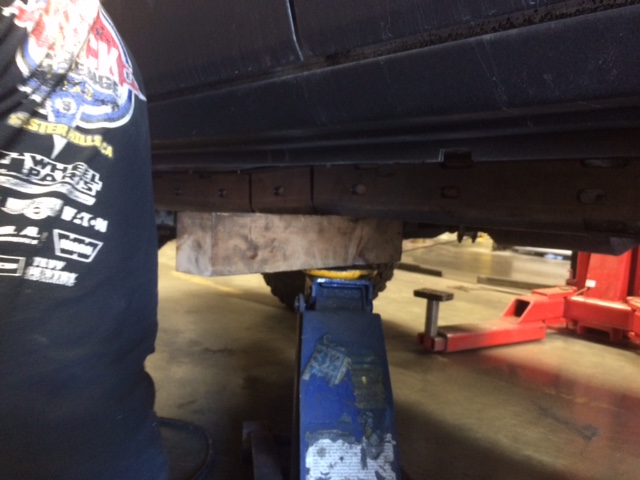
Woohoo phase two of the Wheeling Beer Can! As of today it is less of a beer can because I got the frame stiffeners tacked on! I used the Liquid Iron front plating kit and Ruff Stuff's channel reinforcement for the rest. Grinding everything off was super fun...
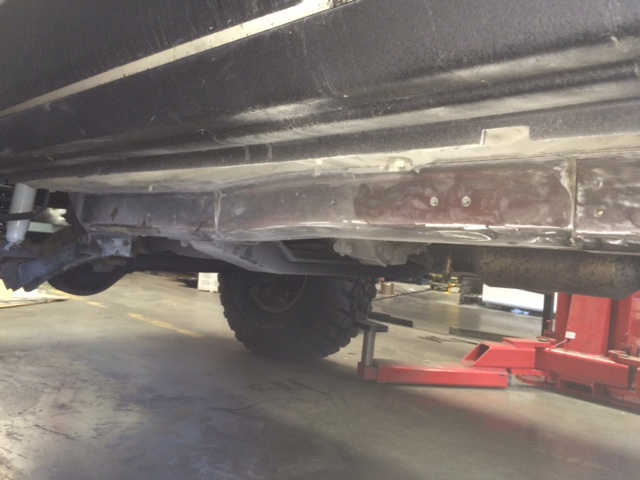
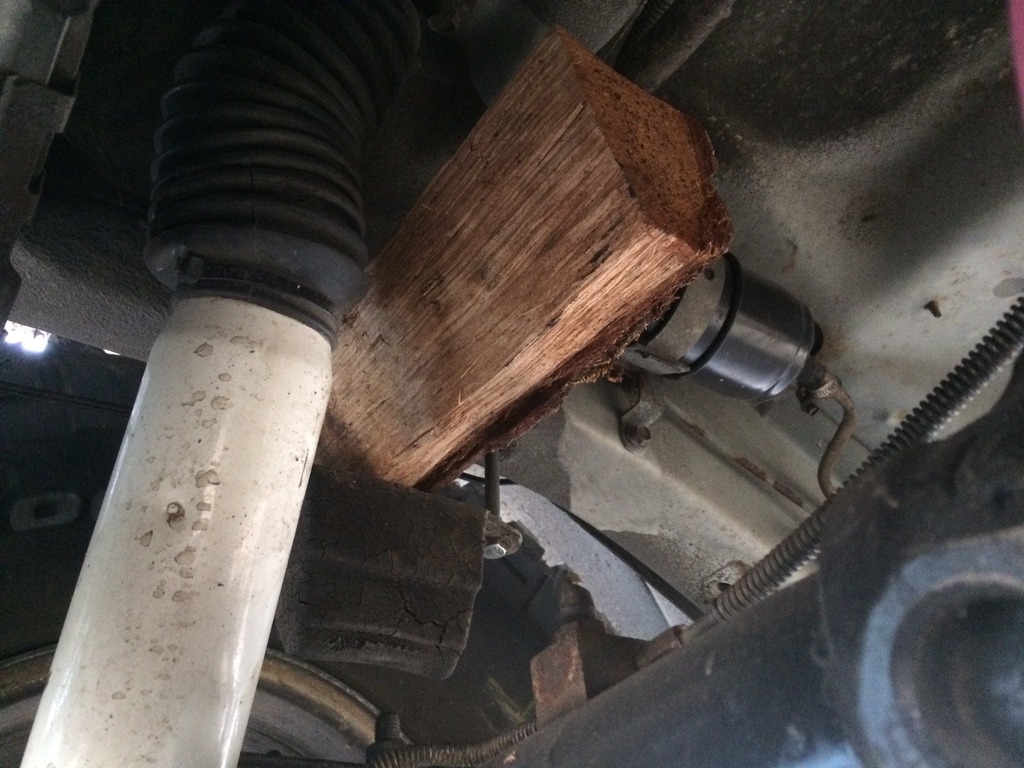
To get the Ruff Stuff one to fit flush I used a floor jack and my trusty block of wood to give it a good push.
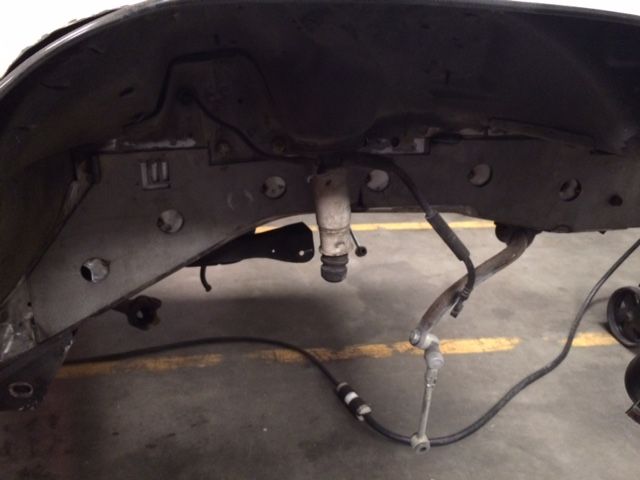
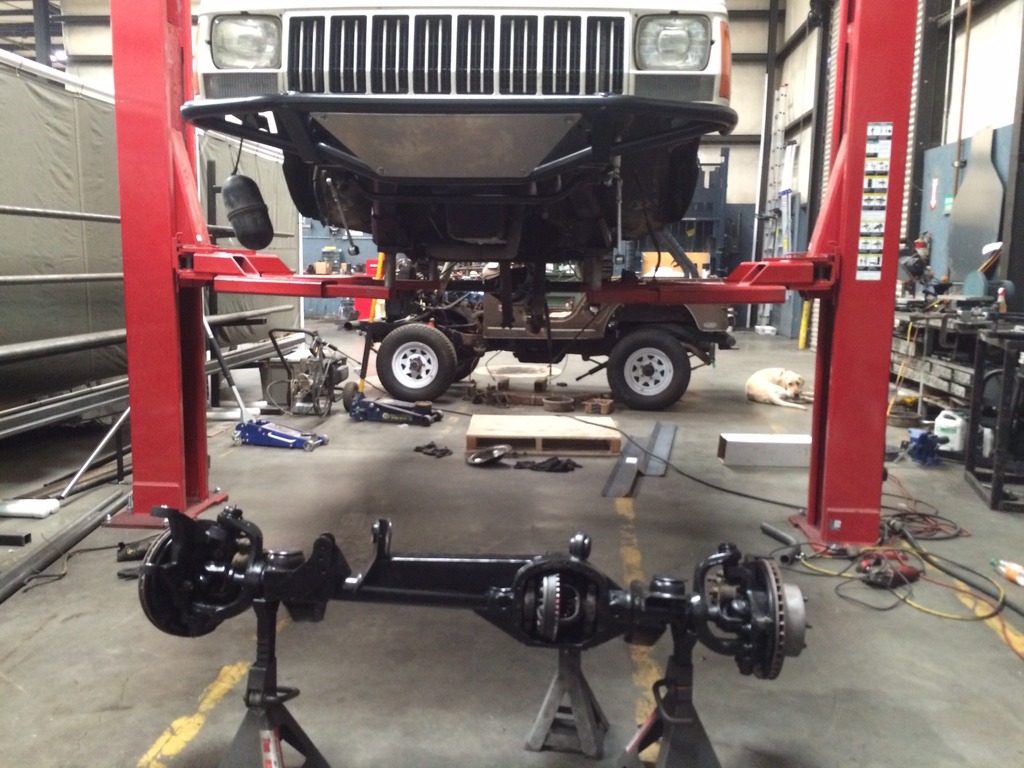
Because I am swapping new axles in I pulled the front axle (with the help of Riley). This made it way easier to grind out and tack in the Liquid Iron kit.
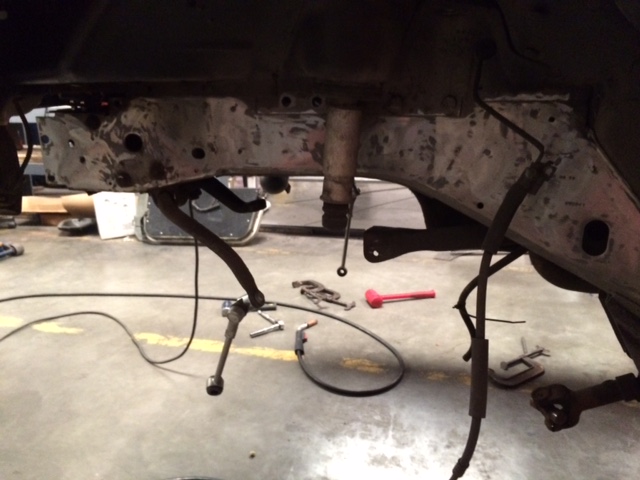
To get the front one to fit well Riley helped and we used c-clamps and a dead-blow hammer.
Once they are fully welded in I am going to pull the rear axle and swap the new ones in. They are the same axles my Jeep has now (high pinion Dana 30 and Chrysler 8.25) but they are geared to 4.56 and the rear has a Detroit. The plan is to leave the front open and eventually put an Artec truss on it. I ordered Ruff Stuff's "DIY Long Arm Kit" and am doing a one ton crossover with a terraflex knuckle for steering.
Once the axles are under the Jeep it's getting the roof chopped off and a cage! It's going to be a busy couple of weeks :banana:

To get the Ruff Stuff one to fit flush I used a floor jack and my trusty block of wood to give it a good push.

Because I am swapping new axles in I pulled the front axle (with the help of Riley). This made it way easier to grind out and tack in the Liquid Iron kit.

To get the front one to fit well Riley helped and we used c-clamps and a dead-blow hammer.

Once they are fully welded in I am going to pull the rear axle and swap the new ones in. They are the same axles my Jeep has now (high pinion Dana 30 and Chrysler 8.25) but they are geared to 4.56 and the rear has a Detroit. The plan is to leave the front open and eventually put an Artec truss on it. I ordered Ruff Stuff's "DIY Long Arm Kit" and am doing a one ton crossover with a terraflex knuckle for steering.
Once the axles are under the Jeep it's getting the roof chopped off and a cage! It's going to be a busy couple of weeks :banana:
10-07-2015, 03:47 PM
#3
Junior Member
Thread Starter
Join Date: Oct 2015
Location: Paso Robles Ca
Posts: 36
Likes: 0
Received 0 Likes
on
0 Posts
Year: 1996
Model: Cherokee
Then my boyfriend had a little fun on a slow day at work. Here's his forum post on the axle shave:
Originally Posted by rileydcasey
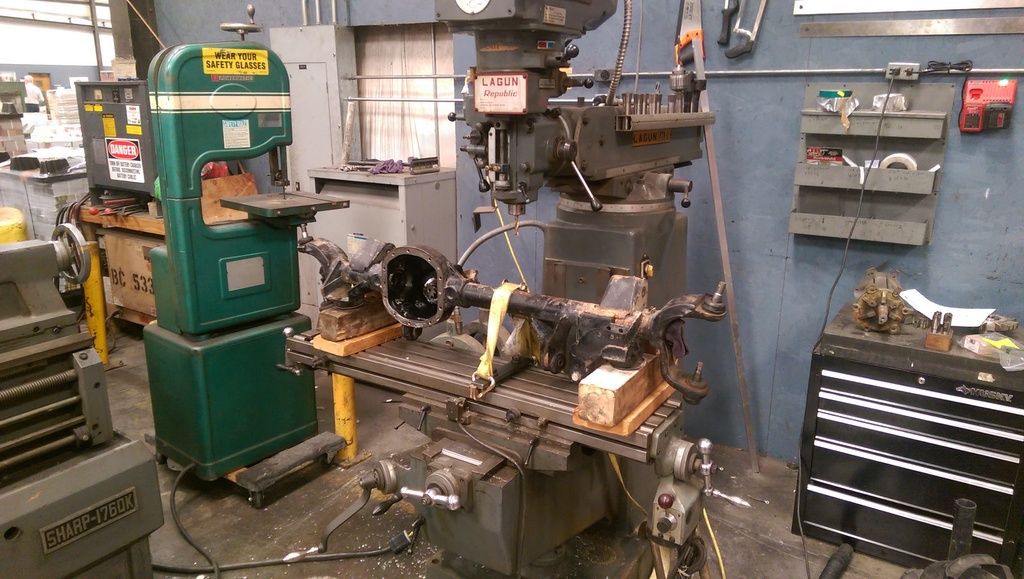
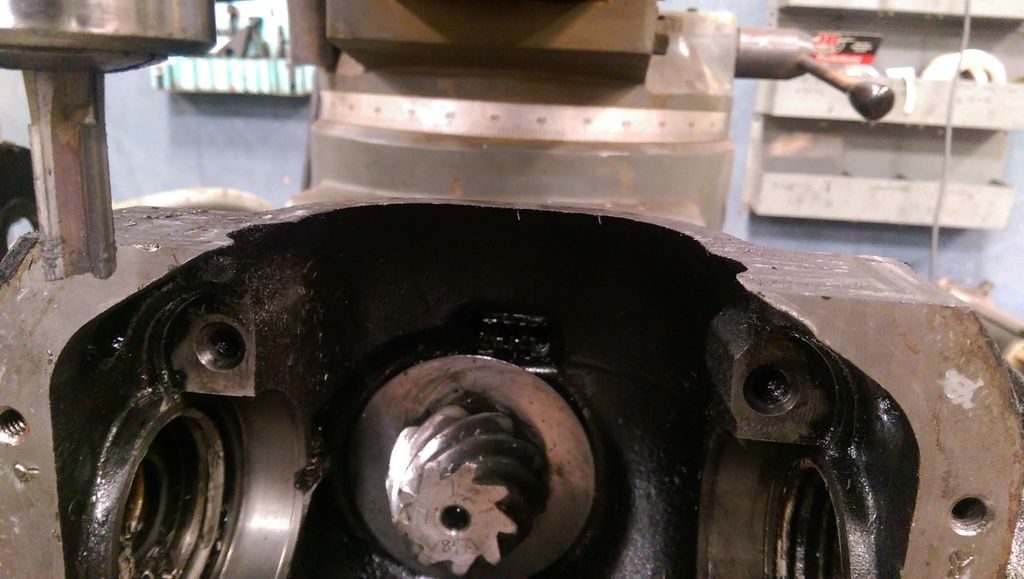
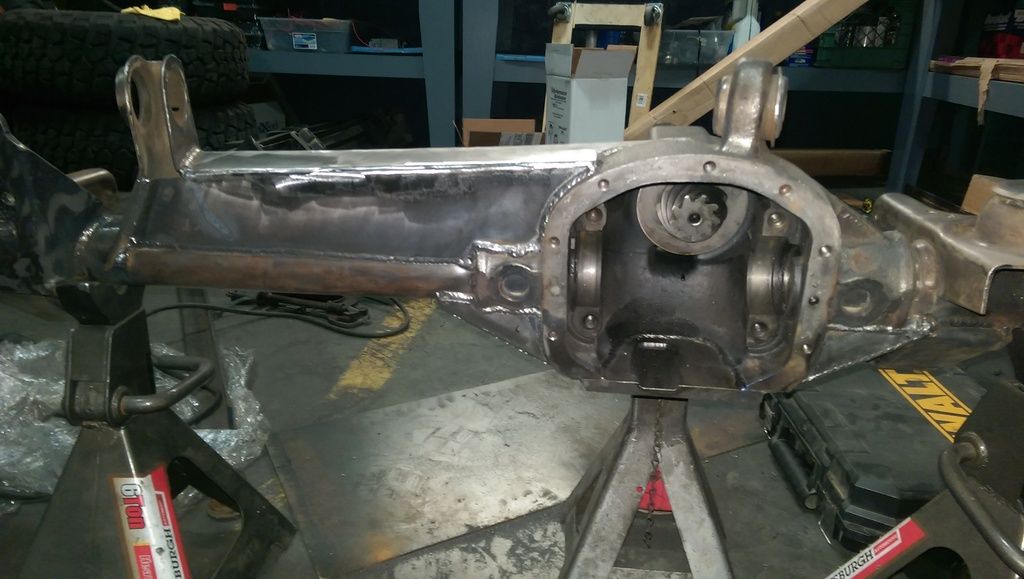
I spent way too much time on this ActionFab inspired hair brained idea, and didn't gain that much, but it was a fun project without much risk of destroying an expensive axle. I think these modifications will help keep this axle alive while providing an extra 7/8" of clearance. For the most part I'll let the pictures do the talking.
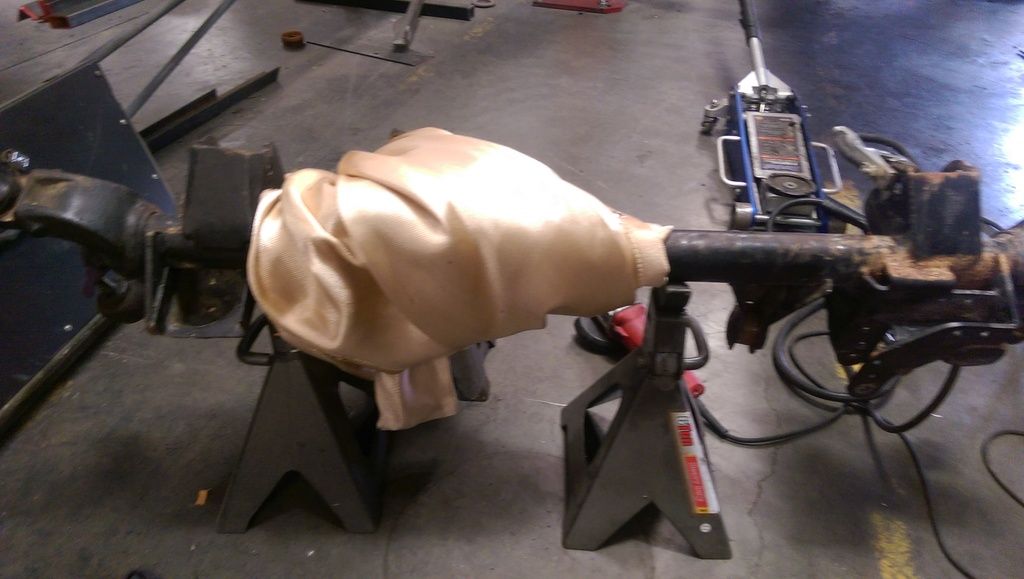
The fixturing left something to be desired in the rigidity department, but it worked.
No turning back now!
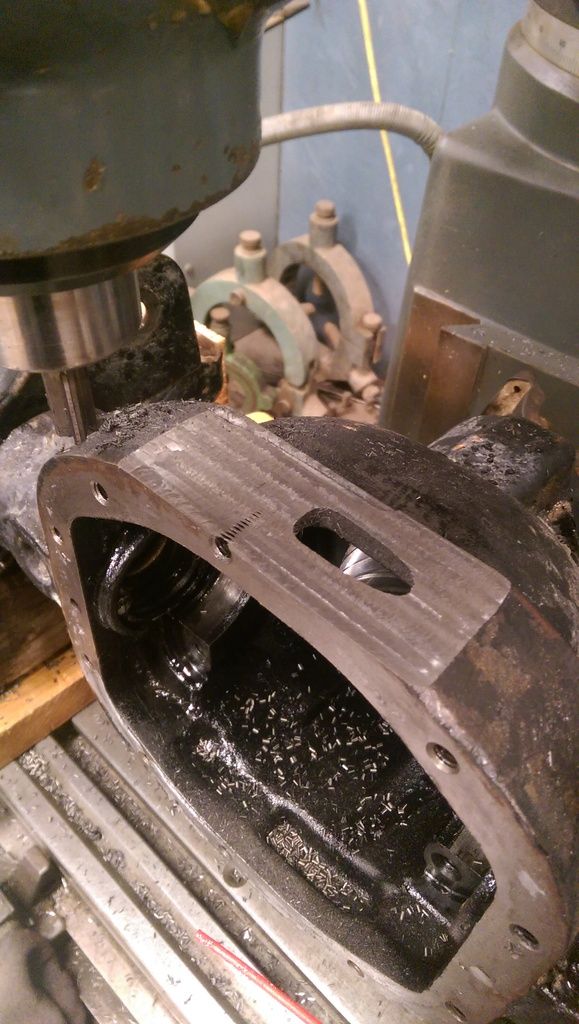
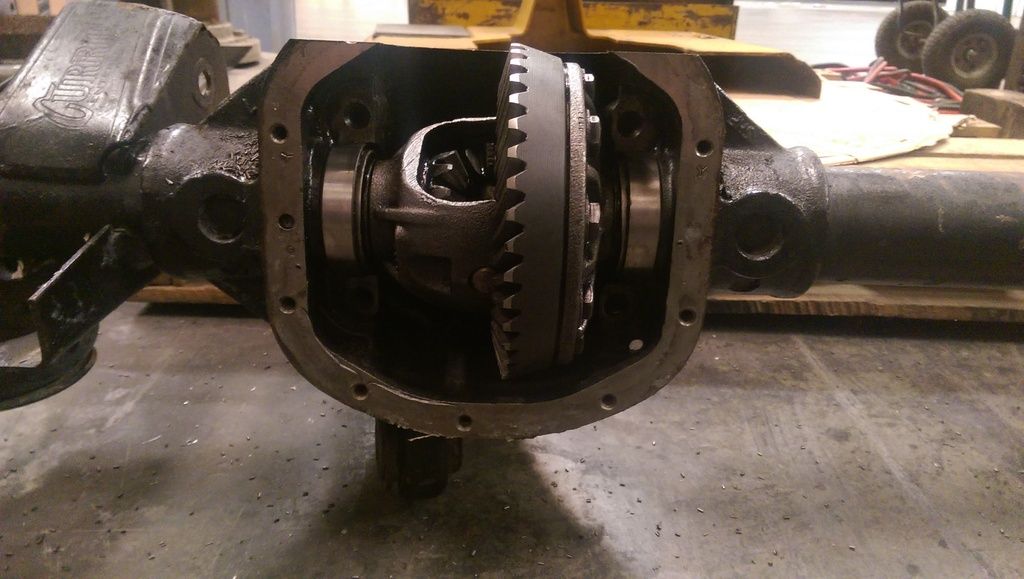
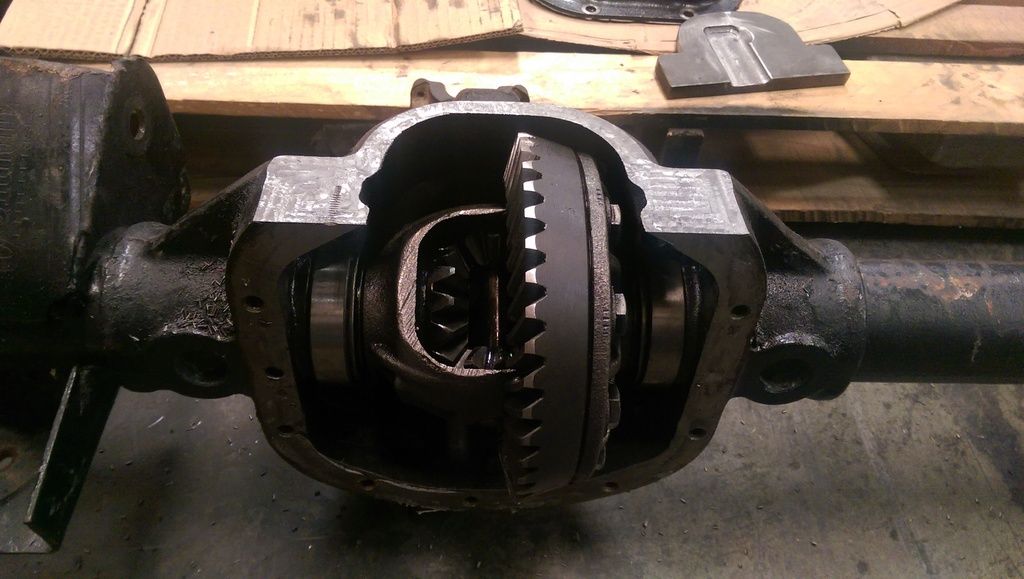
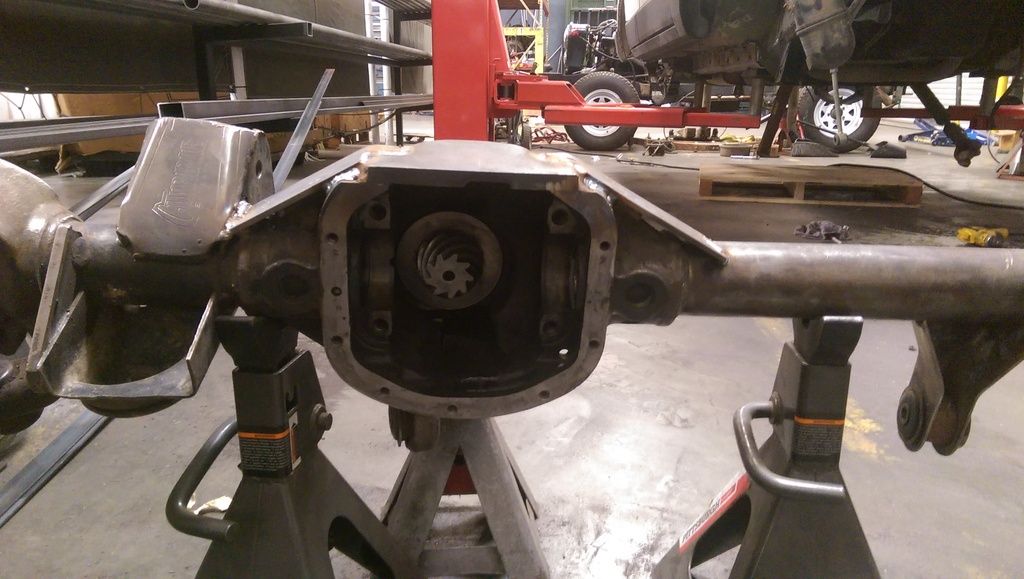
Used the press to clamp the entire carrier and spun with one hand while I held the grinder with the other. I have a lathe, but this was easier. I didn't take much off the ring gear. Maybe .150 total.

You can just see the edge of the holes from the two cover bolts. This is where I stopped. So I removed a total of 3 bolt holes and will be adding two back later.
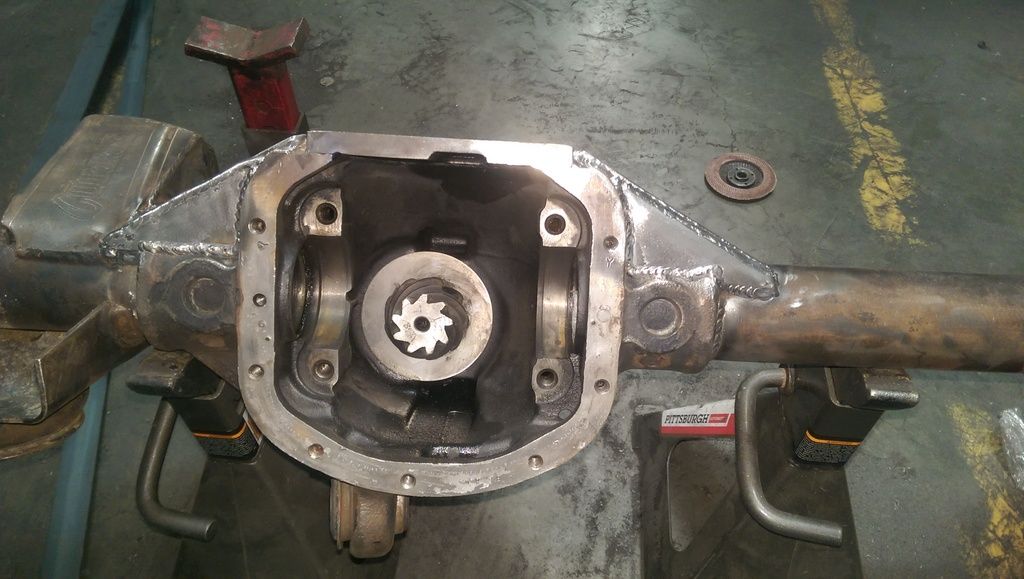
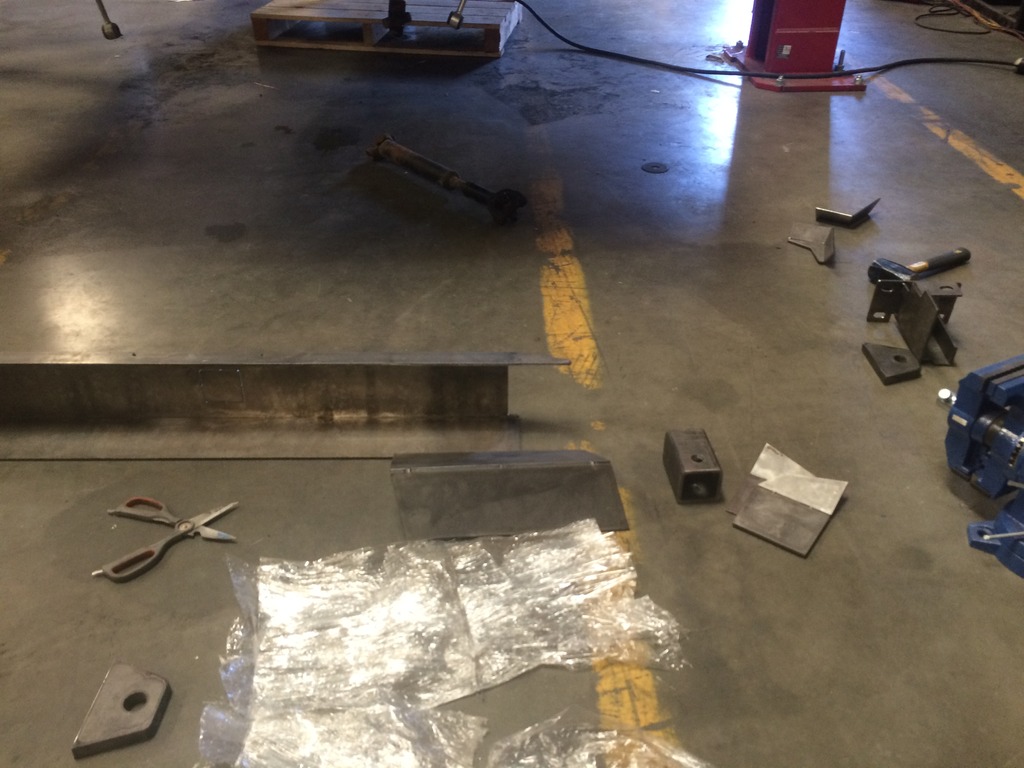
Machining clearance for the ring gear in some 1/2" cold rolled I had laying around:
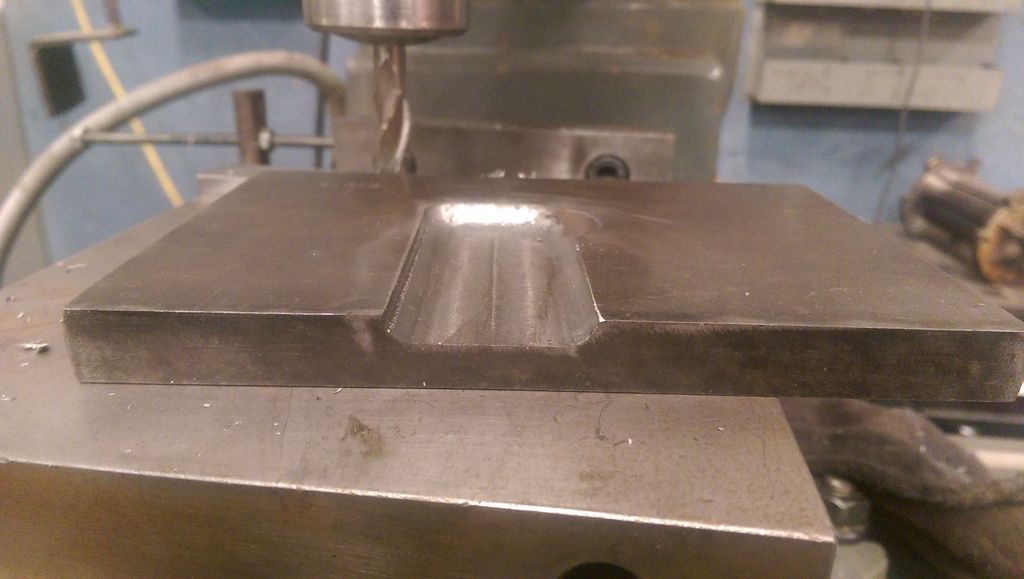
Cut out the profile on the band saw and smoothed it out with a flapper
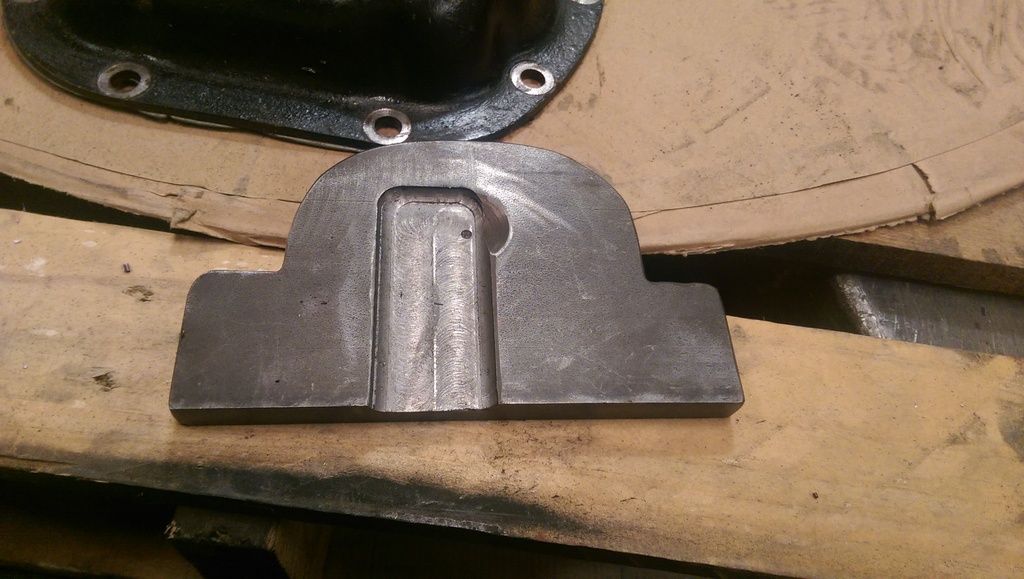
It fits!

Gained a little clearance.
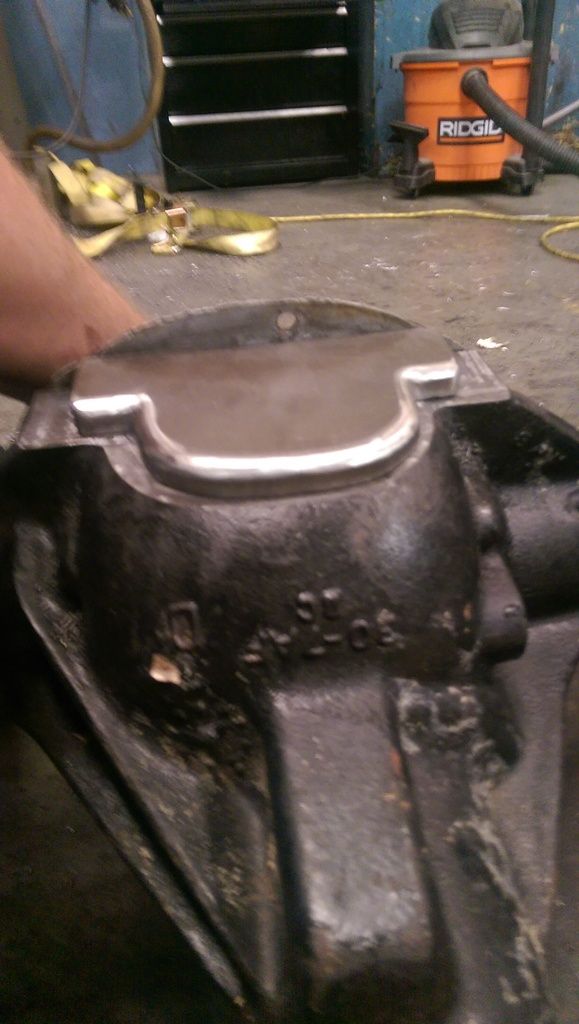
Welded!
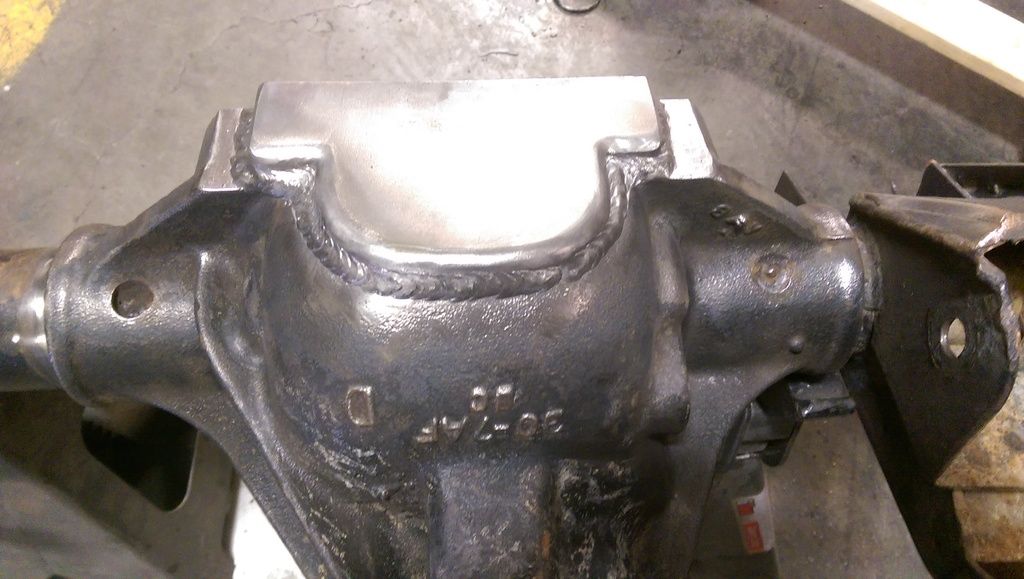
That was my first time welding to cast. I did some reading and consulted friends. In the end I used regular er70s6 wire did some preheat with a propane torch and wrapped it in a fiberglass blanket to cool.
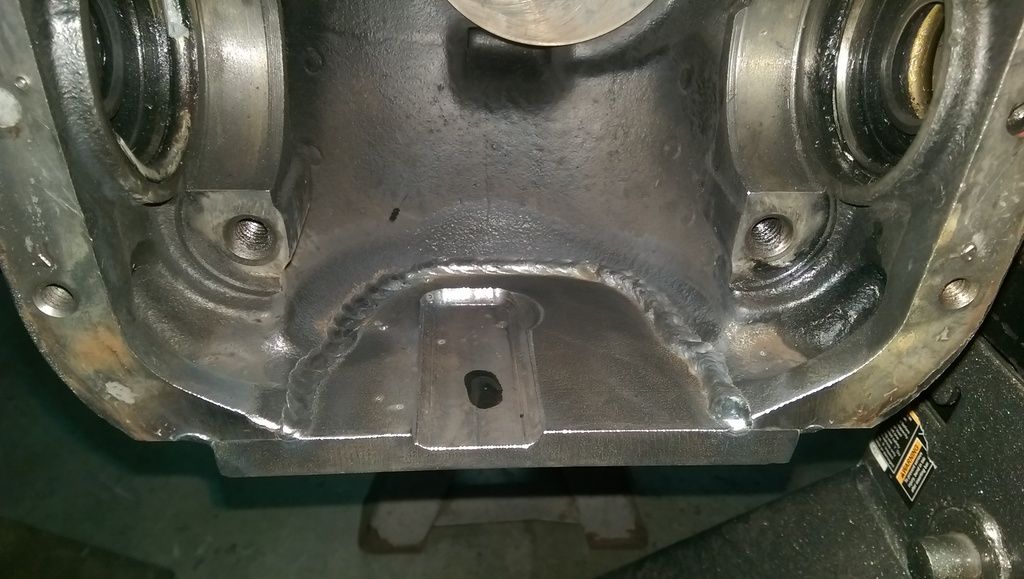
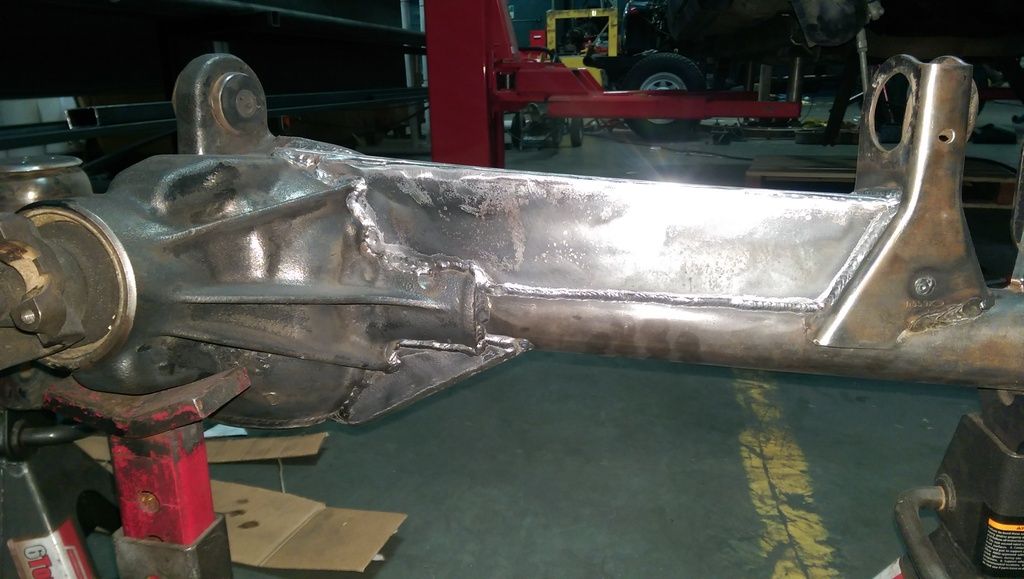
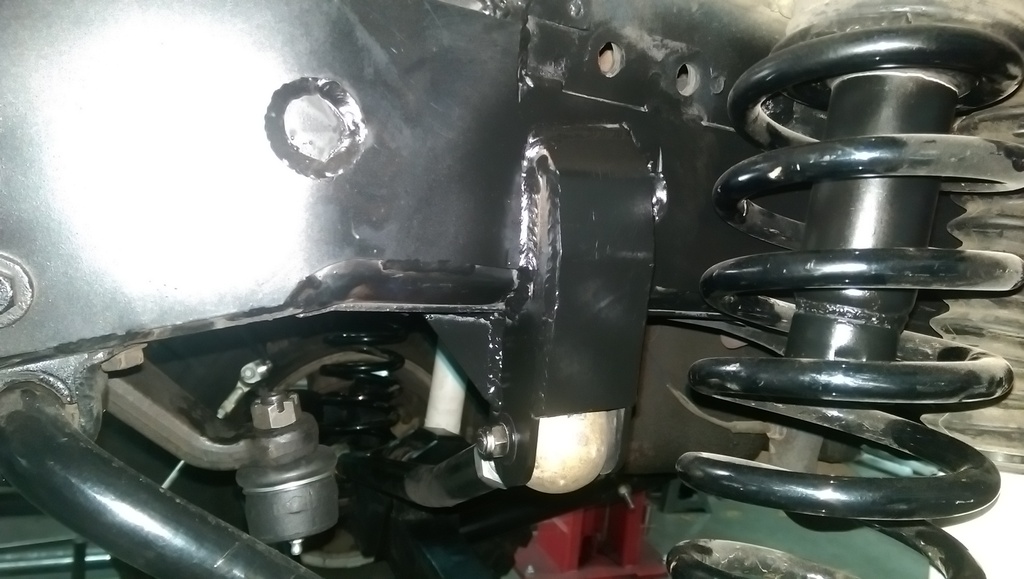
Added a small bottom truss tied into the bottom plate to hold it all together. It is also welded to the cast ribs that go down to the axle tube.
Boxed in:
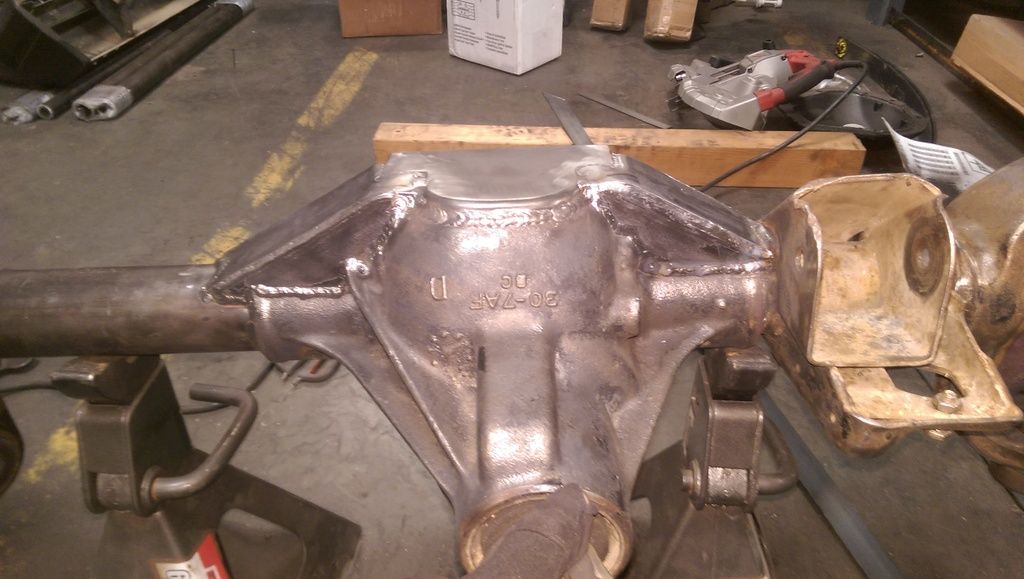
and top truss also gusseting the upper link bracket:
The fixturing left something to be desired in the rigidity department, but it worked.

No turning back now!

Used the press to clamp the entire carrier and spun with one hand while I held the grinder with the other. I have a lathe, but this was easier. I didn't take much off the ring gear. Maybe .150 total.

You can just see the edge of the holes from the two cover bolts. This is where I stopped. So I removed a total of 3 bolt holes and will be adding two back later.

Machining clearance for the ring gear in some 1/2" cold rolled I had laying around:


Cut out the profile on the band saw and smoothed it out with a flapper

It fits!

Gained a little clearance.

Welded!


That was my first time welding to cast. I did some reading and consulted friends. In the end I used regular er70s6 wire did some preheat with a propane torch and wrapped it in a fiberglass blanket to cool.
Added a small bottom truss tied into the bottom plate to hold it all together. It is also welded to the cast ribs that go down to the axle tube.

Boxed in:


and top truss also gusseting the upper link bracket:


Last edited by clatter; 10-07-2015 at 03:52 PM. Reason: add more text
10-07-2015, 03:54 PM
#4
Junior Member
Thread Starter
Join Date: Oct 2015
Location: Paso Robles Ca
Posts: 36
Likes: 0
Received 0 Likes
on
0 Posts
Year: 1996
Model: Cherokee
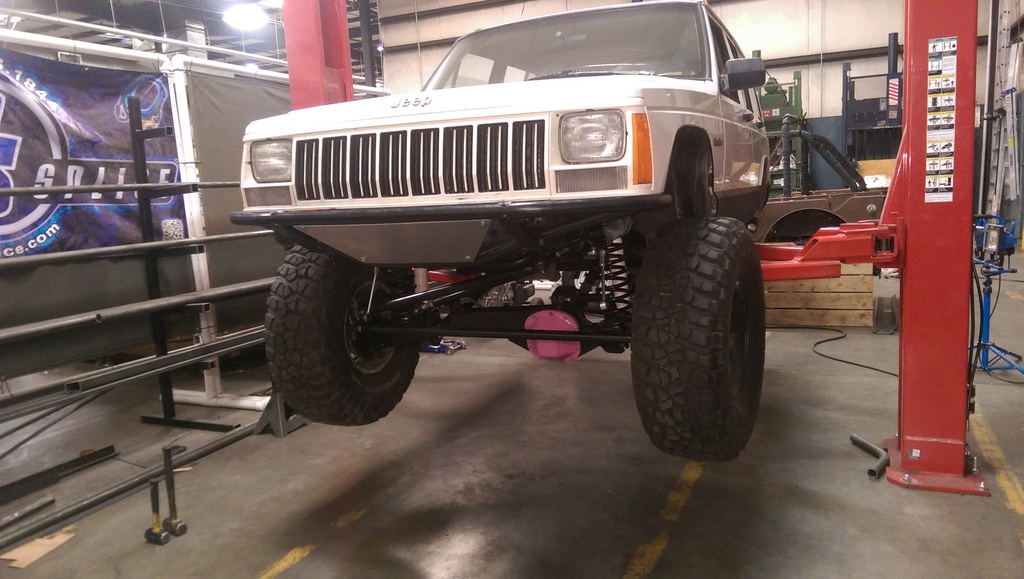
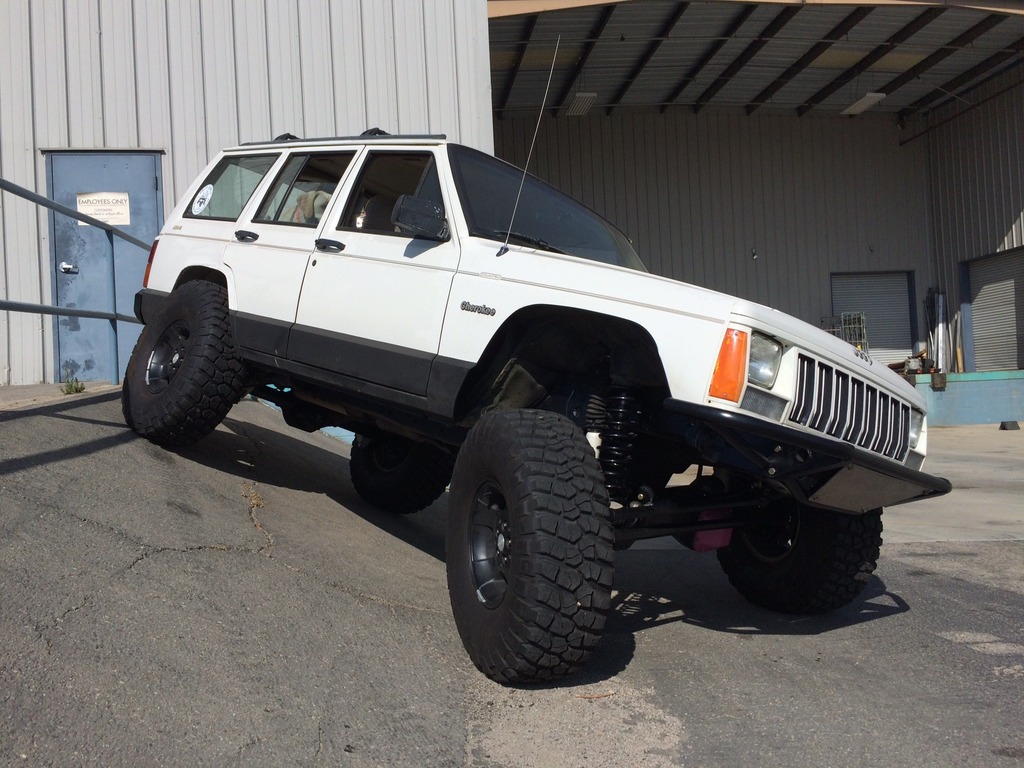
My OME's were a little too tall/stiff so a leaf got taken out. Now the Jeep is a lot more level.
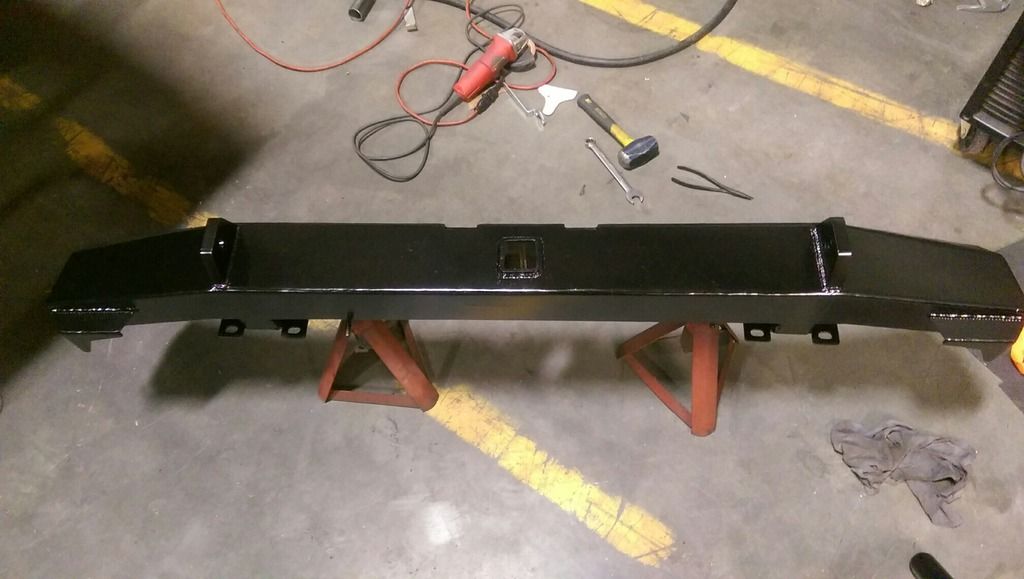
The rear bumper was a birthday present from Riley. The diy kit comes from JRC offroad and goes together real quick. They give you the specs for bending all of the pieces and then you just weld it all together. Riley did the welding and I got nasty with the angle grinder to smooth it all out. The bumper is actually designed for a newer Cherokee but it lines up well enough.
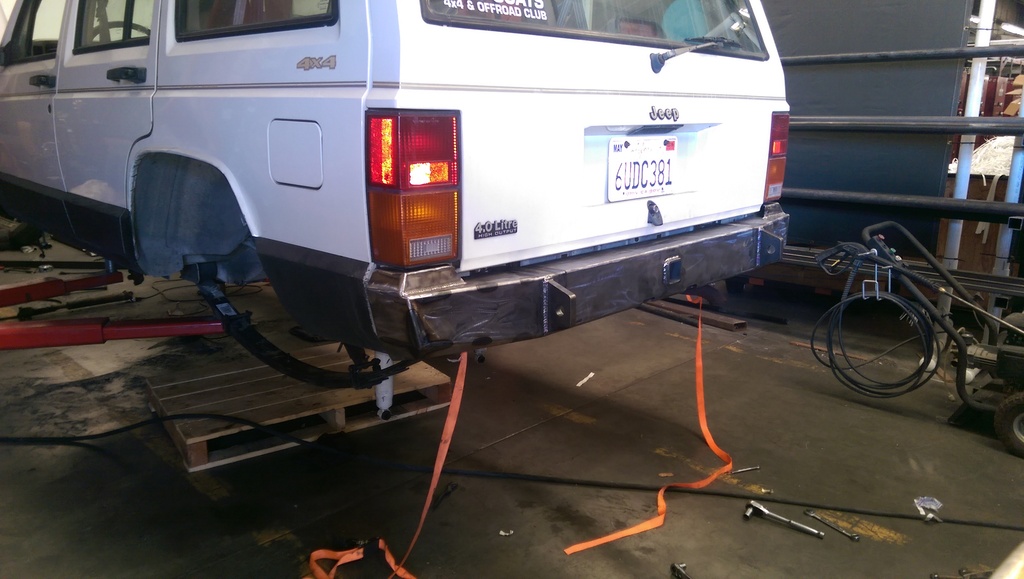
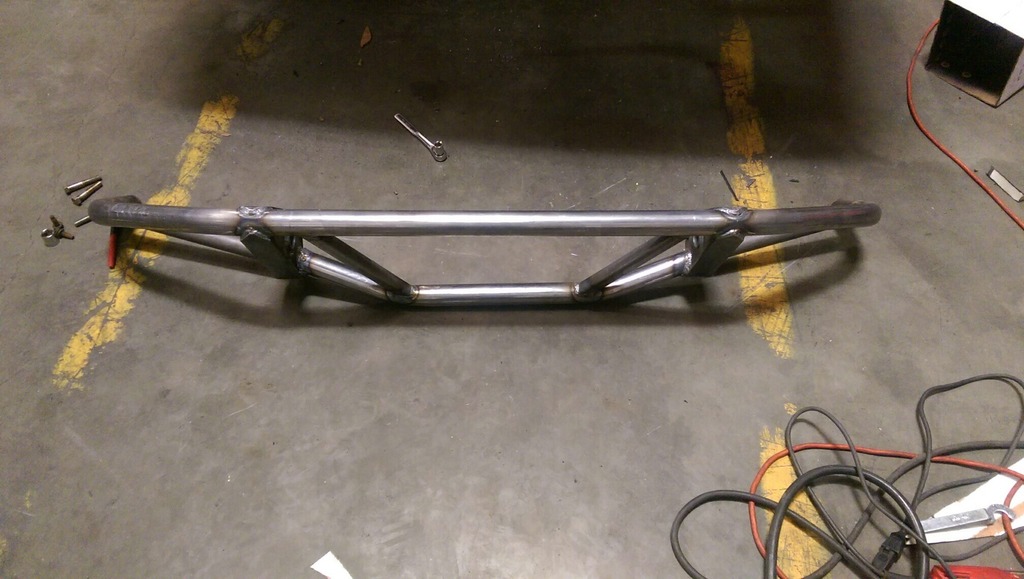
Riley designed the front bumper and I love how it turned out. Eventually a winch will get mounted on top.
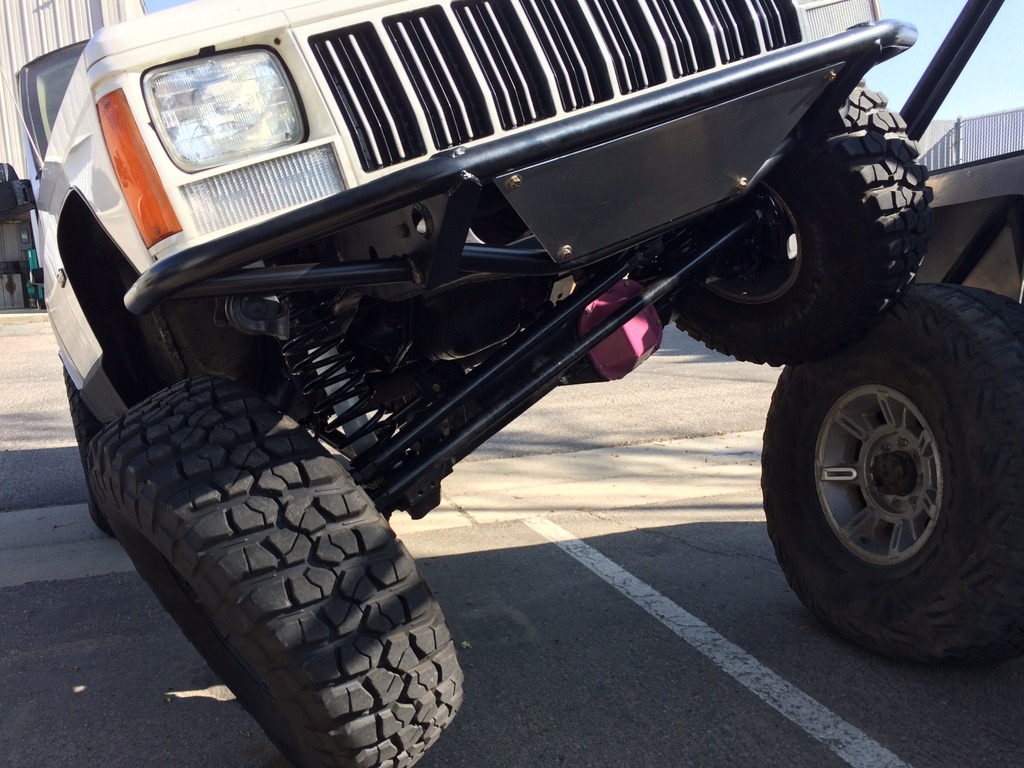
It took a month and lots of annoyed phone calls to get Ruff Stuff to send me all of the parts for their DIY long arm kit. I kept getting a few pieces at a time with the promise that the rest of the stuff "will be in next week". So once those got here last week it was time to get cranking.
First step on the front axle was to replace the super blown out ball joints. The ball joint pulley kit from Oreilly's was able to get them out no problem. Next step was to to re-install the gears (4.56s) in my new front axle (Riley took them out when he shaved it). The bearings were pretty worn so I installed new Spicers. Because the axle housing shifted it was kind of hard to get the gears in. We tried using a case spreader but they just weren't lining up well. Finally we decided to take out a shim out on each side. This allowed the gears to go in nicely. To make sure everything was still aligned properly we used some lipstick as gear setting paint (you have to get resourceful in King City).
Everything looked good so we moved on to setting up the links. The DIY kit from Ruff Stuff allows you to cut everything to your preferred length. We started with the lower links (2x.250 DOM) and cut them 29" long. After adding the bushings and rod ends it made for a 34" radius arm. The upper links are 1.5x.250 DOM. The axle side brackets came with the axle I bought, so we only had to weld brackets on the frame side. We drilled out the stock axle side supper bushings to fit a 1/2" fine thread bolt instead of 7/16".
The axle also came with a Teraflex high steer knuckle. My steering is also 1.5x.250 DOM. We drilled out all of the steering holes to 3/4 and inserted tapered bushings so that I could have 1 ton tie rod ends for the drag link and tie rod. The only bracket we had to make was the track bar bracket. In order to keep the tie rod from hitting my dif when I turn I used the ruff stuff offset tie rod ends.

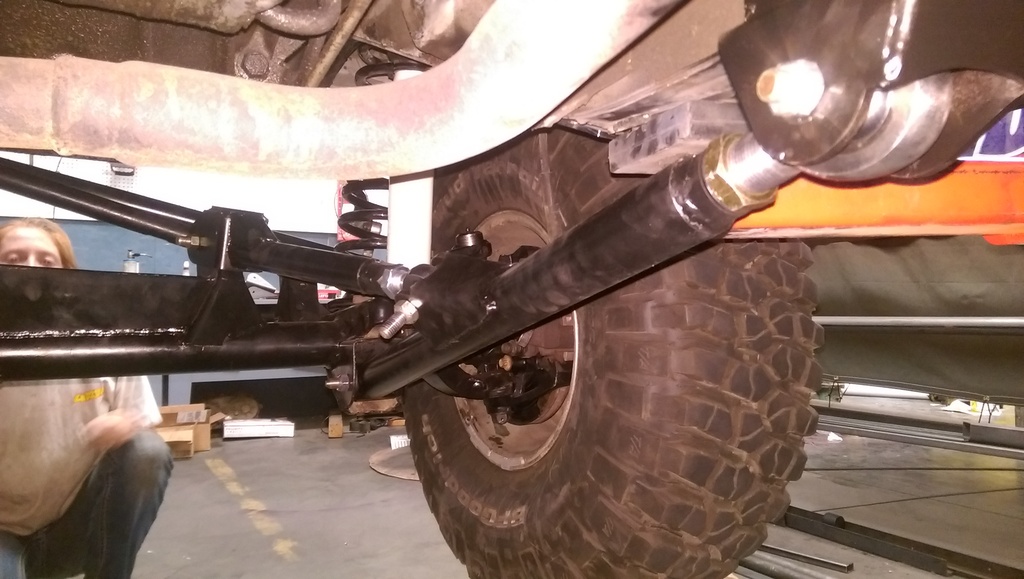
Right now my shocks are limiting my droop and my coil springs are limiting my bump.
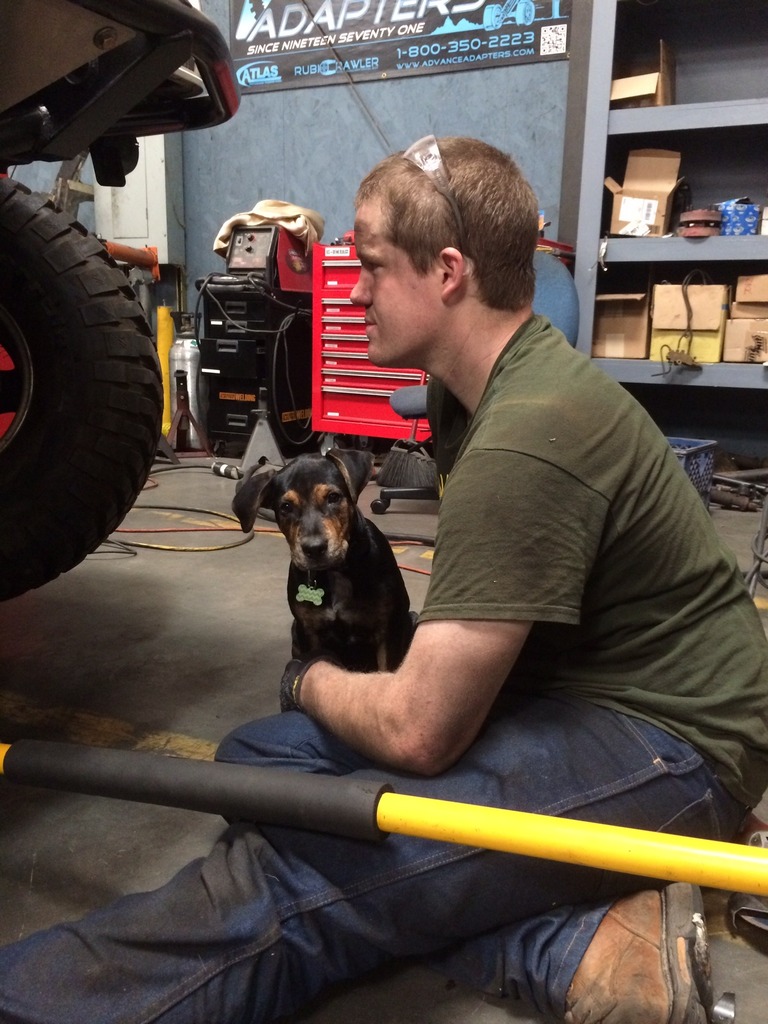
Bailey has already become accustomed to being a shop dog.
I had such a blast working on it and I understand so much more now. Next step is a cage! And skid plates.
The rear bumper was a birthday present from Riley. The diy kit comes from JRC offroad and goes together real quick. They give you the specs for bending all of the pieces and then you just weld it all together. Riley did the welding and I got nasty with the angle grinder to smooth it all out. The bumper is actually designed for a newer Cherokee but it lines up well enough.


Riley designed the front bumper and I love how it turned out. Eventually a winch will get mounted on top.

It took a month and lots of annoyed phone calls to get Ruff Stuff to send me all of the parts for their DIY long arm kit. I kept getting a few pieces at a time with the promise that the rest of the stuff "will be in next week". So once those got here last week it was time to get cranking.
First step on the front axle was to replace the super blown out ball joints. The ball joint pulley kit from Oreilly's was able to get them out no problem. Next step was to to re-install the gears (4.56s) in my new front axle (Riley took them out when he shaved it). The bearings were pretty worn so I installed new Spicers. Because the axle housing shifted it was kind of hard to get the gears in. We tried using a case spreader but they just weren't lining up well. Finally we decided to take out a shim out on each side. This allowed the gears to go in nicely. To make sure everything was still aligned properly we used some lipstick as gear setting paint (you have to get resourceful in King City).

Everything looked good so we moved on to setting up the links. The DIY kit from Ruff Stuff allows you to cut everything to your preferred length. We started with the lower links (2x.250 DOM) and cut them 29" long. After adding the bushings and rod ends it made for a 34" radius arm. The upper links are 1.5x.250 DOM. The axle side brackets came with the axle I bought, so we only had to weld brackets on the frame side. We drilled out the stock axle side supper bushings to fit a 1/2" fine thread bolt instead of 7/16".

The axle also came with a Teraflex high steer knuckle. My steering is also 1.5x.250 DOM. We drilled out all of the steering holes to 3/4 and inserted tapered bushings so that I could have 1 ton tie rod ends for the drag link and tie rod. The only bracket we had to make was the track bar bracket. In order to keep the tie rod from hitting my dif when I turn I used the ruff stuff offset tie rod ends.


Right now my shocks are limiting my droop and my coil springs are limiting my bump.


Bailey has already become accustomed to being a shop dog.


I had such a blast working on it and I understand so much more now. Next step is a cage! And skid plates.
10-07-2015, 03:56 PM
#5
Junior Member
Thread Starter
Join Date: Oct 2015
Location: Paso Robles Ca
Posts: 36
Likes: 0
Received 0 Likes
on
0 Posts
Year: 1996
Model: Cherokee
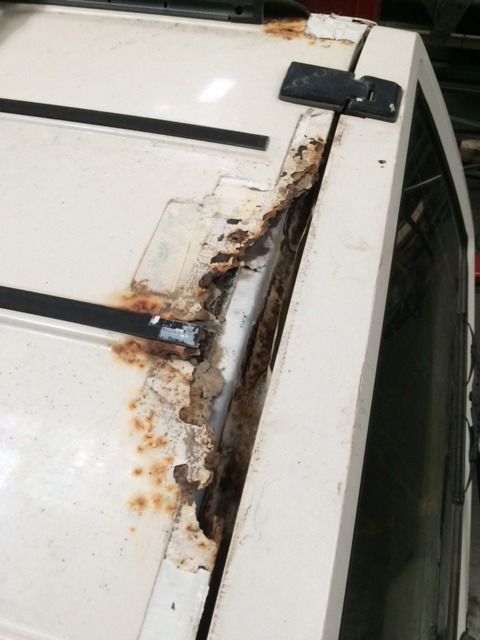
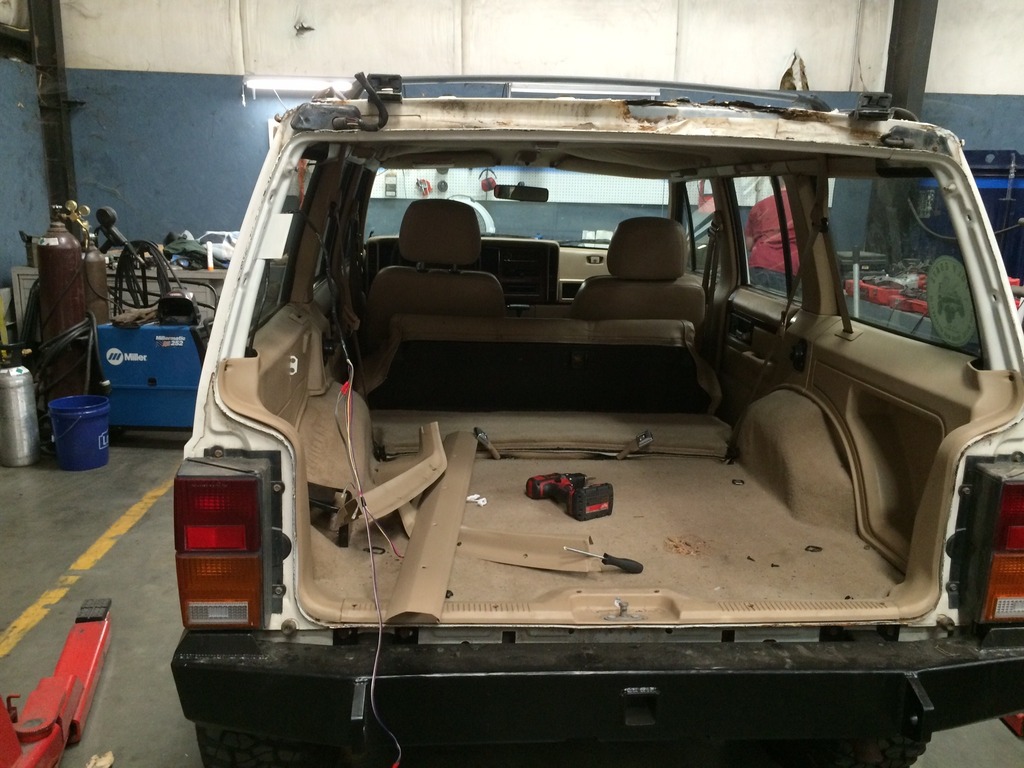
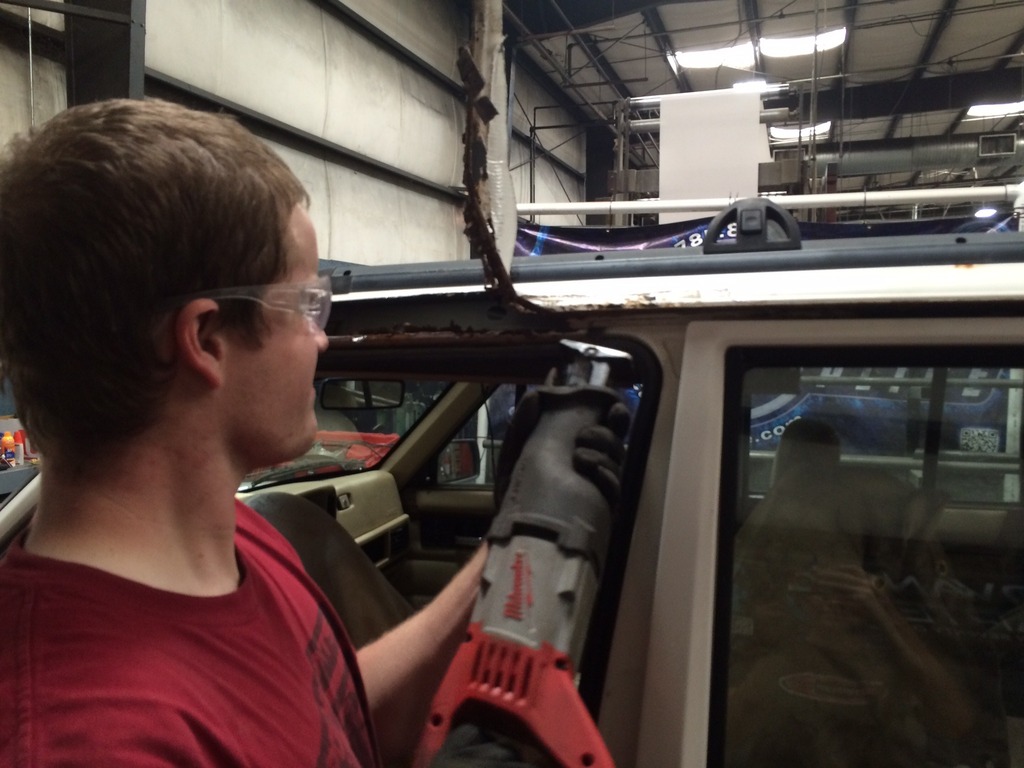
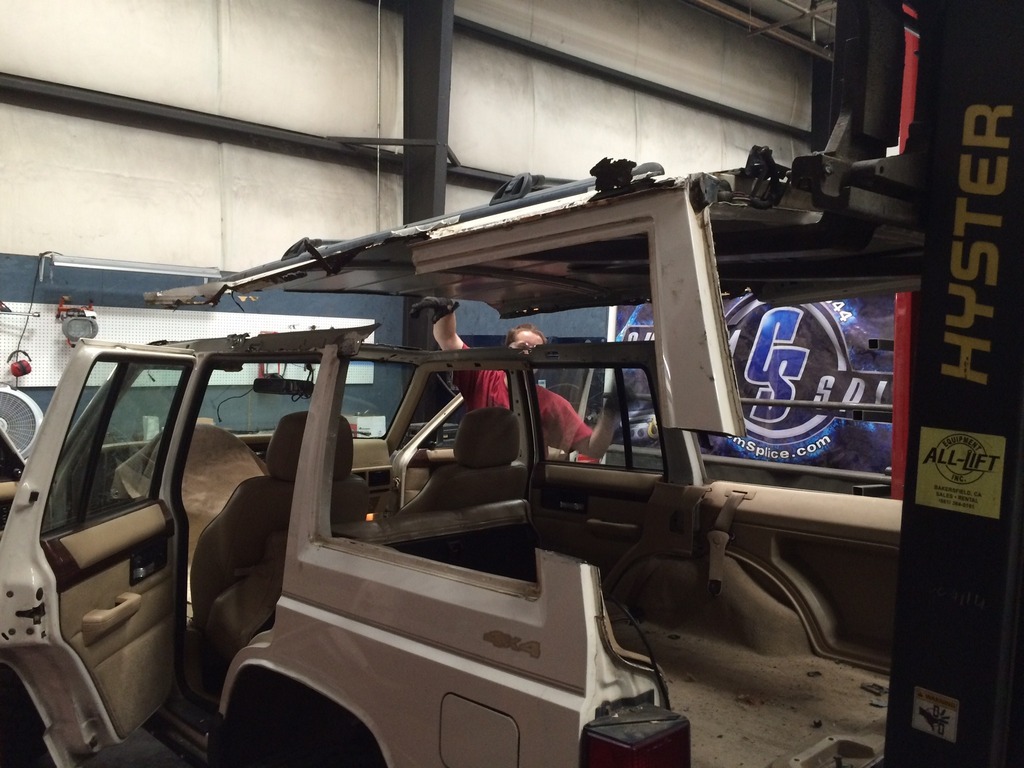
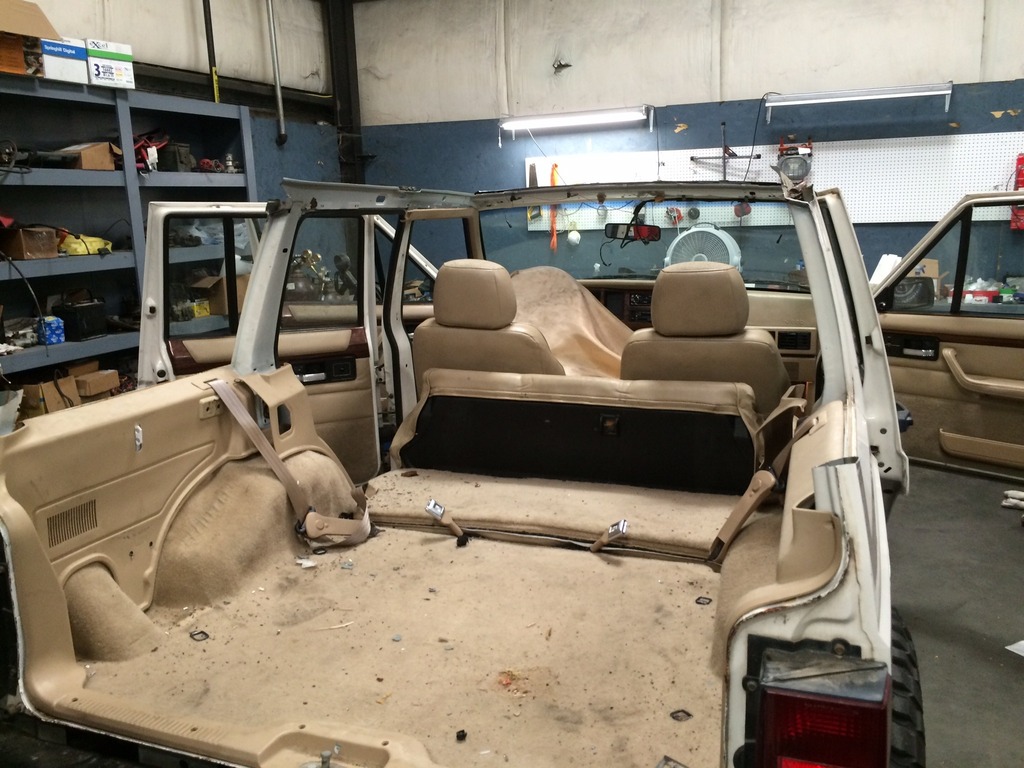
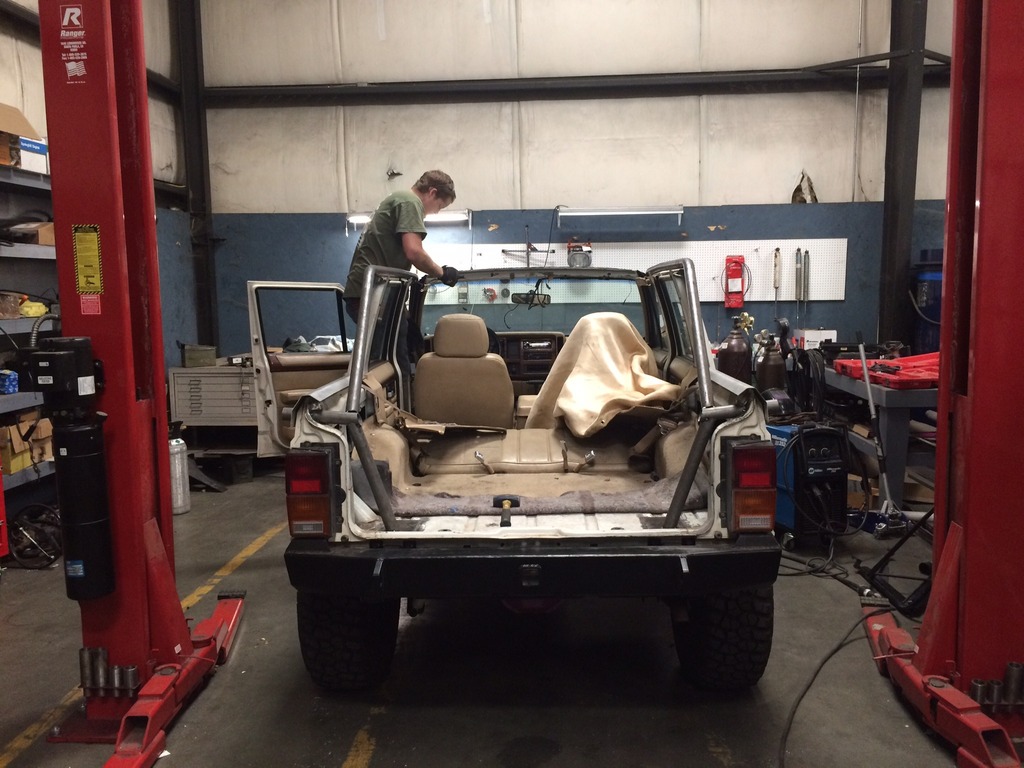
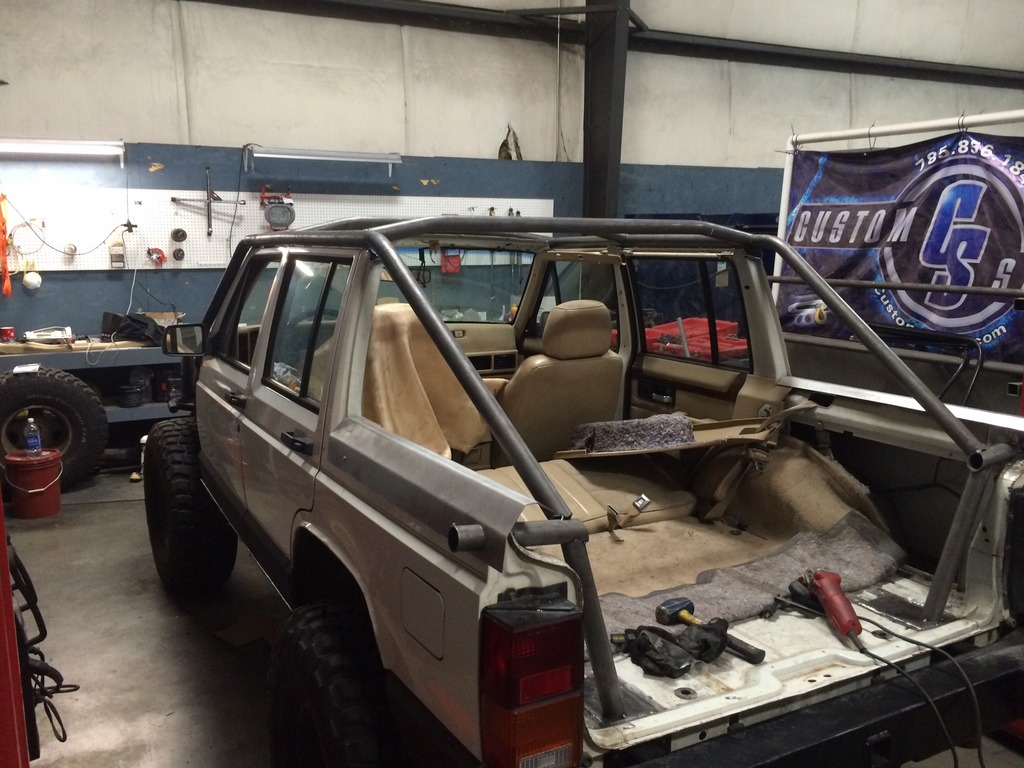
With a shakedown trip to the Rubicon in a couple of weeks it was time to put a cage in her! With the roof looking like this, I definitely wouldn't want to trust it in a roll. The goal was to put in a "medium duty" cage that will hold up well while rock crawling and maximize interior space for the dogs, camping gear and occasional passenger. Friday afternoon was spent gutting the interior and hacking the roof off.
With the rot removed, it was time to dust off the bender and set up the notcher! We ordered 3 sticks of 1.75x.120 for anything that might touch a rock and 2 sticks of 1.75x.095 for interior tubes and 1 stick of 1.5x.120 for miscellaneous support and gusseting. We went home, got some sleep and got up at 7am on Saturday to start day 2.
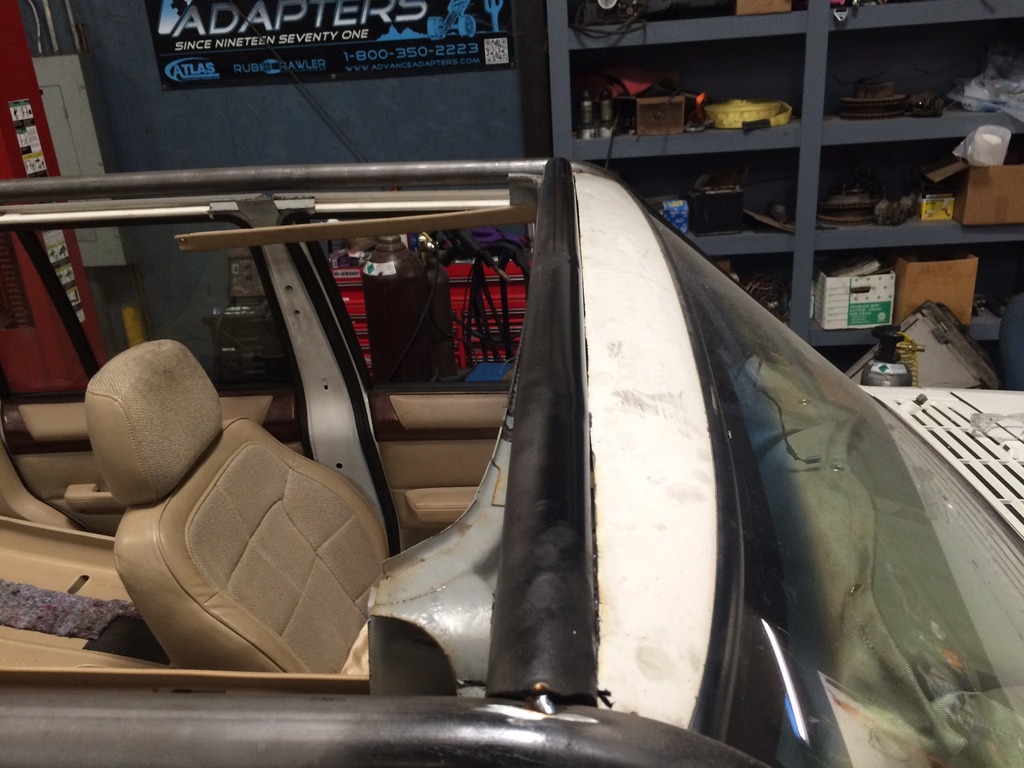
The bed side rails are made from .065 5052 aluminum that we bent on a pan brake to follow the body lines. The A to D pillar took awhile but we got it right the first time on the driver side! Of course when we went to do the passenger side we didn't get the last bend quite right. We just cut it, sleeved it and rotated it to fit. On each side, there was a total of 5 bends, each on a different plane.


With the rot removed, it was time to dust off the bender and set up the notcher! We ordered 3 sticks of 1.75x.120 for anything that might touch a rock and 2 sticks of 1.75x.095 for interior tubes and 1 stick of 1.5x.120 for miscellaneous support and gusseting. We went home, got some sleep and got up at 7am on Saturday to start day 2.
The bed side rails are made from .065 5052 aluminum that we bent on a pan brake to follow the body lines. The A to D pillar took awhile but we got it right the first time on the driver side! Of course when we went to do the passenger side we didn't get the last bend quite right. We just cut it, sleeved it and rotated it to fit. On each side, there was a total of 5 bends, each on a different plane.

 10-07-2015, 03:57 PM
#6
Junior Member
Thread Starter
Join Date: Oct 2015
Location: Paso Robles Ca
Posts: 36
Likes: 0
Received 0 Likes
on
0 Posts
Year: 1996
Model: Cherokee
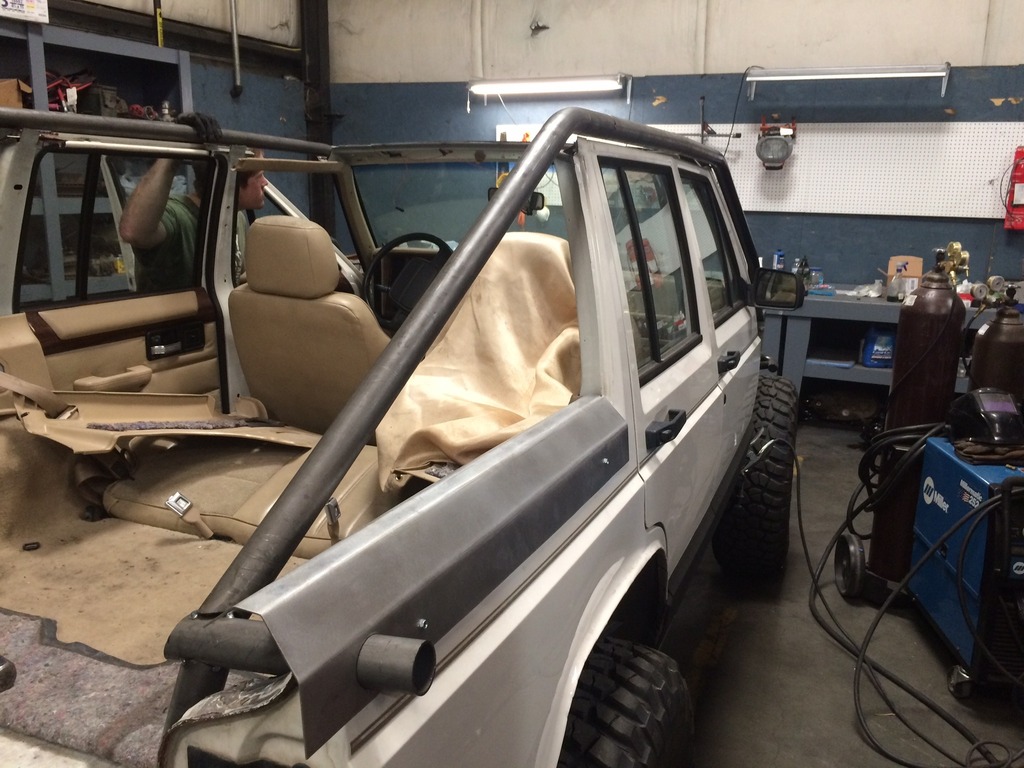
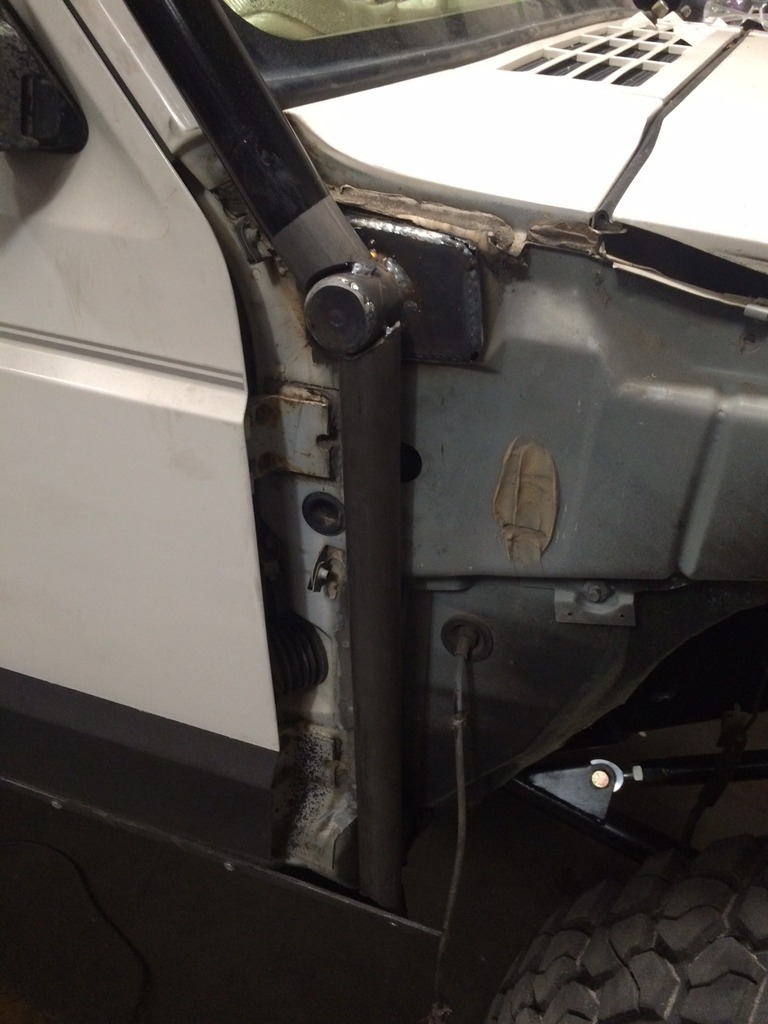
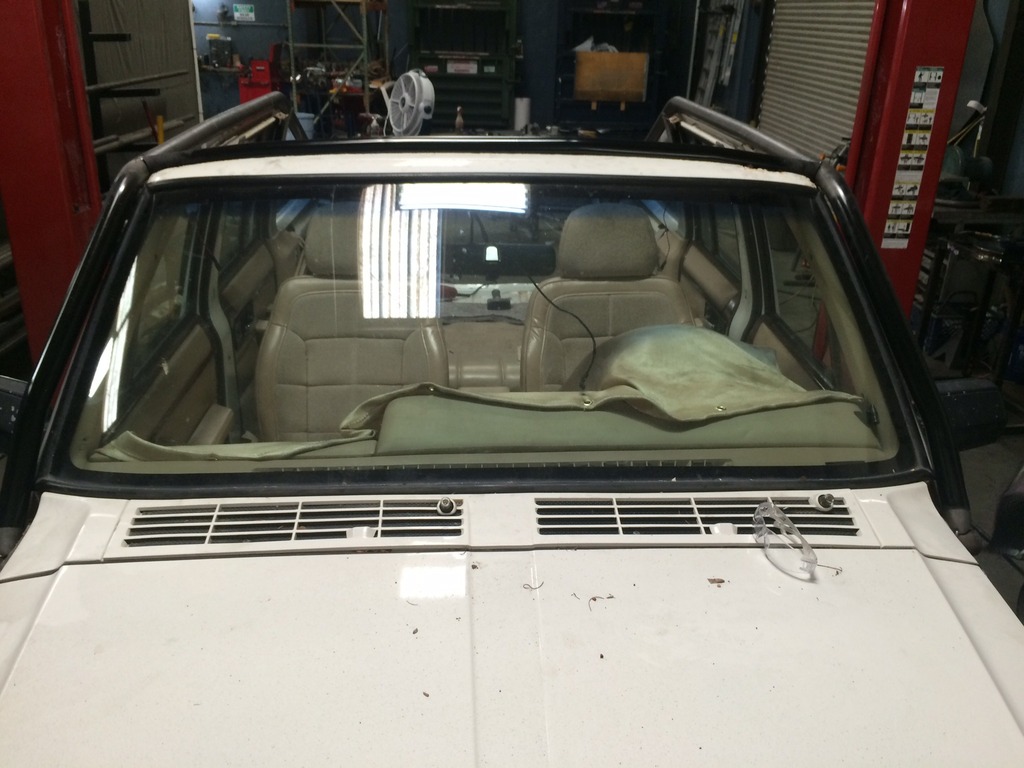
The windshield bar had 4 bends and went in pretty easy. The woman in me likes to plan ahead, so I painted pretty much every tube ahead of time that wasn't going to need future welding.
We started working Sunday nice and early with the overhead tube work. Due to the lack of interior triangulation, I wanted to make sure the roof was nice and strong. I wanted a slight rise in the center so that rain will run off once it gets a soft top.
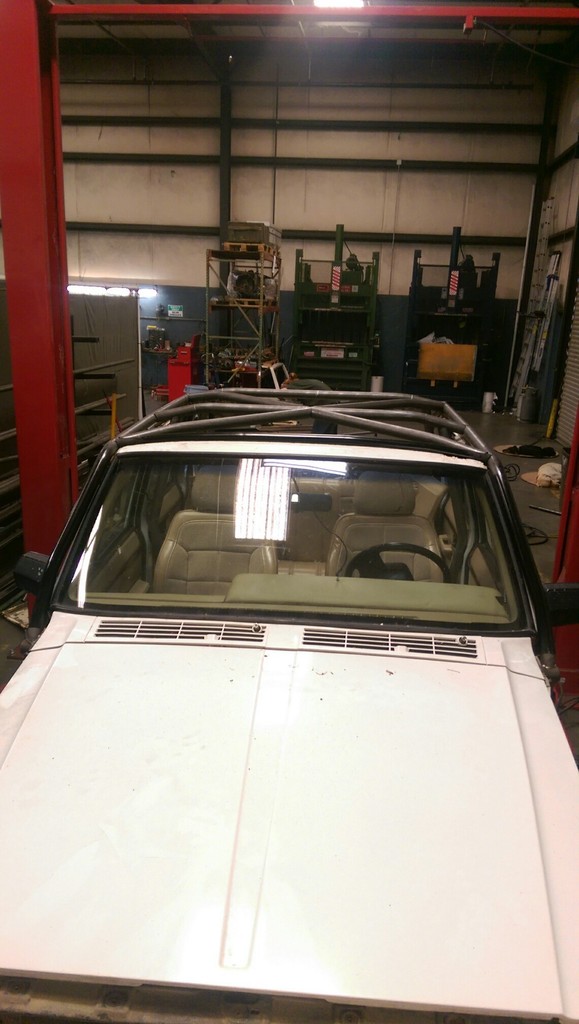
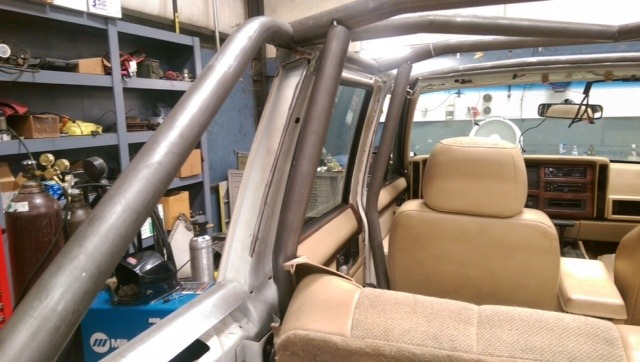
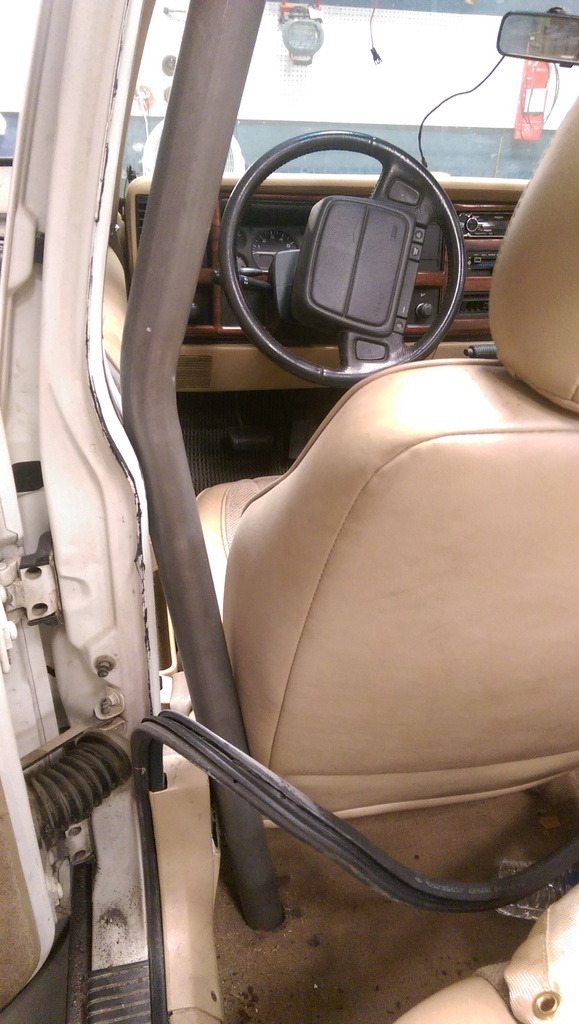
For the B and C pillar I wanted them as tight as possible to the body and not limiting floor space. I also wanted the backseat to still be able to fold down. The B pillars go down through the floor and tie into the frame rails.


I hope to have it finished by next Sunday! Left on the list is...
-tailgate/spare tire carrier
-finish weld the rest of the cage (got about 1/2 done)
-paint the rest of the cage
-plate work to tie the cage into the body
-finish the bed side rock sliders


We started working Sunday nice and early with the overhead tube work. Due to the lack of interior triangulation, I wanted to make sure the roof was nice and strong. I wanted a slight rise in the center so that rain will run off once it gets a soft top.


For the B and C pillar I wanted them as tight as possible to the body and not limiting floor space. I also wanted the backseat to still be able to fold down. The B pillars go down through the floor and tie into the frame rails.


I hope to have it finished by next Sunday! Left on the list is...
-tailgate/spare tire carrier
-finish weld the rest of the cage (got about 1/2 done)
-paint the rest of the cage
-plate work to tie the cage into the body
-finish the bed side rock sliders
Trending Topics
 ^^^^ What he said!!


 10-09-2015, 11:28 AM
#11
CF Veteran
Join Date: Jul 2012
Location: Andover, VT
Posts: 2,971
Received 226 Likes
on
176 Posts
Year: 1999
Model: Cherokee (XJ)
Engine: 4.0 L
Wow wow wow! Awesome work, you're really gettin after it! Every one of us loves to see a female XJer getting dirty working on their rig, can't wait to see more!


 10-26-2015, 10:37 PM
#15
Junior Member
Thread Starter
Join Date: Oct 2015
Location: Paso Robles Ca
Posts: 36
Likes: 0
Received 0 Likes
on
0 Posts
Year: 1996
Model: Cherokee
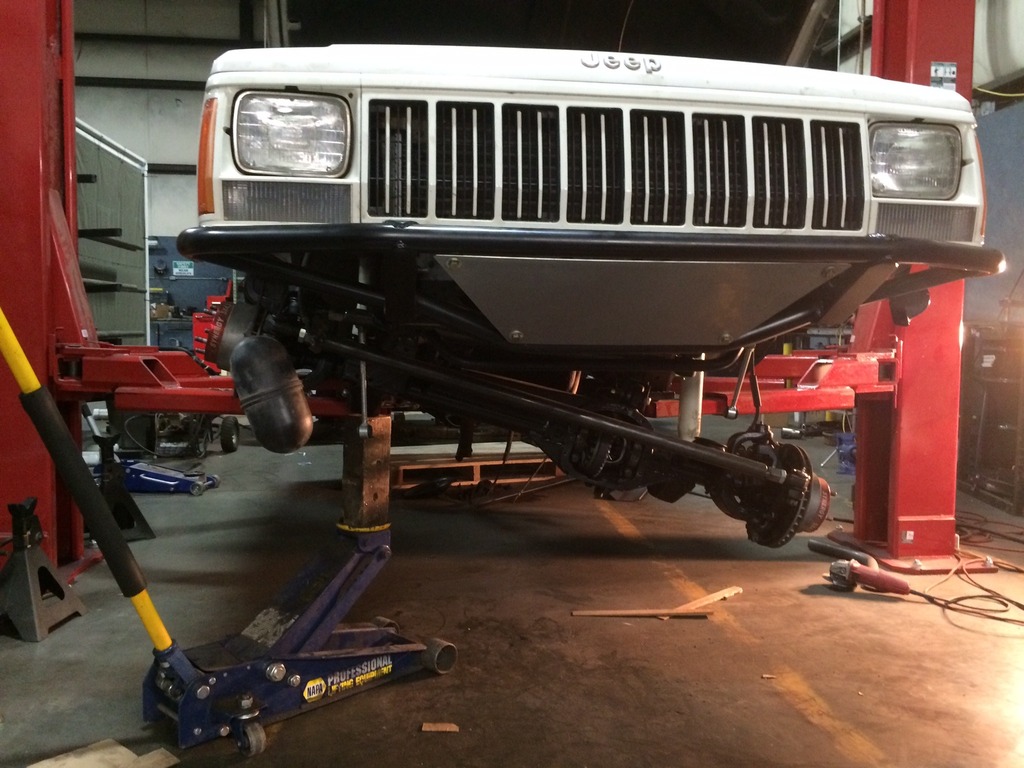
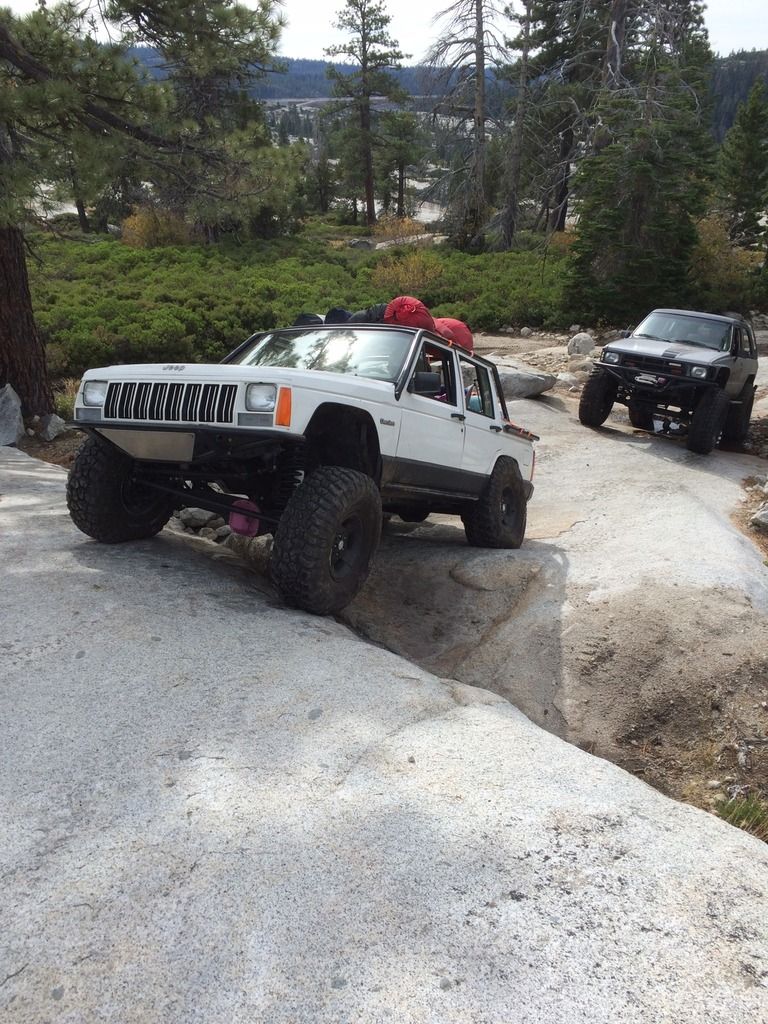
I took the wheeling beer can on her maiden voyage this past weekend to the Rubicon! To get her ready she needed a belly skid, gas tank skid and the sliders finished. I bought JCR's 3/16 steel gas tank skid. It didn't come with the right hardware but a quick trip to the hardware store fixed that and I had it installed in about an hour.
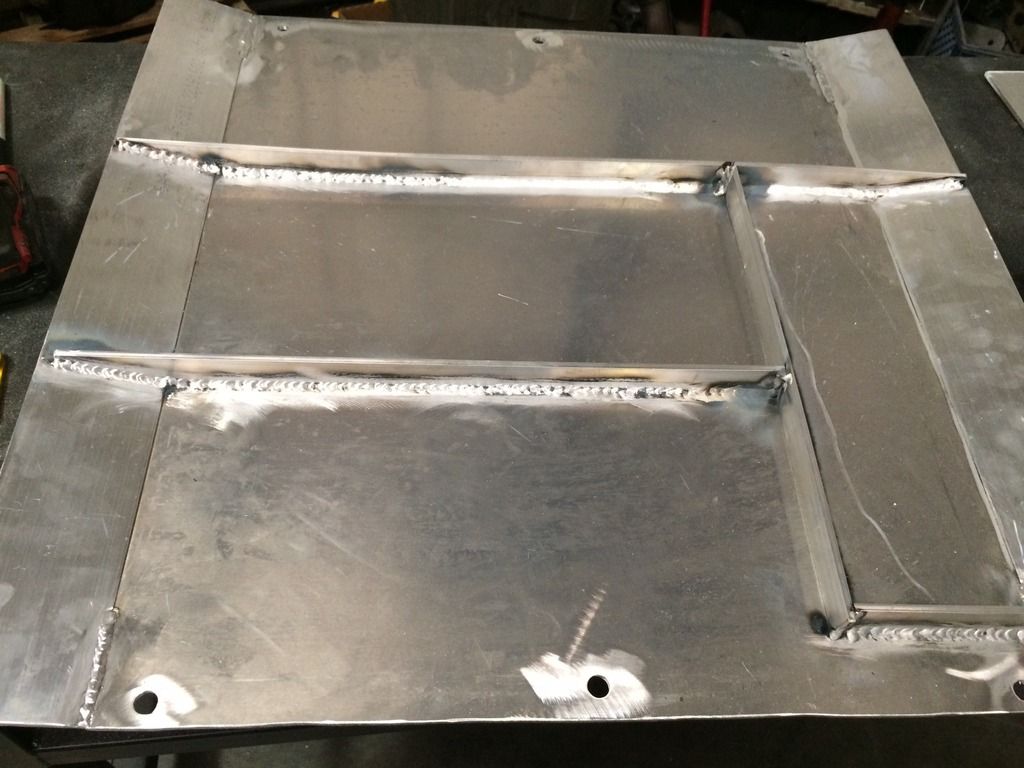
Riley made the belly skid out of 3/16 aluminum with a crossmember behind the cat. He had been itching to try out the spool gun so it was a perfect project. He added the cross bracing to make it more rigid.
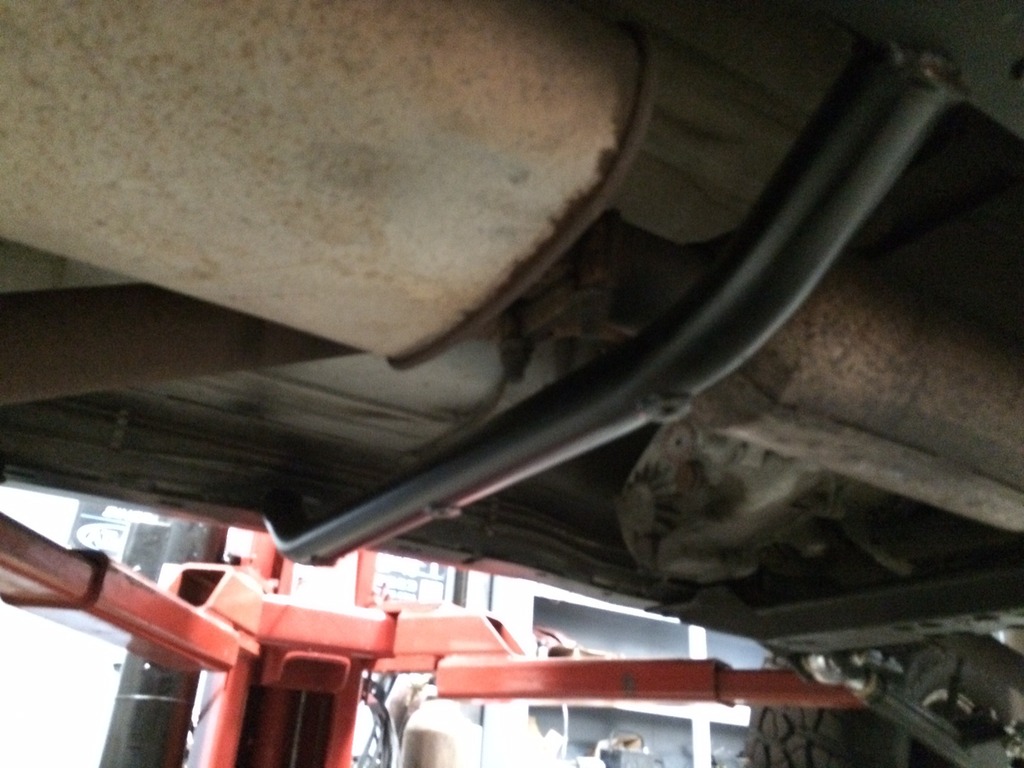

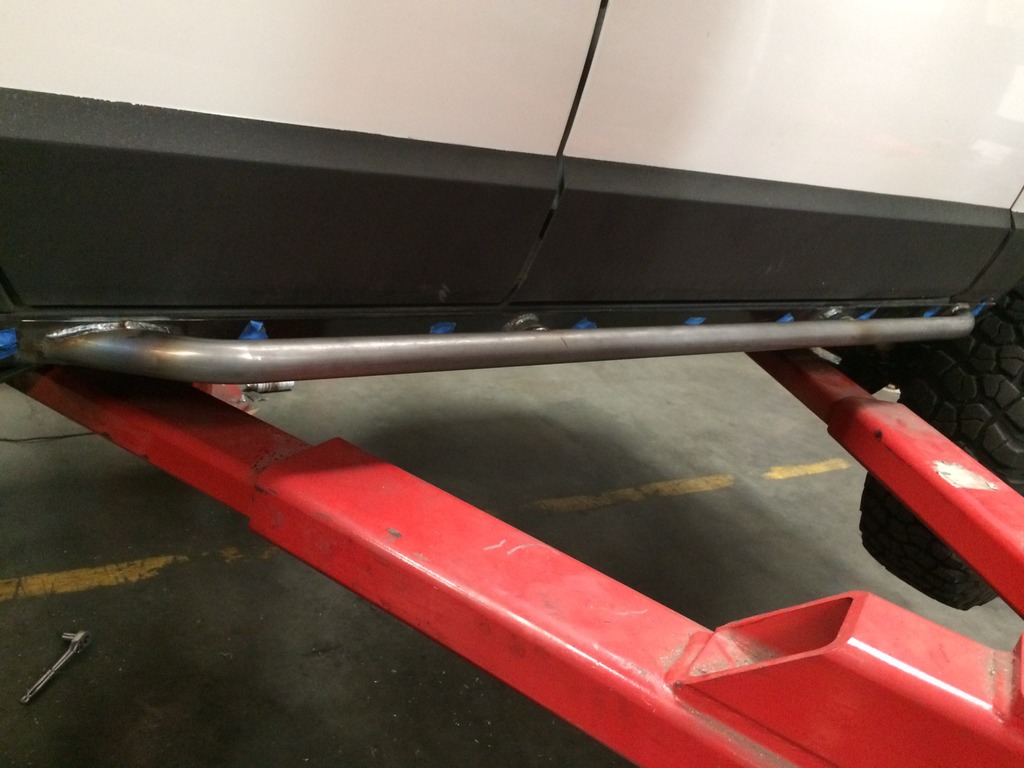
I had been waiting for Riley to get an 1 1/2" die for his bender so that we could finish the sliders. Hopefully it will keep the rocks out of the doors.
The last thing it needed before we left was pink rock lights! I ordered some pink Eagle Eye's off of Ebay. At $20 for 10 of them you could light up the entire Rubicon and still have money left over for beer. We stayed with friends in Sac on Friday and headed up to the trail at 5am on Saturday. We ended up wheeling Wentworth Springs Trail which spits you out onto the Rubicon Trail just past the slabs.
There is one really fun section on Wentworth Springs that I go really bound up on. It broke the tangs off the yoke on my rear axle and shot the u-joint caps out. I pulled the caps off of my spare u-joint and put them on but the straps had stretched so we shimmed them with strips of beer can and tack welded the caps to the yoke using two 12V batteries, some jumper cables and a stick rod.
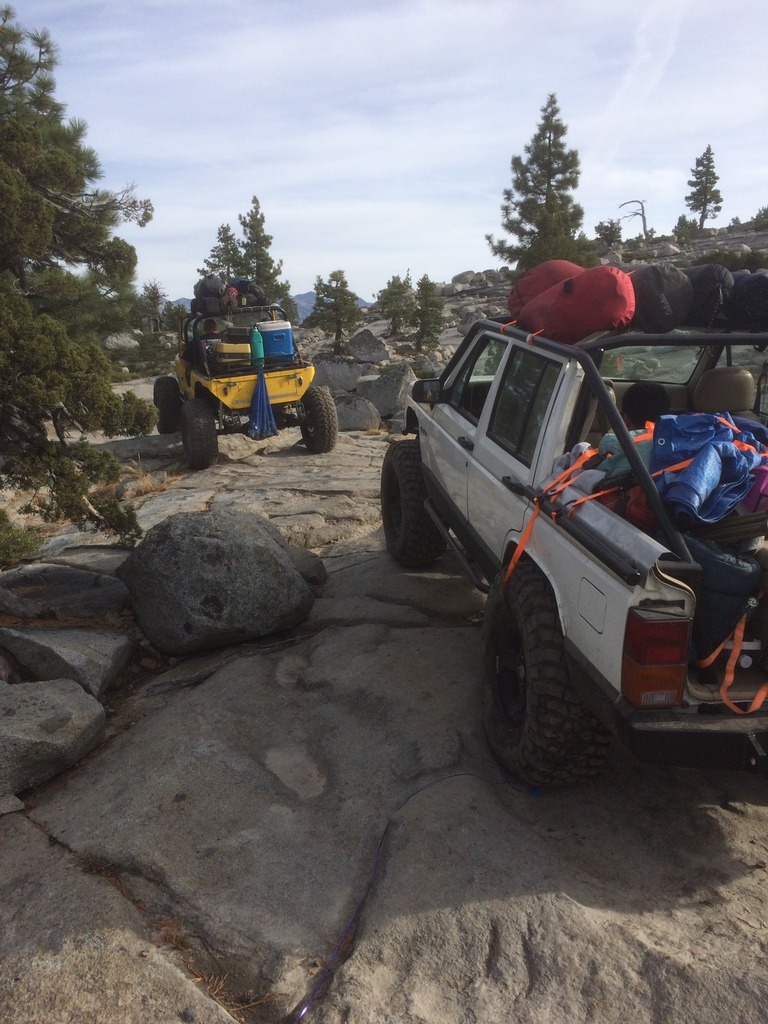
With four people and all of our camping gear it was riding dirty low and rubbing in the back. We had pulled a leaf out of the OME pack to try and get it to ride more level but that ended up making the springs S under load. Someone in our group carries two xj overload springs because he is notorious for breaking front main leaves. With those and some custom Sierra Edition bump stop extensions I was good to go.
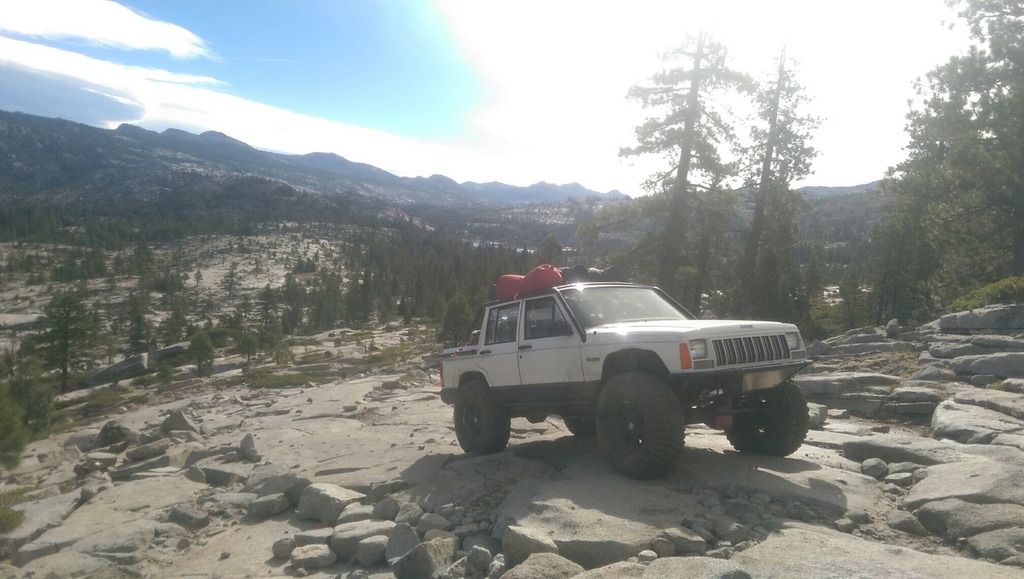
The rest of the trail was smooth sailing and I had a blast. We made it to Buck by late afternoon and had almost the entire trail to ourselves. Sunday morning one of the guy's rigs wouldn't start up (no compression) so we ended up having to tow him all the way back to the trailers. The Jeep did awesome but I want bigger tires so an axle upgrade is probably in the near future. Riley has a 9in and hp 44 out of full size Bronco laying around that I might try to steal when he isn't looking...

Riley made the belly skid out of 3/16 aluminum with a crossmember behind the cat. He had been itching to try out the spool gun so it was a perfect project. He added the cross bracing to make it more rigid.


I had been waiting for Riley to get an 1 1/2" die for his bender so that we could finish the sliders. Hopefully it will keep the rocks out of the doors.

The last thing it needed before we left was pink rock lights! I ordered some pink Eagle Eye's off of Ebay. At $20 for 10 of them you could light up the entire Rubicon and still have money left over for beer. We stayed with friends in Sac on Friday and headed up to the trail at 5am on Saturday. We ended up wheeling Wentworth Springs Trail which spits you out onto the Rubicon Trail just past the slabs.
There is one really fun section on Wentworth Springs that I go really bound up on. It broke the tangs off the yoke on my rear axle and shot the u-joint caps out. I pulled the caps off of my spare u-joint and put them on but the straps had stretched so we shimmed them with strips of beer can and tack welded the caps to the yoke using two 12V batteries, some jumper cables and a stick rod.
With four people and all of our camping gear it was riding dirty low and rubbing in the back. We had pulled a leaf out of the OME pack to try and get it to ride more level but that ended up making the springs S under load. Someone in our group carries two xj overload springs because he is notorious for breaking front main leaves. With those and some custom Sierra Edition bump stop extensions I was good to go.

The rest of the trail was smooth sailing and I had a blast. We made it to Buck by late afternoon and had almost the entire trail to ourselves. Sunday morning one of the guy's rigs wouldn't start up (no compression) so we ended up having to tow him all the way back to the trailers. The Jeep did awesome but I want bigger tires so an axle upgrade is probably in the near future. Riley has a 9in and hp 44 out of full size Bronco laying around that I might try to steal when he isn't looking...


