92 MJ Project
 03-19-2012, 10:42 PM
#1
Member
Thread Starter
Join Date: Mar 2012
Location: Junction City, Kansas
Posts: 131
Likes: 0
Received 1 Like
on
1 Post
Year: 86/91/92
Model: Comanche
I picked up this 1992 Comanche in January 2009. It had the 4.0 HO, AW4, NP231, Dana 30/35, AC, PB, PS, and even a CD player. The truck was generally untouched, just driven 185K miles.
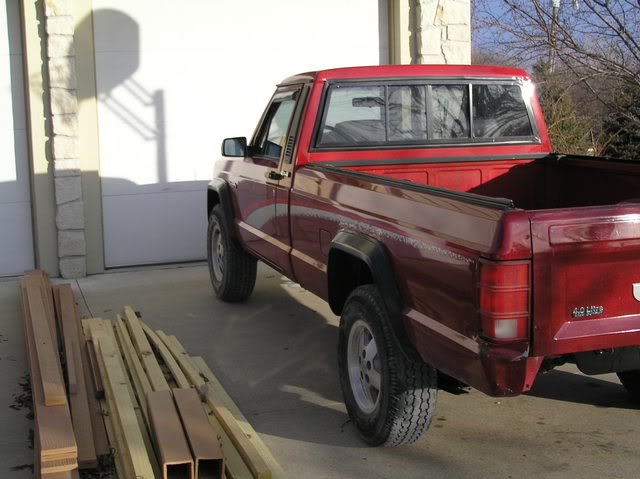
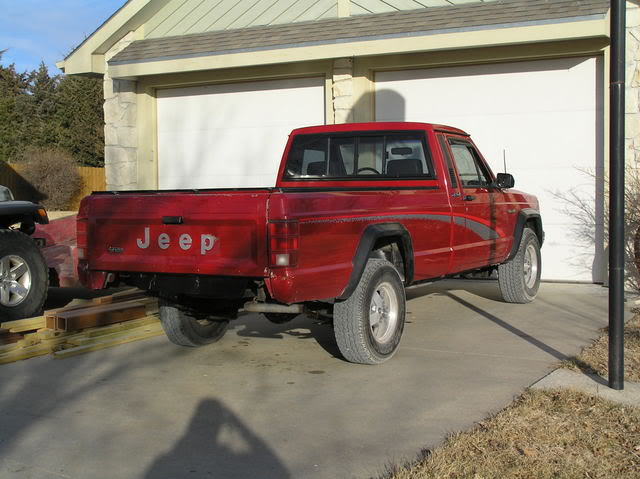
This truck suffered from some major body rot hidden behind bondo around the rear flares, cab corners, rockers, floor pans, and doors. Initially I had planned on doing some small repairs to the truck and driving it. However, after realizing the extent of damages my plan changed and I decided to build it as a 1999 MJ (if Chrysler ever built one) with some tasteful modifications and drive it for another 185,000 miles!!!!
I spent a little time getting a loose rendering done of what my ultimate goal for the MJ is.
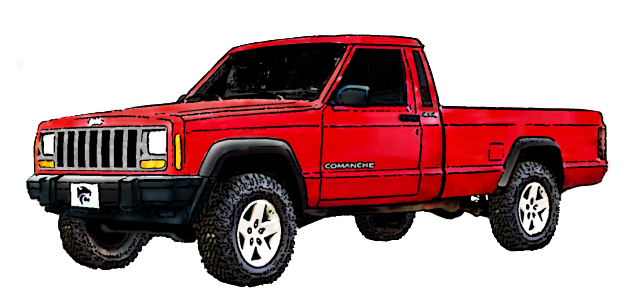
(rendering should include more lift and larger tires....)
- 4.0/AW4/242 (2-AWD-4H-4L)
- Dana 44 Rubicon Front axle and MJ Dana 44 rear axle (rear rubi locker/LSD) with 4.10 gear ratio
- JKS ACOS Pro bumps/spacers with 3" lift springs up front with JKS control arms, Currie Track bar and JKS swaybar disconnects
- HellCreek 3" lift springs in the rear
- Rubicon Moab wheels with an aggressive AT 31" tire
- Black flares
- Full on 97+ conversion (harness, drive train, interior, doors)
- Jeepsticker's "Comanche" door sticker
- SkinnyPedal's IPF/HID headlight conversion (or projector retrofits)
- Tinted side and back windows
- ActonFab hidden basic winch bumper 'capped' with the stock bumper for a pseudo-hidden winch
This truck suffered from some major body rot hidden behind bondo around the rear flares, cab corners, rockers, floor pans, and doors. Initially I had planned on doing some small repairs to the truck and driving it. However, after realizing the extent of damages my plan changed and I decided to build it as a 1999 MJ (if Chrysler ever built one) with some tasteful modifications and drive it for another 185,000 miles!!!!
I spent a little time getting a loose rendering done of what my ultimate goal for the MJ is.
(rendering should include more lift and larger tires....)
- 4.0/AW4/242 (2-AWD-4H-4L)
- Dana 44 Rubicon Front axle and MJ Dana 44 rear axle (rear rubi locker/LSD) with 4.10 gear ratio
- JKS ACOS Pro bumps/spacers with 3" lift springs up front with JKS control arms, Currie Track bar and JKS swaybar disconnects
- HellCreek 3" lift springs in the rear
- Rubicon Moab wheels with an aggressive AT 31" tire
- Black flares
- Full on 97+ conversion (harness, drive train, interior, doors)
- Jeepsticker's "Comanche" door sticker
- SkinnyPedal's IPF/HID headlight conversion (or projector retrofits)
- Tinted side and back windows
- ActonFab hidden basic winch bumper 'capped' with the stock bumper for a pseudo-hidden winch
 03-19-2012, 10:49 PM
#2
Member
Thread Starter
Join Date: Mar 2012
Location: Junction City, Kansas
Posts: 131
Likes: 0
Received 1 Like
on
1 Post
Year: 86/91/92
Model: Comanche
After months of searching, getting close then coming up with nothing, I picked this beautiful donor up from a little town near Columbia, MO a year later in January of 2010
1999 Jeep Cherokee
- 4.0
- AW4
- NP231
- 8.25
- Cruise
- 155,100 miles
- New 235/75r156 tires
- New AC system
- Rolled on its side into a ditch
- Exhaust cut right after Catalytic Converter
- Shot front axle outter shaft u-joint
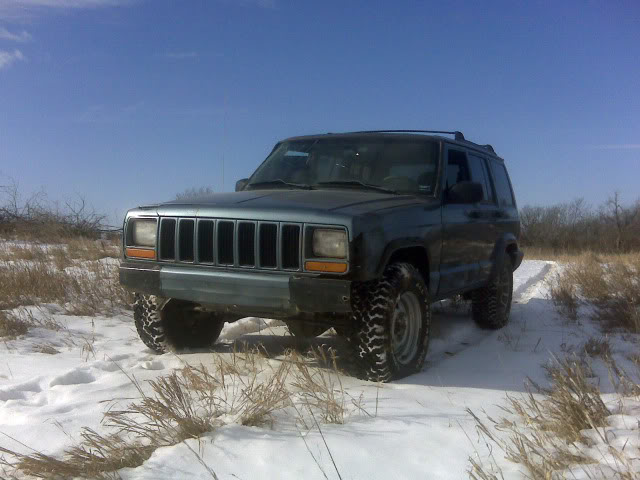
I worked with the donor, thinning down the wiring harness for the MJ to make sure everything works 100% before I take it all apart to shove in the truck.
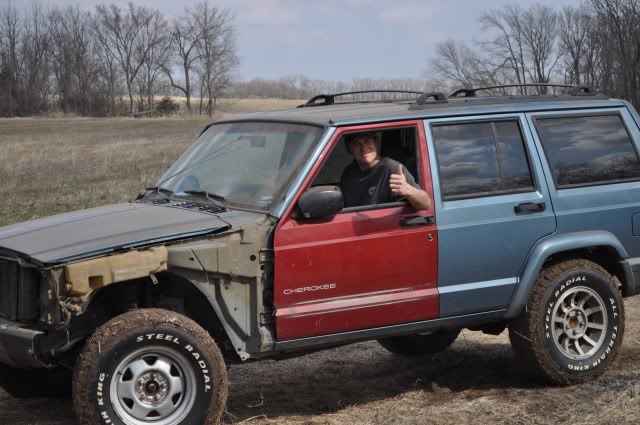
Image of the vitals:
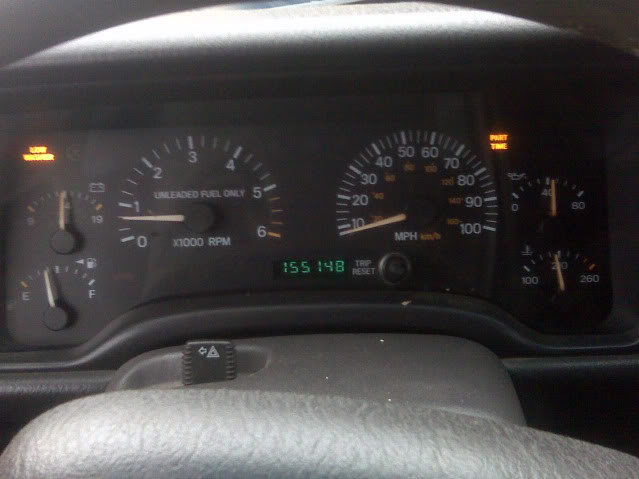
I was able to get my grubby hands on an XJ Infinity stereo system for the Jeep. Comes with the factory CD player, amp, harness, and speakers. I have always liked factory Jeep radios, and their sound, over the misfit aftermarket options. I will have to get creative to get all of it shoved in the MJ. Then I sold the axles and some of the hatch parts from the donor.
1999 Jeep Cherokee
- 4.0
- AW4
- NP231
- 8.25
- Cruise
- 155,100 miles
- New 235/75r156 tires
- New AC system
- Rolled on its side into a ditch
- Exhaust cut right after Catalytic Converter
- Shot front axle outter shaft u-joint
I worked with the donor, thinning down the wiring harness for the MJ to make sure everything works 100% before I take it all apart to shove in the truck.
Image of the vitals:
I was able to get my grubby hands on an XJ Infinity stereo system for the Jeep. Comes with the factory CD player, amp, harness, and speakers. I have always liked factory Jeep radios, and their sound, over the misfit aftermarket options. I will have to get creative to get all of it shoved in the MJ. Then I sold the axles and some of the hatch parts from the donor.
03-19-2012, 10:56 PM
#3
Member
Thread Starter
Join Date: Mar 2012
Location: Junction City, Kansas
Posts: 131
Likes: 0
Received 1 Like
on
1 Post
Year: 86/91/92
Model: Comanche
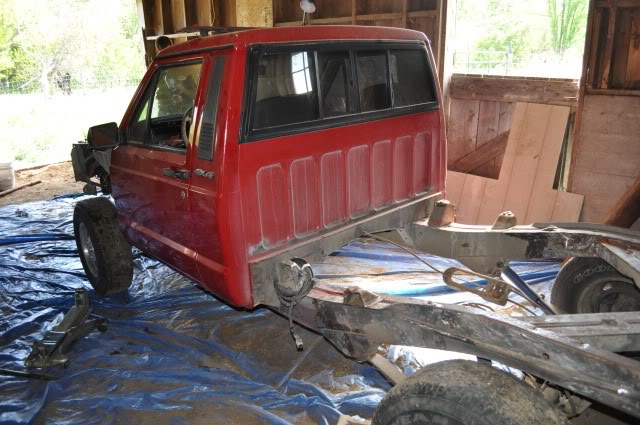
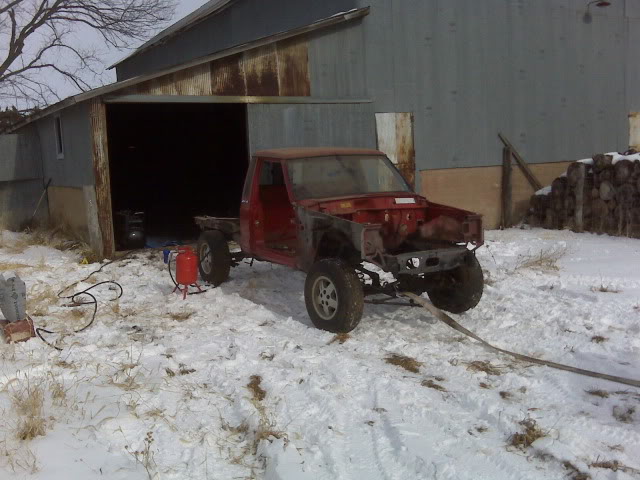
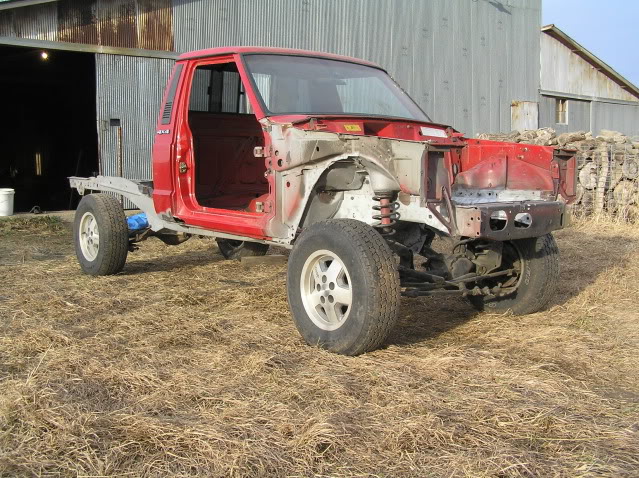
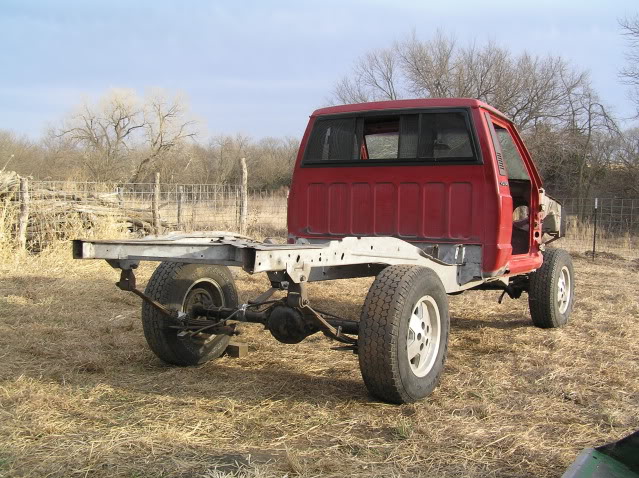
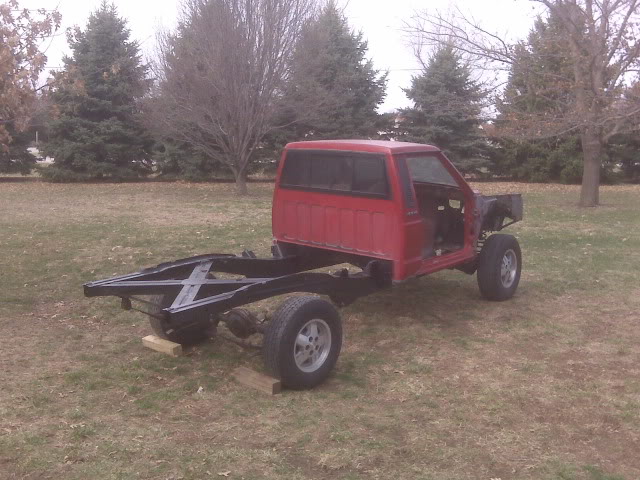
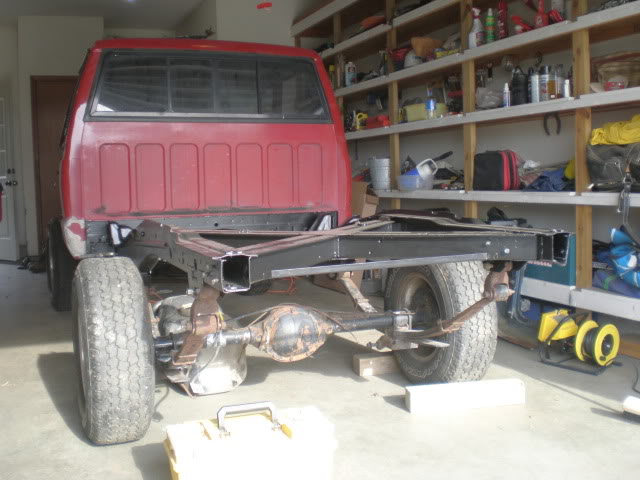
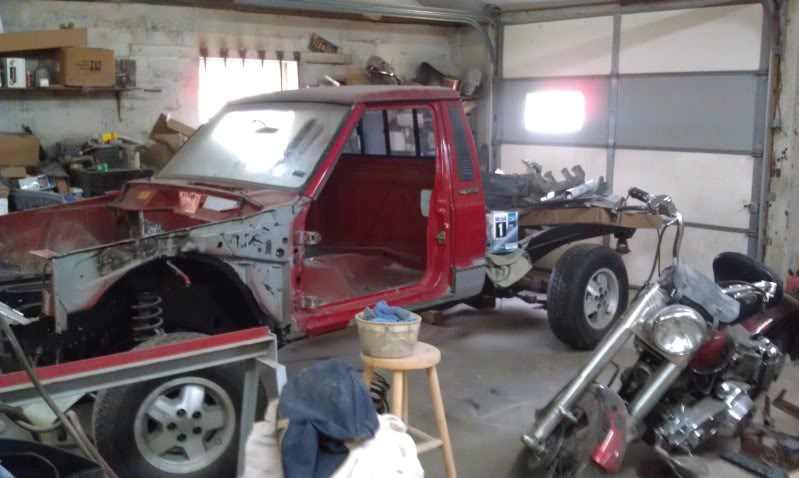
The truck needed stripped and fitted:
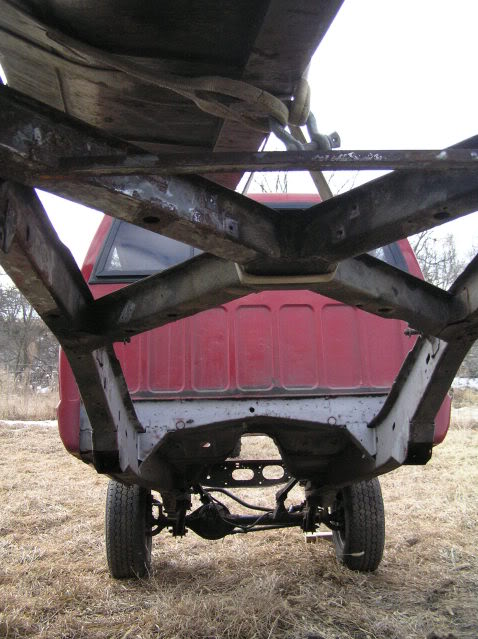
It was time to pull the drivetrain out. Decided to take out the 4.0/AW4/231 as one piece. Used our John Deere 4210 loader to pull it out, worked great!
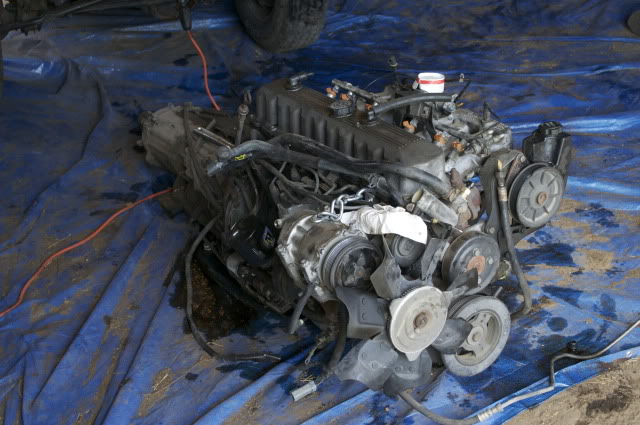
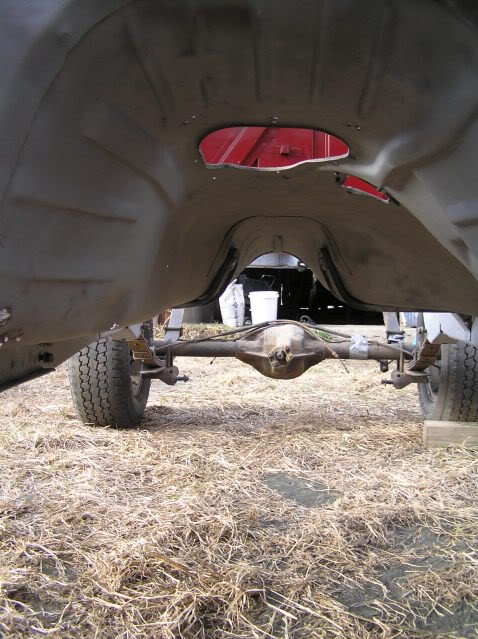
Some MJ nudes:
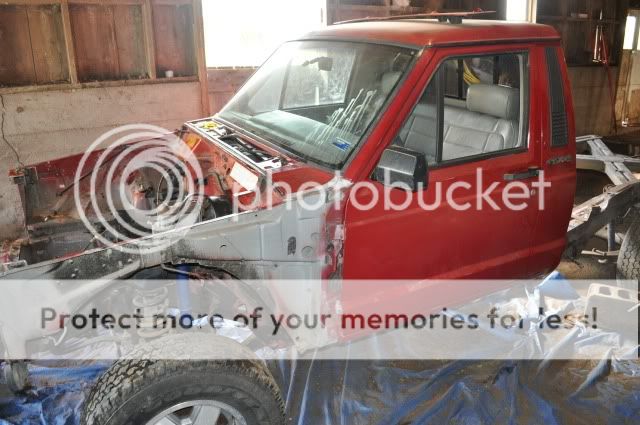
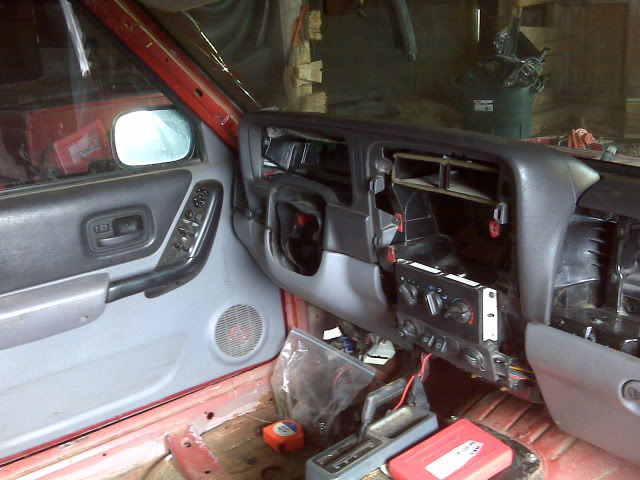
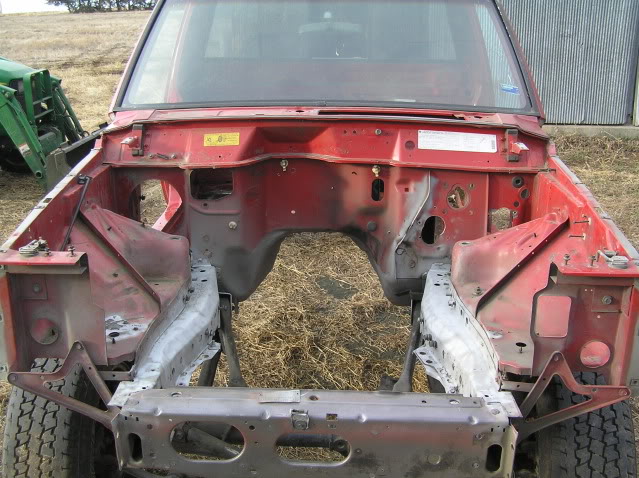
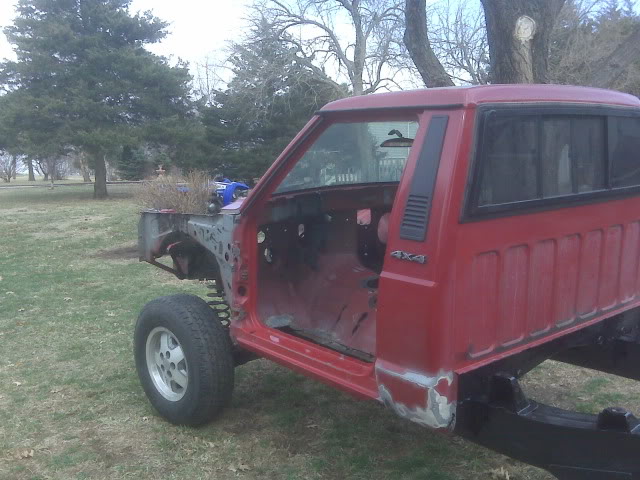
Then I gutted the interior:
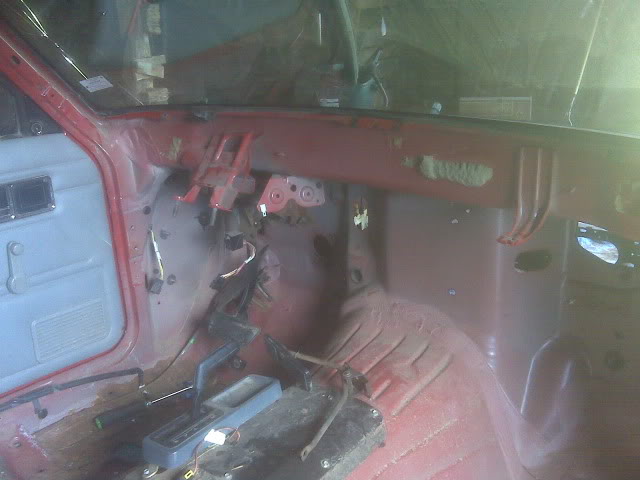
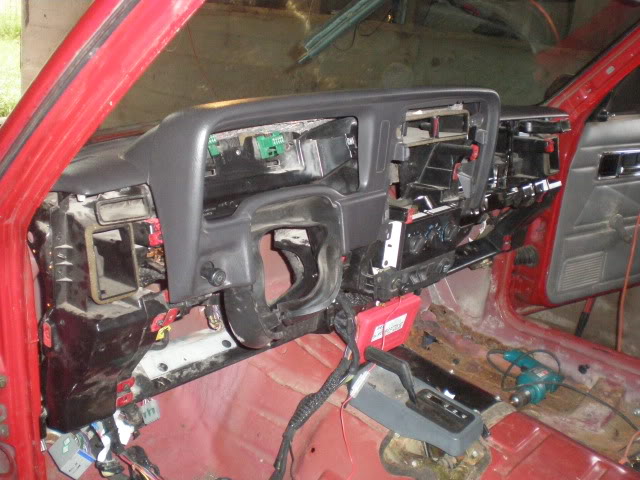
My next step was getting the XJ dash fitted. First I used a spot weld driller to remove the 3 brackets from the firewall. Then I started testing out how the XJ dash will fit. Need to get the top of it mounted securely. I was surprised how little effort this took. Just needed a couple new holes drilled and she was up and in place.
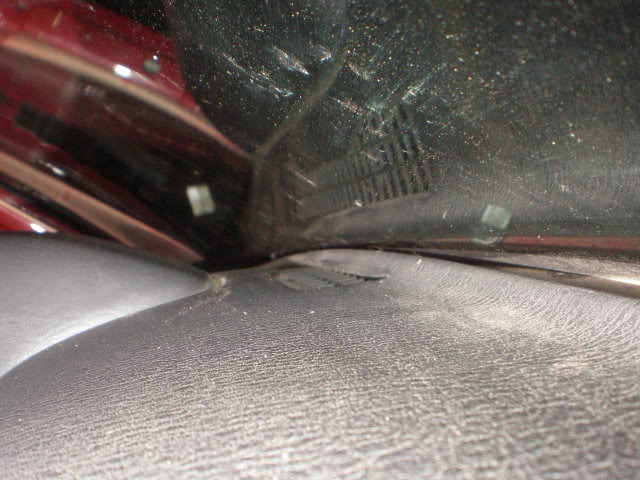
Dash to windsheild clearance.
I removed the MJs doors. Lets just say, 200K miles of rust made this a chore. I wound up cutting off 6 of the bolt heads due to their rusted nature.
I got the doors hung and continued to test fit more of the dash pieces
Once the dash, steering column, foot e-brake and firewall modifications were squared away, I stripped the truck down once again for media blasting:
Started to blast with my new Harbor Freight 20lb blaster and Black Diamond media from Tractor Supply. This is how it started:
It took awhile to get the blaster setup and working correctly. Used up the two bags of media and almost got the rear frame rails cleaned up. The undercoating was tough/slow going, but the Black Diamond media cut through it with two passes.
The finish:
This was my first pass, with the smallest nozzle so it is a little splotchy:
It was time to pull the drivetrain out. Decided to take out the 4.0/AW4/231 as one piece. Used our John Deere 4210 loader to pull it out, worked great!
Some MJ nudes:
Then I gutted the interior:
My next step was getting the XJ dash fitted. First I used a spot weld driller to remove the 3 brackets from the firewall. Then I started testing out how the XJ dash will fit. Need to get the top of it mounted securely. I was surprised how little effort this took. Just needed a couple new holes drilled and she was up and in place.
Dash to windsheild clearance.
I removed the MJs doors. Lets just say, 200K miles of rust made this a chore. I wound up cutting off 6 of the bolt heads due to their rusted nature.
I got the doors hung and continued to test fit more of the dash pieces
Once the dash, steering column, foot e-brake and firewall modifications were squared away, I stripped the truck down once again for media blasting:
Started to blast with my new Harbor Freight 20lb blaster and Black Diamond media from Tractor Supply. This is how it started:
It took awhile to get the blaster setup and working correctly. Used up the two bags of media and almost got the rear frame rails cleaned up. The undercoating was tough/slow going, but the Black Diamond media cut through it with two passes.
The finish:
This was my first pass, with the smallest nozzle so it is a little splotchy:
Last edited by 87Warrior; 03-20-2012 at 06:48 AM.
03-19-2012, 11:01 PM
#4
Member
Thread Starter
Join Date: Mar 2012
Location: Junction City, Kansas
Posts: 131
Likes: 0
Received 1 Like
on
1 Post
Year: 86/91/92
Model: Comanche
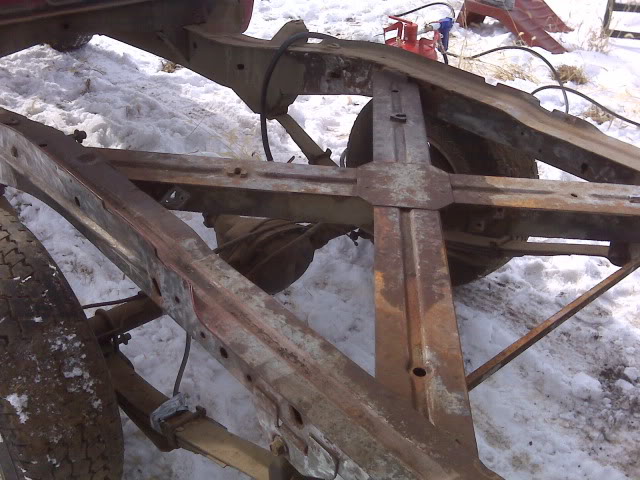
Slowly I made some more progress on the frame.
This was in the way, so I removed it:
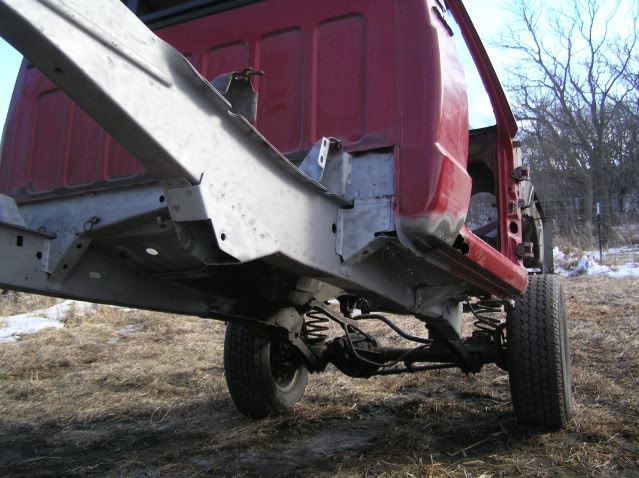
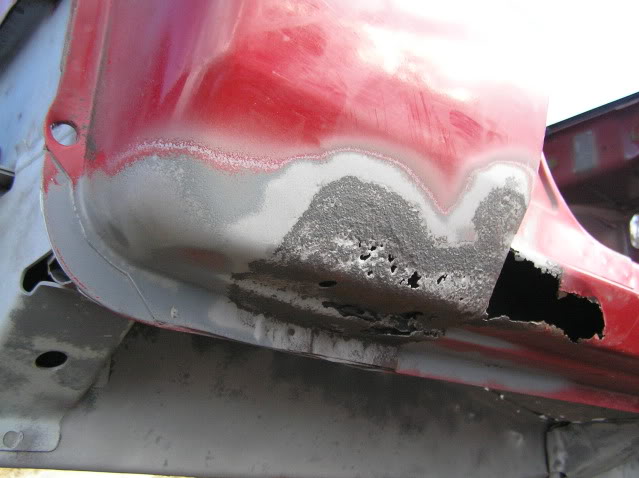
Some of the post-blasting-pre-update pics:
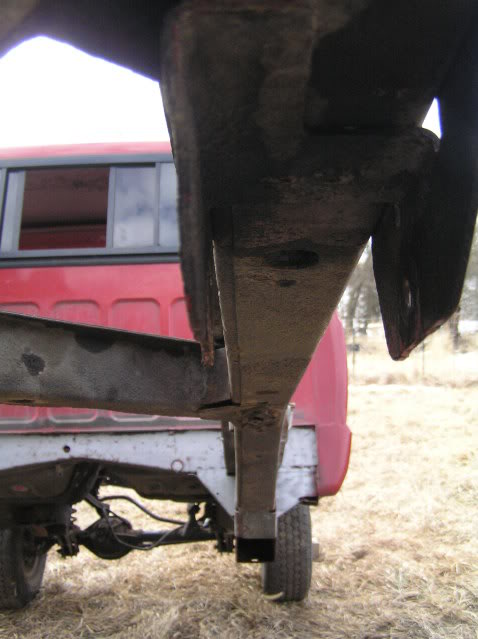
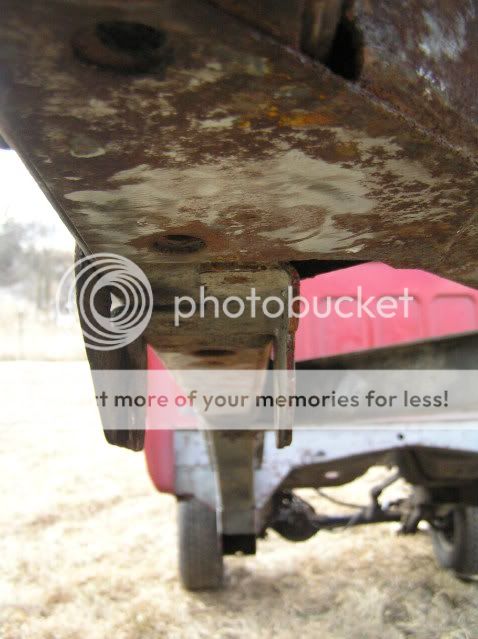
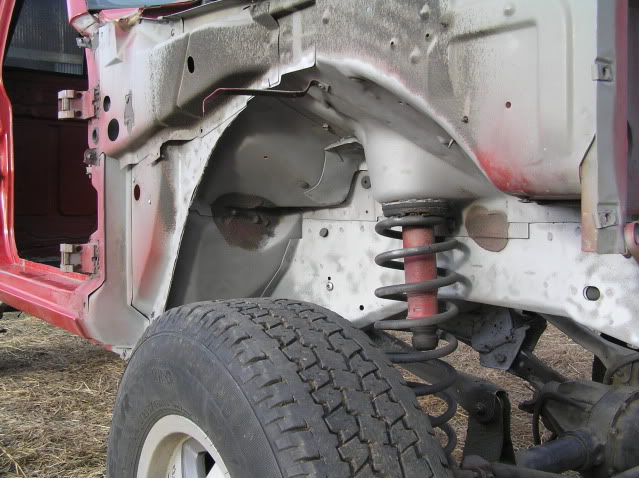
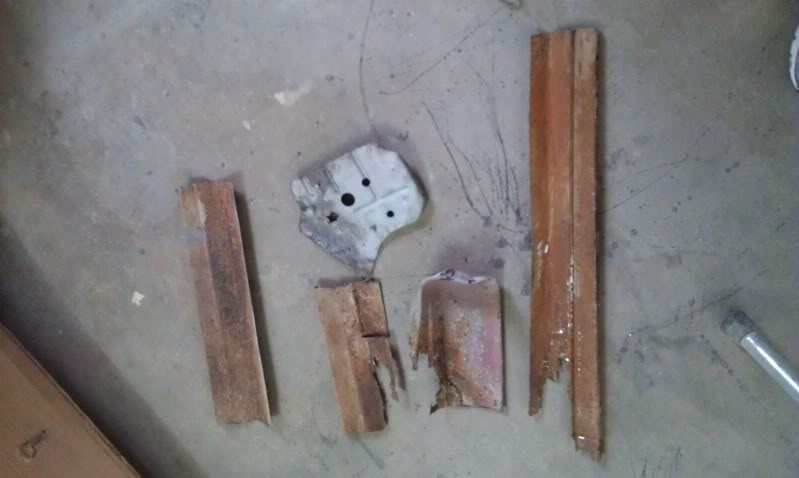
This is the worst of it. Located above the rear bumpstop location.
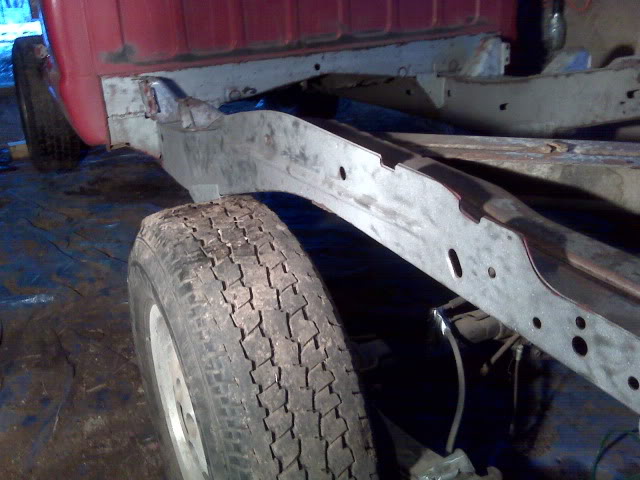
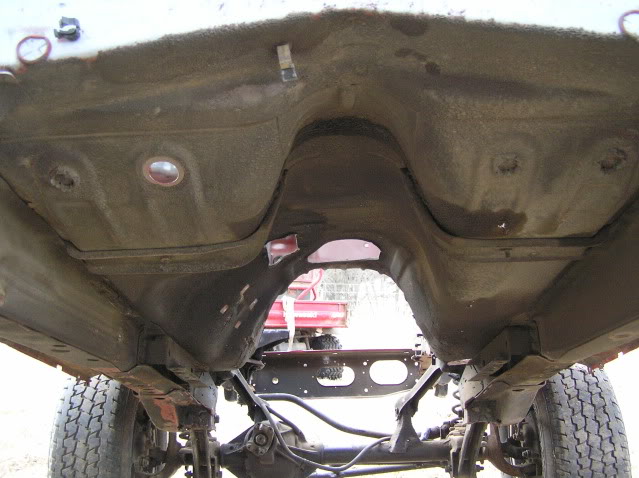
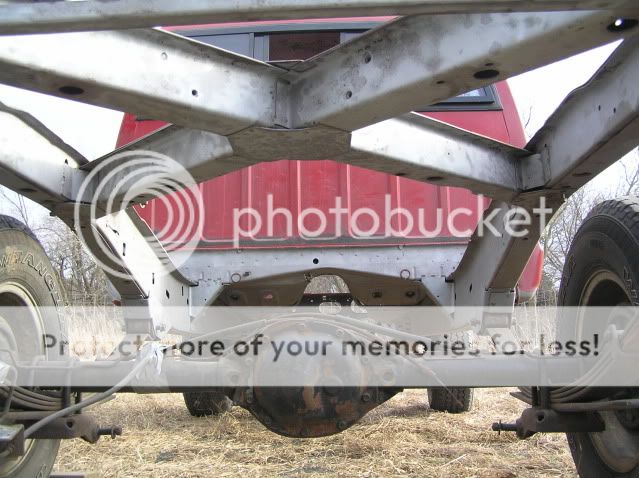
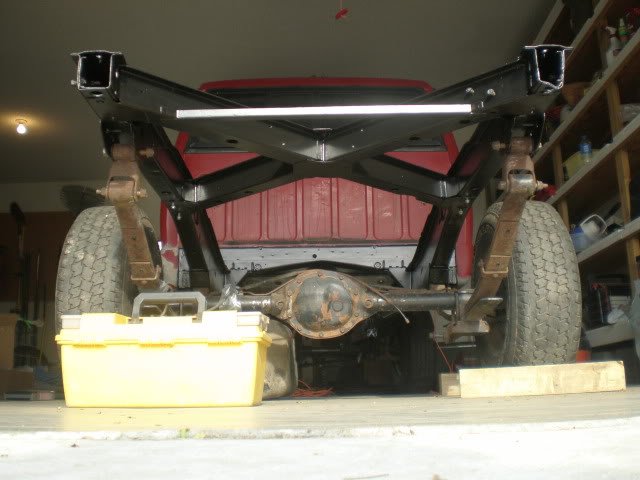
After some blasting, the under carriage:
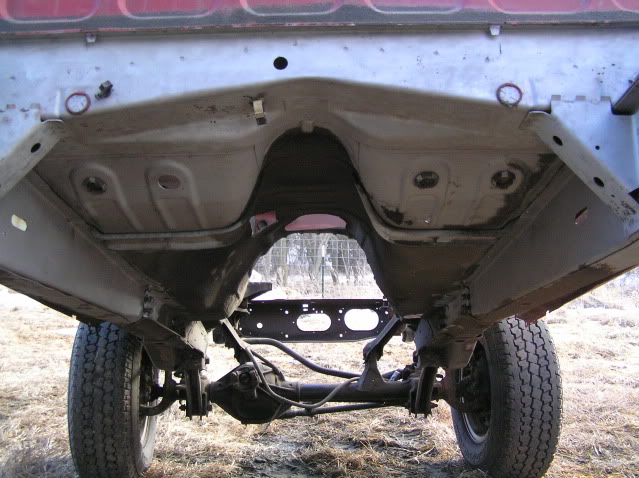
(I needed to degrease the rest of it. I burned through A LOT of media trying to blast the 1/4" layer of grease over the under coating)
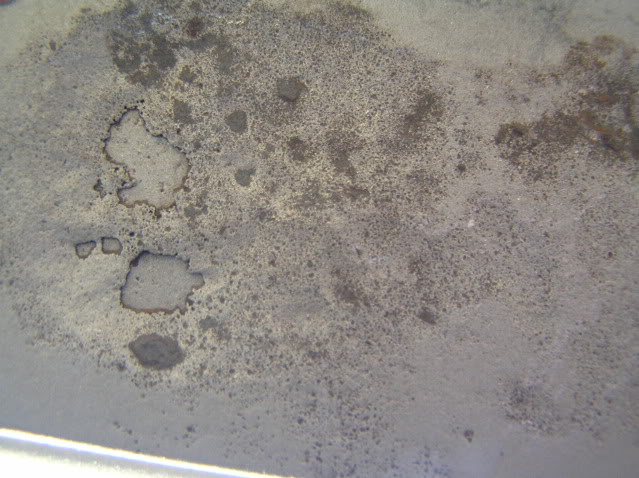
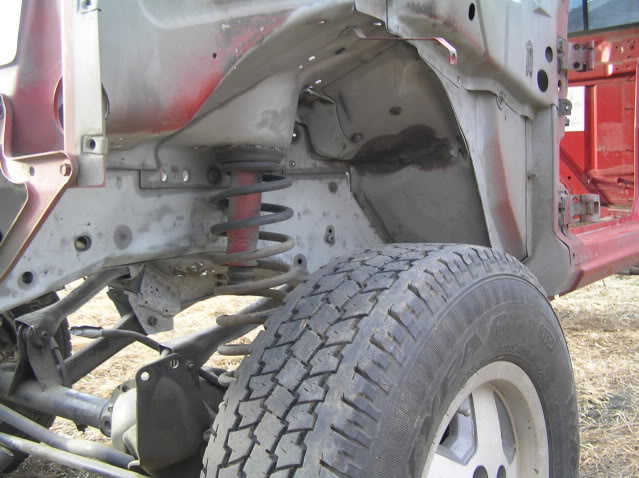
Just how good is that cab corner... blasted until the sheet metal quit disappearing.
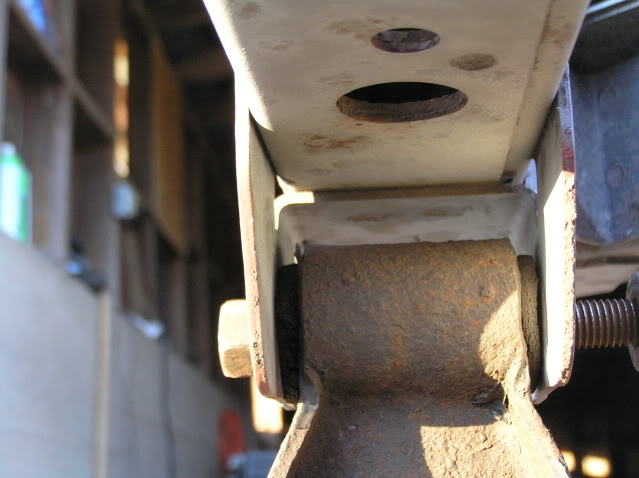
Cleaned up spring hanger:
I was able to reuse the media I collected on a tarp. A simple 6" strainer from the Walmart kitchen section was used to filter the used media. Worked perfect!
After several weeks, I finally finished blasting the frame/chassis. Took much longer than I anticipated, but the HF blaster held through it all and is ready for more.
Overall Shots:
Engine Bay:
Passenger Inner Fender:
Driver Inner Fender:
Under Carriage:
A few spots need cleaned up, but I will use a flapper wheel on an angle grinder. Now I need to blow out the frame and brush on POR15.
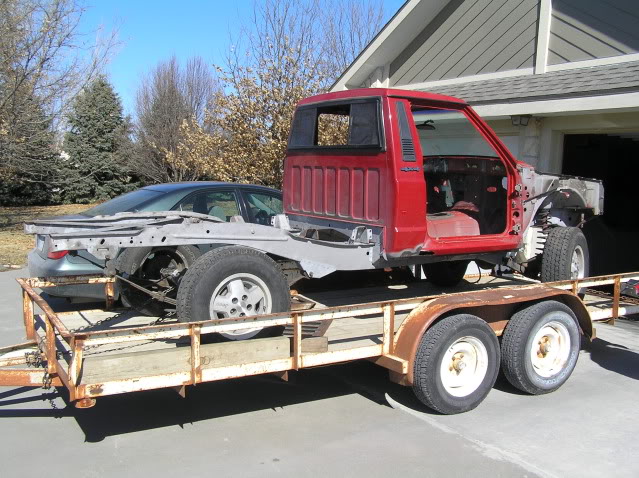
I decided to drag the truck to a garage with CONCRETE FLOORS! Here she is getting ready to go into the "POR15 Booth"
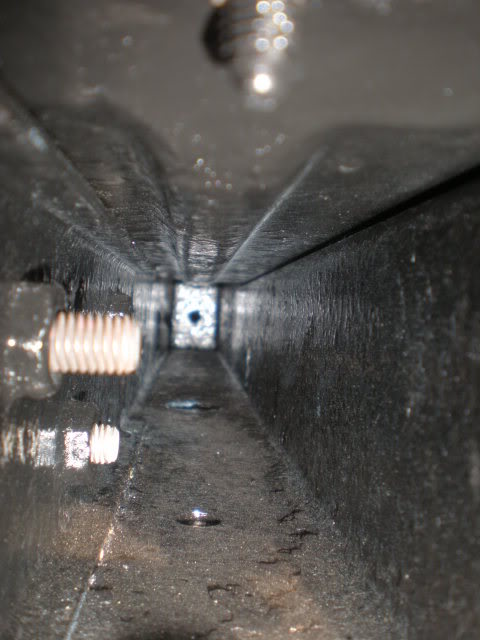
Here is an image of some stamping I found on the MJ frame (passenger inner fender well and inner frame and driver inner fender well and inner frame)
The deeper number changes from location to location (26155, 12134, 13571 and *unknown*)
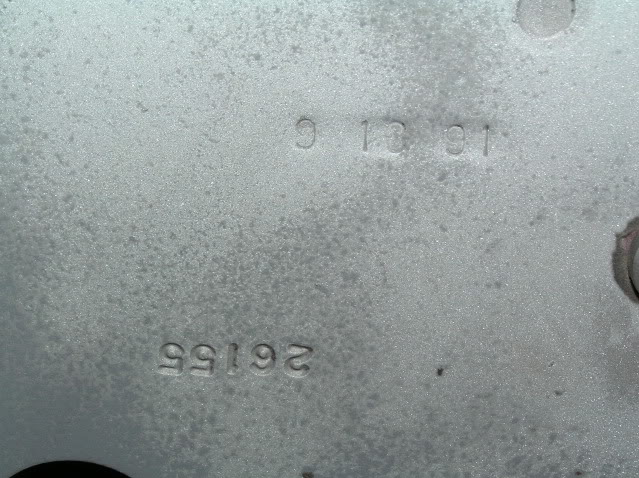
9-13-91 build? Not sure about that, maybe when the frame was built. The build sheet indicates a 9-26-91 build date with an In Service date of 10-26-91.
This was in the way, so I removed it:
Some of the post-blasting-pre-update pics:
This is the worst of it. Located above the rear bumpstop location.
After some blasting, the under carriage:
(I needed to degrease the rest of it. I burned through A LOT of media trying to blast the 1/4" layer of grease over the under coating)
Just how good is that cab corner... blasted until the sheet metal quit disappearing.
Cleaned up spring hanger:
I was able to reuse the media I collected on a tarp. A simple 6" strainer from the Walmart kitchen section was used to filter the used media. Worked perfect!
After several weeks, I finally finished blasting the frame/chassis. Took much longer than I anticipated, but the HF blaster held through it all and is ready for more.
Overall Shots:
Engine Bay:
Passenger Inner Fender:
Driver Inner Fender:
Under Carriage:
A few spots need cleaned up, but I will use a flapper wheel on an angle grinder. Now I need to blow out the frame and brush on POR15.
I decided to drag the truck to a garage with CONCRETE FLOORS! Here she is getting ready to go into the "POR15 Booth"
Here is an image of some stamping I found on the MJ frame (passenger inner fender well and inner frame and driver inner fender well and inner frame)
The deeper number changes from location to location (26155, 12134, 13571 and *unknown*)
9-13-91 build? Not sure about that, maybe when the frame was built. The build sheet indicates a 9-26-91 build date with an In Service date of 10-26-91.
Last edited by 87Warrior; 03-20-2012 at 06:52 AM.
03-19-2012, 11:09 PM
#5
Member
Thread Starter
Join Date: Mar 2012
Location: Junction City, Kansas
Posts: 131
Likes: 0
Received 1 Like
on
1 Post
Year: 86/91/92
Model: Comanche
I fought with the busted bolts in the frame, and WON! I got all of the busted bolts out of the frame and cleaned up the threads with a tap. Spent a few weeks applying POR15 to the truck. In studying the construction of these trucks, it is easy to understand why the frames like to rot away. I then hauled the truck to the car wash to blast the front frame rails and rear frame rails with hot high pressure soap/water. I then soaked them with Marine Clean and treating with Metal Ready. I used the spray gun that comes with the U-Pol raptor liner kit and attached the
,a flexible wand for the 3M Rust kit, to spray the POR. *note: the wand does not thread securely to the U-Pol gun, so I wrapped the threads several times with Teflon tape* It came out very fine and sparse, so it took awhile to coat the inside of the frame rails but had nearly no waste. Also figured out that plain turpentine does a great job cleaning up POR15.
Visited with the body shop guy who strongly suggested I NOT use undercoating on the outside of the truck. He says with the POR15 and Chassis coat there will be absolutely no chance of chipping the paint. I asked about sound deadening and he said it would be OK to spray it over the inside sheet metal after it was treated with POR. Upon his direction I also placed an order for new outer rocks and floor pans for the truck.
Getting close!!!
Then a lot of sanding and two coats of Chassis Black:
03-19-2012, 11:17 PM
#6
Member
Thread Starter
Join Date: Mar 2012
Location: Junction City, Kansas
Posts: 131
Likes: 0
Received 1 Like
on
1 Post
Year: 86/91/92
Model: Comanche
Then I dropped the truck off at the body shop sometime in 2011. The guy works slow on these restoration projects, but does a phenomenal job. The truck will be better than it was from the factory!
Some progress pictures:
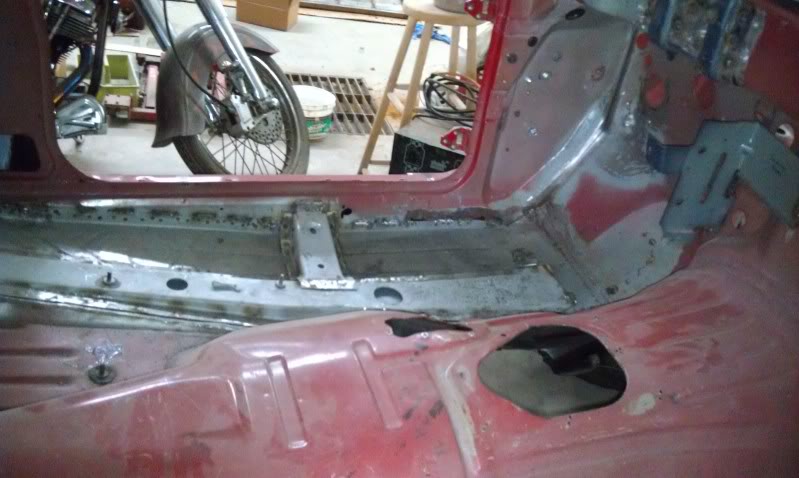
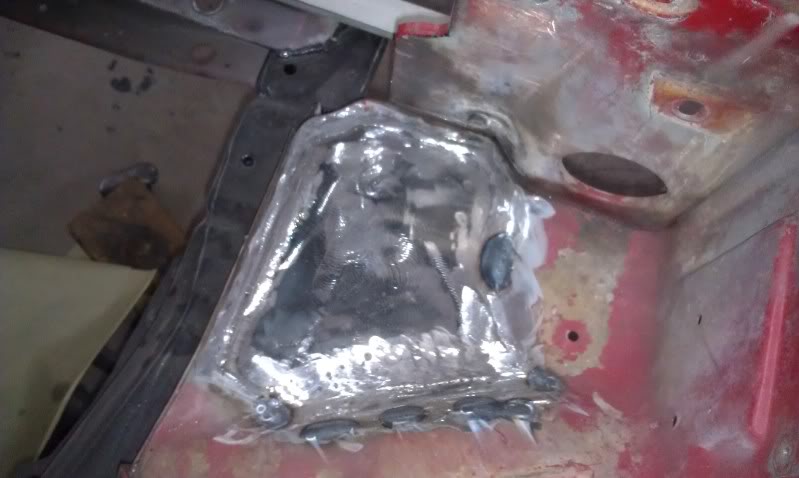
Driver side floor pan is 99% done
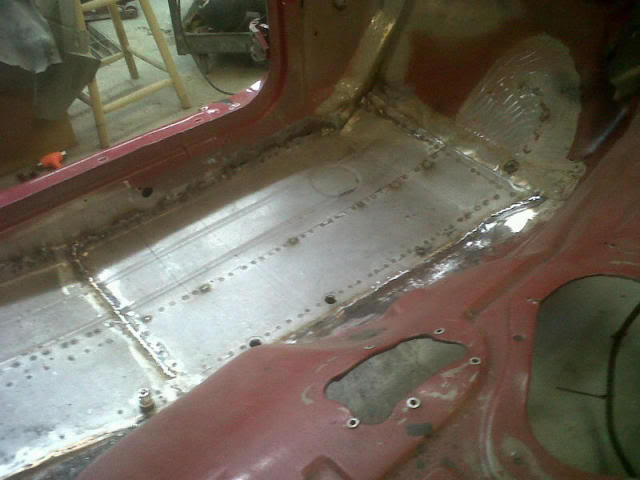
Don't forget the seat belt hole!
Passenger side cleaned up awaiting the floor pans
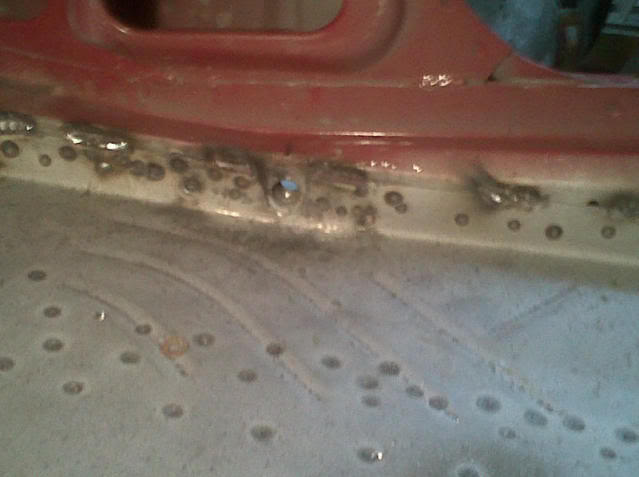
Floor pans are welded in with frame plate and braces

97+ firewall modifications and brackets
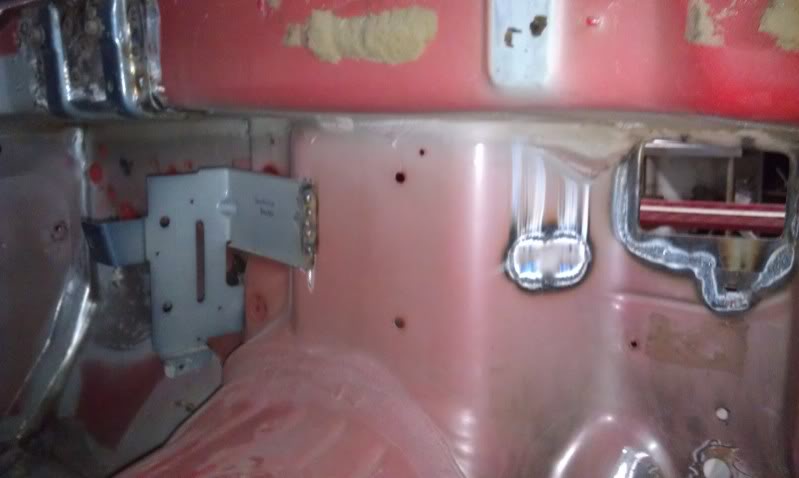
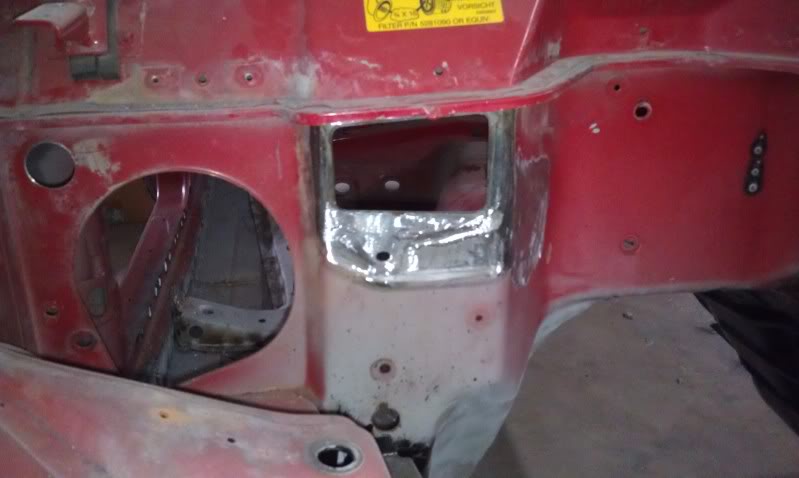
New 3/16" battery mount in the works
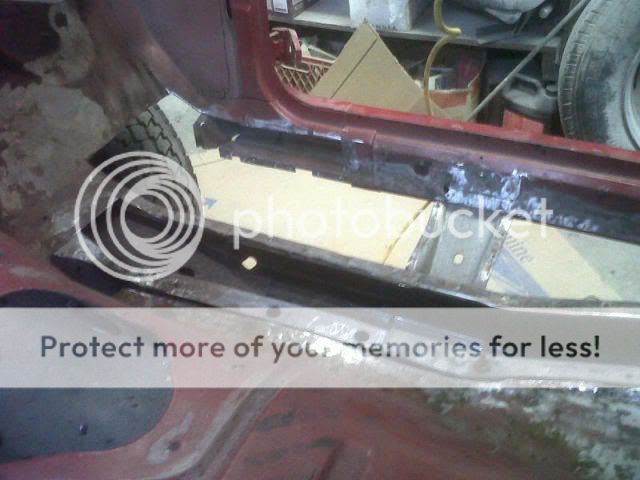
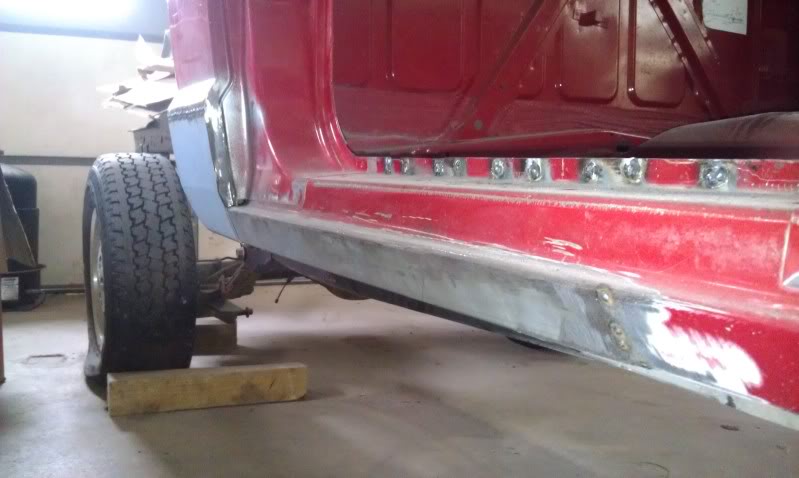
Rockers and cab corners going in
Crap.....
While talking about my truck, and the two other MJs in the shop, my body shop guy continued to express the poor fit of the C2C floor pans and rockers. The MJ rockers are tapered and has a totally different rear floor shape. He indicated the only positive of the C2C parts was the metal quality. We also discussed water proofing the cab at length. When it is done, there should be no water problems.
Some progress pictures:
Driver side floor pan is 99% done
Don't forget the seat belt hole!
Passenger side cleaned up awaiting the floor pans
Floor pans are welded in with frame plate and braces
97+ firewall modifications and brackets
New 3/16" battery mount in the works
Rockers and cab corners going in
Crap.....
While talking about my truck, and the two other MJs in the shop, my body shop guy continued to express the poor fit of the C2C floor pans and rockers. The MJ rockers are tapered and has a totally different rear floor shape. He indicated the only positive of the C2C parts was the metal quality. We also discussed water proofing the cab at length. When it is done, there should be no water problems.
03-19-2012, 11:20 PM
#7
Seasoned Member

Join Date: Sep 2010
Location: georgia
Posts: 425
Likes: 0
Received 0 Likes
on
0 Posts
Year: 1996
Model: Cherokee
Engine: inline 6
Really loving this build makes me wish i had an mj!! what are your plans so far for it?? and how are you configuring the wire harness from the old mj to the new dash???
Keep up the build! subscribed!
Keep up the build! subscribed!
Trending Topics
03-19-2012, 11:29 PM
#8
Member
Thread Starter
Join Date: Mar 2012
Location: Junction City, Kansas
Posts: 131
Likes: 0
Received 1 Like
on
1 Post
Year: 86/91/92
Model: Comanche
- Go to the grocery store? Check
- Go to Moab? Check
- Camp the Rockies? Check
- Take my wife to dinner? Check
- Haul a load of firewood? Check
- Etc....
I sold off the MJ wiring harness for a pretty healthy sum last year
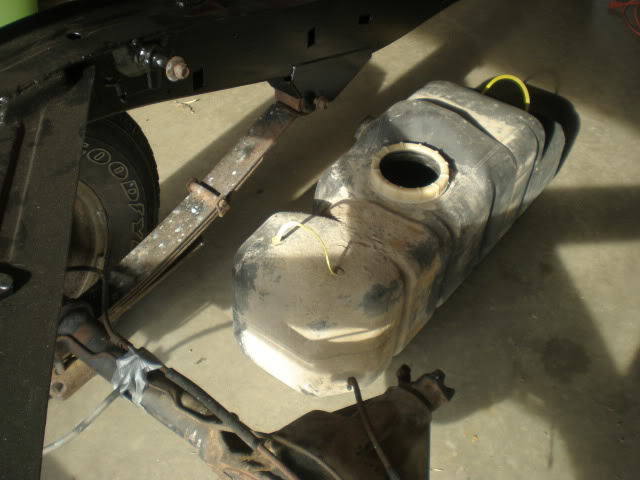
I will be using the 99 harness adapted to the MJ cab/bed harness. I will also be using a Dakota 22gallon fuel tank with a Dakota sender/pump (resistance levels are ALMOST identical to that of the 99, so the fuel gauge will read correctly)
The build is VERY slow, but I will be sure to keep it updated.

 03-20-2012, 09:45 PM
#12
Member
Thread Starter
Join Date: Mar 2012
Location: Junction City, Kansas
Posts: 131
Likes: 0
Received 1 Like
on
1 Post
Year: 86/91/92
Model: Comanche
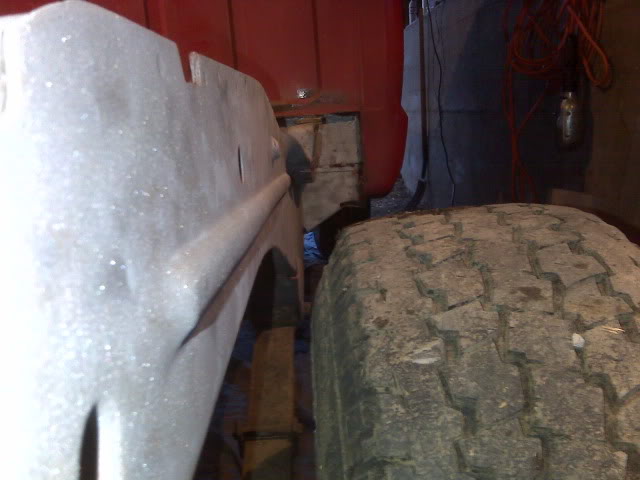
Never fear, I am taking my sweet time on this truck. I've got another, an '86, I am working fast on to get it on the road. That allows me to satisfy my MJ wrenching time so I don't have to rush the little things on the '92. 
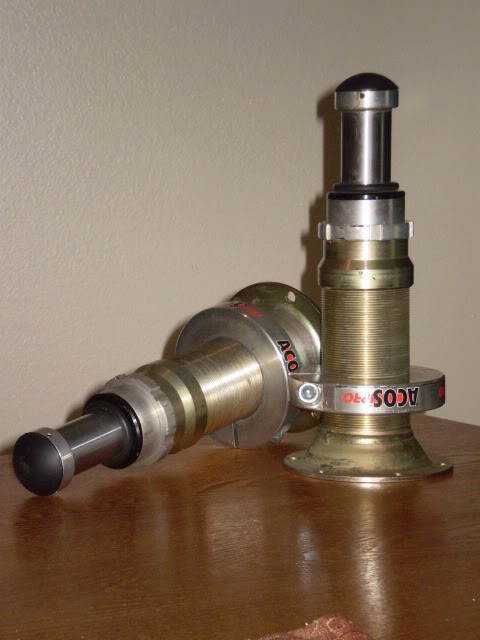
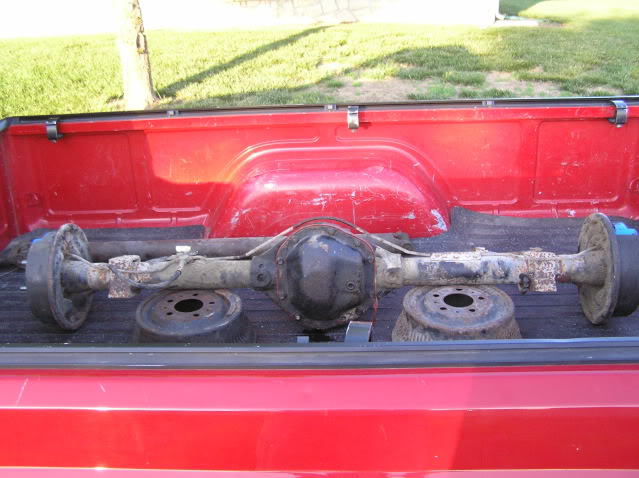
I do have quite the collection of parts for the truck.
JKS ACOS Pro:
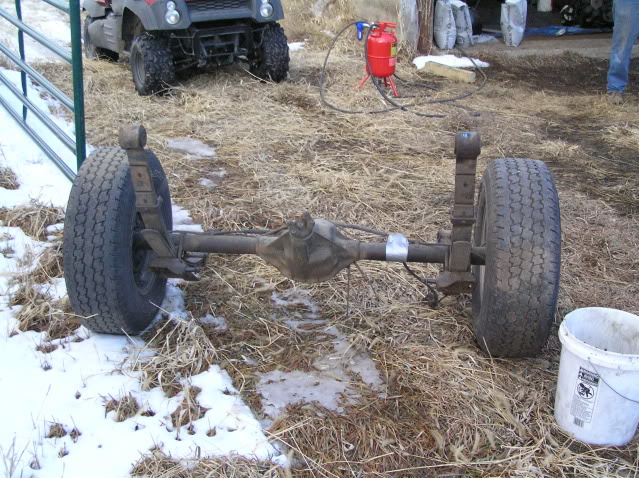
'87 MJ D44:
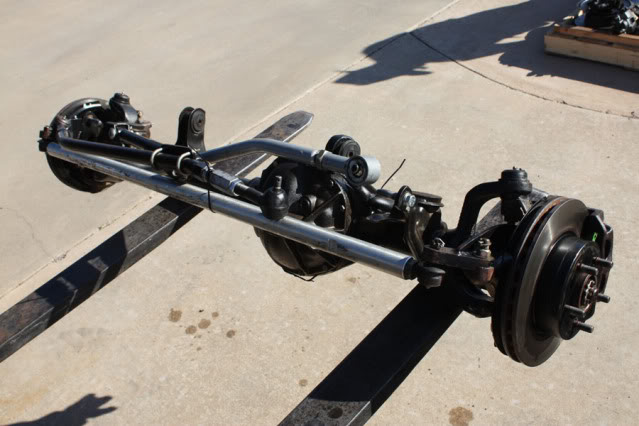
'06 TJ Rubi D44 with 15" Vanco Brakes (sorry, the U-Turn went on my TJ):
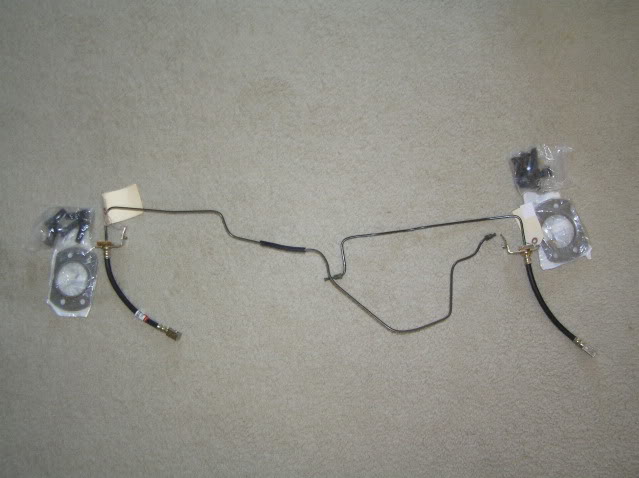
TJ Disk brake parts for the ZJ Disk swap:
Dakota 22g tank:
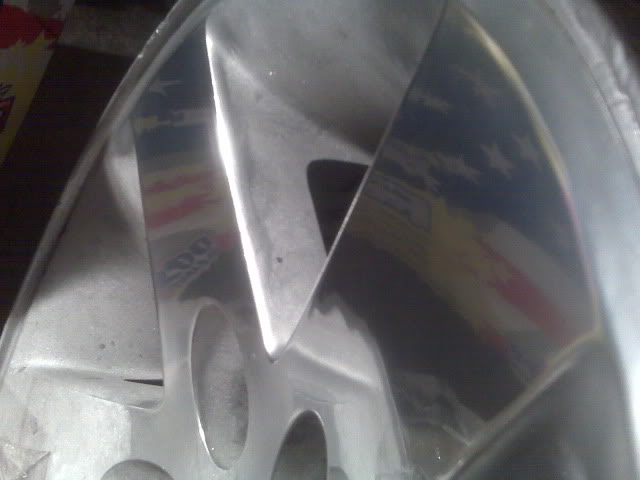
Working on polishing the Moabs for some bling:
I do have quite the collection of parts for the truck.
JKS ACOS Pro:
'87 MJ D44:
'06 TJ Rubi D44 with 15" Vanco Brakes (sorry, the U-Turn went on my TJ):
TJ Disk brake parts for the ZJ Disk swap:
Dakota 22g tank:
Working on polishing the Moabs for some bling:

