1987 Wagoneer Limited
 11-26-2012, 10:59 AM
#46
Seasoned Member
Thread Starter
Join Date: Jan 2011
Location: Austin
Posts: 302
Likes: 0
Received 4 Likes
on
3 Posts
Year: 1987
Model: Wagoneer
Engine: 4.0
 11-26-2012, 01:19 PM
#47
CF Veteran
Join Date: Feb 2011
Location: Bergen County, New Jersey U.S.A.
Posts: 3,074
Likes: 0
Received 0 Likes
on
0 Posts
Year: 1990 Laredo
Model: Cherokee
Engine: 4.0 Inline 6 Renix
it makes a difference and you do not get a sunburn while driving anymore... my jeep felt at least 10 degrees cooler after the tint 
01-07-2013, 01:24 PM
#48
Seasoned Member
Thread Starter
Join Date: Jan 2011
Location: Austin
Posts: 302
Likes: 0
Received 4 Likes
on
3 Posts
Year: 1987
Model: Wagoneer
Engine: 4.0
1/6/13
211,xxx
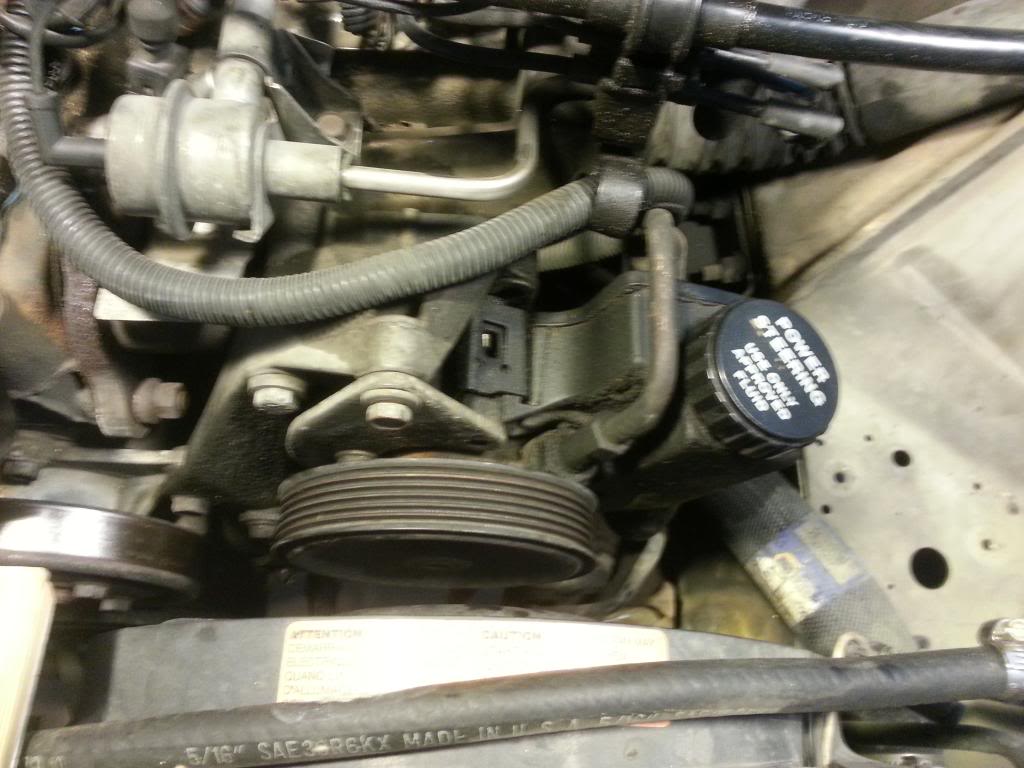
Power steering pump and Headlights
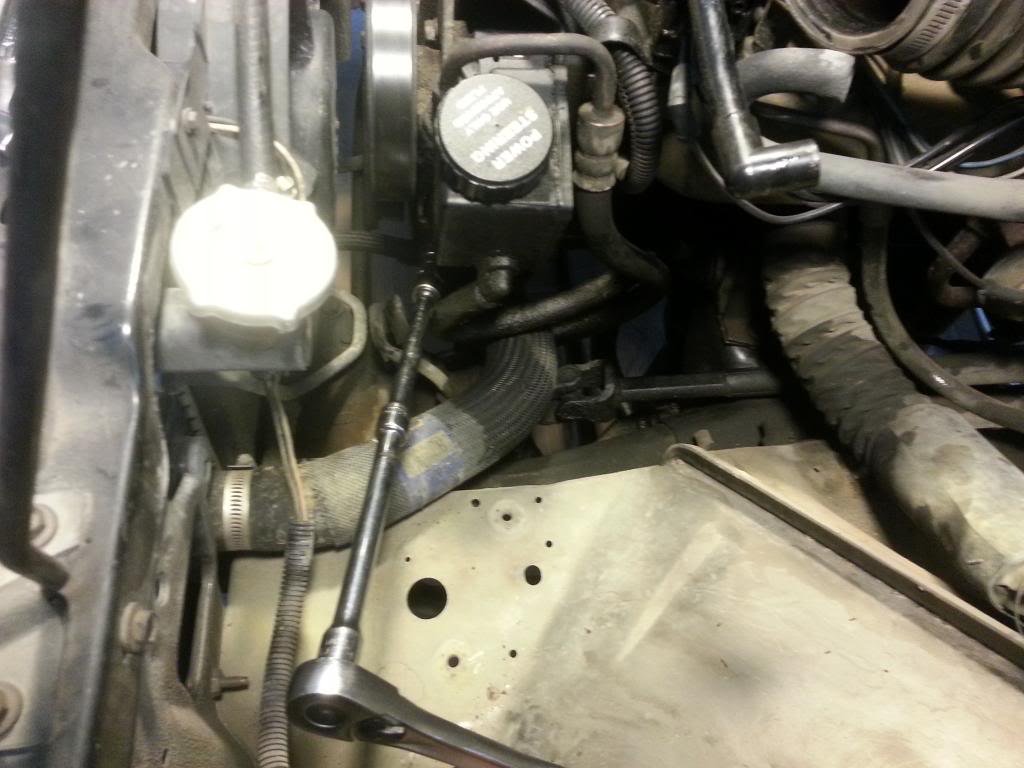
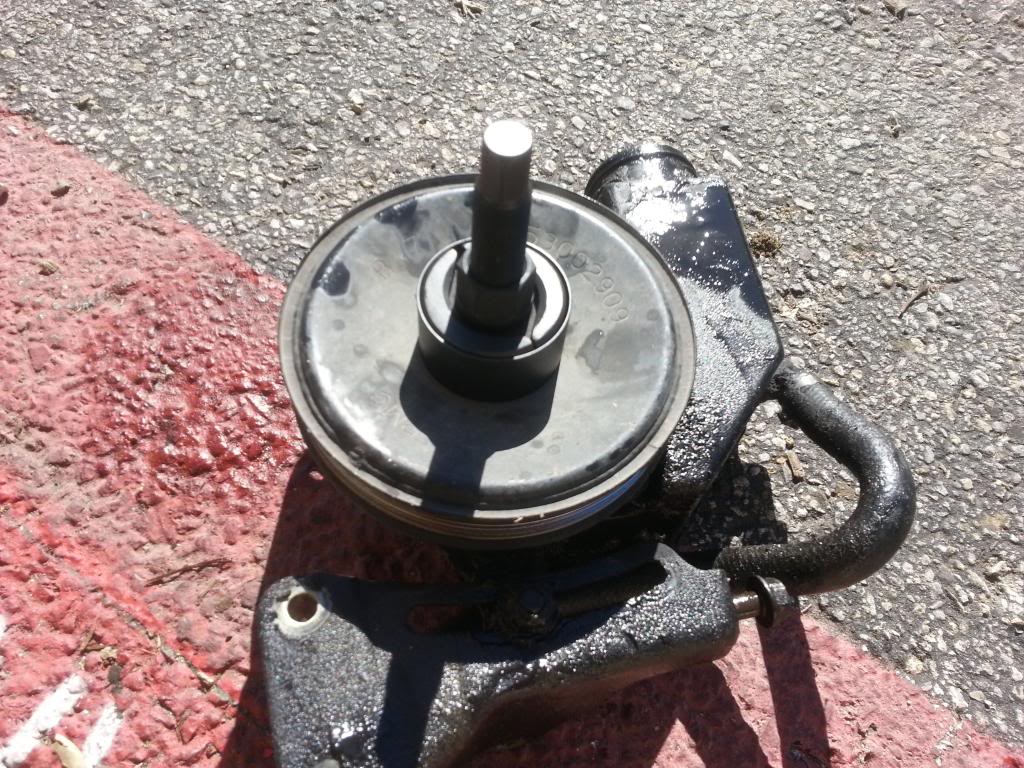
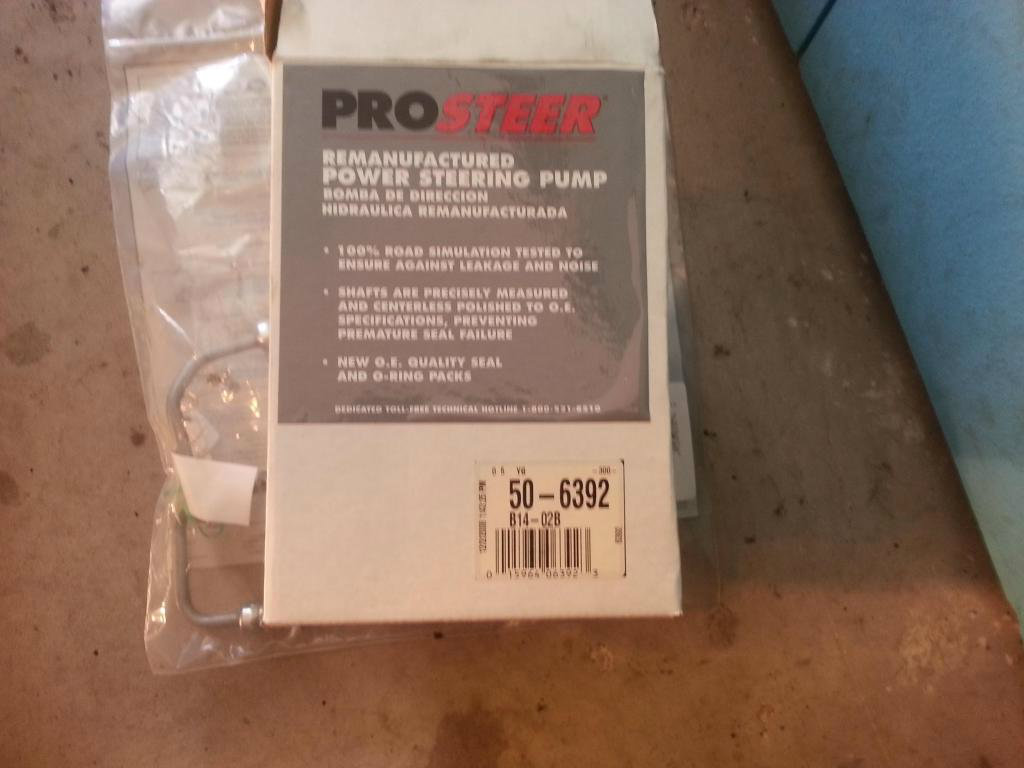
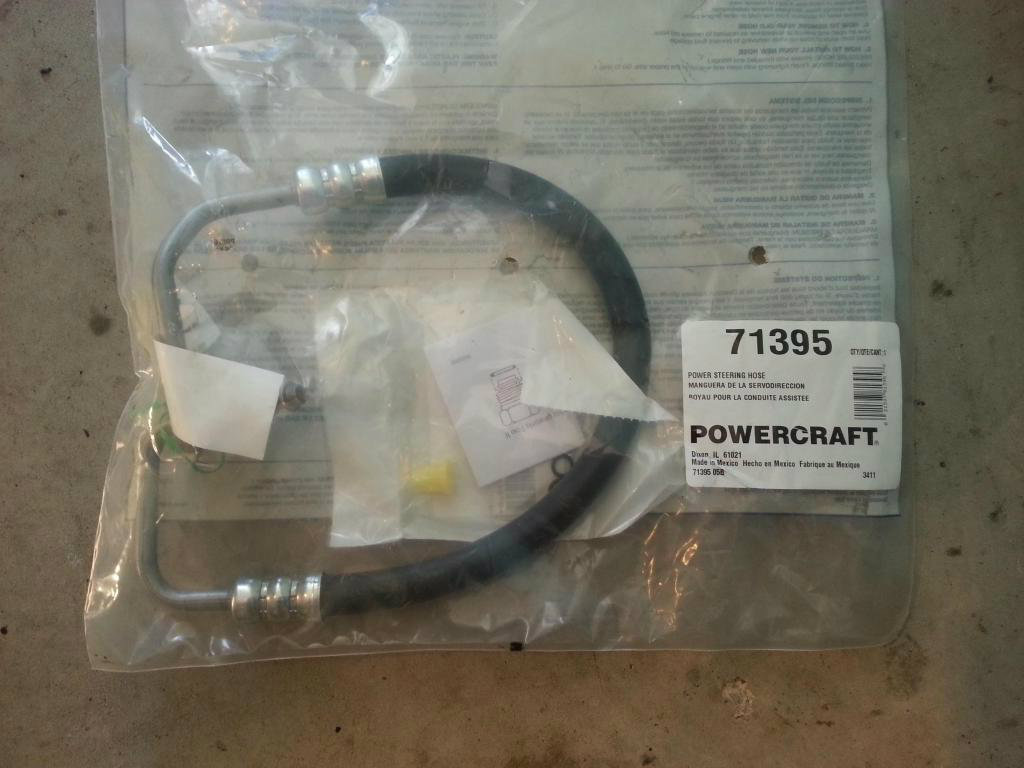
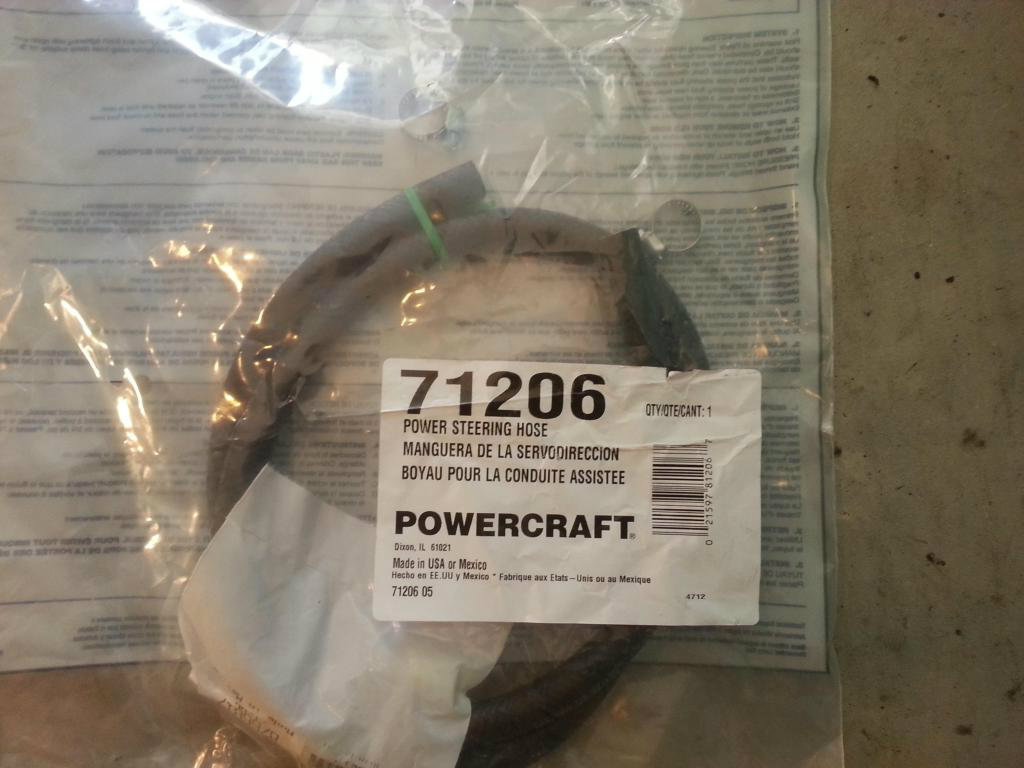
Hokay. I was losing about a quart a week from my power steering assy. I have no idea what component was leaking, as the fluid was everywhere and very nasty. Didn't want to take the time and clean it off and wait to see the leak, so it was a reman pump, new reservoir, and both lines for me.
Unfortunately for me, the ONLY pump+reservoir in town was at a PepBoys. I should have learned my lesson with the fuel pump, but my time frame was compressed and I had to get it done this weekend.
The picture doesn't do it justice.

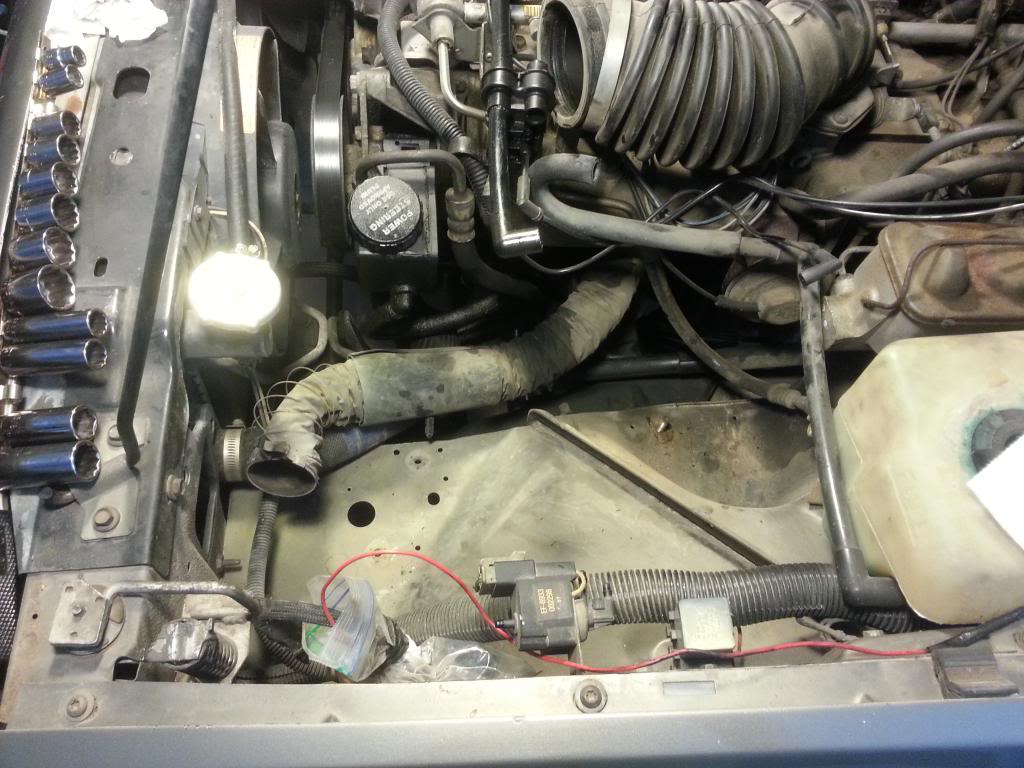
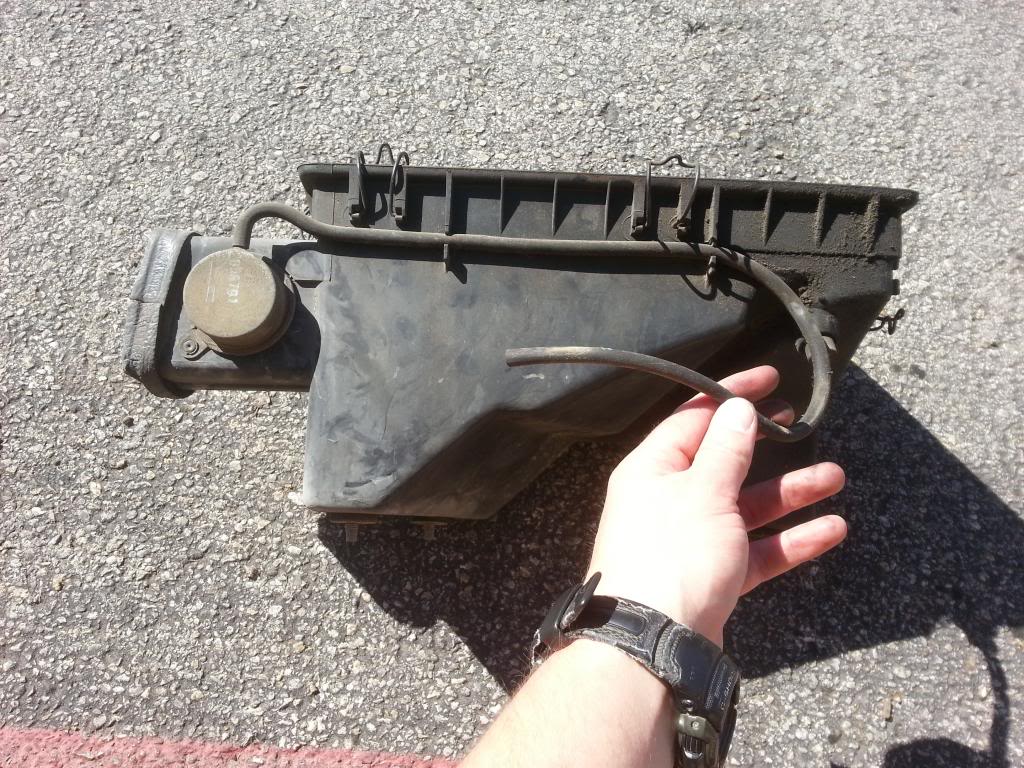
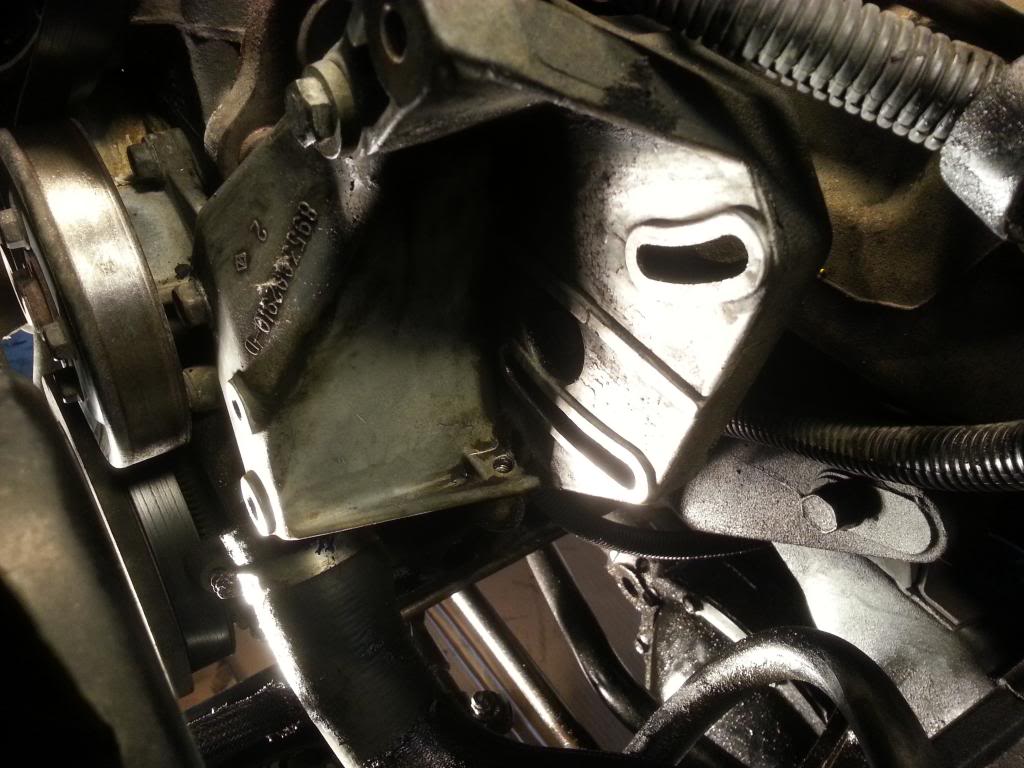
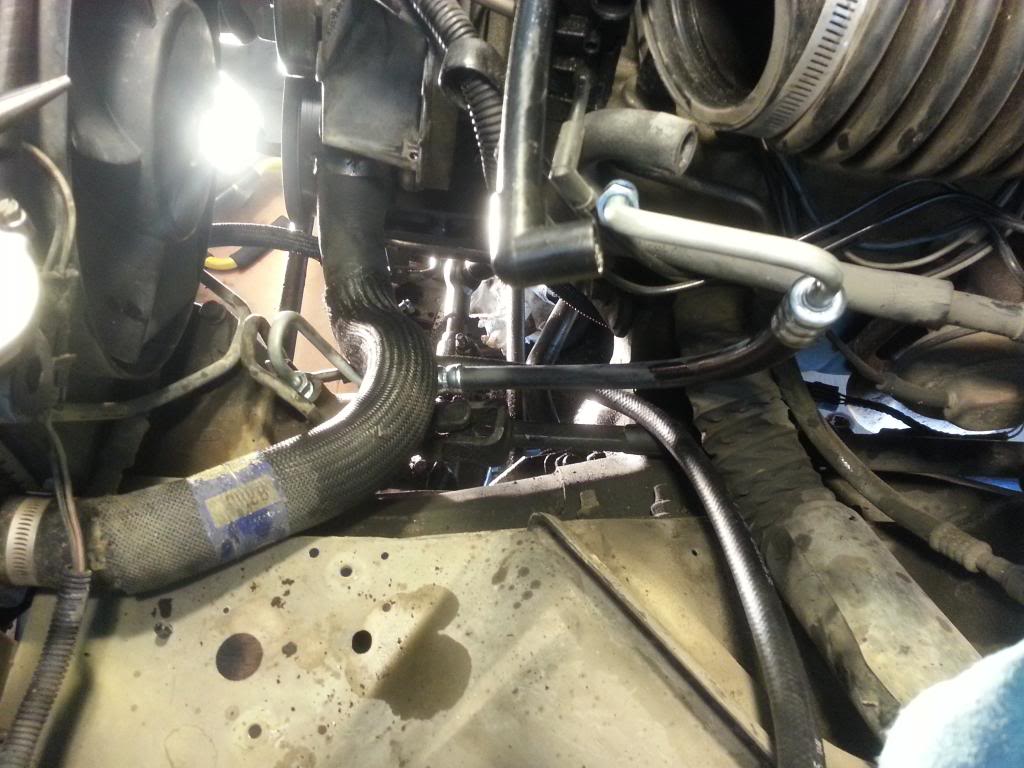
The easiest way to get at everything is to remove the airbox.
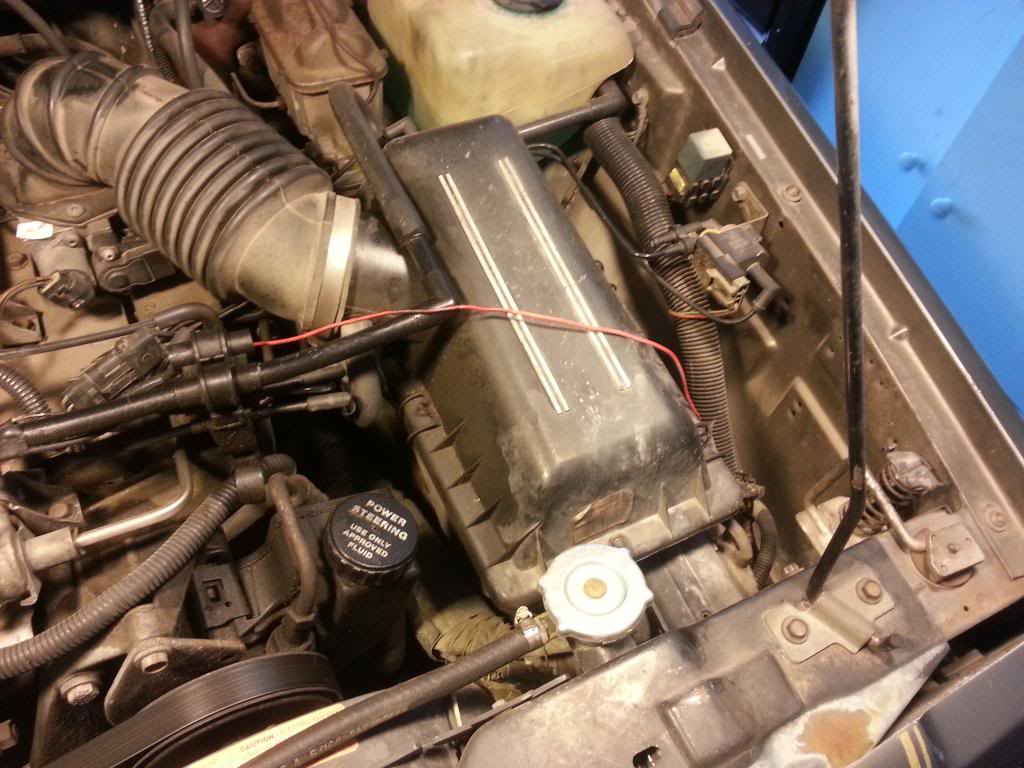
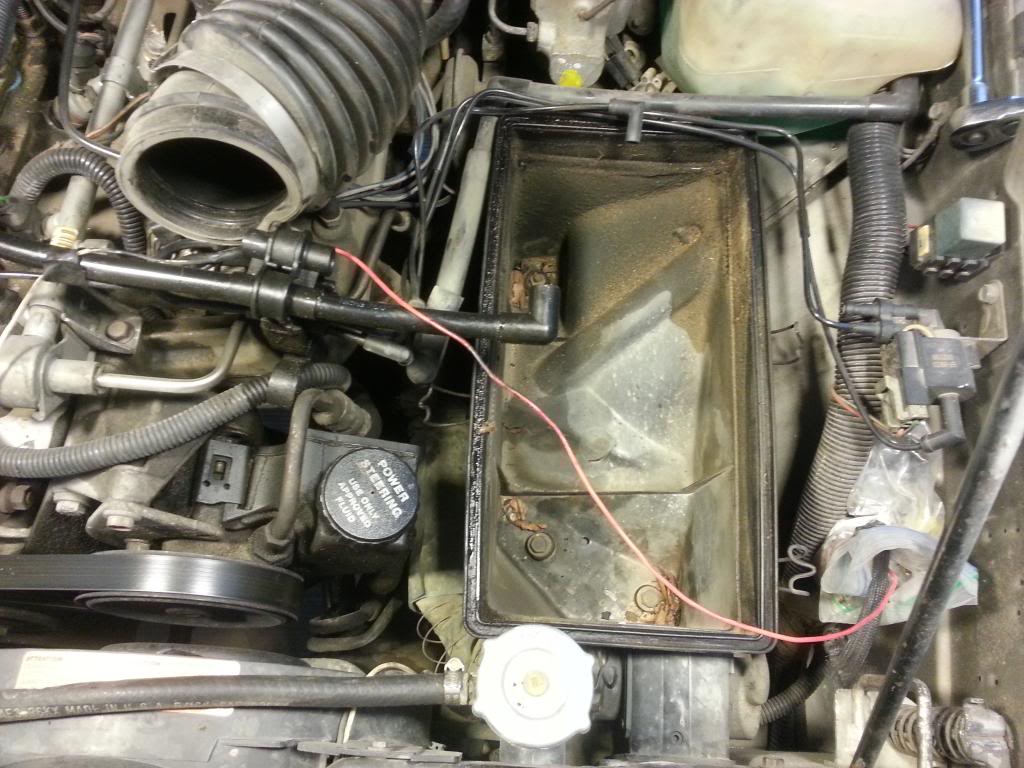
That loose, wire wrapped hose is the Heated Air Hose, which, when the motor is cold, brings warm air into the intake to help things along. It's controlled by a little vacuum switch activated by a thermister on the top of the air box. According to Cruiser, unless you live in Alaska, it's unneeded, but I'm trying to keep things stock, so it stays.
The vacuum switch is on the left in the picture, and that hose connects to a nipple on the back of the top of the airbox.
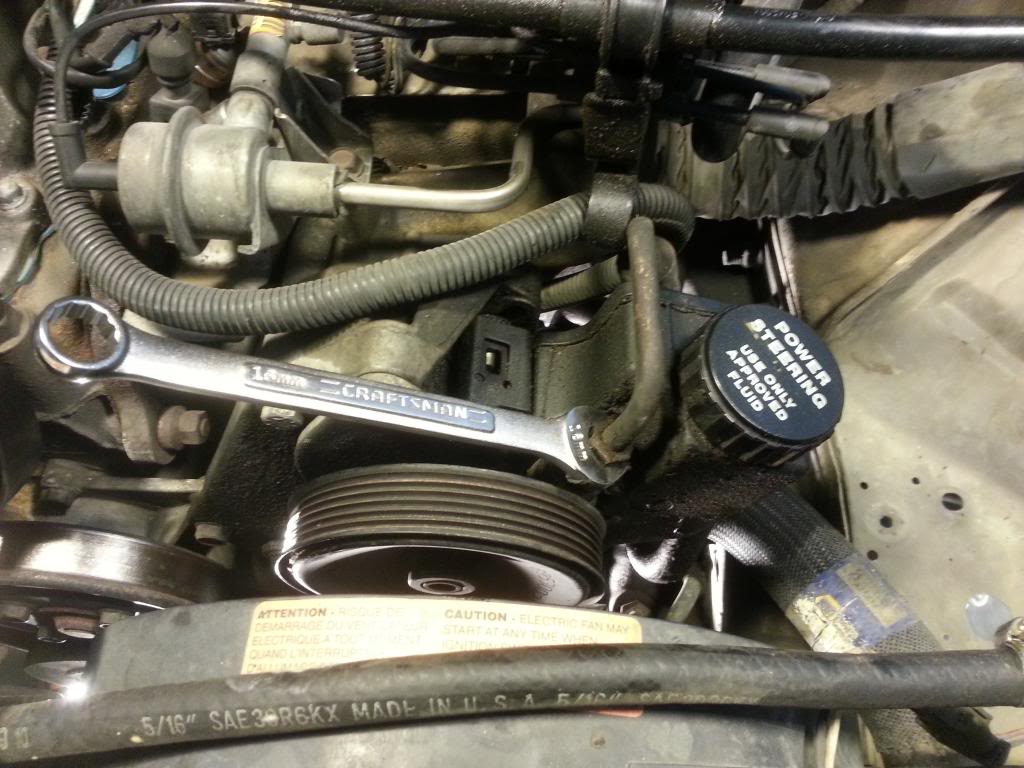
First thing is belt removal.
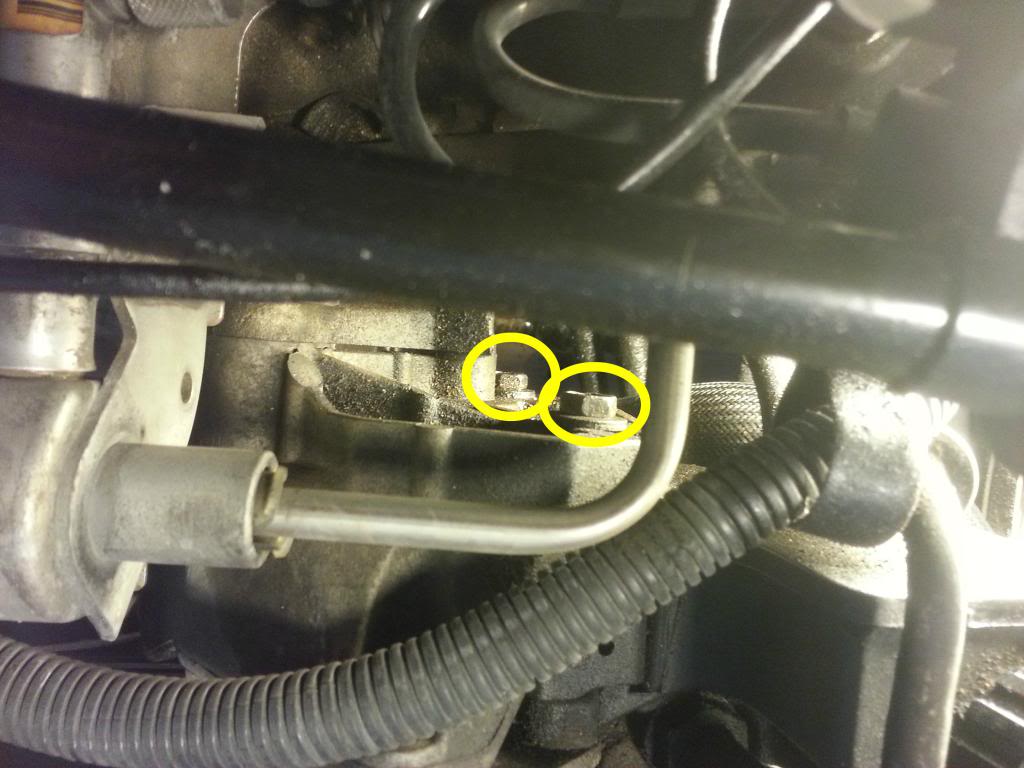
On the Power Steering Pump assembly, loosen these bolts:
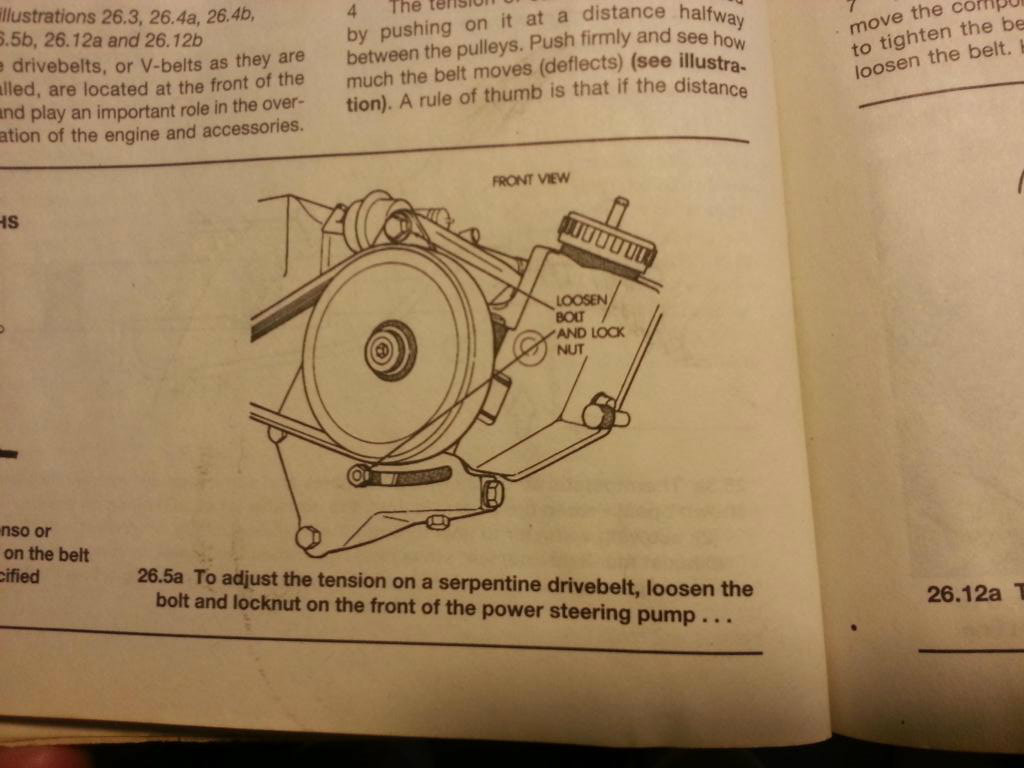
Using a 1/2" socket, a few extensions, and a u-joint, turn the adjustment screw (Tightening the bolt tightens the belt....) counter-clockwise (lefty-loosy).

Since the airbox is out of the way, all the bolts can be gotten at from above.
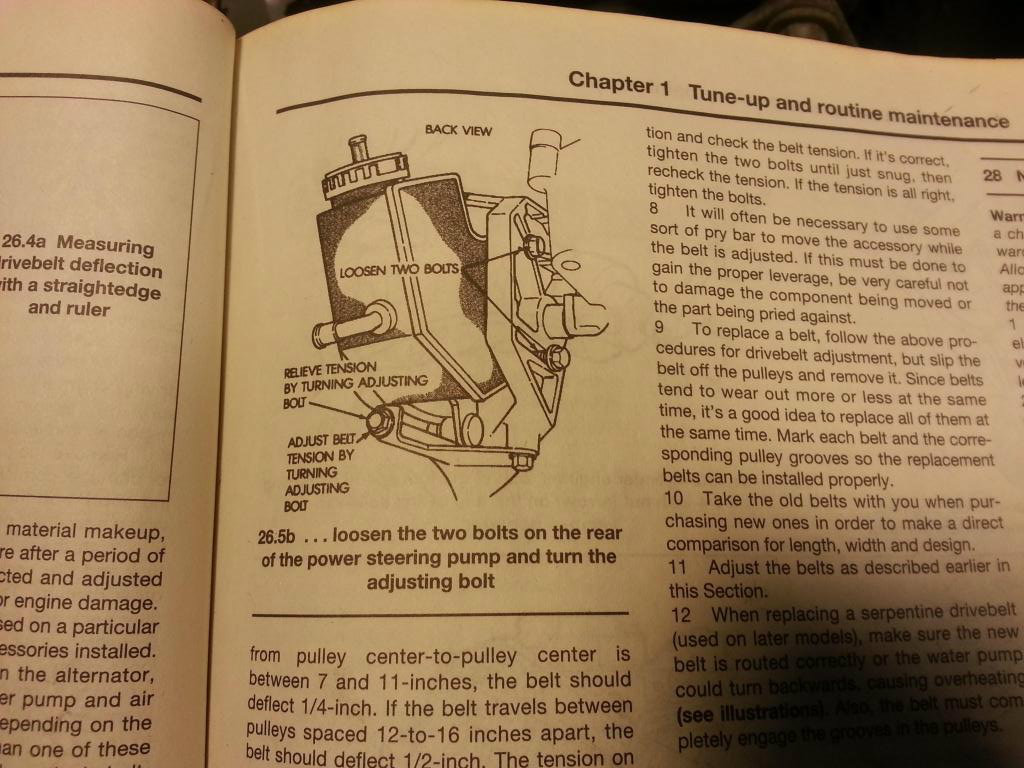
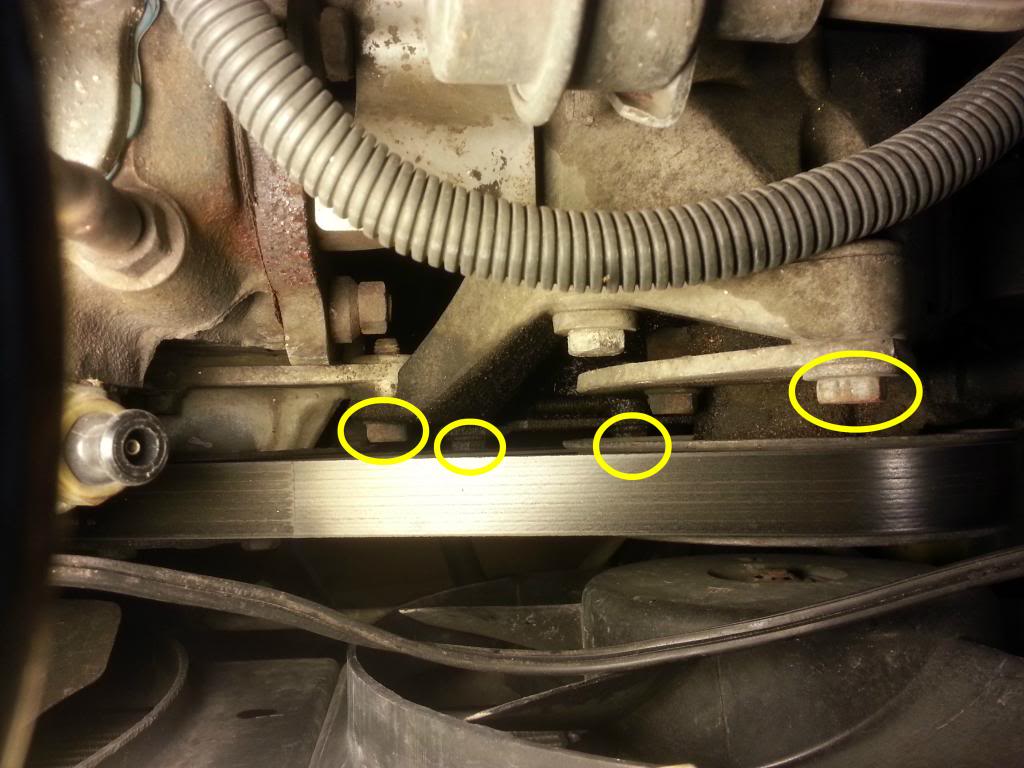
If you haven't already, note the belt routing:
Remove the belt.
Drain the fluid:
If you have a way to suck the fluid out of the reservoir, do so. I didn't, and since I was replacing both hoses anyway, I cut the return hose at the steering box and drained the fluid.
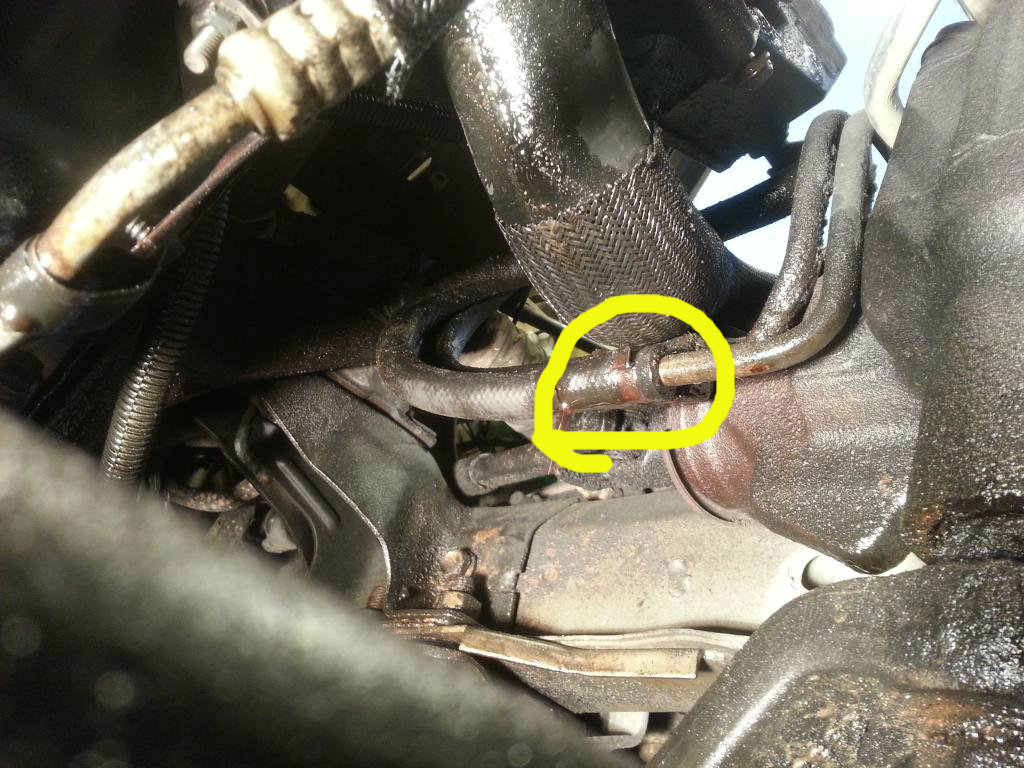
Remove the High Pressure line from the pump (16mm):
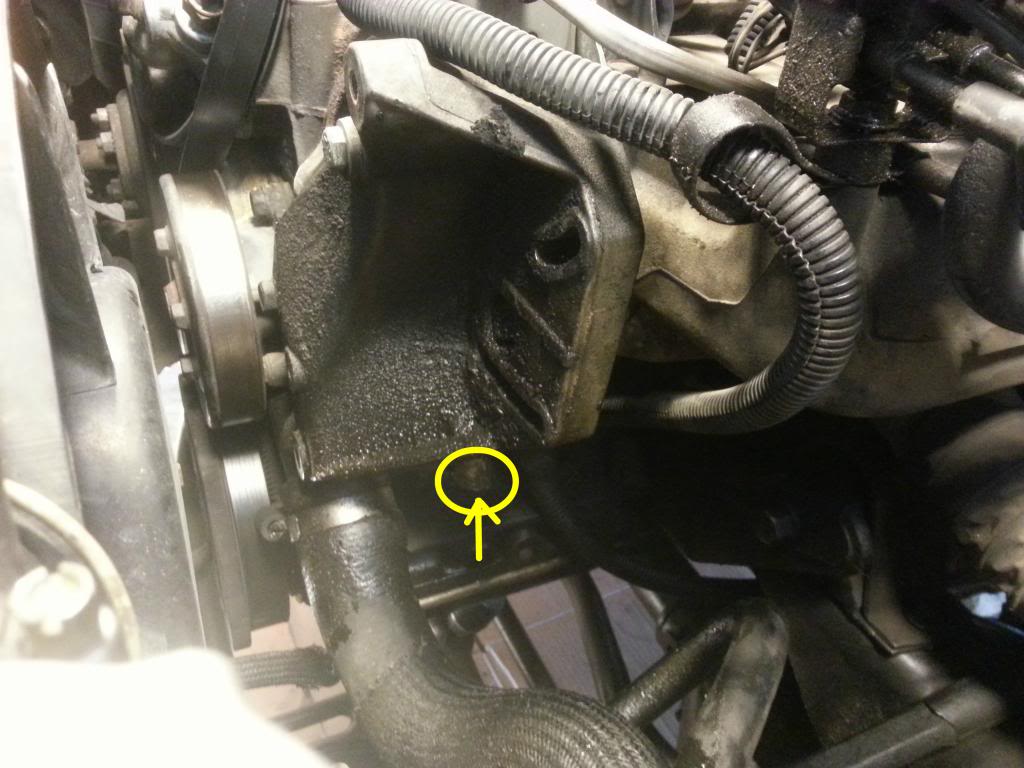
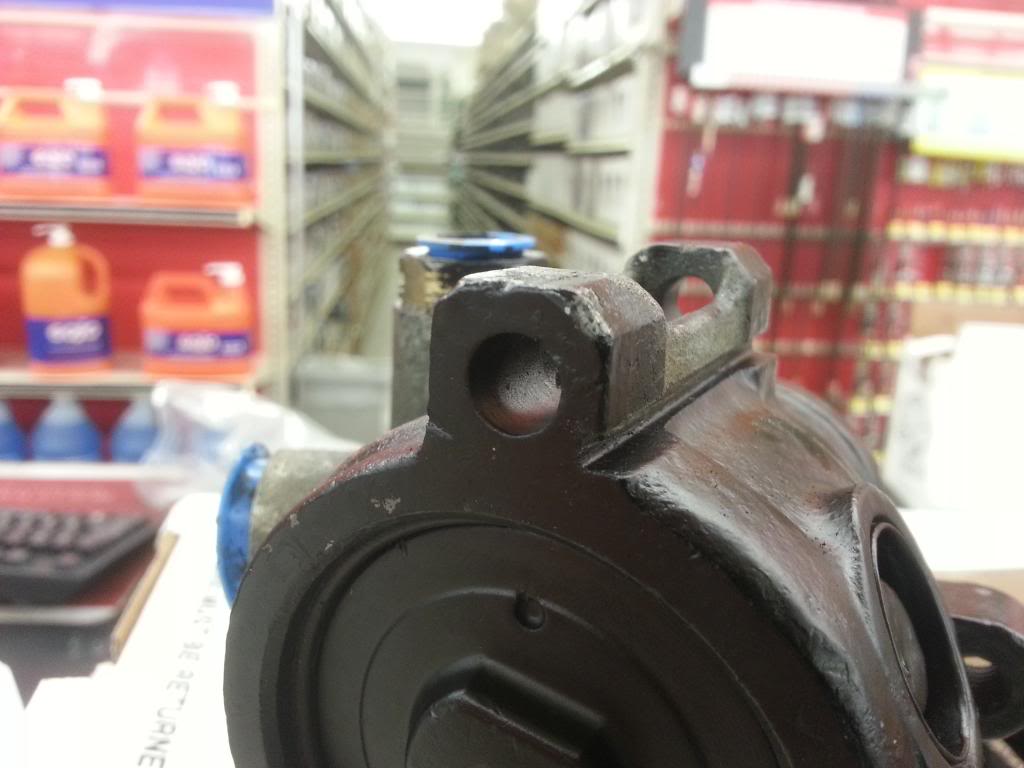
Remove the pump and bracket:
Take out these bolts(you can leave the lockdown nut on, as the bracket it attaches to comes off)
There is a bolt on the back side that attaches here, from below, that needs to come out, too.
And, it all comes out:
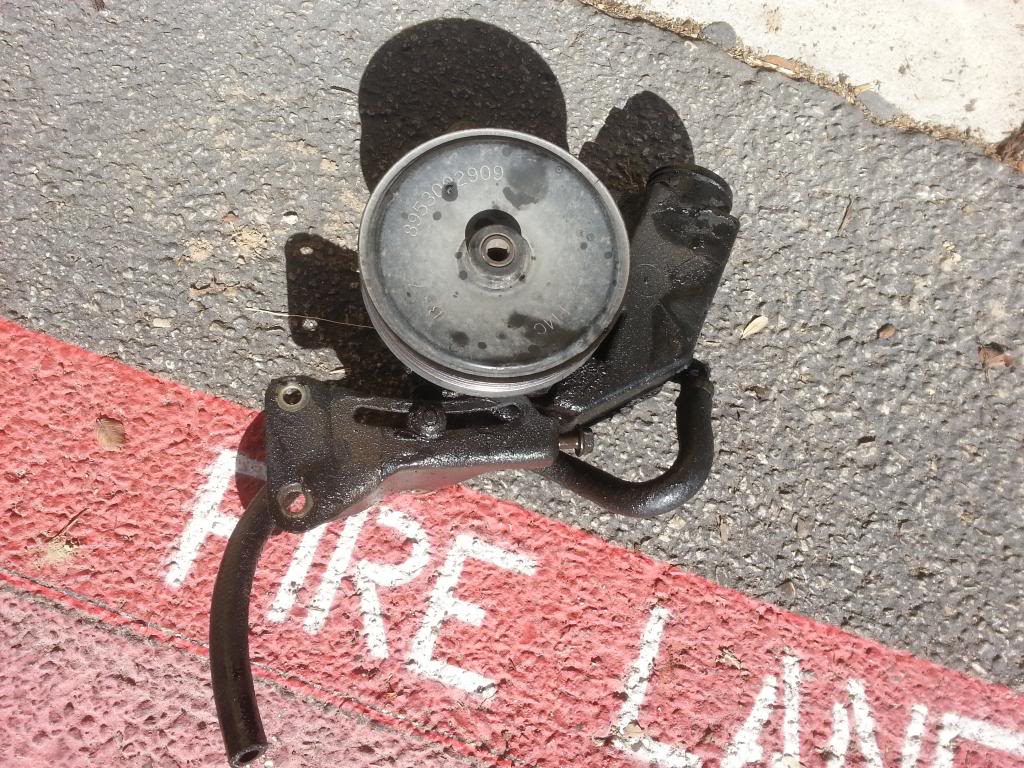
Pretty nasty.
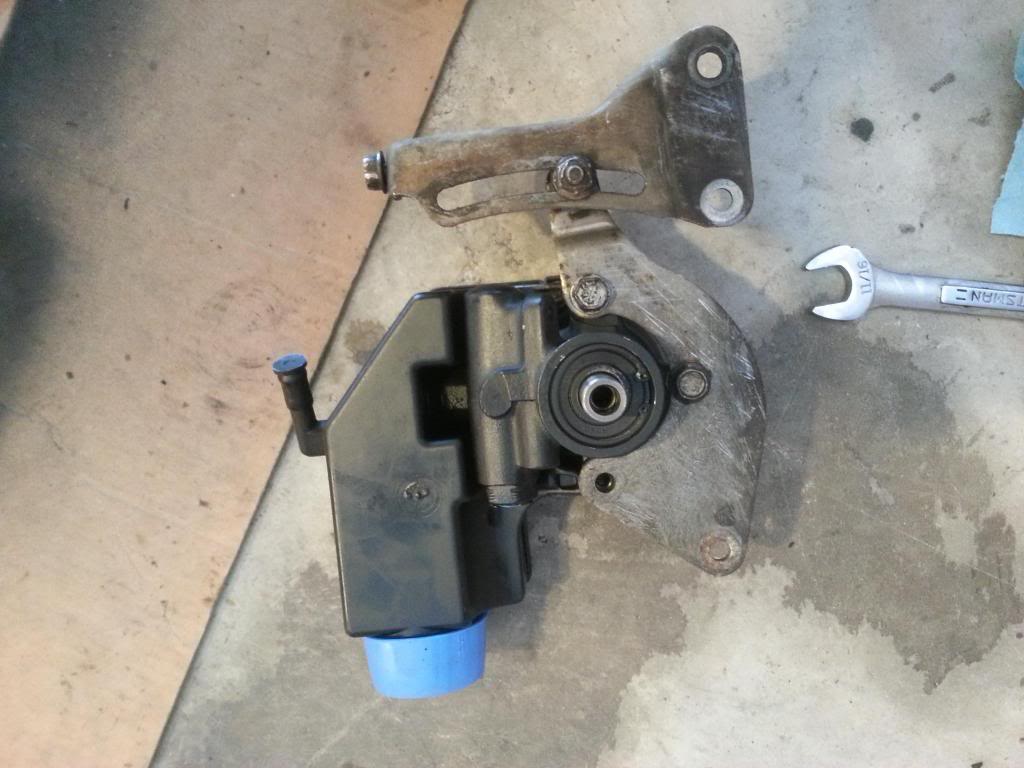
Pull the pully
And you can then get at the bracket bolts

Clean everything up
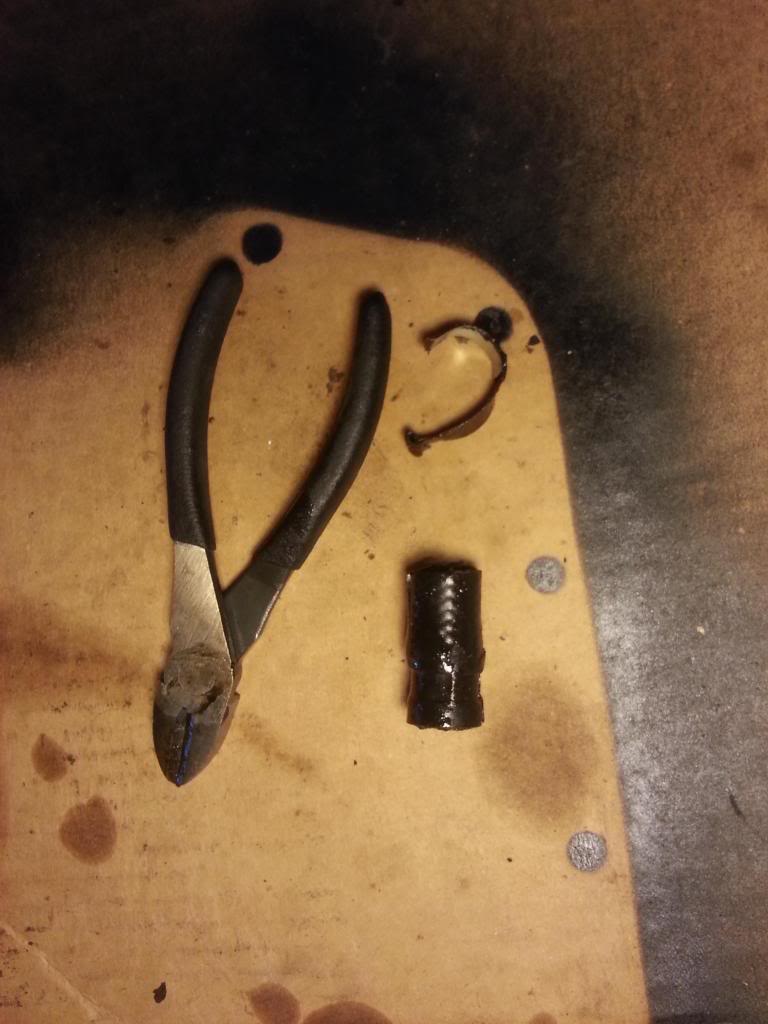
Remove the nub of the return hose that was left on the steering box by cutting off the permanently affixed hose clamp.
When you buy your pump, check the holes where it mounts to the bracket you just removed. Some pumps have the threads drilled out for a clear-through bolt, like this:
So, back to Pep Boys, go through a couple of their pumps till I find one with threads in those holes, swap the new reservoir over to it, then back home to finish the job.
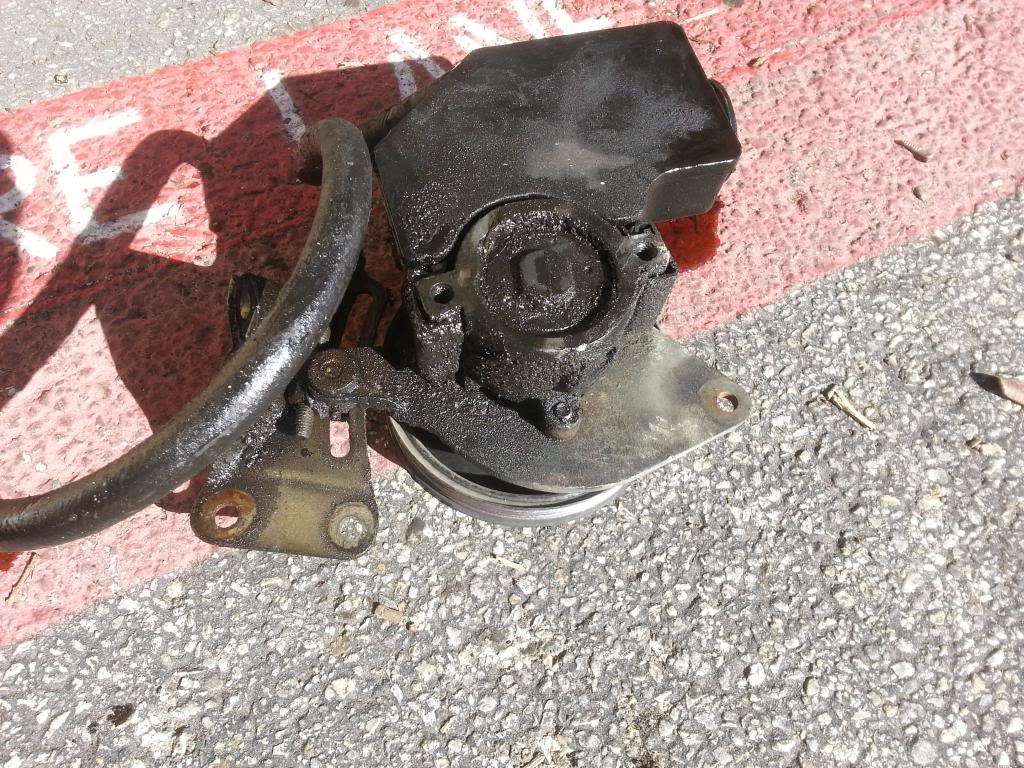
Bracket back on the pump, then the pulley
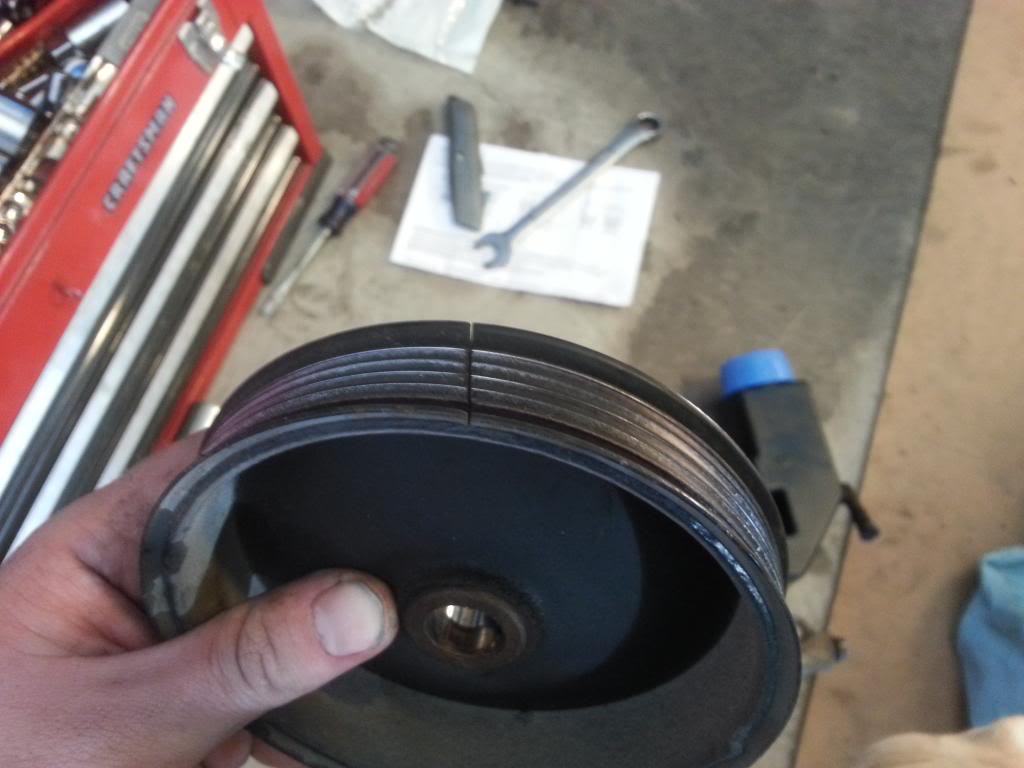
My pulley has this split in it. I'm assuming it's there for a reason as part of the manufacturing process (as this wasn't machined from an Aluminum billet )
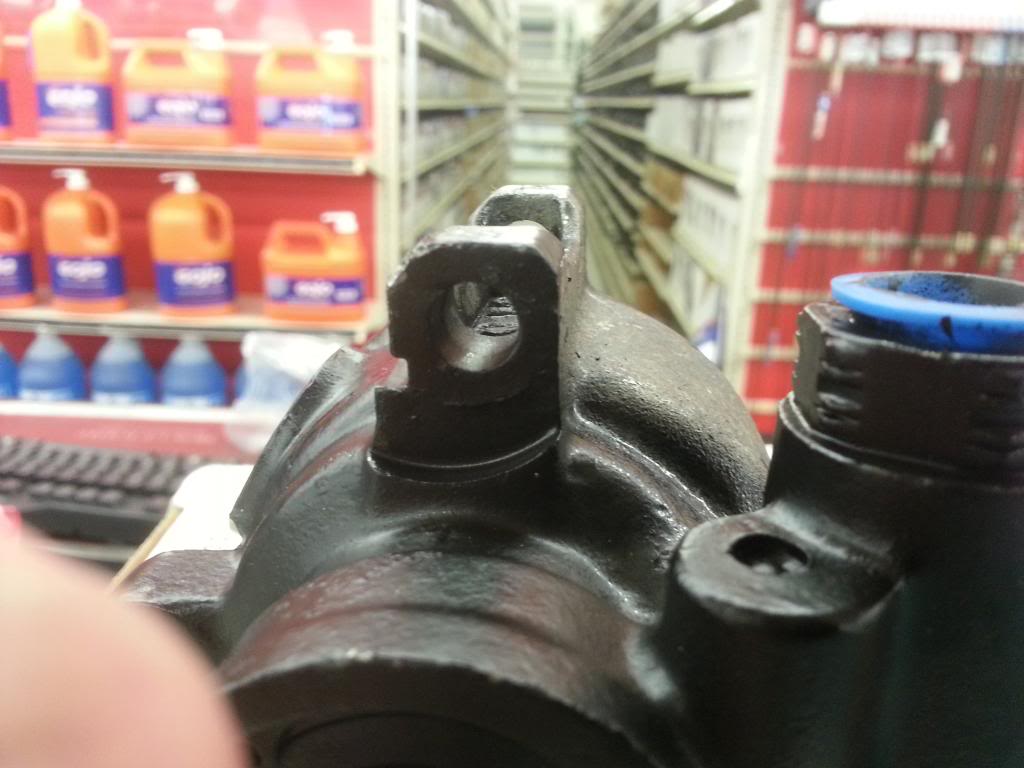
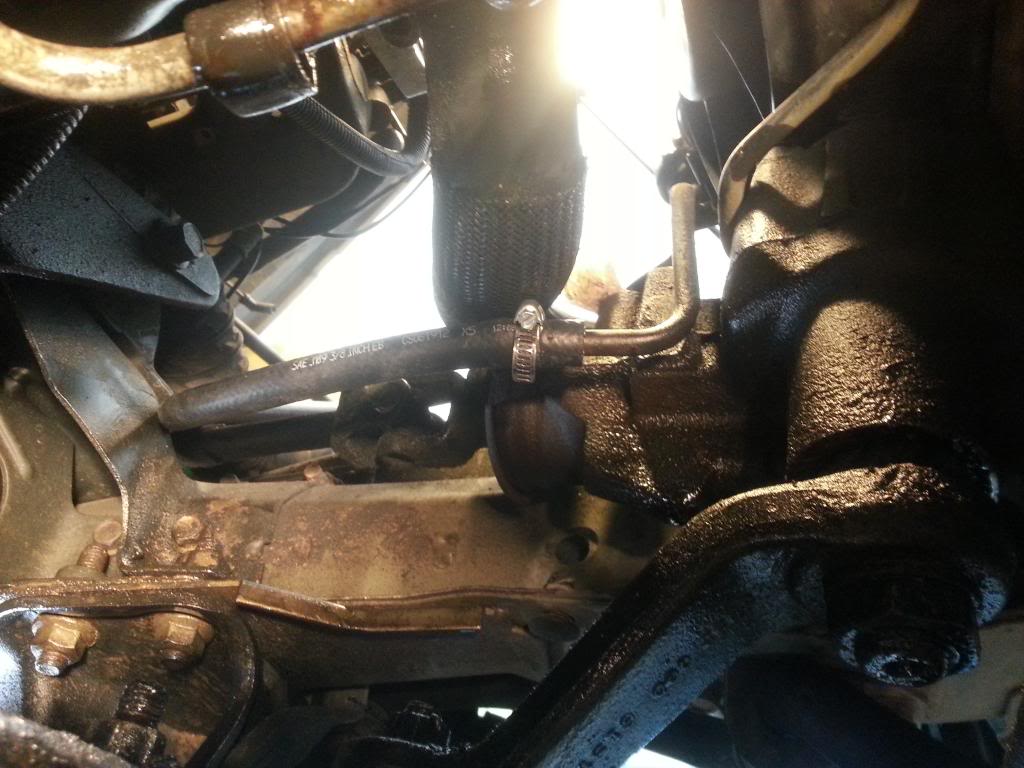
Pull the high pressure hose off the steering box (18mm)
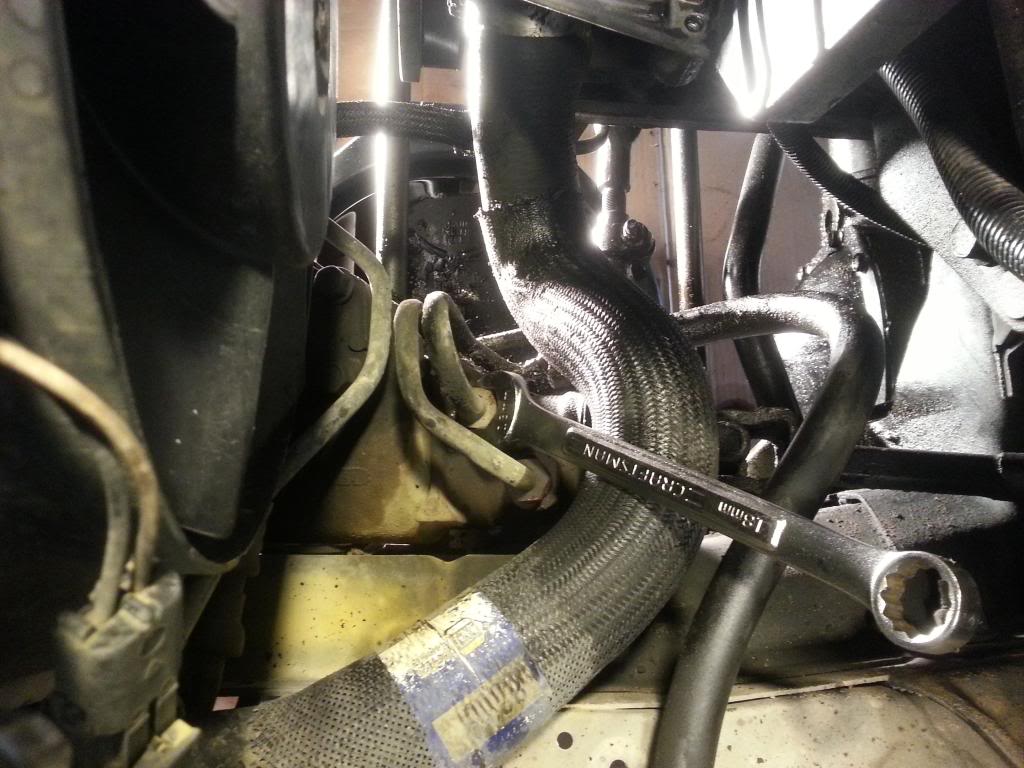
Put the new one on. Be sure to install the orings and lube them with power steering fluid.
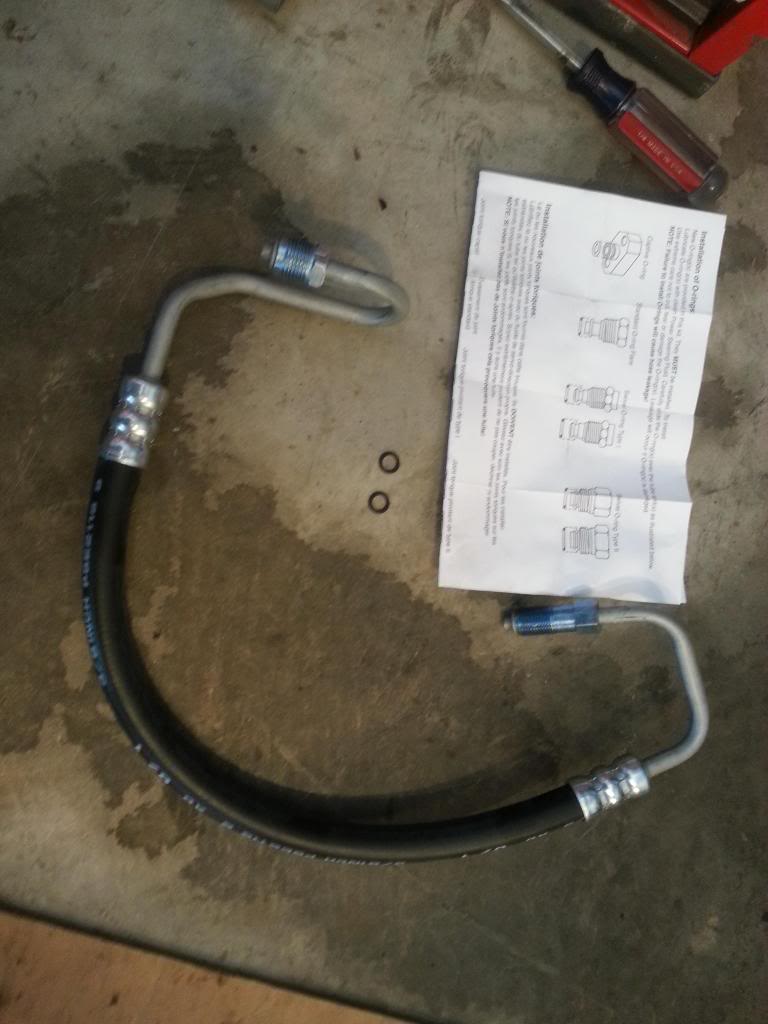
Install the return hose, cut to length.
Mount the new pump on the engine and reverse your tear down process

Fill up the reservoir with PS Fluid, start the motor, turn your wheels to lock in both directions 10 times and check fluid level. Top it off and have a nice day!
Parts used. The pump is Pep Boys, the hoses are Advance.
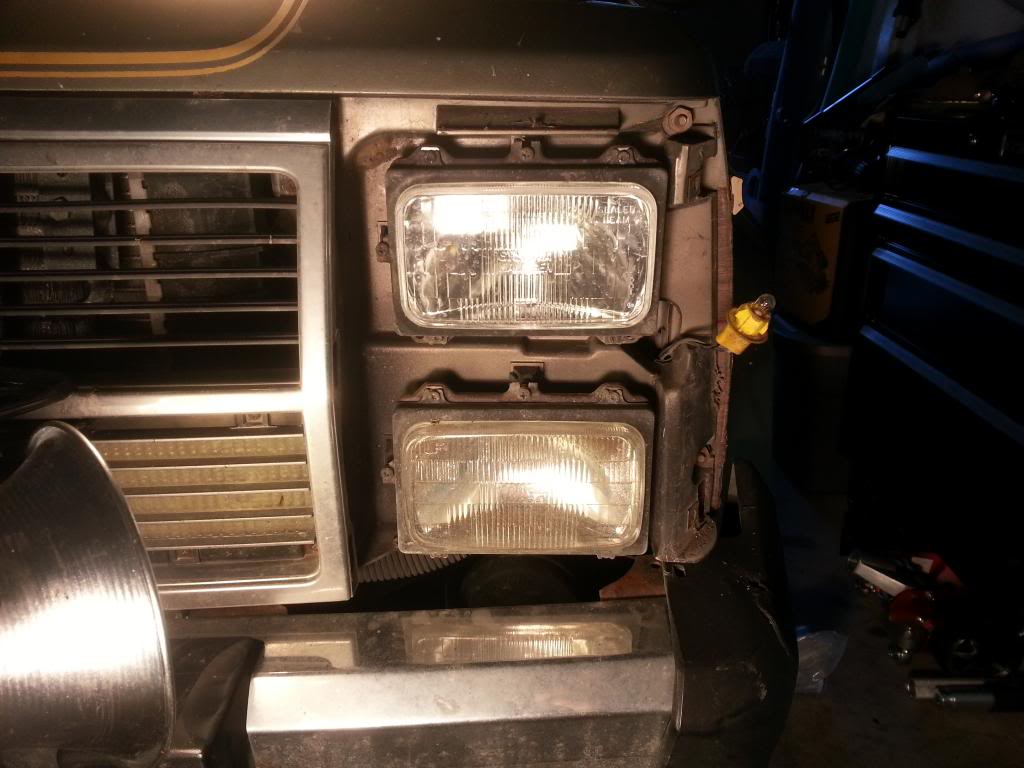
I also bought a set of 4 Waggy headlights/buckets/adjustment screws from 71chevyguy over Christmas. Installed and adjusted them - Now I can see where I'm driving at night!
211,xxx
Power steering pump and Headlights
Hokay. I was losing about a quart a week from my power steering assy. I have no idea what component was leaking, as the fluid was everywhere and very nasty. Didn't want to take the time and clean it off and wait to see the leak, so it was a reman pump, new reservoir, and both lines for me.
Unfortunately for me, the ONLY pump+reservoir in town was at a PepBoys. I should have learned my lesson with the fuel pump, but my time frame was compressed and I had to get it done this weekend.
The picture doesn't do it justice.
The easiest way to get at everything is to remove the airbox.
That loose, wire wrapped hose is the Heated Air Hose, which, when the motor is cold, brings warm air into the intake to help things along. It's controlled by a little vacuum switch activated by a thermister on the top of the air box. According to Cruiser, unless you live in Alaska, it's unneeded, but I'm trying to keep things stock, so it stays
.The vacuum switch is on the left in the picture, and that hose connects to a nipple on the back of the top of the airbox.
First thing is belt removal.
On the Power Steering Pump assembly, loosen these bolts:
Using a 1/2" socket, a few extensions, and a u-joint, turn the adjustment screw (Tightening the bolt tightens the belt....) counter-clockwise (lefty-loosy).
Since the airbox is out of the way, all the bolts can be gotten at from above.
If you haven't already, note the belt routing:
Remove the belt.
Drain the fluid:
If you have a way to suck the fluid out of the reservoir, do so. I didn't, and since I was replacing both hoses anyway, I cut the return hose at the steering box and drained the fluid.
Remove the High Pressure line from the pump (16mm):
Remove the pump and bracket:
Take out these bolts(you can leave the lockdown nut on, as the bracket it attaches to comes off)
There is a bolt on the back side that attaches here, from below, that needs to come out, too.
And, it all comes out:
Pretty nasty.
Pull the pully
And you can then get at the bracket bolts
Clean everything up
Remove the nub of the return hose that was left on the steering box by cutting off the permanently affixed hose clamp.
When you buy your pump, check the holes where it mounts to the bracket you just removed. Some pumps have the threads drilled out for a clear-through bolt, like this:
So, back to Pep Boys, go through a couple of their pumps till I find one with threads in those holes, swap the new reservoir over to it, then back home to finish the job.
Bracket back on the pump, then the pulley
My pulley has this split in it. I'm assuming it's there for a reason as part of the manufacturing process (as this wasn't machined from an Aluminum billet
)Pull the high pressure hose off the steering box (18mm)
Put the new one on. Be sure to install the orings and lube them with power steering fluid.
Install the return hose, cut to length.
Mount the new pump on the engine and reverse your tear down process
Fill up the reservoir with PS Fluid, start the motor, turn your wheels to lock in both directions 10 times and check fluid level. Top it off and have a nice day!
Parts used. The pump is Pep Boys, the hoses are Advance.
I also bought a set of 4 Waggy headlights/buckets/adjustment screws from 71chevyguy over Christmas. Installed and adjusted them - Now I can see where I'm driving at night!
Last edited by letinsh; 01-07-2013 at 01:27 PM.
01-08-2013, 08:38 PM
#49
Newbie

Join Date: Jan 2013
Location: Pendleton, OR
Posts: 2
Likes: 0
Received 0 Likes
on
0 Posts
Year: 1987
Model: Wagoneer
Engine: 4.0l 6 Cylinder
This has been very helpful! i own the same jeep and fn love it. i don't have any cooling problems yet but i want to change it over like u did. my temp gauge doesn't work either goes up when i start the jeep but but goes back down to cold right away. heater is also very weak. after u finished installing everything, did the temp gauge and heater work properly again? also have u had any other problems/fixes with the jeep? mine has 292,000 miles and still running strong. Thx, Chris.
01-08-2013, 11:24 PM
#52
Senior Member
Join Date: Nov 2011
Location: shelley, idaho
Posts: 667
Likes: 0
Received 1 Like
on
1 Post
Year: 1988
Model: Cherokee
Engine: 242CID I-6
This has been very helpful! i own the same jeep and fn love it. i don't have any cooling problems yet but i want to change it over like u did. my temp gauge doesn't work either goes up when i start the jeep but but goes back down to cold right away. heater is also very weak. after u finished installing everything, did the temp gauge and heater work properly again? also have u had any other problems/fixes with the jeep? mine has 292,000 miles and still running strong. Thx, Chris.
Rooster! Great build man!
01-09-2013, 08:33 PM
#53
CF Veteran
Join Date: Feb 2011
Location: Bergen County, New Jersey U.S.A.
Posts: 3,074
Likes: 0
Received 0 Likes
on
0 Posts
Year: 1990 Laredo
Model: Cherokee
Engine: 4.0 Inline 6 Renix
01-14-2013, 12:22 PM
#55
Seasoned Member
Thread Starter
Join Date: Jan 2011
Location: Austin
Posts: 302
Likes: 0
Received 4 Likes
on
3 Posts
Year: 1987
Model: Wagoneer
Engine: 4.0
...my temp gauge doesn't work either goes up when i start the jeep but but goes back down to cold right away. heater is also very weak. after u finished installing everything, did the temp gauge and heater work properly again? also have u had any other problems/fixes with the jeep? mine has 292,000 miles and still running strong. Thx, Chris.
If there is no change, the sensor's bad and you should replace it. See here for how to replace it.
As far as the weak heater, you may need to flush out the heater core (or worst case, replace it, but don't jump to that, yet). If you search, there's plenty of info on how to flush it. I'd start there.
Temp gauge and heater work fine now, although my heater is a bit weak as well. Haven't had time to address it, yet. The list is long

Thanks!
Thanks; no worries
 01-14-2013, 12:52 PM
#56
Seasoned Member
Thread Starter
Join Date: Jan 2011
Location: Austin
Posts: 302
Likes: 0
Received 4 Likes
on
3 Posts
Year: 1987
Model: Wagoneer
Engine: 4.0
1/12/13
211,395
Headlights, etc.
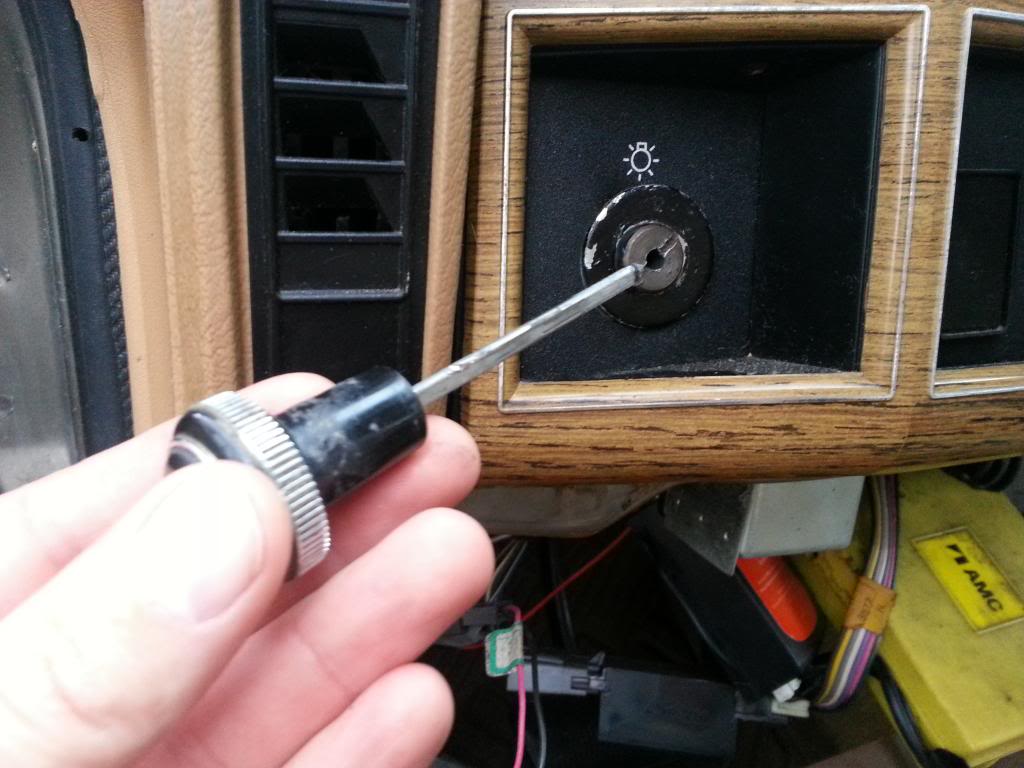
So I was out of town over the weekend doing some Army stuff, and when we wrapped up for the day on Friday, it was 9pm. I get in my XJ, start her up and pull on the headlight ***. Dash lights come on, running lights front and rear come on, but no headlights....looked like this.
Ah, the dreaded headlight switch. So I hitch a ride back to the hotel, and after we finish up on Saturday, I make a run to Advance to pick up a new one. A BDW switch (S940) for $17.
You may or may not want to disconnect your battery before doing this, as the switch is left in the "on" position by removing the ***. That means all the juice that powers your lights is running through the connector as you're messing with it....
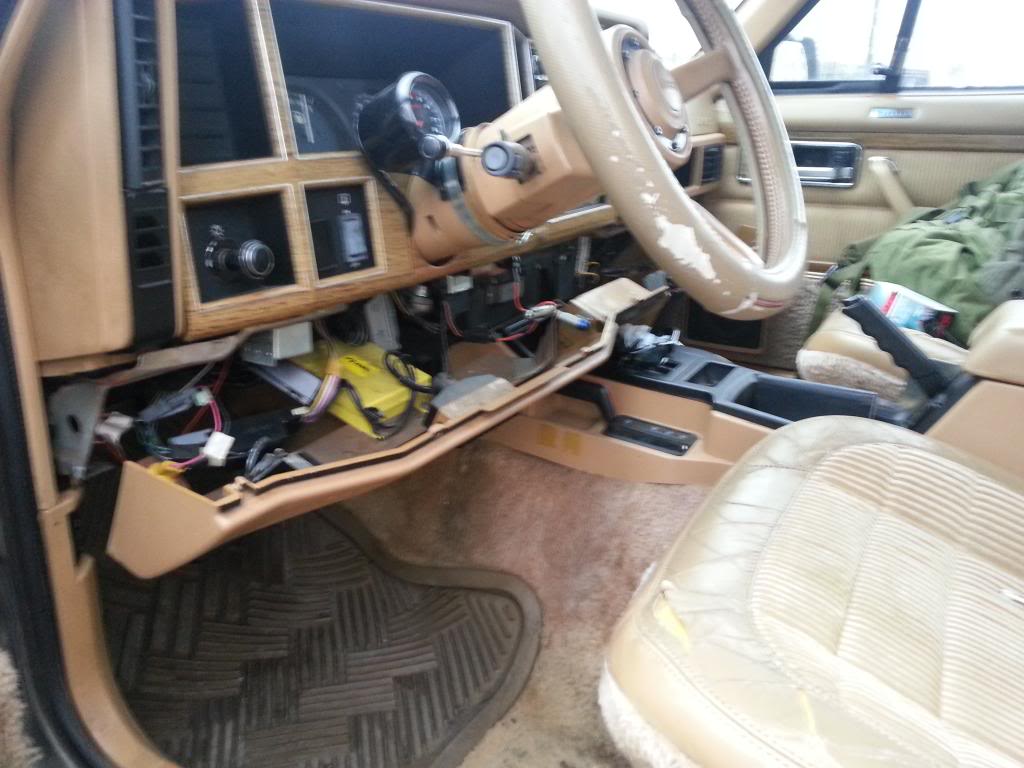
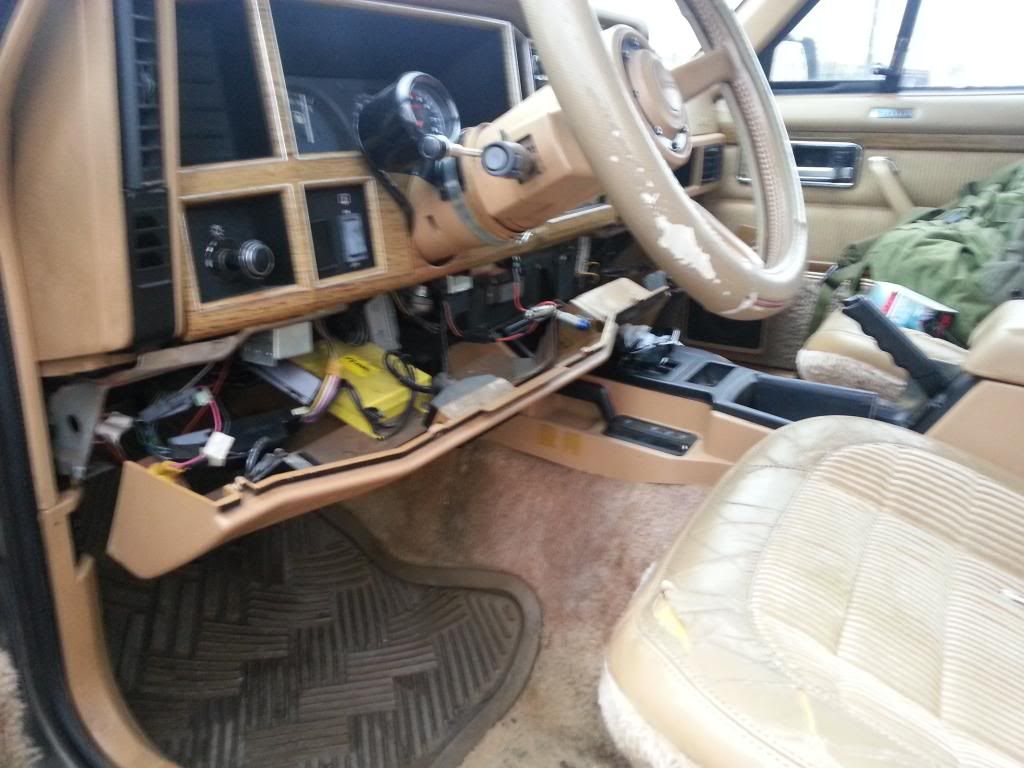
To get at it, you've gotta remove the lower dash, but you can leave everything connected.
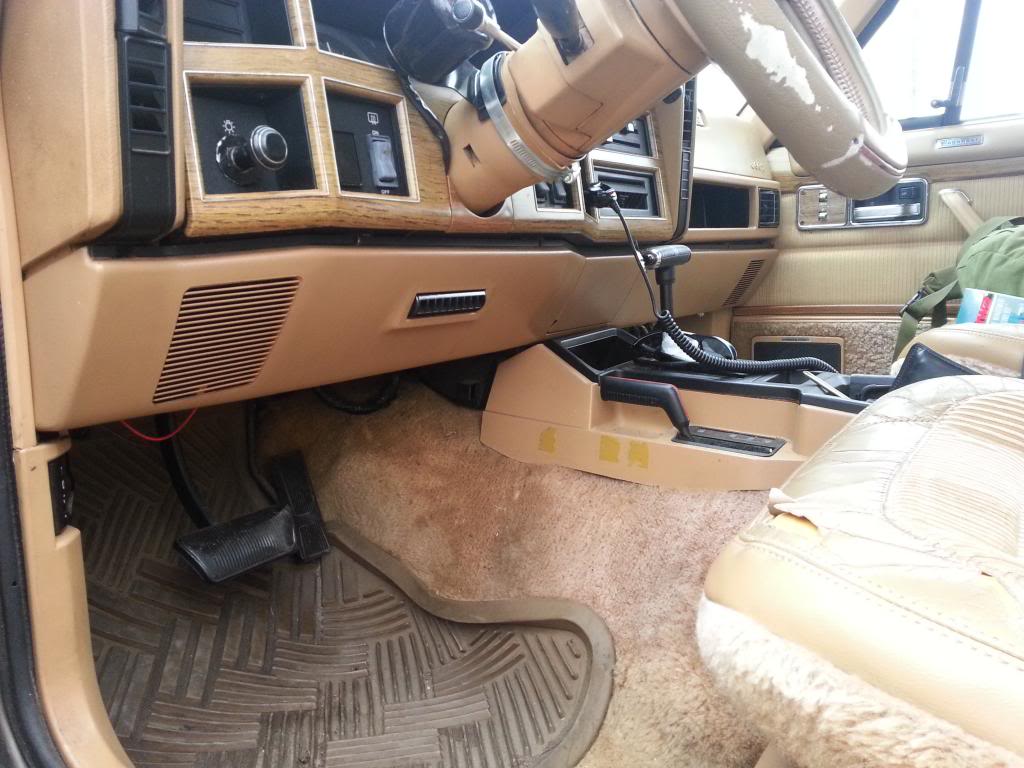
There are around 10 screws (didn't count), then the thing comes off. You've got to have the shifter in Drive or 3rd gear to have enough room to get the thing off.
Clearly this has been done before, as the black plastic bezel around the switch is gone and has been replaced with a painted washer
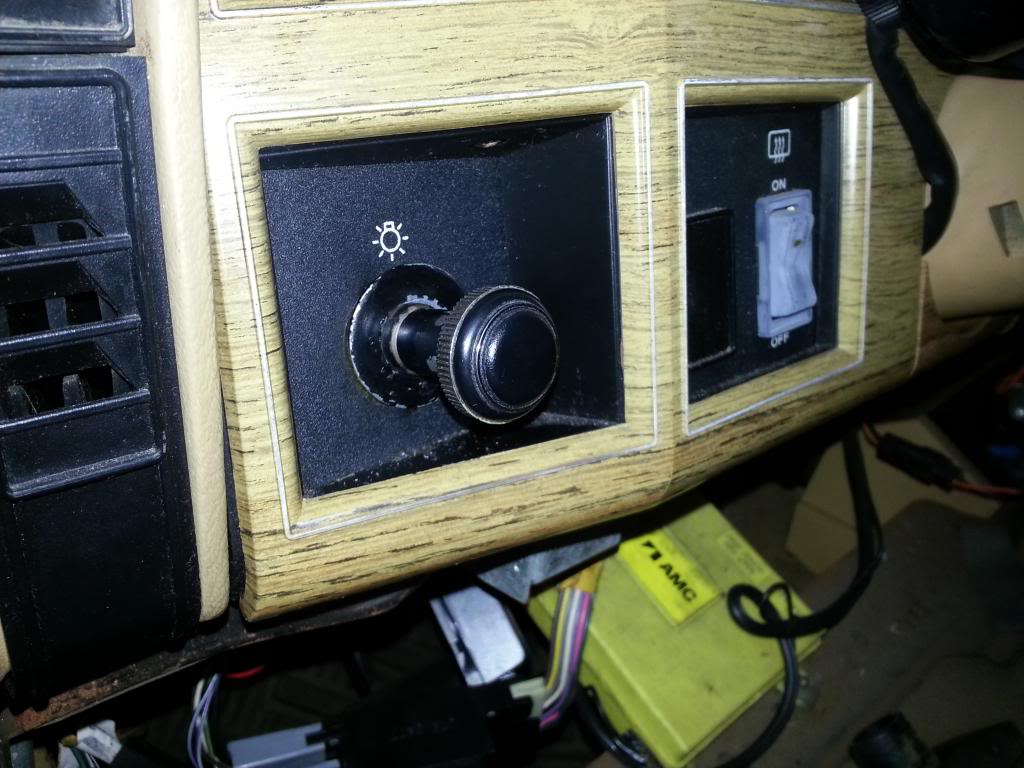
Oh well, something else to fix.
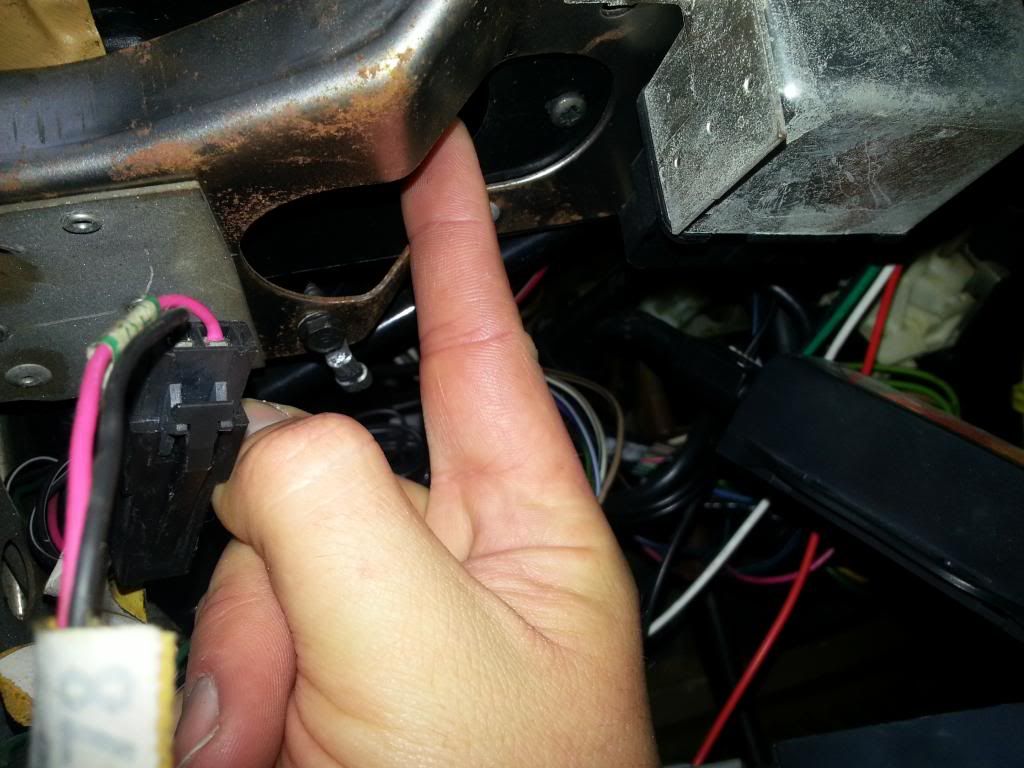
If you look under the switch, from below, there's an access hole. You've got to shove your finger up there and push on the little plunger to remove the ***.
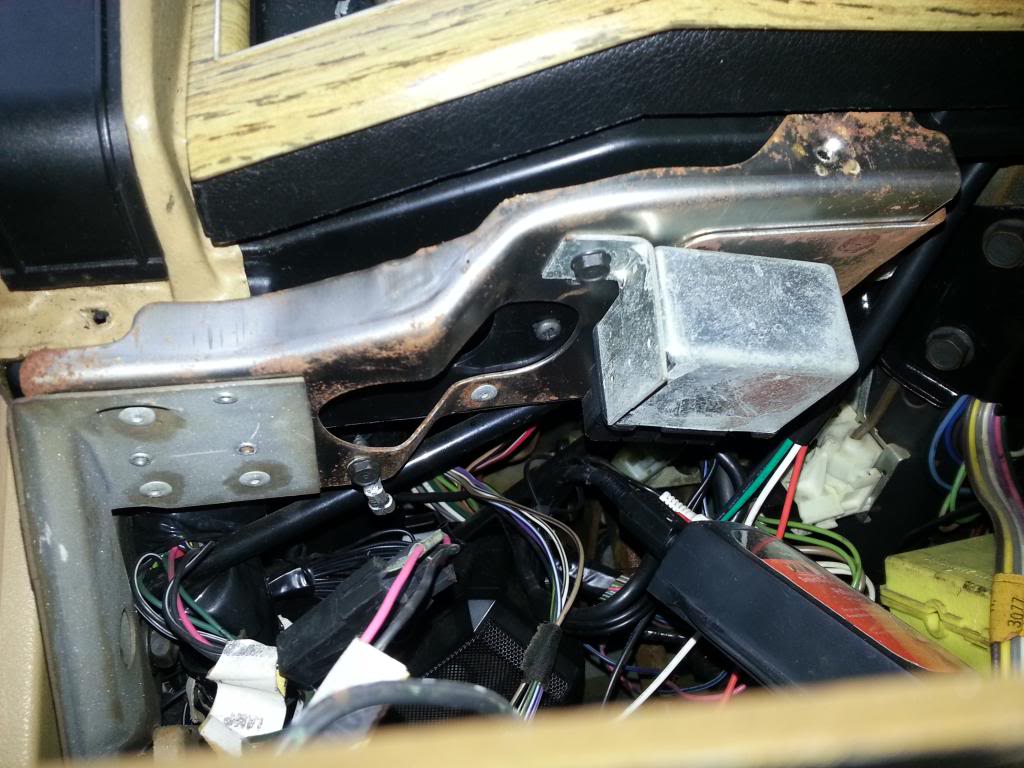
Access hole:

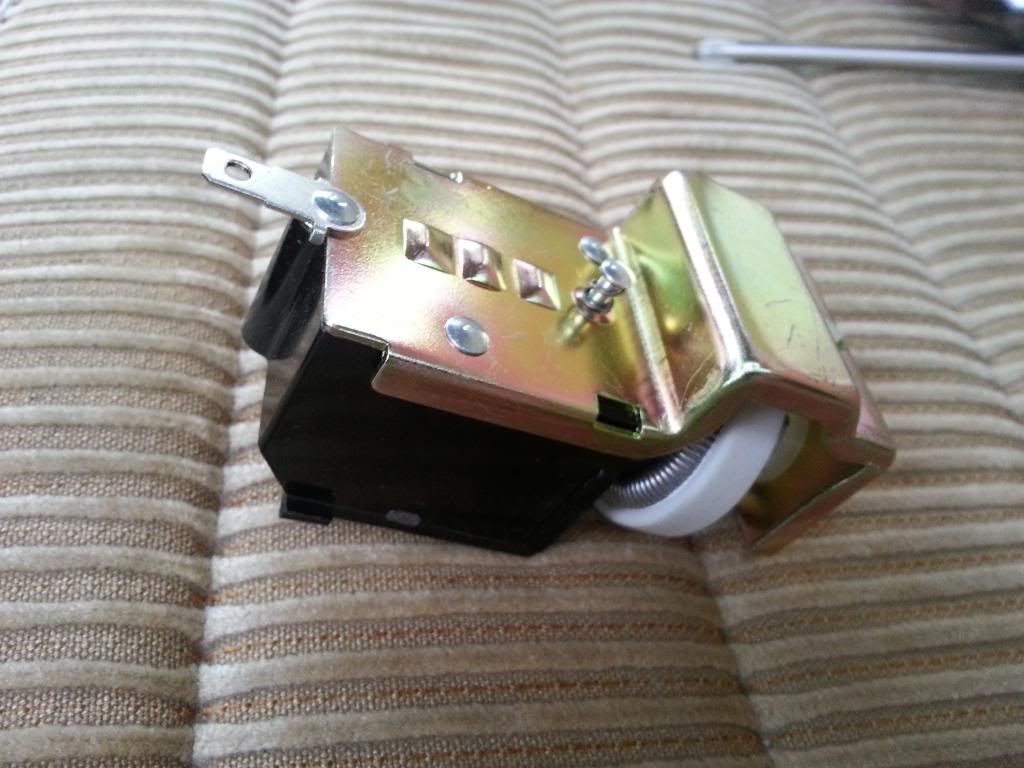
This is the bottom of the new switch, but for illustration, the thing you're looking to push on is that small button with the spring around it. You've got to push pretty hard, then the *** will disengage and you can pull it right out.

Next, use a flat blade to unscrew the retainer that the *** just came out of.
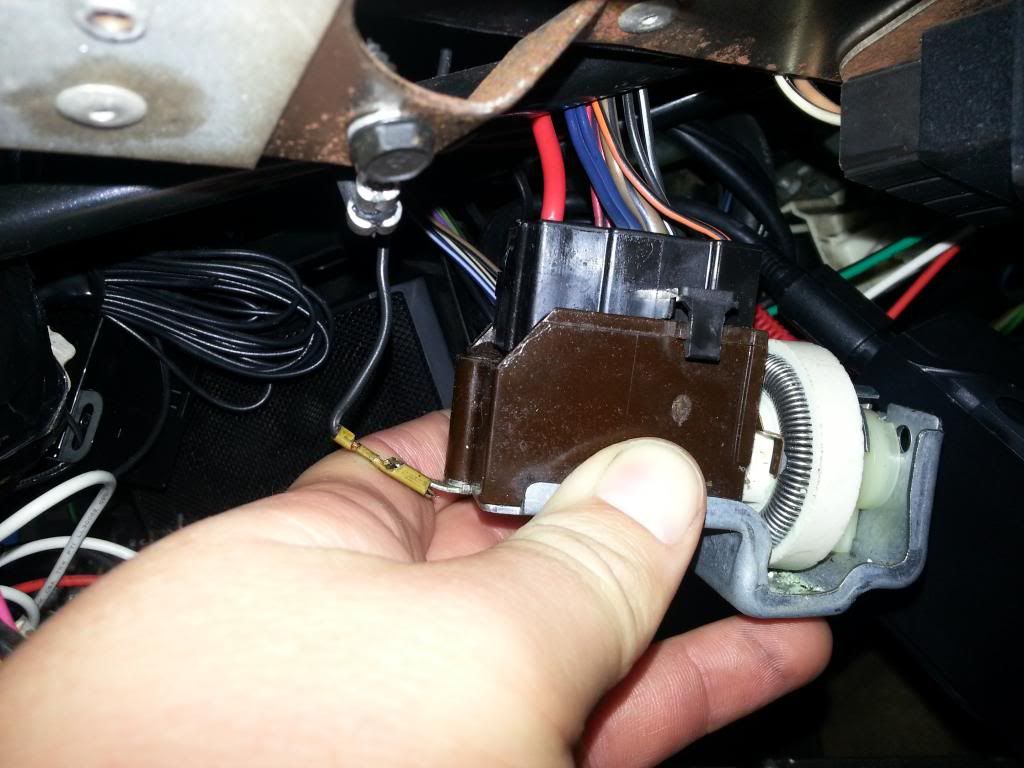
The switch is now loose behind the dash. I've read accounts of not having much room to work, but I was able to pull everything down and have some room to work. If not, use a flat blade to wiggle the connector off the switch - there is a tab on each of the long sides of the switch where the connector clicks into. There is also a ground wire that plugs into the lug on the back.
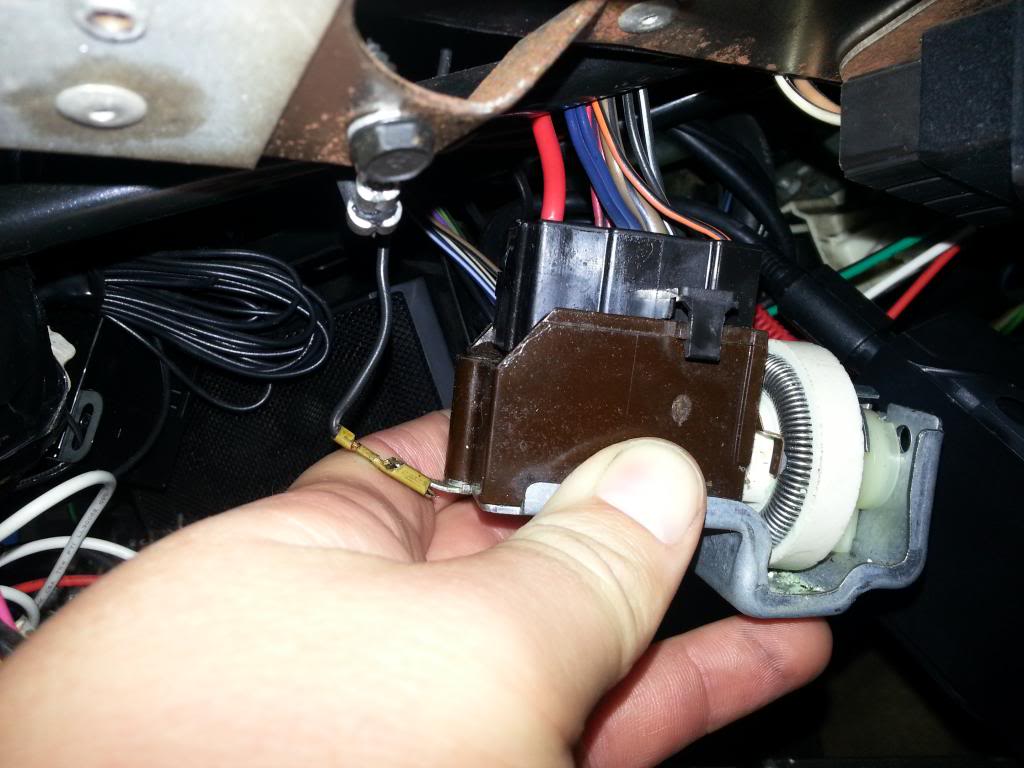
One of the tabs on my connector had broken off at some point.

Clearly, something got warm
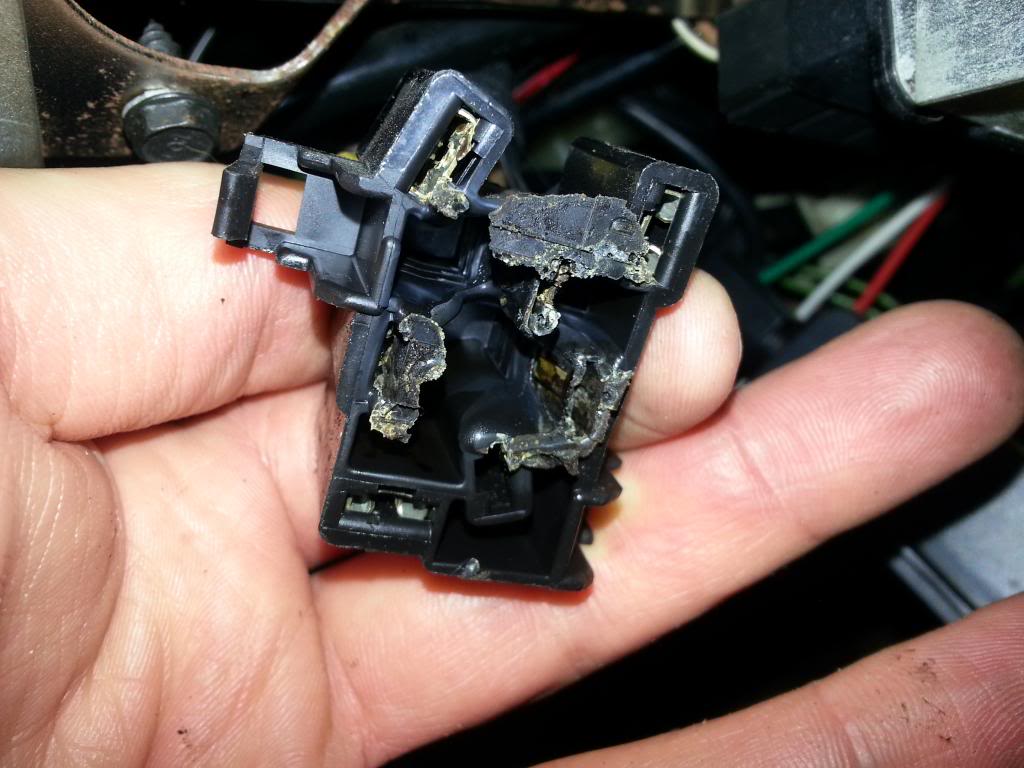
Didn't have time or resources to replace the plug on Saturday, so I shoved it onto the new switch, tested it, and back together she went.
Total time spent was less than 15 minutes.
This is a good excuse to upgrade my lighting harness and bulbs. Those tasks just moved up the list
211,395
Headlights, etc.
So I was out of town over the weekend doing some Army stuff, and when we wrapped up for the day on Friday, it was 9pm. I get in my XJ, start her up and pull on the headlight ***. Dash lights come on, running lights front and rear come on, but no headlights....looked like this.
Ah, the dreaded headlight switch. So I hitch a ride back to the hotel, and after we finish up on Saturday, I make a run to Advance to pick up a new one. A BDW switch (S940) for $17.
You may or may not want to disconnect your battery before doing this, as the switch is left in the "on" position by removing the ***. That means all the juice that powers your lights is running through the connector as you're messing with it....
To get at it, you've gotta remove the lower dash, but you can leave everything connected.
There are around 10 screws (didn't count), then the thing comes off. You've got to have the shifter in Drive or 3rd gear to have enough room to get the thing off.
Clearly this has been done before, as the black plastic bezel around the switch is gone and has been replaced with a painted washer
Oh well, something else to fix.
If you look under the switch, from below, there's an access hole. You've got to shove your finger up there and push on the little plunger to remove the ***.
Access hole:
This is the bottom of the new switch, but for illustration, the thing you're looking to push on is that small button with the spring around it. You've got to push pretty hard, then the *** will disengage and you can pull it right out.
Next, use a flat blade to unscrew the retainer that the *** just came out of.
The switch is now loose behind the dash. I've read accounts of not having much room to work, but I was able to pull everything down and have some room to work. If not, use a flat blade to wiggle the connector off the switch - there is a tab on each of the long sides of the switch where the connector clicks into. There is also a ground wire that plugs into the lug on the back.
One of the tabs on my connector had broken off at some point.
Clearly, something got warm
Didn't have time or resources to replace the plug on Saturday, so I shoved it onto the new switch, tested it, and back together she went.
Total time spent was less than 15 minutes.
This is a good excuse to upgrade my lighting harness and bulbs. Those tasks just moved up the list
Last edited by letinsh; 02-18-2013 at 08:40 AM.
01-14-2013, 05:58 PM
#57
::CF Moderator::
Join Date: Aug 2011
Location: Prescott, Az
Posts: 43,875
Received 1,526 Likes
on
1,238 Posts
Year: 1990
Model: Cherokee (XJ)
Engine: 4.0
1/12/13
211,395
Headlights, etc.
So I was out of town over the weekend doing some Army stuff, and when we wrapped up for the day on Friday, it was 9pm. I get in my XJ, start her up and pull on the headlight ***. Dash lights come on, running lights front and rear come on, but no headlights....looked like this.

Ah, the dreaded headlight switch. So I hitch a ride back to the hotel, and after we finish up on Saturday, I make a run to Advance to pick up a new one. A BDW switch (S940) for $17.
You may or may not want to disconnect your battery before doing this, as the switch is left in the "on" position by removing the ***. That means all the juice that powers your lights is running through the connector as you're messing with it....
To get at it, you've gotta remove the lower dash, but you can leave everything connected.

There are around 10 screws (didn't count), then the thing comes off. You've got to have the shifter in Drive or 3rd gear to have enough room to get the thing off.
Clearly this has been done before, as the black plastic bezel around the switch is gone and has been replaced with a painted washer

Oh well, something else to fix.
If you look under the switch, from below, there's an access hole. You've got to shove your finger up there and push on the little plunger to remove the ***.

Access hole:
This is the bottom of the new switch, but for illustration, the thing you're looking to push on is that small button with the spring around it. You've got to push pretty hard, then the *** will disengage and you can pull it right out.

Next, use a flat blade to unscrew the retainer that the *** just came out of.
The switch is now loose behind the dash. I've read accounts of not having much room to work, but I was able to pull everything down and have some room to work. If not, use a flat blade to wiggle the connector off the switch - there is a tab on each of the long sides of the switch where the connector clicks into. There is also a ground wire that plugs into the lug on the back.
One of the tabs on my connector had broken off at some point.

Clearly, something got warm

Didn't have time or resources to replace the plug on Saturday, so I shoved it onto the new switch, tested it, and back together she went.
Total time spent was less than 15 minutes.
This is a good excuse to upgrade my lighting harness and bulbs. Those tasks just moved up the list
211,395
Headlights, etc.
So I was out of town over the weekend doing some Army stuff, and when we wrapped up for the day on Friday, it was 9pm. I get in my XJ, start her up and pull on the headlight ***. Dash lights come on, running lights front and rear come on, but no headlights....looked like this.
Ah, the dreaded headlight switch. So I hitch a ride back to the hotel, and after we finish up on Saturday, I make a run to Advance to pick up a new one. A BDW switch (S940) for $17.
You may or may not want to disconnect your battery before doing this, as the switch is left in the "on" position by removing the ***. That means all the juice that powers your lights is running through the connector as you're messing with it....
To get at it, you've gotta remove the lower dash, but you can leave everything connected.
There are around 10 screws (didn't count), then the thing comes off. You've got to have the shifter in Drive or 3rd gear to have enough room to get the thing off.
Clearly this has been done before, as the black plastic bezel around the switch is gone and has been replaced with a painted washer
Oh well, something else to fix.
If you look under the switch, from below, there's an access hole. You've got to shove your finger up there and push on the little plunger to remove the ***.
Access hole:
This is the bottom of the new switch, but for illustration, the thing you're looking to push on is that small button with the spring around it. You've got to push pretty hard, then the *** will disengage and you can pull it right out.
Next, use a flat blade to unscrew the retainer that the *** just came out of.
The switch is now loose behind the dash. I've read accounts of not having much room to work, but I was able to pull everything down and have some room to work. If not, use a flat blade to wiggle the connector off the switch - there is a tab on each of the long sides of the switch where the connector clicks into. There is also a ground wire that plugs into the lug on the back.
One of the tabs on my connector had broken off at some point.
Clearly, something got warm
Didn't have time or resources to replace the plug on Saturday, so I shoved it onto the new switch, tested it, and back together she went.
Total time spent was less than 15 minutes.
This is a good excuse to upgrade my lighting harness and bulbs. Those tasks just moved up the list
01-26-2013, 07:26 PM
#59
Senior Member

Join Date: Jan 2010
Location: Lyons, Oregon
Posts: 536
Likes: 0
Received 0 Likes
on
0 Posts
Year: 1991
Model: Cherokee
Engine: 4.0 HO
You are doing a great job!!! Keep up the good work. I bought a 90 Wagoneer Woody for my daughter to drive when she gets her license in Sept. and have been slowly trying to clean her up (the Jeep not the daughter). Some of the stuff you've mentioned I've already done, the others, I'm sure, will have to be done eventually.
06-09-2013, 12:35 PM
#60
Seasoned Member
Thread Starter
Join Date: Jan 2011
Location: Austin
Posts: 302
Likes: 0
Received 4 Likes
on
3 Posts
Year: 1987
Model: Wagoneer
Engine: 4.0
8 June 13
216,450ish
After 6 months, life has calmed down a bit and I'm back in country long enough to finally have time to get back into the XJ.
Last Thursday, on my way home from work, I experienced severe, random brake pedal kick back. Like, hard enough to send my knee into the steering wheel. Brakes were fine all day, then it randomly kicked back. It seemed to be coming from the driver's front, and it was scary enough that I though I'd find the caliper dangling by the brake line, wrapped around the axle.
No such luck. Up on jack stands, both front wheels off and everything is "toight like a toiger". The only thing I could find, which needs to be addressed, but doesn't seem to be involved, is that somehow the dust boots for 2 of my 4 tie rod ends have come off...
The rotors have no grooves and to the naked eye don't look warped (I know I should have them checked), the pads are about 50%, all bolts, etc are tight.
Thought it might be in the pedal / booster mechanism, but the under dash parts and pieces look good. By the time I got under the hood, it was too dark to do any real looking.
Put the wheels back on and drove around, but couldn't reliably reproduce. It would happen under hard and soft braking, with no rhyme or reason.
After getting to work and back on Friday, I parked it until I could take a look.
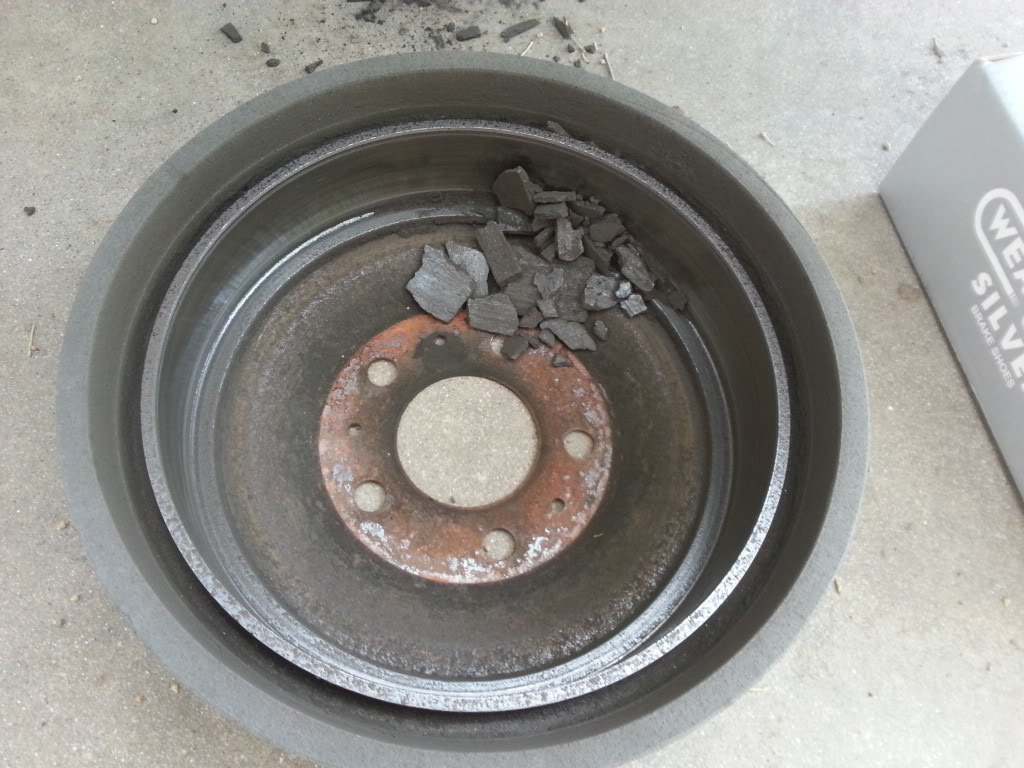
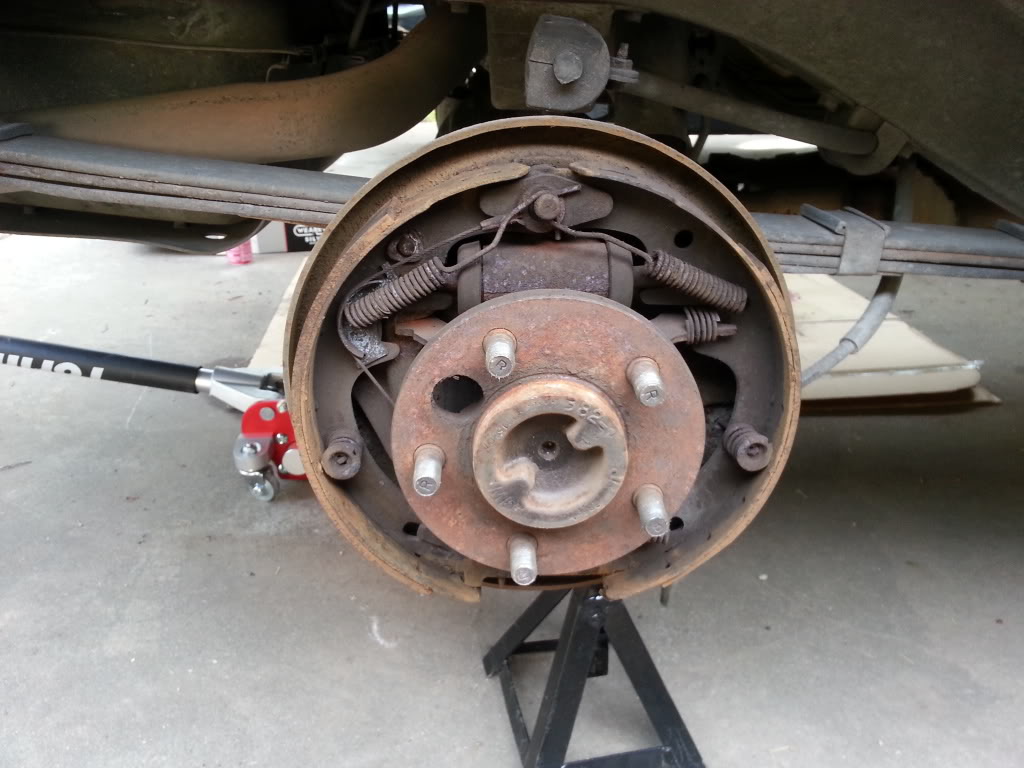
Saturday afternoon, I took the rears off and this is what I found on the driver's side:
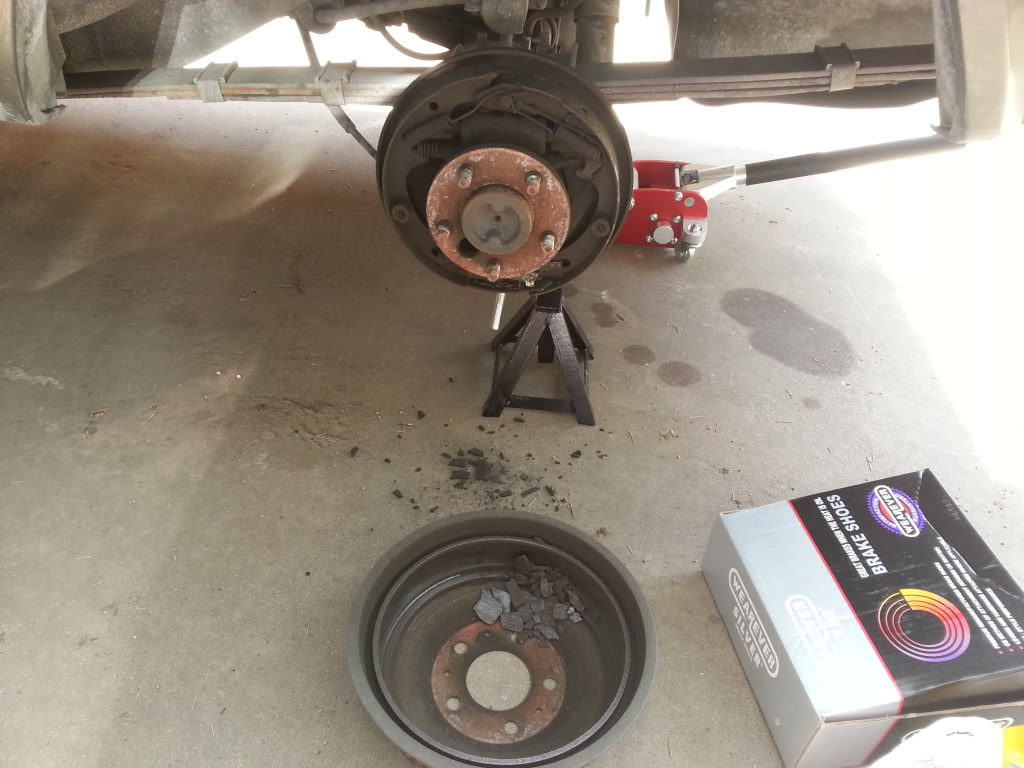
It *might* have been my issue
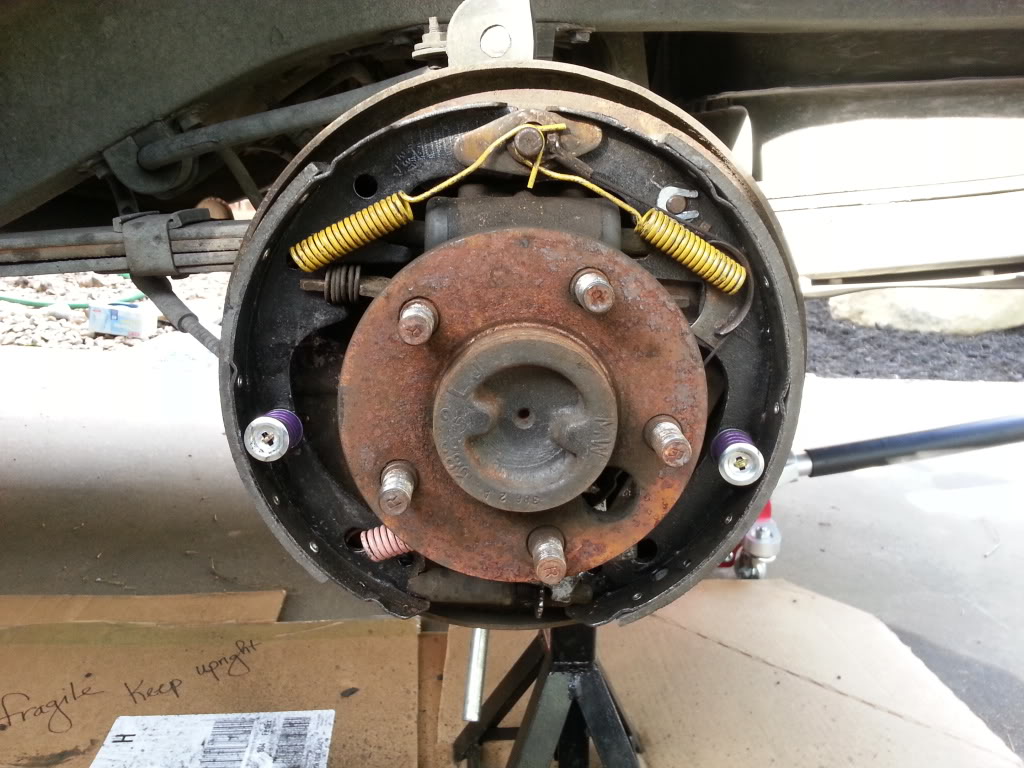
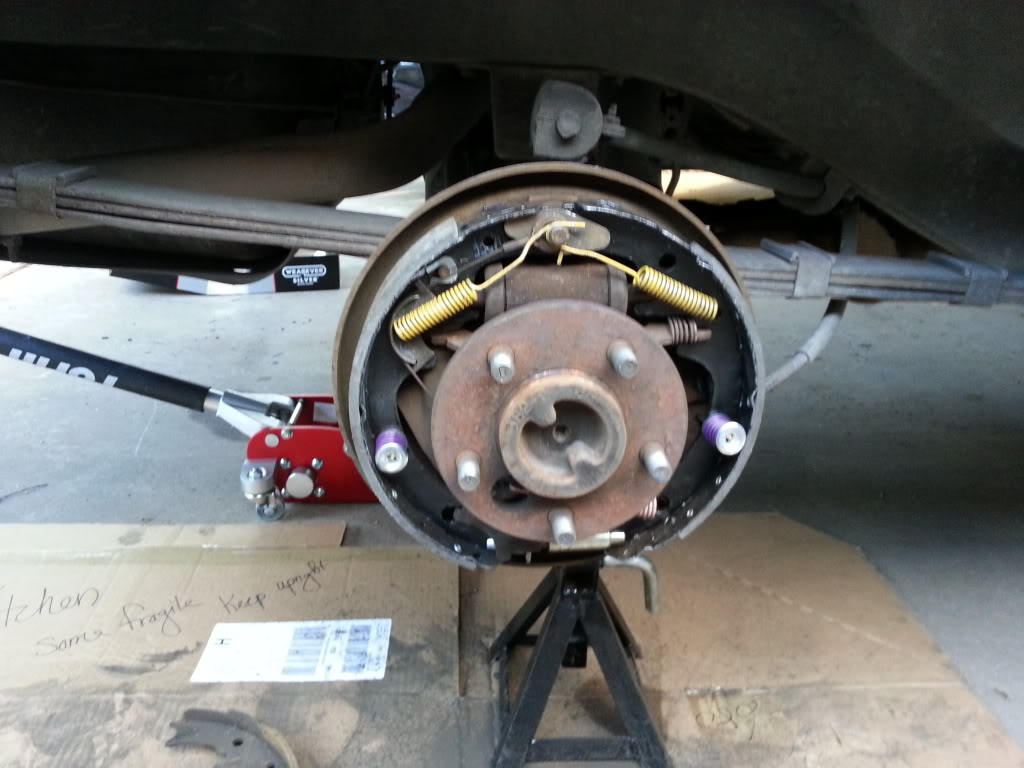
Passenger side looked fine, but I replaced both sets of shoes and new hardware, as well.
They look so pretty
And now that we have a house and a 2 car garage, I'm gonna be able to get more work done
216,450ish
After 6 months, life has calmed down a bit and I'm back in country long enough to finally have time to get back into the XJ.
Last Thursday, on my way home from work, I experienced severe, random brake pedal kick back. Like, hard enough to send my knee into the steering wheel. Brakes were fine all day, then it randomly kicked back. It seemed to be coming from the driver's front, and it was scary enough that I though I'd find the caliper dangling by the brake line, wrapped around the axle.
No such luck. Up on jack stands, both front wheels off and everything is "toight like a toiger". The only thing I could find, which needs to be addressed, but doesn't seem to be involved, is that somehow the dust boots for 2 of my 4 tie rod ends have come off...
The rotors have no grooves and to the naked eye don't look warped (I know I should have them checked), the pads are about 50%, all bolts, etc are tight.
Thought it might be in the pedal / booster mechanism, but the under dash parts and pieces look good. By the time I got under the hood, it was too dark to do any real looking.
Put the wheels back on and drove around, but couldn't reliably reproduce. It would happen under hard and soft braking, with no rhyme or reason.
After getting to work and back on Friday, I parked it until I could take a look.
Saturday afternoon, I took the rears off and this is what I found on the driver's side:
It *might* have been my issue
Passenger side looked fine, but I replaced both sets of shoes and new hardware, as well.
They look so pretty
And now that we have a house and a 2 car garage, I'm gonna be able to get more work done