1987 Wagoneer Limited
 07-25-2011, 11:48 AM
#1
Seasoned Member
Thread Starter
Join Date: Jan 2011
Location: Austin
Posts: 302
Likes: 0
Received 4 Likes
on
3 Posts
Year: 1987
Model: Wagoneer
Engine: 4.0
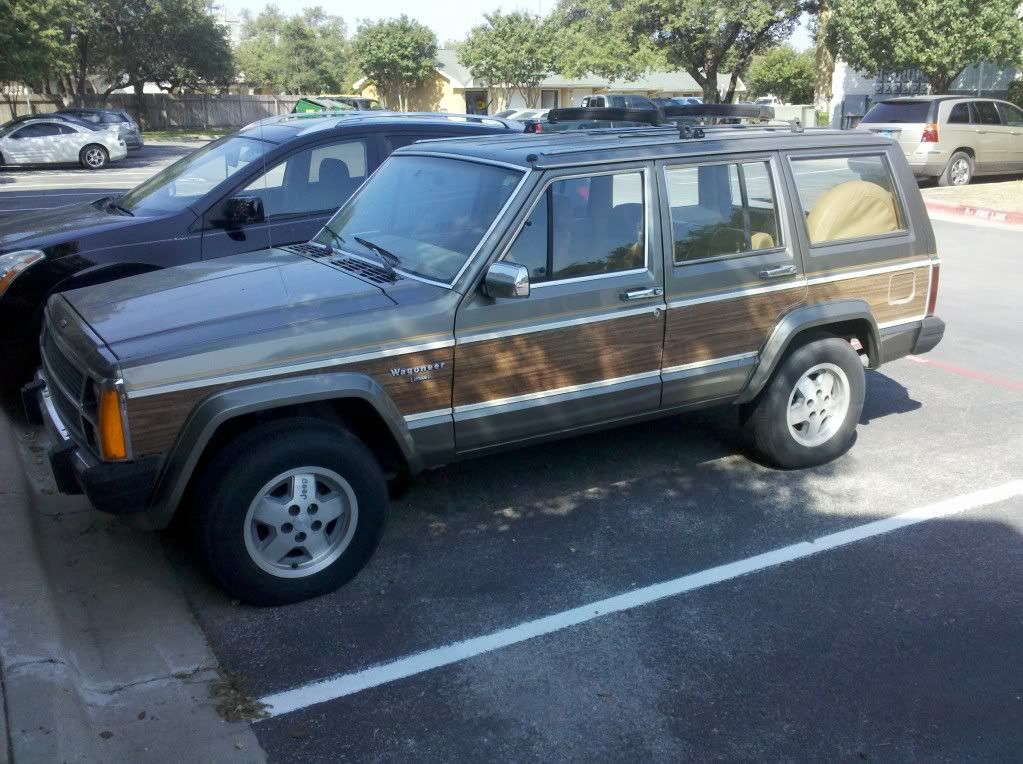
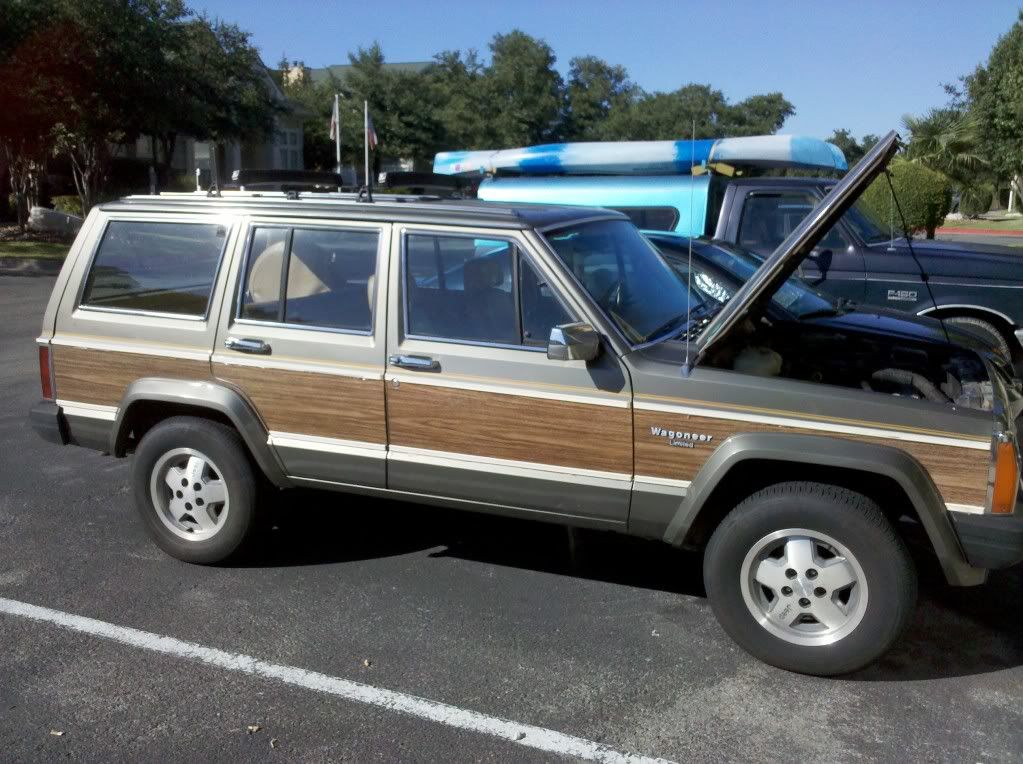
Well, I've been lurkin' for quite some time and have decided to start a build thread to keep track of what I've done. The Jeep was a gift from the original owner, my father-in-law, about a year ago. It had been in NC for all of it's life, until my wife and I drove it back here to TX last summer. On the drive back, the Renix cooling system reared it's ugly head and decided to overheat. I limped it back, and it sat, parked, until this April.
The Waggy's in good condition, so I'm not looking to do anything too extensive to it. It also holds sentimental value to my wife, so doing any major surgery to it is out of the question
Specs:
1987 Jeep Wagoneer Limited
4.0L
AW4
NP 231
D35/D30
197,xxx miles
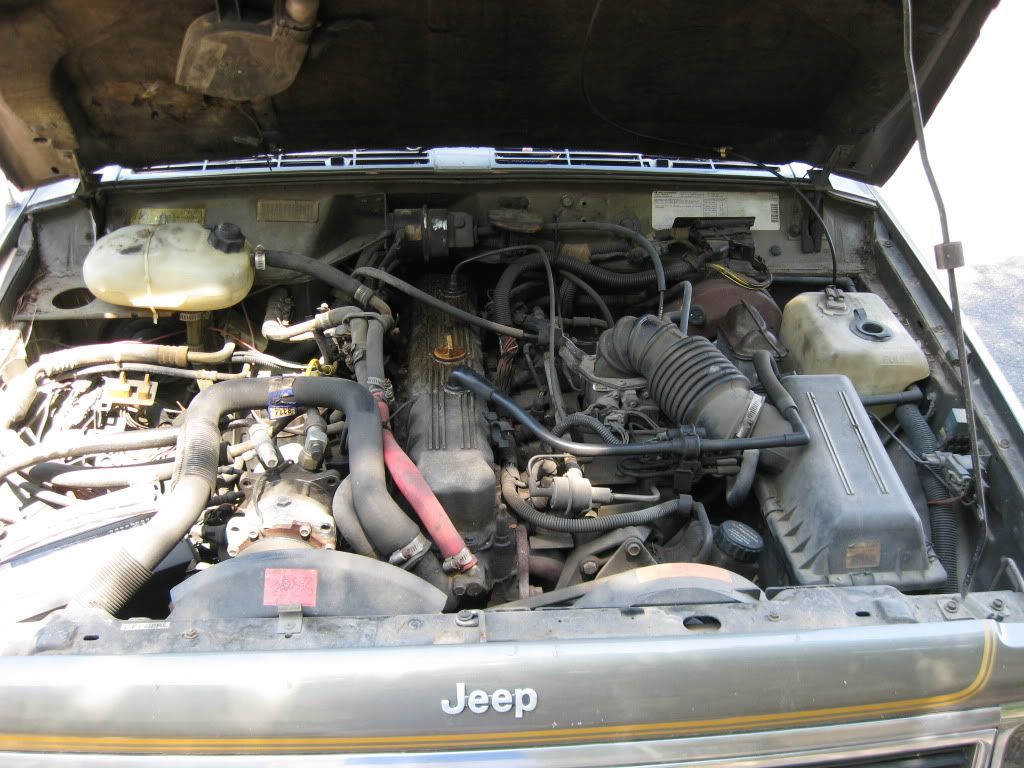
Pre-Coolant System swap:
The Waggy's in good condition, so I'm not looking to do anything too extensive to it. It also holds sentimental value to my wife, so doing any major surgery to it is out of the question
Specs:
1987 Jeep Wagoneer Limited
4.0L
AW4
NP 231
D35/D30
197,xxx miles
Pre-Coolant System swap:

 07-25-2011, 09:51 PM
#4
Seasoned Member
Thread Starter
Join Date: Jan 2011
Location: Austin
Posts: 302
Likes: 0
Received 4 Likes
on
3 Posts
Year: 1987
Model: Wagoneer
Engine: 4.0
Thanks, CC-I dig the wood trim, too. Sets "Willis" apart 
First things first - do something about that blasted cooling system.
It's been covered a million times, but here's how I converted from the older '87-'90 "closed" system to the newer '91+ "open" system.
Much credit to BCBlues, here.
I noticed the system starting to fail as my wife and I road-tripped back from NC last July. We took the long route and went through the Blue Ridge Mountains, but it wasn't until Alabama where it got to the point of having to travel at night just to keep the temp down. As usual, the overflow tank ruptured on the seam and the system couldn't stay pressurized.
So, this is what I did to fix it.
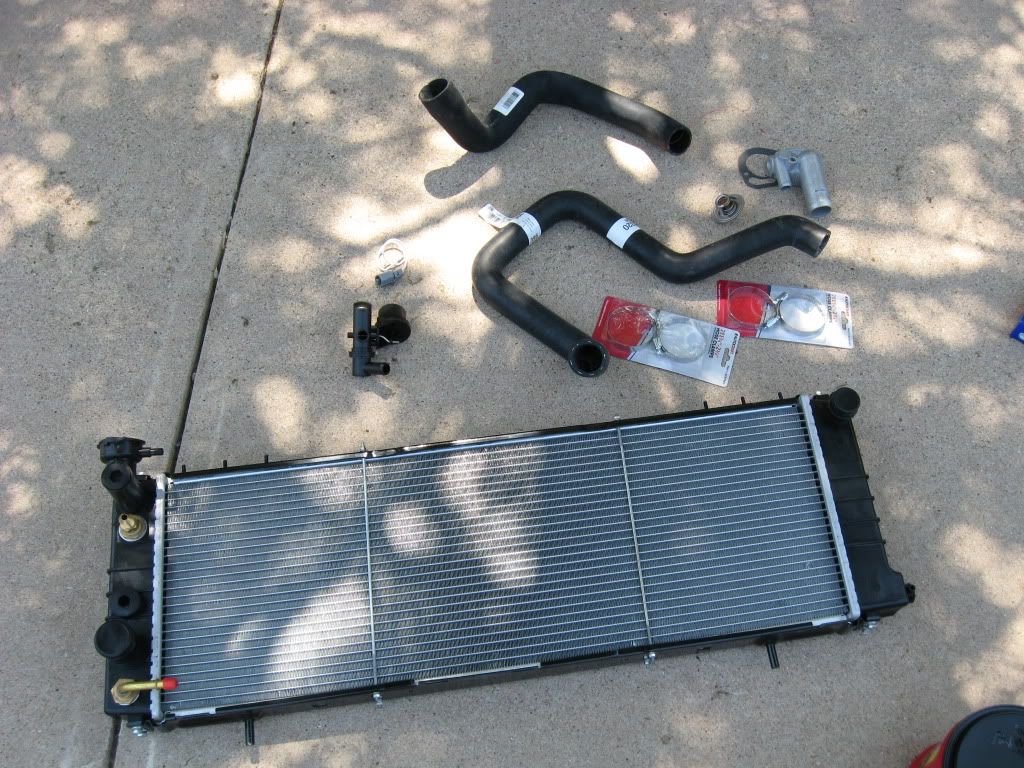
Parts list:
Radiator : DPI 1193 radiator for '91-'01 Cherokee/Comanchee here
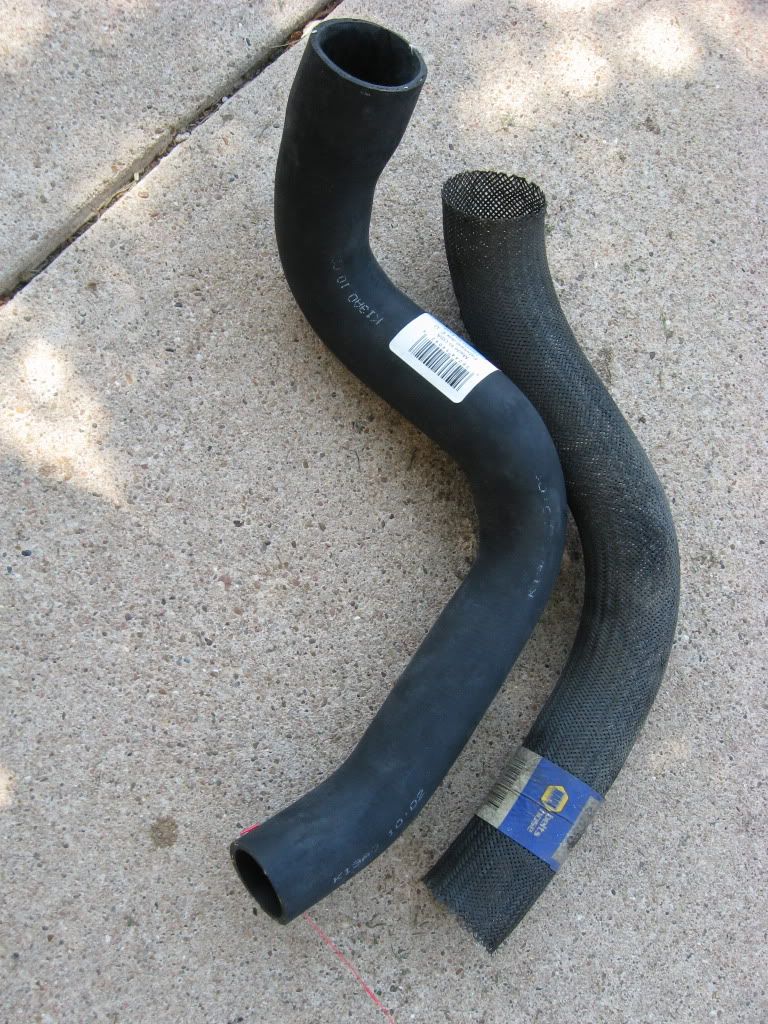
Upper Radiator Hose : Dayco E71320 $11.49
Lower Radiator Hose : Dayco D71321 $13.49
Thermostat Housing : Dorman 902-306 $10.99
Thermostat Housing Gasket : $1.99
195F Thermostat : Stant 13009 #3.99
Heater Bypass Valve : Factory Air Valve 74777 $18.49
Coolant Fan Switch : Echlin Ignition Parts ECH FS111 $15.49
Coolant Fan Switch Connector : Echlin Ignition Parts ECH FSC10 $13.49
Various hose clamps and bulk heater hose
Radiator cap : 13psi $4.99
Minus the bulk hose, this is what you need:
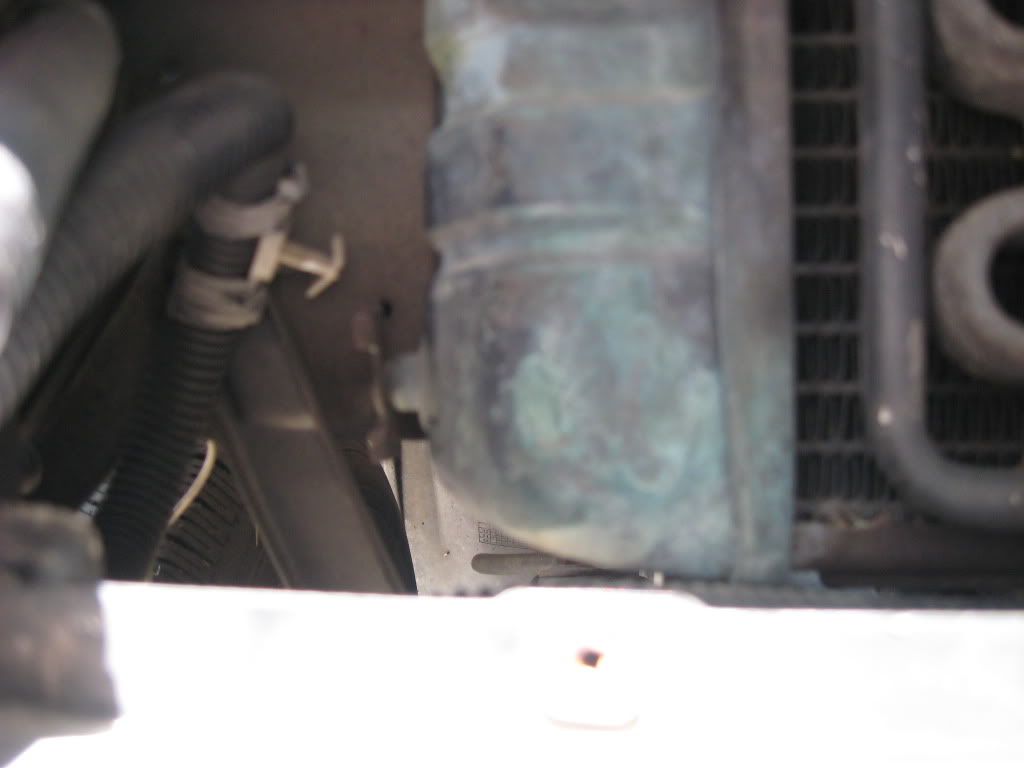
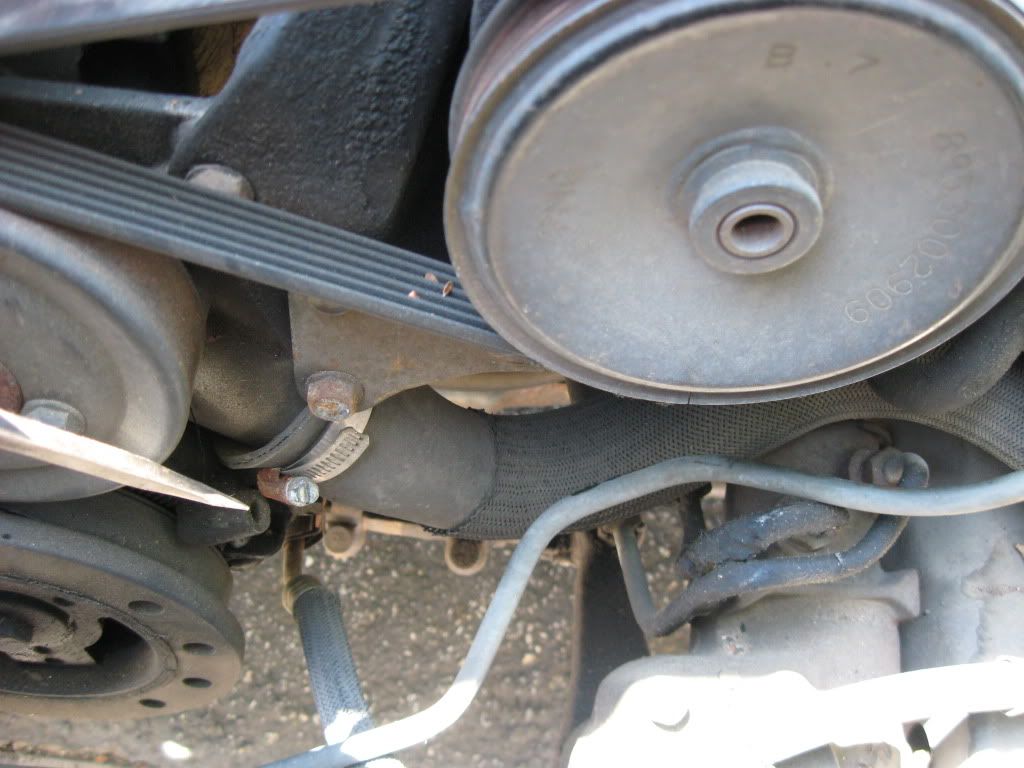
The original setup:
First things first is to make sure your engine is cool and drain the coolant. On my Waggy, the radiator drain petcock was behind the passenger turn lamp:
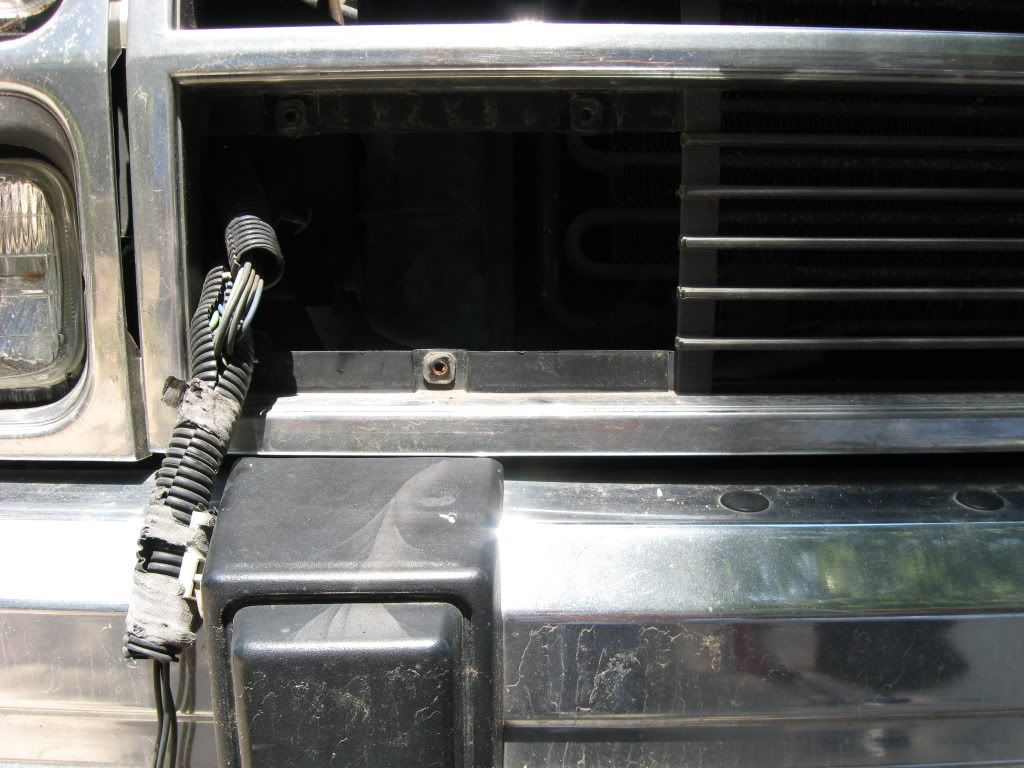
....ok, the wife's calling. I'll finish later
First things first - do something about that blasted cooling system.
It's been covered a million times, but here's how I converted from the older '87-'90 "closed" system to the newer '91+ "open" system.
Much credit to BCBlues, here.
I noticed the system starting to fail as my wife and I road-tripped back from NC last July. We took the long route and went through the Blue Ridge Mountains, but it wasn't until Alabama where it got to the point of having to travel at night just to keep the temp down. As usual, the overflow tank ruptured on the seam and the system couldn't stay pressurized.
So, this is what I did to fix it.
Parts list:
Radiator : DPI 1193 radiator for '91-'01 Cherokee/Comanchee here
Upper Radiator Hose : Dayco E71320 $11.49
Lower Radiator Hose : Dayco D71321 $13.49
Thermostat Housing : Dorman 902-306 $10.99
Thermostat Housing Gasket : $1.99
195F Thermostat : Stant 13009 #3.99
Heater Bypass Valve : Factory Air Valve 74777 $18.49
Coolant Fan Switch : Echlin Ignition Parts ECH FS111 $15.49
Coolant Fan Switch Connector : Echlin Ignition Parts ECH FSC10 $13.49
Various hose clamps and bulk heater hose
Radiator cap : 13psi $4.99
Minus the bulk hose, this is what you need:
The original setup:
First things first is to make sure your engine is cool and drain the coolant. On my Waggy, the radiator drain petcock was behind the passenger turn lamp:
....ok, the wife's calling. I'll finish later
Last edited by letinsh; 07-26-2011 at 05:33 PM.
07-25-2011, 09:51 PM
#5
Member
Join Date: May 2011
Location: Central Valley, CA.
Posts: 122
Likes: 0
Received 0 Likes
on
0 Posts
Year: 2000
Model: Cherokee
Engine: 4.0 I6
That's a clean Waggy, keeping in mind you're going for primarily stock, what are your plans for it?
Talk the wife into a small lift and some 31's?
Talk the wife into a small lift and some 31's?
07-26-2011, 02:02 PM
#7
Seasoned Member
Thread Starter
Join Date: Jan 2011
Location: Austin
Posts: 302
Likes: 0
Received 4 Likes
on
3 Posts
Year: 1987
Model: Wagoneer
Engine: 4.0
And, I'm back. Thanks, guys!
To continue....
Next, it's time to disconnect the Electric fan (driver's side), and remove. After that, remove the screws holding the fan shroud and push it towards the engine and hang it on the mechanical fan.
Oh, yeah, remove the battery...gives you more room.
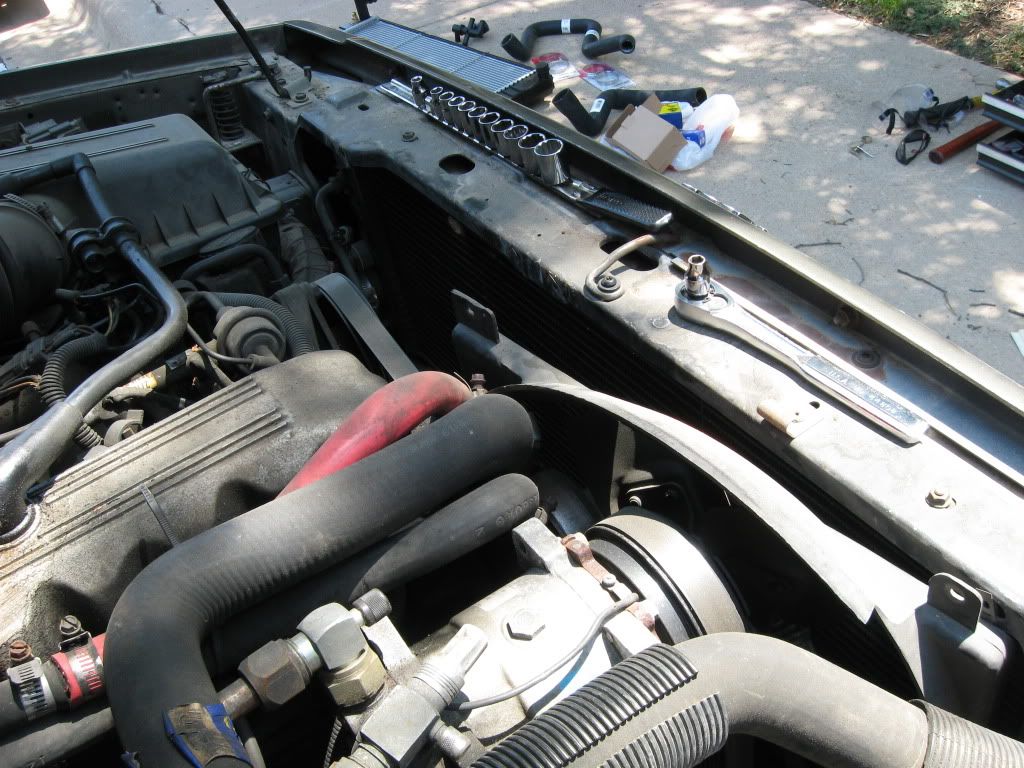
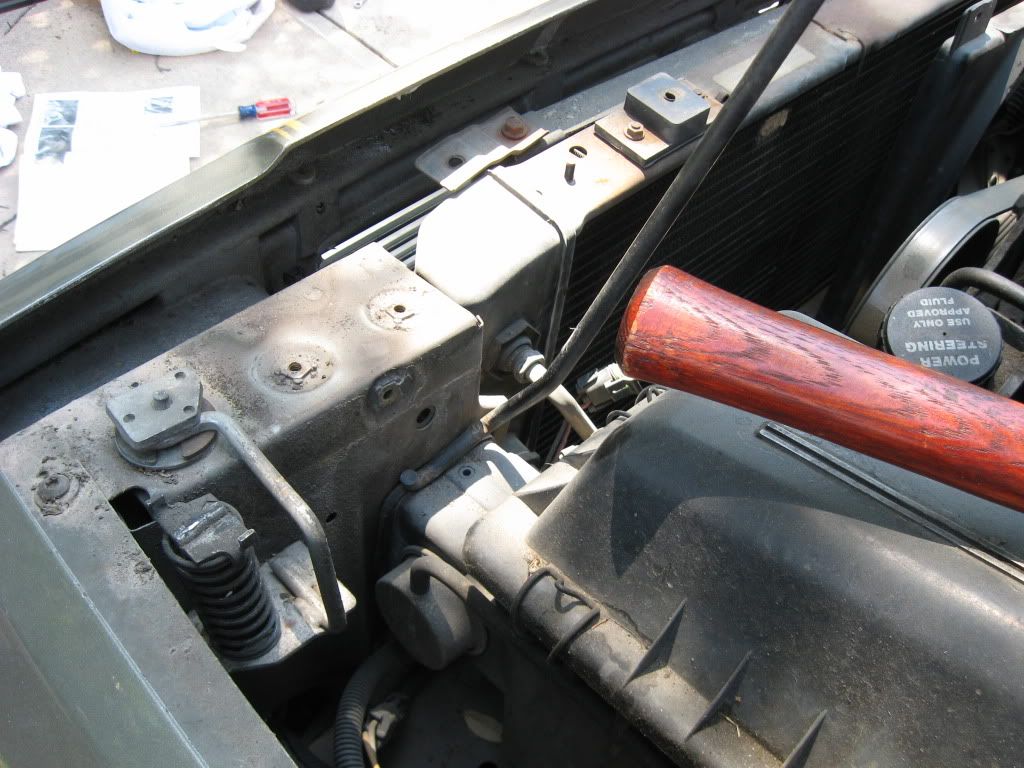
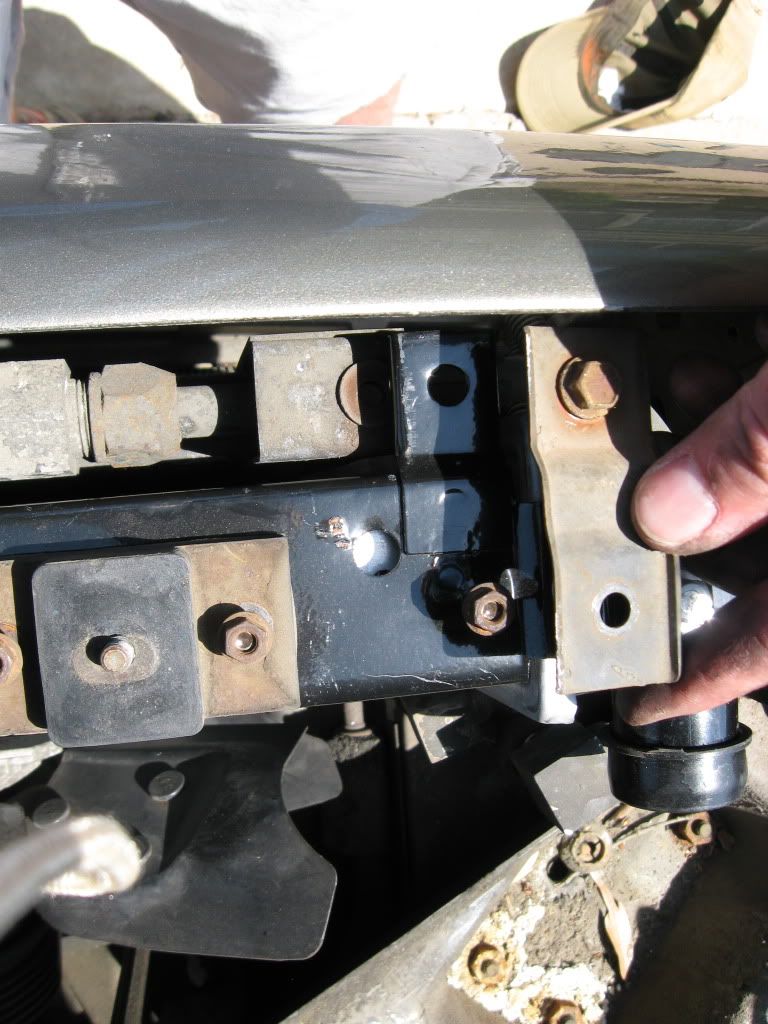
Next, it's time to remove the cross braces that hides the radiator. There is a problem, and that's that the hood prop rod is fastened to the piece you're removing. I, carefully, unscrewed it and wedged the bottom in beside the air box so it would still hold the hood up. Both pieces the hood latch is attached to need to come out.
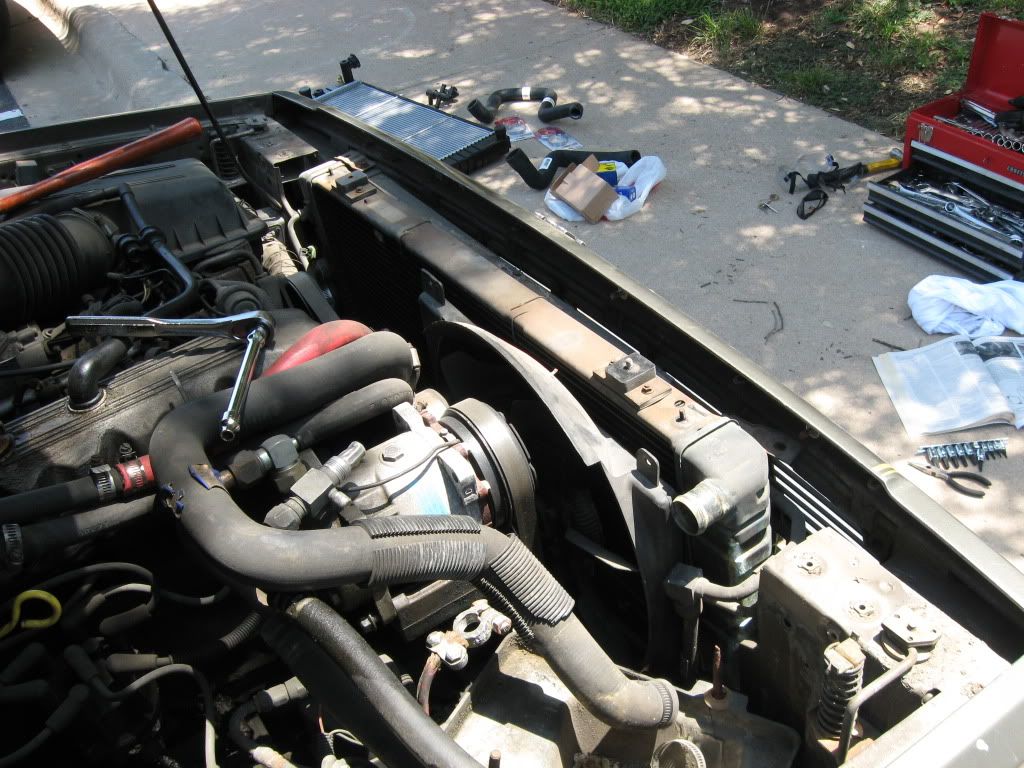
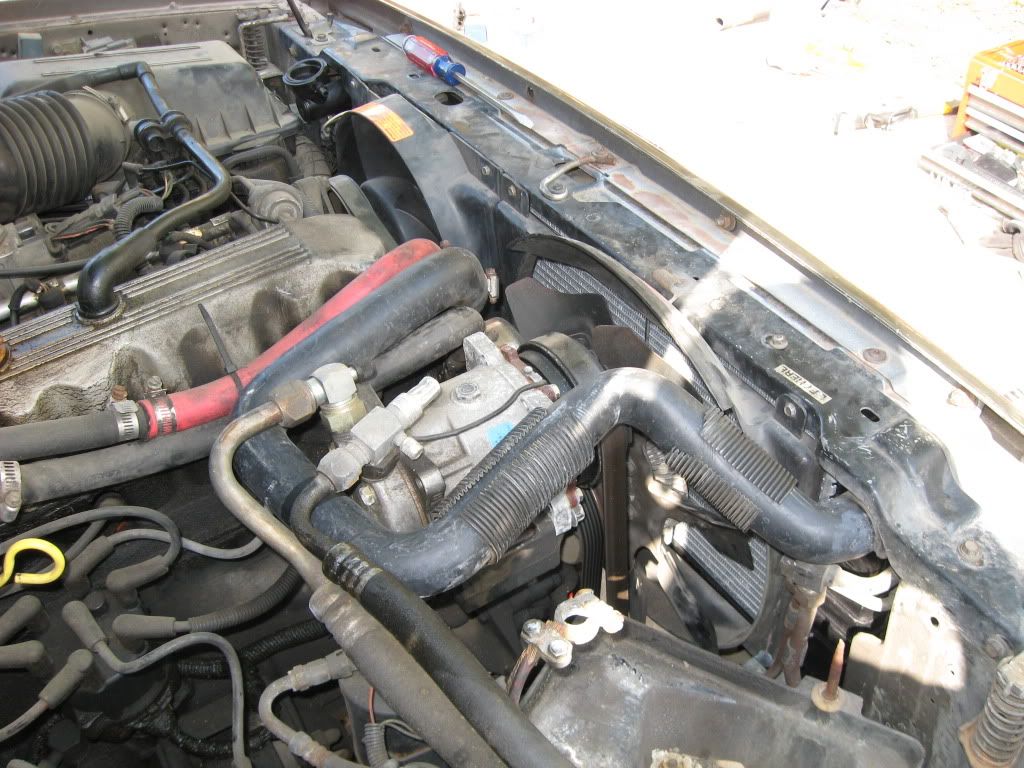
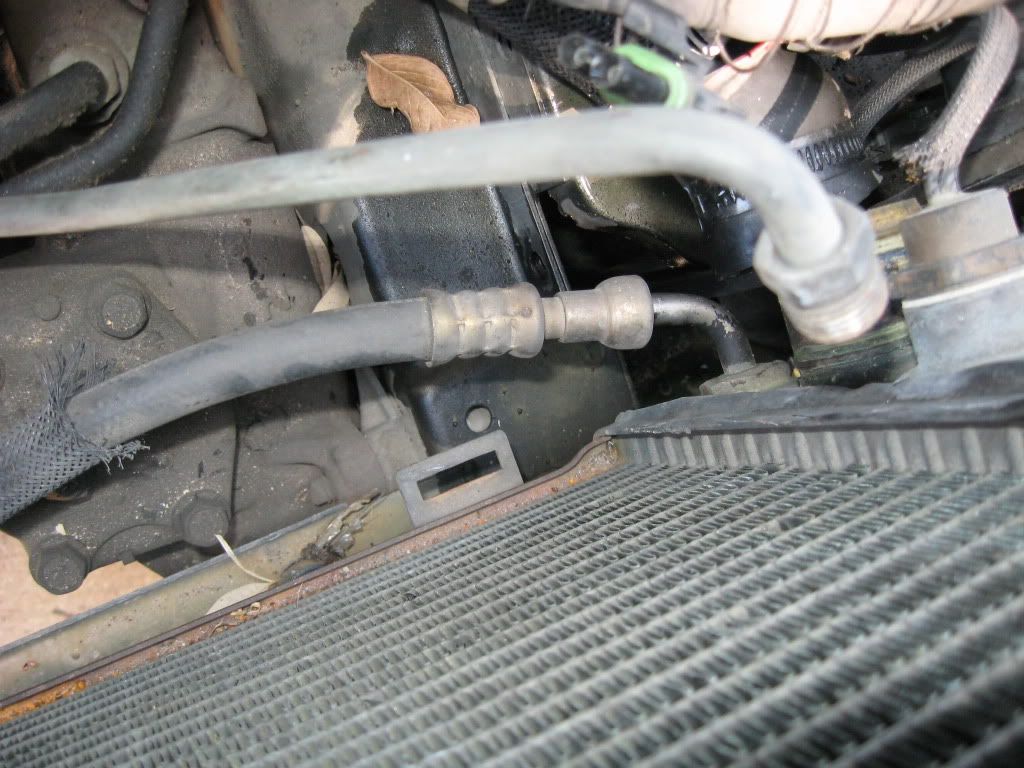
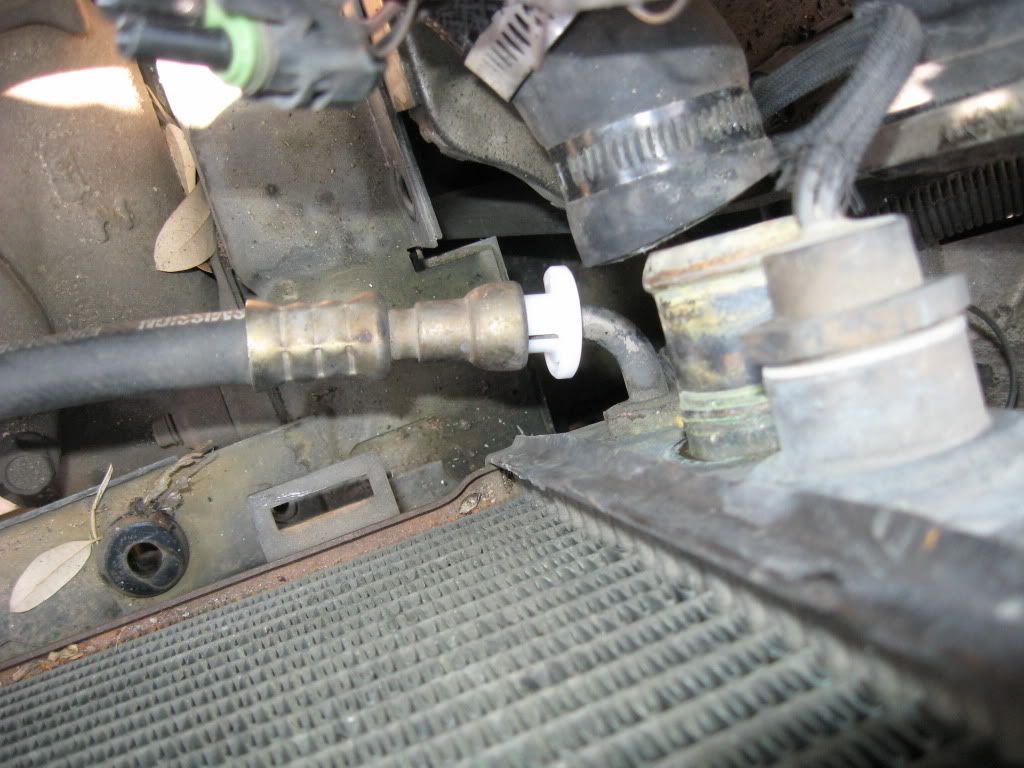
Next, disconnect the top and bottom radiator hoses as well as the tranny cooler lines. The top tranny line is easy to get out, but the bottom one is a trick. I dicked around with it for over an hour trying to figure out how it disconnects....turns out there's a disconnect tool....AC/Fuel line disconnect tool...1 minute and it was off.
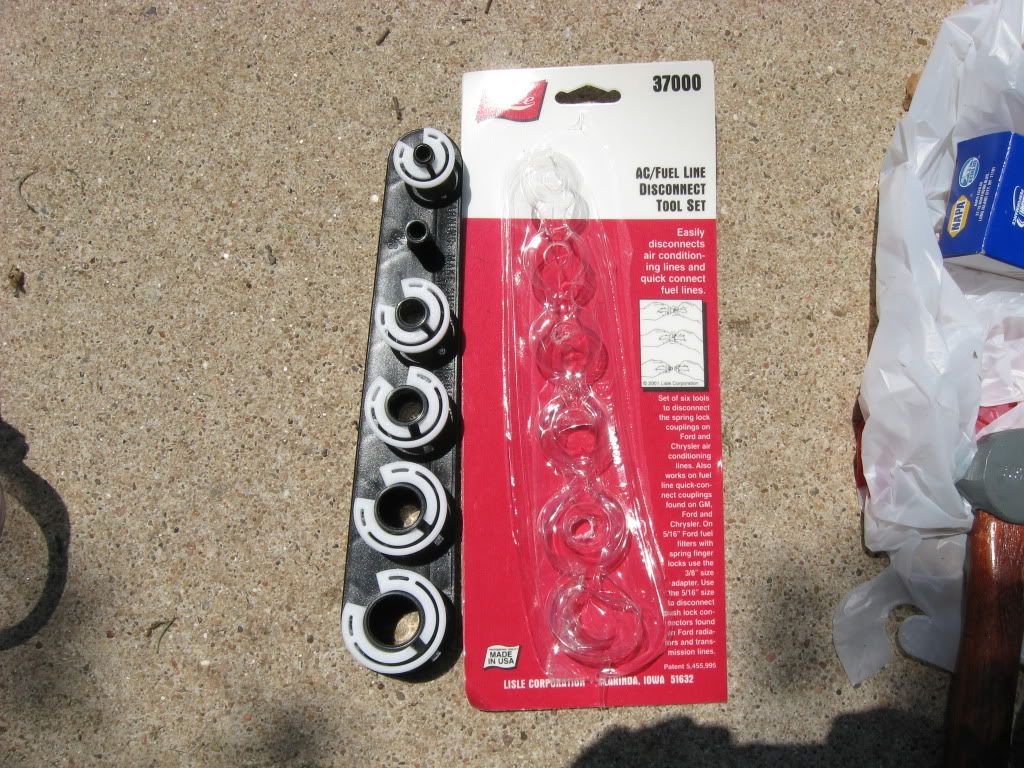
Once everything was disconnected, out she came.
Remove the fan shroud for more working room.
Now that there's all kinds of room, you can easily get to the water pump if you want to. I chose not to do that and went straight to the thermostat housing.
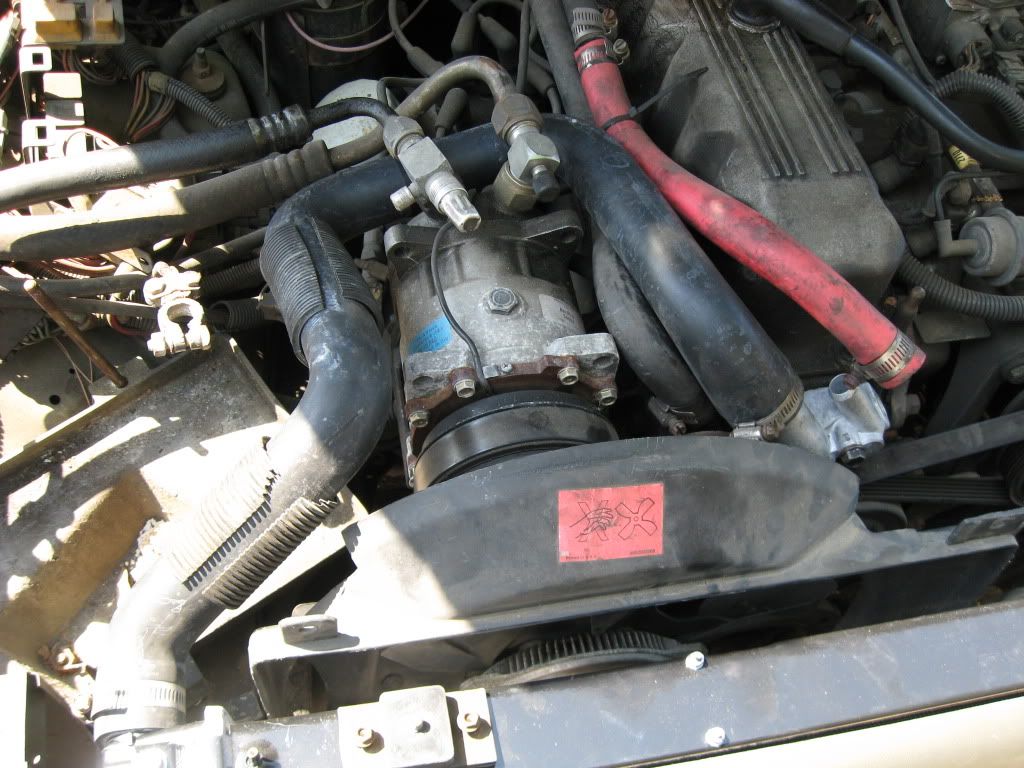
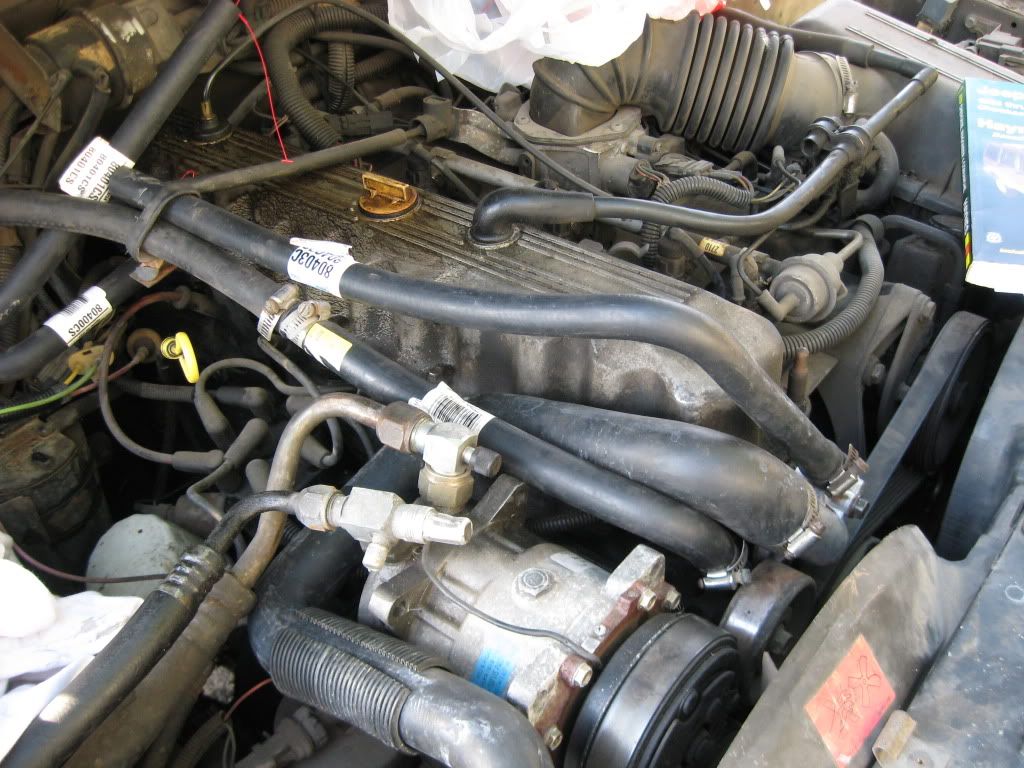
Old:
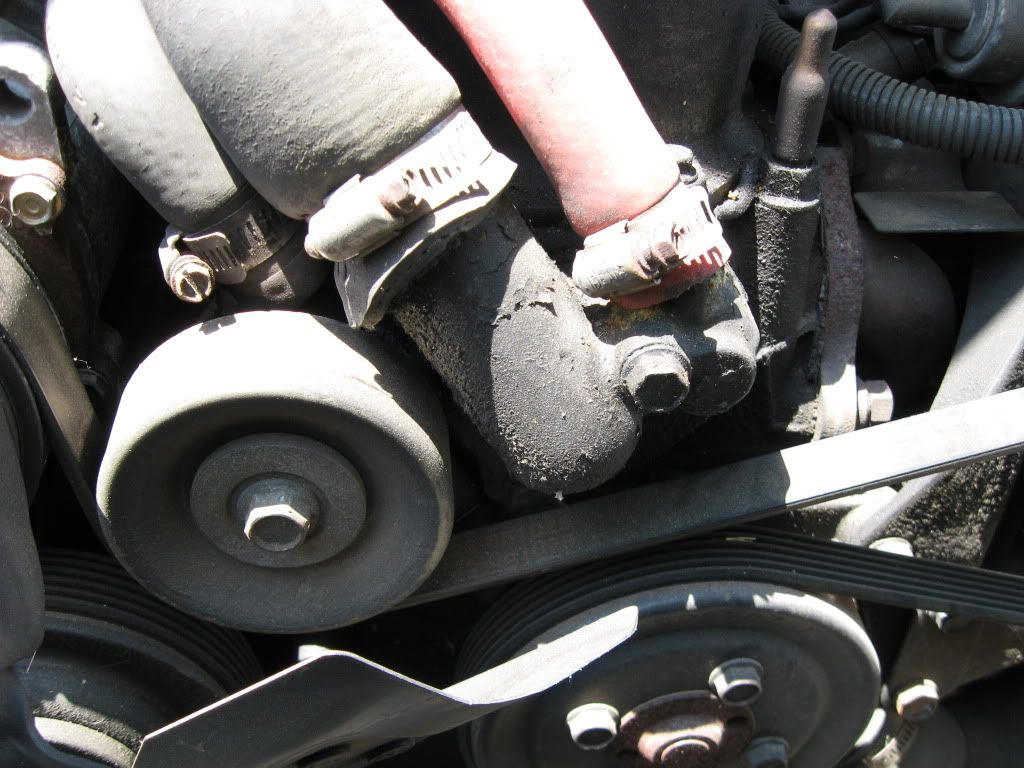
As you can see, the hoses are shot and the thing's rusted up.
Popped the two bolts and time for the new one:
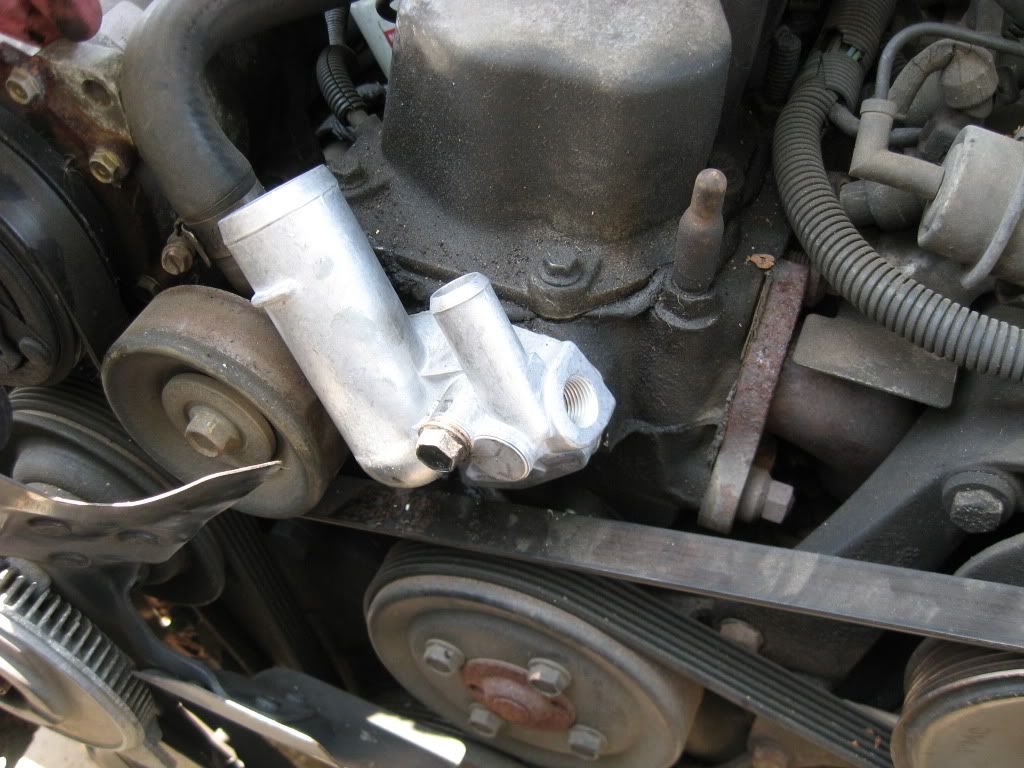
You can see the threaded opening there on the driver's side. That's where you're going to install the fan switch. The housing comes with a plug if you end up not doing that.
Time to attach the new Radiator hoses. Be sure to route them correctly and place any sort of heat shielding/plastic thingys back on them.
To continue....
Next, it's time to disconnect the Electric fan (driver's side), and remove. After that, remove the screws holding the fan shroud and push it towards the engine and hang it on the mechanical fan.
Oh, yeah, remove the battery...gives you more room.
Next, it's time to remove the cross braces that hides the radiator. There is a problem, and that's that the hood prop rod is fastened to the piece you're removing. I, carefully, unscrewed it and wedged the bottom in beside the air box so it would still hold the hood up. Both pieces the hood latch is attached to need to come out.
Next, disconnect the top and bottom radiator hoses as well as the tranny cooler lines. The top tranny line is easy to get out, but the bottom one is a trick. I dicked around with it for over an hour trying to figure out how it disconnects....turns out there's a disconnect tool....AC/Fuel line disconnect tool...1 minute and it was off.
Once everything was disconnected, out she came.
Remove the fan shroud for more working room.
Now that there's all kinds of room, you can easily get to the water pump if you want to. I chose not to do that and went straight to the thermostat housing.
Old:
As you can see, the hoses are shot and the thing's rusted up.
Popped the two bolts and time for the new one:
You can see the threaded opening there on the driver's side. That's where you're going to install the fan switch. The housing comes with a plug if you end up not doing that.
Time to attach the new Radiator hoses. Be sure to route them correctly and place any sort of heat shielding/plastic thingys back on them.
Trending Topics
07-26-2011, 02:26 PM
#8
Seasoned Member
Thread Starter
Join Date: Jan 2011
Location: Austin
Posts: 302
Likes: 0
Received 4 Likes
on
3 Posts
Year: 1987
Model: Wagoneer
Engine: 4.0
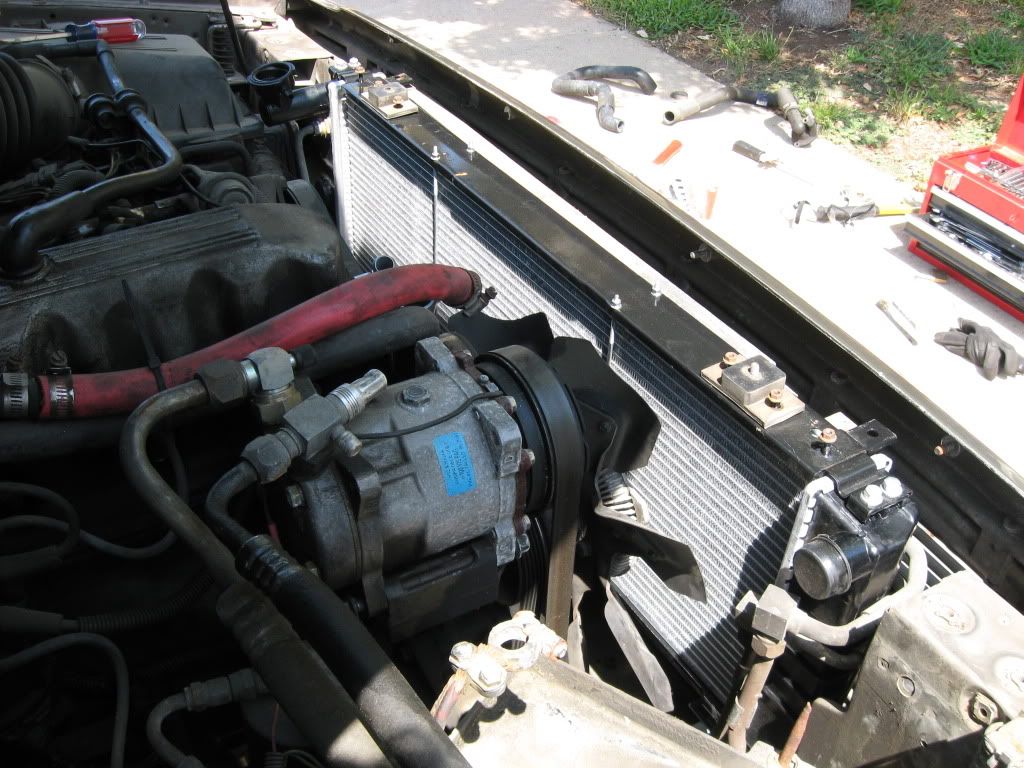
Time to put the new radiator in. Remember to attach the two rubber "bumpers" from the top of the old radiator onto the new one. As you can see in the first picture, the new radiator shipped to me was kinda trapazoidal rather than rectangular, so mine took a little "massaging" to get it in.
Before you bolt things in, though, remember to put that fan shroud back over the mech. fan so you can mount it later.
Screw the retaining brackets back on. Mine took some forcing....
Attach your tranny oil lines and lower radiator hose...

Upper radiator hose....
Attach the cross-braces back on to hold the radiator in place.
Then fan shroud and electric fan, just to wrap up the radiator portion of the install.
Now for the heater hose.
Before you bolt things in, though, remember to put that fan shroud back over the mech. fan so you can mount it later.
Screw the retaining brackets back on. Mine took some forcing....
Attach your tranny oil lines and lower radiator hose...
Upper radiator hose....
Attach the cross-braces back on to hold the radiator in place.
Then fan shroud and electric fan, just to wrap up the radiator portion of the install.
Now for the heater hose.
07-26-2011, 04:56 PM
#9
Seasoned Member
Thread Starter
Join Date: Jan 2011
Location: Austin
Posts: 302
Likes: 0
Received 4 Likes
on
3 Posts
Year: 1987
Model: Wagoneer
Engine: 4.0
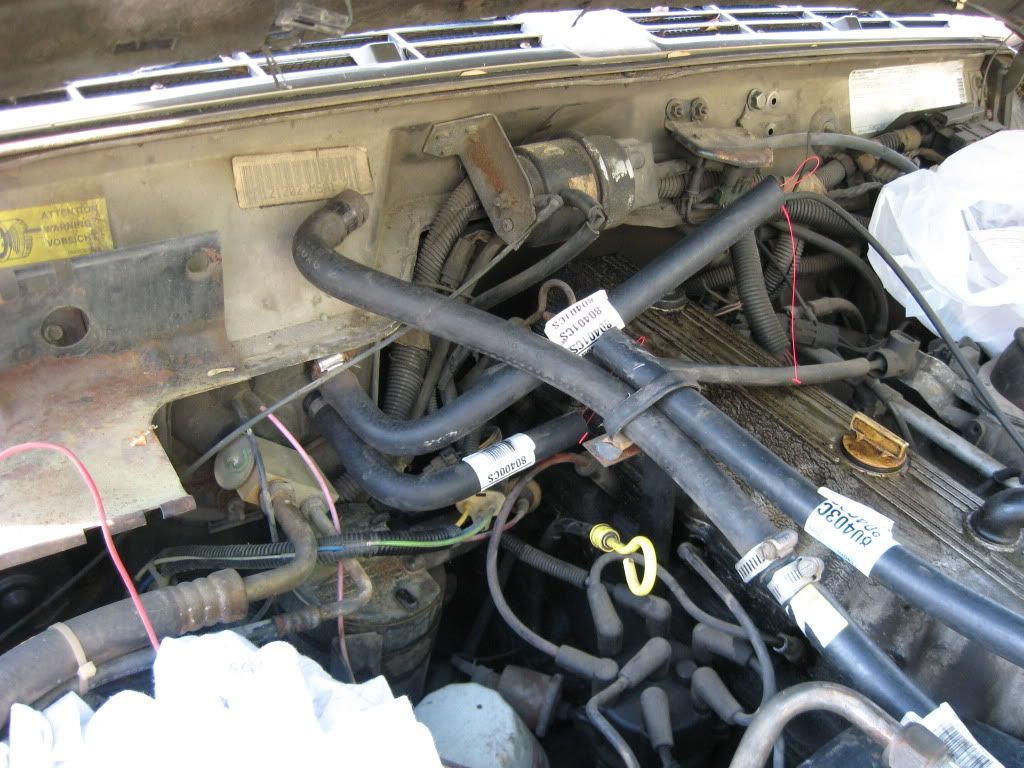
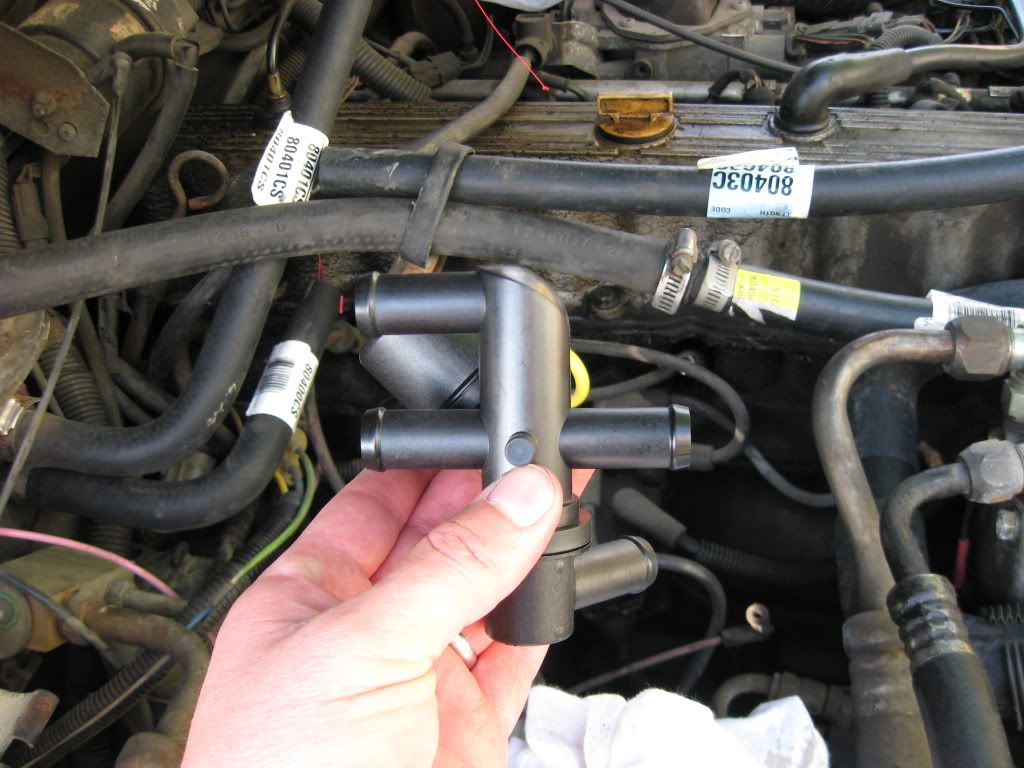
Heater hoses.
Carefully disconnect the vacuum line and fitting from the heater valve. Remove the old coolant expansion tank (and mount if you want), the metal "y" pipe, and the old heater valve.
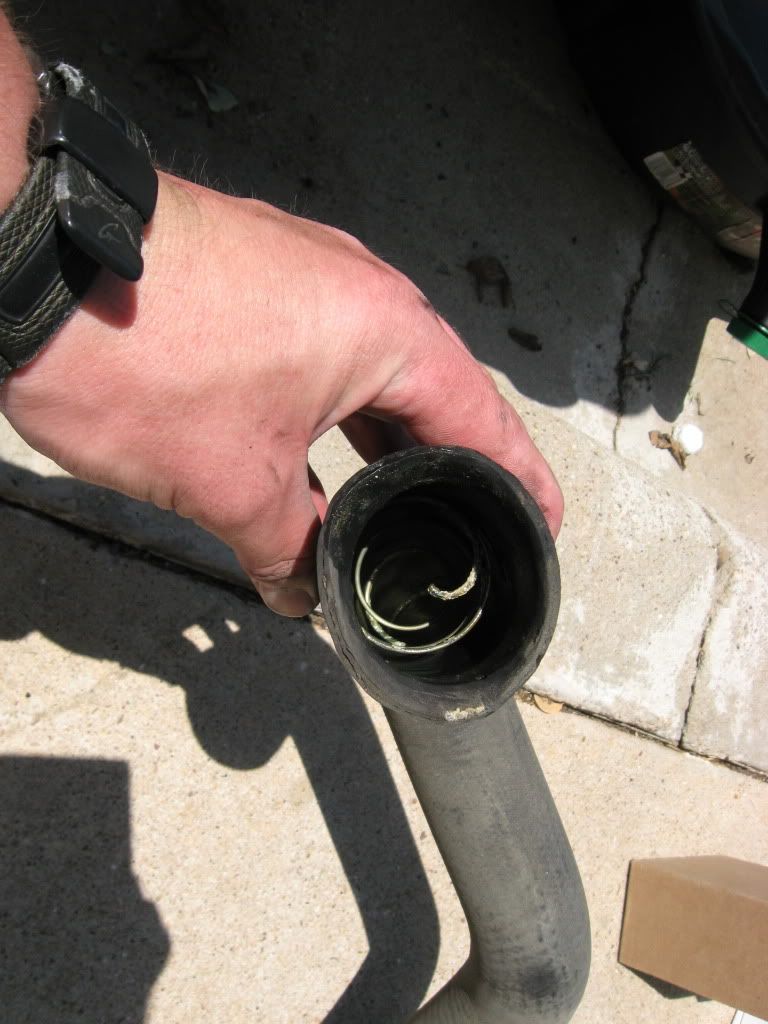
Test fit you bulk heater hose (5/8").
From BCBlues...
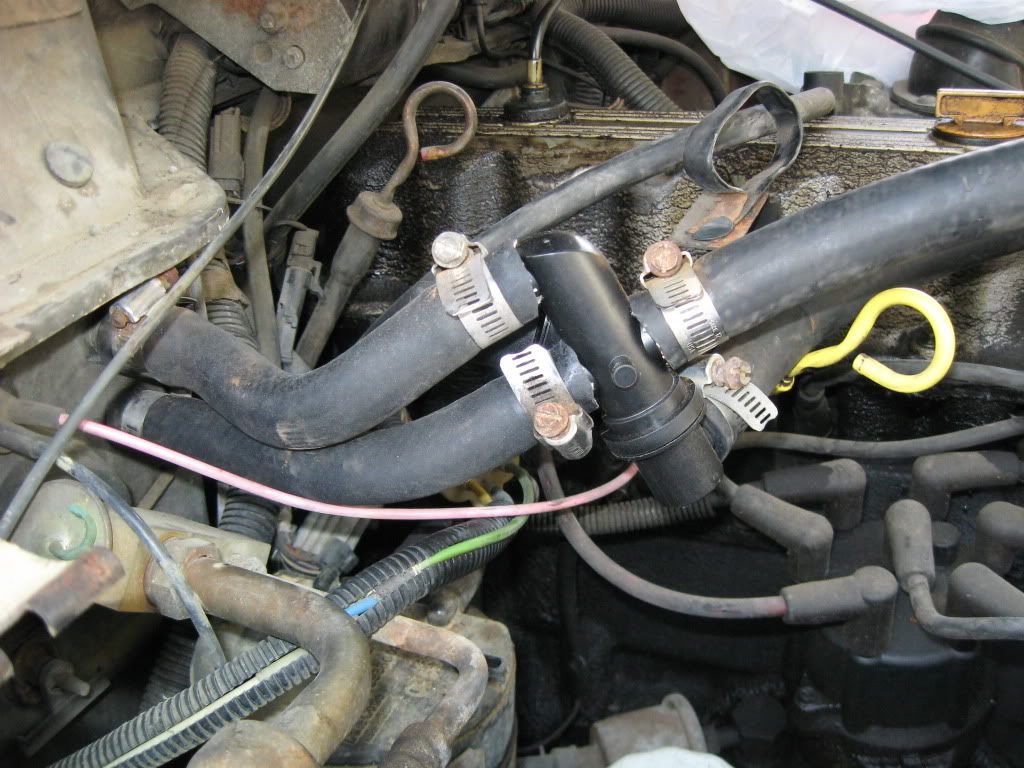
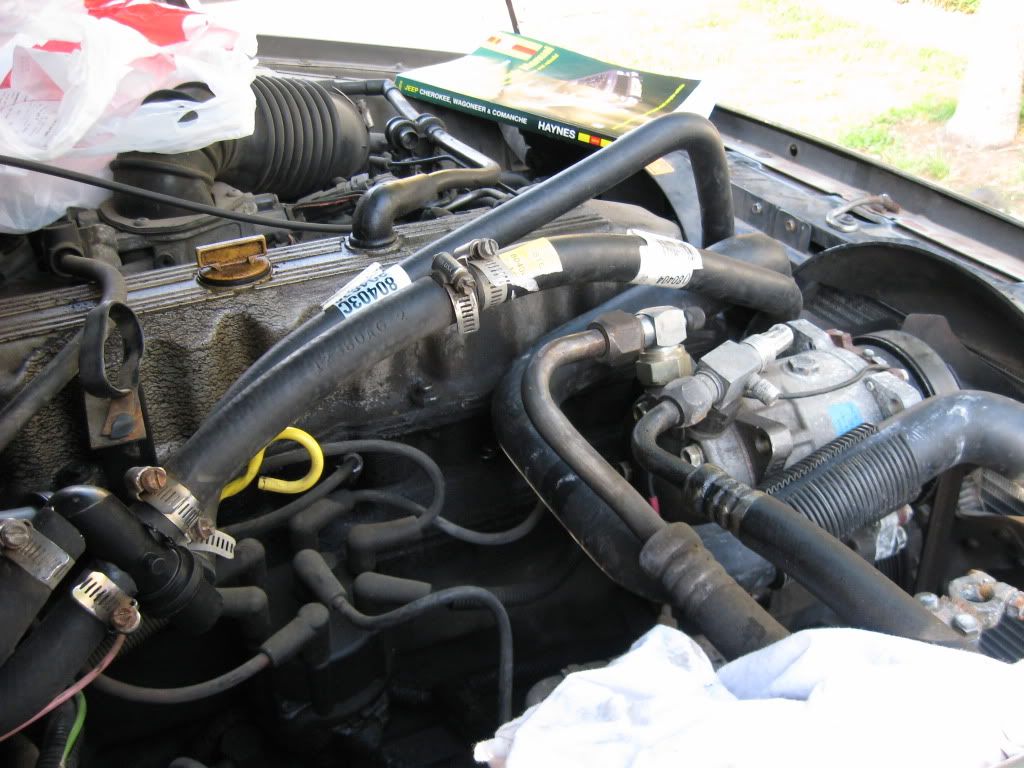
Hoses routed and done:
Carefully disconnect the vacuum line and fitting from the heater valve. Remove the old coolant expansion tank (and mount if you want), the metal "y" pipe, and the old heater valve.
Test fit you bulk heater hose (5/8").
From BCBlues...
This valve has 4 connections. Looking at the valve from the opposite side from the vacume switch with the curved end of the valve facing upward you will see one connection facing forward, two connections facing back and one facing at a 45 degree angle facing towards you. On the bottom angled connection run a 5/8" heater hose to the thermostat housing. On the single connection on the front run 5/8" heater hose to the water pump. Connect the two rear facing connections to the top and bottom connections of the heater core. Connect the vacume line that was connected to your old valve to the connection on the new one.
Hoses routed and done:
Last edited by letinsh; 07-26-2011 at 05:04 PM.
07-26-2011, 05:28 PM
#11
Seasoned Member
Thread Starter
Join Date: Jan 2011
Location: Austin
Posts: 302
Likes: 0
Received 4 Likes
on
3 Posts
Year: 1987
Model: Wagoneer
Engine: 4.0
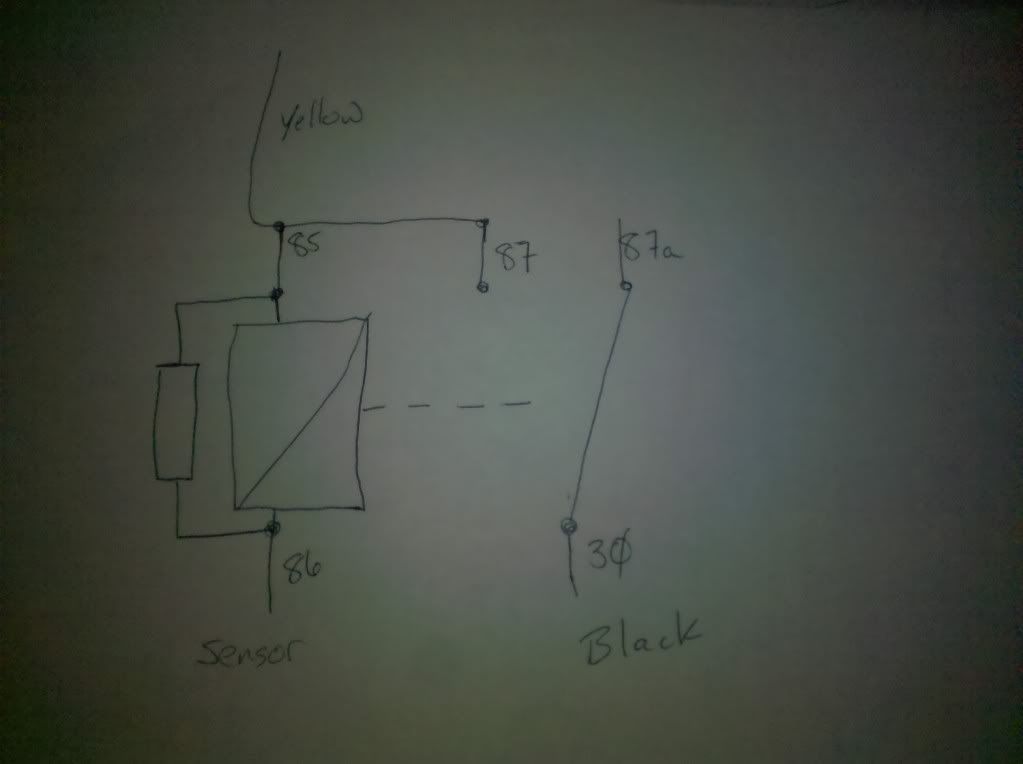
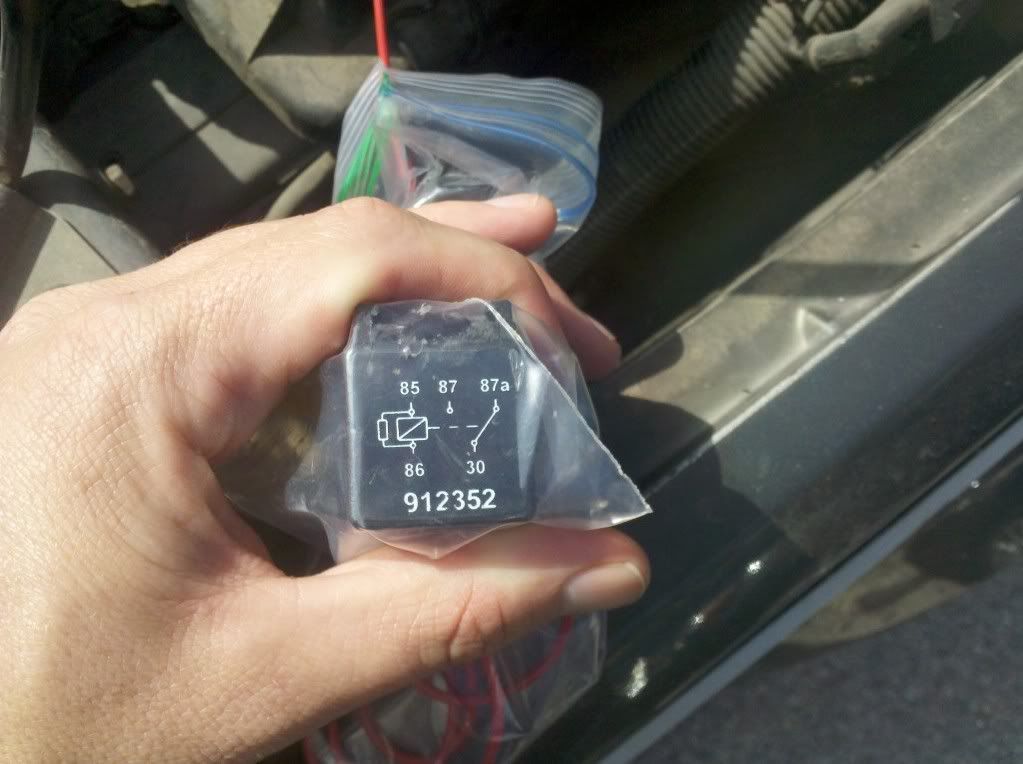
Now to hook up the fan switch. The "closed" system used a sensor located in the radiator to turn the electric fan on and off. The placement wasn't the best for an accurate temp reading, and the new style radiators don't have a location for the sensor. This is why we need the new fan switch. I used the FS111 and it's connector FSC10. This switch is a single pole switch and grounds out when proper temp is reached. This particular switch closes between 204F and 220F, the perfect temp to keep our 4.0's happy. You'll also need a relay - I used a standard 5 pin relay.
From BCBlues....
Looks like this:
I keep mine in a baggie right now
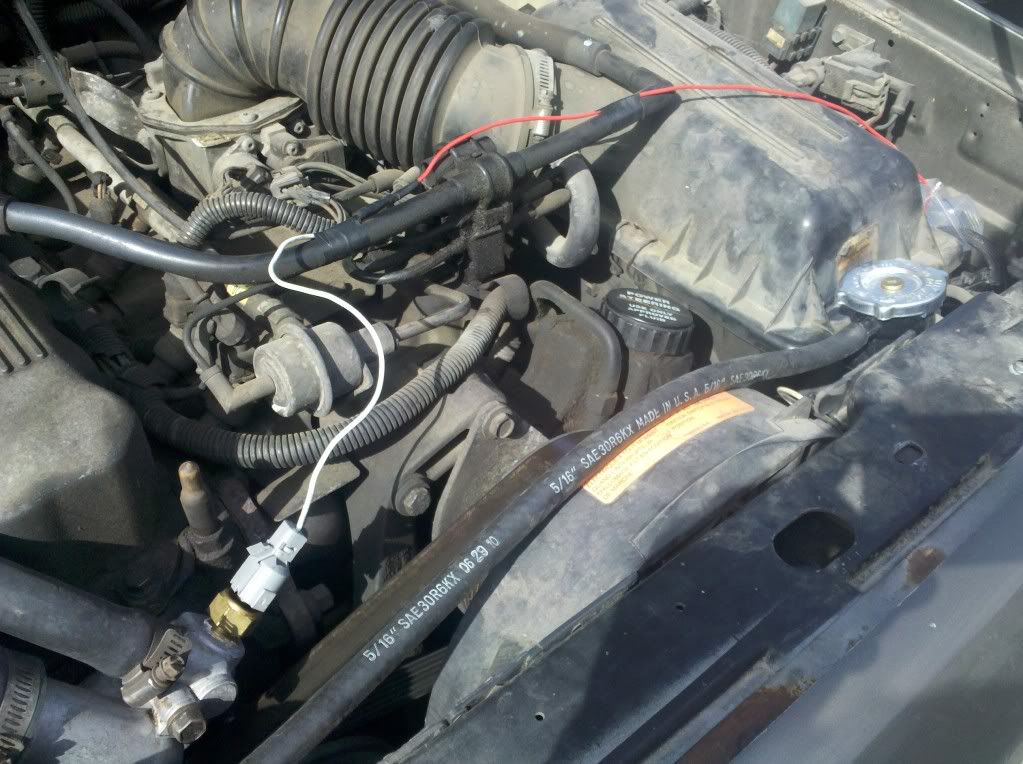
And there she is...All done, with an electric fan that comes on when the A/C is on and/or the temp hits 204F
From BCBlues....
1. Run the new fan switch wire to the ground terminal of the relay.
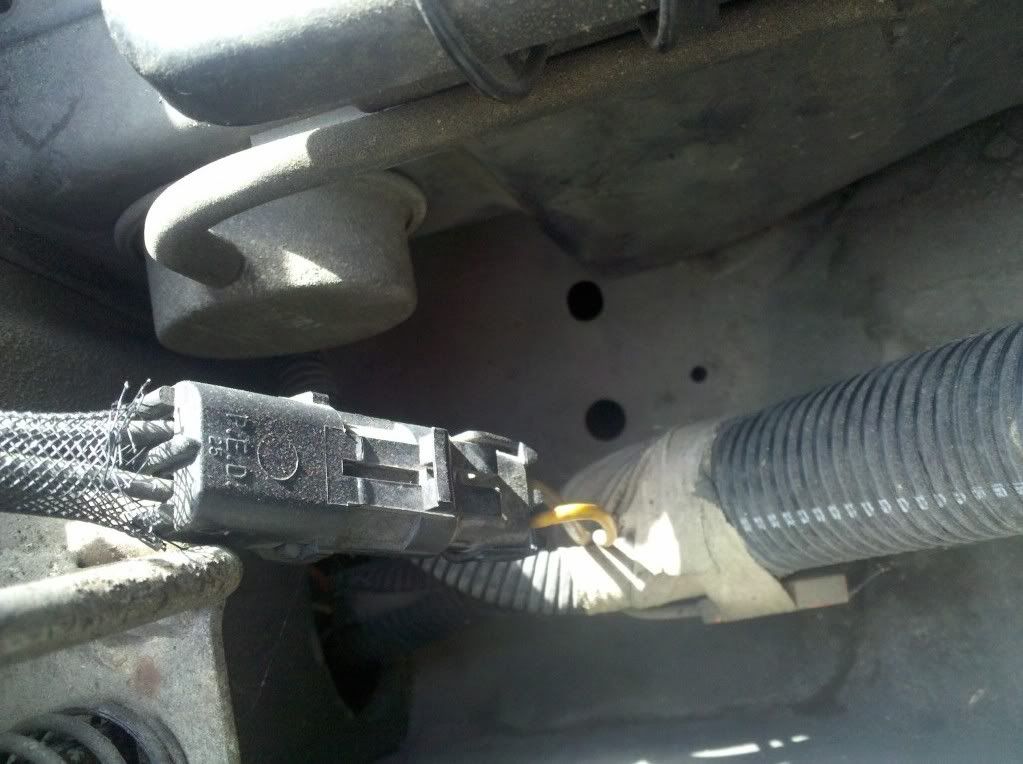
2. Carfully cut off the original wires with plug from the original radiator mounted fan switch. Cut them off at the switch side so you have the plug with the wires attached. The yellow wire is +12V and the black wire goes to the original fan relay. Connect the wires with plug to the switched (load = yellow, output= black) terminals of the relay. Since the yellow wire is hot +12v when the ignition is on use this wire (make a jumper to connect to the + side of the relay) to power (activate) the relay.
Recap step 2. Yellow wire goes to relay + (positive) and relay load terminals. Black wire goes to relay output terminal. Fan switch goes to relay - (minus /ground) terminal.
I keep mine in a baggie right now
And there she is...All done, with an electric fan that comes on when the A/C is on and/or the temp hits 204F
Last edited by letinsh; 06-01-2012 at 12:00 PM.
07-26-2011, 10:33 PM
#12
Seasoned Member
Thread Starter
Join Date: Jan 2011
Location: Austin
Posts: 302
Likes: 0
Received 4 Likes
on
3 Posts
Year: 1987
Model: Wagoneer
Engine: 4.0
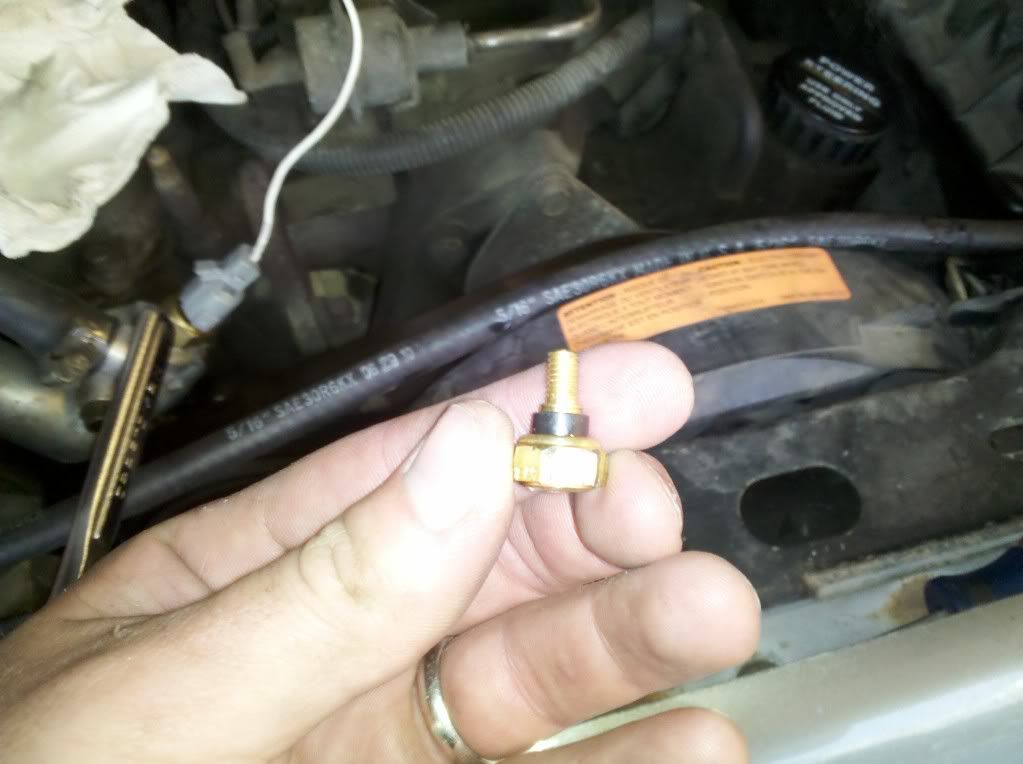
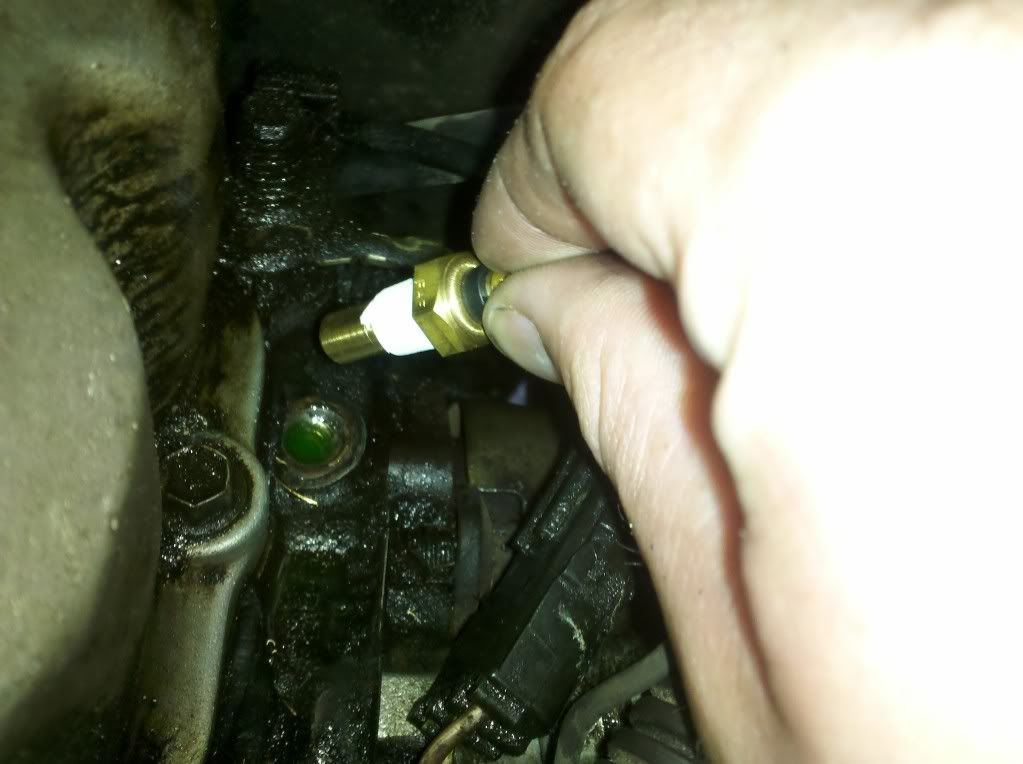
Once he was running again, I noticed that the temp gauge never really warmed up...the opposite problem from what I just had. I've never heard of a Jeep not heating up...just Jeeps overheating. The heater was working well and IR thermometer showed the coolant was reaching operating temperature, so either the gauge was busted or the Coolant Temp Sensor was messed up. The cheaper option was to replace the Sensor first and see if it fixed the problem. In the Renix system, there are 2 temp sensors. The one that the ECU uses to adjust AFR is located in the block underneath the exhaust manifold. The temp gauge has its own sensor, located at the back of the head on the driver's side.
So I went to my neighborhood Advance Auto Parts and picked up a WT761 for $17.98.
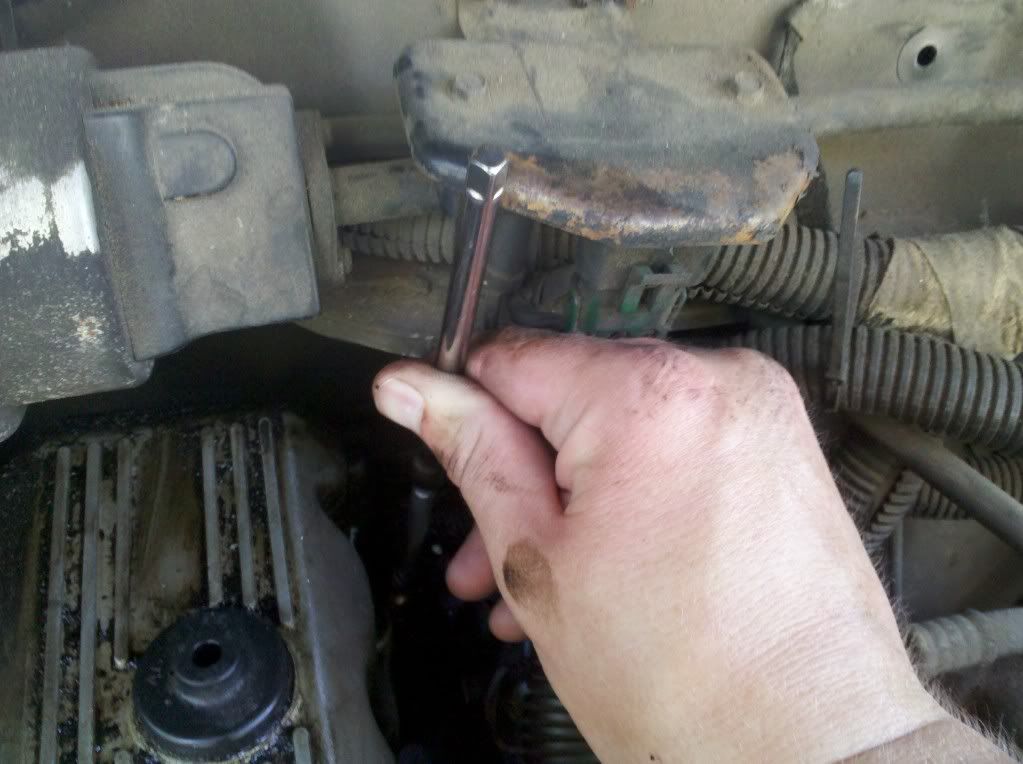
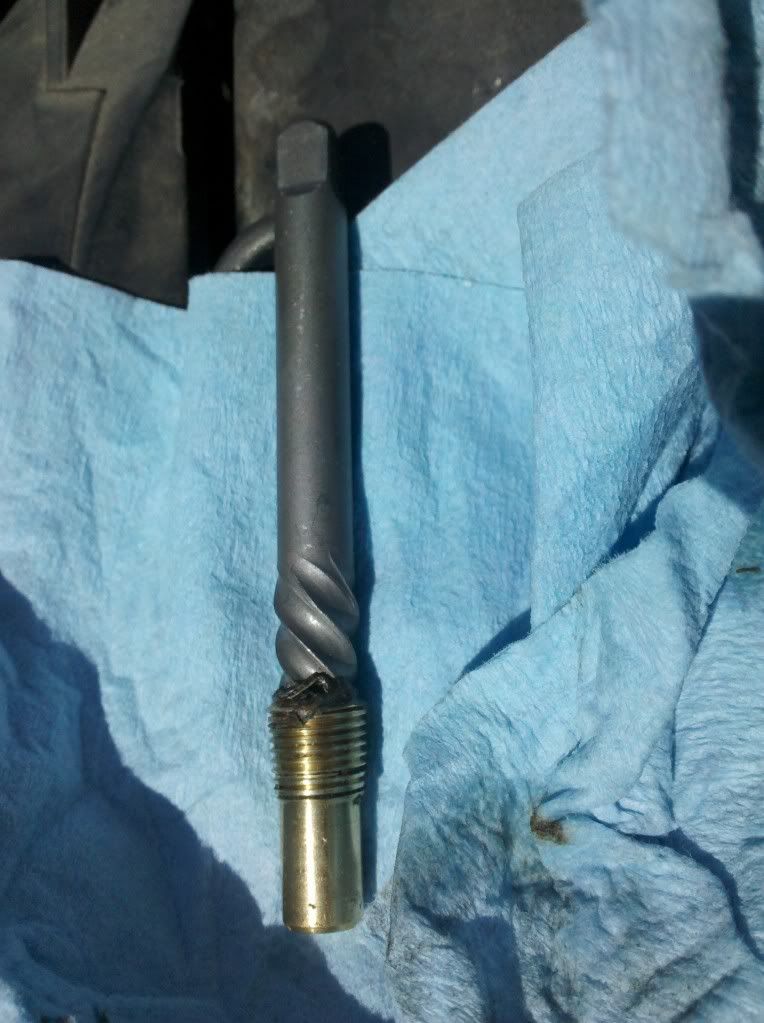
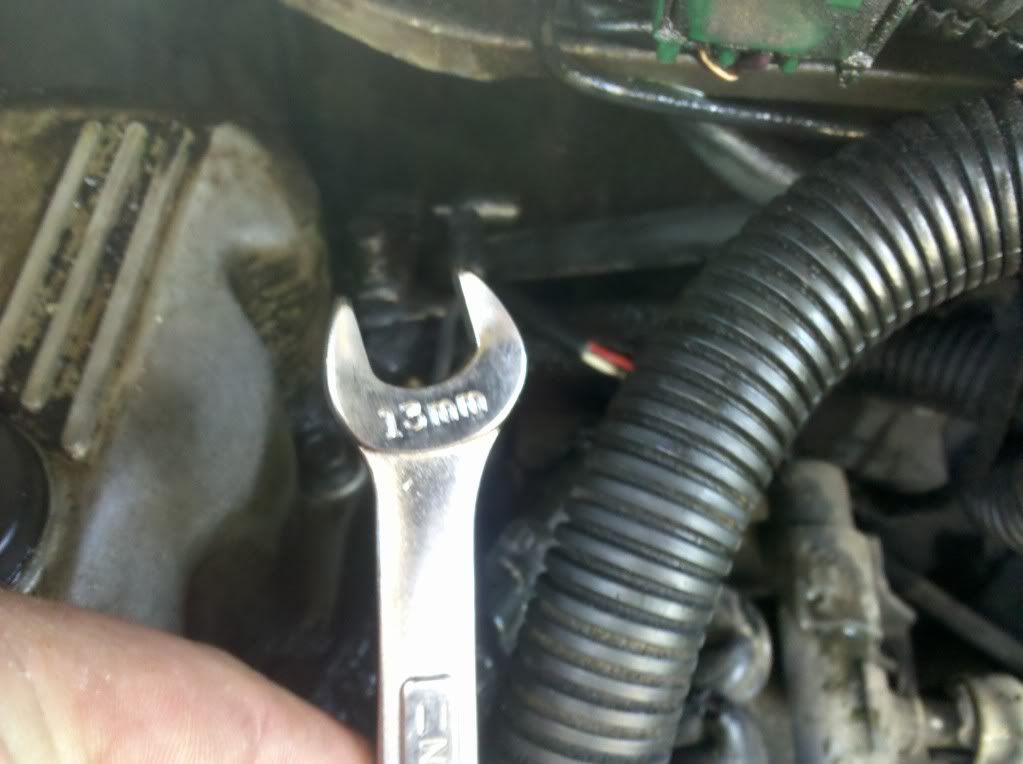
First I unplugged the sensor and jammed a 13mm deep-well socket on it and pulled it out. Piece of cake. I wrapped the new sensor threads with Teflon tape and proceeded to hand-thread the thing in. It sits at an angle and doesn't thread straight into the head. I then threw my handy-dandy 13mm deep-well back on and started cranking. And cranked the head of the sensor right off...
Not good.
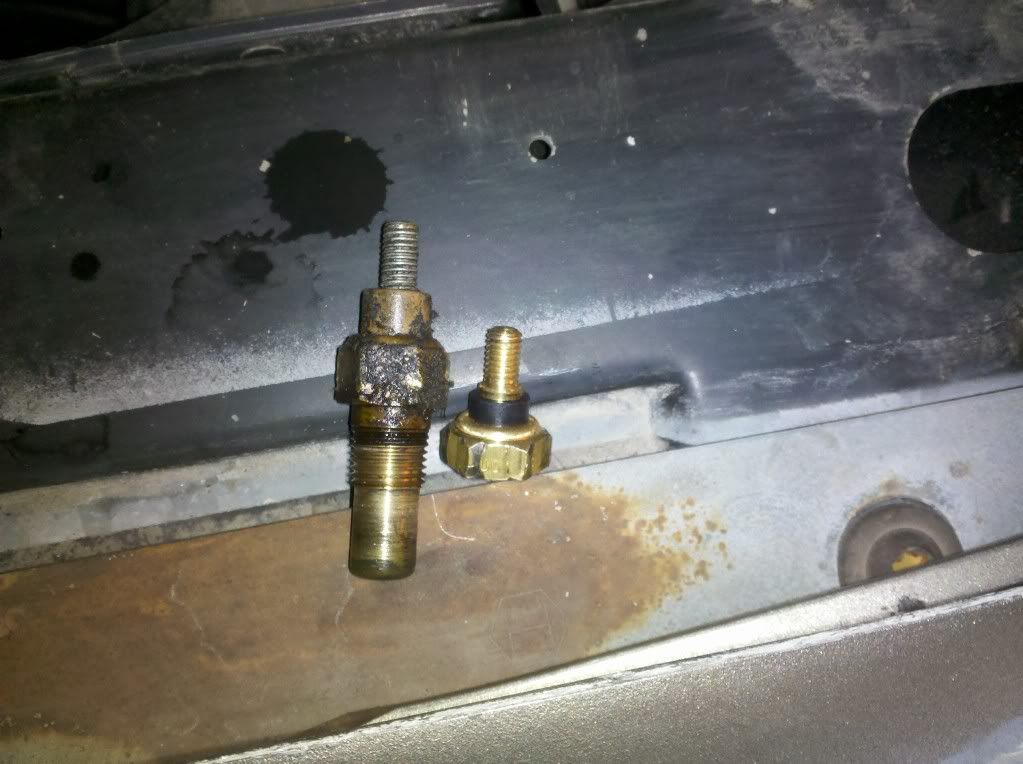

Let the part and tool throwing begin.
Not cool.
A day of googling showed that this was pretty common.
With the hole plugged, I took the opportunity to toothbrush and Engine Brite away some of the gunk.
I went to Sears and picked up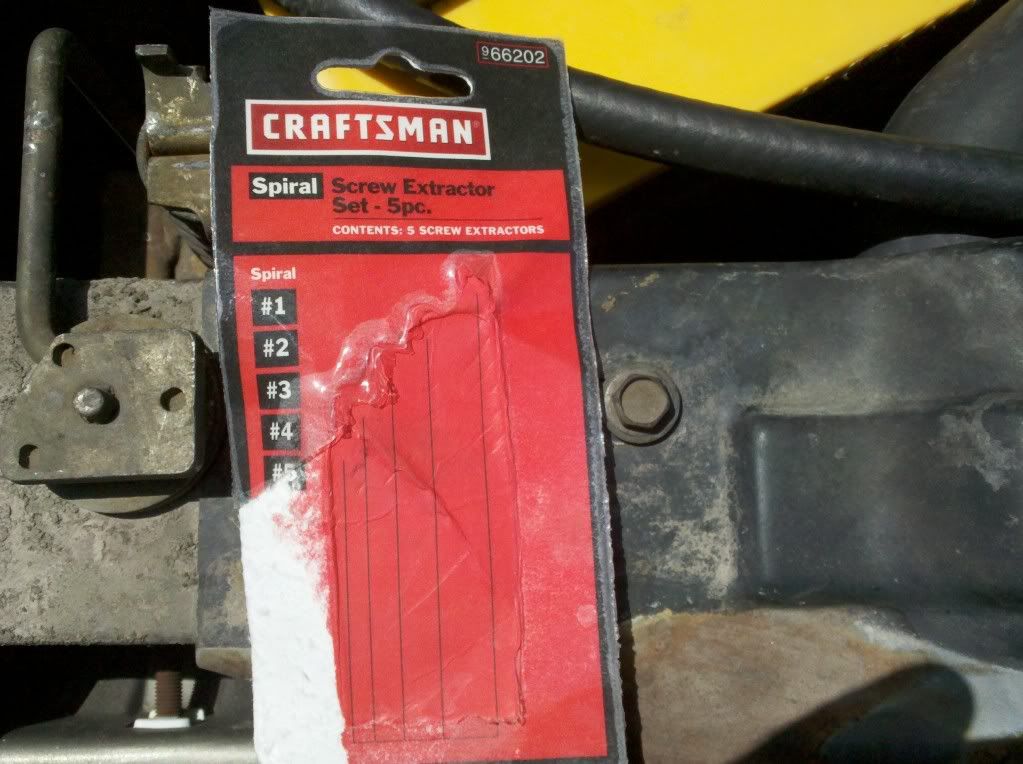
I've never used these before, but I didn't have a choice...have to start somewhere. The sensor has a cavity in it where a spring sits, so you don't have to drill a hole for the extractor. The Number 4 Extractor fits perfectly. There's not much room for a hammer back there by the firewall, but fortunately, the back end of the #4 fits perfectly in a 1/4" drive socket extension, so plunk it on and bang away
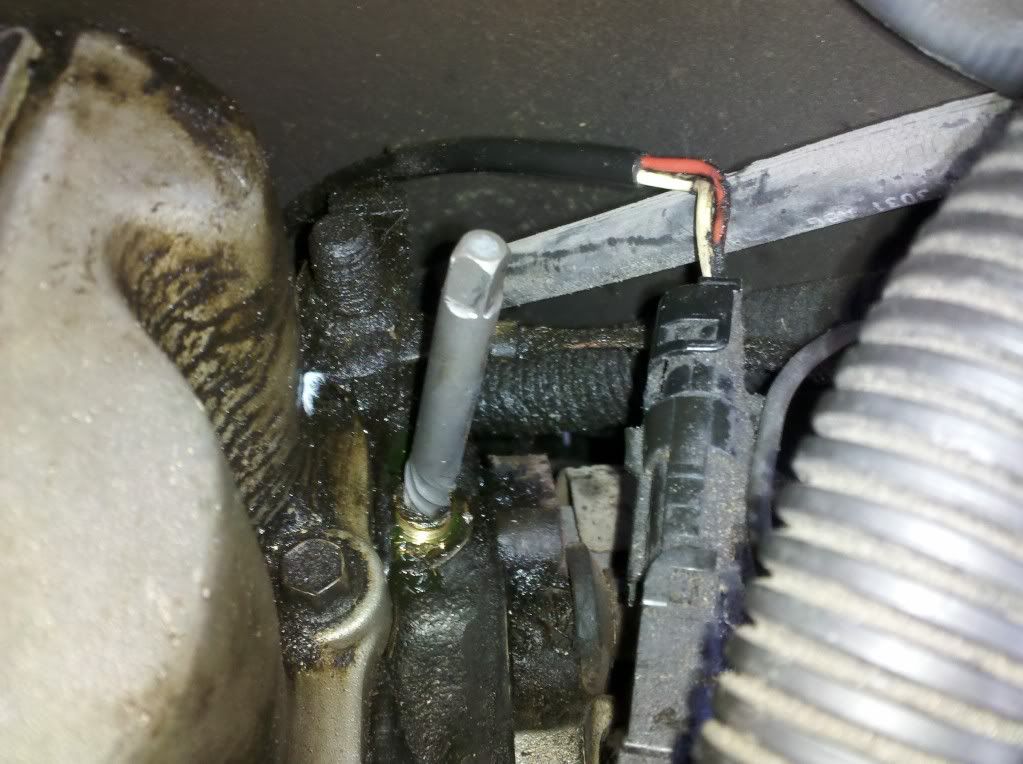
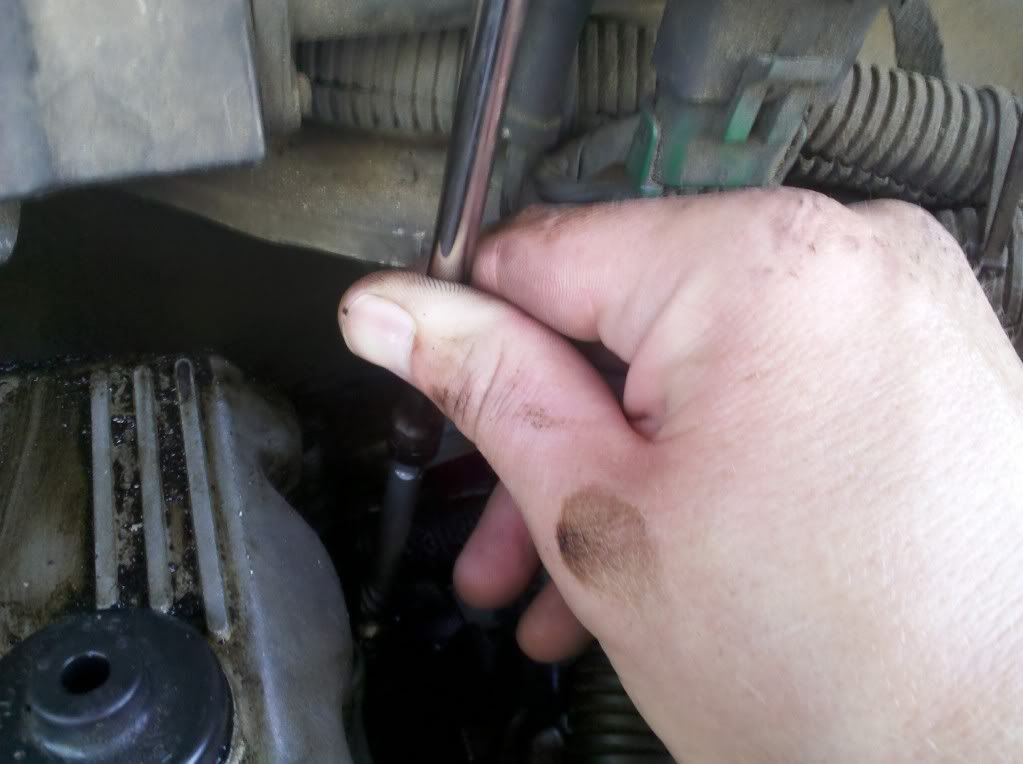
Put a box-end on it and crank away.
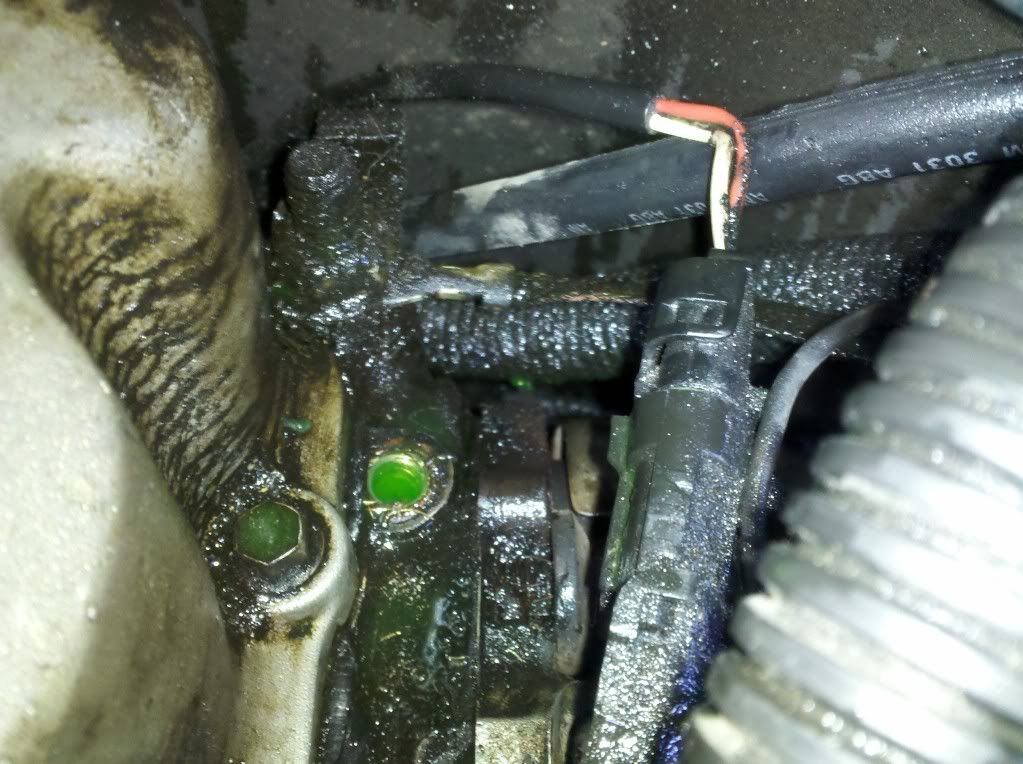
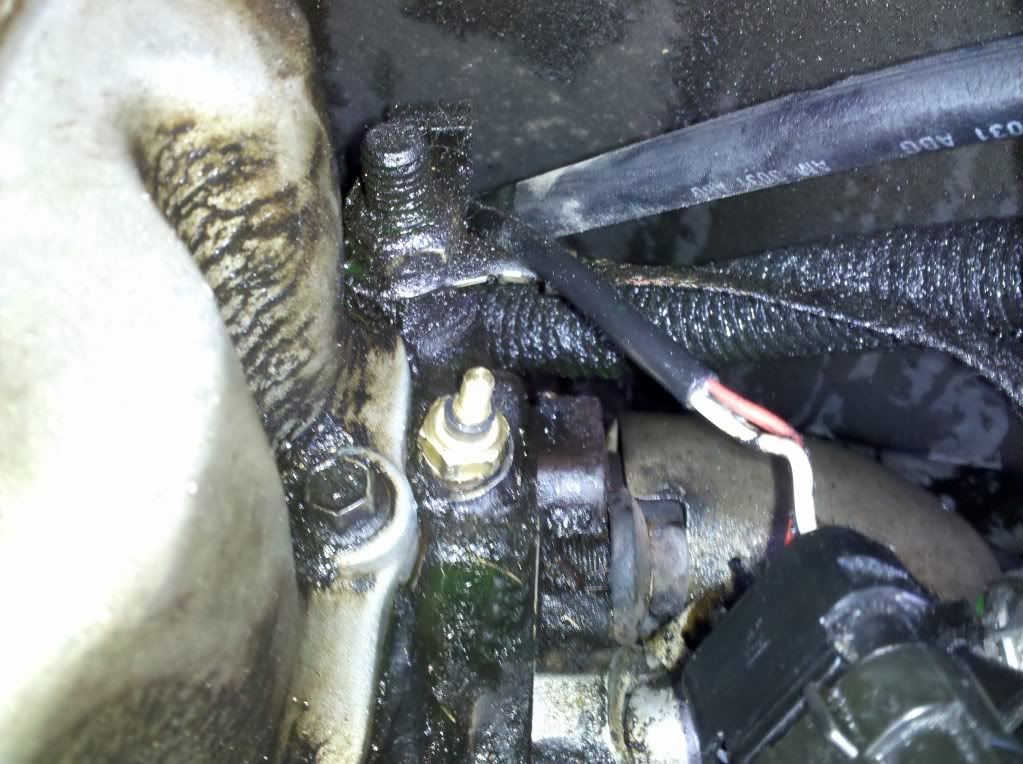
Take two. Teflon tape again and be careful!
You can see the angle at which it goes in

Using a box-end, carefully tighten it down
Plug everything back up and turn the key
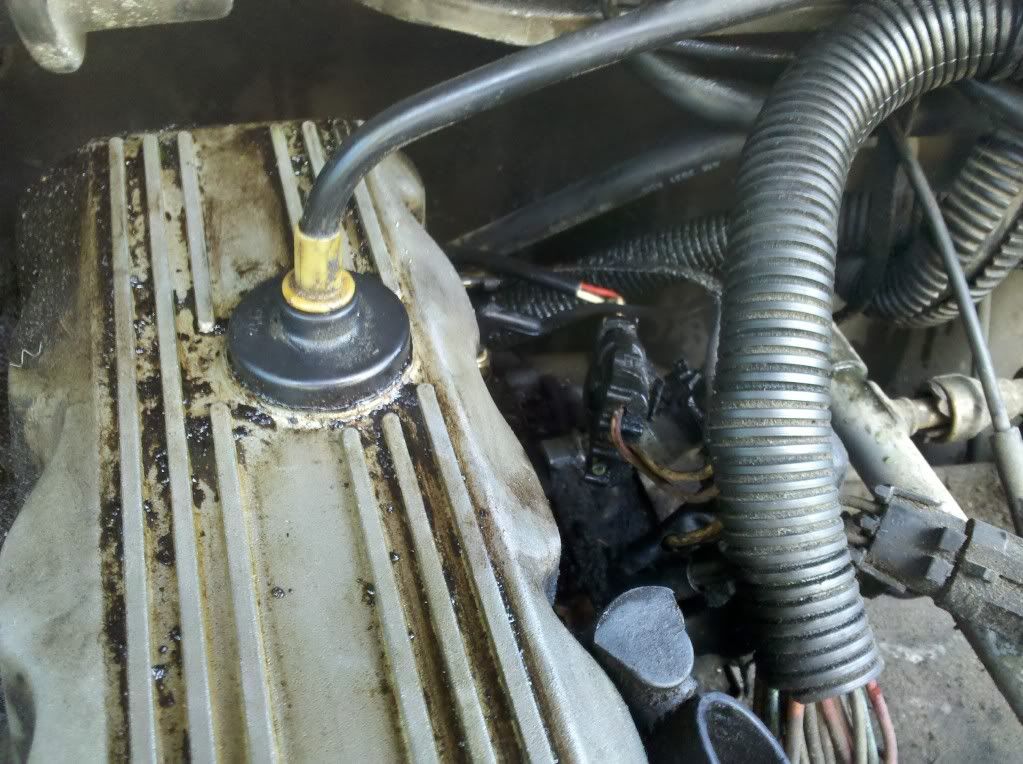
Everything working normally now!
So I went to my neighborhood Advance Auto Parts and picked up a WT761 for $17.98.
First I unplugged the sensor and jammed a 13mm deep-well socket on it and pulled it out. Piece of cake. I wrapped the new sensor threads with Teflon tape and proceeded to hand-thread the thing in. It sits at an angle and doesn't thread straight into the head. I then threw my handy-dandy 13mm deep-well back on and started cranking. And cranked the head of the sensor right off...
Not good.
Let the part and tool throwing begin.
Not cool.
A day of googling showed that this was pretty common.
With the hole plugged, I took the opportunity to toothbrush and Engine Brite away some of the gunk.
I went to Sears and picked up
I've never used these before, but I didn't have a choice...have to start somewhere. The sensor has a cavity in it where a spring sits, so you don't have to drill a hole for the extractor. The Number 4 Extractor fits perfectly. There's not much room for a hammer back there by the firewall, but fortunately, the back end of the #4 fits perfectly in a 1/4" drive socket extension, so plunk it on and bang away
Put a box-end on it and crank away.
Take two. Teflon tape again and be careful!
You can see the angle at which it goes in
Using a box-end, carefully tighten it down
Plug everything back up and turn the key
Everything working normally now!
08-08-2011, 03:03 PM
#13
Seasoned Member
Thread Starter
Join Date: Jan 2011
Location: Austin
Posts: 302
Likes: 0
Received 4 Likes
on
3 Posts
Year: 1987
Model: Wagoneer
Engine: 4.0
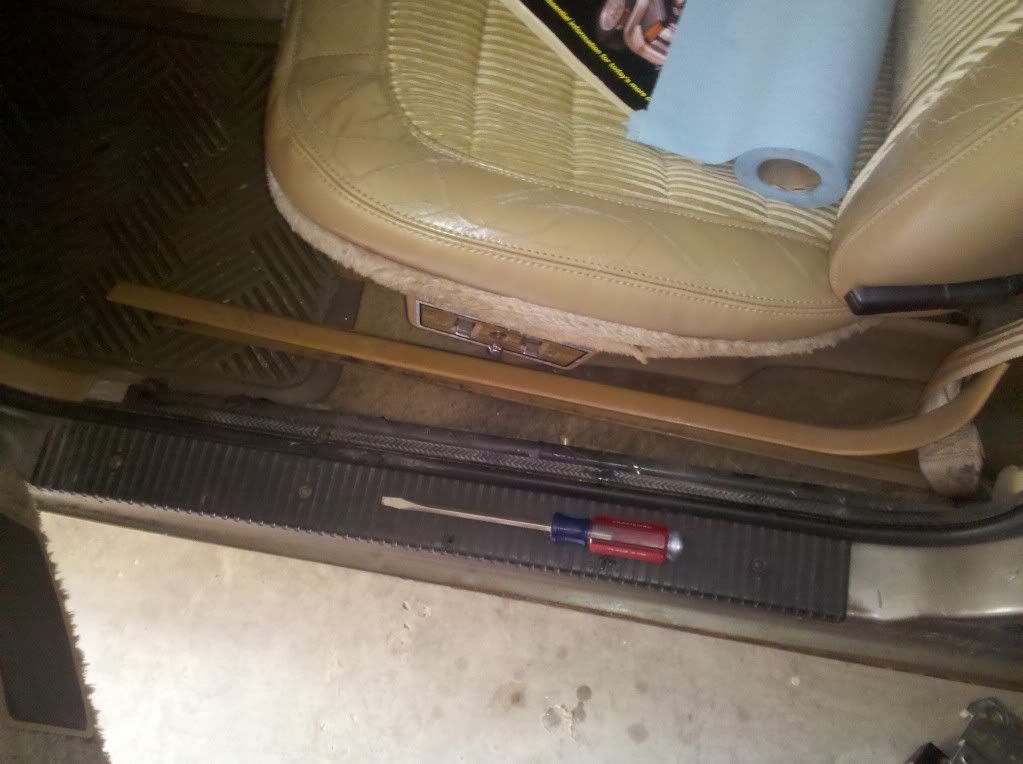
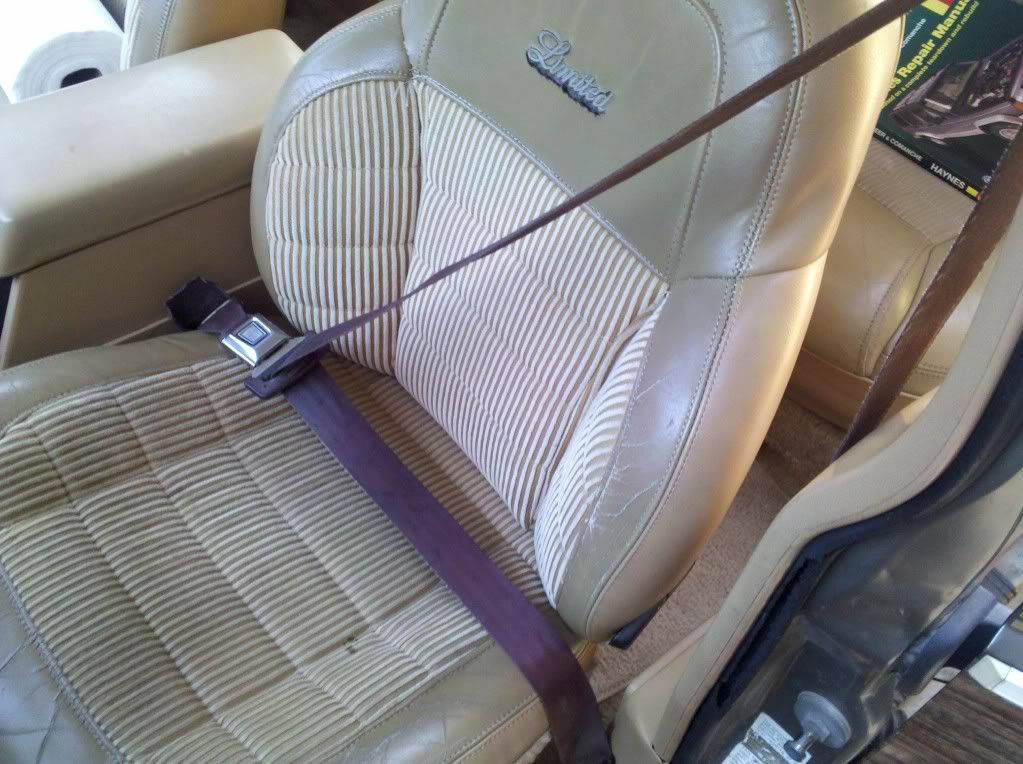
Next, I failed the safety inspection because the driver's side seat belt had a couple holes in it from being slammed into the door.
Went to the JY to pick up a replacement-pulled a blue one from a '98 Cherokee.
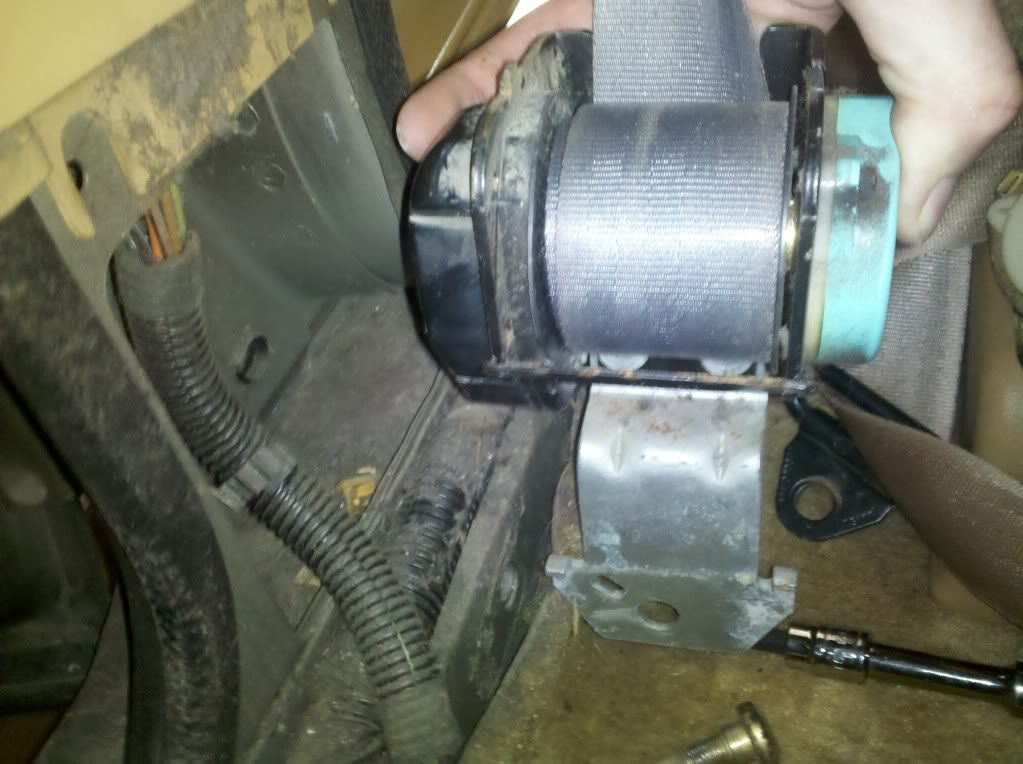
First thing is to pull the plastic molding off the driver's side floor, to access the retracting mechanism.
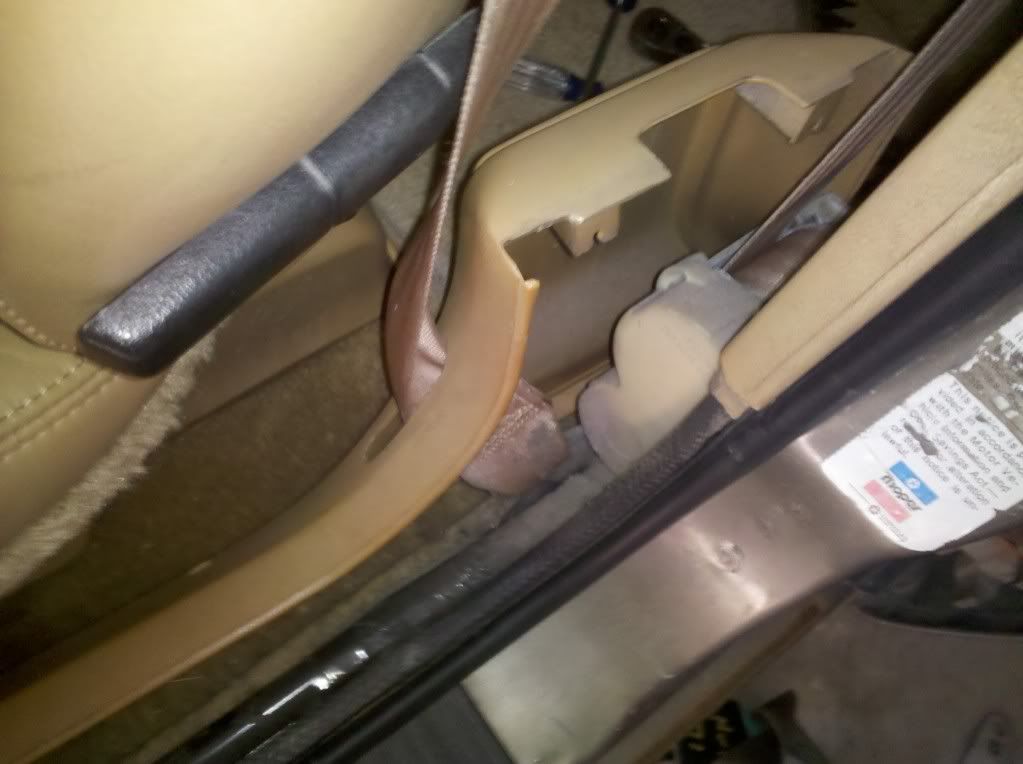
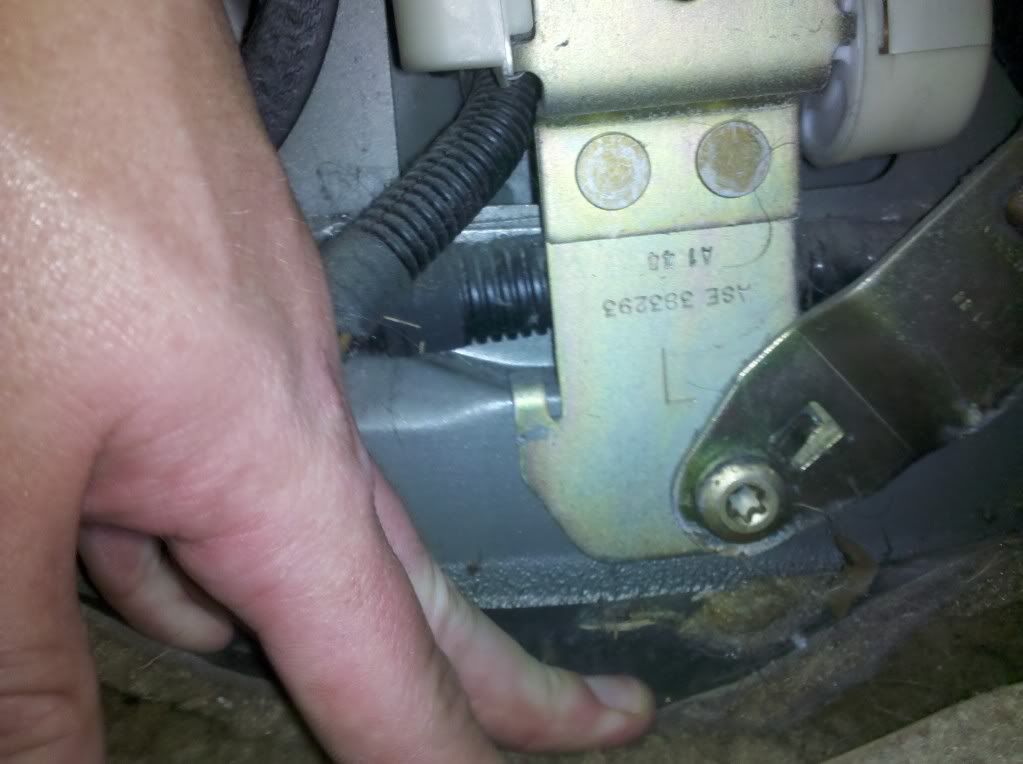
Next, remove the bolt holding the retracting mechanism to the pillar.
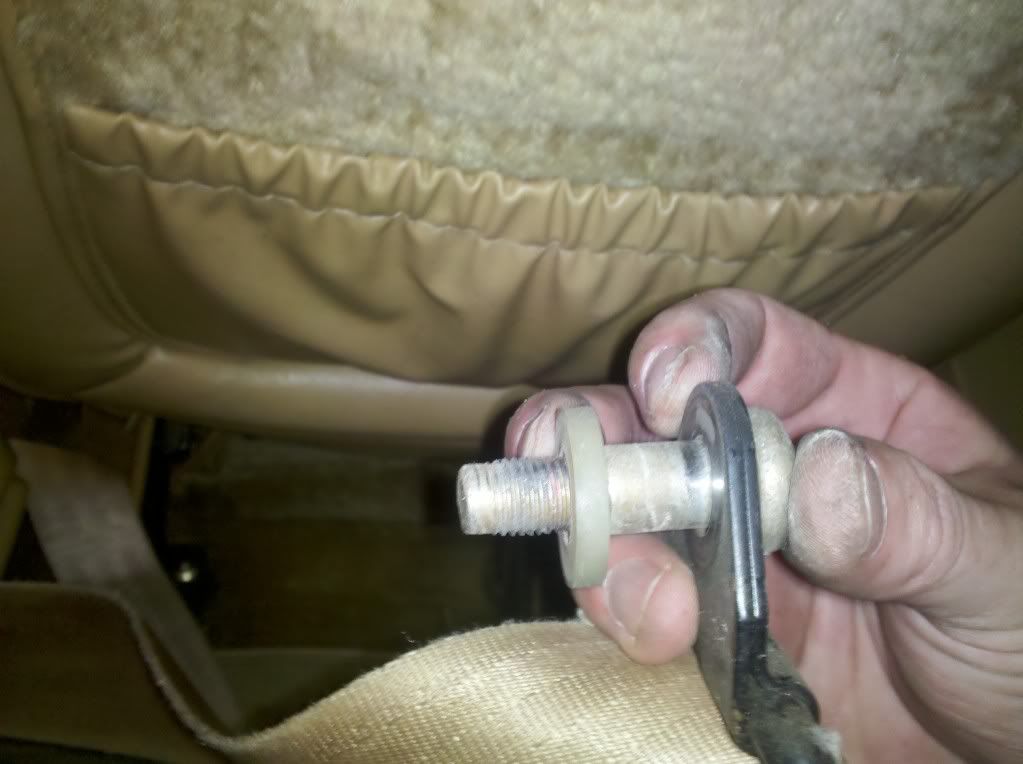
Once done, thread the end of the seat belt back out of the slot in the molding to free it. Remove the bolt holding the upper attachment point to the pillar.
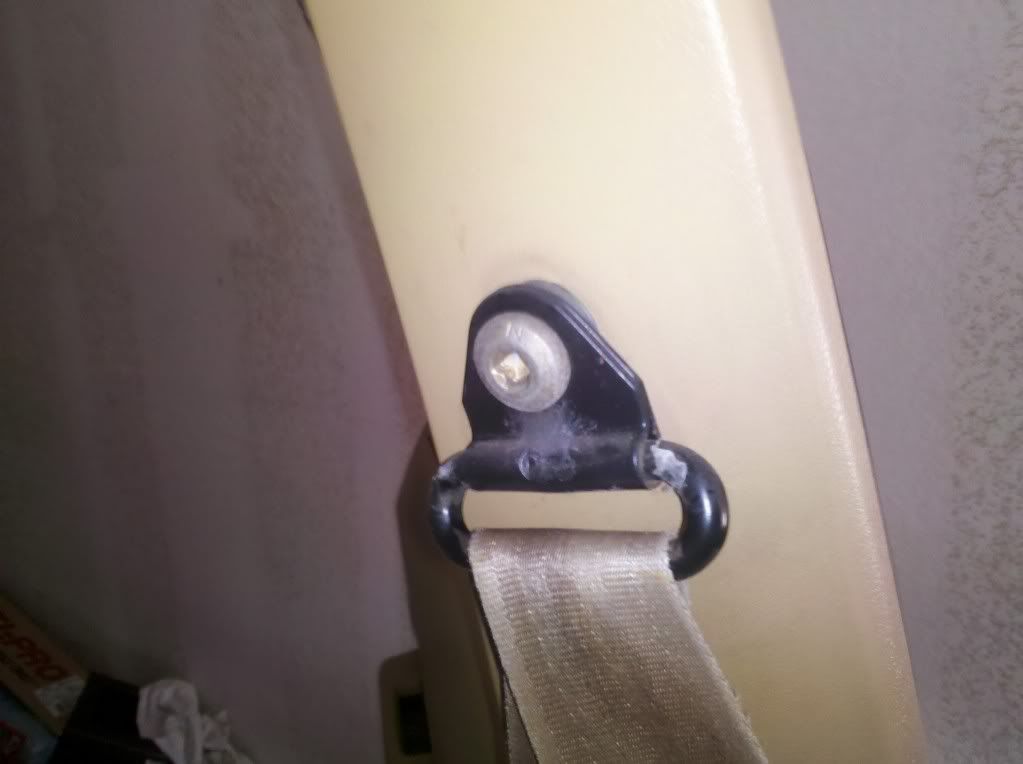
Be sure to keep track of whatever plastic spacer/washer is there and remember how exactly it mounts up.
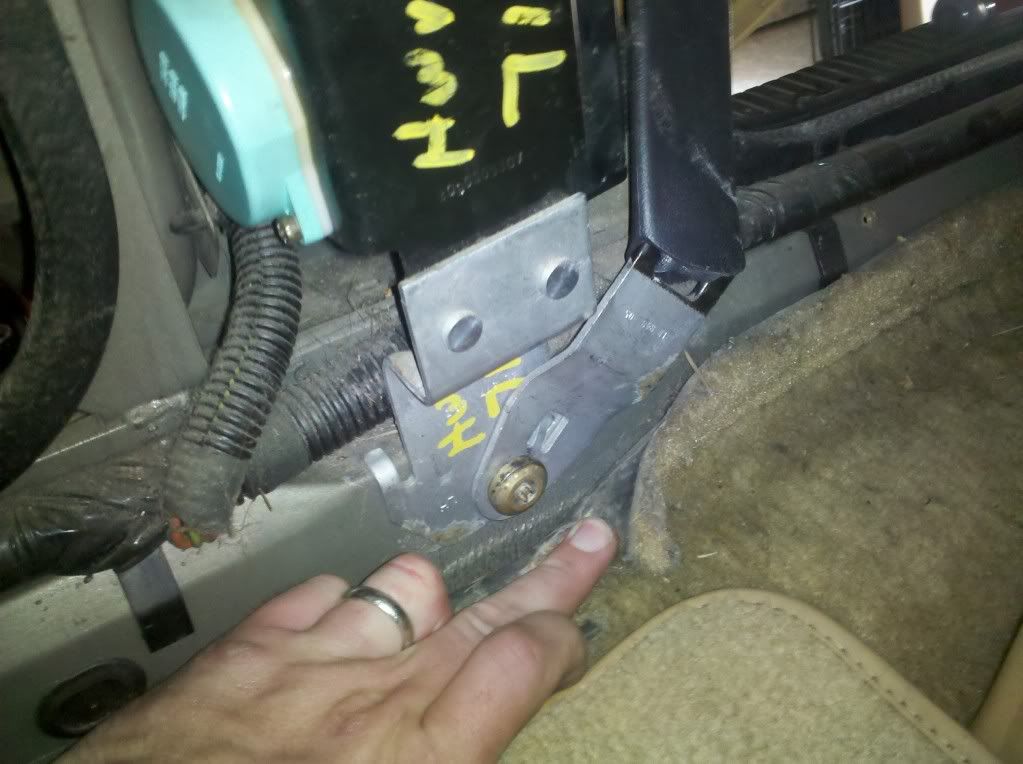
Once that's done, the old seat belt should be removed. Install the new one in the reverse manner.
Tab A goes into Slot B.
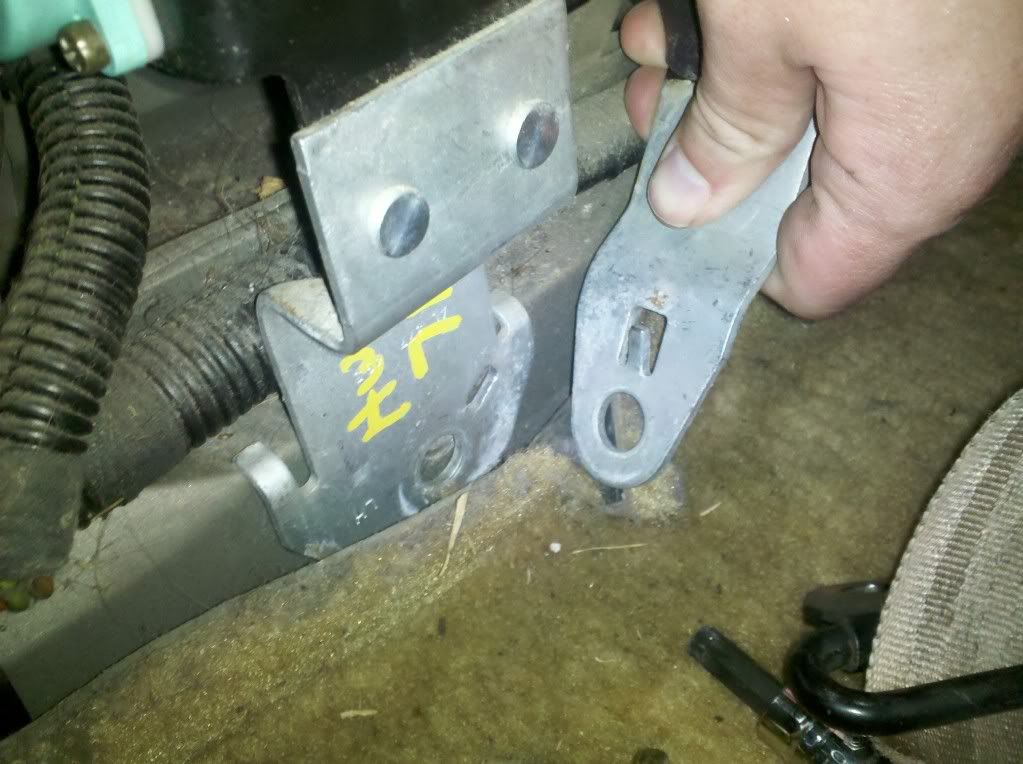
In case you don't keep track of which bolt goes to which location, the short one goes on the bottom, and the longer one goes on the top. Reverse them and you won't be able to cinch down the bottom one.
Next, compare latching mechanisms....
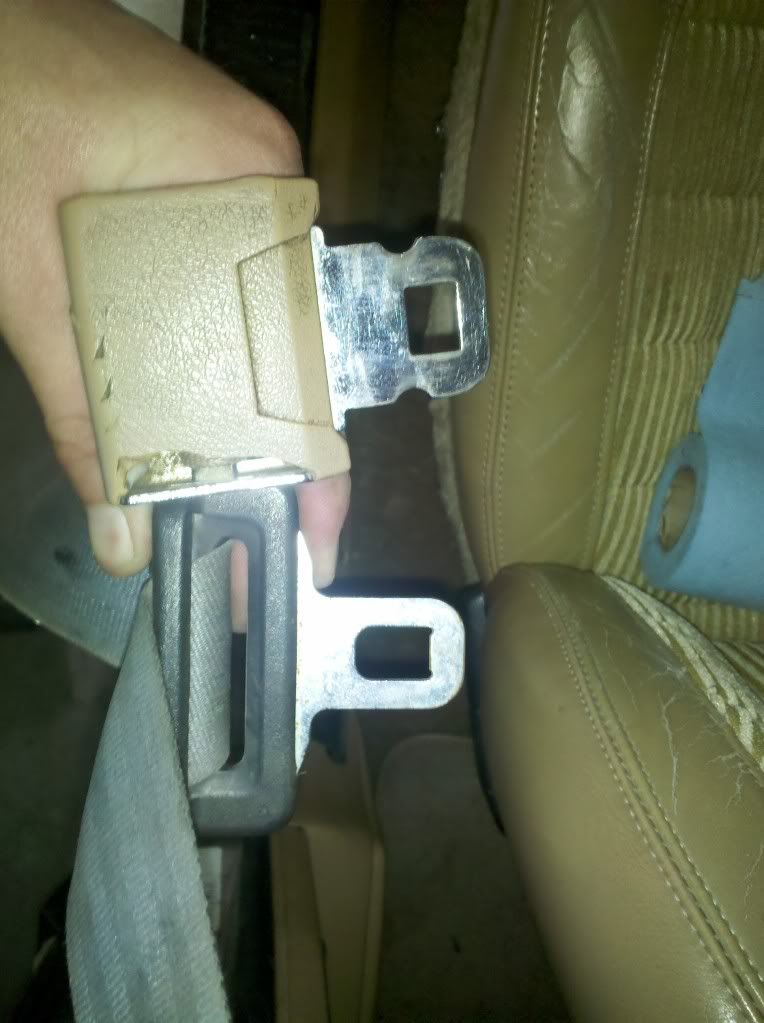
uh oh....new one won't latch into the old buckle....

Back to the JY. The buckle for the belt I had bought had a different mounting location from mine (under the seat, instead of onto the tunnel). So, I poke around until I find one that mounts to the tunnel...and buy the complete thing.
Replace the belt again, as stated above, but now replace the buckle, too.
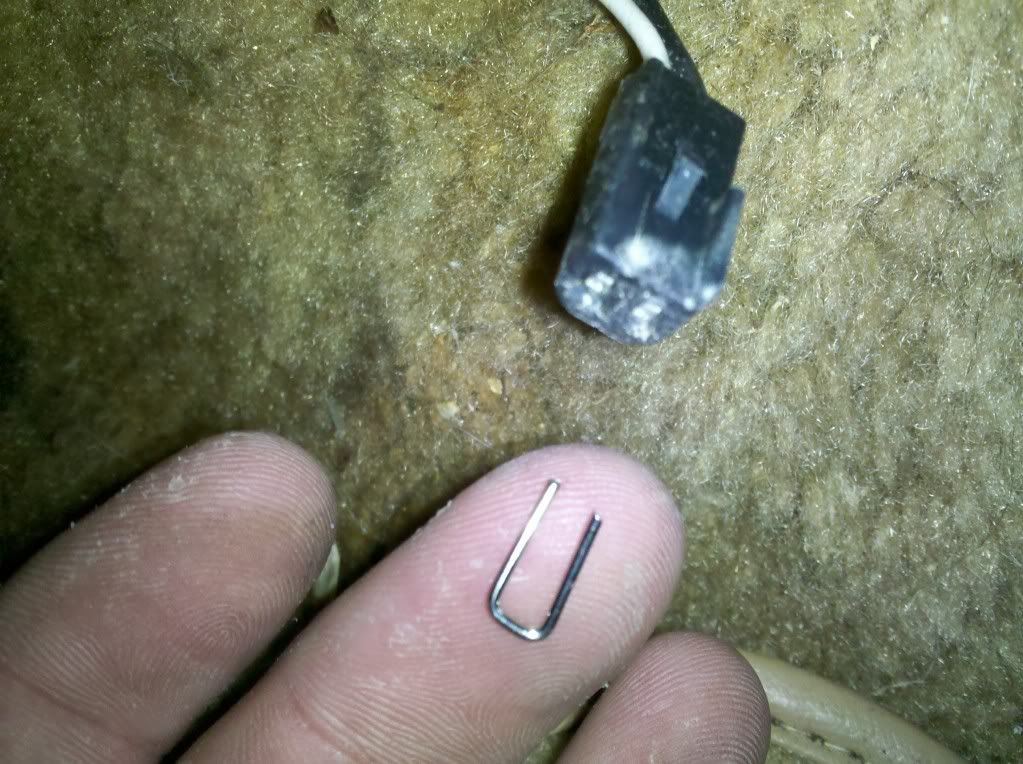
Unbolt the buckle from the tunnel. Mine had a sensor in the buckle that the new one did not. I disconnected the wire...
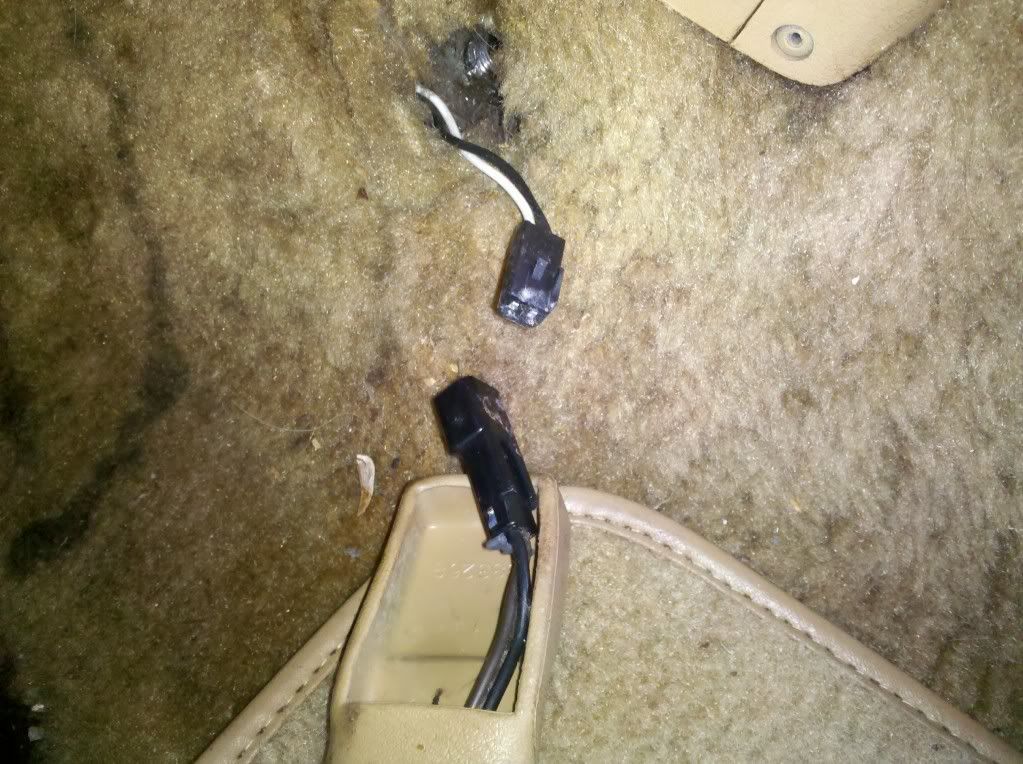
and made a jumper for the connector, so the "fasten seat belt" light wouldn't be on all the time.
And bolted the new buckle on.
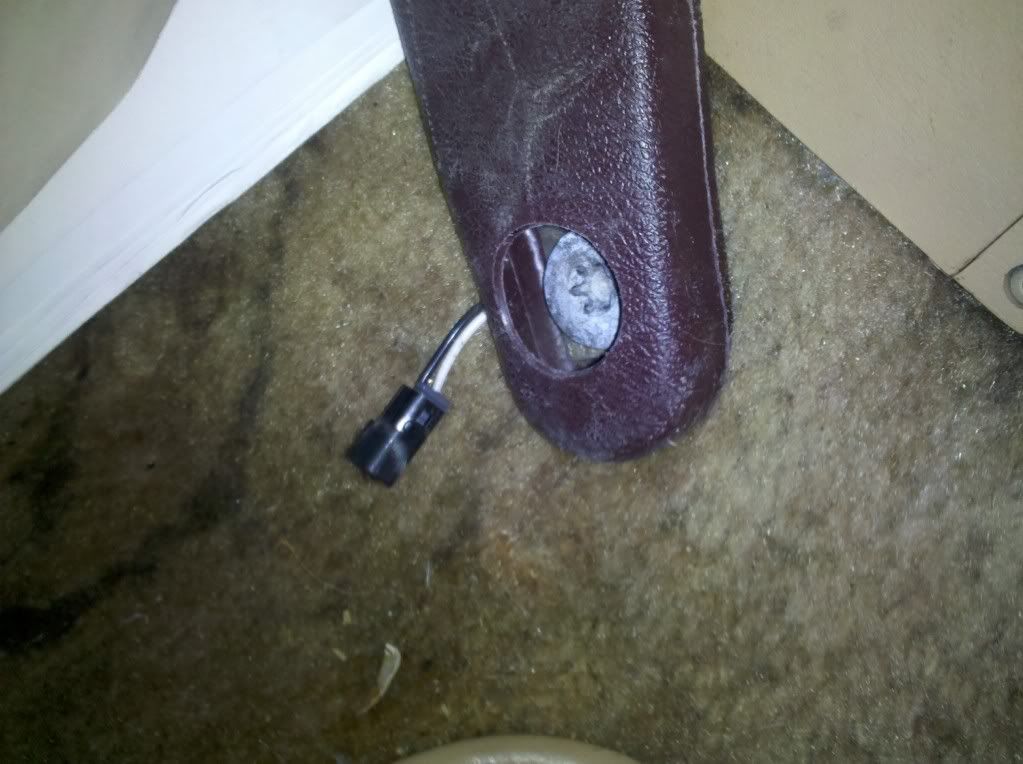
Voila!
Inspection ready!
Went to the JY to pick up a replacement-pulled a blue one from a '98 Cherokee.
First thing is to pull the plastic molding off the driver's side floor, to access the retracting mechanism.
Next, remove the bolt holding the retracting mechanism to the pillar.
Once done, thread the end of the seat belt back out of the slot in the molding to free it. Remove the bolt holding the upper attachment point to the pillar.
Be sure to keep track of whatever plastic spacer/washer is there and remember how exactly it mounts up.
Once that's done, the old seat belt should be removed. Install the new one in the reverse manner.
Tab A goes into Slot B.
In case you don't keep track of which bolt goes to which location, the short one goes on the bottom, and the longer one goes on the top. Reverse them and you won't be able to cinch down the bottom one.
Next, compare latching mechanisms....
uh oh....new one won't latch into the old buckle....
Back to the JY. The buckle for the belt I had bought had a different mounting location from mine (under the seat, instead of onto the tunnel). So, I poke around until I find one that mounts to the tunnel...and buy the complete thing.
Replace the belt again, as stated above, but now replace the buckle, too.
Unbolt the buckle from the tunnel. Mine had a sensor in the buckle that the new one did not. I disconnected the wire...
and made a jumper for the connector, so the "fasten seat belt" light wouldn't be on all the time.
And bolted the new buckle on.
Voila!
Inspection ready!
08-08-2011, 03:05 PM
#14
Seasoned Member
Thread Starter
Join Date: Jan 2011
Location: Austin
Posts: 302
Likes: 0
Received 4 Likes
on
3 Posts
Year: 1987
Model: Wagoneer
Engine: 4.0
Emissions...the bane of a Renix system...
Failed with too high CO. HC and CO2 were fine. Any idea what would cause this and how to fix it...?
High CO indicates it's running rich(?), but burning everything completely, otherwise there'd be high HC for unburned fuel, right?
Air filter?
O2 sensor?
Engine Temp sensor?
Help!
I'm itchin' to make this my DD and get rid of the F150...
Last edited by letinsh; 08-08-2011 at 04:10 PM.
