spray paint?
 10-04-2010, 07:09 PM
#1
Seasoned Member
Thread Starter
Join Date: Sep 2010
Location: Tucson, Az
Posts: 353
Likes: 0
Received 0 Likes
on
0 Posts
Year: 1995
Model: Cherokee
Engine: inline 6
im wanting to paint my jeep olive drab and wondering if spray paint would work, and if anybody has done this with theirs, and how it turned out. sorry if theres already threads on this didnt see one. im looking for a cheep way to do this and look decent.
 10-04-2010, 07:14 PM
#2
Seasoned Member
Join Date: Aug 2008
Location: Maine
Posts: 494
Likes: 0
Received 3 Likes
on
3 Posts
Year: 1991 Laredo
Model: Cherokee
Engine: 4.0L H.O.
You can do it! I've even seen (can't remember what website it was) someone do a GREAT roll on paint job on their cherokee. It came out GLEEMING! Light coats and plenty of sanding. If you do a spray bomb job, just seal it... From my personal experience, if you spray paint (especially primer or a flat color) and don't seal the end result, rust will form very very very quickly.
Let us know how you do!
Let us know how you do!
10-04-2010, 07:14 PM
#3
Member
Join Date: Jun 2010
Location: Columbus, OH
Posts: 113
Likes: 0
Received 1 Like
on
1 Post
Year: 1996
Model: Cherokee
Engine: 4.0 of course
It will work of course. It may not look professional or last like real automotive paint. When spray painting, prep is everything, that and a decent spray technique. Take your time and it will look decent.
10-04-2010, 07:16 PM
#4
Seasoned Member
Thread Starter
Join Date: Sep 2010
Location: Tucson, Az
Posts: 353
Likes: 0
Received 0 Likes
on
0 Posts
Year: 1995
Model: Cherokee
Engine: inline 6
how would i go about prepping it? i was planning on just painting over the factory paint but sanding it a bit first so the paint would stick better.
10-04-2010, 07:22 PM
#5
Seasoned Member
Join Date: Aug 2008
Location: Maine
Posts: 494
Likes: 0
Received 3 Likes
on
3 Posts
Year: 1991 Laredo
Model: Cherokee
Engine: 4.0L H.O.
that, take care of any rust issues at the base, and use red lead filler for any imperfections before you hit it with paint. sand and sand and sand until you get it how you want.
10-04-2010, 07:33 PM
#6
Seasoned Member
Thread Starter
Join Date: Sep 2010
Location: Tucson, Az
Posts: 353
Likes: 0
Received 0 Likes
on
0 Posts
Year: 1995
Model: Cherokee
Engine: inline 6
just measured the square footage of all surfaces being painted rounding up came out to 120 sq feet, 1 can gives you about 12 sq feet of paint so im looking at around $40.00

Trending Topics
10-04-2010, 08:08 PM
#8
Seasoned Member
Thread Starter
Join Date: Sep 2010
Location: Tucson, Az
Posts: 353
Likes: 0
Received 0 Likes
on
0 Posts
Year: 1995
Model: Cherokee
Engine: inline 6
thank you for the help. ill let you know how it goes. ill post pics on my build thread hopefully Friday night
10-05-2010, 05:35 PM
#10
CF Veteran
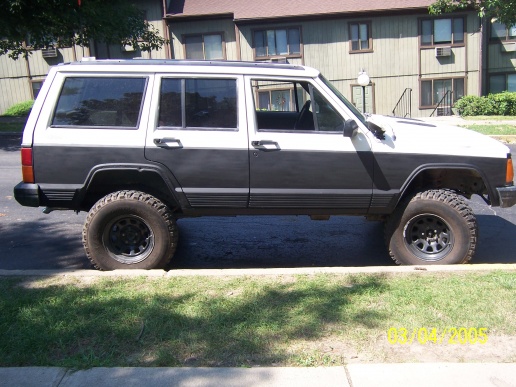
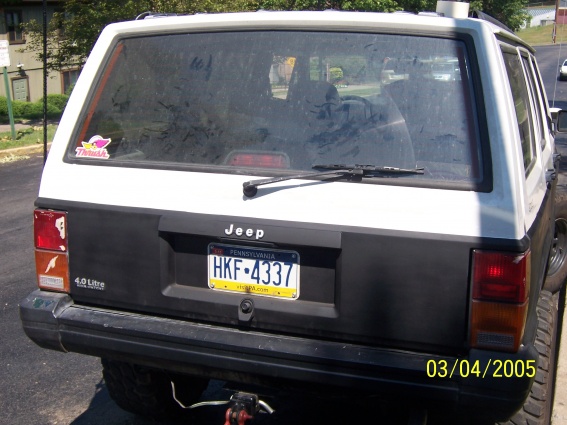
I did it and it came out fine.
I used a scotch pad to knock off all the old flaky paint.
EDIT: another thing my friends get mad cause my jeep never scratches lol
I used a scotch pad to knock off all the old flaky paint.
EDIT: another thing my friends get mad cause my jeep never scratches lol
10-05-2010, 05:46 PM
#12
Member
Join Date: Aug 2010
Location: Muskegon Michigan
Posts: 111
Likes: 0
Received 0 Likes
on
0 Posts
Year: 1995
Model: Cherokee
Material:
- About 12 cans of OD green semi flat. I used Aervoe, about $3 a can. Since this is a rattle can job, use some semi-gloss to avoid the bling factor and paint streaks.
-primer - use automotive primer, rust inhiitor primer or similar. A buddy that works on the business recommended using weld-on primer. That crap is $6 per rattle can. I had the crappiest time with it. Fopur of my cans had something worng and started spraying crap half way. That sucked, and it took time away since I had to do more sanding to take the excess crap. Use some Auto primer from OSH at $3 a can, and you should be set I ended up re-doing most of my primer with that. I learned later that the weld-on primer has a tendency to "chill" in the can after a while, so that is why the crappy dots flew everywhere. If going that route, have a bucket with hot water and leave the cans floating to regain temperature.
- electric sander is recommended, but you can get away with regular sandpaper. Buy different sheets of grit paper, from 80, 120, 200, 400, 800, 1000.
-Good ol' Bondo - Since I was covering some tiny holes from my stock Renegade Jeep stuff, I used a bit of bondo here and there. The hood I got was pretty beat up, so Bondo helped make it look a bit better.
-plastic tarps (cheap s tarps at OSH, about a buck for a large size tarp) - use it for the floor and to cover interior, whatever.
-masking tape - get decent marsking tape, about 2 inches wide
-thinner, and acetone to clean up stuff
-some latex gloves won't hurt either
-a ratio of 3 beers per can of paint will make the job look nicer
Start:
Start by planning and preparing the space you will be doing your work. Have materials ready, and budget your time depending of what you are planning to do. You can easily do this is a weekend if you budget your time right.
Friday: I started by removing flares, bumpers, etc, and covering areas like the interior, over the tires and wheels on the evening before I painted. SInce I had just done my interior herculining, most of my stuff was out, including the cage, but removing all this stuff is not necessary. Wash and clean the Jeep after removal of the stuff, and let the Jeep dry overnight. If you want to do any additional sawzall work this is the time to do the cutting
Saturday morning: Meet Bondo, James Bondo and Bondage
Start by preppring sander and sandpaper. I used 120 grit for most of the job, and some 80 here and there for rougher stuff. The 120 is good, any lower than that you will see scratches. Clean up the areas that you are planning to bondo, sand with 80 grit to bare metal, and prep the bondo. Use thin layers than a bunch of bondo to do a decent job. My recommendation is making small quantities, and doing an areat a time. Bondo dryes pretty quickly, specially if u use a bit more of the hadner than recommended. Use a bondo type plastic spatula, apply the first layer, let it dry for 20 minutes, than use sander to take excess. Make sure you are sanding around the area as well (i.e. a minimum of 5 inches after the bondo covered area, in long strokes with teh sander. I used 120 grit for that. If the job came out smooth, you are done on that area. If you have minor holes or darker spots in the bondo, you may need a new thin layer, so repeat the process with less quantity. If you are covering holes, as in my case, use tape or duct tape from inside when possible so the bondo does not go through.
After being done with the bondo, let it dry well for at least 30 minutes, and start sanding the Jeep. If you have rust, and it is minor, use a rust reverser chemical (turns rust to balck primer). You can use Jasco, or other stuiff to remove most of the rust first if it is pretty bad, then use the rust reverser (most aoto part stores have them in rattle cans, I bought one at Kragen for a few bucks). Important, clean and repair any areas that have any rust!!!! You do not want to paint over that.
Start the sanding process, and again, I used a cheap but decent hand sander, and it worked great ($25 at hardware store). If you have compressed air, you can use a pneumatic sander instead, if it is rotary, be careful regarding the rpm, too much and you may have metal burns and expansion and fudge things up. You can also use a paint remover, but then will go to bare metal and loose factory base coat. Since My basecoat is in decent shape, removing the whole paint did not seem like a good option. If that is the aproach, you will need to use a good primer with base coat (i.e. weld on), or apply a base coat to avoid metal to surface rust.
After sanding, there are some all purpose cleaners you can use with a rag, or use thinner lightly on a rag to remove the dust from the sanding process. I would avoid using Acetone, since it leaves residuals (i.e. small stains) after it dries, but since you are going to primer it is not a big deal at this stage yet. Clean throughly, and do some final disassembly during that process. I removed the hood and tailgate while the Jeep was drying, but this step is optional. If you are going to paint using rattle cans, I recommend removing the hood for best leverage while spraying.
Masking:
I used a plastic tarp on the floor of the driveway, and after removing the hood, put a piece of plastic to cover the engine bay. the masking process is important since it will avoid overspray which looks crappy, and protect areas from paint and dust, as well as the interior. I recommend covering the wheel wells and tires, so they do not get painted and look crappy. Remember, focus on doing a clean and decent job. Use that masking tape well, and press on it hard so that it adheres to the surface and does not leave lifts where paint could run through. My girlfriend helped with the masking tape while I took the hood and tailgate to a table in the backyard to get things primed. No, you can not borrow her. Remember that areas that get overspray can be cleaned with Acetone or thinner.
Primer:
In my case, I was doing a TJ front clip conversion, so I had to do more work on the hood I got since it was pretty beat. Bondo paid a few more visits to get it as decent as it would get. I have not used bondo before, but it was a pretty straight forward process. While the bondo was drying on the hood (I had to work on the hood a few times, sand, etc), I started the priming process on the body. leave your cans (not referring to beer cans ) in a bucket with warm water, and alternate between cans after shaking them well. The same tip applies to the paint process.
Shoot the first spray on a tarped area, or test piece, since the first shoot of primer from the can may have sediments. When primering or painting, keep about 10-15 inches from the surface, and make sure you spray pass the end of the areas you are spraying. I used the techinque of painting using horizontal moves, from beggining to end, on a back and forth motion, and running slowly but straight spraying evenly thorugh the surface. Try to keep each pass within two inches, which will avoid "stripes" and keep the areas covered even. This is almost like mowing the lawn, slightly go over where you just sprayed.
While the primer started setting in, I went back to the hood, windshield and tailgate, and did the same process. I recommend waiting about 30 minutes, for the primer to cure decently, and apply a second thin layer of primer. Depending of the primer yoiu are using, a couple hours or letting it siyt overnight may be needed for the primer to cure fully. Have a couple beers, check out your rig in gray, and relax. I worked on my rockers while the Jeep was drying, banged and primered the TJ grill I was going to use.
Sunday - Paint:
The primer dried well and fast, As I mentioned before, I had some issues with the "Weld On" primer (left tiny bubble sediments here and there), so I had to do some heavier sanding in some areas and re-primer using other primers. After doing this step, I let the primer sit and dry well for another four hours. During that time, I started with the hood and tailgate.
I sanded the hood, windshield and tailgate with 800 and then 1000 grit sandpaper, to make things smooth (I did wetsanding, but either way should do it). Use the cleaner to remove dust and let it sit a bit, then use a clean pice of cloth to remove any minor dust. The hood is one of the biggest surfaces in your rig, so it is a bit tricky to do a decent job without leaving stripes. I recommend propping the hood over a table so it is slightly below waist level. Shake well those warmed up cans, and start around the middle of the hood from front to back, in straight motions, all the way. remember to spray pass the end of the hood. Do the side to side motion back and forth, walk around to the other side of the hood, and repeat. Let the paint cure about 15 minutes.
While the paint was curing, I did my tailgate. Since the hood will see a lot of action, I did three coats of paint. Avoid mixing cans on the final coat, since sometimes they vary slightly in composition, so it may have a different "shade". Before the last coat, I used a 1000 grit sandpaper by hand.
Back to the rig, I repeated the process starting from the front to the back, and rear of the Jeep , and then front to the rear on the other side. The paint cures pretty fast, so I was taking a few beer brakes and starting with second and third coats on the same order I did before. Do the wetsanding process before the last coat, clean, and shoot the last one. Take extra care on this step, and your paintjob should come really good. Jeep back in the garage, and let it dry well (I recommend 10 hours if possible), before putting flares, hood, tailgate, etc back. If I did not had the problem with the primer, I could have the Jeep literally done and back together at the end of the day. Leave rockers off for the next 4 days, and let the paint cure well. I recommend not washing the Jeep for at least 10 days, so that the paint can really cook and adhere. You can optionally shoot rattle can clear coat, but that will make it harder for touching up scratches in the future, when you could just clean, shake the can and voila.
I am also getting ready to do mine. I copied and pasted this a while back, so when Im ready to get mine done I have a good guideline.
Hope this helps a little!!