
fender trimming


Thread Starter
Member
Joined: Mar 2009
Posts: 248
Likes: 0
From: Houston TEXAS
Year: 1996
Model: Cherokee
Engine: 4.0
what is a good guide for trimming the fenders? should I just trace the stock fender flares and then remoce them? Also, what do I use to cut them? Sawzall??


CF Veteran
Joined: Mar 2009
Posts: 1,988
Likes: 3
From: USA
Year: 1999
Engine: l6 4.0, K&N FIPK & 62mm bored TB
Here is a thread I did on cut-n-folding the rears. I mess around in the thread a bit, but the info is good and there's lots of pics. I don't think the cut-n-fold method works for the front. The best advice I can give you would be to mark where you want to cut, tape it off, use an angle grinder, brace yourself & have at it!

Senior Member


Joined: Feb 2009
Posts: 522
Likes: 28
From: Prosser, WA
Year: 1993
Model: Cherokee(XJ)
Engine: 4.0
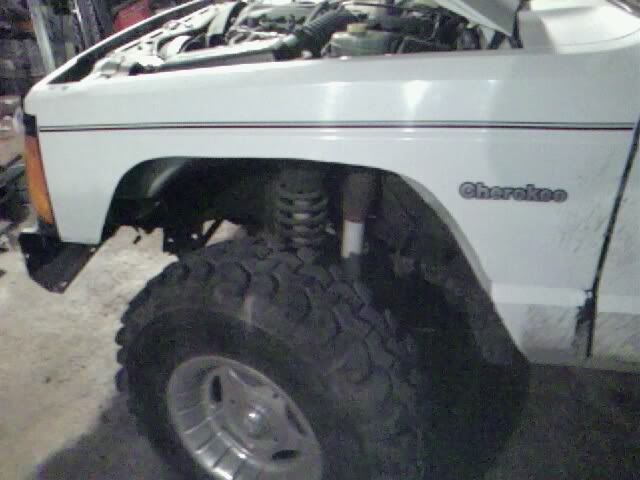
heres a friends i did. we traced the front flares and them took them off and used a air nibbler fo most of it, a lot easier than a sawzall or cutoff wheel.
the rear we pulled the flare off and had to straighten part of the sheetmetal from the previous owner dropping it on a log. then using the sawzall we made a few relief cuts and used my THOR hammer to bend it over.

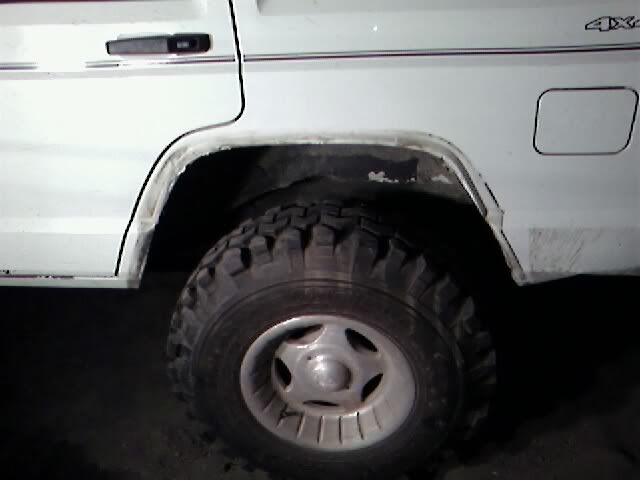
sprayed some black paint inside the wheel wells and done.
the rear we pulled the flare off and had to straighten part of the sheetmetal from the previous owner dropping it on a log. then using the sawzall we made a few relief cuts and used my THOR hammer to bend it over.
sprayed some black paint inside the wheel wells and done.
Junior Member
Joined: Dec 2008
Posts: 91
Likes: 0
Model: Cherokee
For the fronts I used a drafting compass so I could keep the same line as the factory cut out. I cut a little more than most but I plan on having tube for flares so I wasn't worried about fitting regular flares on it. After scribing it I used a 4.5" cutoff wheel and cut it small then went back with a flap wheel and ground to size. To finish it off I used some 180 grit sandpaper; you can run your hand on the entire thing and not worry about getting cut...


For the rear I took a little different approach...


For the rear I took a little different approach...
Trending Topics
Senior Member
Joined: Jan 2009
Posts: 920
Likes: 1
Year: 1996
Model: Cherokee
Engine: 4.0
for the front just cut were you think looks good and on the back do the cut and fold method easiest way and wont compromise the strength of the unibody at all heres mine and good luck


Member
Joined: Mar 2009
Posts: 222
Likes: 1
Year: 1999
Model: Cherokee
Engine: I6 4.0L
If you use a cutoff wheel watch the sparks by your glass windows. The sparks are hot enough to etch the glass. I know because I have little dots on my windows. Not noticeable, but I know it's there.
Thread Starter
Member
Joined: Mar 2009
Posts: 248
Likes: 0
From: Houston TEXAS
Year: 1996
Model: Cherokee
Engine: 4.0
[QUOTE=warrpath4x4;162129]heres a friends i did. we traced the front flares and them took them off and used a air nibbler fo most of it, a lot easier than a sawzall or cutoff wheel.
what is an air nibbler? Would I be able to use a circular handheld grinder?
what is an air nibbler? Would I be able to use a circular handheld grinder?

Junior Member
Joined: Nov 2008
Posts: 36
Likes: 0
Year: 1991
Model: Cherokee
Engine: 4.0 I6 HO
[quote=tedrick92;162708]
An air nibbler is used with an air compresser, google it. Yes you can use a 4.5" angle grinder that would be fine!! Be sure you get a metal cutting wheel....it's thin, ask the local home depot or Lowes guys he'll know what to use...hopefully!
Let us know how it goes
Let us know how it goes
Last edited by DrRandy; Apr 15, 2009 at 12:11 AM.
Junior Member
Joined: Dec 2008
Posts: 91
Likes: 0
Model: Cherokee
:hijack:
I was originally thinking 35's with no lift but there's no way to do that in the front without rebuilding the front wheel wells also and those have the shock mount and spring perches - I didn't want to deal with that right now so it's got a little less than 3" of lift right now...
:/hijack:
X's 2! I brought a sandwich into the garage once and when I was done I didn't bring the plate in and went back to grinding. My wife still hasn't seen the burn marks on the plate and in our house it's "don't ask don't tell"!
Below is a pic of an air nibbler. It's a great tool to have but you can use the handheld grinder aka 4.5" cutoff wheel. Like I mentioned in my post that's what I used. The trick is to NOT cut it to size with the cuttoff wheel but to use a flapwheel (disc with a bunch of pieces of sandpaper) for the final fitting...
The metal goes in the slot on the bottom and it gets nibbled away by the pin that goes up and down.

I was originally thinking 35's with no lift but there's no way to do that in the front without rebuilding the front wheel wells also and those have the shock mount and spring perches - I didn't want to deal with that right now so it's got a little less than 3" of lift right now...
:/hijack:
The metal goes in the slot on the bottom and it gets nibbled away by the pin that goes up and down.
Member
Joined: Dec 2008
Posts: 229
Likes: 0
Model: Cherokee
For the fronts I used a drafting compass so I could keep the same line as the factory cut out. I cut a little more than most but I plan on having tube for flares so I wasn't worried about fitting regular flares on it. After scribing it I used a 4.5" cutoff wheel and cut it small then went back with a flap wheel and ground to size. To finish it off I used some 180 grit sandpaper; you can run your hand on the entire thing and not worry about getting cut...
For the rear I took a little different approach...
For the rear I took a little different approach...