Battery to small?


 03-05-2013, 11:05 PM
#2
CF Veteran
Join Date: Sep 2009
Location: Summerville, Ga
Posts: 6,322
Likes: 0
Received 5 Likes
on
5 Posts
Year: 1995
Model: Cherokee
Engine: 2.5 4 cyl.
So the engine turns over fine? Sounds more like you have connection issues/ bad alternator. Try pulling the negative battery terminal while the engine is running. If your alternator is bad then it'll go dead in a few seconds or so.
Also.. your battery could just be bad. Go have the battery checked at your local auto parts store.
Also.. your battery could just be bad. Go have the battery checked at your local auto parts store.
03-05-2013, 11:10 PM
#3
Seasoned Member
Join Date: Jan 2012
Location: Valley Park, MO
Posts: 422
Likes: 0
Received 0 Likes
on
0 Posts
Year: 1989
Model: Cherokee
Engine: 4.0L Renix Freshly Rebuilt!!
Or just look at your battery gauge. What is it reading? Make sure your grounds are clean too.
03-05-2013, 11:21 PM
#5
Junior Member
Thread Starter
Join Date: Mar 2013
Posts: 73
Likes: 0
Received 0 Likes
on
0 Posts
So the engine turns over fine? Sounds more like you have connection issues/ bad alternator. Try pulling the negative battery terminal while the engine is running. If your alternator is bad then it'll go dead in a few seconds or so.
Also.. your battery could just be bad. Go have the battery checked at your local auto parts store.
Also.. your battery could just be bad. Go have the battery checked at your local auto parts store.
03-05-2013, 11:26 PM
#6
CF Veteran
Join Date: Sep 2009
Location: Summerville, Ga
Posts: 6,322
Likes: 0
Received 5 Likes
on
5 Posts
Year: 1995
Model: Cherokee
Engine: 2.5 4 cyl.
Body side ground coming off the battery terminal, as well as the battery terminals themselves. But if you have low voltage then it sounds like your battery is bad, not too small. However you could fit a bigger battery in there if you wanted. I've got a size up battery in mine, its a tight fit in the tray, but it does fine.
You're alternator could still be bad, i know plenty of people who's replaced they alternator and gotten a dud. Go to the parts store and have the battery checked first. Its probably bad.
You're alternator could still be bad, i know plenty of people who's replaced they alternator and gotten a dud. Go to the parts store and have the battery checked first. Its probably bad.
03-05-2013, 11:41 PM
#7
Junior Member
Thread Starter
Join Date: Mar 2013
Posts: 73
Likes: 0
Received 0 Likes
on
0 Posts
Body side ground coming off the battery terminal, as well as the battery terminals themselves. But if you have low voltage then it sounds like your battery is bad, not too small. However you could fit a bigger battery in there if you wanted. I've got a size up battery in mine, its a tight fit in the tray, but it does fine.
You're alternator could still be bad, i know plenty of people who's replaced they alternator and gotten a dud. Go to the parts store and have the battery checked first. Its probably bad.
Trending Topics
03-05-2013, 11:49 PM
#8
CF Veteran
Join Date: Sep 2009
Location: Summerville, Ga
Posts: 6,322
Likes: 0
Received 5 Likes
on
5 Posts
Year: 1995
Model: Cherokee
Engine: 2.5 4 cyl.
Not necessarily. My last battery had a tag of 5/06 and lasted up until about 6 months ago.
around 14 is normal at idle. If your radio and everything is dim and flickering when you have 14.79V at idle then its definitely a connection problem somewhere. Start checking all your grounds.
around 14 is normal at idle. If your radio and everything is dim and flickering when you have 14.79V at idle then its definitely a connection problem somewhere. Start checking all your grounds.
03-05-2013, 11:50 PM
#9
CF Veteran
Join Date: Aug 2011
Location: Nor-Cal Coast
Posts: 10,489
Likes: 0
Received 17 Likes
on
17 Posts
Year: 90,84
Model: Cherokee
Engine: 4.0,2.5
I'm not sure I'd want to run it with the battery disconnected. Not that I haven't done it in a jam, but there's sensitive stuff that likes having it there to absorb and smooth out spikes and the like. A volt meter on the battery will tell you if it's getting juice, without that (tiny) risk. I'm shopping for a new TCU, but I doubt changing batteries with it running two years ago is what killed it...
03-06-2013, 06:04 AM
#10
::CF Moderator::
Join Date: Aug 2011
Location: Prescott, Az
Posts: 43,864
Received 1,524 Likes
on
1,236 Posts
Year: 1990
Model: Cherokee (XJ)
Engine: 4.0
Start with these 2 things. Cheap and easy.
Renix Ground Refreshing
The Renix era XJs and MJs were built with an under-engineered grounding system for the engine/transmission electronics. One problem in particular involves the multiple ground connection at the engine dipstick tube stud. A poor ground here can cause a multitude of driveabililty issues, wasted time, failed emission tests, and wasted money replacing components unnecessarily.
The components grounding at the dipstick tube stud are:
Distributor Sync Sensor, TCU main ground, TCU "Shift Point Logic", Ignition control Module, Injectors, ECU main ground which other engine sensors ground through, Oxygen sensor, Knock Sensor, Cruise Control, and Transmission Sync signal. All extremely important stuff.
The factory was aware of the issues with this ground point and addressed it by suggesting the following:
Remove the nut holding the wire terminals to the stud. Verify that the stud is indeed tightened securely into the block. Scrape any and all paint from the stud’s mounting surface where the wires will attach. Must be clean, shiny and free of any oil, grease, or paint.
Inspect the wire terminals. Check to see that none of the terminals are crimped over wire insulation instead of bare wire. Be sure the crimps are tight. It wouldn’t hurt to re-crimp them just as a matter of course. Sand and polish the wire terminals until clean and shiny on both sides. Reinstall all the wires to the stud and tighten the nut down securely.
While you’re in that general area, locate the battery negative cable which is fastened to the engine block just forward of the dipstick stud. Remove the bolt, scrape the block to bare metal, clean and polish the cable terminal, and reattach securely.
Another area where the grounding system on Renix era Jeeps was lacking is the engine to chassis ground. There is a braided cable from the back of the cylinder head that also attaches to the driver’s side of the firewall. This cable is undersized for it’s intended use and subject to corrosion and poor connections at each end.
First off, remove the cable end from the firewall using a 15mm wrench or socket. Scrape the paint off down to bare metal and clean the wire terminal. Reattach securely.
Remove the other end of the cable from the rear of the head using a 3’4" socket. Clean all the oil, paint and crud from the stud. Clean the wire terminal of the cable and reattach securely.
A suggestion regarding the braided cable:
I prefer to add a #4 Gauge cable from the firewall to a bolt on the rear of the intake manifold, either to a heat shield bolt or fuel rail bolt. A cable about 18" long with a 3/8" lug on each end works great and you can get one at any parts store already made up. Napa has them as part number 781116.
A further improvement to the grounding system can be made using a #4 cable, about 10" long with 3/8" terminals at each end. Attach one end of this cable to the negative battery bolt and the other end under the closest 10mm headed bolt on the radiator support just forward of the battery. Napa part number 781115.
For those of us with Comanches, it’s very important to remove the driver’s side taillamp assembly to access the ground for the fuel pump. Remove the screw holding the black ground wire. Scrape the paint from the body and corrosion from the wire terminal. Reattach securely.
If you want to upgrade your grounds and battery cables in general, contact Jon at
www.kelleyswip.com. He makes an incredible cable upgrade for a very reasonable price.
Revised 03-04-2013
I suggest unplugging EVERY electrical connection in the engine bay you can find, whether engine related or not, and spraying it out with a good electronics cleaner, visually inspecting the terminals making sure they haven’t retracted into the plastic holder, and then plugging it back together. There’s a critical 10-pin connector for the front lighting system located in front of the air cleaner and behind the left headlight assembly. Don’t miss that one
. Also be sure that the connectors to the ballast resistor mounted near the air cleaner housing are clean and tight.
ALL of the relays should be removed, the terminals wire-brushed until shiny, and the receptacles sprayed out with contact cleaner. Then plug them back in. I do this on every Renix Jeep I purchase or work on for someone else.
Revised 07/23/2012
03-06-2013, 08:25 AM
#11
CF Veteran
Join Date: Sep 2011
Location: Riviera, Texas
Posts: 4,172
Likes: 0
Received 4 Likes
on
4 Posts
Year: 1998 Sport
Model: Cherokee
Engine: 4.0
So the engine turns over fine? Sounds more like you have connection issues/ bad alternator. Try pulling the negative battery terminal while the engine is running. If your alternator is bad then it'll go dead in a few seconds or so.
Also.. your battery could just be bad. Go have the battery checked at your local auto parts store.
Also.. your battery could just be bad. Go have the battery checked at your local auto parts store.
Last edited by RTorrez1; 03-06-2013 at 11:21 AM.
03-06-2013, 10:55 AM
#12
Junior Member
Thread Starter
Join Date: Mar 2013
Posts: 73
Likes: 0
Received 0 Likes
on
0 Posts
Start with these 2 things. Cheap and easy.
Renix Ground Refreshing
The Renix era XJs and MJs were built with an under-engineered grounding system for the engine/transmission electronics. One problem in particular involves the multiple ground connection at the engine dipstick tube stud. A poor ground here can cause a multitude of driveabililty issues, wasted time, failed emission tests, and wasted money replacing components unnecessarily.
The components grounding at the dipstick tube stud are:
Distributor Sync Sensor, TCU main ground, TCU "Shift Point Logic", Ignition control Module, Injectors, ECU main ground which other engine sensors ground through, Oxygen sensor, Knock Sensor, Cruise Control, and Transmission Sync signal. All extremely important stuff.
The factory was aware of the issues with this ground point and addressed it by suggesting the following:
Remove the nut holding the wire terminals to the stud. Verify that the stud is indeed tightened securely into the block. Scrape any and all paint from the stud’s mounting surface where the wires will attach. Must be clean, shiny and free of any oil, grease, or paint.
Inspect the wire terminals. Check to see that none of the terminals are crimped over wire insulation instead of bare wire. Be sure the crimps are tight. It wouldn’t hurt to re-crimp them just as a matter of course. Sand and polish the wire terminals until clean and shiny on both sides. Reinstall all the wires to the stud and tighten the nut down securely.
While you’re in that general area, locate the battery negative cable which is fastened to the engine block just forward of the dipstick stud. Remove the bolt, scrape the block to bare metal, clean and polish the cable terminal, and reattach securely.
Another area where the grounding system on Renix era Jeeps was lacking is the engine to chassis ground. There is a braided cable from the back of the cylinder head that also attaches to the driver’s side of the firewall. This cable is undersized for it’s intended use and subject to corrosion and poor connections at each end.
First off, remove the cable end from the firewall using a 15mm wrench or socket. Scrape the paint off down to bare metal and clean the wire terminal. Reattach securely.
Remove the other end of the cable from the rear of the head using a 3’4" socket. Clean all the oil, paint and crud from the stud. Clean the wire terminal of the cable and reattach securely.
A suggestion regarding the braided cable:
I prefer to add a #4 Gauge cable from the firewall to a bolt on the rear of the intake manifold, either to a heat shield bolt or fuel rail bolt. A cable about 18" long with a 3/8" lug on each end works great and you can get one at any parts store already made up. Napa has them as part number 781116.
A further improvement to the grounding system can be made using a #4 cable, about 10" long with 3/8" terminals at each end. Attach one end of this cable to the negative battery bolt and the other end under the closest 10mm headed bolt on the radiator support just forward of the battery. Napa part number 781115.
For those of us with Comanches, it’s very important to remove the driver’s side taillamp assembly to access the ground for the fuel pump. Remove the screw holding the black ground wire. Scrape the paint from the body and corrosion from the wire terminal. Reattach securely.
If you want to upgrade your grounds and battery cables in general, contact Jon at
www.kelleyswip.com. He makes an incredible cable upgrade for a very reasonable price.
Revised 03-04-2013
I suggest unplugging EVERY electrical connection in the engine bay you can find, whether engine related or not, and spraying it out with a good electronics cleaner, visually inspecting the terminals making sure they haven’t retracted into the plastic holder, and then plugging it back together. There’s a critical 10-pin connector for the front lighting system located in front of the air cleaner and behind the left headlight assembly. Don’t miss that one
. Also be sure that the connectors to the ballast resistor mounted near the air cleaner housing are clean and tight.
ALL of the relays should be removed, the terminals wire-brushed until shiny, and the receptacles sprayed out with contact cleaner. Then plug them back in. I do this on every Renix Jeep I purchase or work on for someone else.
Revised 07/23/2012
Renix Ground Refreshing
The Renix era XJs and MJs were built with an under-engineered grounding system for the engine/transmission electronics. One problem in particular involves the multiple ground connection at the engine dipstick tube stud. A poor ground here can cause a multitude of driveabililty issues, wasted time, failed emission tests, and wasted money replacing components unnecessarily.
The components grounding at the dipstick tube stud are:
Distributor Sync Sensor, TCU main ground, TCU "Shift Point Logic", Ignition control Module, Injectors, ECU main ground which other engine sensors ground through, Oxygen sensor, Knock Sensor, Cruise Control, and Transmission Sync signal. All extremely important stuff.
The factory was aware of the issues with this ground point and addressed it by suggesting the following:
Remove the nut holding the wire terminals to the stud. Verify that the stud is indeed tightened securely into the block. Scrape any and all paint from the stud’s mounting surface where the wires will attach. Must be clean, shiny and free of any oil, grease, or paint.
Inspect the wire terminals. Check to see that none of the terminals are crimped over wire insulation instead of bare wire. Be sure the crimps are tight. It wouldn’t hurt to re-crimp them just as a matter of course. Sand and polish the wire terminals until clean and shiny on both sides. Reinstall all the wires to the stud and tighten the nut down securely.
While you’re in that general area, locate the battery negative cable which is fastened to the engine block just forward of the dipstick stud. Remove the bolt, scrape the block to bare metal, clean and polish the cable terminal, and reattach securely.
Another area where the grounding system on Renix era Jeeps was lacking is the engine to chassis ground. There is a braided cable from the back of the cylinder head that also attaches to the driver’s side of the firewall. This cable is undersized for it’s intended use and subject to corrosion and poor connections at each end.
First off, remove the cable end from the firewall using a 15mm wrench or socket. Scrape the paint off down to bare metal and clean the wire terminal. Reattach securely.
Remove the other end of the cable from the rear of the head using a 3’4" socket. Clean all the oil, paint and crud from the stud. Clean the wire terminal of the cable and reattach securely.
A suggestion regarding the braided cable:
I prefer to add a #4 Gauge cable from the firewall to a bolt on the rear of the intake manifold, either to a heat shield bolt or fuel rail bolt. A cable about 18" long with a 3/8" lug on each end works great and you can get one at any parts store already made up. Napa has them as part number 781116.
A further improvement to the grounding system can be made using a #4 cable, about 10" long with 3/8" terminals at each end. Attach one end of this cable to the negative battery bolt and the other end under the closest 10mm headed bolt on the radiator support just forward of the battery. Napa part number 781115.
For those of us with Comanches, it’s very important to remove the driver’s side taillamp assembly to access the ground for the fuel pump. Remove the screw holding the black ground wire. Scrape the paint from the body and corrosion from the wire terminal. Reattach securely.
If you want to upgrade your grounds and battery cables in general, contact Jon at
www.kelleyswip.com. He makes an incredible cable upgrade for a very reasonable price.
Revised 03-04-2013
I suggest unplugging EVERY electrical connection in the engine bay you can find, whether engine related or not, and spraying it out with a good electronics cleaner, visually inspecting the terminals making sure they haven’t retracted into the plastic holder, and then plugging it back together. There’s a critical 10-pin connector for the front lighting system located in front of the air cleaner and behind the left headlight assembly. Don’t miss that one
. Also be sure that the connectors to the ballast resistor mounted near the air cleaner housing are clean and tight.
ALL of the relays should be removed, the terminals wire-brushed until shiny, and the receptacles sprayed out with contact cleaner. Then plug them back in. I do this on every Renix Jeep I purchase or work on for someone else.
Revised 07/23/2012
03-06-2013, 11:05 AM
#13
CF Veteran
Join Date: May 2008
Posts: 3,018
Likes: 0
Received 13 Likes
on
13 Posts
Year: 1988
Model: Cherokee
Engine: AMC242
So the engine turns over fine? Sounds more like you have connection issues/ bad alternator. Try pulling the negative battery terminal while the engine is running. If your alternator is bad then it'll go dead in a few seconds or so.
Also.. your battery could just be bad. Go have the battery checked at your local auto parts store.
Also.. your battery could just be bad. Go have the battery checked at your local auto parts store.
DO NOT DO THIS!
Fine with pre-74 vehicles (points & condenser, next to no electronics,) but this can lead to a huge repair bill with vehicles that have more modern electronic controls!
I've posted a writeup here on how to check your primary electrical setup - search it up and follow that. (No, I didn't keep a link. It's its own thread, so it should be easy to find...)
03-06-2013, 11:07 AM
#14
Junior Member
Thread Starter
Join Date: Mar 2013
Posts: 73
Likes: 0
Received 0 Likes
on
0 Posts
You really should stop recommending this. I have seen a few pother post that you have told this to and it the WRONG thing to do on any vehicle with a computer in it. It was fine for older vehicles before they start putting in the computer to control everything. All you are doing is leading someone in the wrong direction and possibly damaging the electronics. No it wont always cause damage but why would you want to rick it??? Like I mentioned in another post that you recommended this. You should only recommend this if you are willing to take the responsibility for frying there computer and you are willing to replace it for them. Other wise you need to stop telling everyone to try this!


 03-06-2013, 02:22 PM
#15
CF Veteran
Join Date: Sep 2011
Location: Riviera, Texas
Posts: 4,172
Likes: 0
Received 4 Likes
on
4 Posts
Year: 1998 Sport
Model: Cherokee
Engine: 4.0
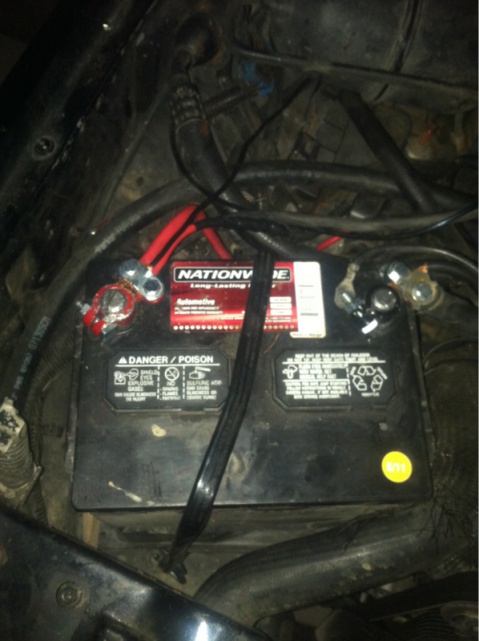
Ya im not gonna do that. But i cleaned the two grounds on the block. Then i followed the alt charging wire to see if it was good, and it went from a 6 or 7 gage wire to a 9 gage wire. So i cut that 9 gage wire out, then connected it where it was in the first place,and i can tell its charging better. So now right when the headlights get dim i hear a click under the driver side dash. Maybe my headlight switch? Or maybe the connections to the switch are bad. But they don't get as dim.
Attachment 179250
Attachment 179251
Attachment 179252
Attachment 179250
Attachment 179251
Attachment 179252
DO NOT DO THIS!
Fine with pre-74 vehicles (points & condenser, next to no electronics,) but this can lead to a huge repair bill with vehicles that have more modern electronic controls!
I've posted a writeup here on how to check your primary electrical setup - search it up and follow that. (No, I didn't keep a link. It's its own thread, so it should be easy to find...)